Christmas Tree Cupcake Stand

The free plans on this website are made possible with advertising and affiliate links.  Thank you for helping us keep plans free.


Cupcake display stand tiered
Difficulty
Intermediate
| Print this plan

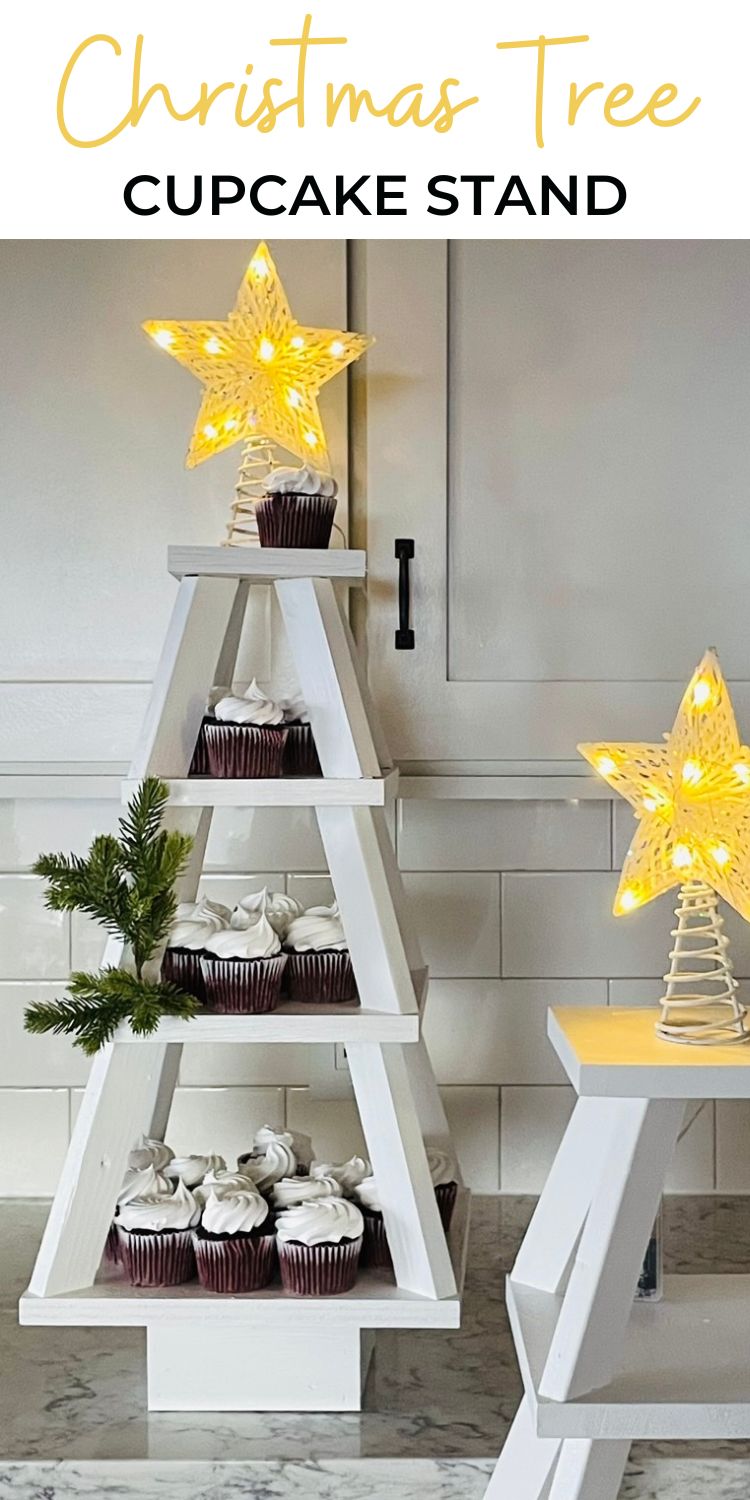
Elevate cookies, desserts and cupcakes to a 3D display with this tiered Christmas tree cupcake stand.  This step by step plans shows you how to build it.  Free plans with video from Ana-White.com

Holds three dozen cupcakes. 

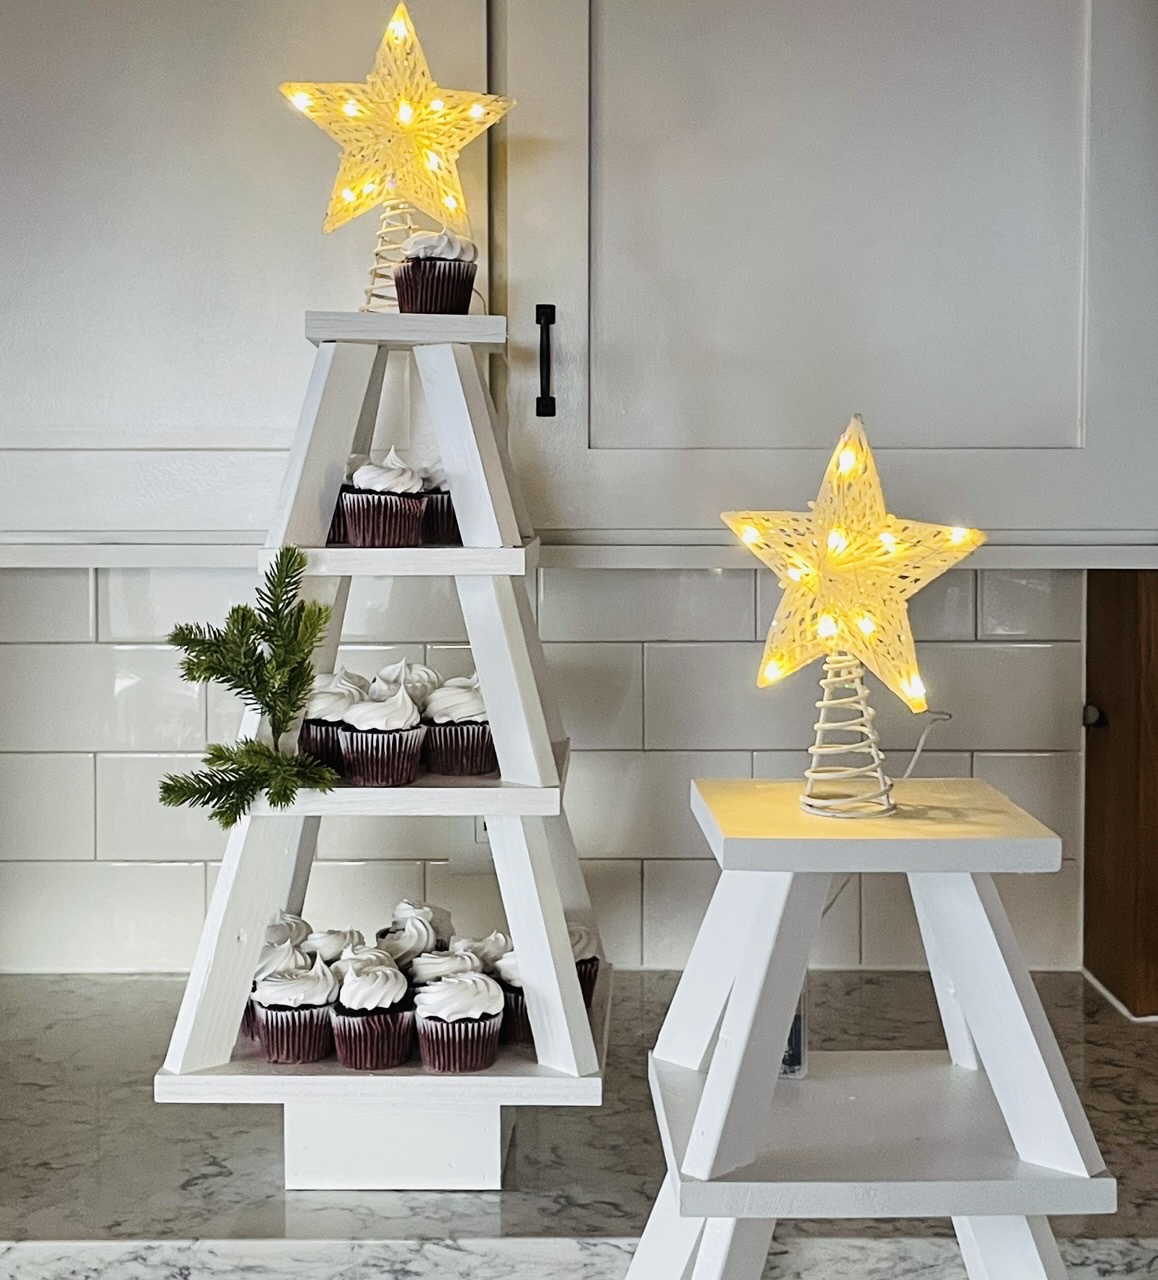
Here's a great way to save space and create a dessert display.  This easy to make tiered Christmas cupcake tray holds about three dozen cupcakes.

Watch this reel - here's how I built it:


A post shared by Ana White (@anawhitediy)

Free plans below!


Pin For Later!

Christmas Tree Cupcake Stand

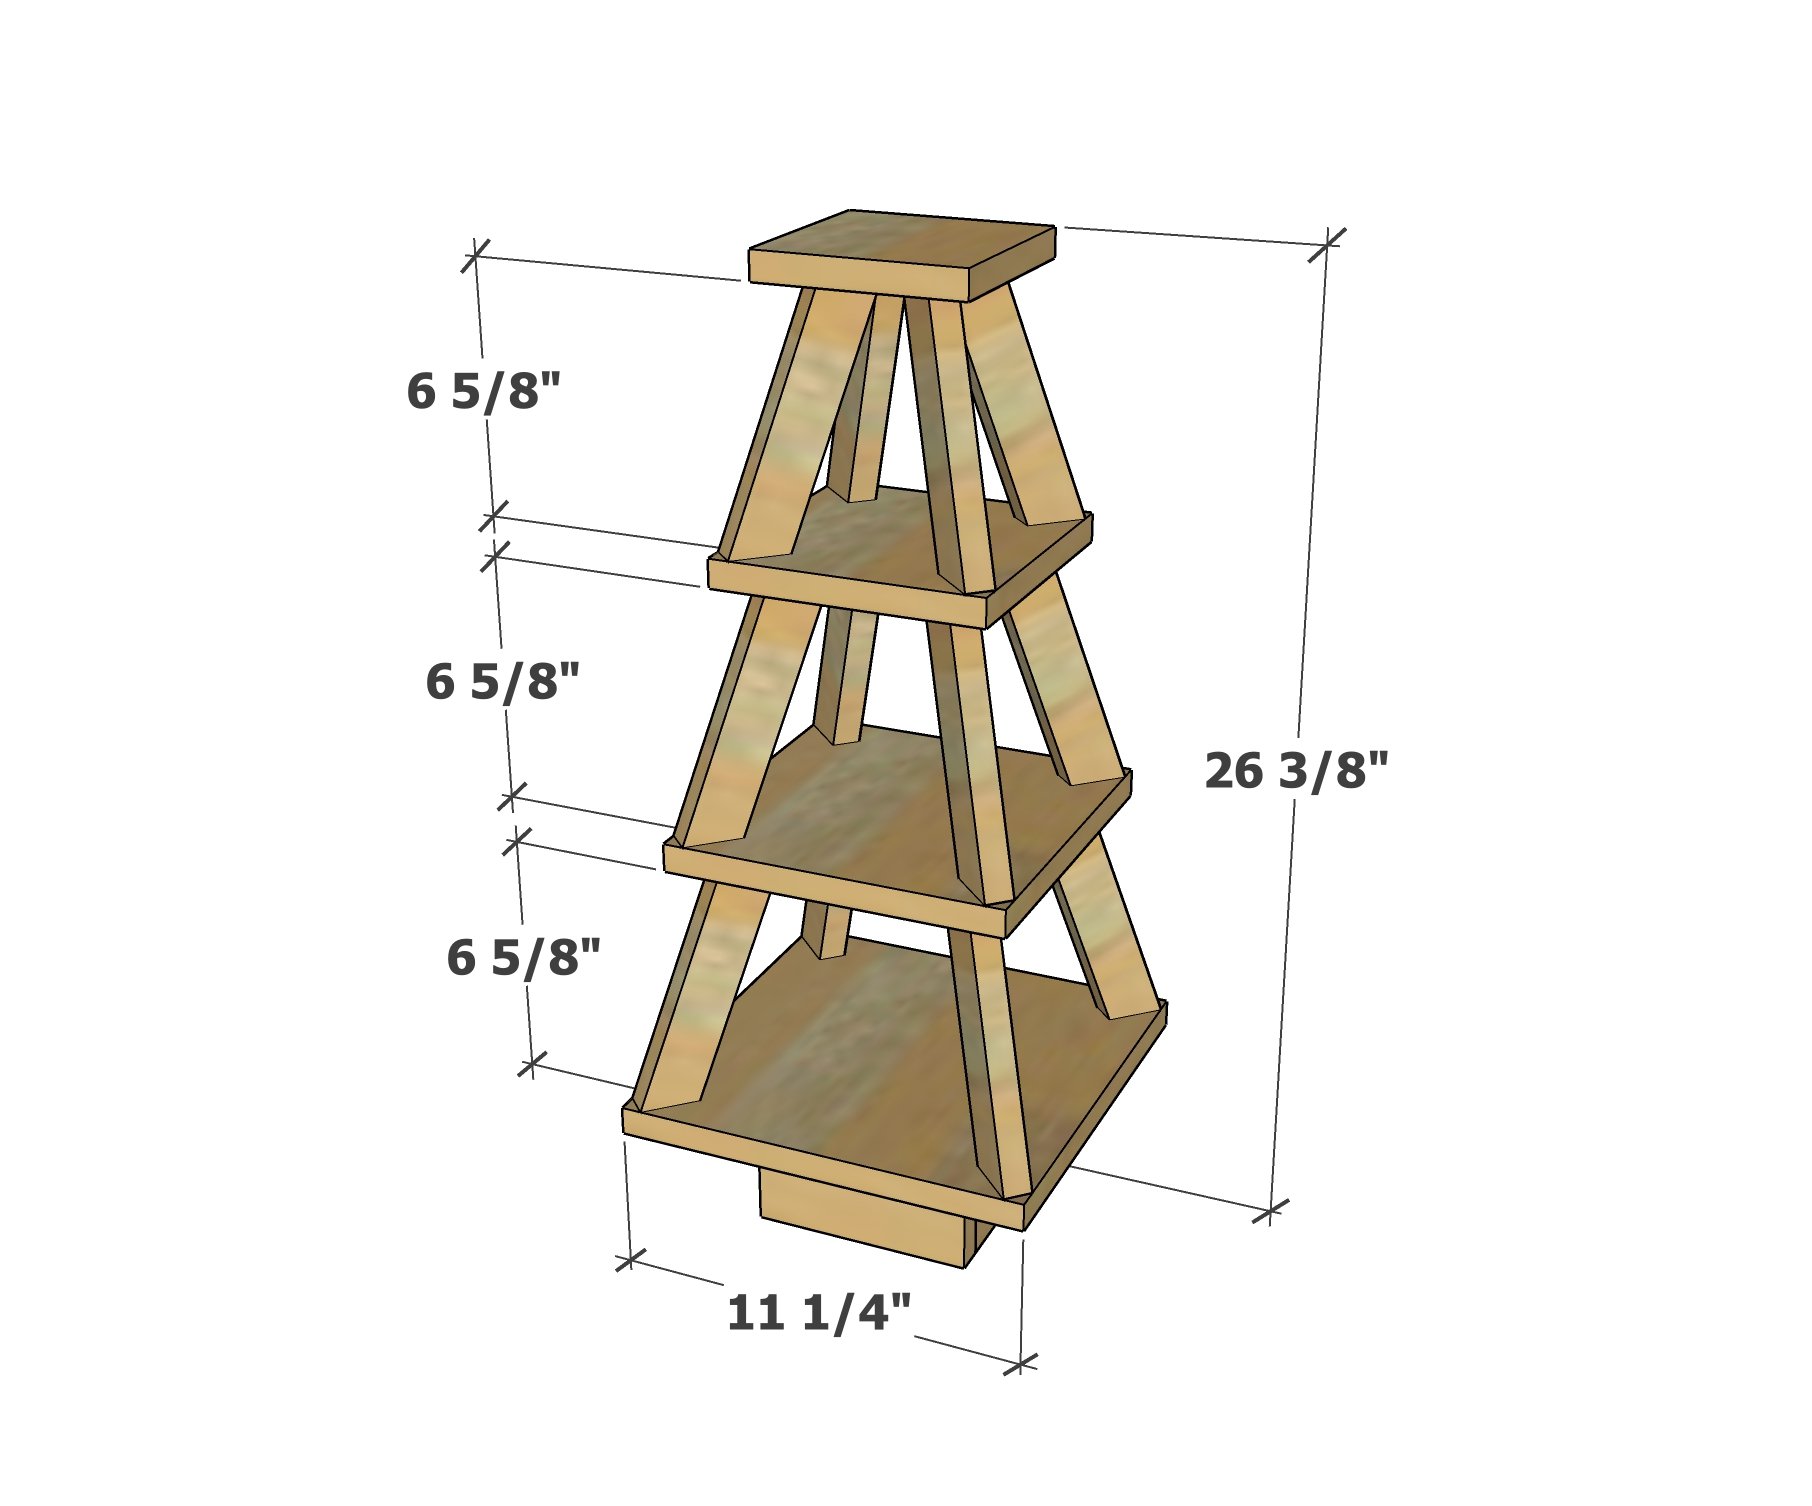
Dimensions
cupcake stand tree
About 2 feet tall, 1 foot x 1 foot base

Preparation

Shopping List
  • 1x4 - 2 feet
  • 1x2 - 8 feet
  • 1x12 - 11-1/4" inches
  • 1x10 - 9-1/4" inches
  • 1x8 - 7-1/4" inches
  • 1x6 - 5-1/2" inches
  • wood glue (hot glue recommended)
  • 1-1/4" brad nails
  • 1 - lighted Christmas tree topper star (optional)
Cut List
  • 2 - 1x4 @ 6"
  • 2 - 1x4 @ 4-1/2"
  • 4 - 1x2 @ 7" - long point to short point measurement, ends cut PARALLEL, 20 degrees off square (bottom level)
  • 8 - 1x2 @ 6" - long point to short point measurement, ends cut PARALLEL, 20 degrees off square (upper levels)
  • 1 - 1x12 @ 11-1/4"
  • 1 - 1x10 @ 9-1/4"
  • 1 - 1x8 @ 7-1/4"
  • 1 - 1x6 @ 5-1/2"
Tools
Tape Measure
Pencil
Safety Glasses
Miter Saw
Brad Nailer

Instructions

Step 1

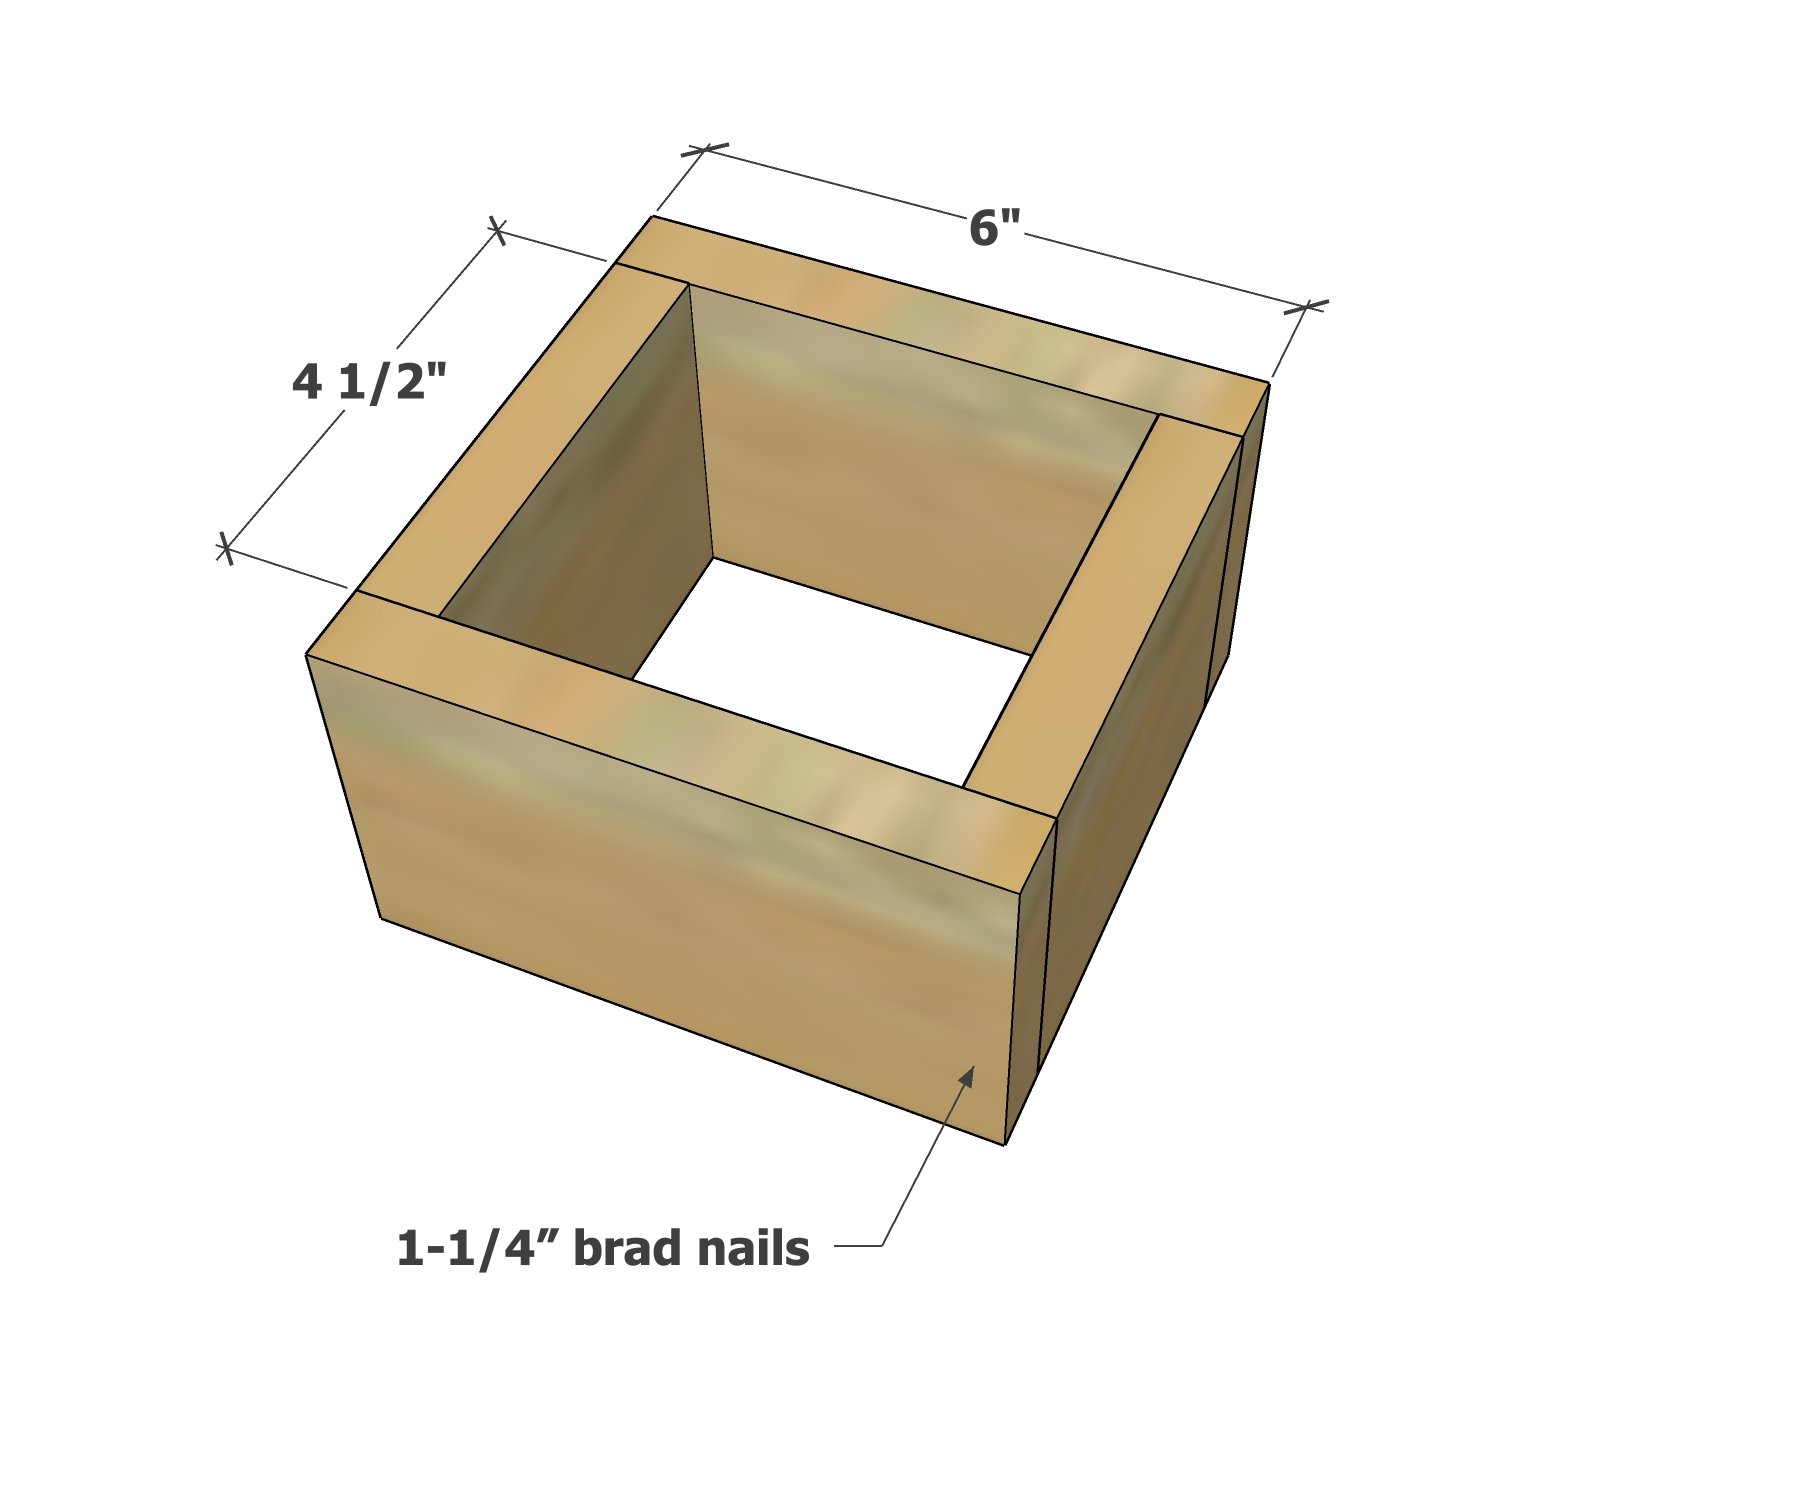
Use 1-1/4" brad nails and glue to nail together the tree base from the 1x4 boards.

Step 2

Place the 1x12 on top and center.

Nail the 1x12 to the base with 1-1/4" brad nails.

Step 3

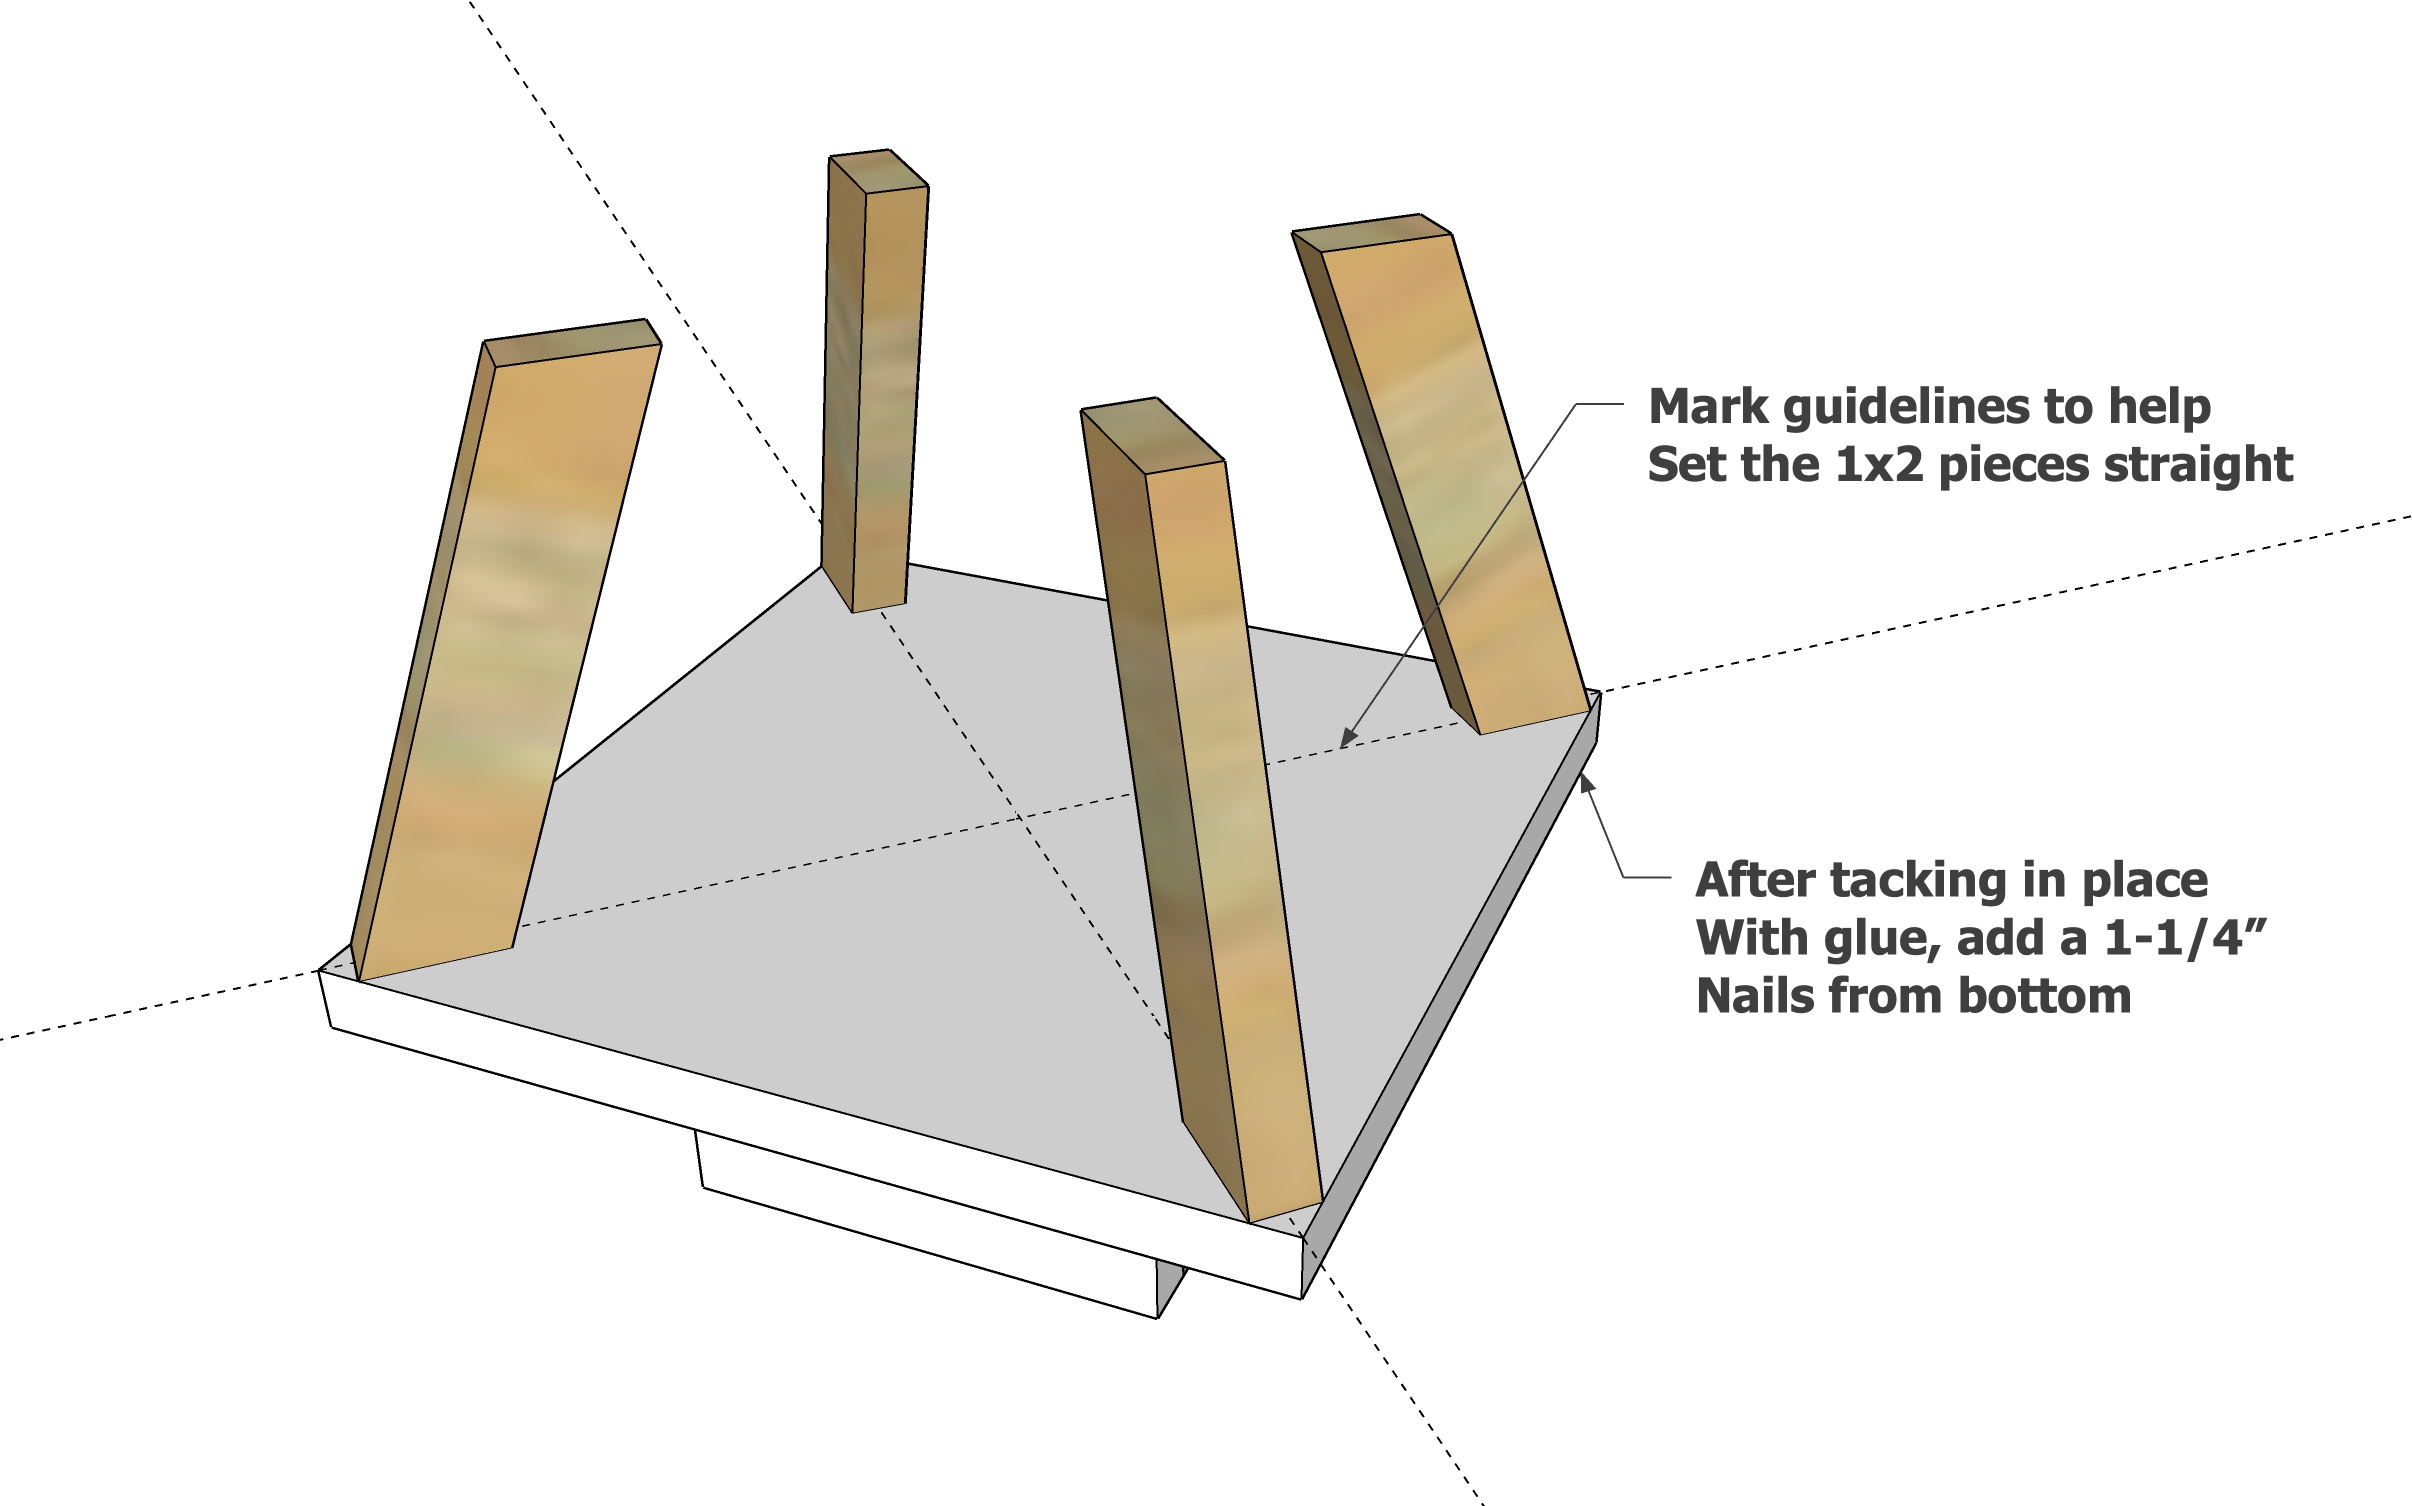
Mark guide lines with a pencil from diagonal corners as shown in the diagram.

Glue the 7" long 1x2 pieces on, centered on the guide lines.  Hot glue is recommended since it dries fast.

Attach also with 1-1/4" brad nails when glue is dry.

Step 4

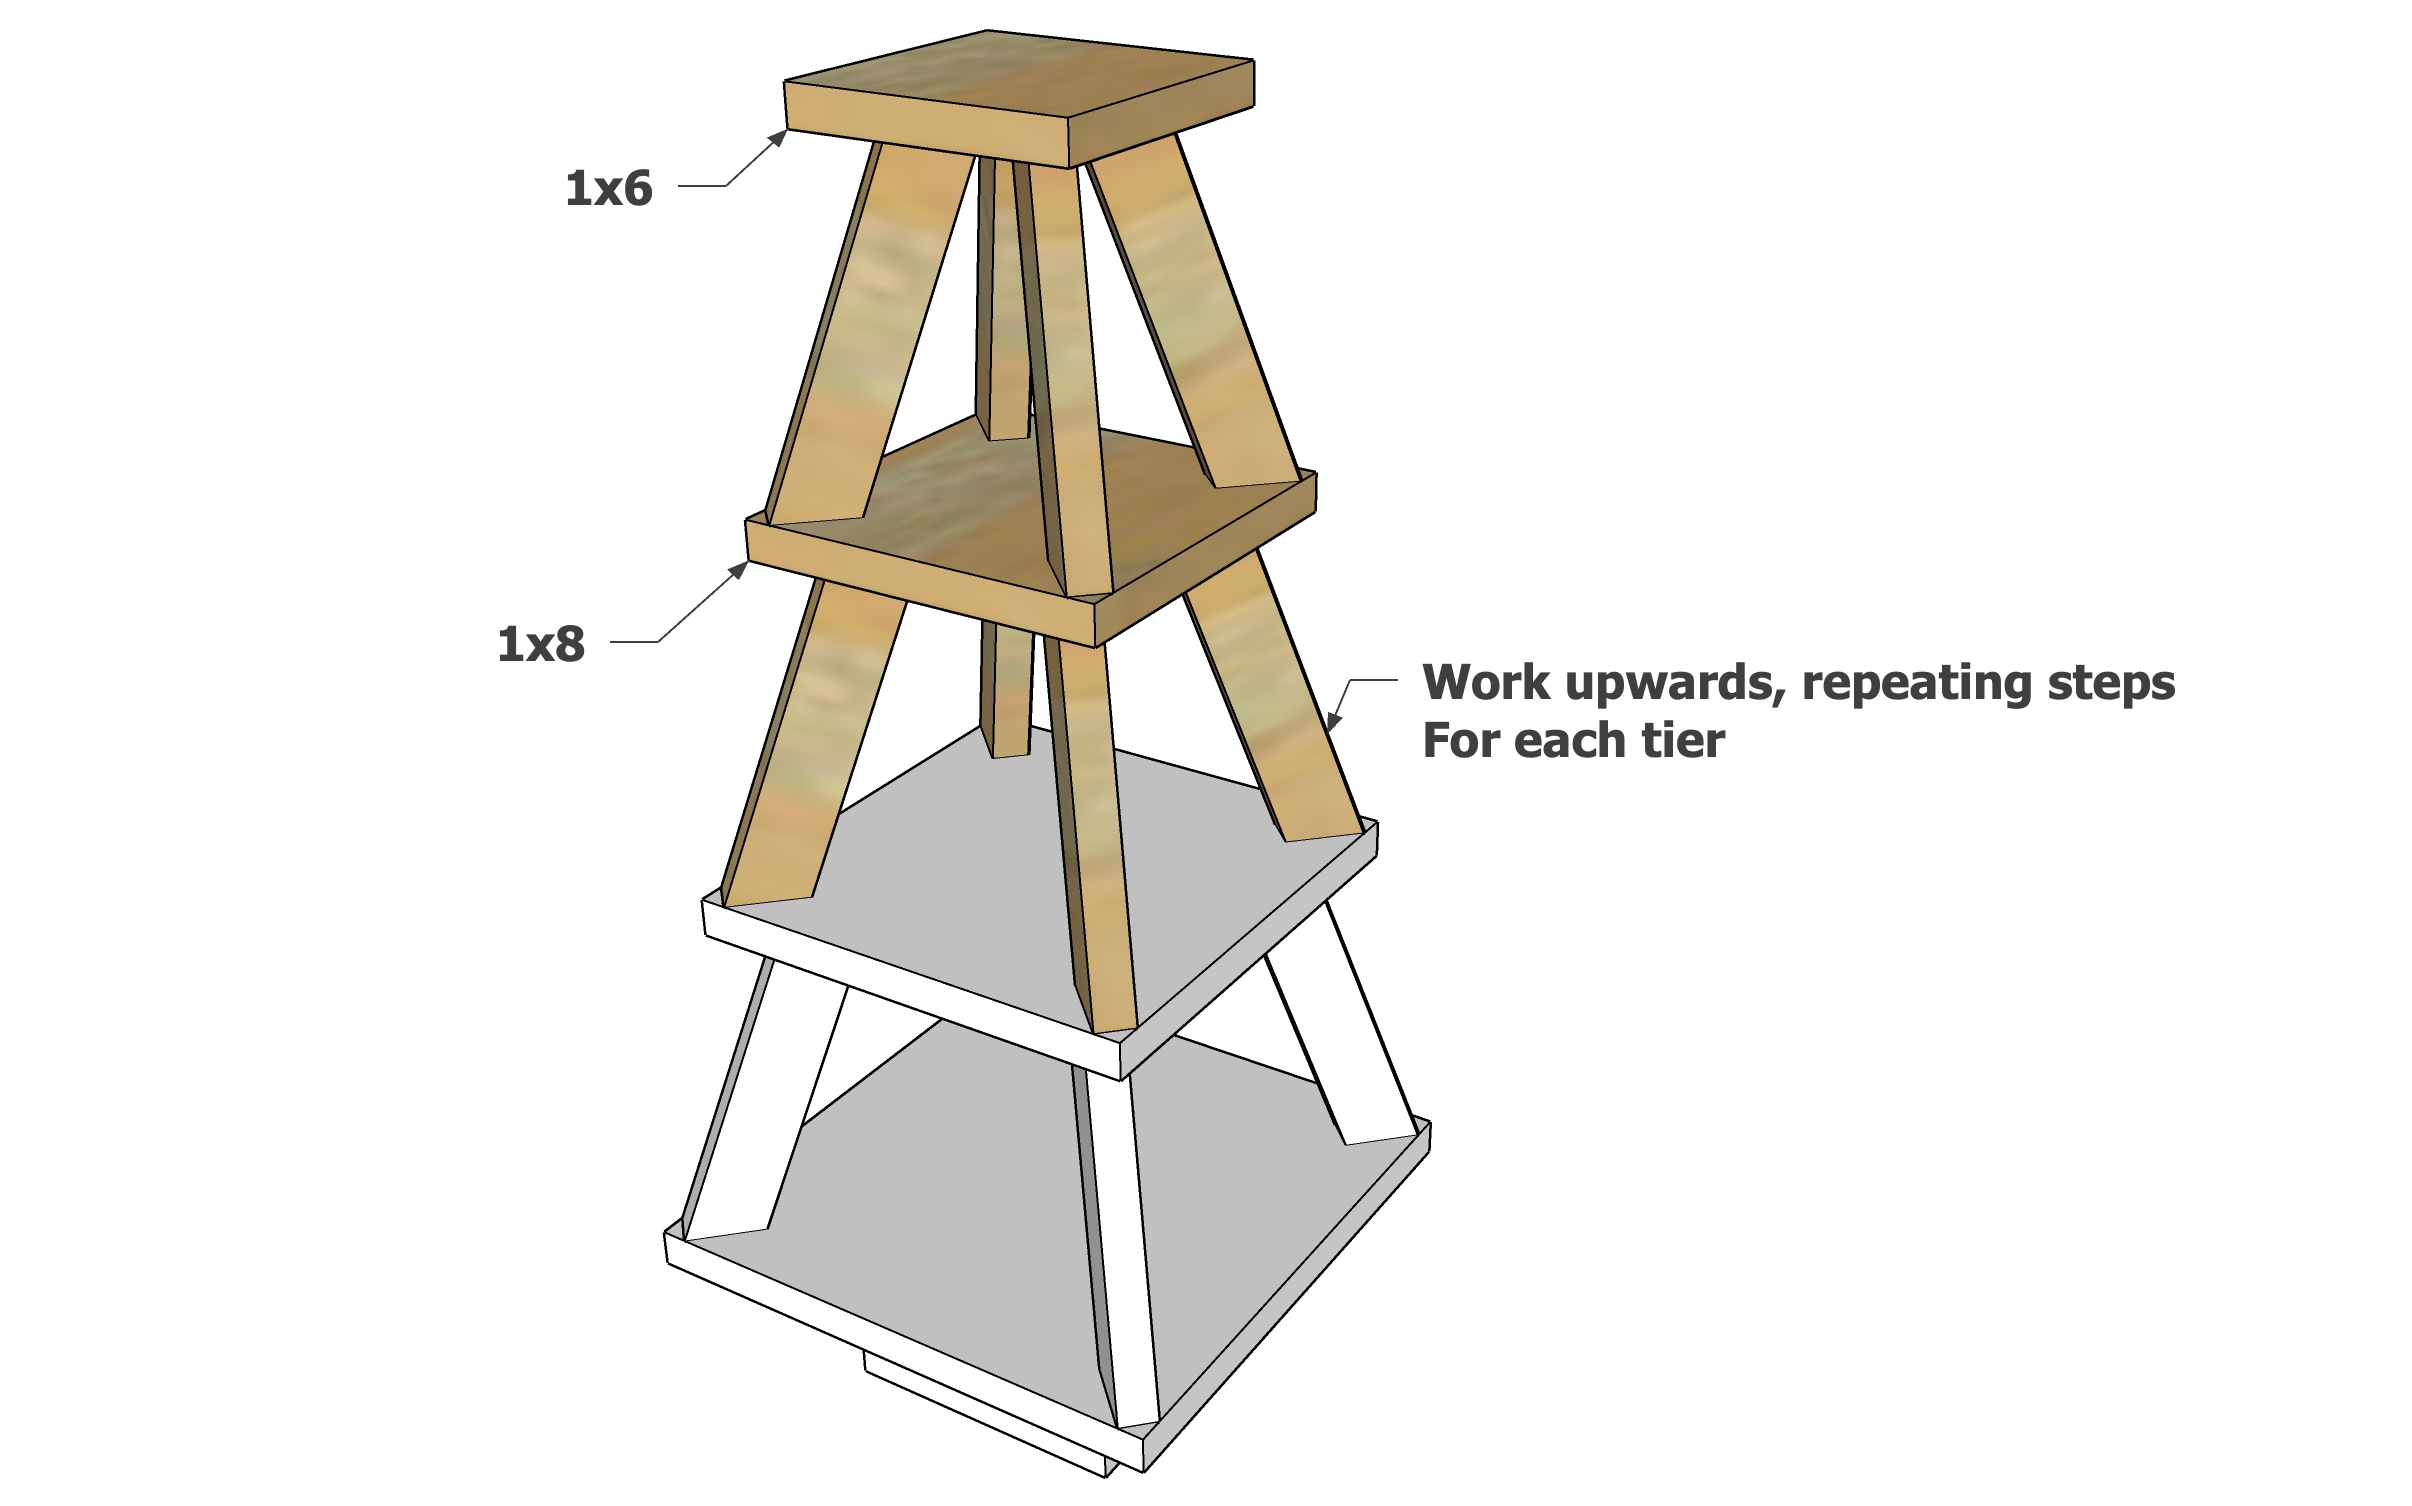
Add the 1x10 shelf on top and glue and nail to the lower level of 1x2s.

For the upper levels, I used a shorter 1x2 length (6").

Repeat these steps with the 1x8 and 1x6 top.

Seasonal And Holiday