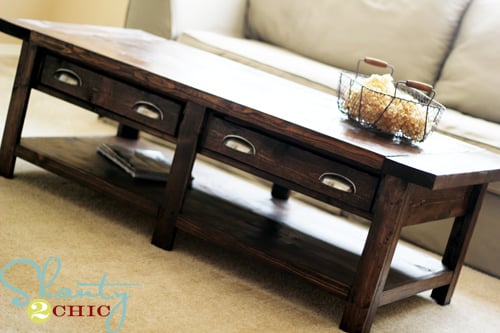
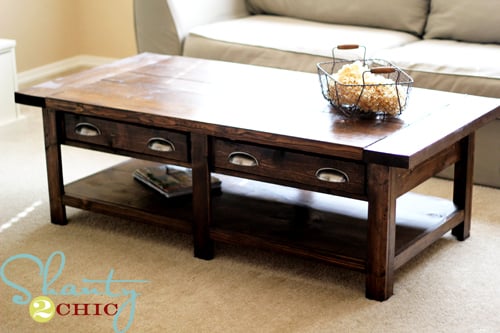
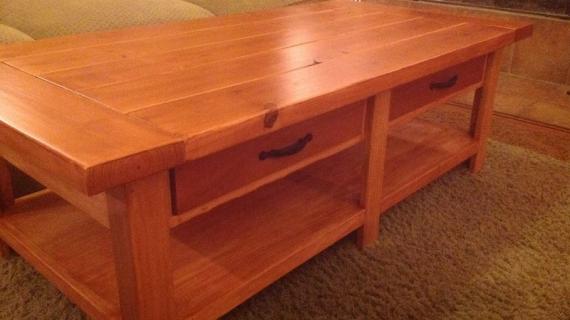
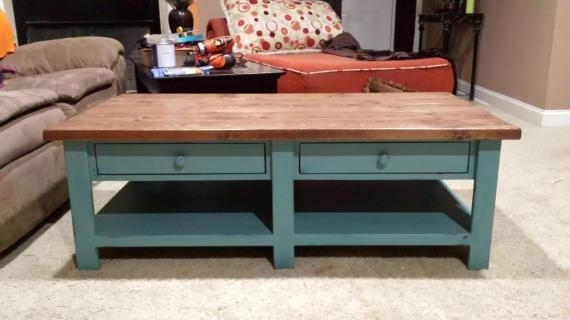
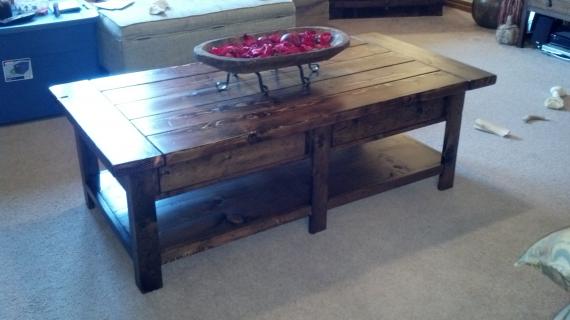
Here's a great coffee table plan made of solid pine boards and simple building techniques, featuring two drawers and a roomy bottom shelf. This is a free, step by step woodworking plan with detailed diagrams, shopping list and cut list to help you build your own coffee table.
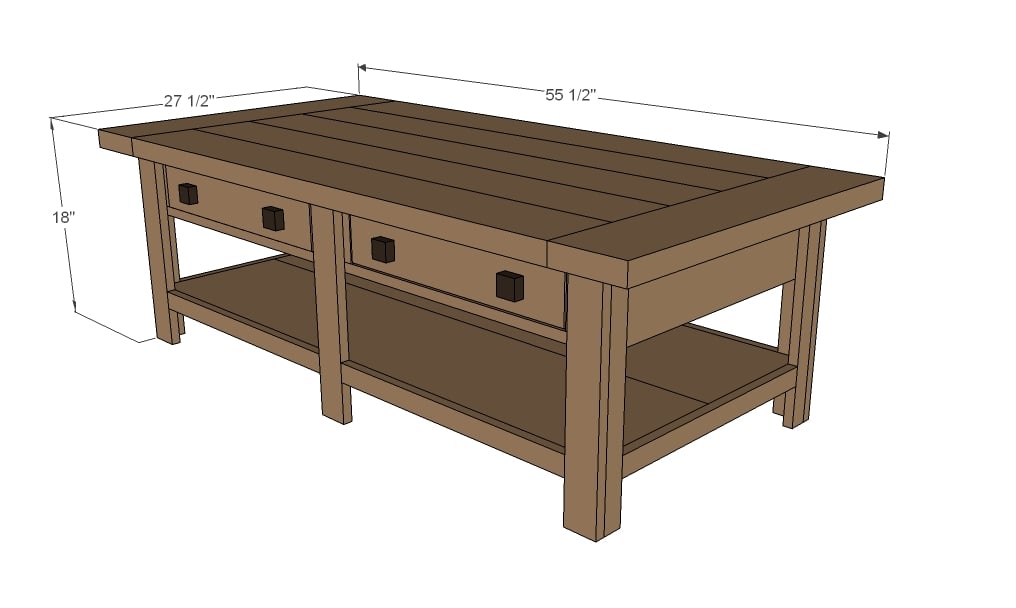
Preparation
- 1 – 1x12 @ 8 feet long
- 1 – 1x6 @ 8 feet long
- 2 – 2x6 @ 8 feet or stud length
- 1 – 2x6 @ 10 feet long (cut breadboard ends from this board)
- 7 – 1x3 @ 8 feet long
- 2 – 1x2 @ 8 feet long
- 1 – 1x4 @ 4 feet long
- 1 – ¼” thick plywood, ¼ of a sheet
- 2 sets 16” euro side/bottom corner mount white drawer slides
- 4 knobs
- 1 ¼” brad nails
- 2” brad nails
- 1 ¼” pocket hole screws
- 2 ½” pocket hole screws
- 2 – 1x12 @ 4 feet long- bottom shelf
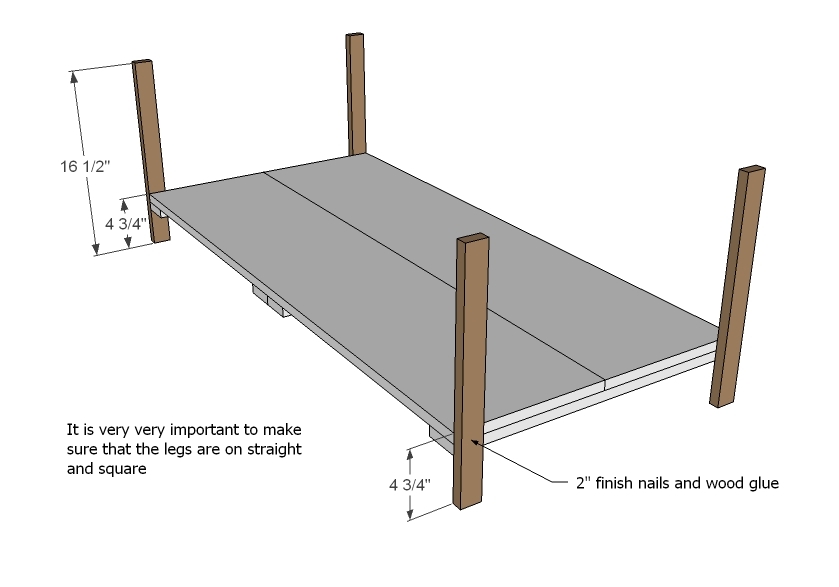
- 4 – 1x3 @ 22 ½” long - bottom shelf supports
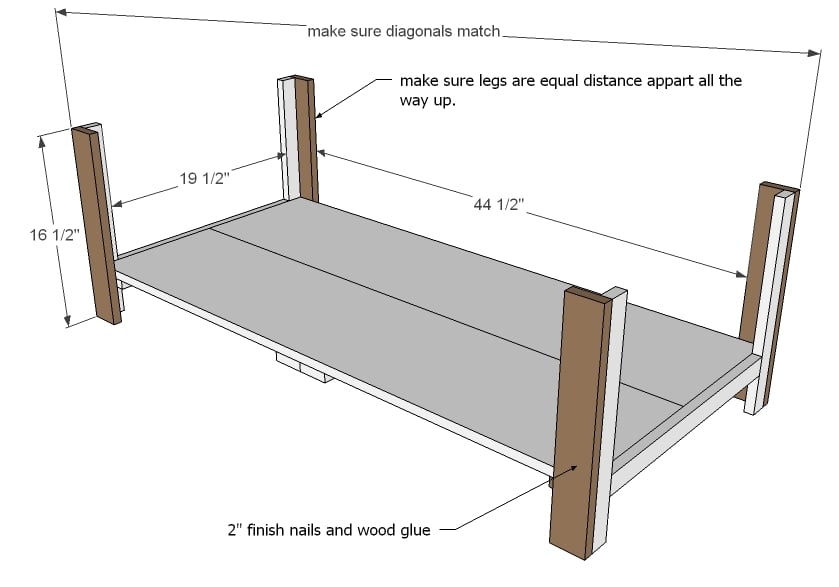
- 4 – 1x2 @ 16 ½” long - legs
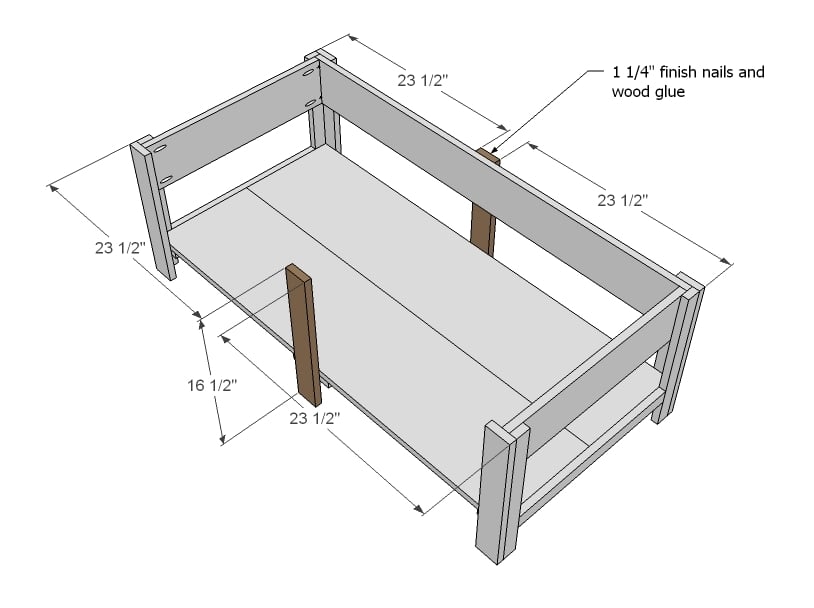
- 6 – 1x3 @ 16 ½” long - legs
- 1 – 1x6 @ 48” long - back apron
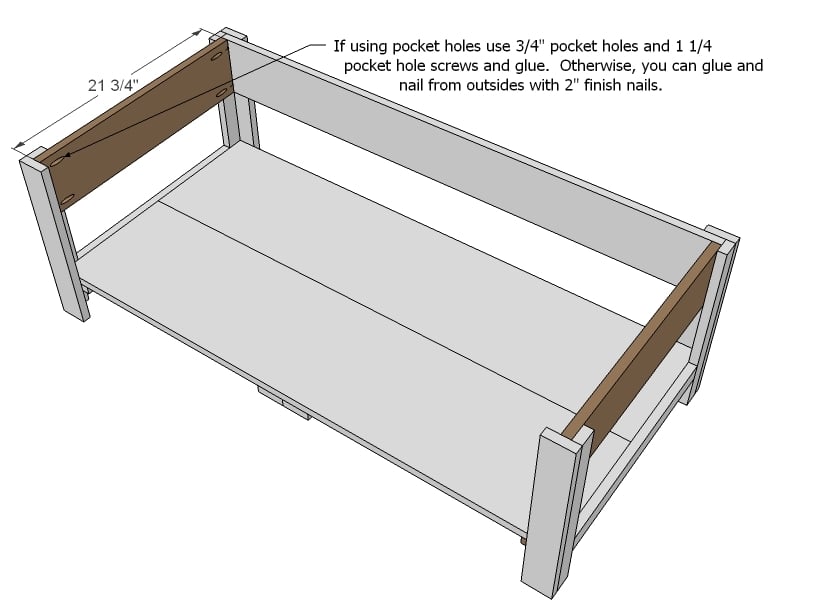
- 2 – 1x6 @ 21 ¾” long - side aprons
- 4 – 1x2 @ 21” long - trim
- 2 – 1x2 @ 19 ½” long - trim
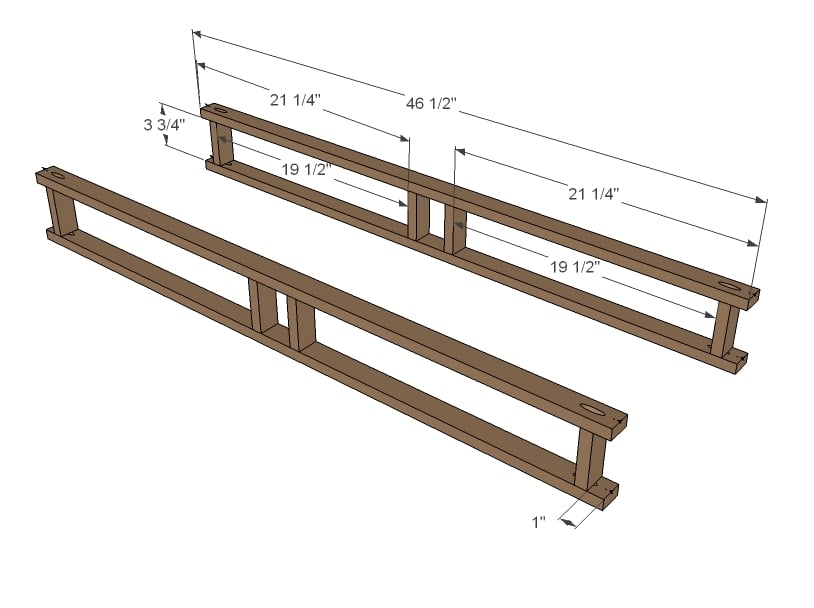
- 4 – 1x3 @ 46 ½” long drawer framing
- 8 – 1x3 @ 3 ¾” long - drawer framing
- 4 – 1x3 @ 16” long - drawers
- 4 – 1x3 @ 17” long - drawers
- 2 – 1x4 @ 19 ¼” long - drawer faces
- 2 – ¼” plywood @ 18 ½” x 16” - drawer bottoms
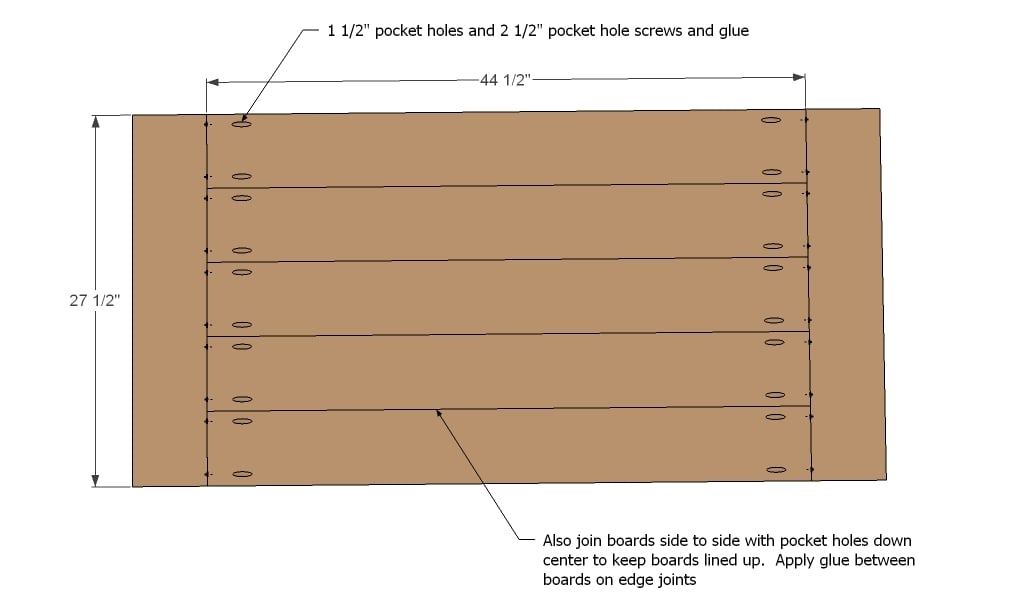
- 5 – 2x6 @ 44 ½” - top
- 2 – 2x6 @ 27 ½” - top, measure and cut to fit
Recommend cutting as you go to ensure perfect fit
Please read through the entire plan and all comments before beginning this project. It is also advisable to review the Getting Started Section. Take all necessary precautions to build safely and smartly. Work on a clean level surface, free of imperfections or debris. Always use straight boards. Check for square after each step. Always predrill holes before attaching with screws. Use glue with finish nails for a stronger hold. Wipe excess glue off bare wood for stained projects, as dried glue will not take stain. Be safe, have fun, and ask for help if you need it. Good luck!
Instructions
Step 1
1x12 11 ¼” wide x ¾” thick
This is definitely an advanced plan because of all the pieces and the drawers, so make sure you read through entire plan before starting. Also, I would recommend cutting as you go for the best fit on trim boards.
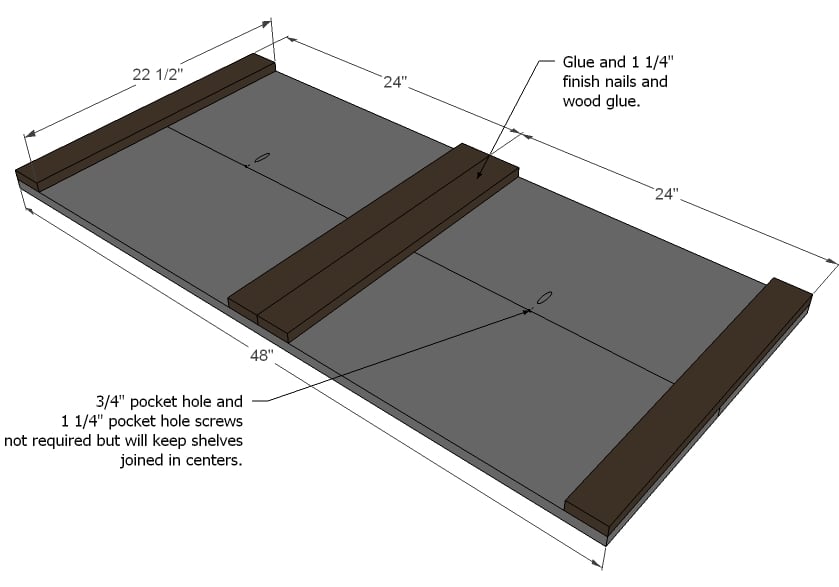
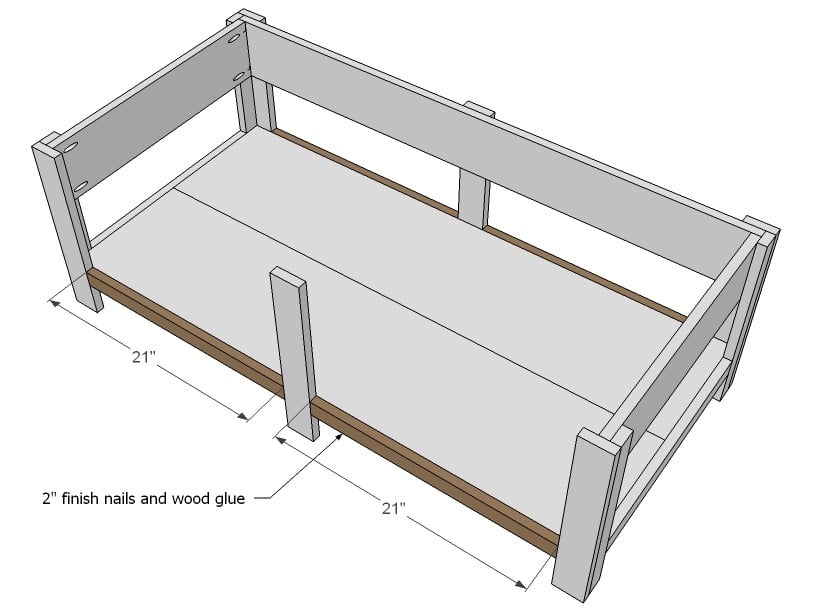
Start by attaching 1x3s to bottom of the 1x12s to create the bottom shelf. Use glue and 1 ¼” finish nails. Adjust for square.
Step 2
Step 3
Step 4
Step 6
Step 7
Step 8
The drawer frames also work to trim out the front of the project, so test after building to make sure they fit correctly. These are made with 1x3 boards for extra strength – if using pocket holes, drill two pocket holes per end. These must be built exactly square and exactly the same for the drawers to slide correctly.
Step 9
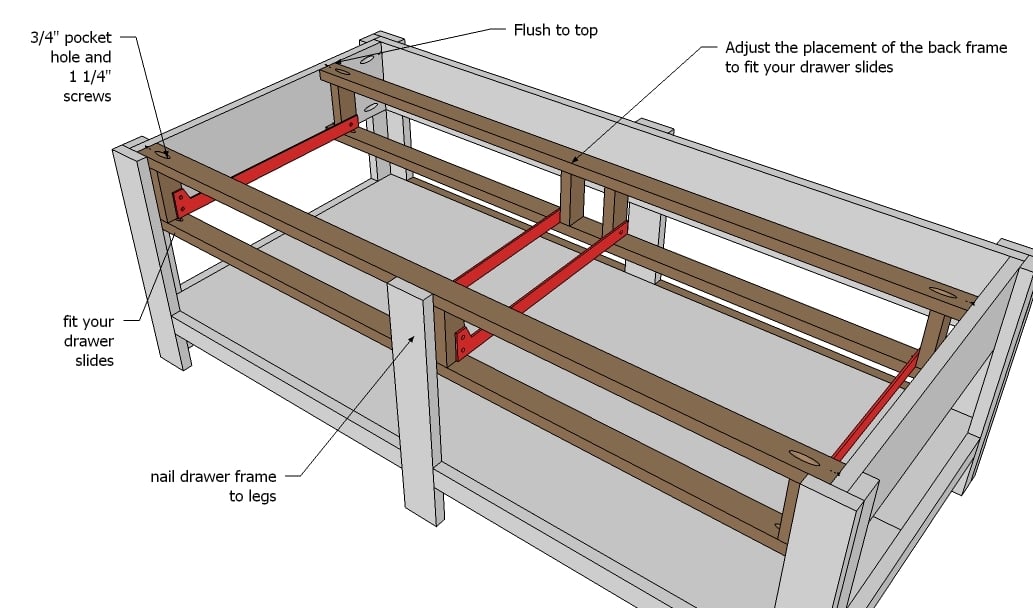
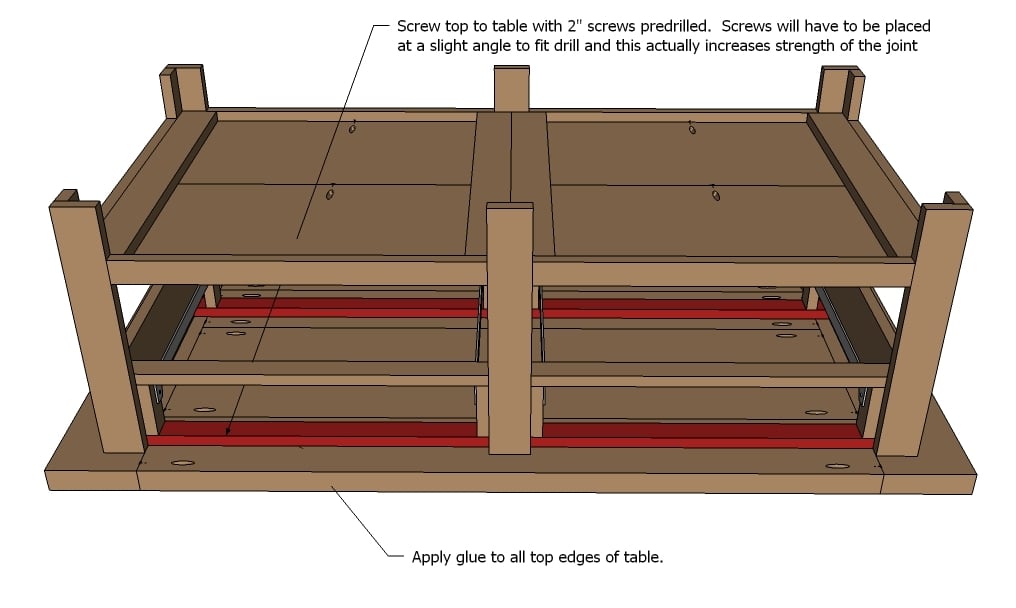
Install drawer frames in coffee table top, flush to the top as shown in diagram. Place back drawer frame to fit your drawer slides as shown in diagram. The slides need to sit ¾” inset from the front of the front frame to allow for the drawer face to hide the slides.
Here is a good video showing how to install drawer slides
Step 10
Step 11
Step 12
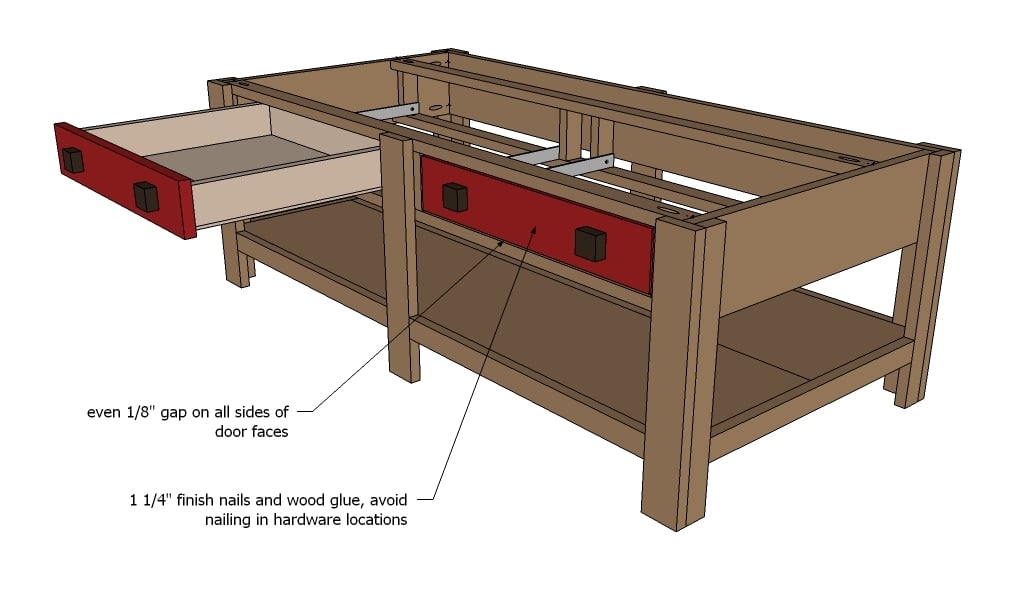
Drawer faces are nailed to drawer box with 1 ¼” finish nails and glue, with an even gap around all sides. Attach hardware – you may need to drill special holes to accommodate the drawer hardware with the double thick face by drilling through drawer box with larger bit sized for screw head, and drilling through face of drawer with bit sized for screw shaft.
It is always recommended to apply a test coat on a hidden area or scrap piece to ensure color evenness and adhesion. Use primer or wood conditioner as needed.







Comments
Ed Acosta (not verified)
Wed, 02/01/2012 - 10:09
Nice
I think I will shorten the depth and make it taller use it as my shop work bench!!!!! Y'all Rock!!!
K.Taylor (not verified)
Wed, 02/01/2012 - 10:50
In the cut list it says 2
In the cut list it says 2 1x12" at 8 feet long, should that be 4 feet long instead? Just wondering since the materials list only has 1 1x12" listed.
In reply to In the cut list it says 2 by K.Taylor (not verified)
Ana White
Wed, 02/01/2012 - 11:07
Thanks for catching - just
Thanks for catching - just updated the cut list to 2 - 1x12 @ 4 feet long for the bottom shelf. Appreciate you taking your time to help.
Guest (not verified)
Thu, 02/02/2012 - 07:05
you are addictive. it's worse
you are addictive. it's worse than facebook, believe me. every day i have to check what ana has in store for her fans. and since seeing this site last week i have on wip 4 of your projects and many more on my to do list.
i love you and god bless
sarina -all the way from india (small world :))
dawnkasotia
Thu, 02/02/2012 - 09:42
Benchright Coffee Table
I love the design and color of this.
Brook @ BeingBrook (not verified)
Thu, 02/02/2012 - 19:28
Gorgeous!
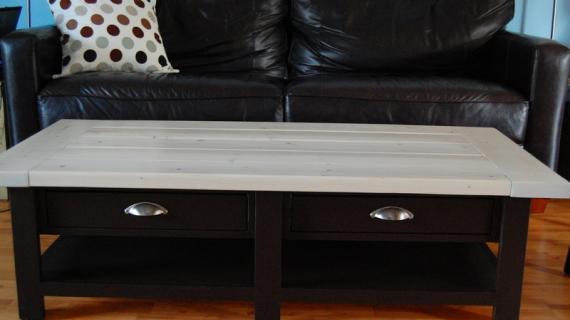
I love this! Ashley did a wonderful job. The finish is perfect!
Meghan Finch (not verified)
Fri, 02/03/2012 - 14:50
Beautiful! I noticed this
Beautiful! I noticed this project shows up in the Beginner Projects section, along with a few other Advanced looking projects. Are they supposed to be there?
Meghan Finch (not verified)
Fri, 02/03/2012 - 14:52
Sorry, I should have said
Sorry, I should have said that it shows up in "Starter Projects", not beginner projects. :)
LitchfieldHills (not verified)
Thu, 02/09/2012 - 12:16
Any suggestions on how to
Any suggestions on how to keep everything square as you progress. Just looking at step 2, keeping the four vertical pieces all parallel, while also making each on perpendicular to the base, seems a little tricky.
countrymarketp…
Thu, 02/09/2012 - 20:26
Stain color
Beautiful work as usual. I was curious to the color stain that you used to finish this table?
Guest (not verified)
Sun, 02/12/2012 - 09:01
A bit more description might help
I really like you plans and am going to make this coffee table for my daughter. One suggestion: On the cut list could you reference the piece of use in plan. ie- "1x2x21" boards - edging for bottom shelve" This would make it a bit easier but over-all plan is great and I will let you know how this comes out.
Chris E. (not verified)
Thu, 11/01/2012 - 15:30
I have 2 questions: What type
I have 2 questions:
What type of wood did you use?
What did you use the 2x6's for? I can't figure it out.
This table looks awesome I can't wait to start making it!
Mike Meadows (not verified)
Fri, 11/02/2012 - 09:21
2x6s
Chris- It appears as though the 2x6s are used only on the table top. Joined together with glue and pocket holes. Hope that helps.
I am not sure what type of wood Ana used, but am also interested to find out.
SilverStar (not verified)
Tue, 12/18/2012 - 22:06
Middle support
I love this table but I wondered if one of the modifications I was thinking of making on my altered version would compromise its stability. I wanted to take out the middle legs and just have the four corners with two drawers across the front. Any thoughts on how that might affect the stability of the table/drawers?
SilverStar (not verified)
Tue, 12/18/2012 - 22:09
Middle support
I love this table but I wondered if one of the modifications I was thinking of making on my altered version would compromise its stability. I wanted to take out the middle legs and just have the four corners with two drawers across the front. Any thoughts on how that might affect the stability of the table/drawers?
kongk
Tue, 05/21/2013 - 04:53
Wow, wonderful blog layout!
Wow, wonderful blog layout! How long have you been blogging for? you make blogging look easy. The overall look of your web site is fantastic, let alone the content!
Relationship Advice by T-Lad Web