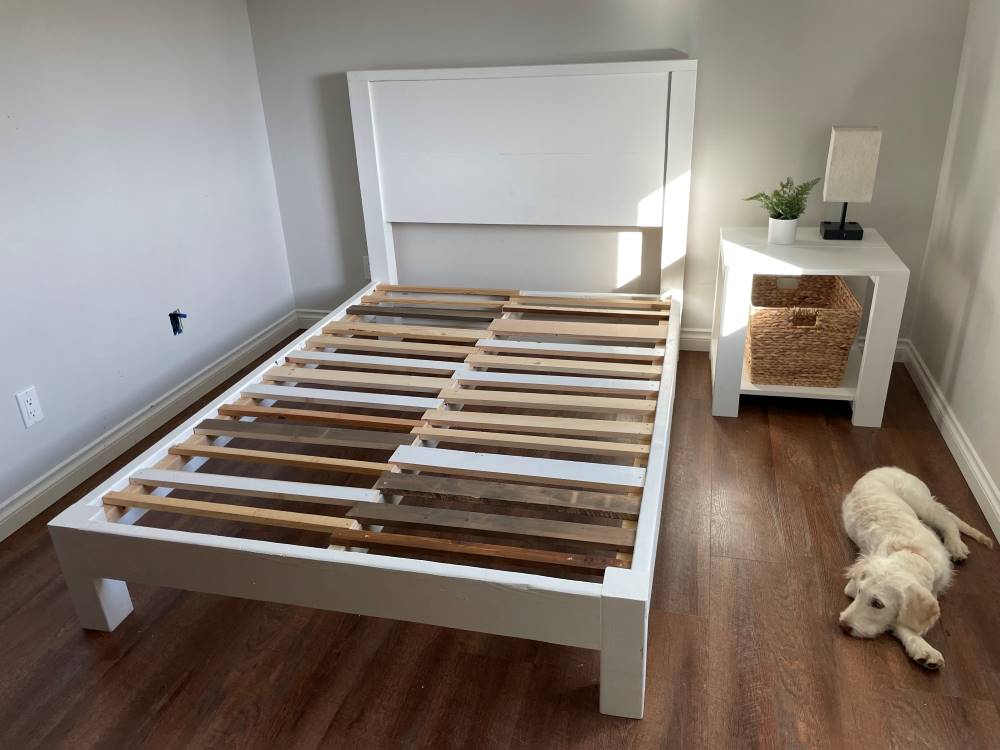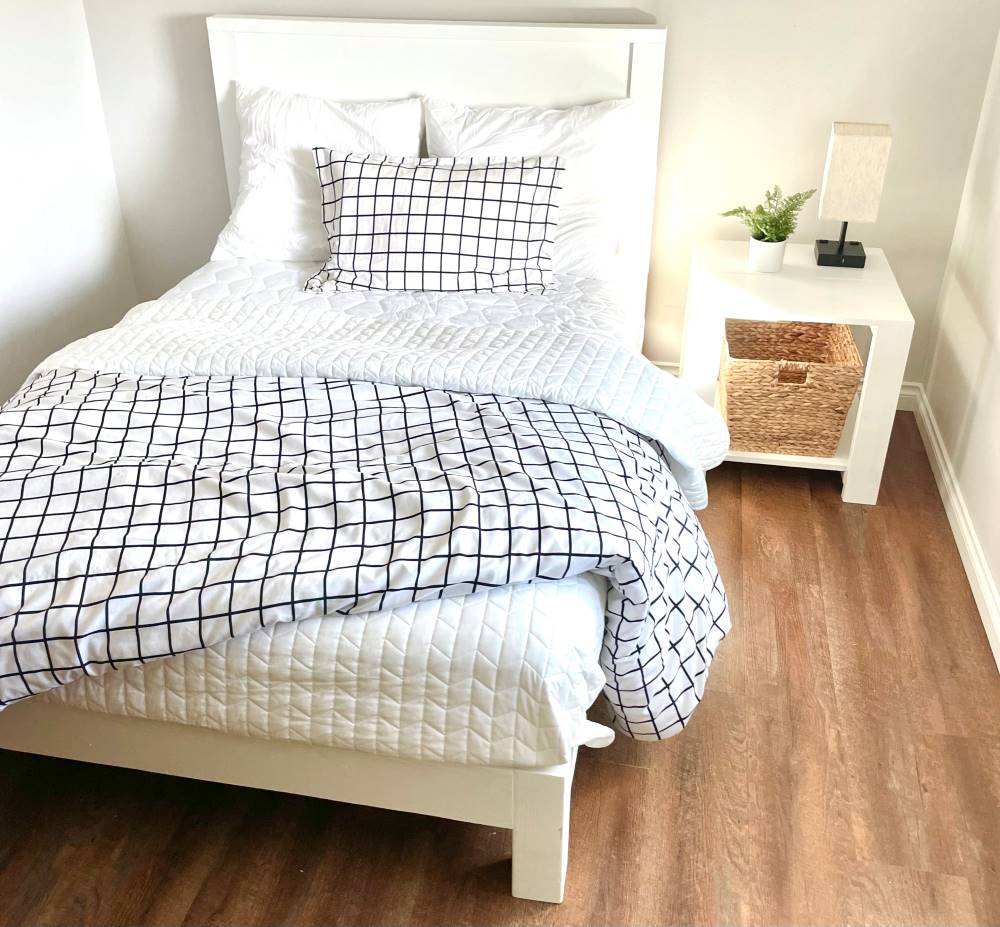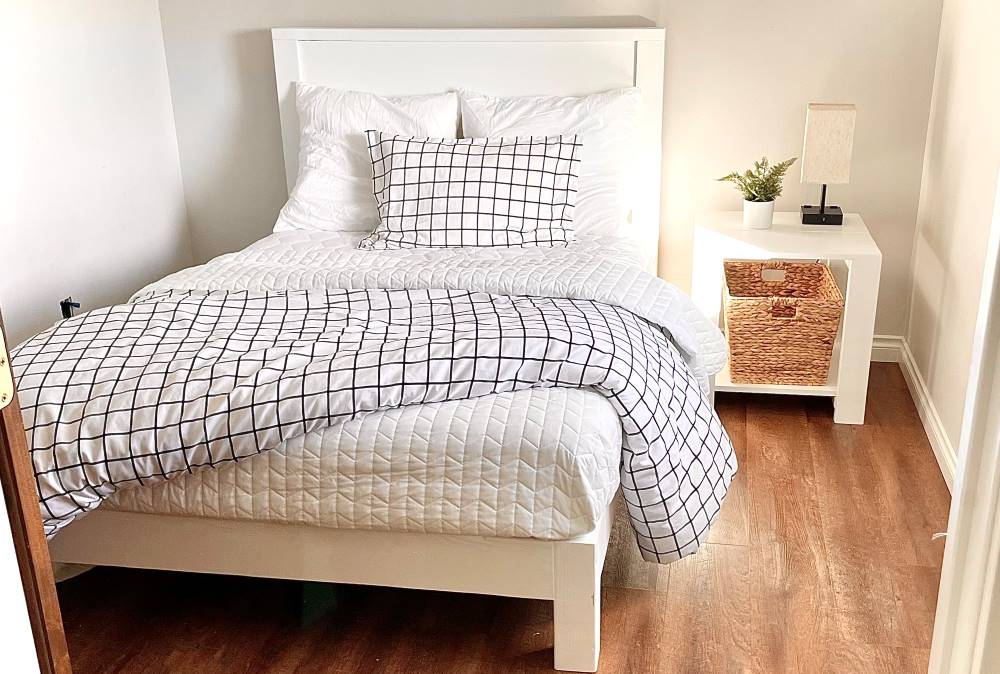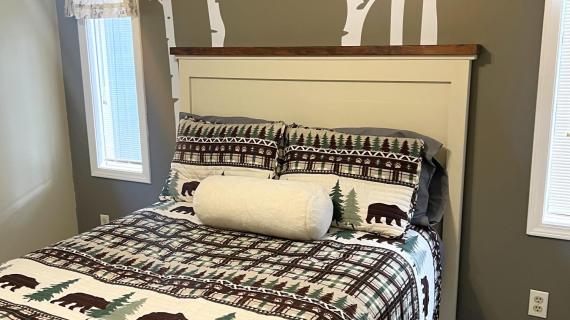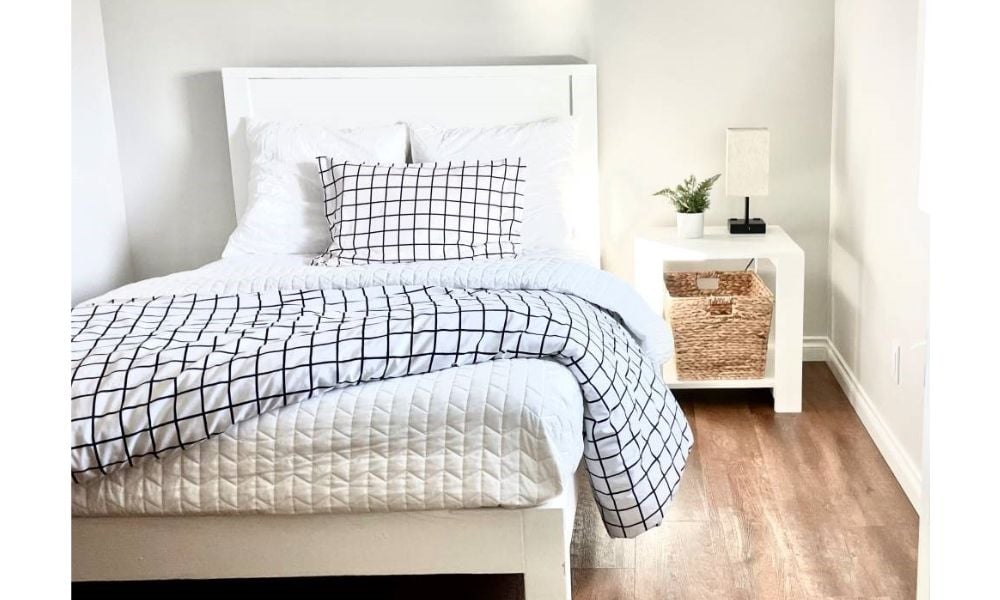
If you are looking for a small space farmhouse bed with clean lines and solid wood construction (perfect for staining or painting!), this is the one.
Like a frame for your bedding, this beautiful bed is inexpensive and easy to make.
Free step by step plans with photos, video tutorial and diagrams. Plans to fit twin, full, queen, standard king and California king mattress sizes. By Ana-White.com
Pin For Later!

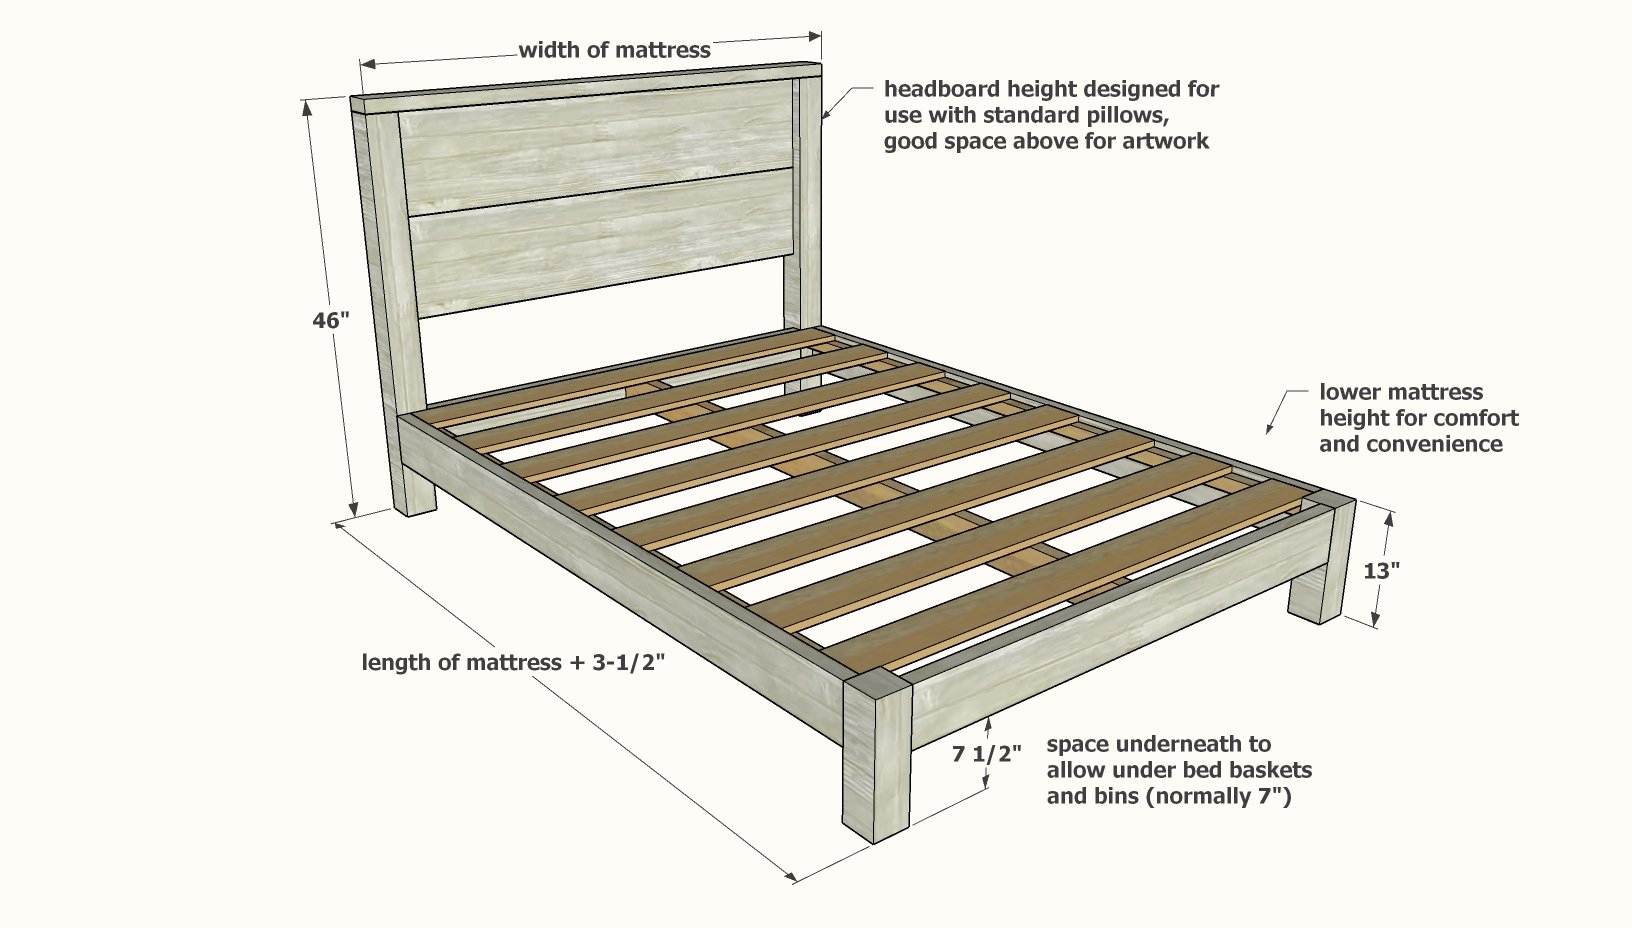
Preparation
TWIN SHOPPING LIST (38x75)
- 1 - 4x4 @ 8 feet long
- 1 - 1x12 @ 6 feet long
- 1 - 2x4 @ 4 feet long
- 2 - 2x6 @ 8 feet long (can be stud length)
- 1 - 2x6 @ 4 feet long
- 2 - 2x2 furring strips @ 8 feet long
- 5 - 1x3 or 1x4 furring strips (bed slats) @ 6 feet long
- 1-1/4" pocket hole screws (about 15)
- 2-1/2" pocket hole screws (about 20)
- Screws or nails for attaching slats, can be 1-1/4" brad nails or similar length screws (about 20)
- 2-1/2" long screws for attaching cleats to inside siderails, can be Kreg screws or self tapping star bit screws (About 16)
FULL SHOPPING LIST (54x75)
- 1 - 4x4 @ 8 feet long
- 1 - 1x12 @ 8 feet long
- 1 - 2x4 @ 8 feet long (cut 75" piece from this board)
- 1 - 2x4 @ 10 feet long
- 2 - 2x6 @ 8 feet long (can be stud length)
- 1 - 2x6 @ 4 feet long
- 2 - 2x2 furring strips @ 8 feet long
- 10 - 1x3 or 1x4 furring strips (bed slats) @ 51" long, or use 26" scrap 1x material
- 1-1/4" pocket hole screws (about 20)
- 2-1/2" pocket hole screws (about 30)
- Screws or nails for attaching slats, can be 1-1/4" brad nails or similar length screws (about 20)
- 2-1/2" long screws for attaching cleats to inside siderails, can be Kreg screws or self tapping star bit screws (About 16)
QUEEN SHOPPING LIST (60x80)
- 1 - 4x4 @ 8 feet long
- 1 - 1x12 @ 10 feet long
- 1 - 2x4 @ 8 feet long (cut 80" piece from this board)
- 1 - 2x4 @ 10 feet long
- 3 - 2x6 @ 8 feet long (can be stud length)
- 2 - 2x2 furring strips @ 8 feet long
- 10 - 1x3 or 1x4 furring strips (bed slats) @ 57" long, or use 28-1/2" scrap 1x material
- 1-1/4" pocket hole screws (about 25)
- 2-1/2" pocket hole screws (about 30)
- Screws or nails for attaching slats, can be 1-1/4" brad nails or similar length screws (about 25)
- 2-1/2" long screws for attaching cleats to inside siderails, can be Kreg screws or self tapping star bit screws (About 20)
STANDARD KING SHOPPING LIST (76x80)
- 1 - 4x4 @ 8 feet long
- 2 - 1x12 @ 6 feet long
- 3- 2x4 @ 8 feet long (can be stud length)
- 3 - 2x6 @ 8 feet long (can be stud length)
- 2 - 2x2 furring strips @ 8 feet long
- 10 - 1x3 or 1x4 furring strips (bed slats) @ 73" long, or use 37-1/2" scrap 1x material
- 1-1/4" pocket hole screws (about 25)
- 2-1/2" pocket hole screws (about 30)
- Screws or nails for attaching slats, can be 1-1/4" brad nails or similar length screws (about 25)
- 2-1/2" long screws for attaching cleats to inside siderails, can be Kreg screws or self tapping star bit screws (About 20)
CALIFORNIA KING SHOPPING LIST (72x84)
- 1 - 4x4 @ 8 feet long
- 2 - 1x12 @ 6 feet long
- 3- 2x4 @ 8 feet long (can be stud length)
- 3 - 2x6 @ 8 feet long (can be stud length)
- 2 - 2x2 furring strips @ 8 feet long
- 11 - 1x3 or 1x4 furring strips (bed slats) @ 69" long, or use 29-1/2" scrap 1x material
- 1-1/4" pocket hole screws (about 25)
- 2-1/2" pocket hole screws (about 30)
- Screws or nails for attaching slats, can be 1-1/4" brad nails or similar length screws (about 25)
- 2-1/2" long screws for attaching cleats to inside siderails, can be Kreg screws or self tapping star bit screws (About 20)
TWIN CUT LIST (38x75)
- 2 - 4x4 @ 44-1/2" - headboard legs
- 1 - 2x4 @ 38" - headboard top
- 2 - 1x12 @ 31" - headboard panel
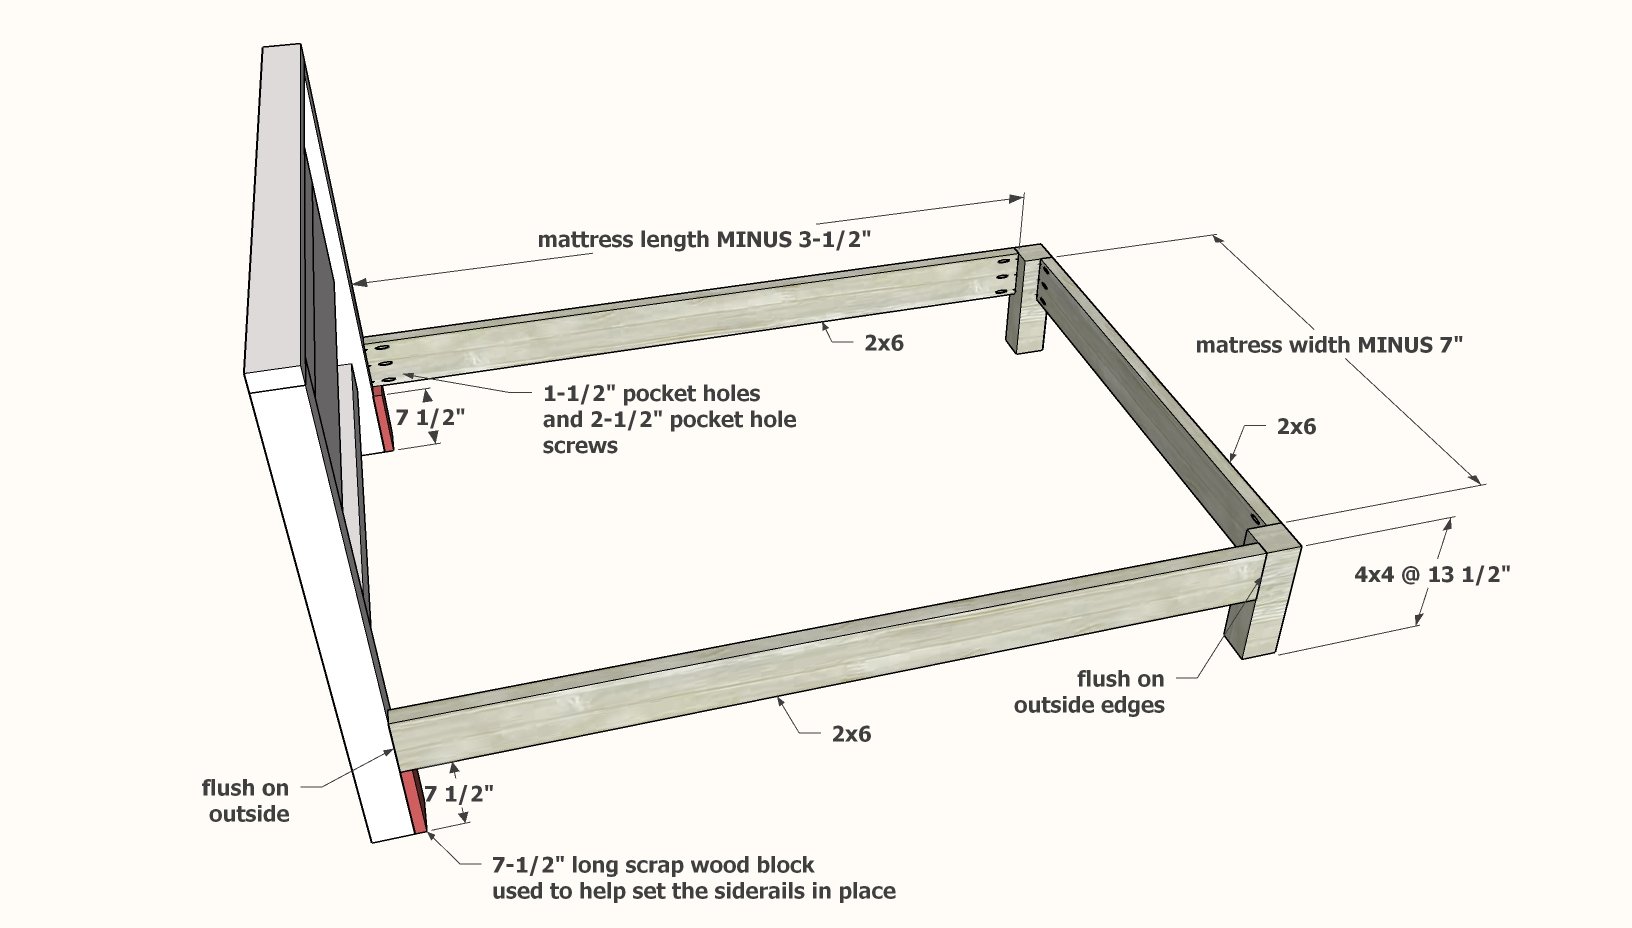
- 2 - 4x4 @ 13-1/2" - footboard legs
- 2 - 2x6 @ 71-1/2" - siderails
- 1 - 2x6 @ 31" - footboard
- 2 - 2x2 @ 71-1/2" - cleats
- 10 - 1x3 or 1x4 @ 35" - slats
FULL CUT LIST (54x75)
- 2 - 4x4 @ 44-1/2" - headboard legs
- 1 - 2x4 @ 54" - headboard top
- 2 - 1x12 @ 47" - headboard panel
- 1 - 2x4 @ 47" - headboard base support
- 2 - 4x4 @ 13-1/2" - footboard legs
- 2 - 2x6 @ 71-1/2" - siderails
- 1 - 2x6 @ 47" - footboard
- 2 - 2x2 @ 71-1/2" - cleats
- 1 - 2x4 @ 75" - center cleat
- 10 - 1x3 or 1x4 @ 51" - slats
QUEEN CUT LIST (60x80)
- 2 - 4x4 @ 44-1/2" - headboard legs
- 1 - 2x4 @ 60" - headboard top
- 2 - 1x12 @ 53" - headboard panel
- 1 - 2x4 @ 53" - headboard base support
- 2 - 4x4 @ 13-1/2" - footboard legs
- 2 - 2x6 @ 76-1/2" - siderails
- 1 - 2x6 @ 53" - footboard
- 2 - 2x2 @ 76-1/2" - cleats
- 1 - 2x4 @ 80" - center cleat
- 10 - 1x3 or 1x4 @ 57" - slats
STANDARD KING CUT LIST (76x80)
- 2 - 4x4 @ 44-1/2" - headboard legs
- 1 - 2x4 @ 76" - headboard top
- 2 - 1x12 @ 69" - headboard panel
- 1 - 2x4 @ 69" - headboard base support
- 2 - 4x4 @ 13-1/2" - footboard legs
- 2 - 2x6 @ 76-1/2" - siderails
- 1 - 2x6 @ 69" - footboard
- 2 - 2x2 @ 76-1/2" - cleats
- 1 - 2x4 @ 80" - center cleat
- 10 - 1x3 or 1x4 @ 73" - slats
CALIFORNIA KING CUT LIST (72x84)
- 2 - 4x4 @ 44-1/2" - headboard legs
- 1 - 2x4 @ 72" - headboard top
- 2 - 1x12 @ 65" - headboard panel
- 1 - 2x4 @ 65" - headboard base support
- 2 - 4x4 @ 13-1/2" - footboard legs
- 2 - 2x6 @ 80-1/2" - siderails
- 1 - 2x6 @ 65" - footboard
- 2 - 2x2 @ 80-1/2" - cleats
- 1 - 2x4 @ 84" - center cleat
- 11 - 1x3 or 1x4 @ 69" - slats
Instructions
Step 1
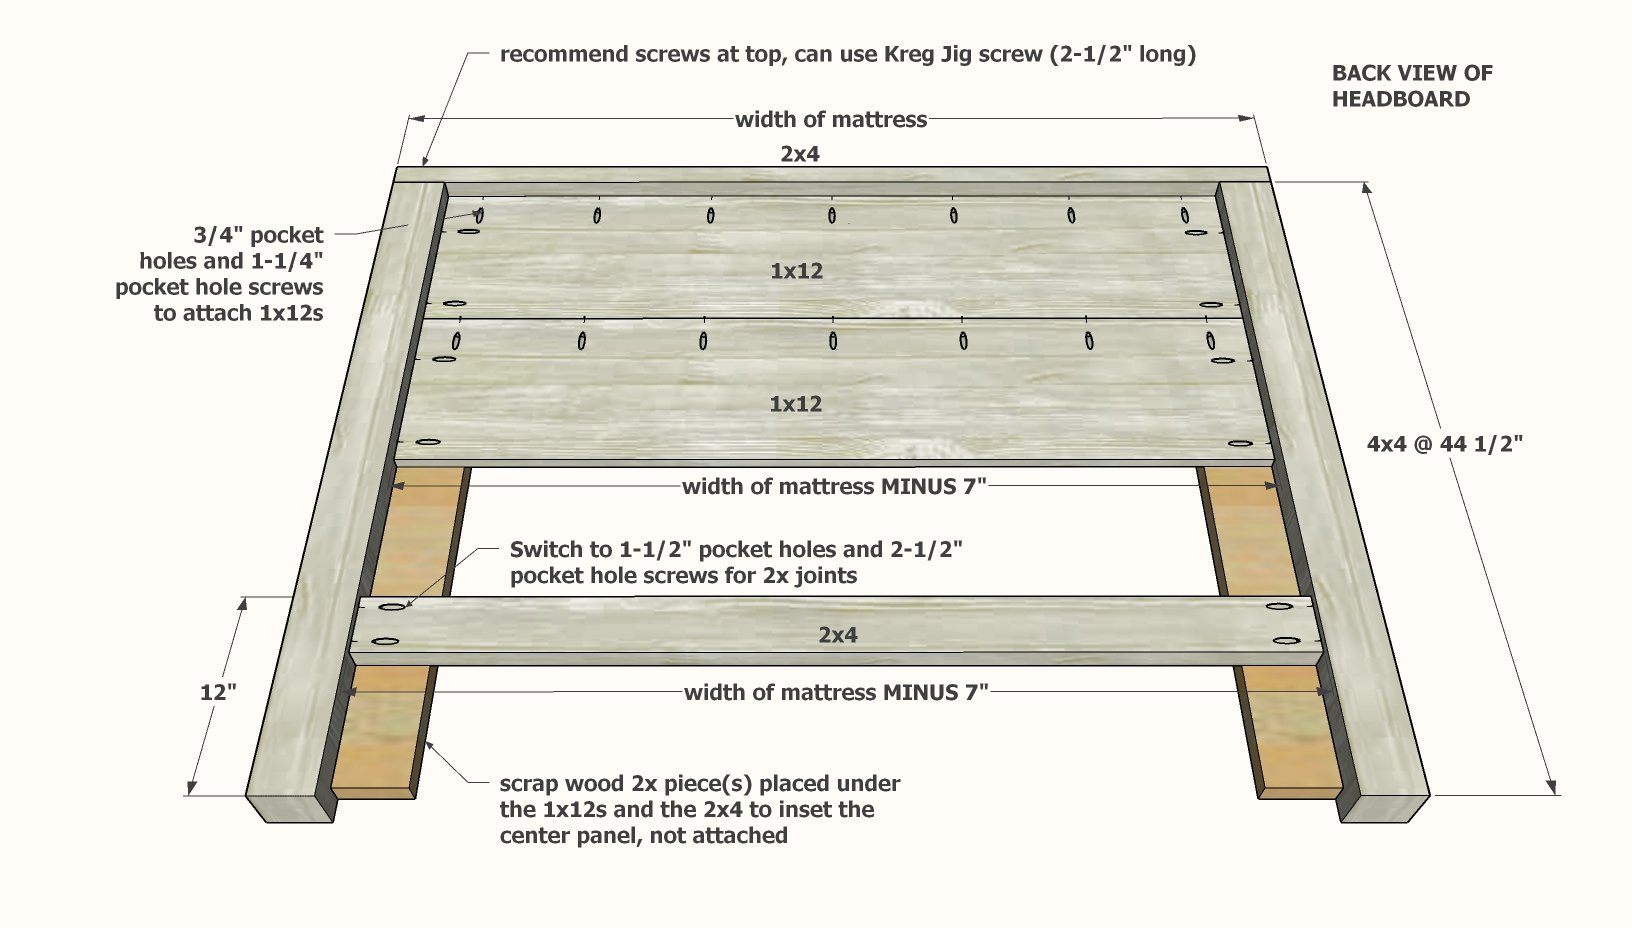
HEADBOARD
- Set Kreg Jig to 3/4" setting.
- Drill pocket holes on ends and top edge of both 1x12 boards, on 3/4" setting.
- Attach first 1x12 to the 4x4 legs, set up 1-1/2", using 1-1/4" pocket hole screws.
- Then attach second 1x12 to the first 1x12 and the 4x4 legs.
- Next, add the top 2x4, attach with 1-1/4" pocket hole screws. Additional screws from top are recommended.
- Set Kreg Jig to 1-1/2" setting.
- Drill two pocket holes on each end of the 2x4 lower support.
- Attach with 2-1/2" pocket hole screws to the 4x4 legs, set up 1-1/2" as shown in diagram.
NOTE: The base 2x4 is not required for twin sized bed frames.
Step 2
Step 3
MATTRESS SUPPORT CLEATS
To support the slats, cleats need to be attached inside the bed frame.
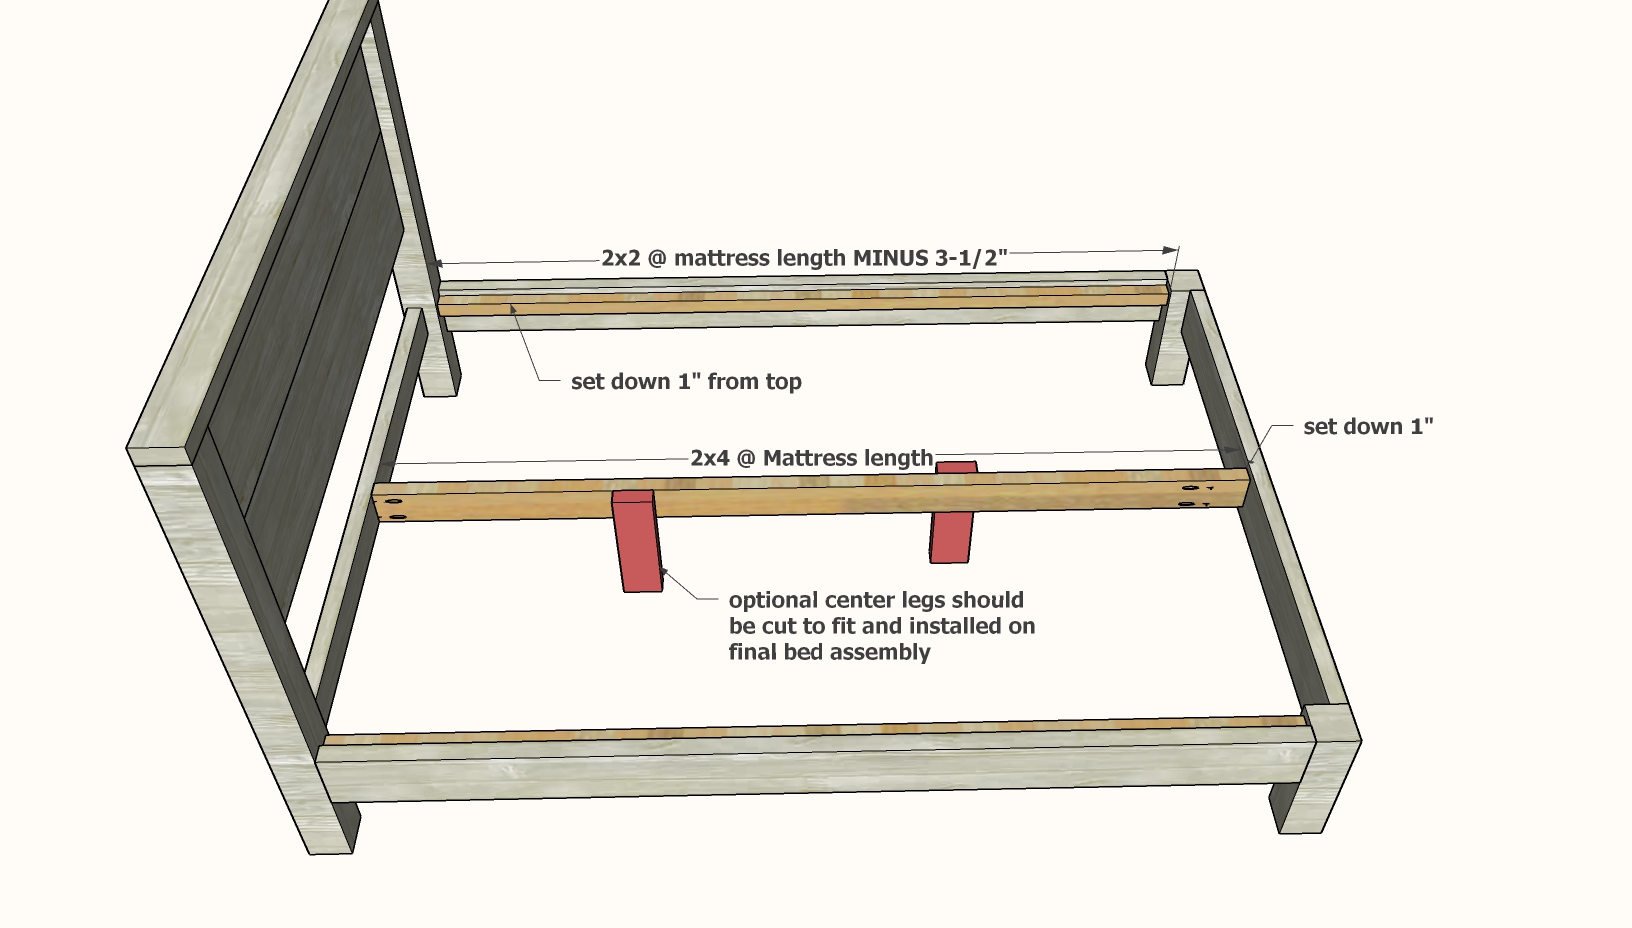
Measure down 1" from siderails and attach the 2x2 cleats, with screws every 8-12". You can use 2-1/2" kreg screws, or you can use 2-1/2" self tapping star bit screws.
Attach the center 2x4, matching the headboard 2x4 but set down 1" from the footboard 2x4. Attach with two 1-1/2" pocket holes per end, with 2-1/2" pocket hole screws.
Center legs can be cut (cut slightly shorter), but do not add until final assembly. Floors can be uneven, so you want to place the leg(s) in the room.
Step 4
SLATS
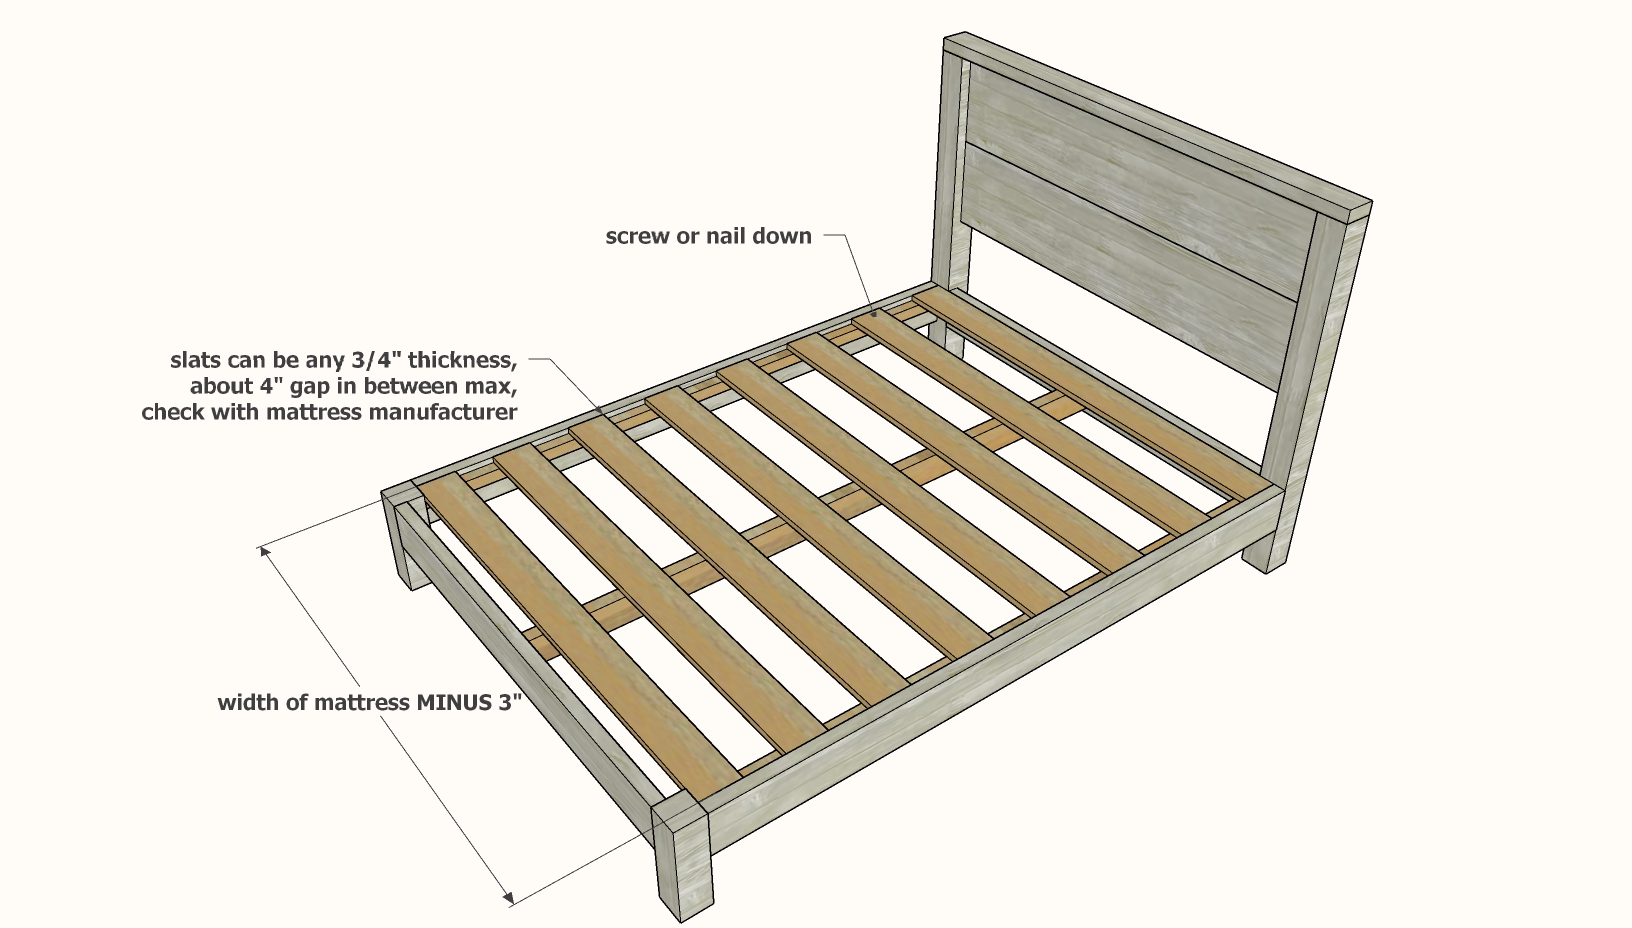
Add slats to the tops of the cleats and nail down with 1-1/4" brad nails, or alternatively, screws between 1-1/4" and 2" long. You can use Kreg Screws, but they are expensive.
If you have scrap material, you can use half slats, alternating as done in the video.
All slats should be 3/4" thick.
Try to keep opening less than 4", or as recommended by the mattress manufacturer.
Sand with 120 grit sandpaper, working in the direction of the wood grain.
Vacuum all sanding residue off.
A good sanding will result in a more professional looking product.
I do a final sanding of 220 after the last coat is dry, and sometimes in between.
For a stain, simply follow the stain manufacturers instructions. Clear coat can be added, but it is not a tabletop, so is not required.


