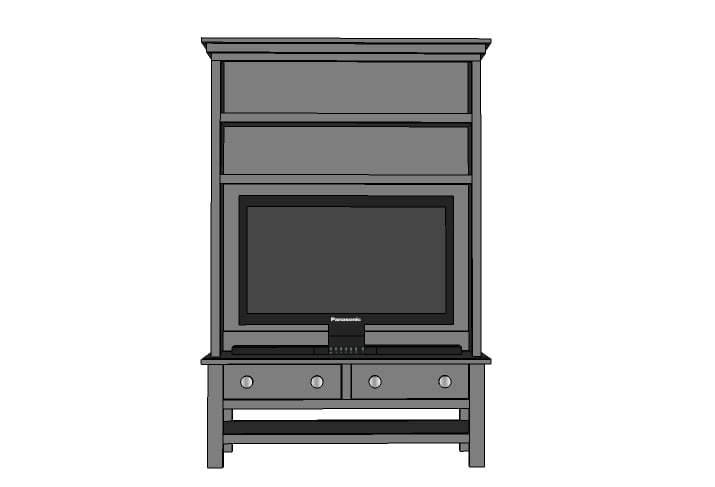
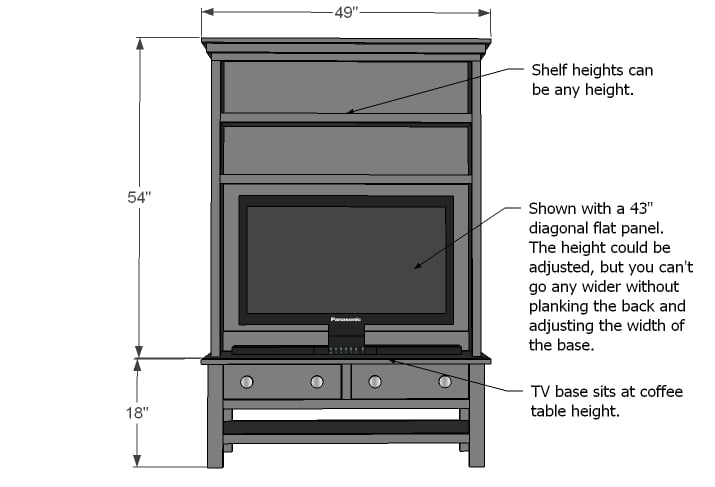
A very simple tv console featuring two drawers and one large shelf.
The Cottage Hutch works with the Cottage Media Console. It is fully customizable to fit any flat panel that is under 44" wide. You can also make yours narrower by simply using a narrower width board
Preparation
2 – 1×12 boards, 10 feet long
1 – 1×12 board, 4 feet long
(optionally you could use 1 sheet of plywood cut into strips 11 1/2″ wide or the desired width of your hutch)
1 sheet 1/4″ plywood, beadboard, paneling (for the back)
1 – 1×4, 8 feet long
5 – 1×2 Boards, 8 feet Long
2″ Screws or 1 1/4″ Pocket Hole Screws
2″ Finish Nails
1 1/4″ Finish Nails
1″ Finish Nails (you only need a few, screws work too)
Wood Glue
Wood Filler
120 Grit Sand Paper
Primer, Paint and Stain
Tip Resistant Kit
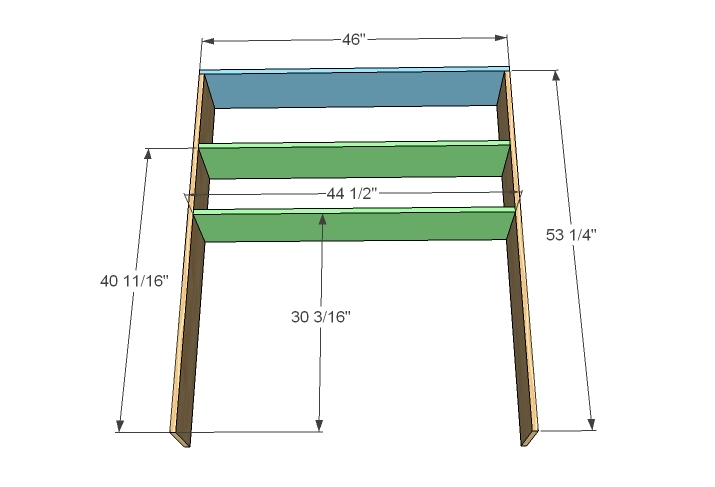
2 – 1×12 @ 53 1/4″ (Sides)
1 – 1×12 @ 46″ (Top)
2 – 1×12 @ 44 1/2″ (Shelves)
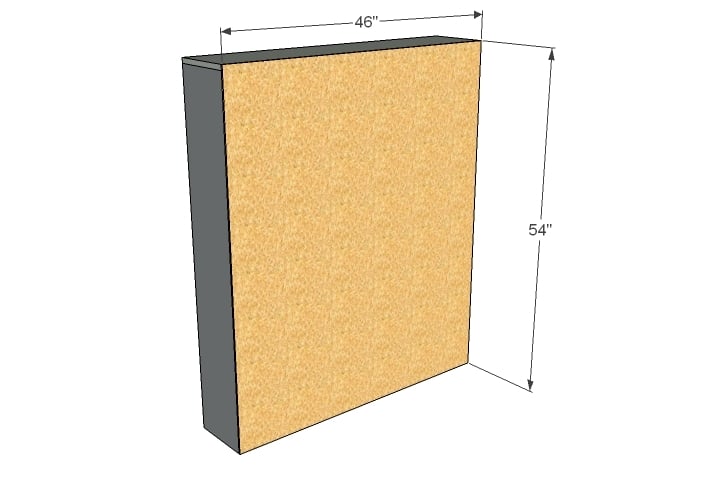
1 – 1/4″ plywood @ 46″ x 54″ (Back)
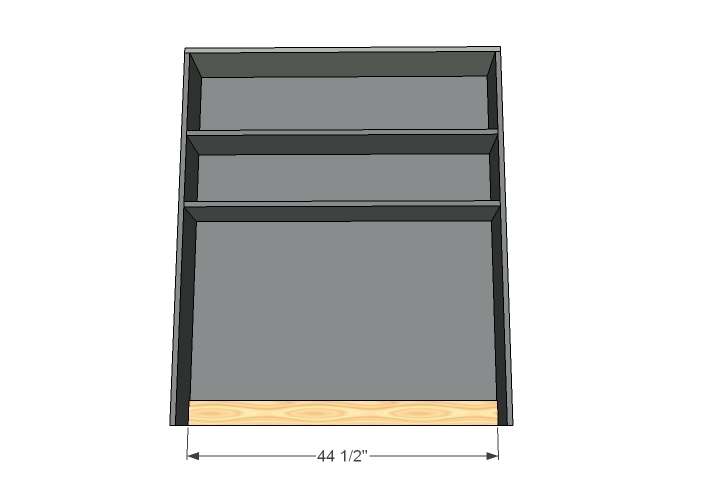
1 – 1×4 @ 44 1/2″ (Bottom Support)
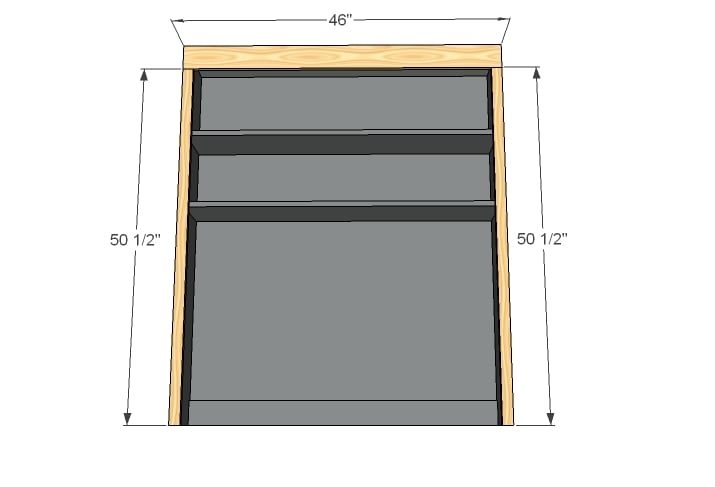
1 – 1×4 @ 46″ (Header)
2 – 1×2 @ 50 1/2″ (Sides)
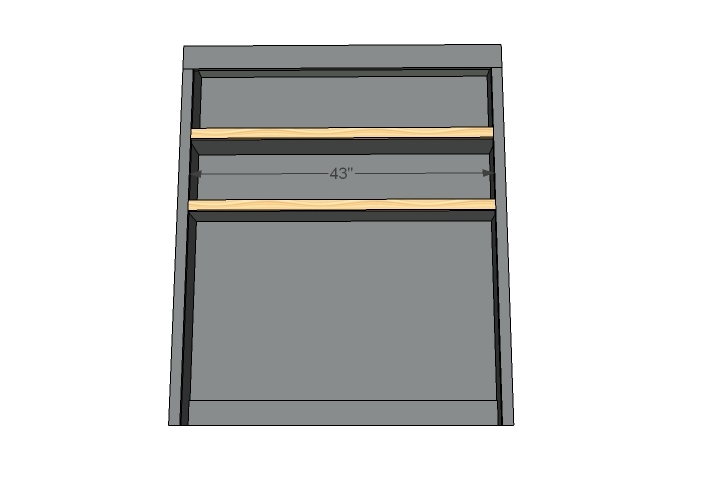
2 – 1×2 @ 43″ (Shelf Trim)
4 – 1×2 @ 12 1/4″ (Or the Width of your Box Boards + 3/4″)
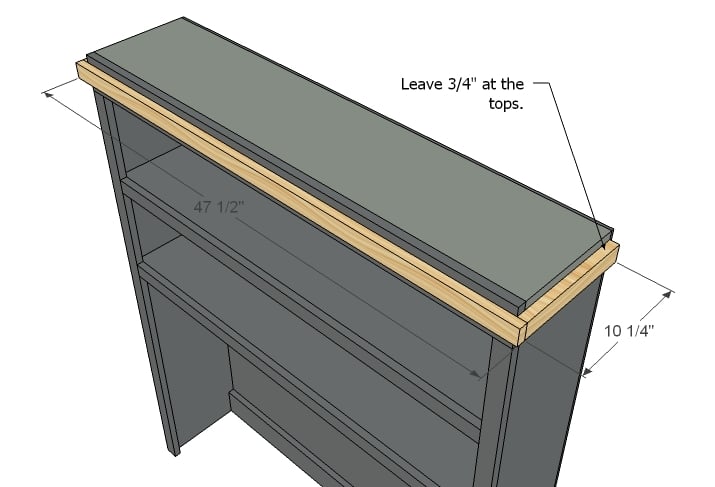
1 – 1×2 @ 47 1/2″ (Crown Bottom)
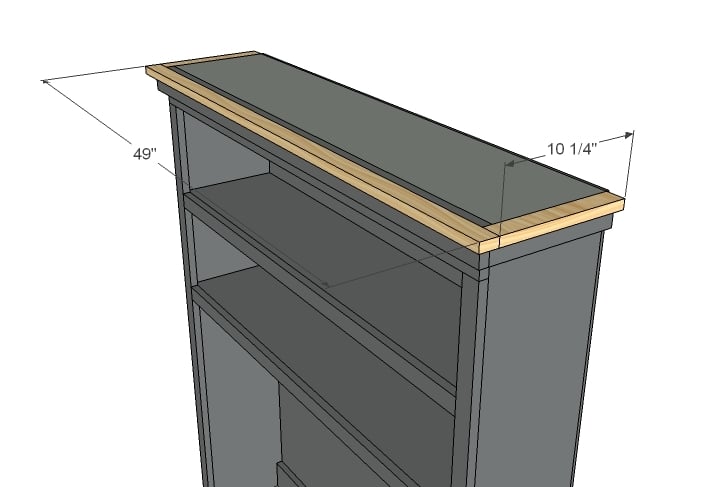
1 – 1×2 @ 49″ (Crown Top)
Instructions
Step 1
Box
Begin by building the box as shown in the diagram above. Carefully measure out and mark the placement of the shelves on the sides and predrill all holes. Apply wood glue and attach shelves and top to sides. Adjust for square by taking a diagonal measurement from outside corners and adjust box until the diagonal match (push longer measurement opposite corners together).
Step 2
Step 3
Step 4
Front Face Trim
I’m such a fan of face frames because it is like adding plywood to the front and back – just increases the support and strength. And I just think it looks more finished. Bonus – if you are using plywood, the trim will cover up raw plywood edges. In fact, most hardwood furniture pieces are made with plywood with hardwood veneers, then face framed with hardwood boards. So you are only buying a few pricy maple boards, not an entire media hutch made of maple.
Start by attach the header. Then attach the sides, make sure you use glue and fasten to the shelves. I would use 2″ finish nails, as they all but disappear in trim.
Step 6
Bottom Crown
For the bottom crown, make sure you use 1 1/4″ finish nails and glue. Use the top crown (see next step) as a spacer to help you know where the bottom crown goes. I like to attach the sides first, then the front.
Also, there is absolutely no reason why you can’t just trim the top out in storebought crown moulding. This method is simply cheap and easy.
Step 7
Step 8
Finishing
Fill your nail and screw holes with wood filler. Let dry and add a second coat of wood filler (wood filler can shrink when it dries). Sand with 120 grit sandpaper. Vacuum with a soft bristled brush and wipe clean with a damp cloth. Prime and paint (insides first for an easier better finish) or apply wood conditioner (if needed, test out a strip of scrap board first) and stain. Apply a top coat for added durability and sheen.
Safety
Make sure you attach the hutch to a stud in the wall behind the hutch to keep it from tipping forward using a tip resistant kit (check the hardware aisle at most any store). Also recommended, attach the hutch the media console using a metal bracket, also available in your hardware aisle.


