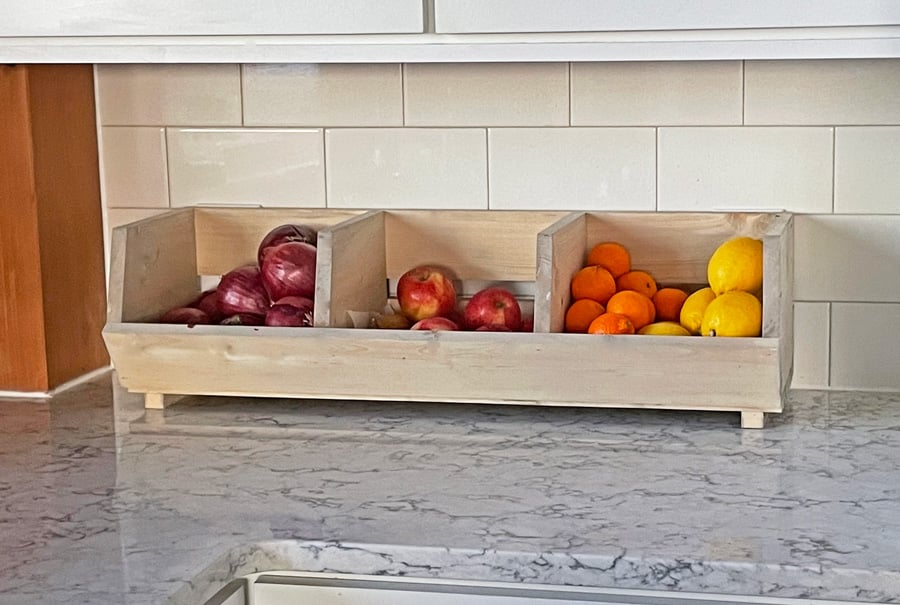


Free plans to build your own potato bin for about $20 in lumber.
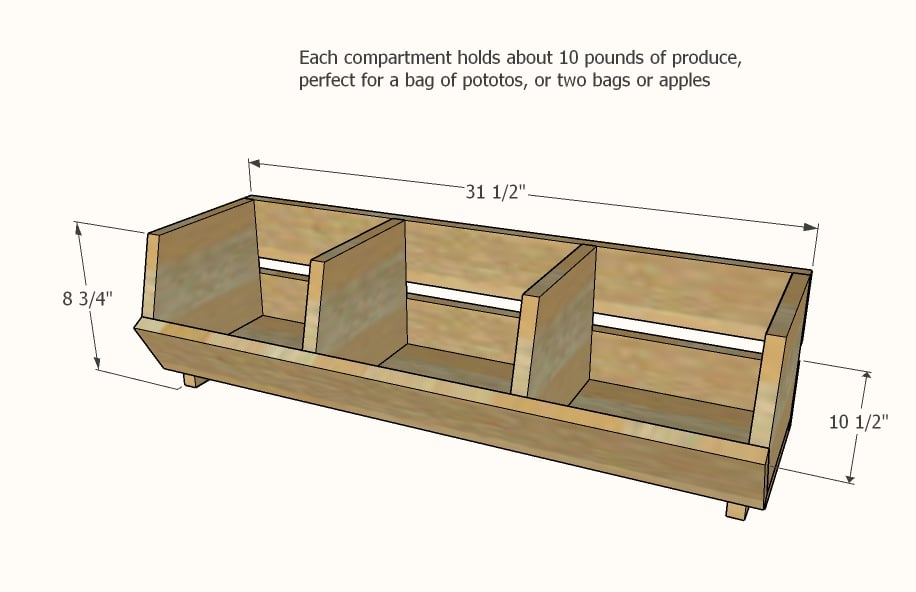
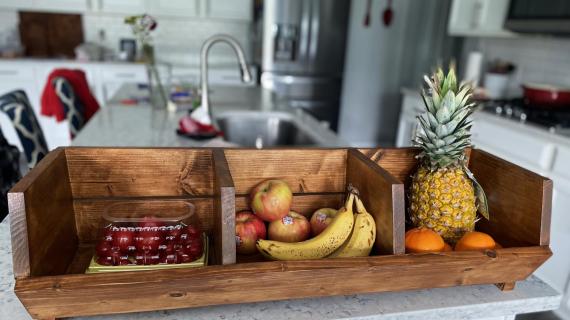
Features three compartments generously sized, each holding about 10 pounds of produce. Stackable design. Solid wood construction, can be easily modified and stained or painted as desired.
This is an easy DIY project using pine wood boards and includes free step by step diagrams, shopping and cut list from Ana-White.com.
Why Store Produce on the Countertop?
If you have some extra countertop space in your kitchen, storing produce in plain sight has benefits-
- Easy to keep track of stock and know when to buy more produce
- Easy to put away produce
- Keeps healthy produce handy - my kids ate three times as many apples a day since the apples were in plain sight
- Countertop convenience makes it easy to add more vegetables into foods - no more digging for garlic in the pantry
- Saves space in the fridge and pantry
- Easy to clean and remove spoiled produce
- Adds a gorgeous decor element to the kitchen
Why Build This Potato Bin?
- Only about $20 in lumber
- Smartly sized to hold 10 pounds of produce per section
- Footed design is easy to move and clean under
- Solid wood is more food safe - good for storing raw produce
- Can be finished to suit your kitchen
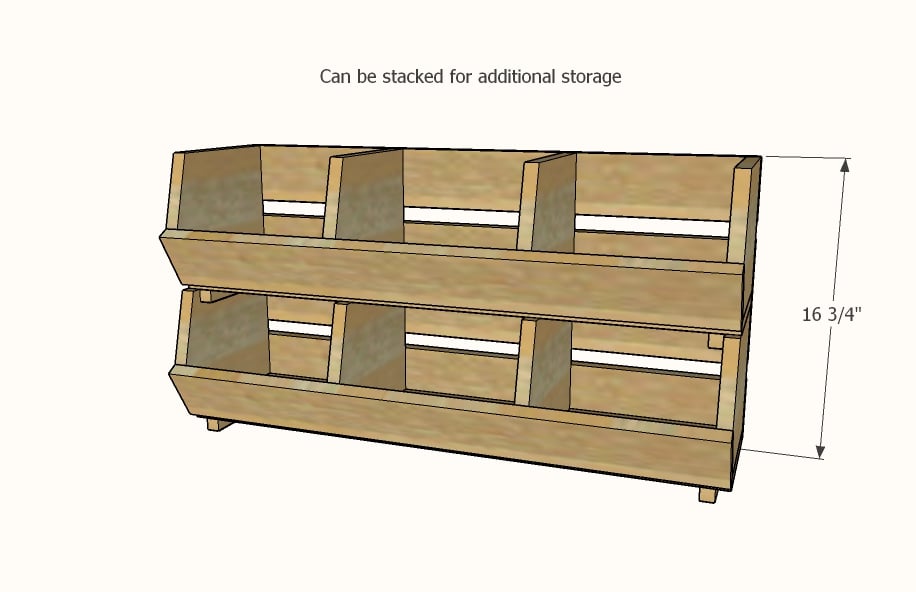
- Stackable for even more storage
- Easy to customize length to fit your space
- Beautiful farmhouse look - for that farm to table element
- Our free step by step plans make it easy!
Quick Video Tutorial of Building this Project
Want to see this project come together? Here's a quick video that shows me building it in about 1 minute:
Ready to build yourself? The free plans follow.
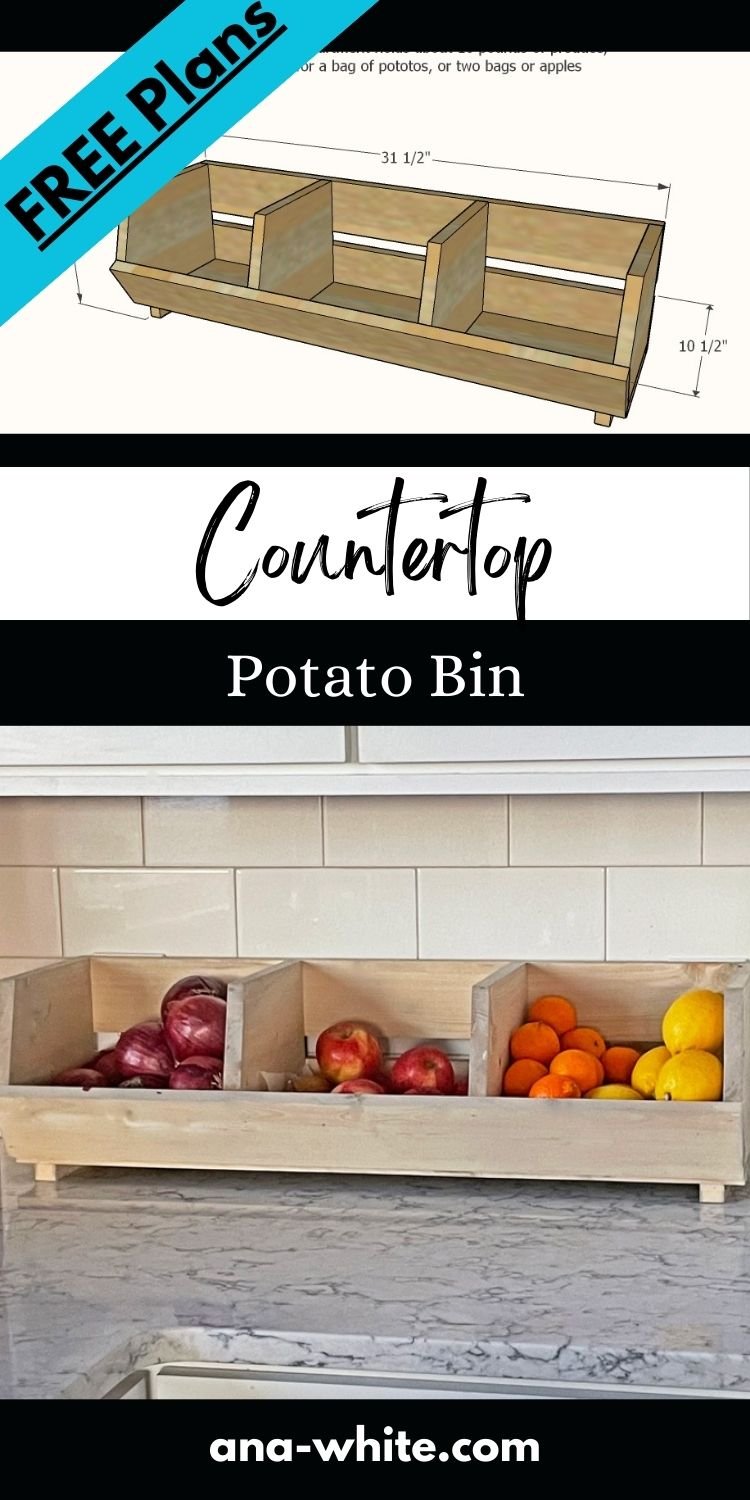
Pin for Later!
Preparation
- 1 - 1x8 @ 6 feet long
- 1 - 1x4 @ 8 feet long
- 1-1/4" brad nails and wood glue
- food safe stain or paint
- protective stick on furniture pads (felt or acrylic) to protect countertops on bottom of feet
If you don't have a brad nailer, you can also attach with 2" self tapping star bit screws (trim screws is what I would recommend) using a drill.
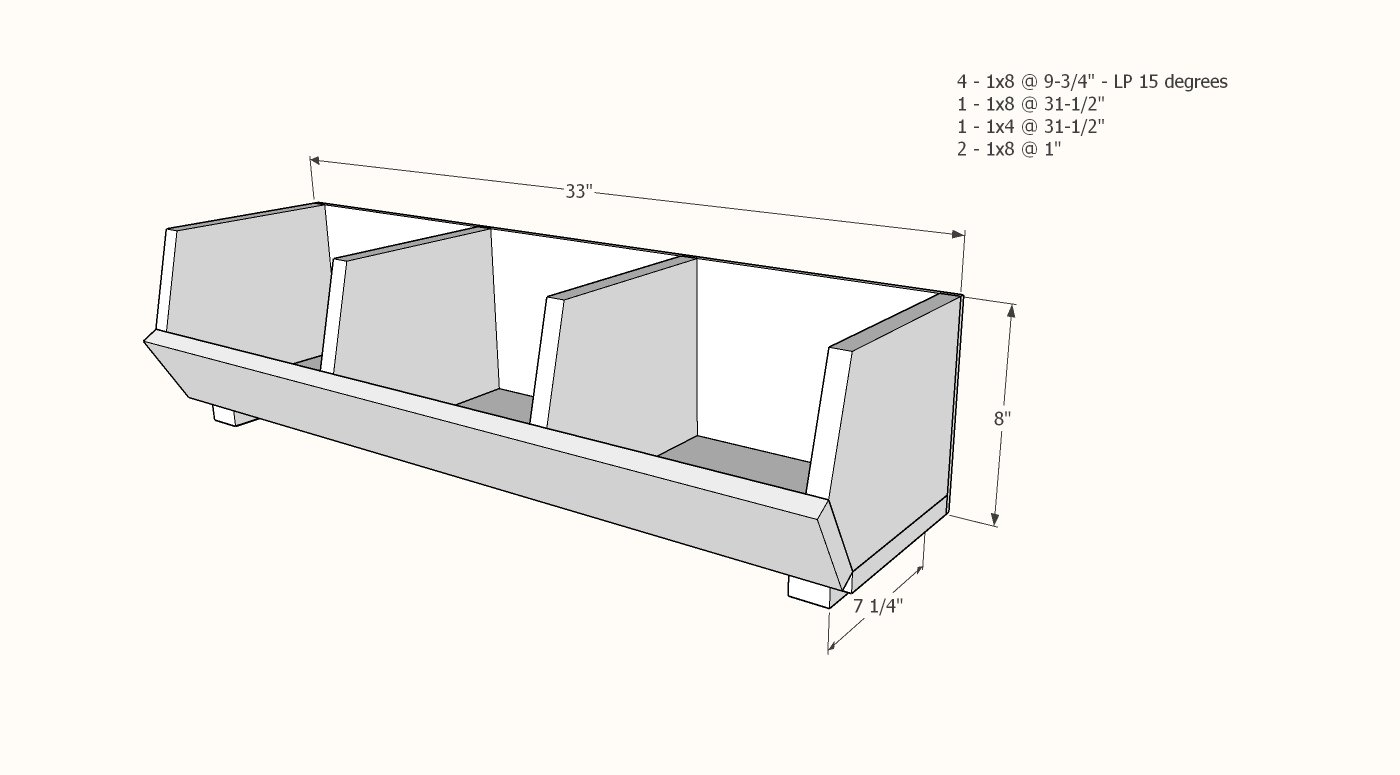
- 2 - 1x8 @ 1" long - cut first
- 4 - 1x8 @ 9-3/4" long - longest point measurement, one end cut at 15 degrees off square
- 1 - 1x8 @ 31-1/2" long
- 3 - 1x4 @ 31-1/2" long


Instructions
Step 1

Cutting the dividers isn't hard, and once you have one cut, you can use it as a pattern to cut the rest. A miter saw is recommended to make these cuts, but you could also use a speed square and circular saw to mark the angles. To conserve wood when cutting, cut the pieces as follows:
- First, set your saw to 15 degrees off square.
- Cut one divider, with the long point 9-3/4".
- Then set saw back to square (0 degrees).
- Cut the second divider using the first 15 degree cut as your angled cut side.
- Repeat to cut the remaining two dividers.
- Then set the saw to 30 degrees off square.
- Mark the longer corner as shown in the diagram and cut off with the miter saw.
Step 2
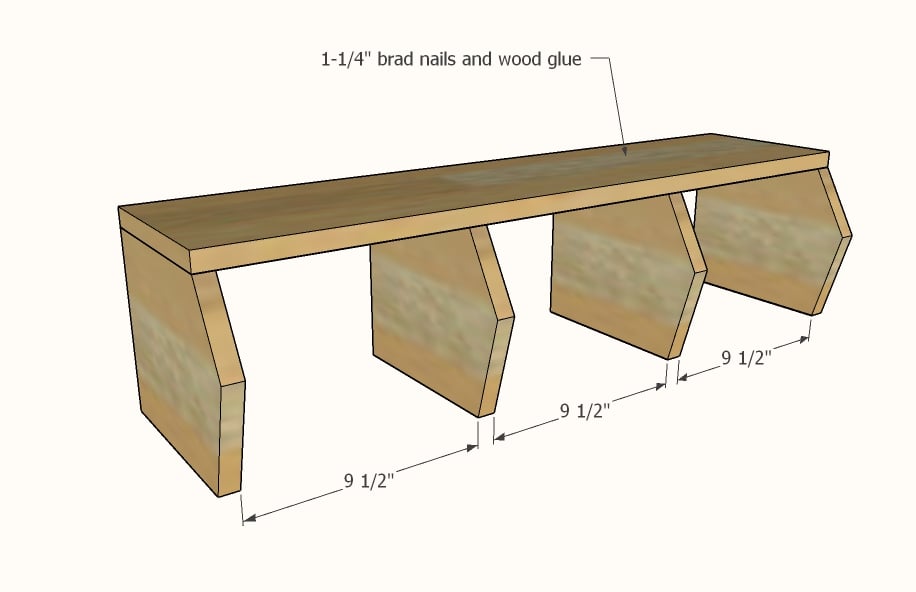
Attach the 1x8 bottom to the dividers with 1-1/4" brad nails and wood glue.
Step 3

Attach the front 1x4 with 1-1/4" brad nails and wood glue.
Step 4
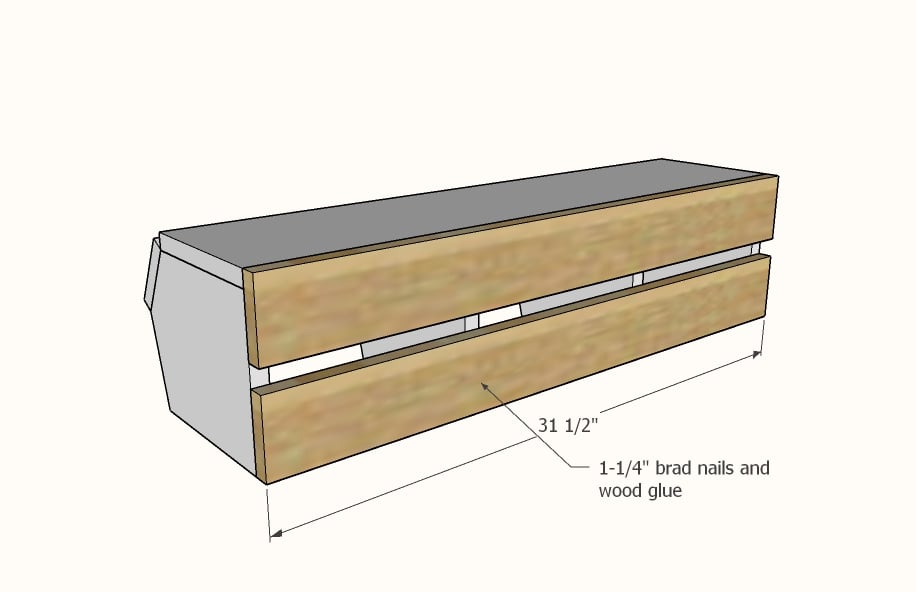
Attach the back 1x4s with 1-1/4" brad nails and wood glue.
Step 5
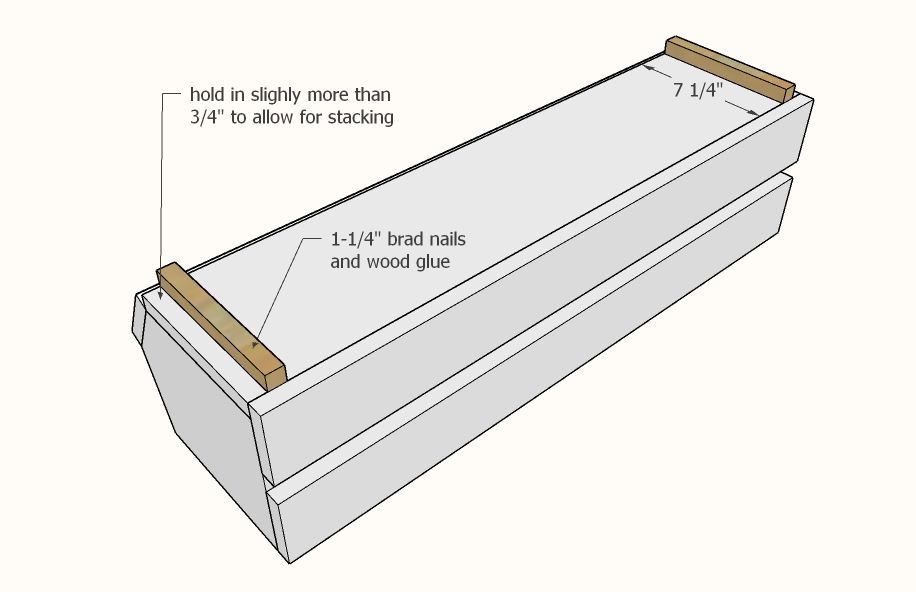
Attach the "feet" to the bottom, with slightly more than 3/4" space on the outside to allow for stacking.
Lightly sand and with 120-150 to make smooth.
Remove all sanding residue with a vacuum. Wipe with a damp cloth.
If painting or staining, line with wax paper before using with produce. The wax paper will also make it easy to clean.

Comments
oscarc25
Thu, 01/06/2022 - 12:33
Wood recommendation?
Thank you so much for all of the amazing plans. This is such a great community, and I'm grateful to be a part of it now that I am getting into woodworking.
What kind of wood is recommended for this project?
Kamoanui
Tue, 01/18/2022 - 09:53
The description paragraph at…
The description paragraph at the very top says pine boards, but you could use any type of wood you want.