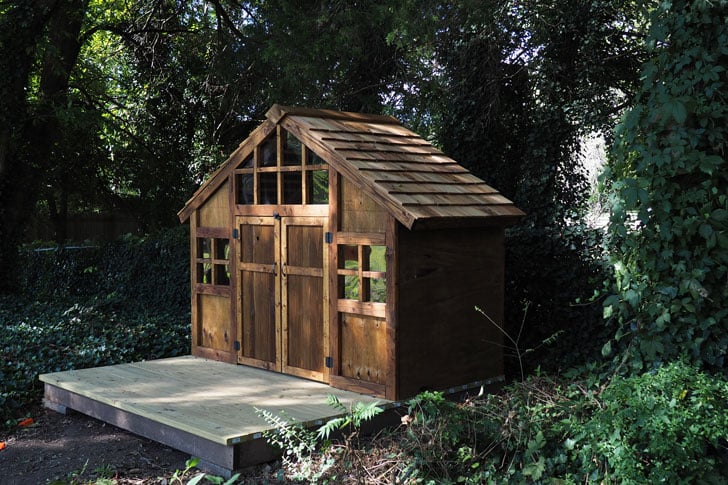


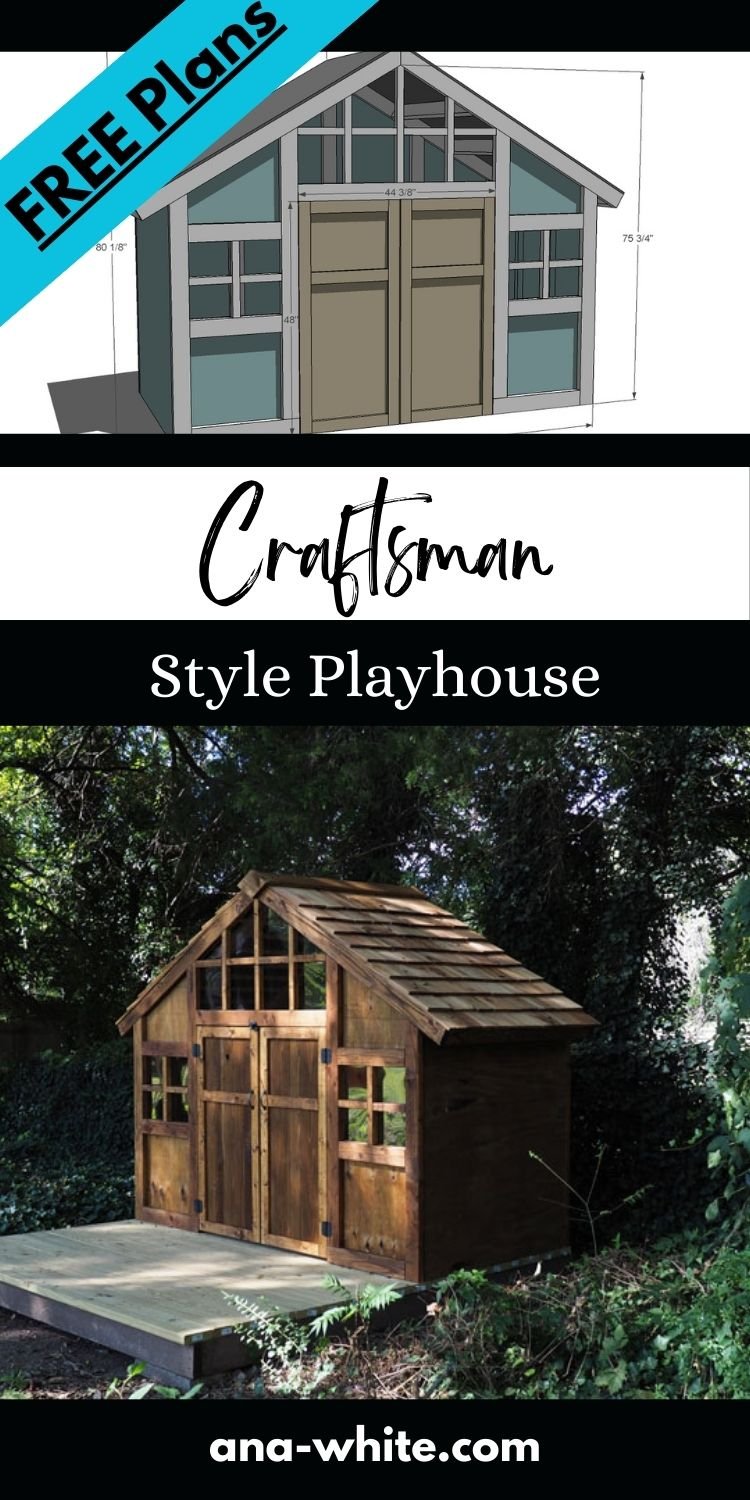
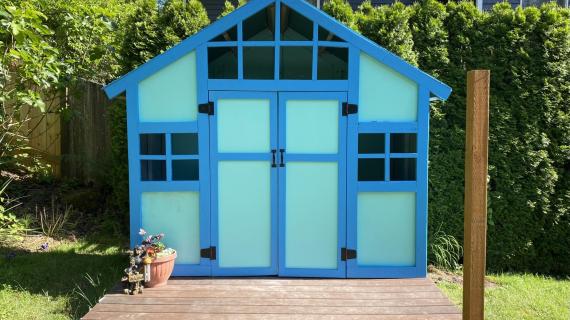
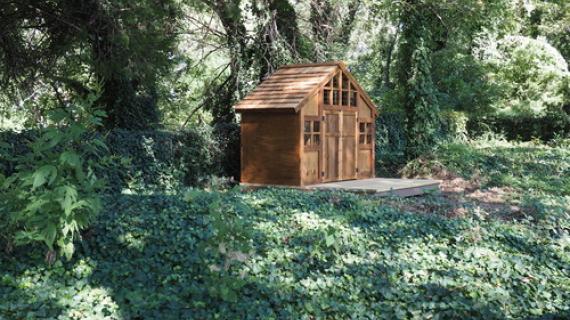
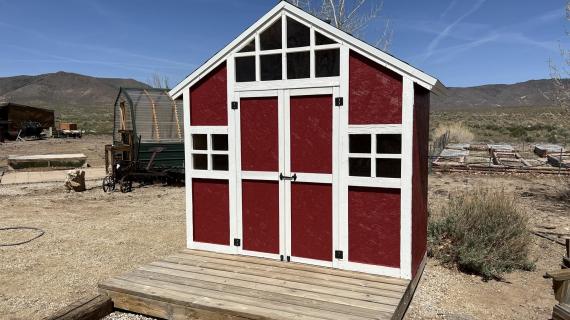
This gorgeous playhouse features wide open french doors, a taller ceiling, and beautiful windows. You'll love the step by step plans and diagrams. Beautiful reader submitted photos by AerialC
Pin for Later!
Preparation
5 - sheets exterior plywood (we used 3/8" but see notes on roofing plywood below)
8 - 2x2 @ 8 feet long
20 - 2x4 @ 8 feet long
1x3s for doors if desired
2-1/2" pocket hole screws (blue coated exterior ones)
Galvanized nails or screws for attaching plywood
Roofing of choice
Listed in steps


Please read through the entire plan and all comments before beginning this project. It is also advisable to review the Getting Started Section. Take all necessary precautions to build safely and smartly. Work on a clean level surface, free of imperfections or debris. Always use straight boards. Check for square after each step. Always predrill holes before attaching with screws. Use glue with finish nails for a stronger hold. Wipe excess glue off bare wood for stained projects, as dried glue will not take stain. Be safe, have fun, and ask for help if you need it. Good luck!
Instructions
Step 1
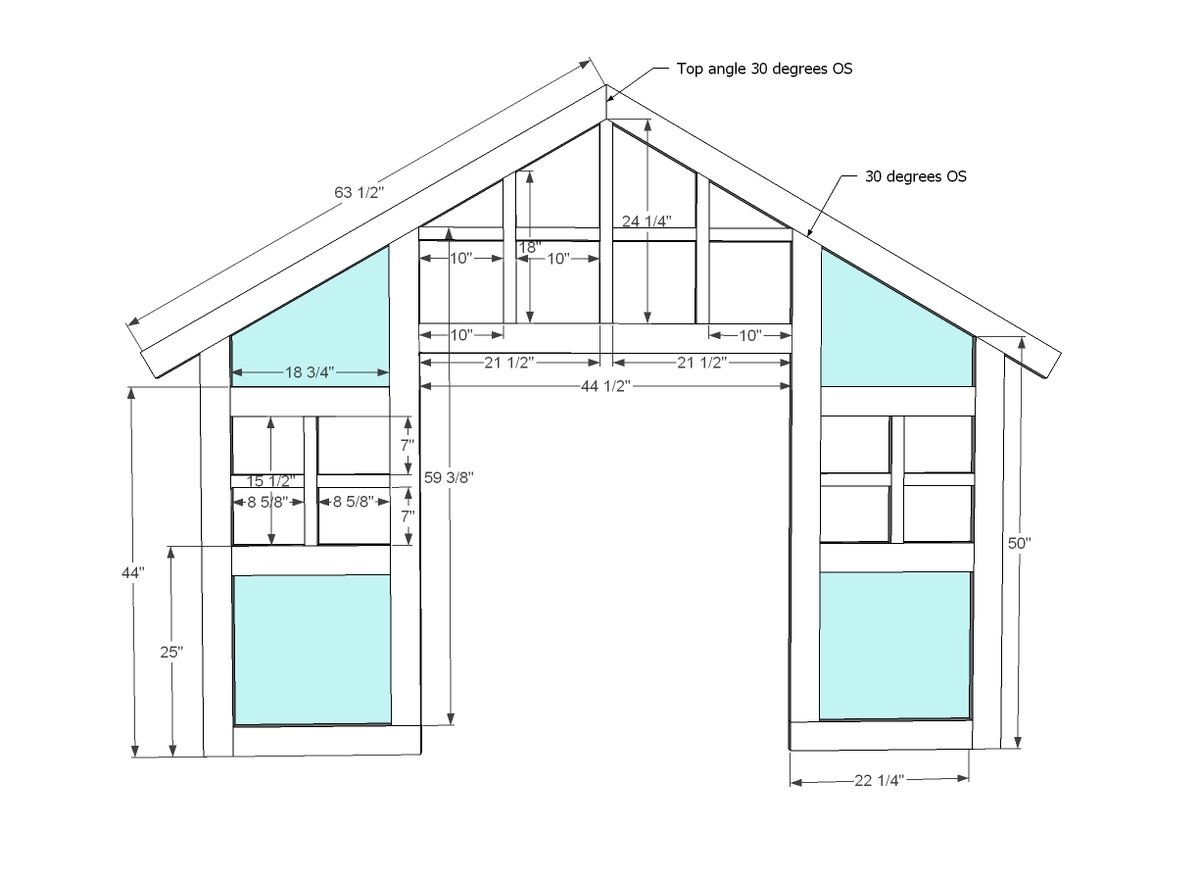
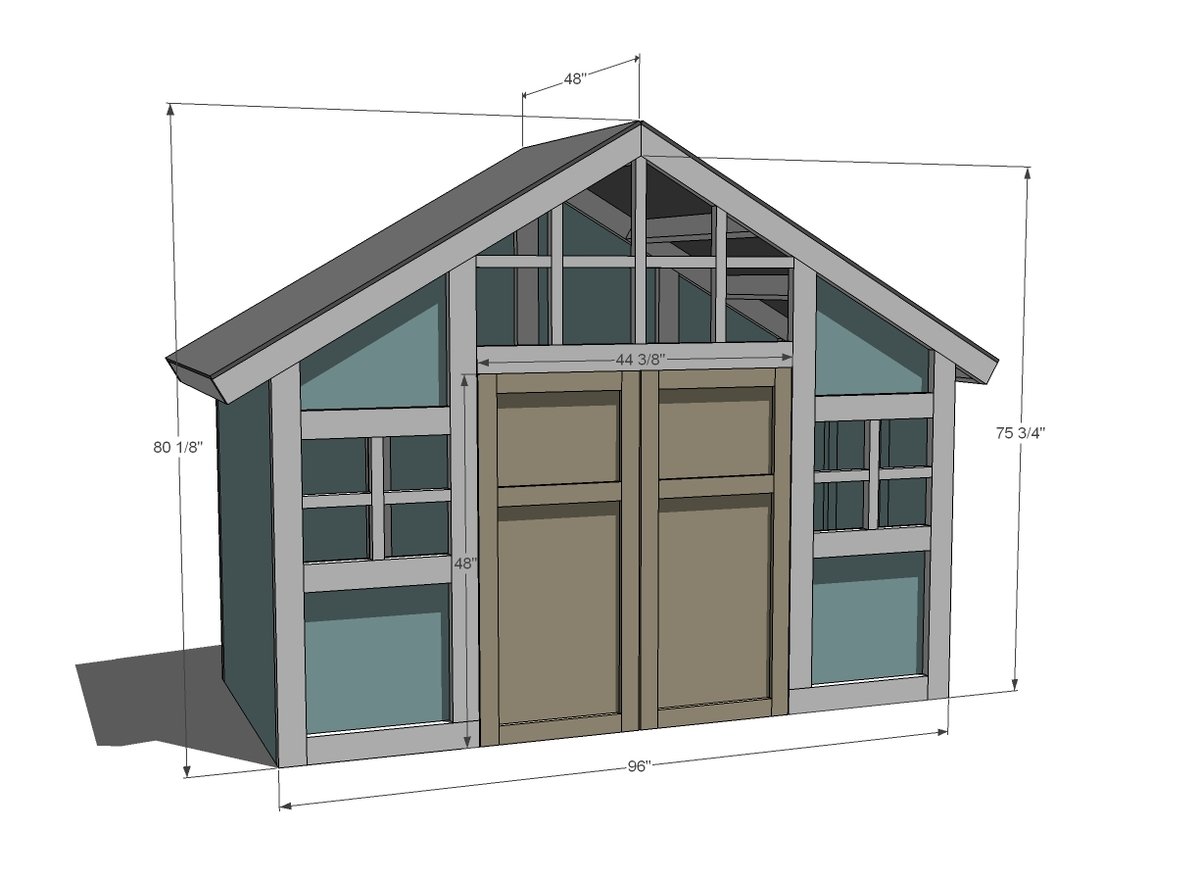
FRONT WALL
- 2 – 2x4 @ 63 1/2" (top cut at 30 degrees off square)
- 2 – 2x4 @ 50” (top cut at 30 degrees off square)
- 2 – 2x4 @ 59 3/8” (top cut at 30 degrees off square)
- 4 – 2x4 @ 18 3/4"
- 2 – 2x4 @ 22 1/4"
- 1 – 2x4 @ 44 1/2"
WINDOW GRILLS
- 2 – 2x2 @ 15 1/2"
- 4 – 2x2 @ 8 5/8”
- 4 – 2x2 @ 10”
- 2 – 2x2 @ 18” (top end cut at 30 degrees off square)
- 1 – 2x2 @ 24 1/4" (top dogeared to 30 degrees off square) - this is the top center piece
The entire front wall was built on the ground with a Kreg Jig set for 1-1/2" stock and using 2-1/2" pocket hole screws.
The 2x4 boards are joined together flat (so the wall is 1-1/2" thick before plywood).
Wait until after you build the other walls to use scrap plywood for filling in the blue pieces.
We used 3/8" exterior plywood, just nailed on from back.
Top rafters overhang the outer 2x4s by 6", measured along bottom edge of rafters.
Step 2

ROOF OVERHANG ON UNDERSIDE OF RAFTERS IS 6”
BACK WALL
- 2 – 2x4 @ 63 1/2” – one end cut at 30 degrees off square
- 2 – 2x4 @ 50” – one end cut at 30 degrees off square
- 2 – 2x4 @ 59 3/8” – one end cut at 30 degrees off square
- 1 – 2x4 @ 62 1/4” – top dogeared to point at 30 degrees off square
- 1 – 2x4 @ 89” 2 - 3/8" exterior plywood 48" cut to fit - save scraps for the front wall.
We built the back wall again on the ground, using the Kreg Jig again. The blue is 3/8" exterior plywood nailed on to back. Again, 2x4 boards are joined together flat, so wall is 1-1/2" thick before plywood is attached.
Step 3
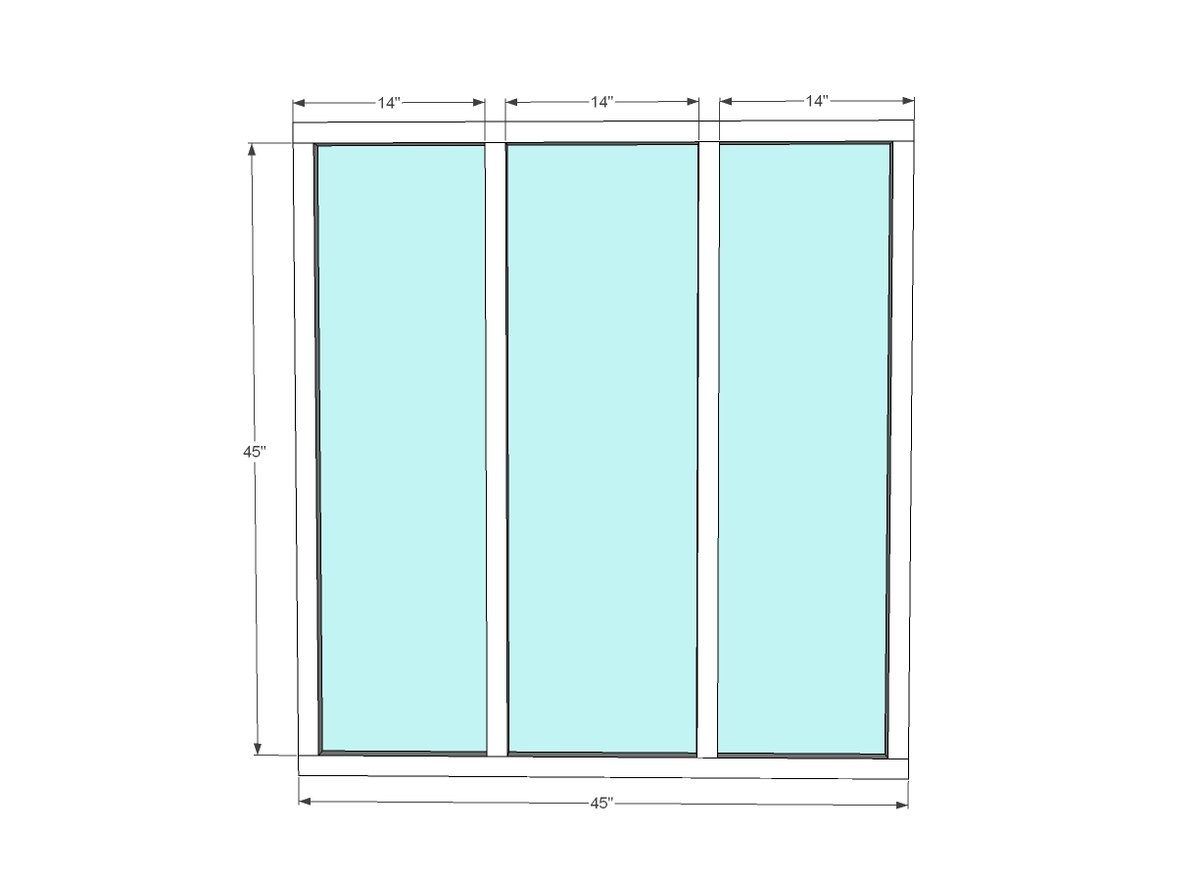
SIDE WALLS – BUILD 2
- 12 – 2x2 @ 45”
- 2 – 1/2" plywood @ 45” x 48”
Build two of the side walls - we used the Kreg Jig here too.
Step 4
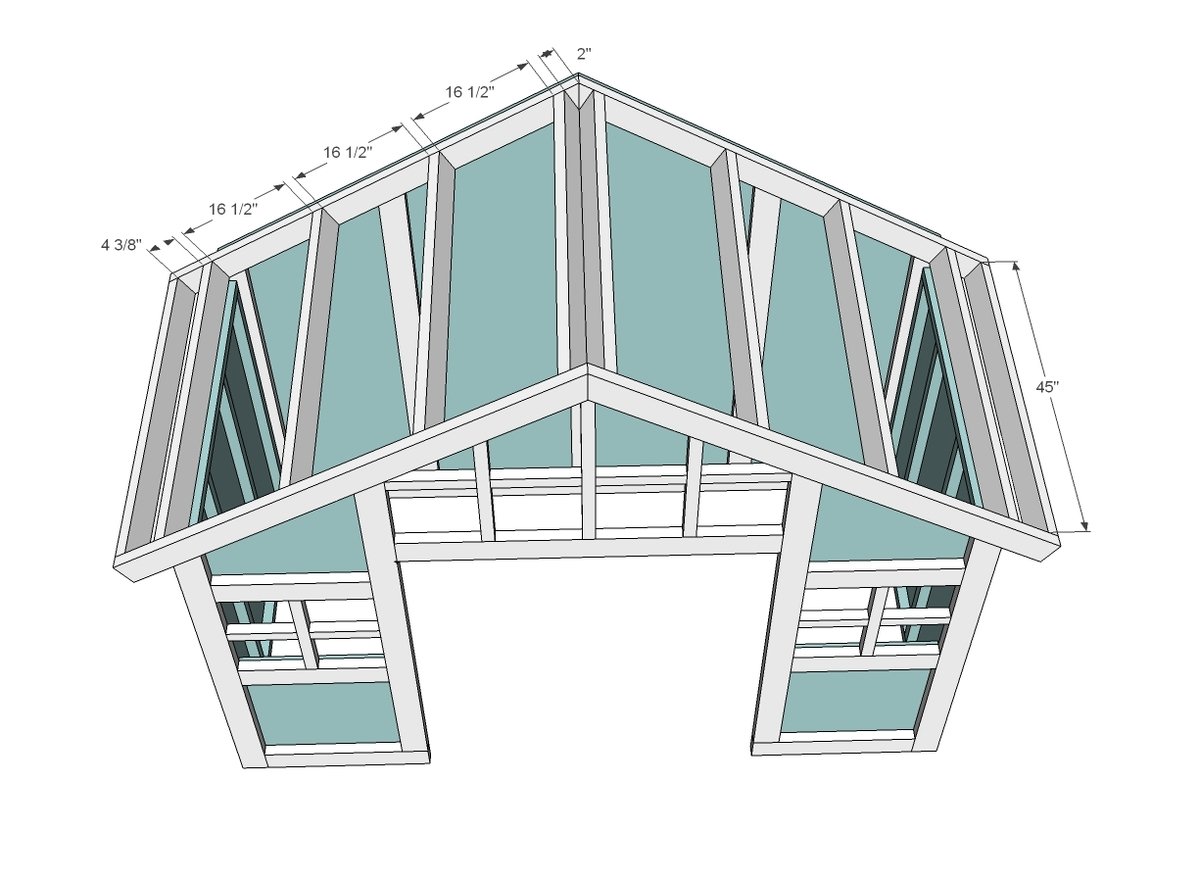
Once all the walls were built, we attached the front and back walls to the side walls to create the walls of the playhouse. Then we added rafters to make the roof.
RAFTERS
- 10 – 2x4 @ 45”
Step 5

Attach roof plywood to top.
Step 6

DOORS - BUILD TO YOUR OPENINGS. We recommend leaving generous gaps around the doors to prevent finger pinching.
- 4 – 1x3 @ 48”
- 6 – 1x3 @ 17”
- 2- ½” plywood @ 22 ¼” x 48”
We built the doors out of 1x3s and added the 3/8" plywood to the back. If your roof plywood is 3/4" thick, you could just use the slabs as doors. Also, later on we ended up trimming 2" off the bottoms of the doors just so they open easy and no toes get scraped underneath the door.
It is always recommended to apply a test coat on a hidden area or scrap piece to ensure color evenness and adhesion. Use primer or wood conditioner as needed.
Comments
Joy T.
Mon, 05/19/2014 - 13:14
Material costs
I couldn't find any reference to how much the estimated material costs were... do you know how much was spent to get all the lumber and hardware?
TL1128
Thu, 06/06/2019 - 05:48
How much did materials cost?
How much did materials cost?
spitzmel
Sat, 07/05/2014 - 13:28
Back wall dimension
This is totally cute!! Should the 2 end boards be the same dimension? In the graphic it shows the 2 board being different dimensions 46.5" and 50". In the cut list they are both 50". Thanks!!
kfamilie
Sun, 08/09/2015 - 22:19
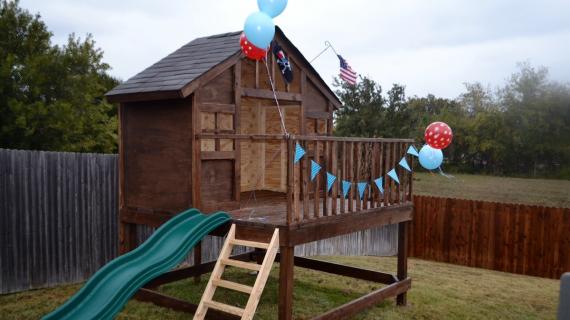
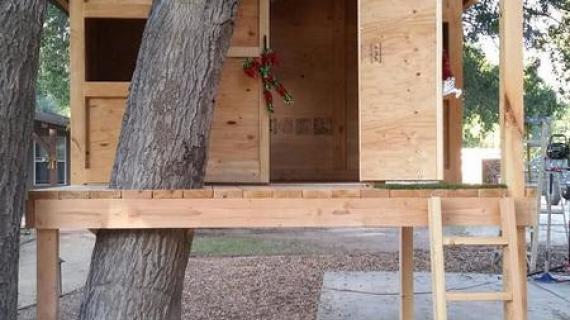
Support underneath
Hi! We are about to start gathering our supplies to build the playhouse deck and I was wondering how I create those extra support braces pictured on the deck above, which seem to be an addition to the original playhouse deck plans. First time builder here! Thank you!
In reply to Support underneath by kfamilie
Ana White
Mon, 08/10/2015 - 08:30
Those are cross supports. You
Those are cross supports. You can create them with 2 x 4 boards.
dogmelissa
Sat, 08/15/2015 - 07:31
Longer deck?
Help! I want to build this with a longer deck, so there's some deck beside the playhouse. The total length of the platform will be 10' long. In the exact orientation shown, the extra 2' will be to the left end of the house/platform. Can I run the joists in that 10' direction, cantilievered 2' over a dropped beam? Will I need to double the end joist on the other end? Are 2x6 joists still enough? Thanks for the help!
rlowmaker
Mon, 06/22/2020 - 12:38
The back wall cut list is…
The back wall cut list is wrong for the digested one. It should say 72.25 not 62.25. Good thing I have extra 2x4 lol
rlowmaker
Mon, 06/22/2020 - 12:39
Argh not digested lol it…
Argh not digested lol it supposed to say dog eared. I hate auto correct sometimes lol
dennisc9
Tue, 07/28/2020 - 12:05
cost list for craftsman playhouse.
yes I was also wondering about a cost list.