

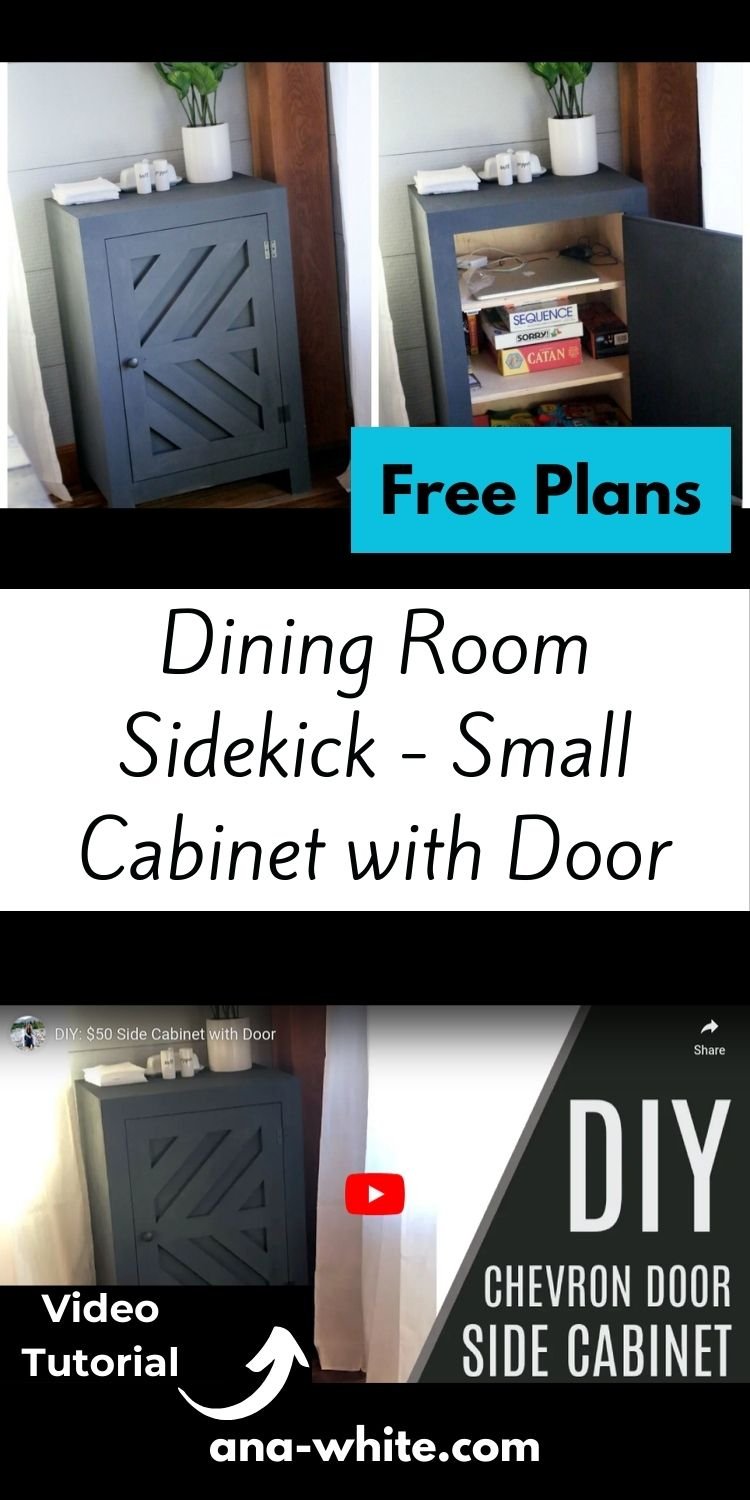
This small cabinet with door is easy to build for about $50 in materials. Free plans created by ANA-WHITE.com
Does your family use the dining room table for board games, arts and crafts, homework, and more? What do you do with all the stuff when dinner time comes around?
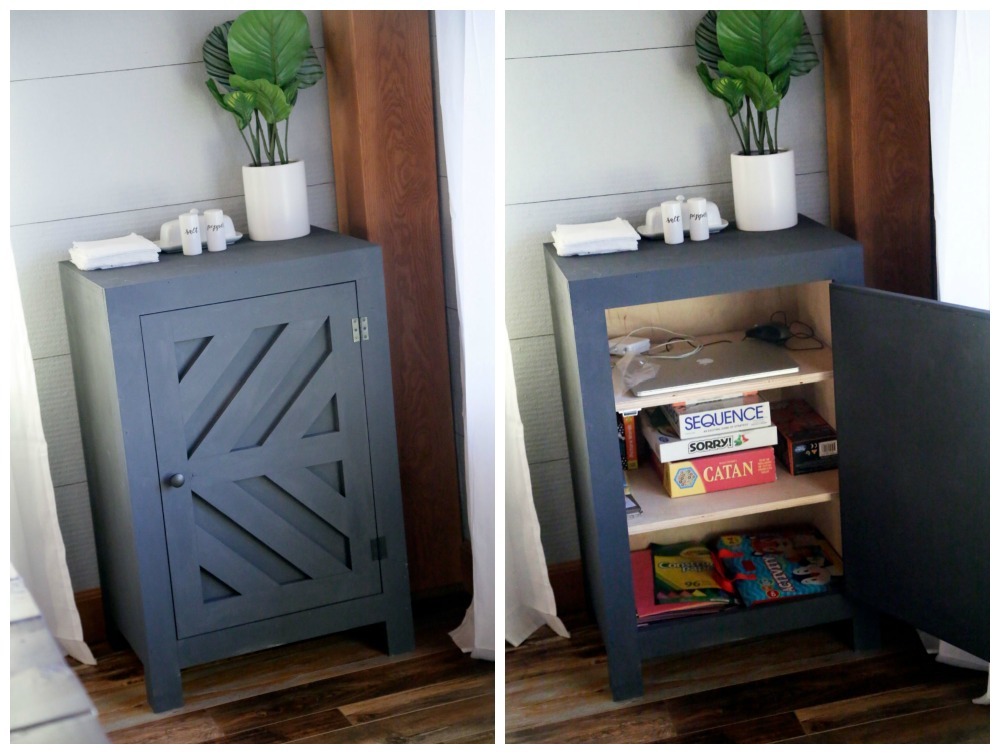
We were spending a good twenty minutes clearing our dining table off every evening before dinner, and moving all the board games to a cabinet in the living room. I'm a firm believer that efficient processes make for clean and clutter free homes, and hauling board games into another room Every. Single. Meal. is not efficient. Not at all.
We were also spending a good amount of time hauling napkins and salt and pepper from the spice cabient to the table and back. Why are we doing this.
My dining table doesn't need a sideboard. It needs a sidekick.
![]()
Just for the board games. Just for the salt and pepper.
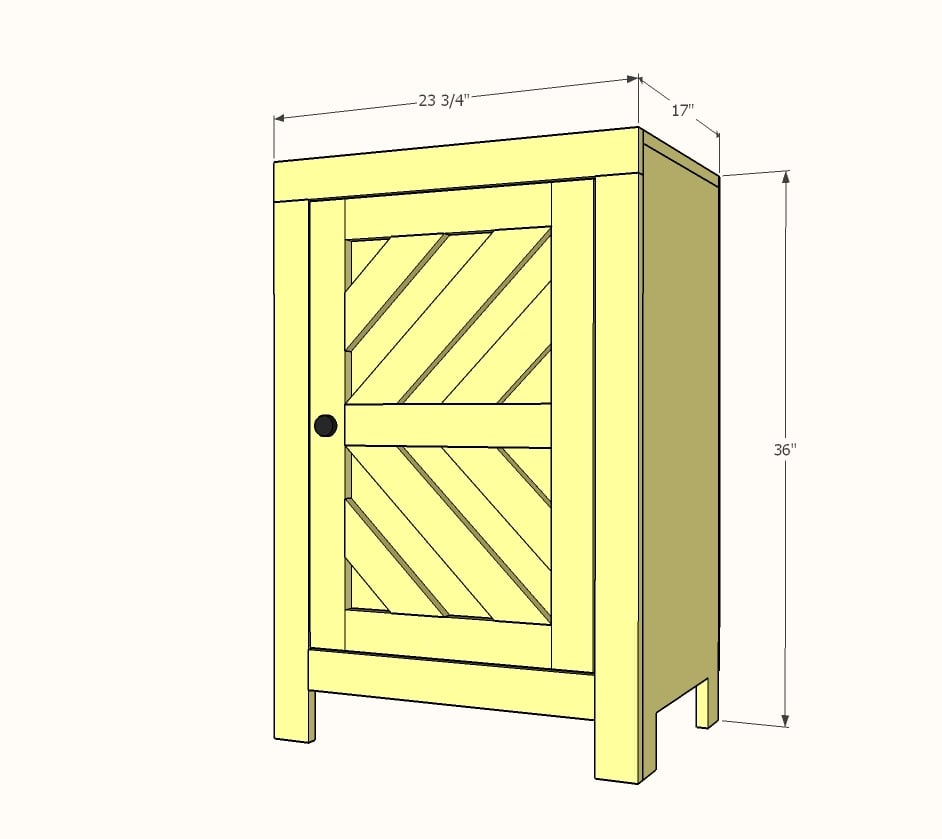
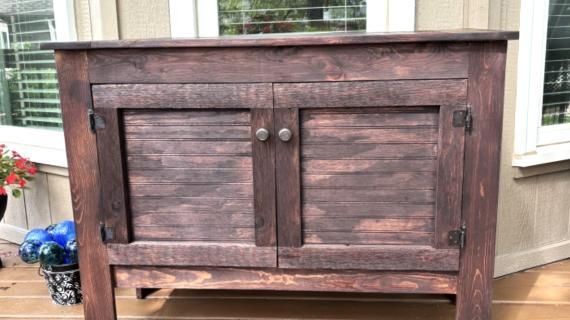
But since I wanted this new piece to be beautiful in my space, I added a little detail to the door.
![]()
I love that the detail makes what is a very simple and modest cabinet into something interesting and scrulptural. I love that the door looks like a giant "Play" button, because this cabinet is all about play.
But most of all - I love that this cabinet was such a truly simple build. So simple.
You can watch me build it in the following video -
And then build it yourself with the free plans following.
Enjoy! Ana
PS - Don't need a side cabinet in your dining room? You could also use this cabinet as a counter height desk-
![]()
Small bath vanity (may need to make deeper to accommodate the sink and plumbing -
![]()
Or go double width and use it as console, media or entertainment center, sideboard or bookshelf.
![]()
Let me know in the comments if you'd like to see any of the modifications made into plans.
Pin For Later!
Preparation
1 - sheet of 3/4" plywood ripped into two strips, 15-3/4" wide x 8 feet long (you'll only need about half of this material) OR 12 feet of 1x12 boards (for a narrower depth cabinet)
3 - 1x3 @ 8 feet long
48" x 48" piece of 1/4" plywood
2 small hinges
1 knob
may also need a magnetic clasp or similar to keep door shut
Carcass
2 - 3/4" plywood @ 15-3/4" x 35-1/4" - sides
1 - 3/4" plywood @ 15-3/4" x 23-3/4" - top
1 - 3/4" plywood @ 15-3/4" x 22-1/4" - bottom shelf
1 - 3/4" plywood @ 15-1/4" x 22-1/4" - middle shelf
1 - 1/4" plywood @ 23-3/4" x 32-3/4" - back
Face Frame
1 - 1x3 @ 23-3/4" - face frame top
2 - 1x3 @ 33-1/2" - face frame sides
1 - 1x3 @ 18-3/4" - face frame bottom
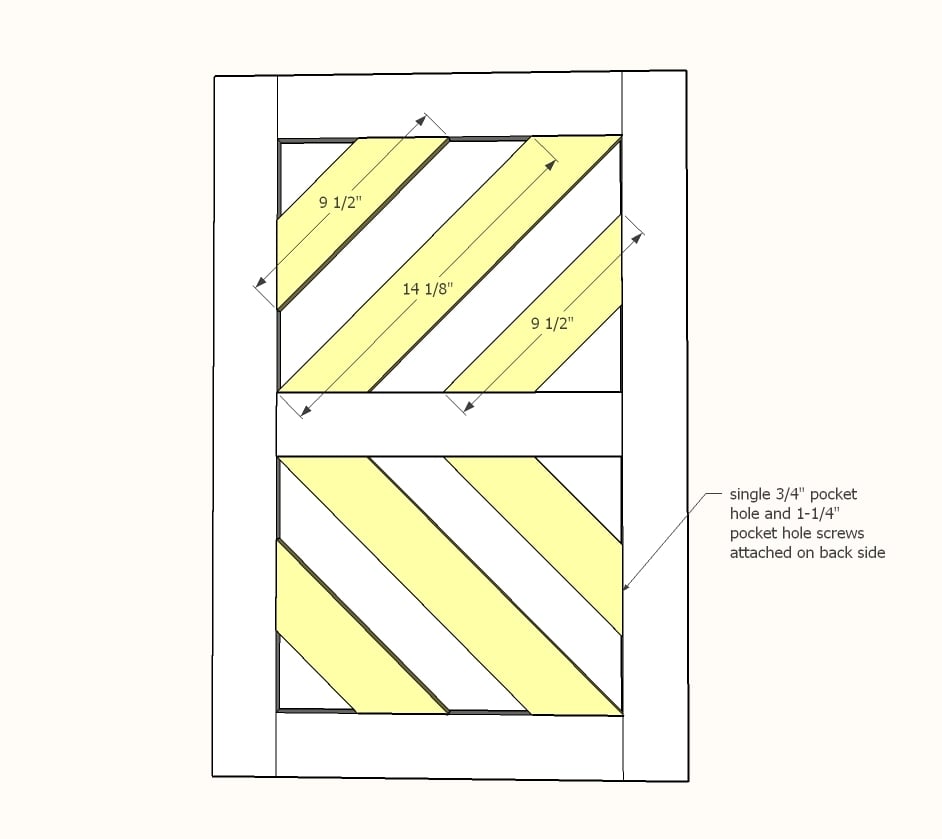
Door
2 - 1x3 @ 27-1/2" - door stiles
3 - 1x3 @ 13-1/2" - door rails
2 - 1x3 @ 14-1/8" - long point to short point measurement, both ends cut at 45 degrees, ends ARE parallel
4 - 1x3 @ 9-1/2" - long point to long point measurement, both ends cut at 45 degrees, ends are NOT parallel
1 - 1/4" plywood @ 27-1/2" x 18-1/2"


Instructions
Step 1

Cut out the bottom of the side panels with a jigsaw or circular saw. The two side panels need to be made in mirror, with the front leg smaller than the back. This will matter if your plywood has a finished side that you'd like to keep on the exterior of the project.
Drill three pocket holes along top edge on inside, with pocket hole jig set for 3/4" materials.
Step 2

Attach sides to top with 1-1/4" pocket hole screws.
Attach bottom to sides with pocket holes.
Step 3
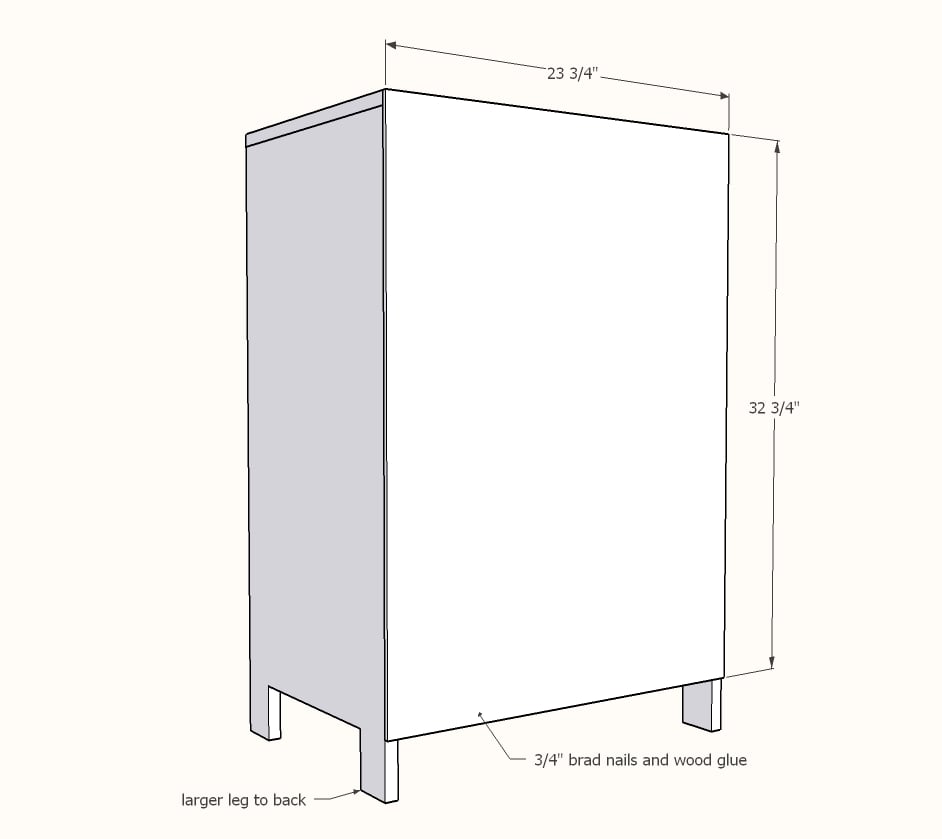
Cut back on tablesaw or with circular saw.
Attach with glue and 3/4" brad nails.
Step 4
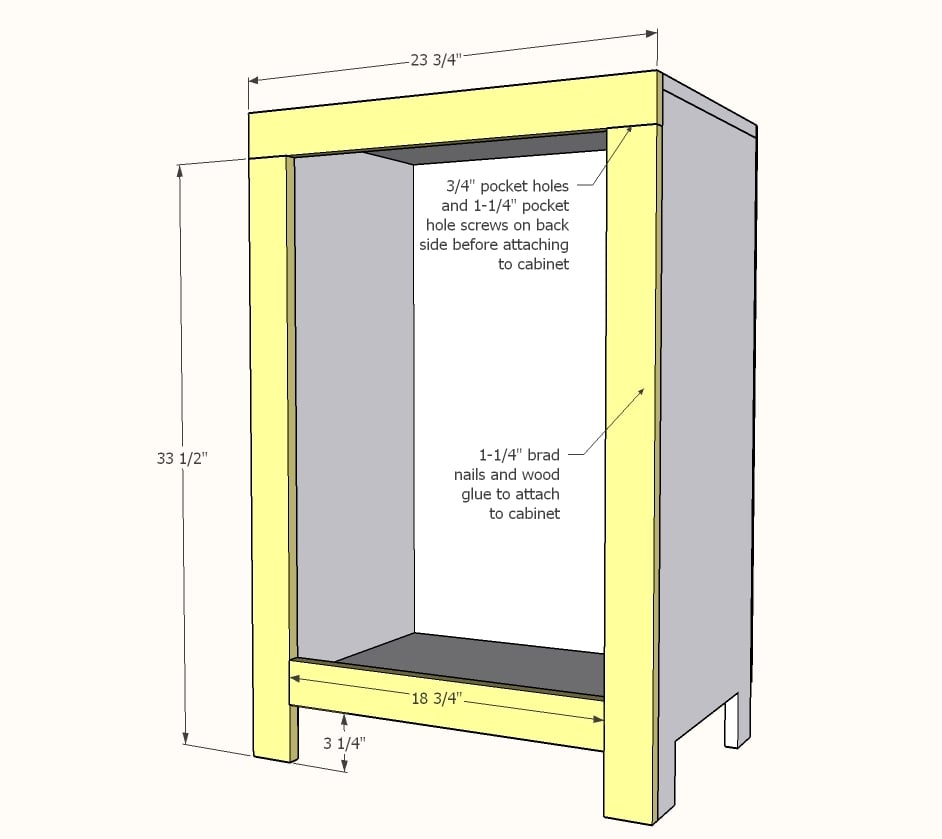
Build face frame first with 3/4" pocket holes and 1-1/4" pocket hole screws.
Attach to the front of project with 1-1/4" brad nails and glue.
Step 5

Step 6
Add inlay pieces.
Attach back with glue and 3/4" brad nails.
Step 7
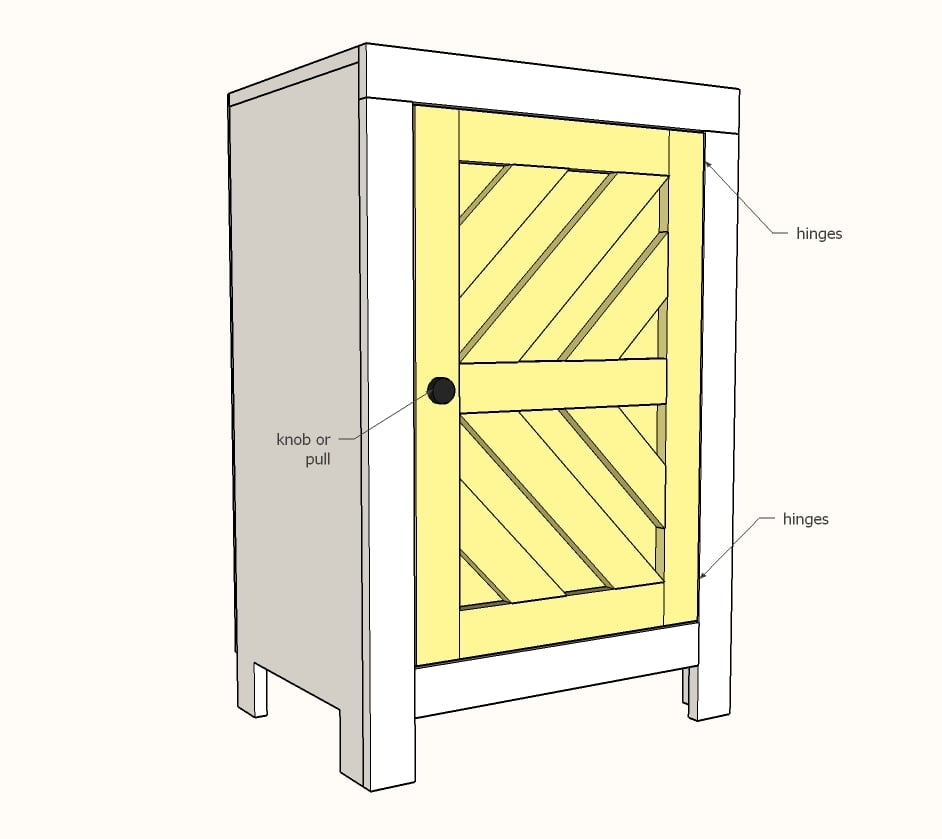
Install door with hinges.
Add shelves.
Sand and finish as desired.

Comments
jvos
Thu, 01/24/2019 - 07:47
PDF link
Ana, the PDF version link does not appear to be working on this plan.
erinanne
Thu, 01/09/2020 - 14:07
Double width
Can you share plans for this in a double width please?
LampAtFeet
Thu, 05/07/2020 - 11:30
Double width plans?
Would love to get the plans for the double width, as well as the desk plans. Thank you so much, love your plans.
lyds6382
Thu, 05/07/2020 - 22:11
Double Width
Would love the double width plans!
ashmo
Tue, 06/23/2020 - 18:26
Double Width
I would love the double width plans! I have the perfect place planned for it!
ChrisDu
Sun, 07/12/2020 - 21:25
Double Width
Can I get the PDF for double width plans for this?
chandlermonton
Sat, 11/21/2020 - 08:51
Double Width
Was a PDF ever created for the double width plans?
jskjeie
Tue, 01/12/2021 - 15:26
Double Width
Is it possible to get double width plans for this cabinet
katvonwang
Mon, 03/01/2021 - 12:50
Double width plans
May I please have the double width plans for this cabinet? Thanks!
LMantyka
Wed, 03/03/2021 - 07:01
Love this! Could I get a…
Love this! Could I get a plan in this with four of those sections? Would make a beautiful sideboard
nikkibutterfly
Tue, 06/29/2021 - 16:52
Double width
Is there plans for the double width cabinet?
hewi17
Fri, 11/19/2021 - 20:14
Would LOVE to get this plan…
Would LOVE to get this plan for a double cabinet! Trying to make a set for my wife. It’s a surprise for our nursery :)