

Easy plans for a beautiful garden bed with hoop frame that allows you to easily transition from season to season. Find all the details at The Homespun Journal.
Preparation
65 ft- ½ inch PVC piping
2- 1/2 inch T joints
4- 4 way joints
12- galvanized brackets
32 nails
3’ x 75’ chicken wire
PVC cement
PVC:
2- 16" PVC
2- 32" PVC
1- 33" PVC
6 - 5' PVC
Please read through the entire plan and all comments before beginning this project. It is also advisable to review the Getting Started Section. Take all necessary precautions to build safely and smartly. Work on a clean level surface, free of imperfections or debris. Always use straight boards. Check for square after each step. Always predrill holes before attaching with screws. Use glue with finish nails for a stronger hold. Wipe excess glue off bare wood for stained projects, as dried glue will not take stain. Be safe, have fun, and ask for help if you need it. If you would like to see how the garden bed was built before beginning the hoop frame, go here. Good luck!
Instructions
Step 1
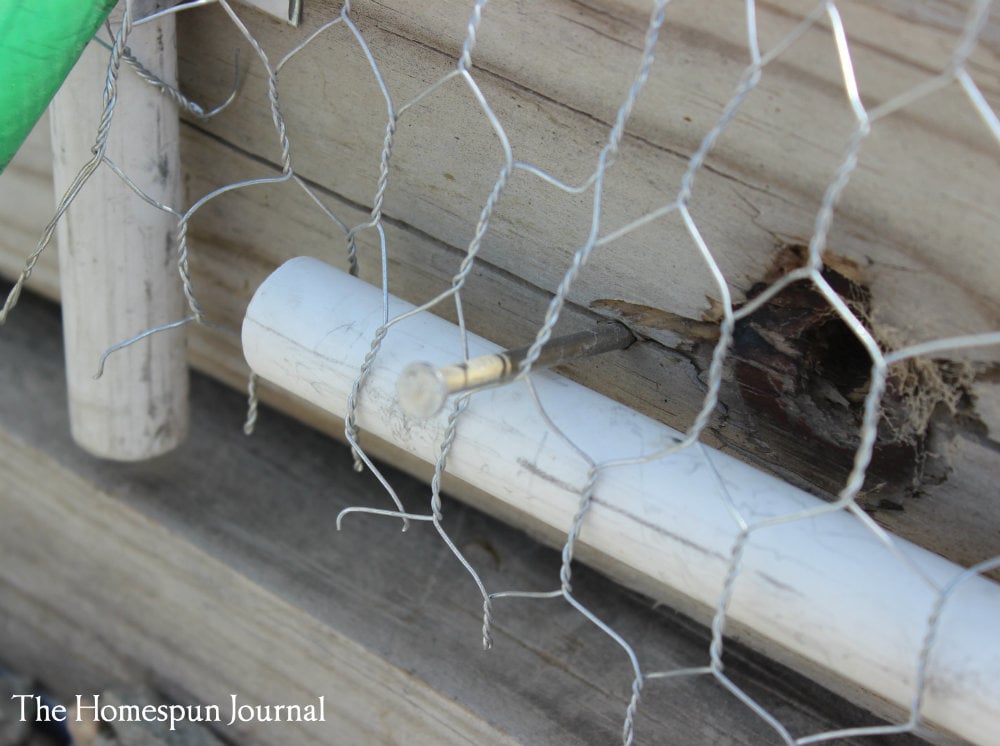
Nail the galvanized brackets into place. See the graphics above. Do not nail these in place tightly; allow space for the frame to easily slip in.
Step 2
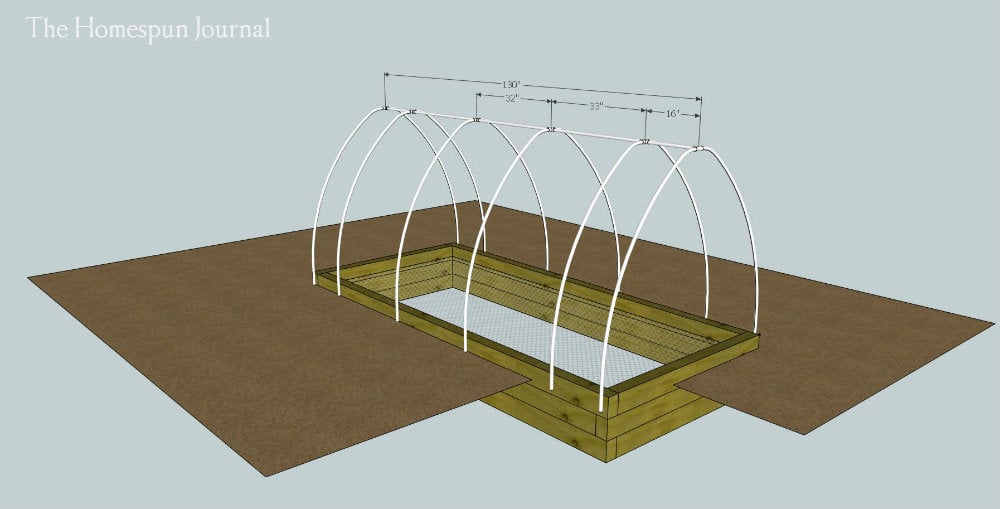
Connect the frame. Assemble the spine of the frame in the following order: T joint-16″ PVC-4 way joint-33″ PVC-4 way joint-32″ PVC-4 way joint-33″ PVC-4 way joint-16″ PVC-T joint. Connect a 5 foot section of PVC piping to all remaining joint openings. Use glue to secure all joints once each piece has been fitted. See the graphic above for measurements.
Step 3
Install the frame. Place the frame into the galvanized brackets along one side. With the help of a kind friend, bend the frame and secure each piping section into its respective bracket on the opposite side.
Step 4
Tighten the brackets. Hammer the bracket nails into the bed so they are each secured tightly.
Step 5
Apply fencing to long sides. Cut fencing into 3 x 5.5 foot sections. Secure the fencing to the top cross bar by folding it over on itself. Allow the excess to hang down toward the bottom.
Step 6
Secure the bottom. Staple the bottom of each 32″ and 16″ section, wrap the sides around the frame as needed. Feed PVC piping through the bottom of the 33″ sections. Pull down and secure with nails in a manner that will allow the fencing to slip off when needed and pulled down when not in use.
It is always recommended to apply a test coat on a hidden area or scrap piece to ensure color evenness and adhesion. Use primer or wood conditioner as needed.
Comments
benjaminrogers
Fri, 09/06/2013 - 11:36
another mounting option
Use 24" pieces of rebar. Pretty cheap and no screws or nails. Simply get enough rebar (2 x # of hoops) and drive into the group with a hammer. Just make sure the rebar fits the inner diameter of the pvc.
arcarro
Tue, 10/22/2013 - 08:00
Good text
Good text. Thanks you