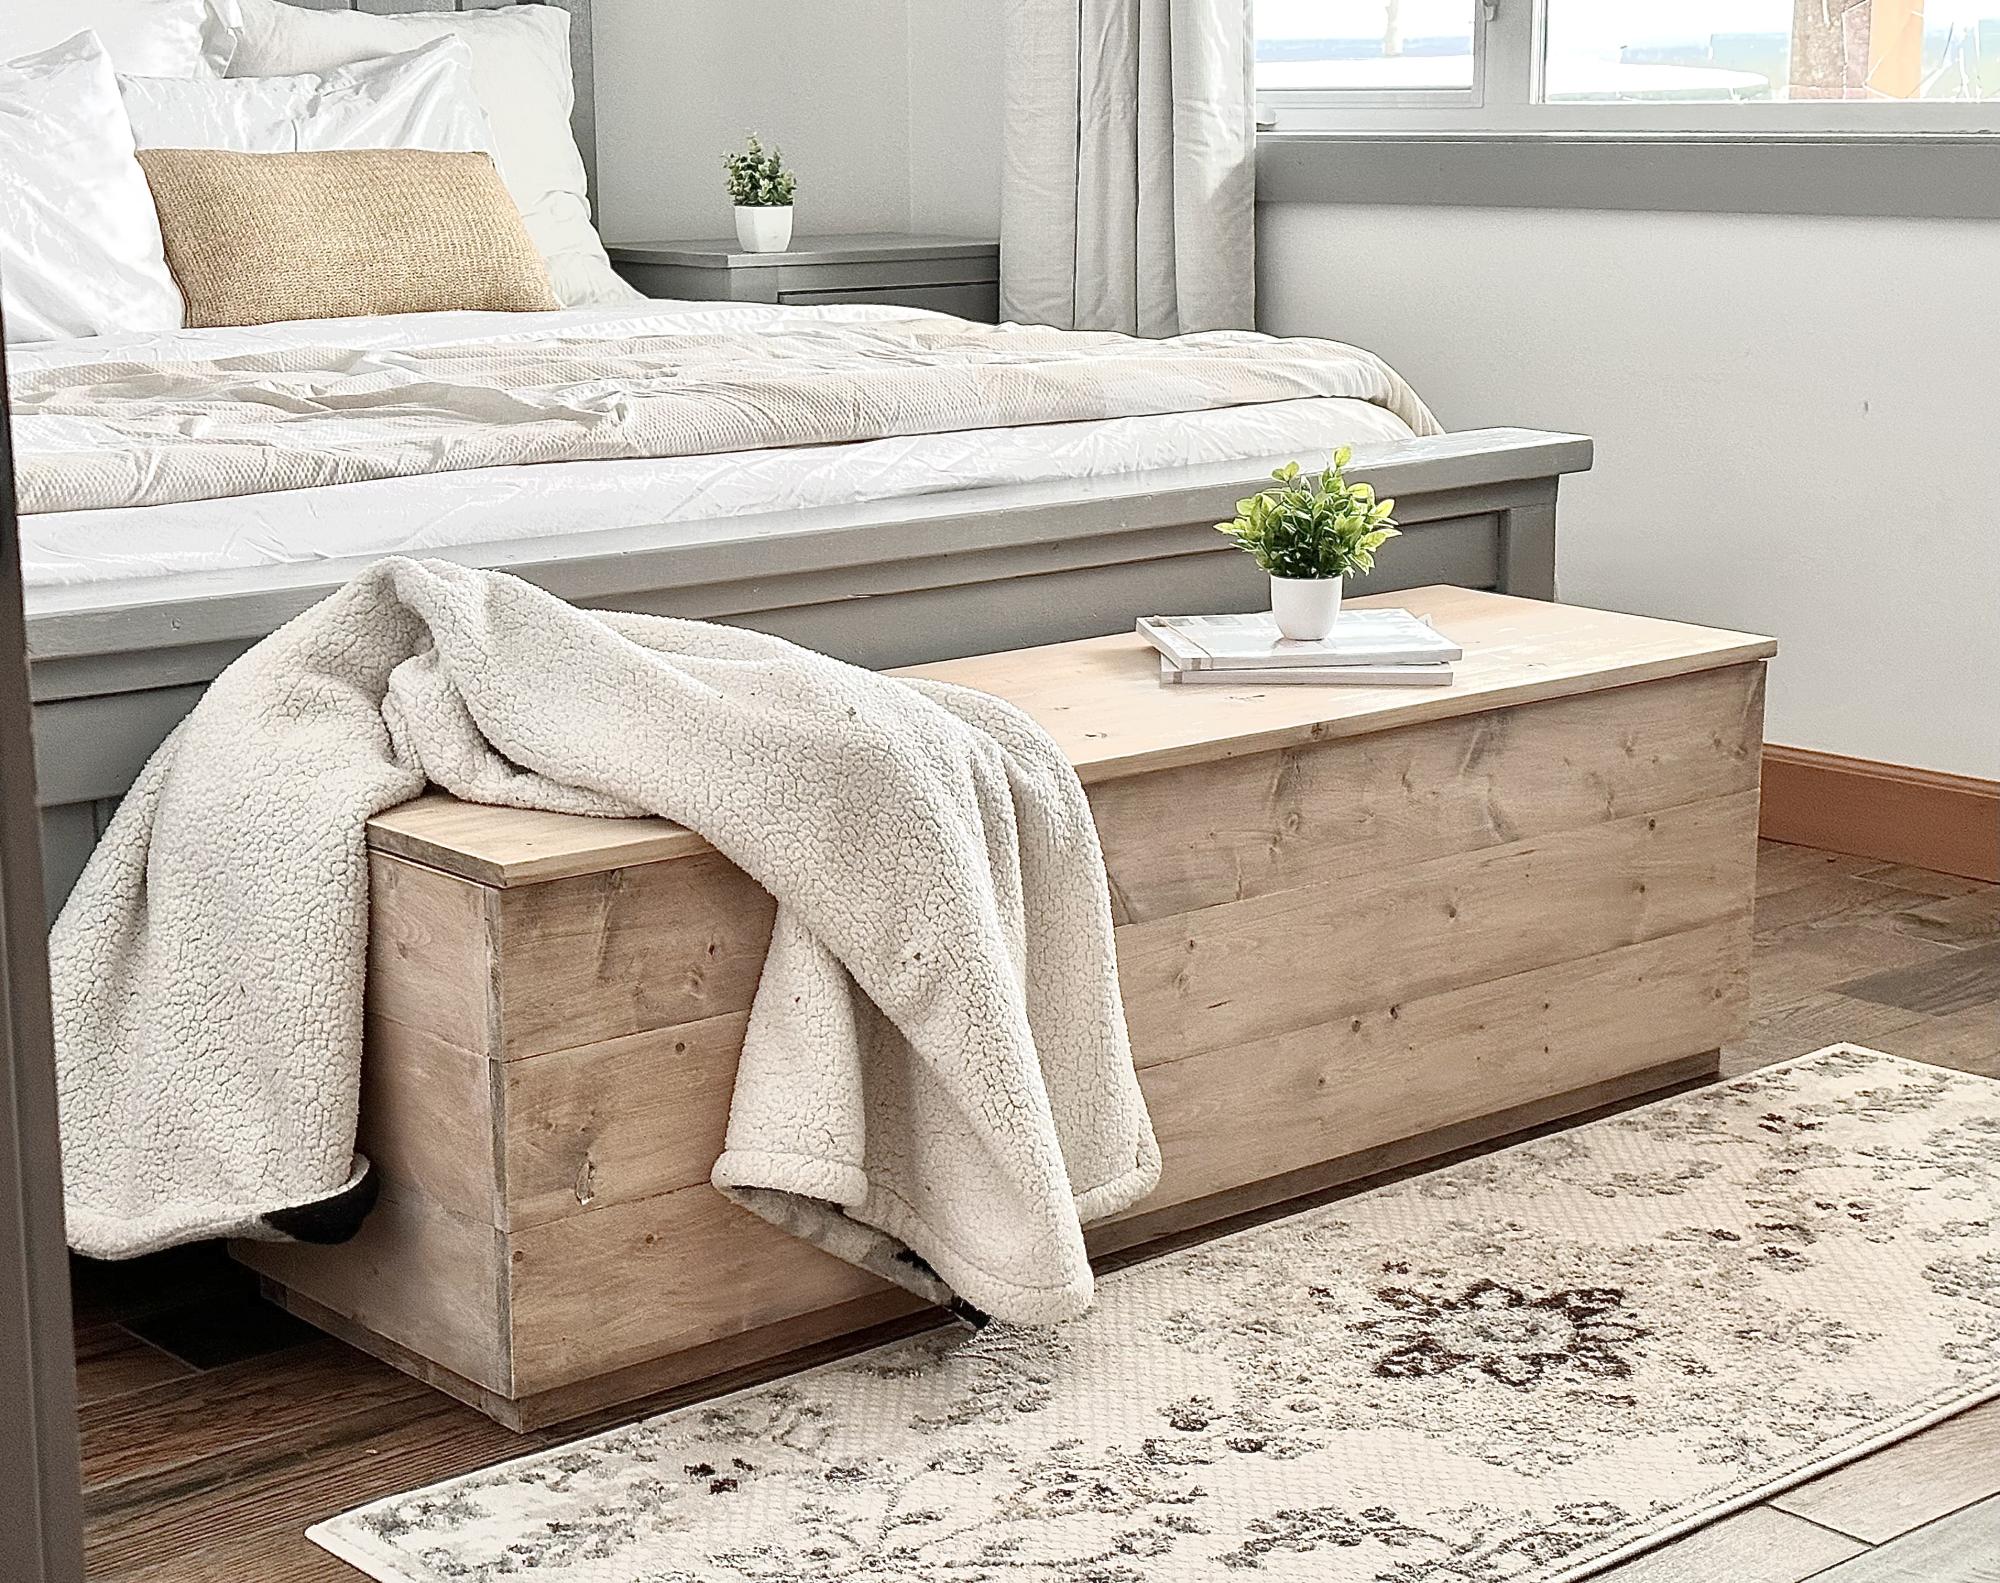


Do you need a bench with maximum storage? A wood chest or trunk can provide tons of storage and act as occasional seating or even tabletop surface.
Save hundreds of dollars by building your own wood trunk or chest. This is a free project plan with step by step diagrams, video tutorial, shopping and cut lists - everything you need to be successful at building your own wood trunk!
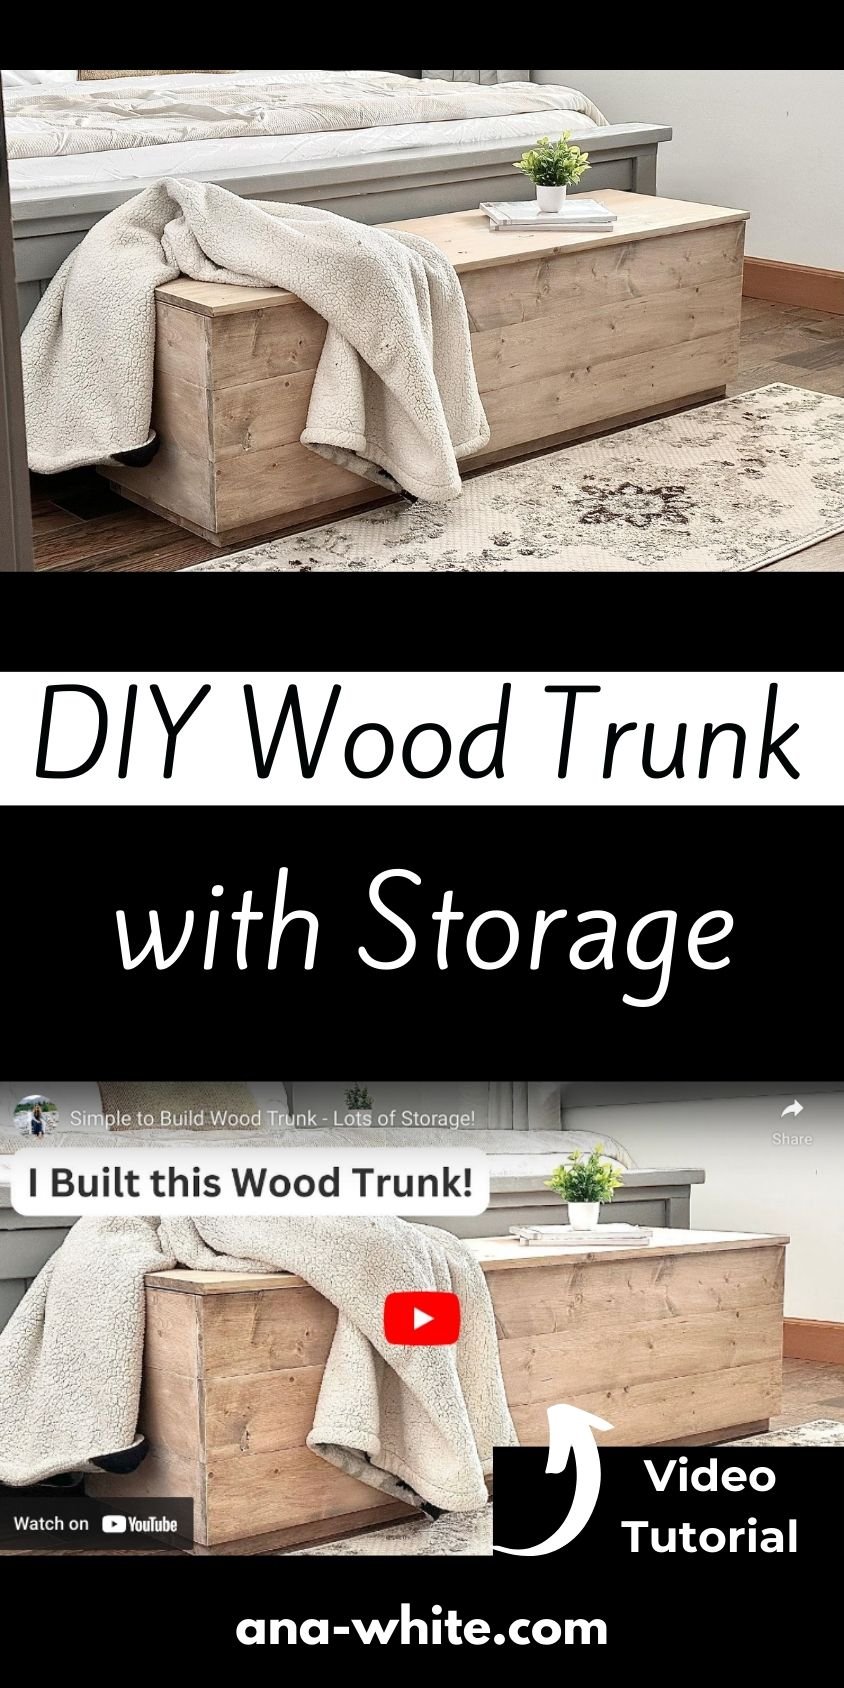
Pin For Later!

Preparation
- 13 - 1x6 @ 5 feet long (can also buy 10 foot 1x6 and cut in half)
- 1 - 1x8 @ 5 feet long
- 3 - 2x2 @ 8 feet long
- 100 - 1-1/4" pocket hole screws
- 1-1/4" brad nails
- wood glue
- piano hinge or 3" butt hinges (three)
- toy box lid supports
- 3 - 1x6 @ 58-1/2" - bottom
- 6 - 1x6 @ about 16-1/2" - measure and cut to fit - sides
- 8 - 1x6 @ 60" - front/back/top
- 2 - 2x2 @ 58-1/2" - bottom frame
- 2 - 2x2 @ about 15" - measure and cut to fit - bottom frame sides
- 3 - 2x2 @ about 14" - measure and cut to fit - under lid supports


For long term durability and more professional results, I recommend using a pocket hole joinery system for wood joints. Here is a video with tips for using a pocket hole jig:
Instructions
Step 1
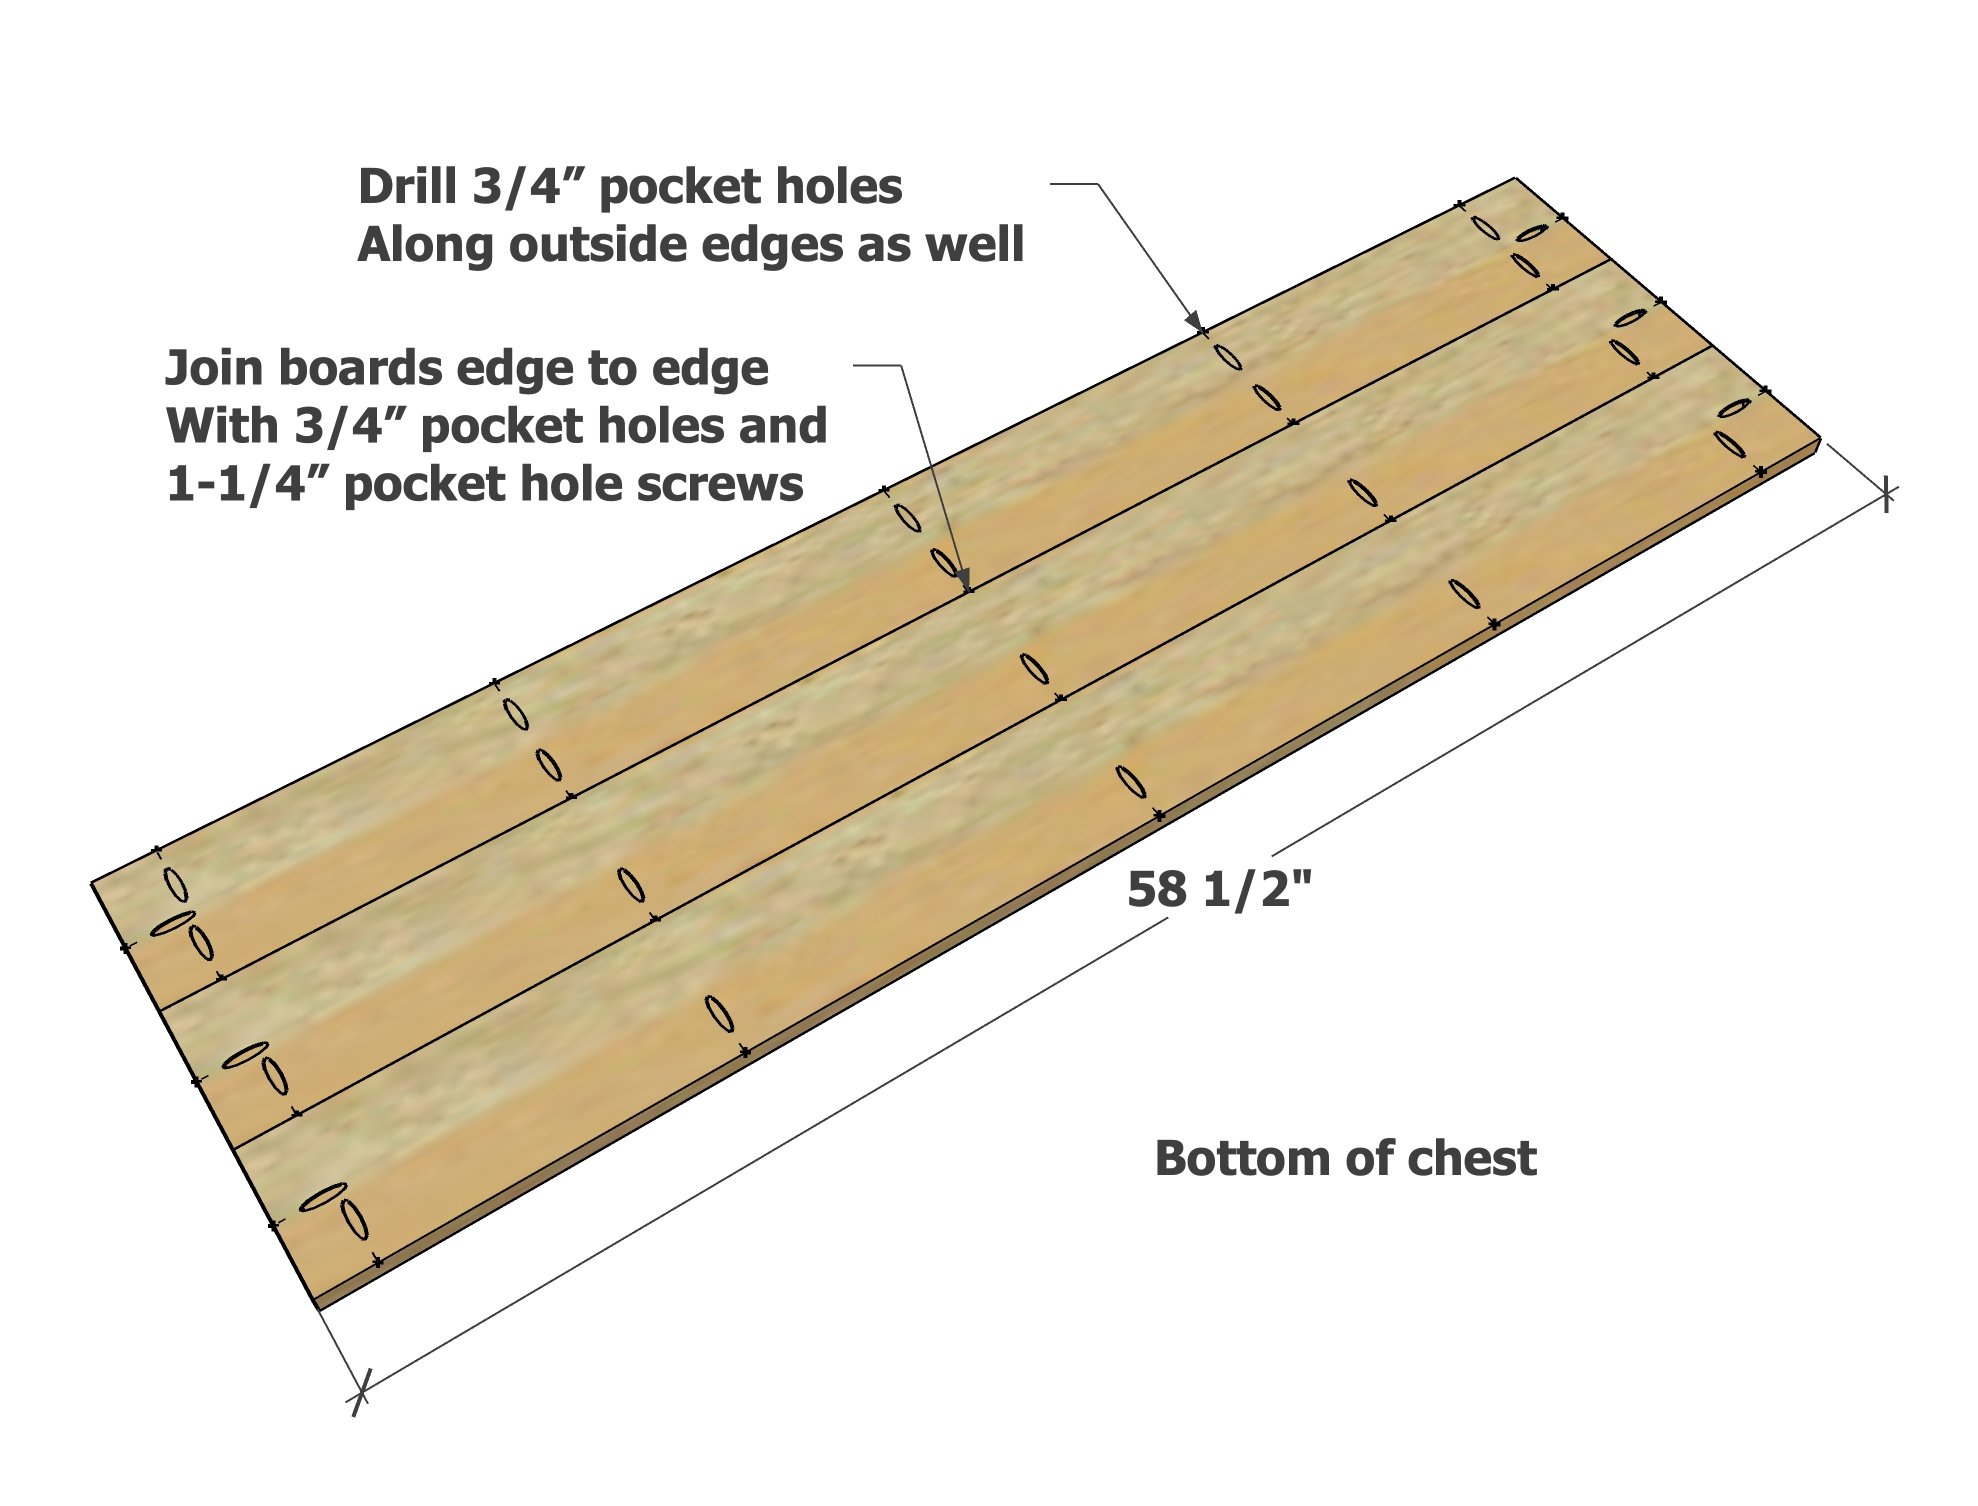
Build the Bottom
Cut the top pieces and join together with 3/4" pocket holes and 1-1/4" pocket hole screws.
Step 2
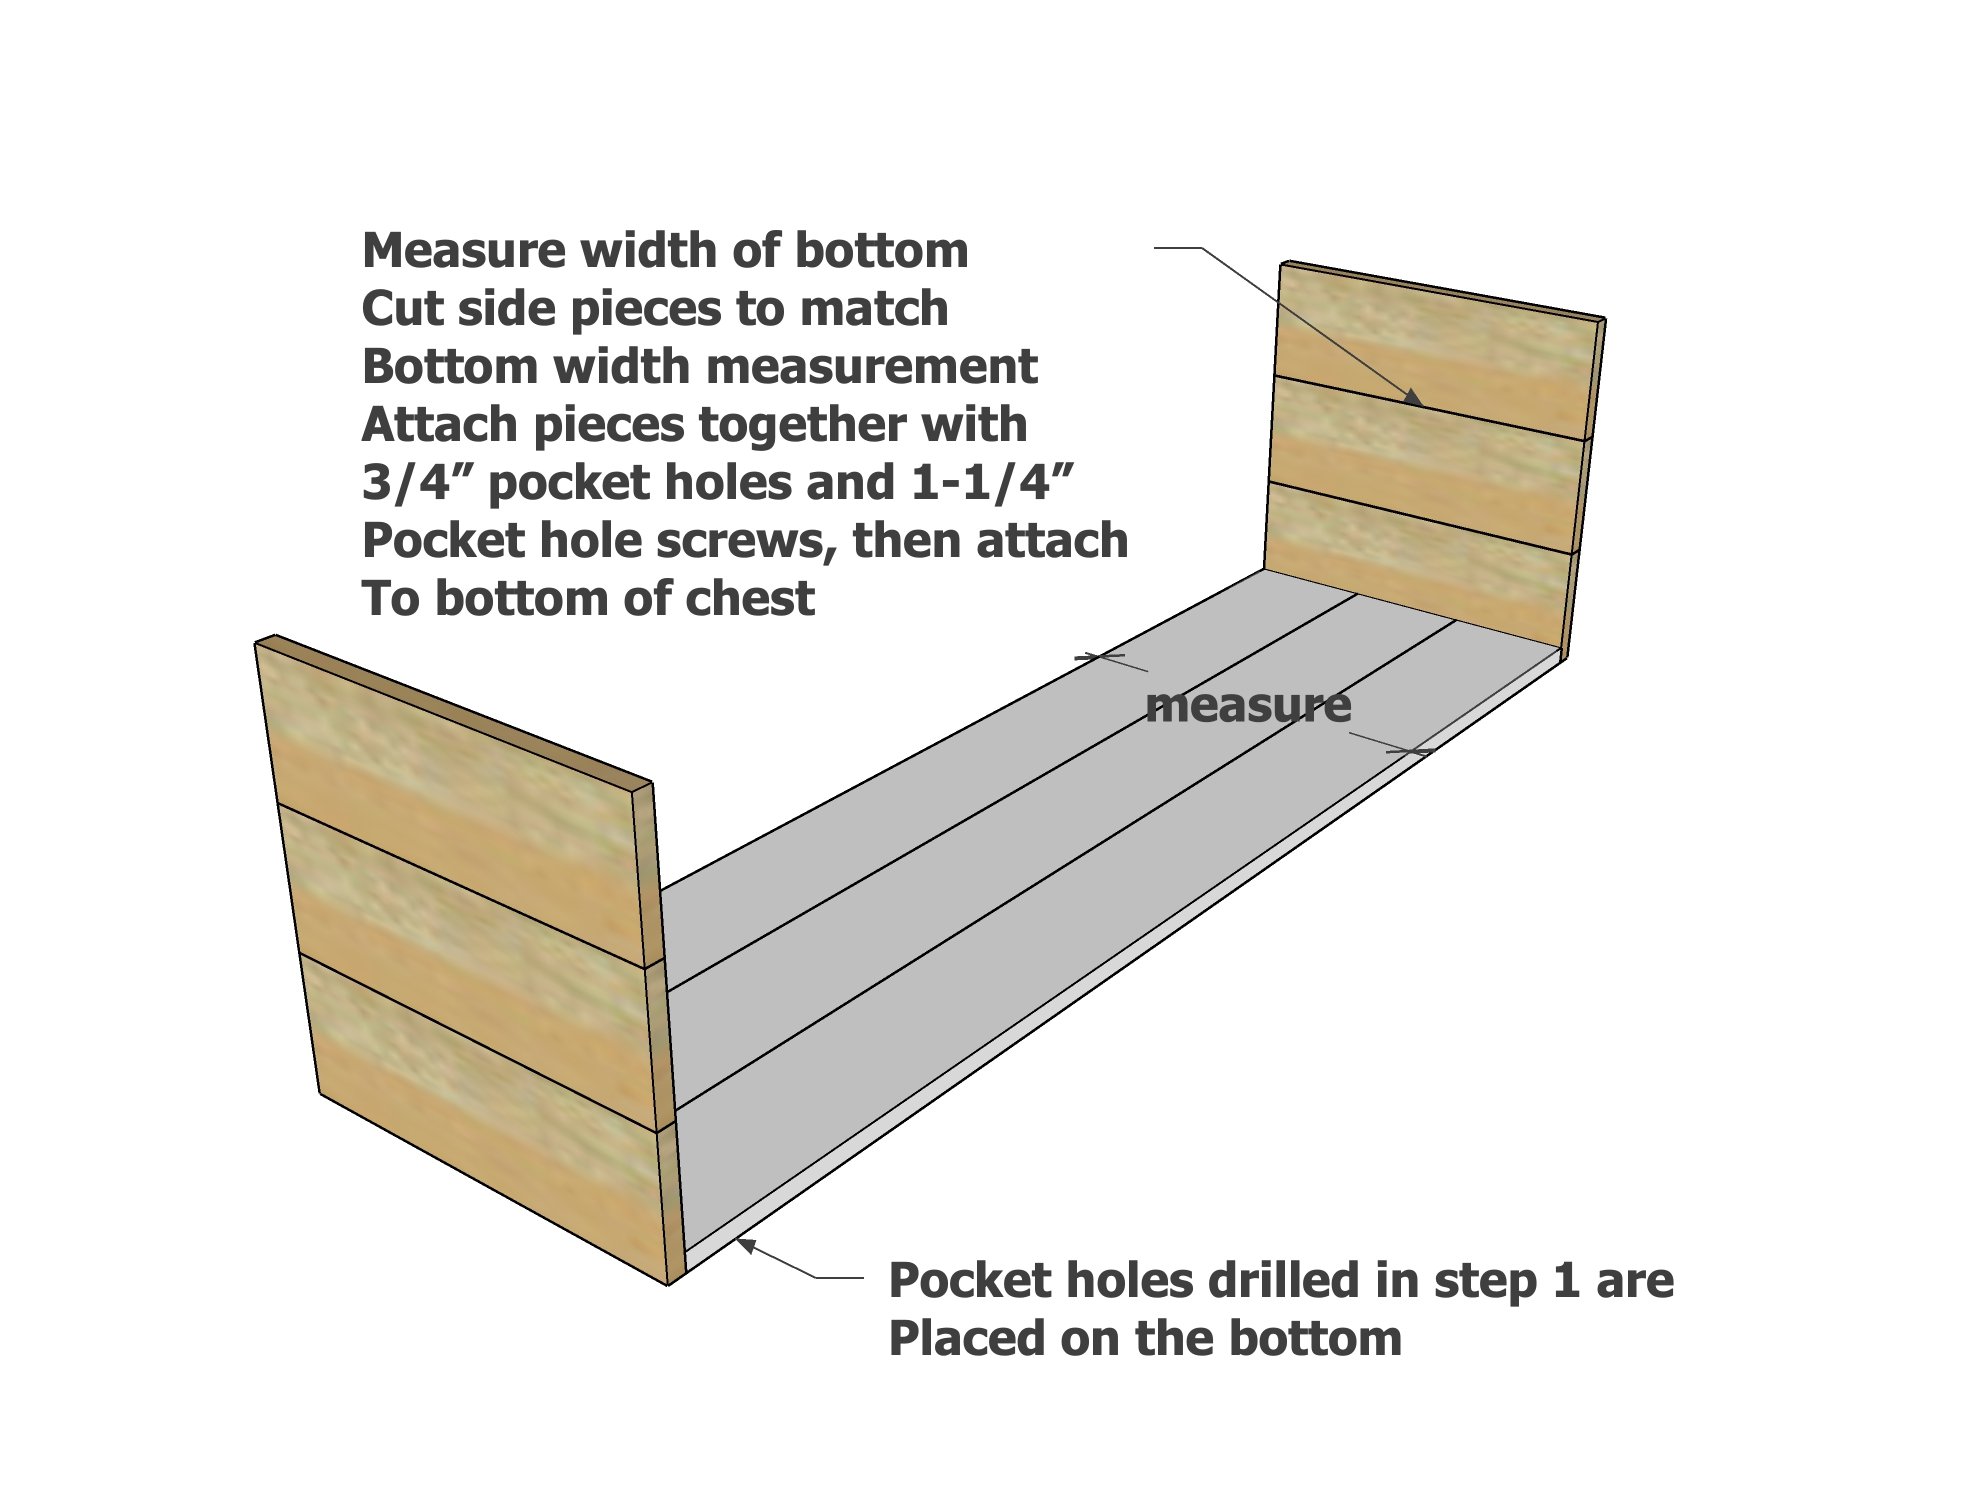
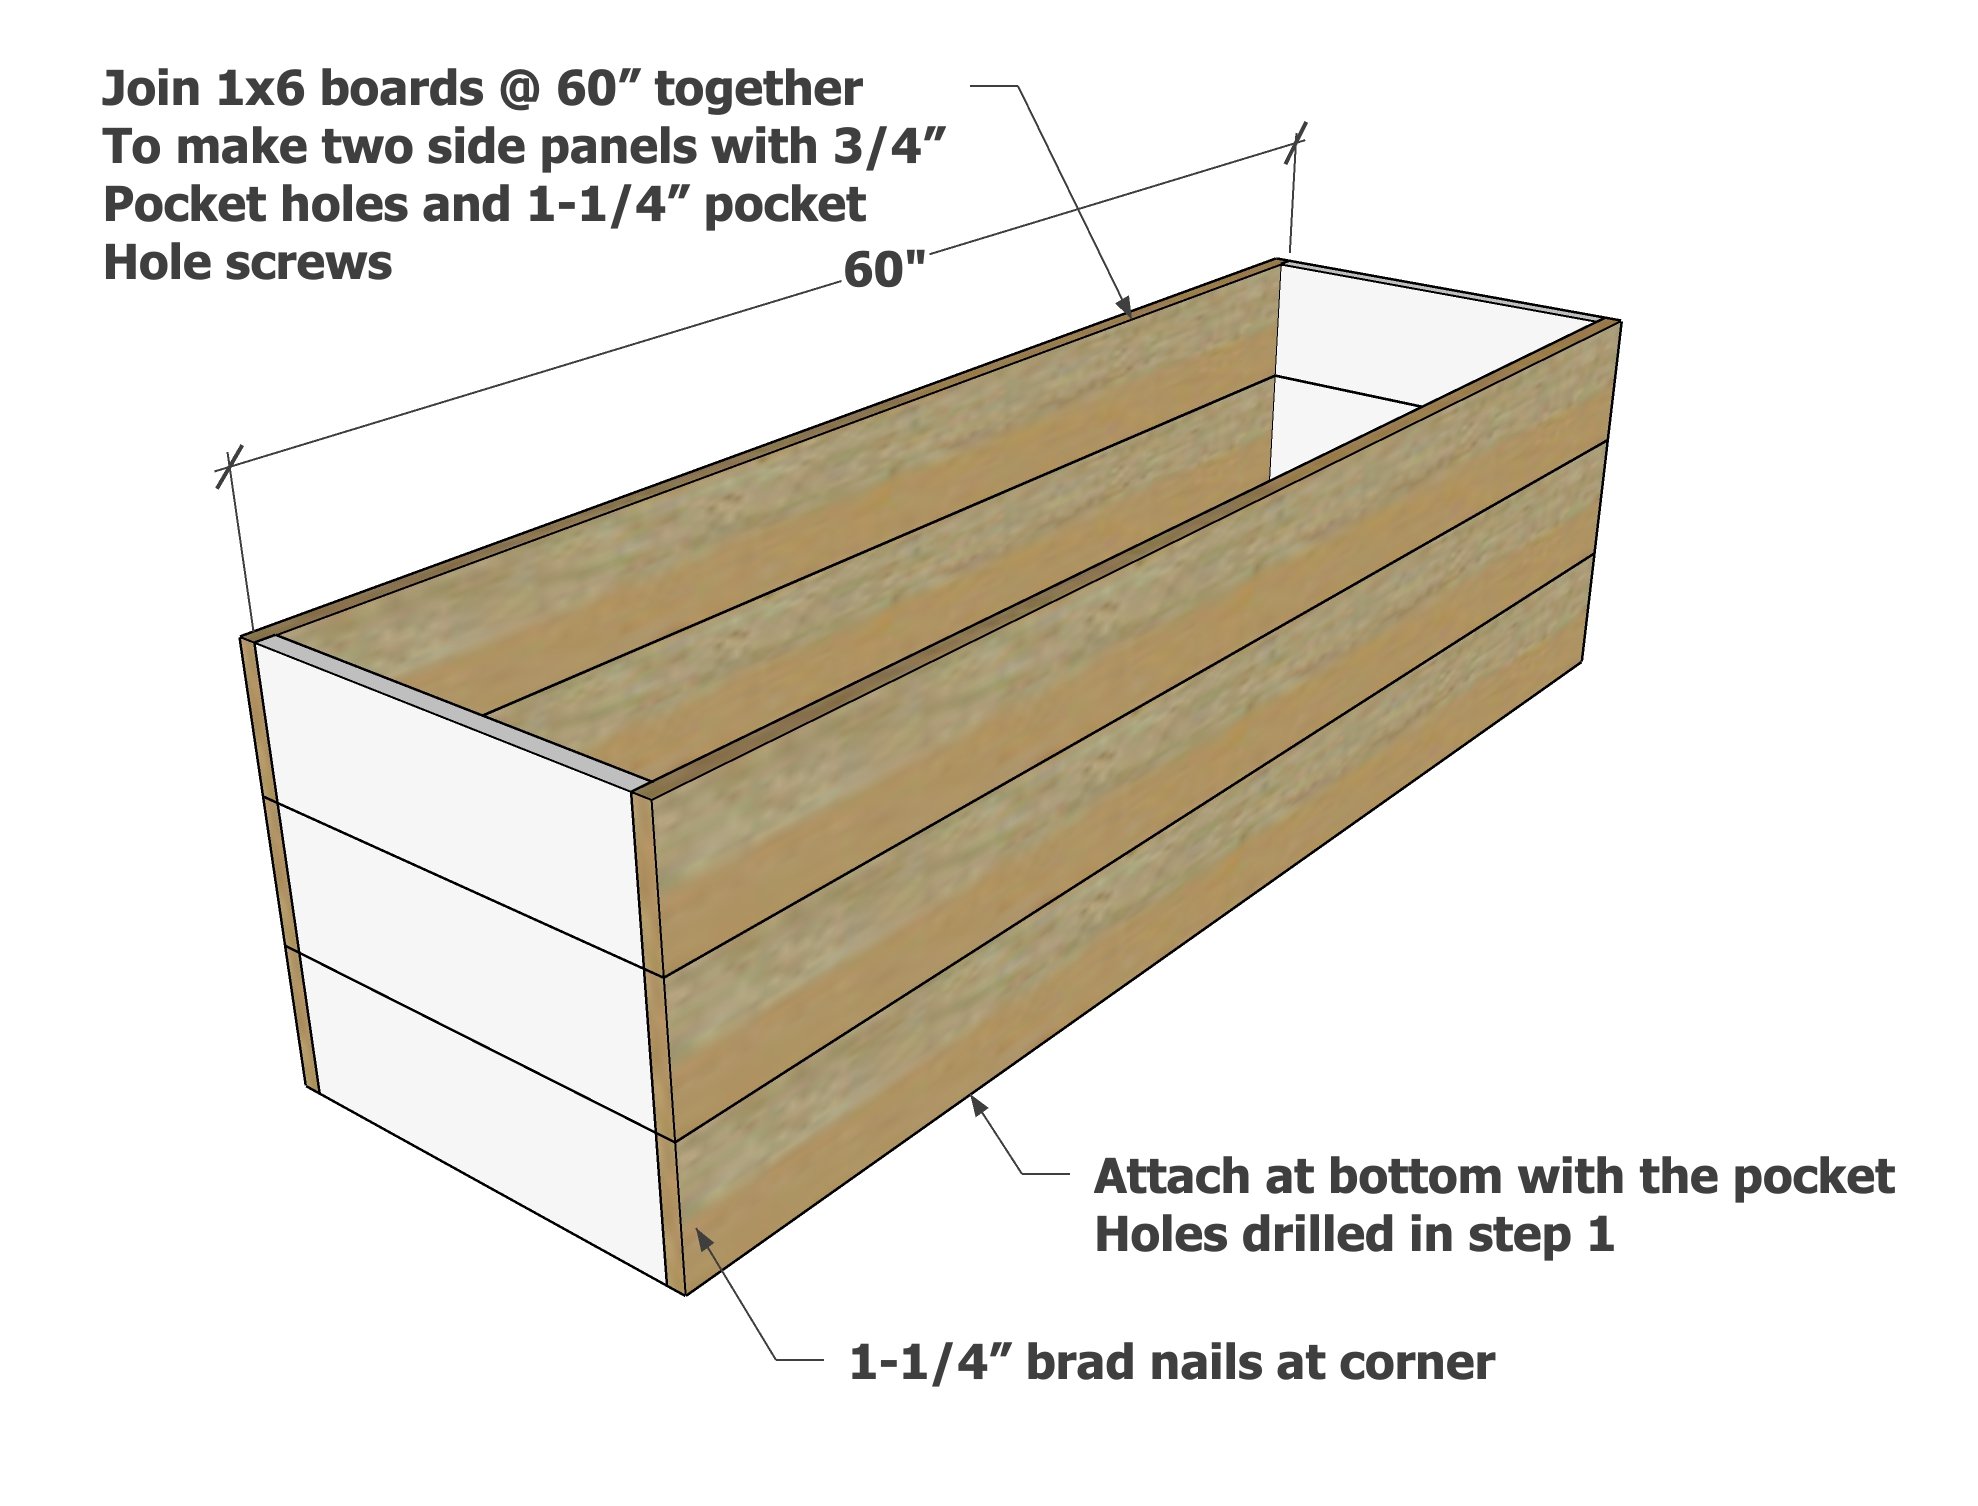
Build the Sides and Attach
The sides need to match the width of the bottom. Measure the bottom width, then cut the side boards to match.
Build the two side panels and attach to the base.
Step 3
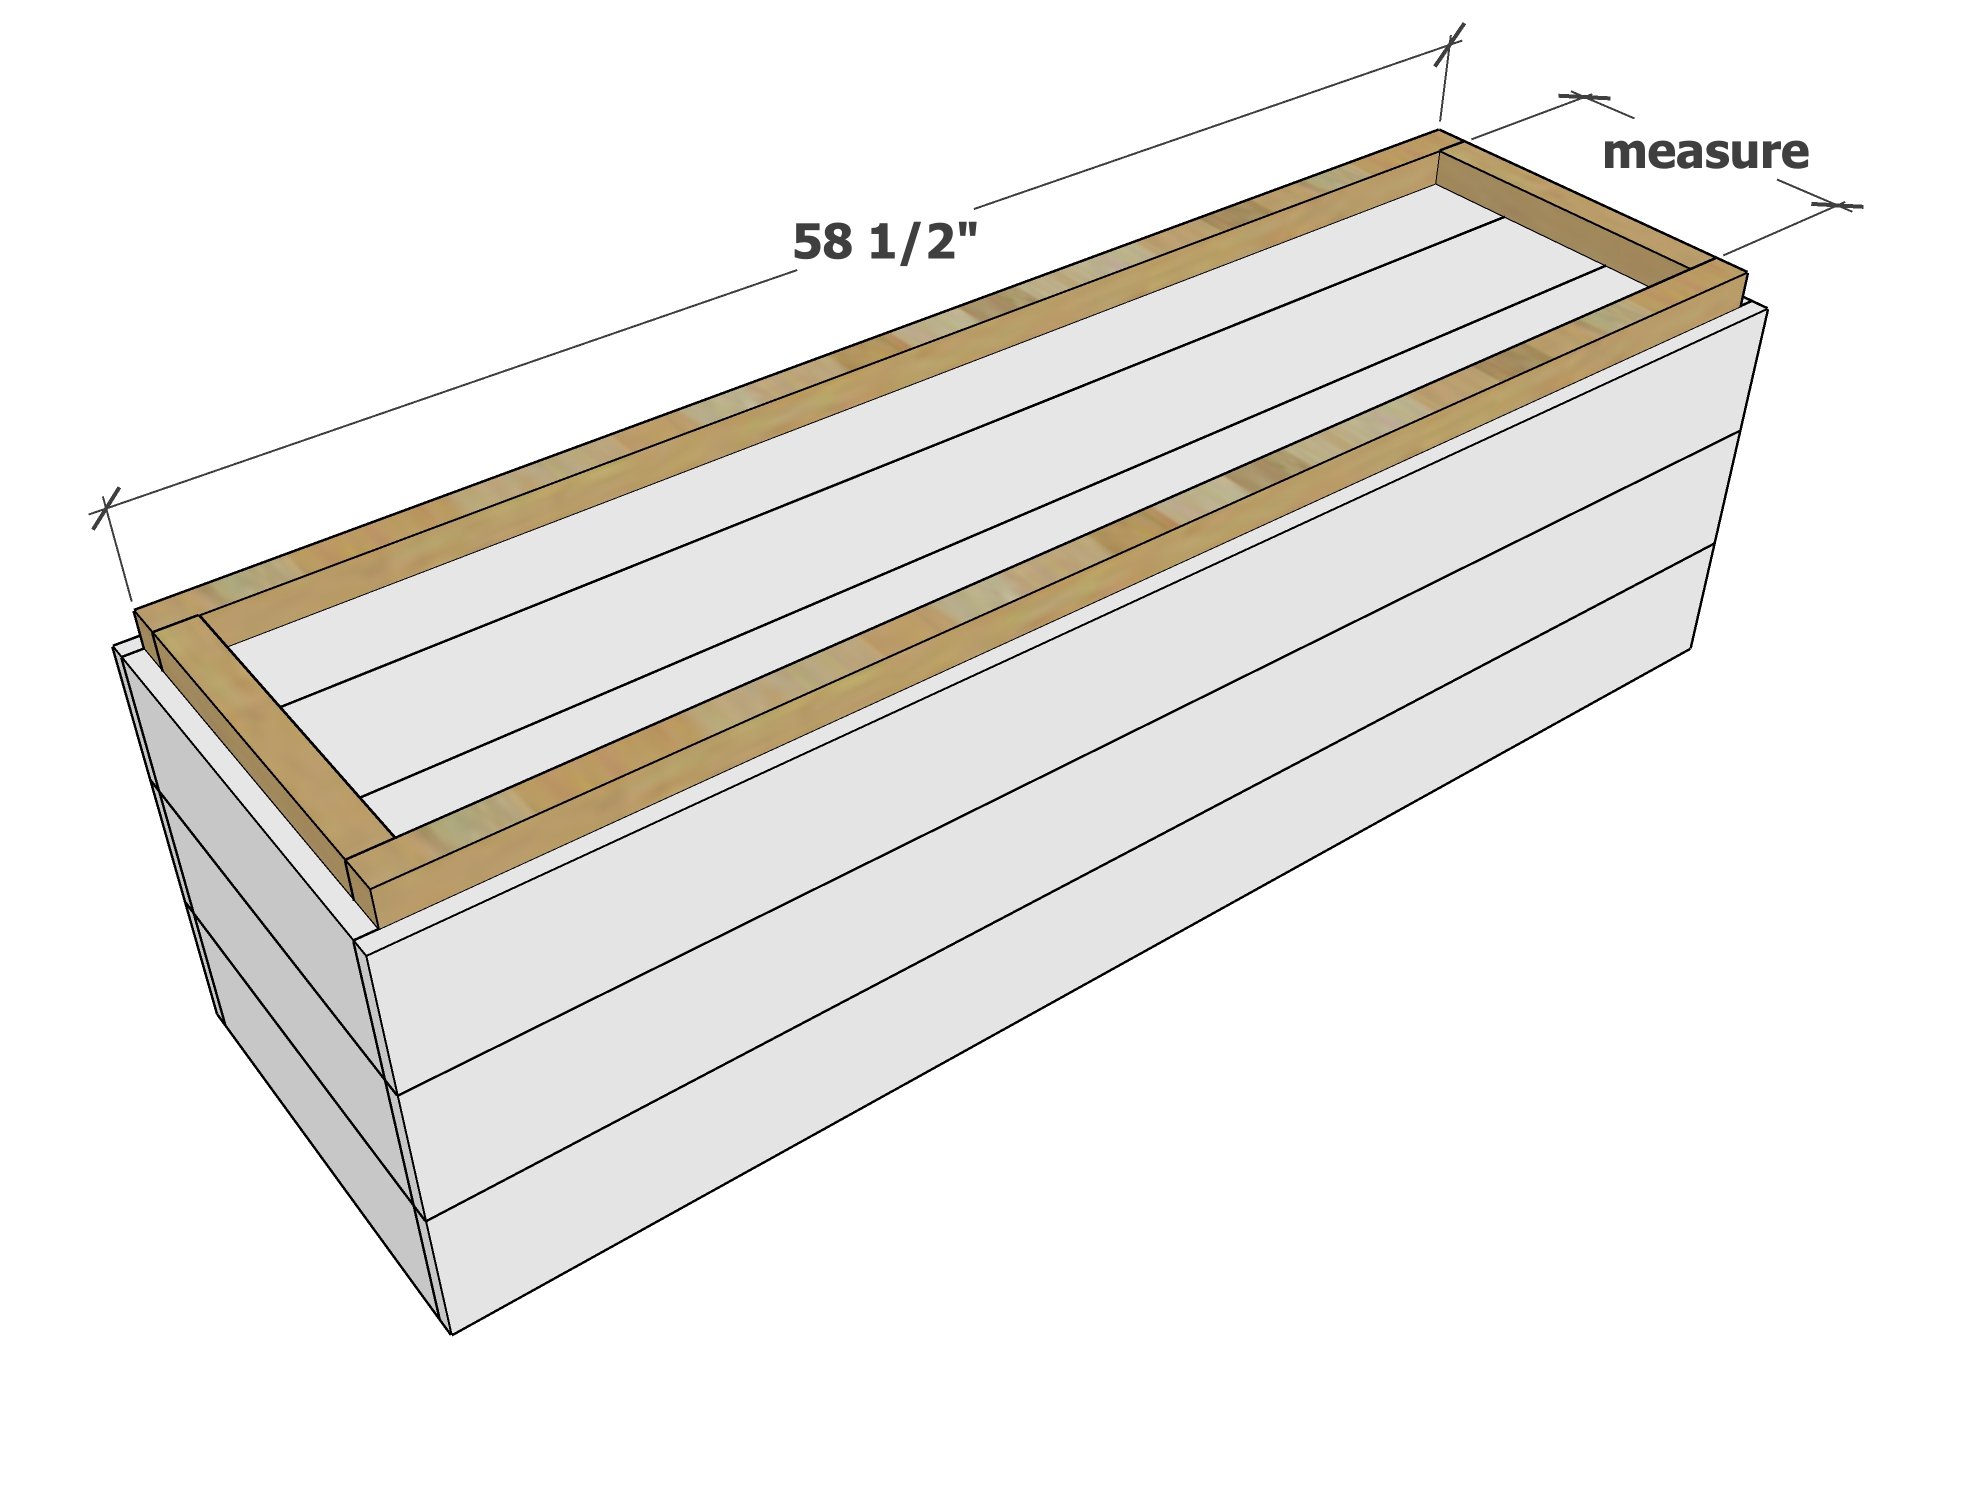
Front and Back
Build the two front and back panels and attach to the bottom and sides.
Step 4
Base
As shown in the video, drill half way through the base pieces with the Kreg Jig bit. Then attach the base pieces to the bottom with 1-1/4" pocket hole screws.
Step 5
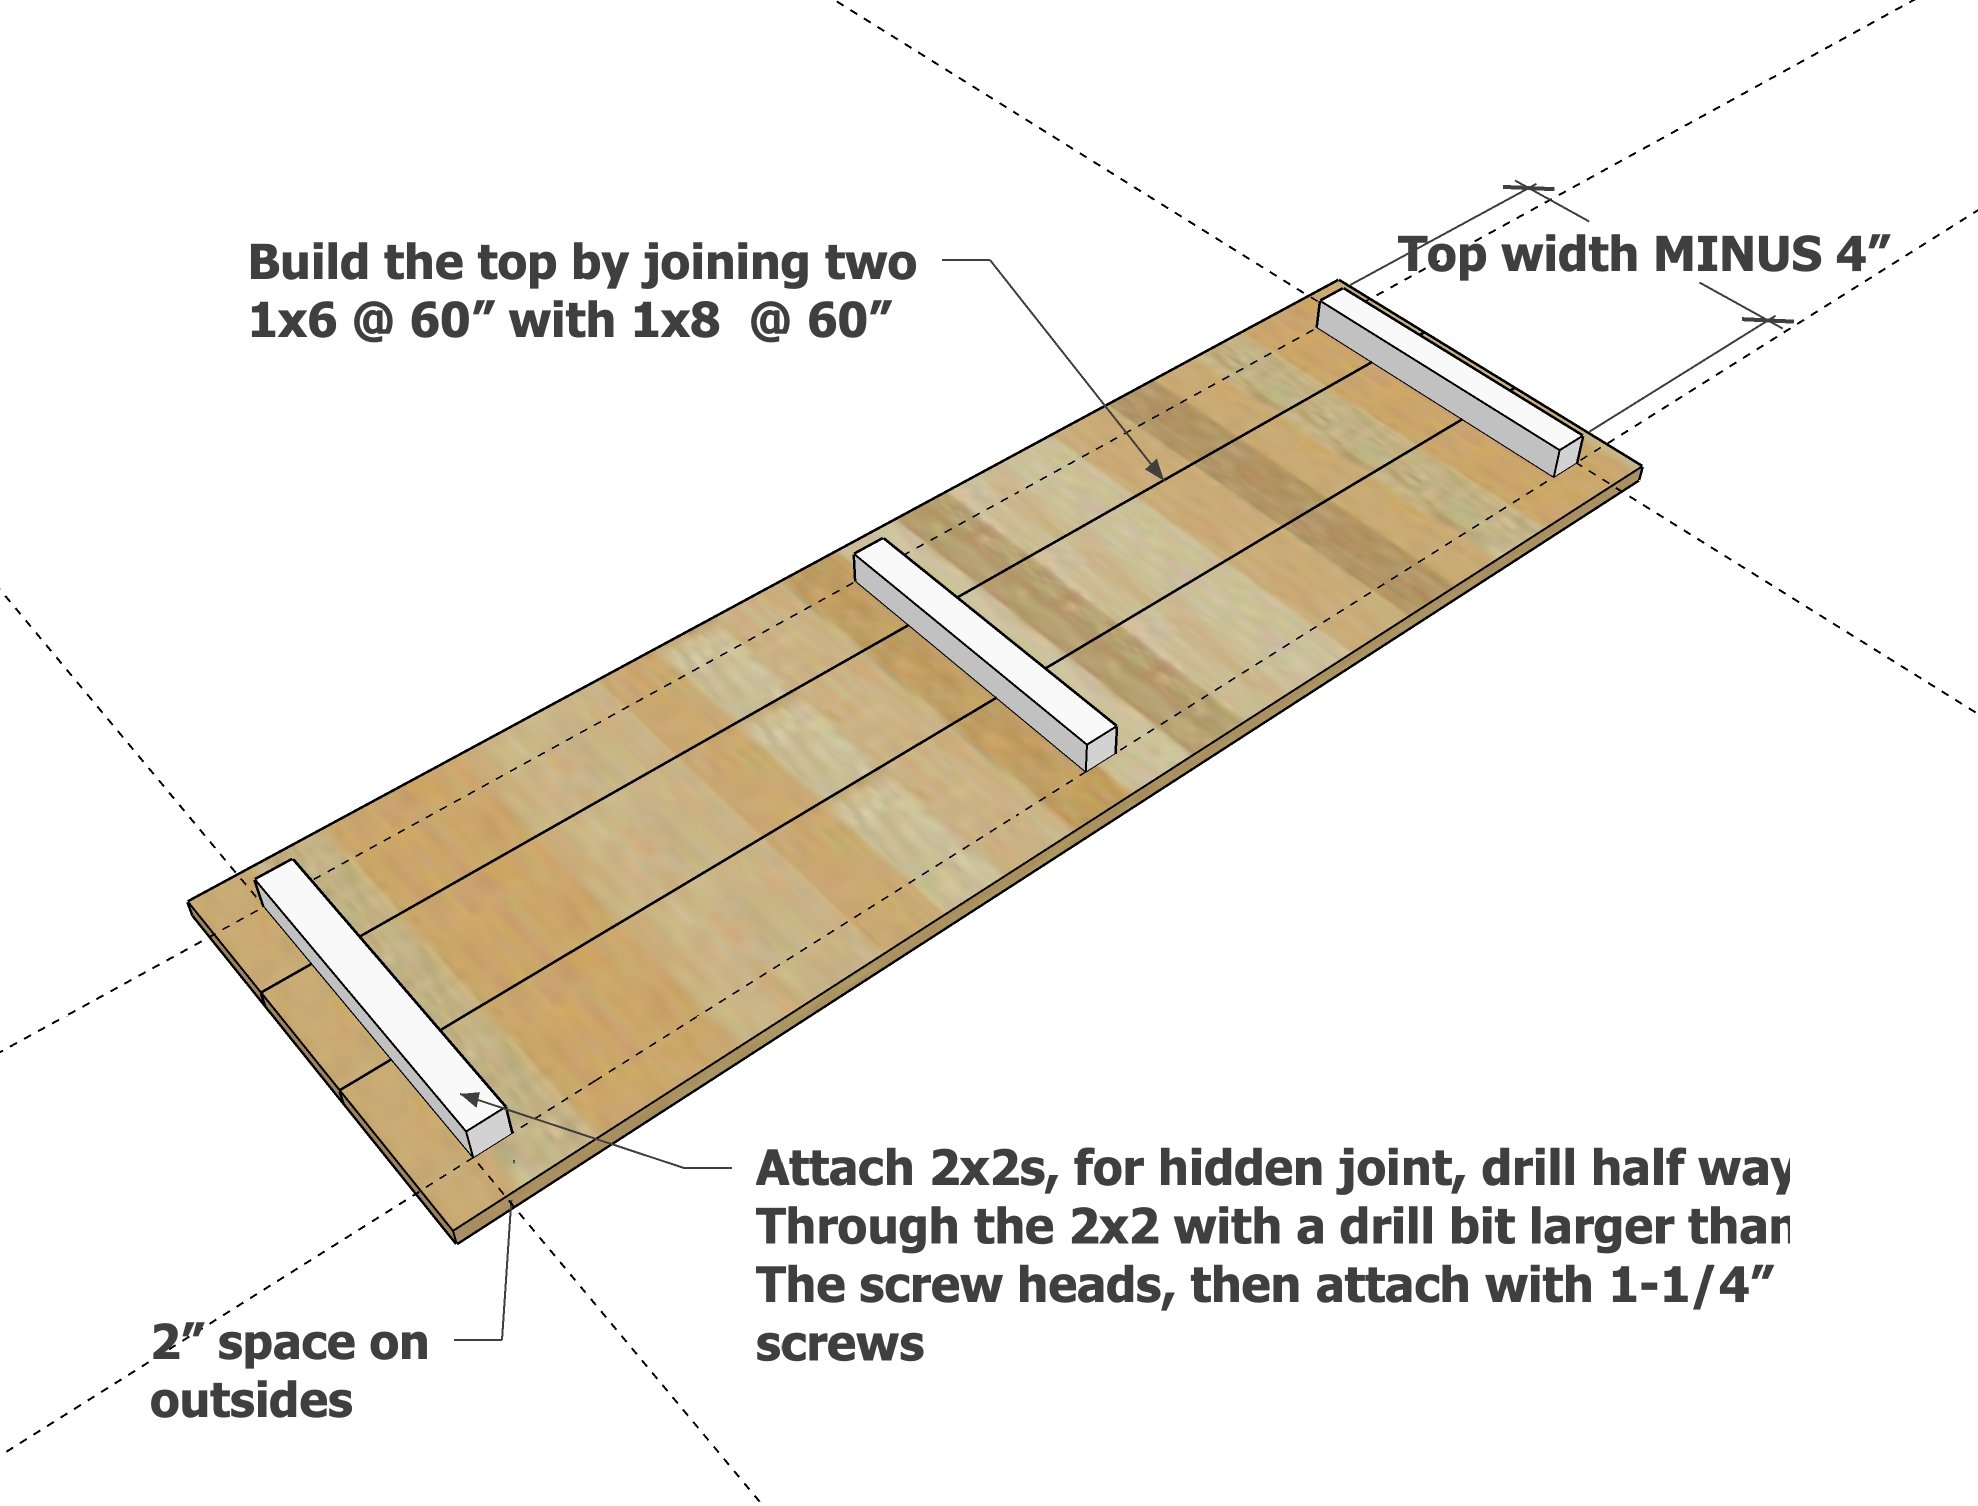
Lid Supports
Attach 2x2 lids supports to the underside of the top.
Step 6

Attach the top to the base with the hinges on the back.
Add the toy box lid supports and adjust as necessary.
The next day, I whitewashed with a paint and water mixture.
I then sanded lightly with 220 grit sandpaper.
The top applied a light coat of water based polyurethane.