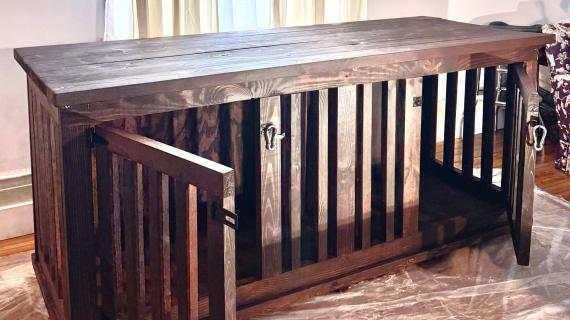


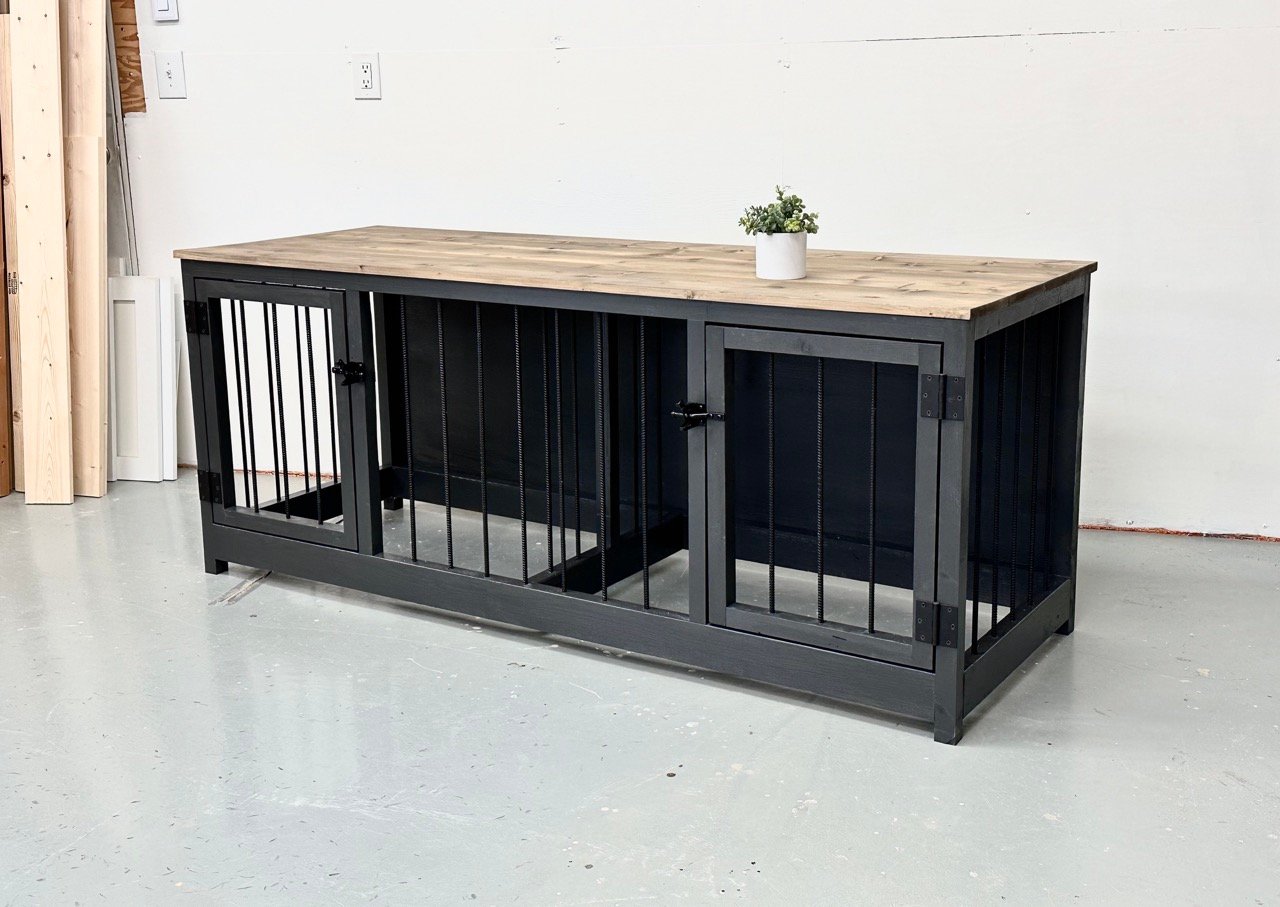
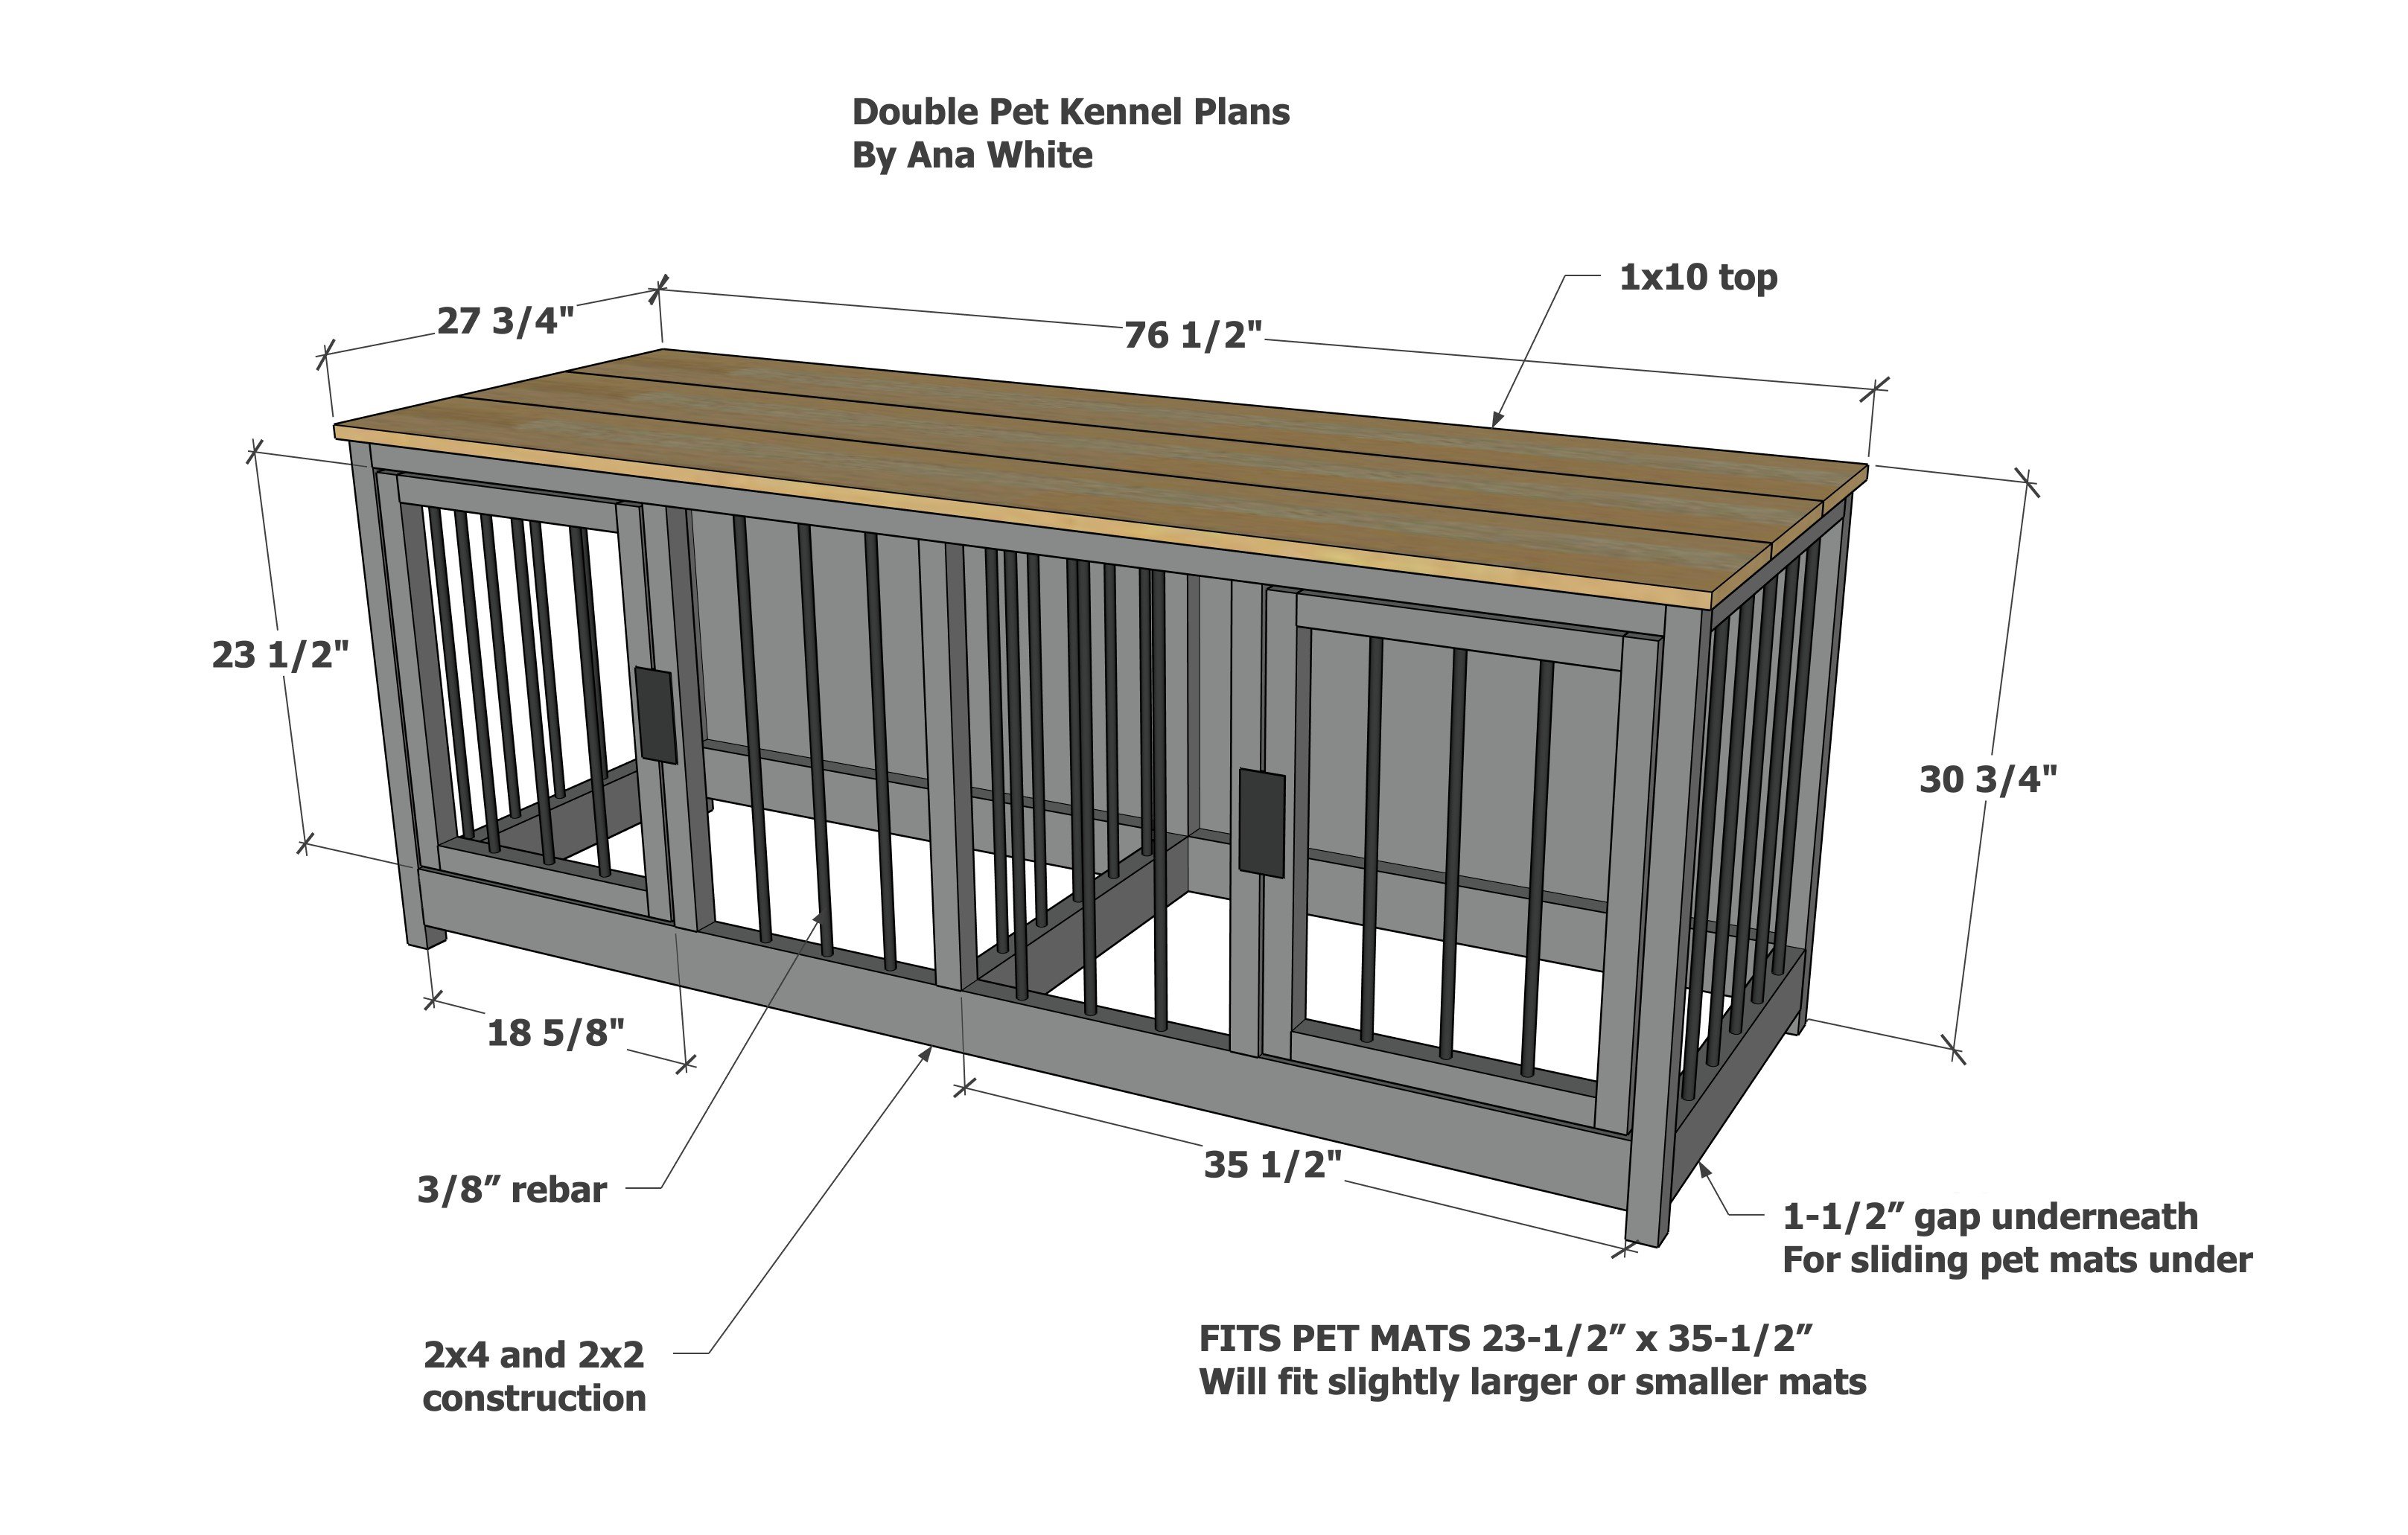
Free plans to build your own dog crate furniture! This plan features a double design, sized similar to a large tv console. This wood kennel fits two medium to large dogs. The plans use 2x2 and 2x4 for the frame, rebar for the bars, 1/4" plywood for the back and 1x10s for the top.
This design is open on the bottom, so a standard sized pet mat can be easily slid underneath (and slid out to clean if needed).
Free plans include step by step diagrams, shopping and cut list, and video tutorial.
Why I Built this Project
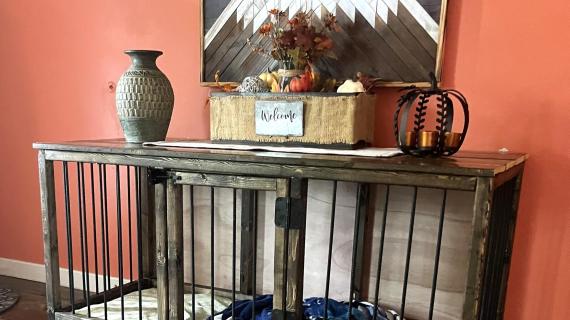
My niece has a small apartment with two large dogs. She wanted a more attractive solution than a plastic kennel, and also wanted to be able to use the top surface as a tabletop and to support a large tv.
They also wanted an open bottom so plastic pet trays could be easily slid under (and out) if needed for cleaning.
Why We Love this Double Dog Crate Furniture
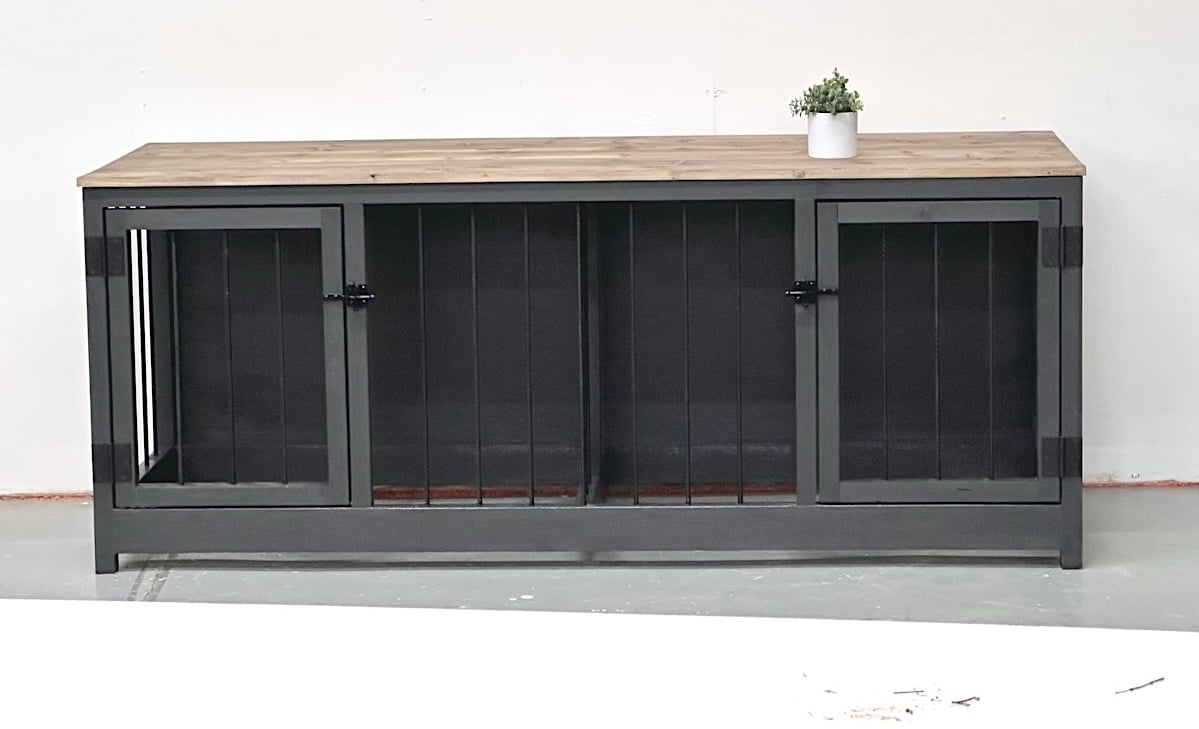
- Much more attractive than a metal or plastic kennel
- Top is useable as a tabletop surface
- Easy to clean and use
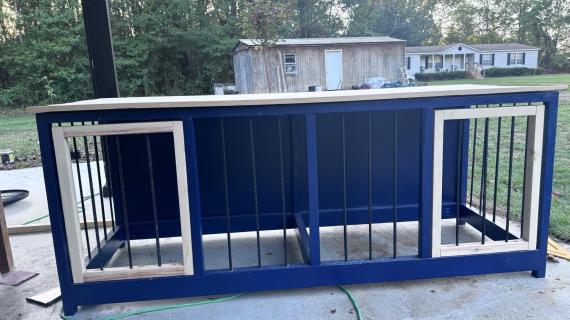
- Double design for two dogs saves space and while keeping dogs separated
- Easy to customize color and size to match desgin
- Surprisingly lightweight for how large the project is
- Very sturdy
Watch! Build Video for This Project
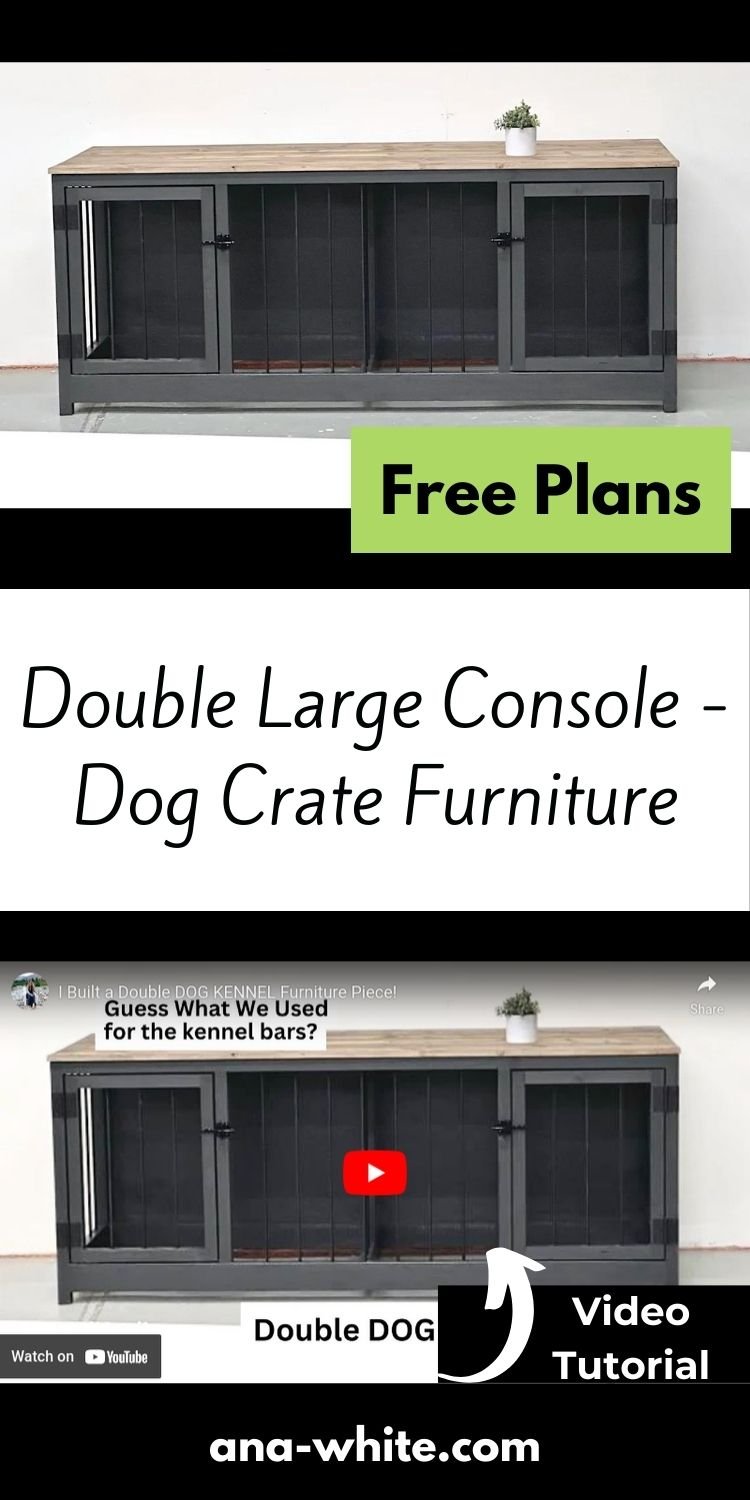
Free Plans to Build Your Own Dog Crate Furniture - Double Design
Ready to build this yourself? Here's the free plans, enjoy!
Pin For Later!
Preparation
- 3 - 1x10 @ 8 feet long
- 2 - 2x4 @ 10 feet long (light yellow toned wood is easier to work with)
- 5 - 2x2 @ 8 feet long
- 1 - sheet of 1/4" plywood or underlayment or paneling for the back
- About 60 feet of 3/8" rebar, can be cut in half for transport
- 2 sets of 3" narrow profile hinges
- 2 - gate latches, base of latches should be 1-1/2" wide to be mounted on the 2x2 framing
- 2-1/2" pocket hole screws (about 50) for building the main frame
- 1-1/4" pocket hole screws (about 20) for building the top panel
- 1-3/4" self tapping star bit screws (about 20) used to attach the top
- 3/4" brad nails or staples (for attaching the back)
- wood glue
- 120 grit sandpaper
- 3/8" drill bit (to match the outside diameter of the rebar)
- Paint or stain as desired
Also needed - rebar cutting tool or band saw or saw with metal cutting blade (could be jigsaw or circular saw)
- 2 - 2x2 @ 72-1/2" - framing
- 4 - 2x2 @ 30" - legs
- 2 - 2x4 @ 72-1/2" - framing
- 7 - 2x2 @ 23-1/2" - framing
- 3 - 2x4 @ 23-1/2" - framing
- 1 - 1/4" plywood @ 28-1/2" x 75-1/2" - back
- 3 - 1x10 @ 76-1/2" - top
- 4 - 2x2 @ 14-1/2" - door
- 4 - 2x2 @ 23" - door


Instructions
Step 1
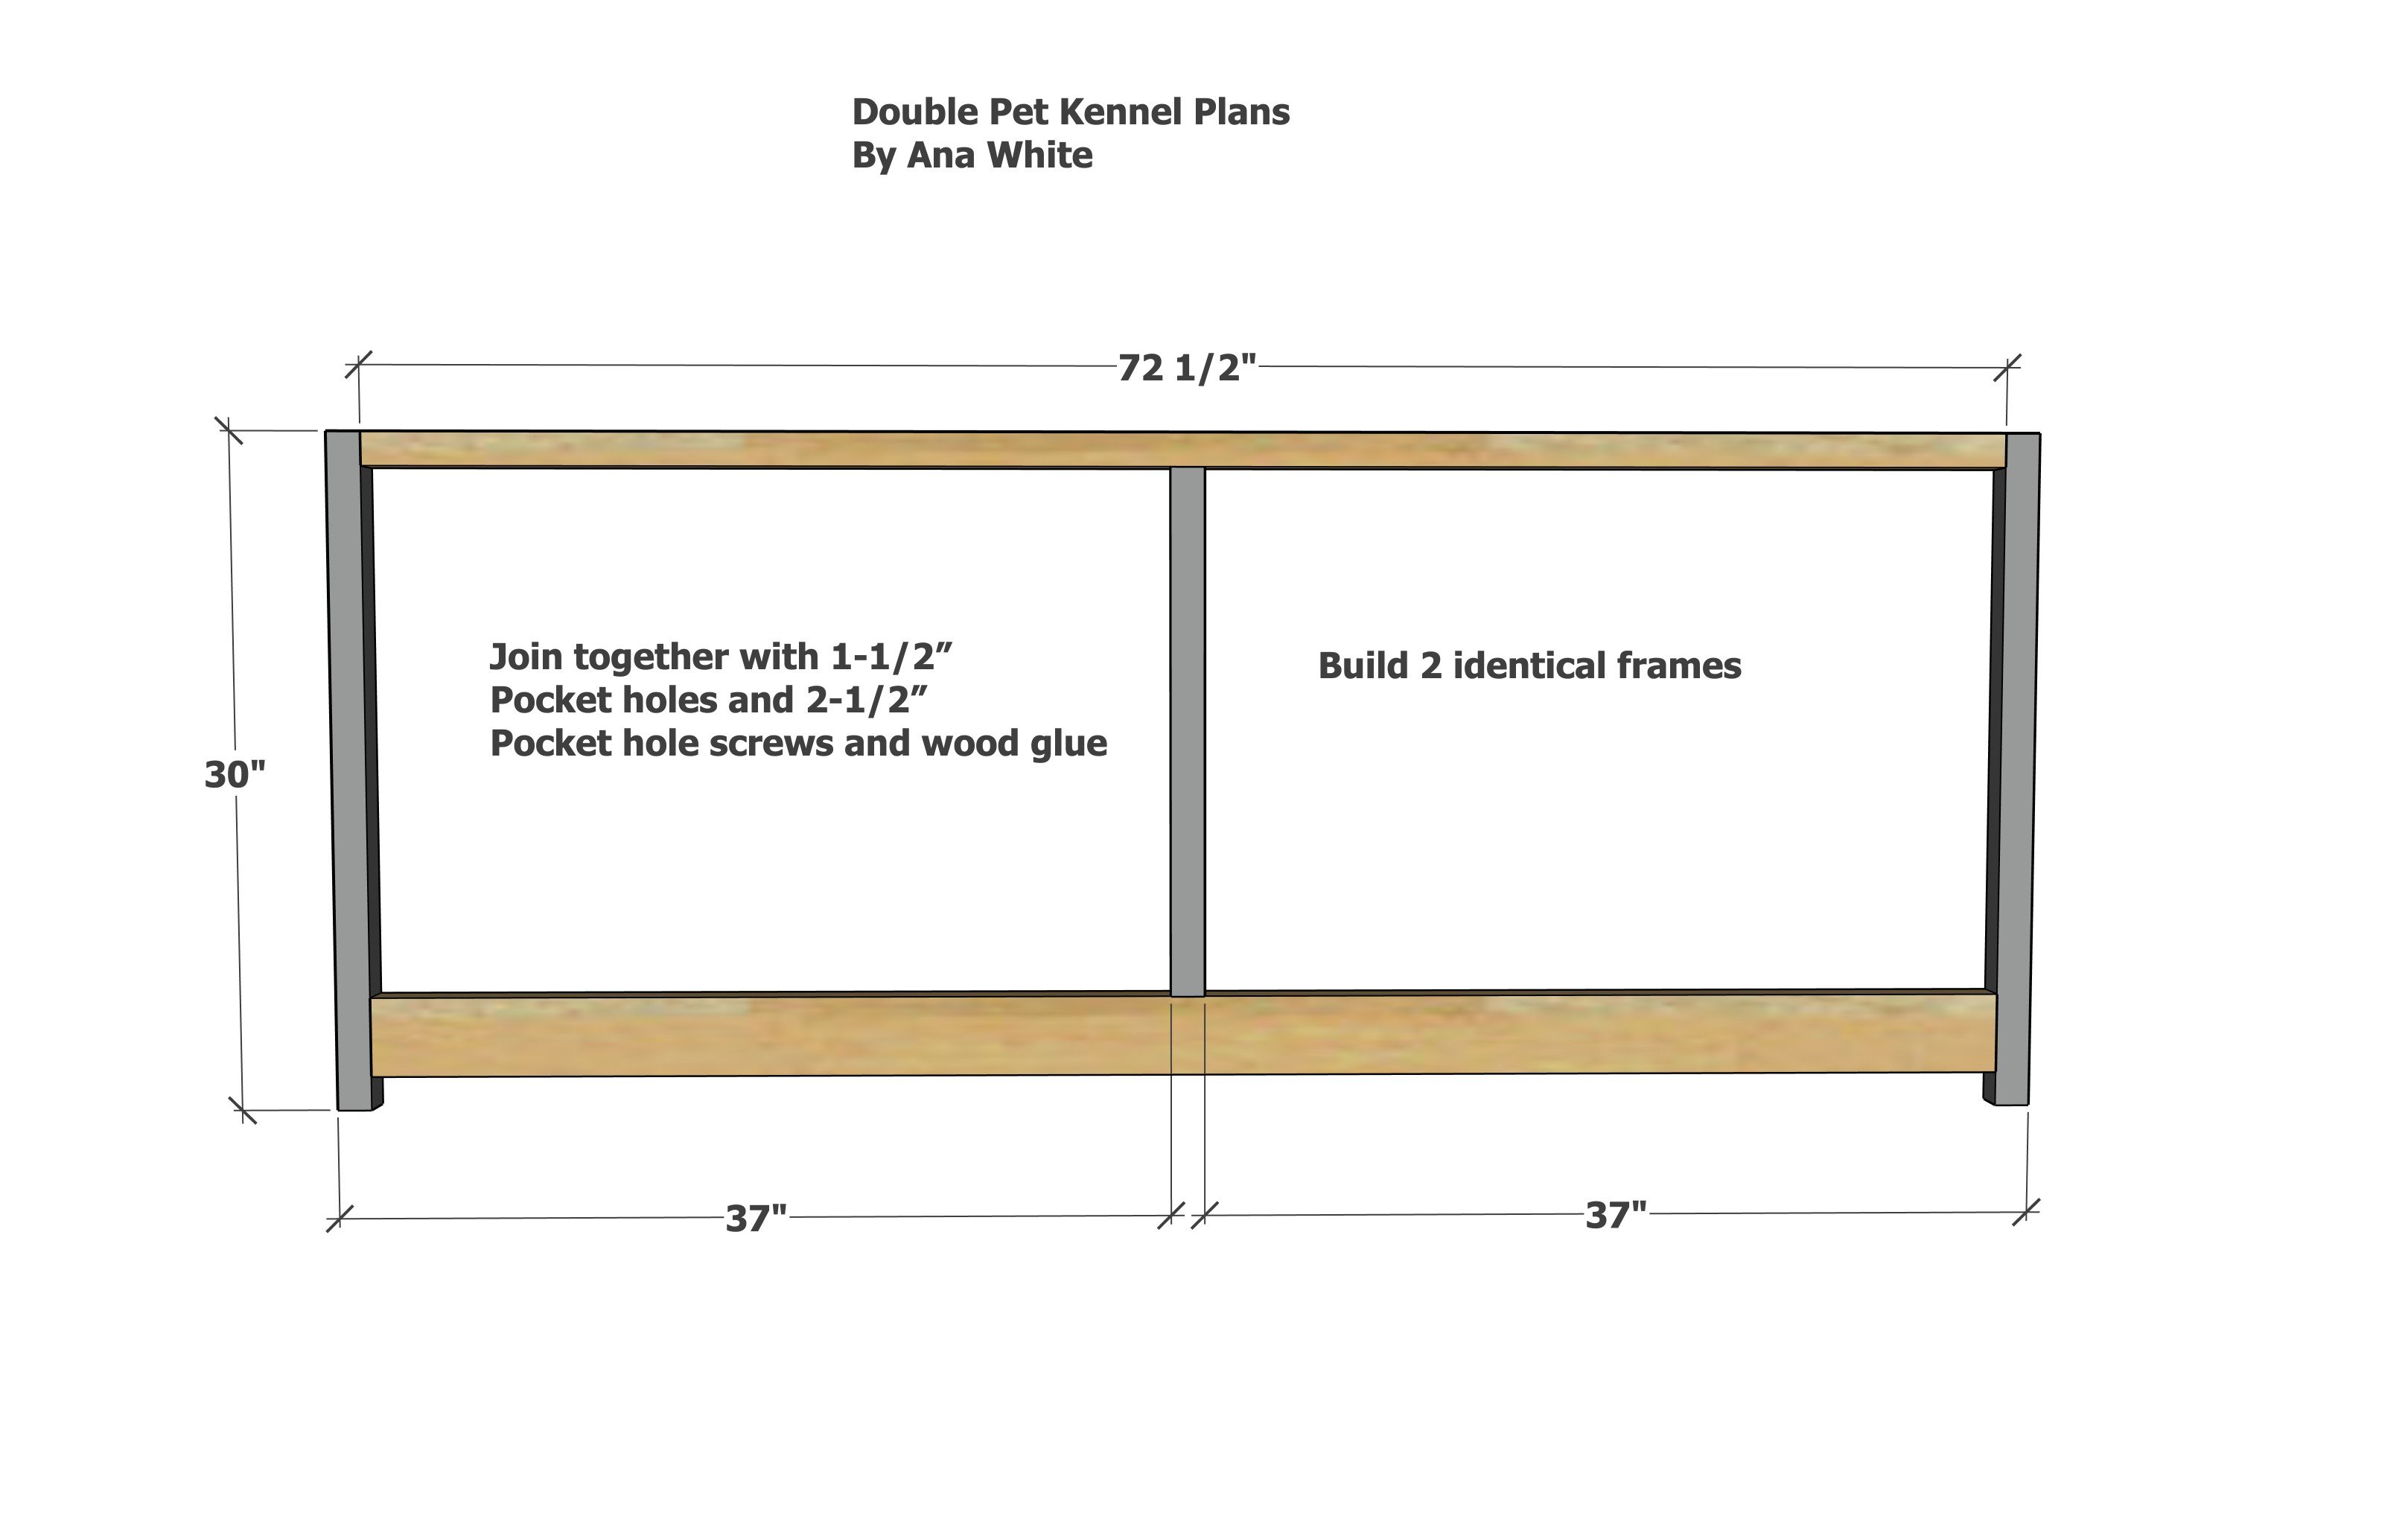
Build two frames identical for the front and back.
Practice a few of the pocket hole joints on scrap wood before beginning. Here is a video with tips on using the pocket hole jig.
Step 2
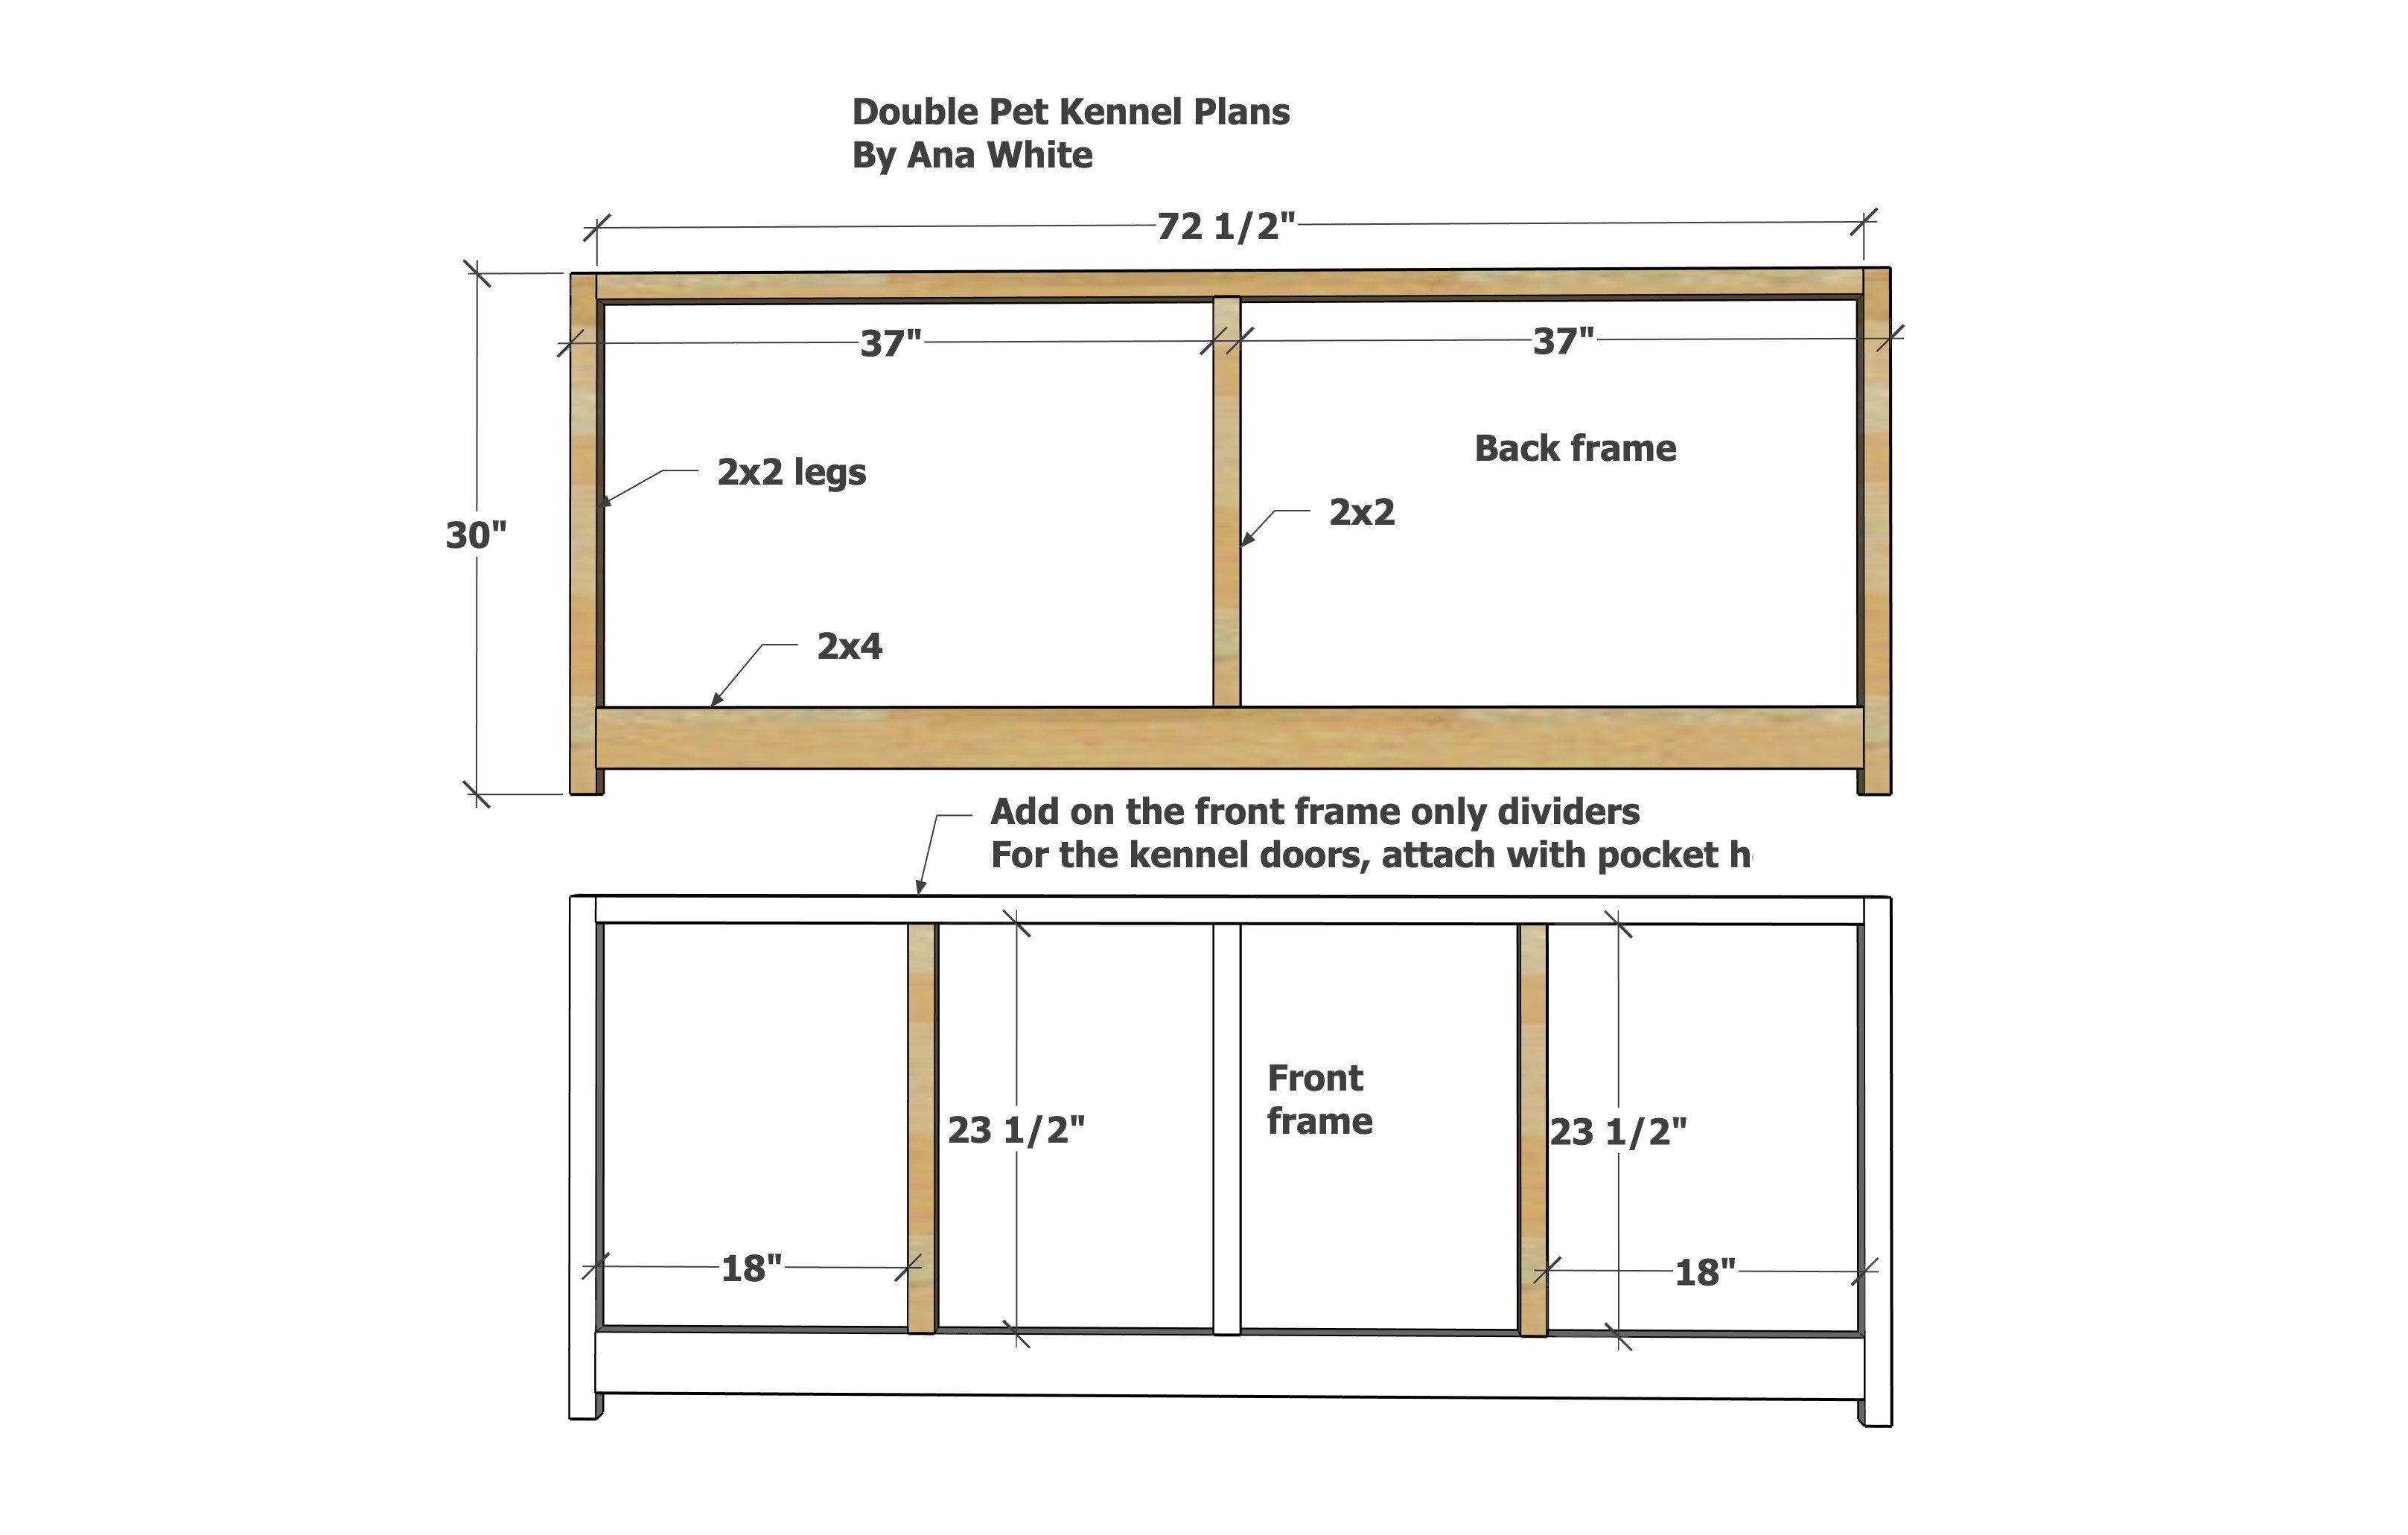
Add the dividers for the front frame as shown.
Step 3
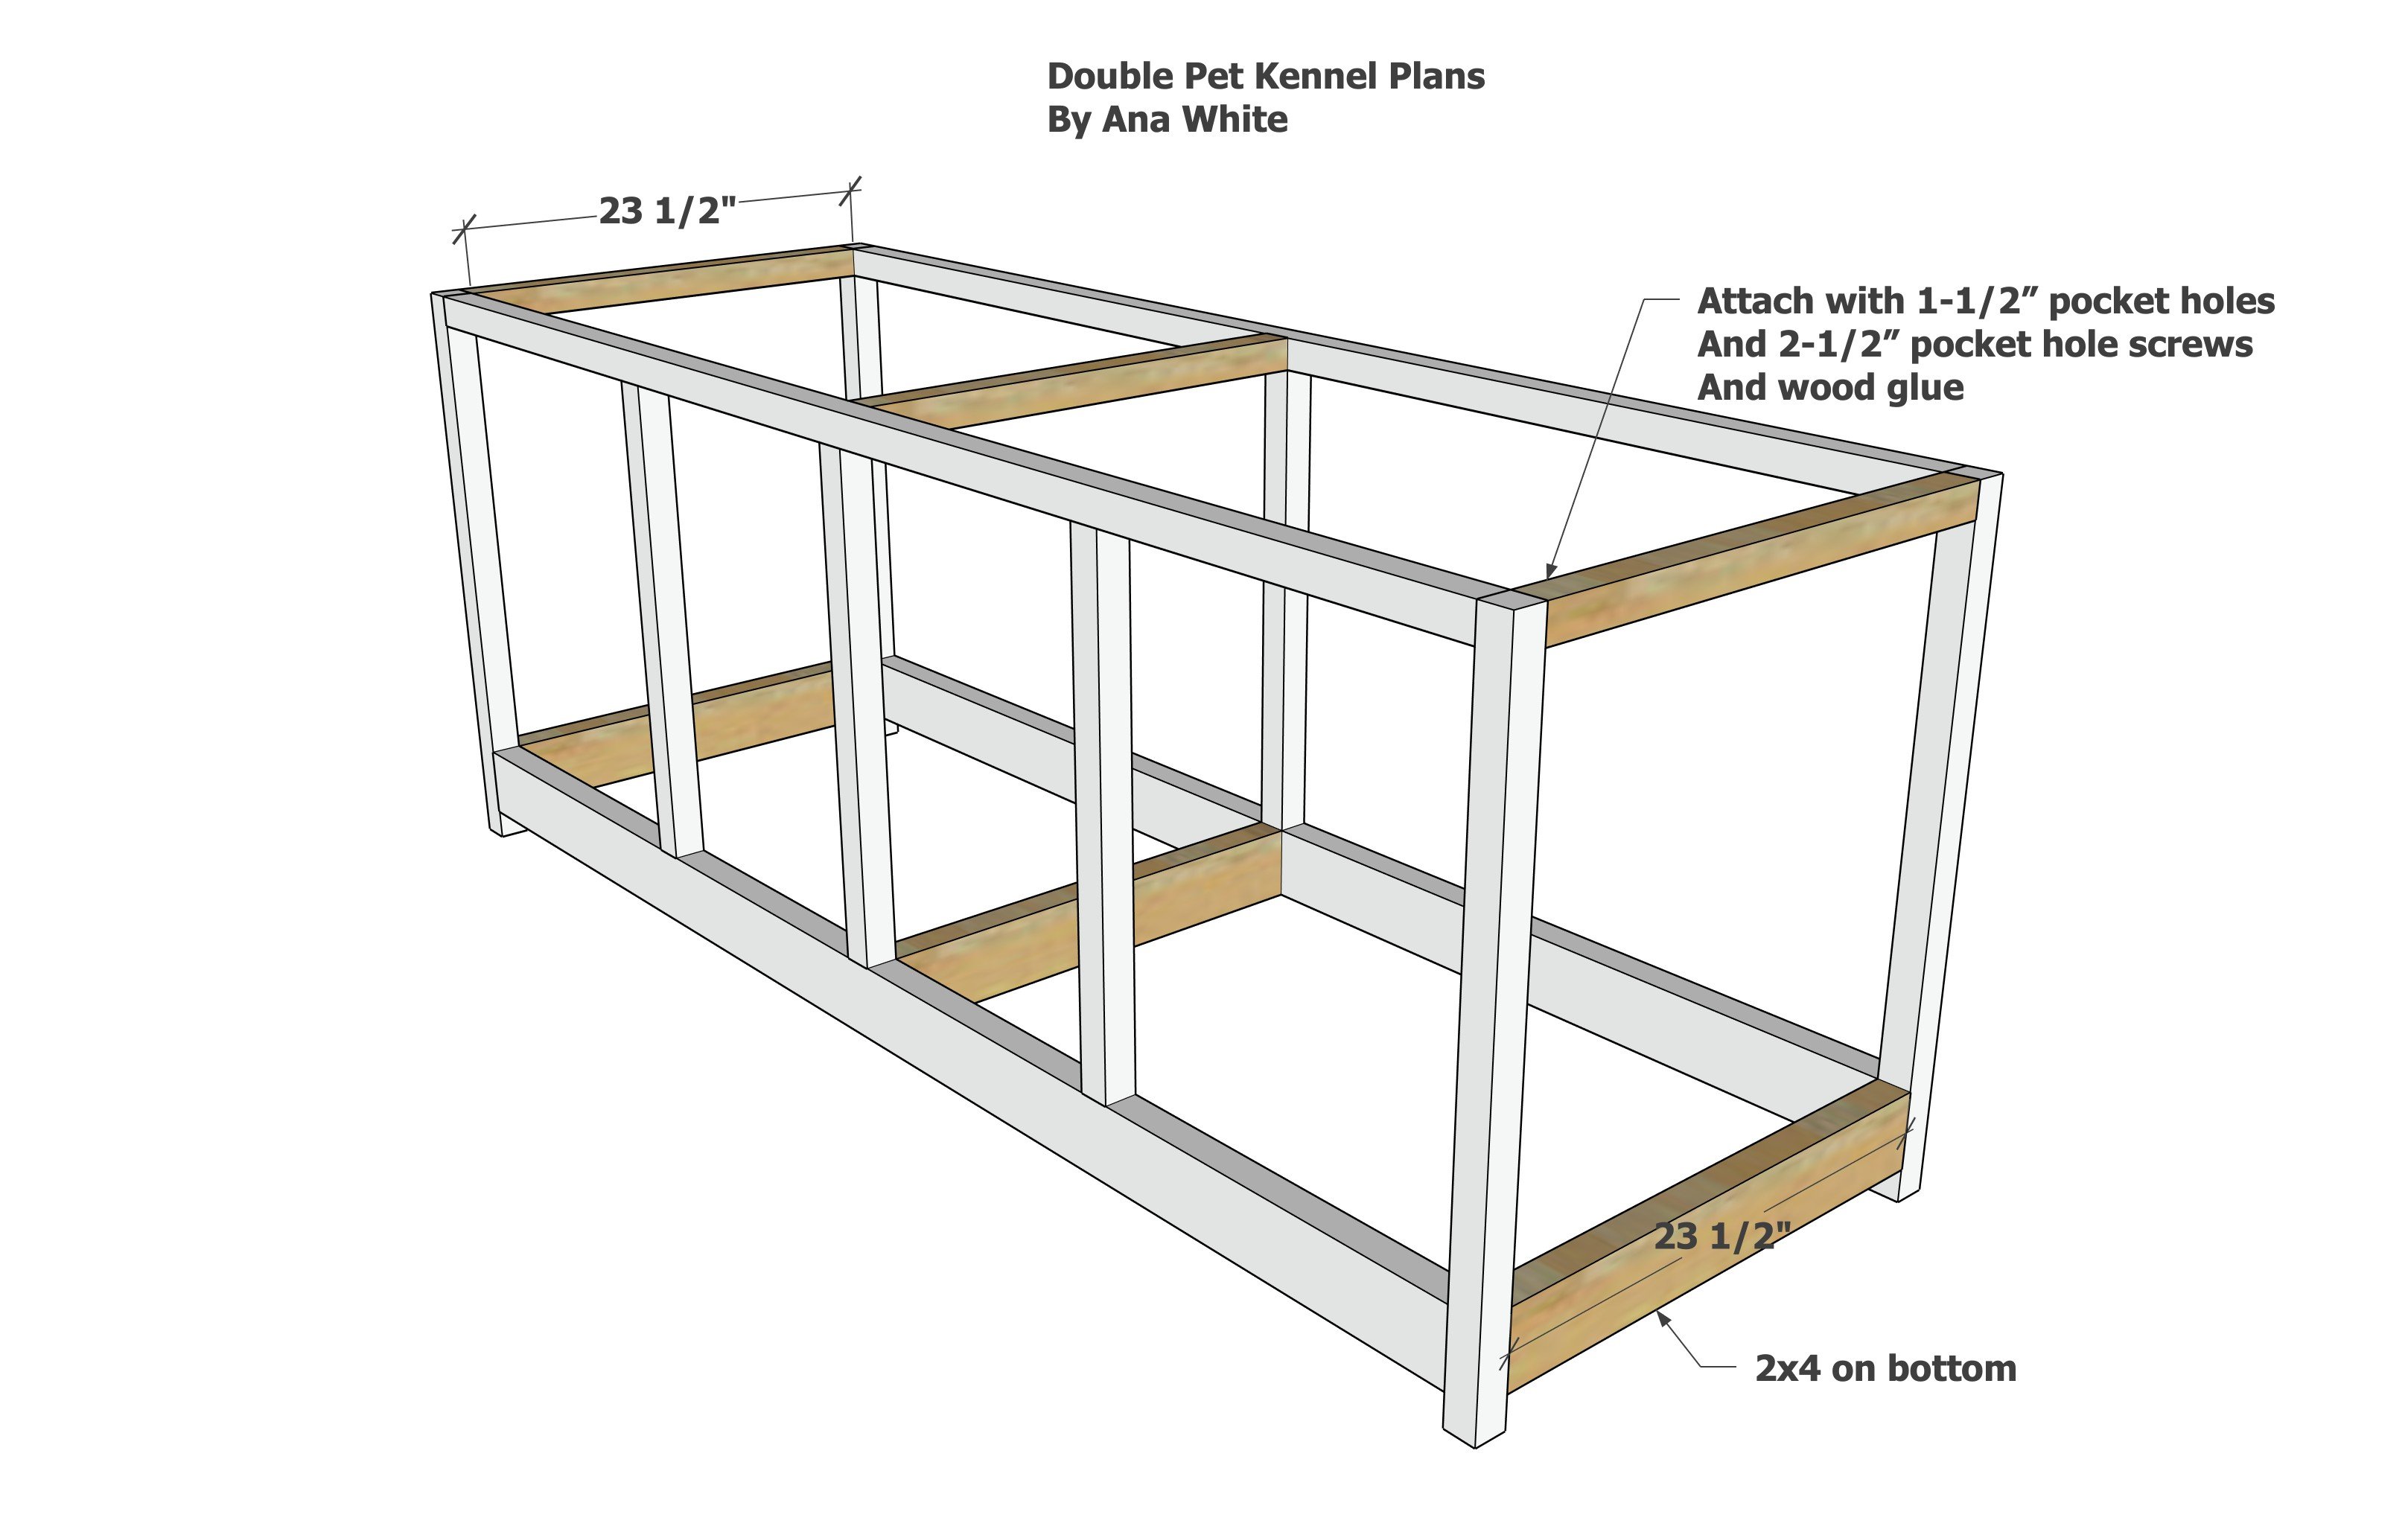
Attach the two frames together.
Step 4
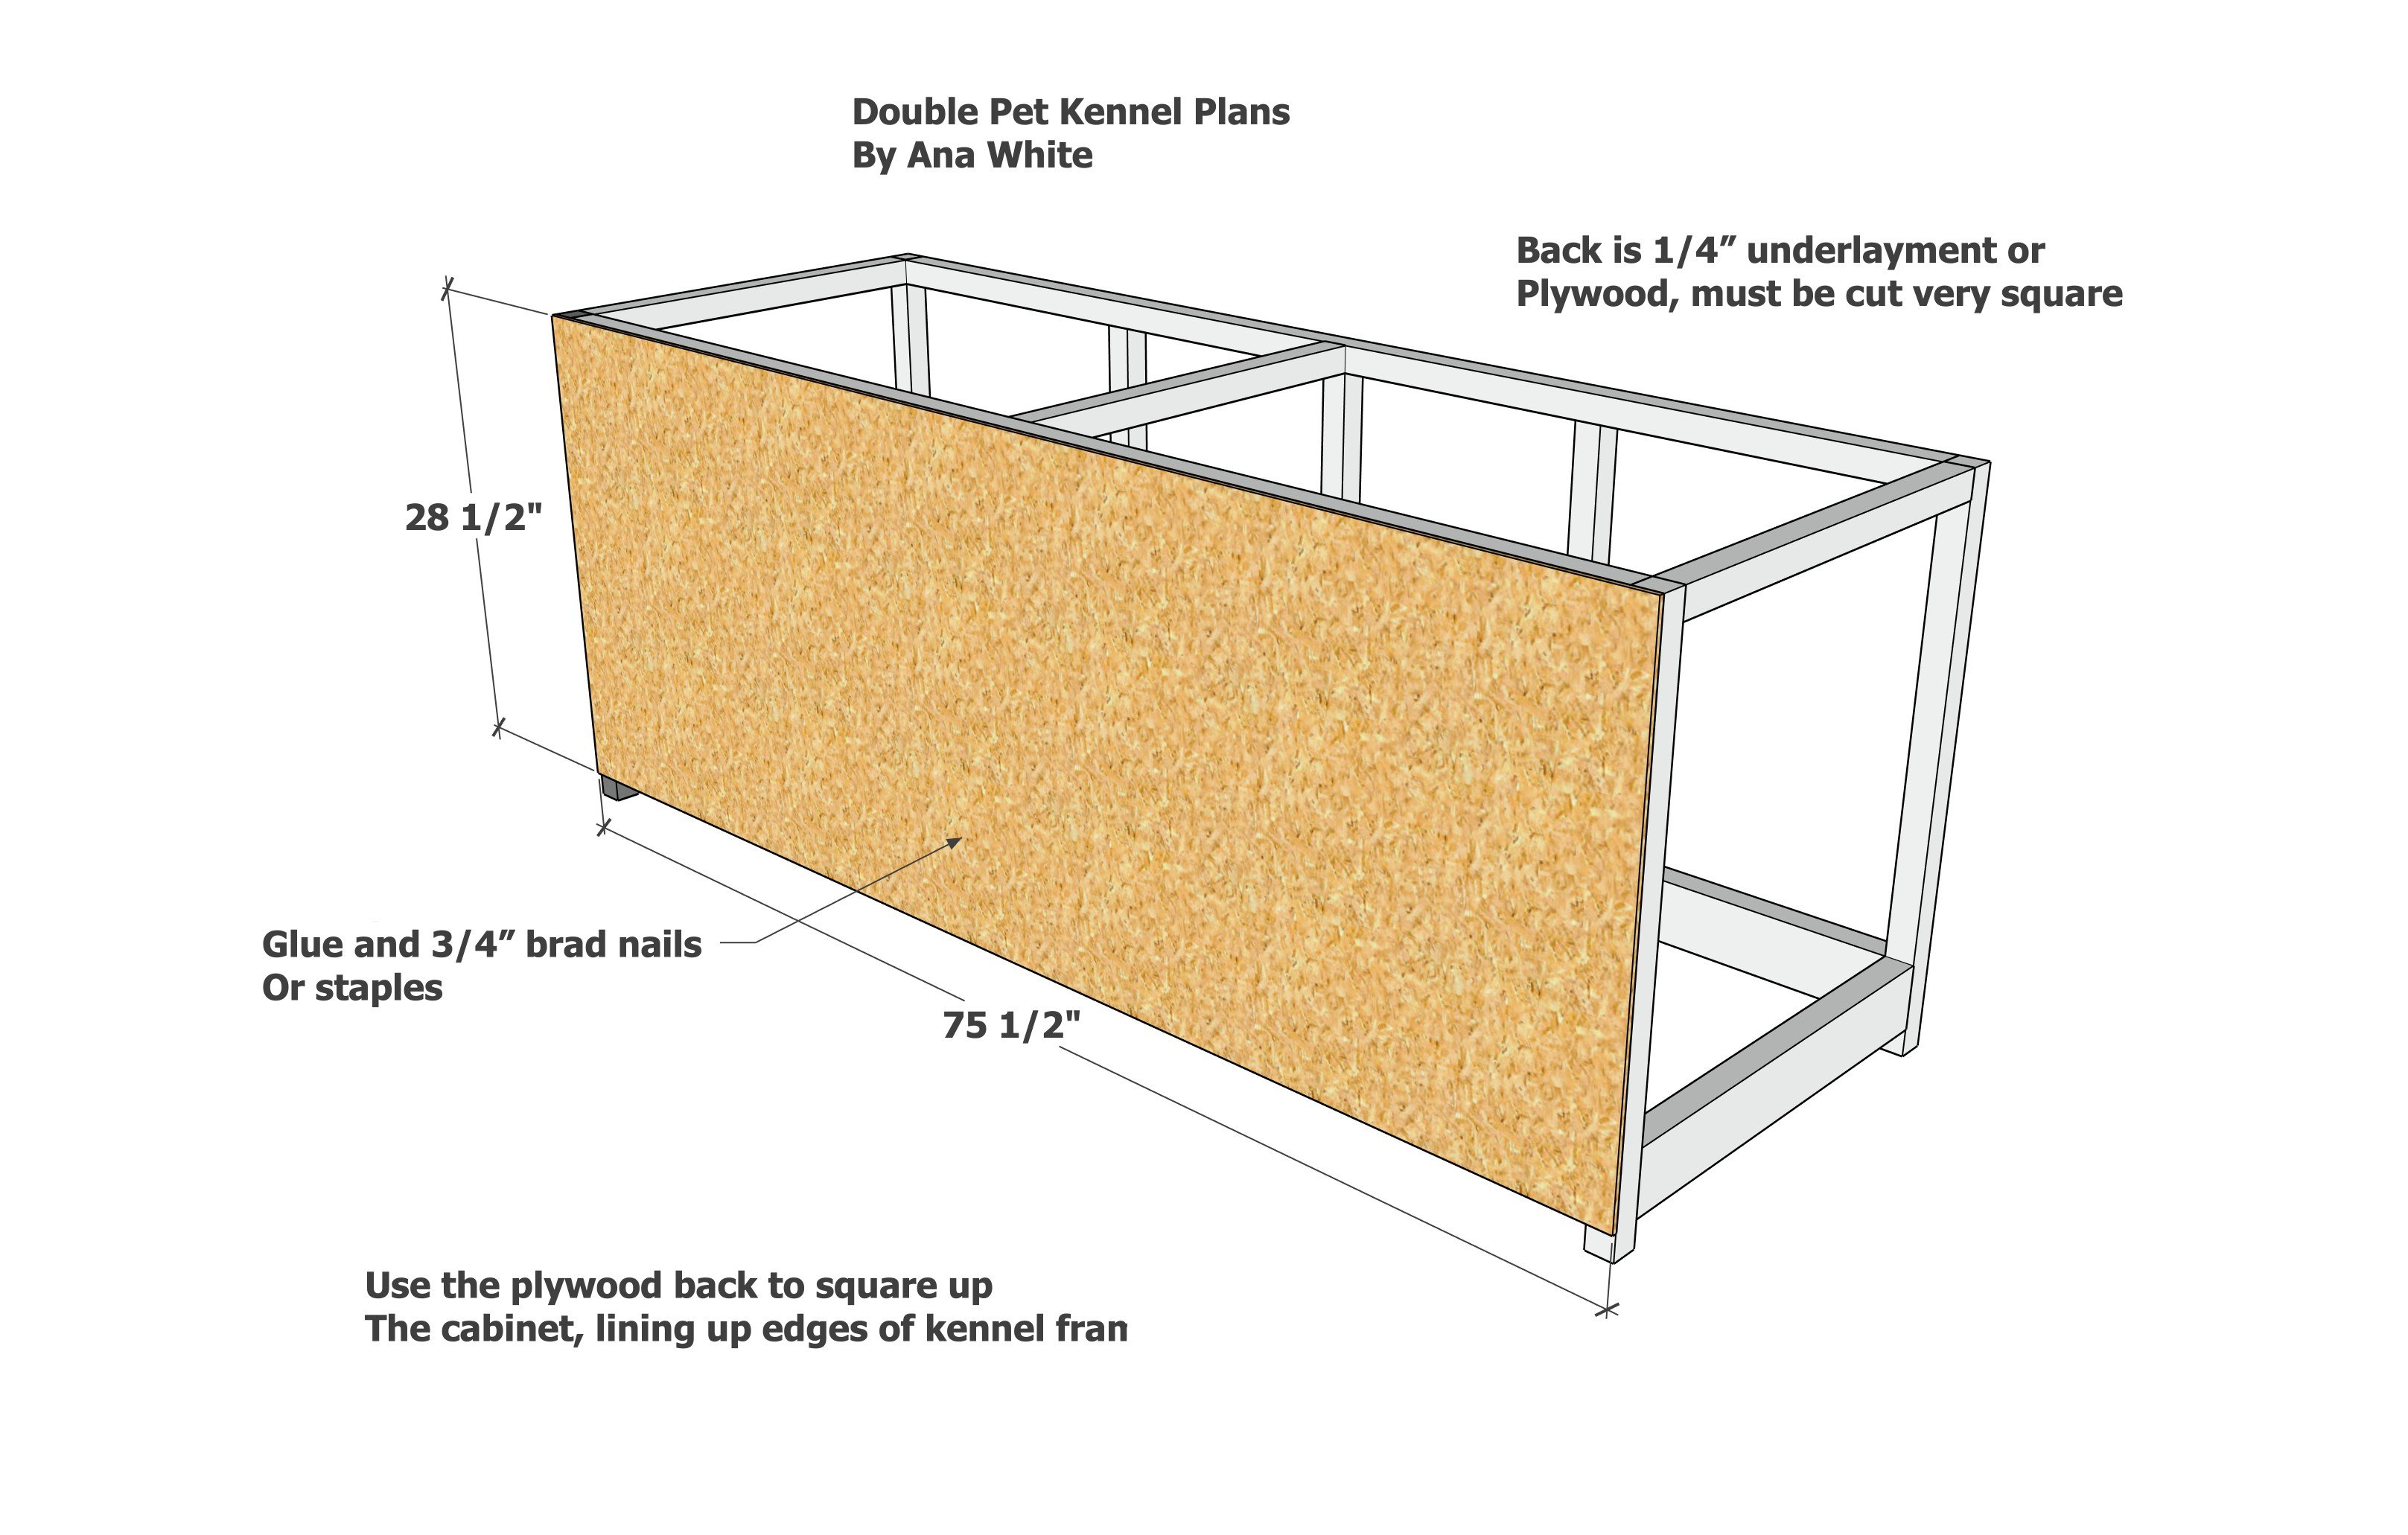
Cut the 1/4" plywood panel for the back with a circular saw.
Here is a video of the jig that I used in the build video:
Step 5
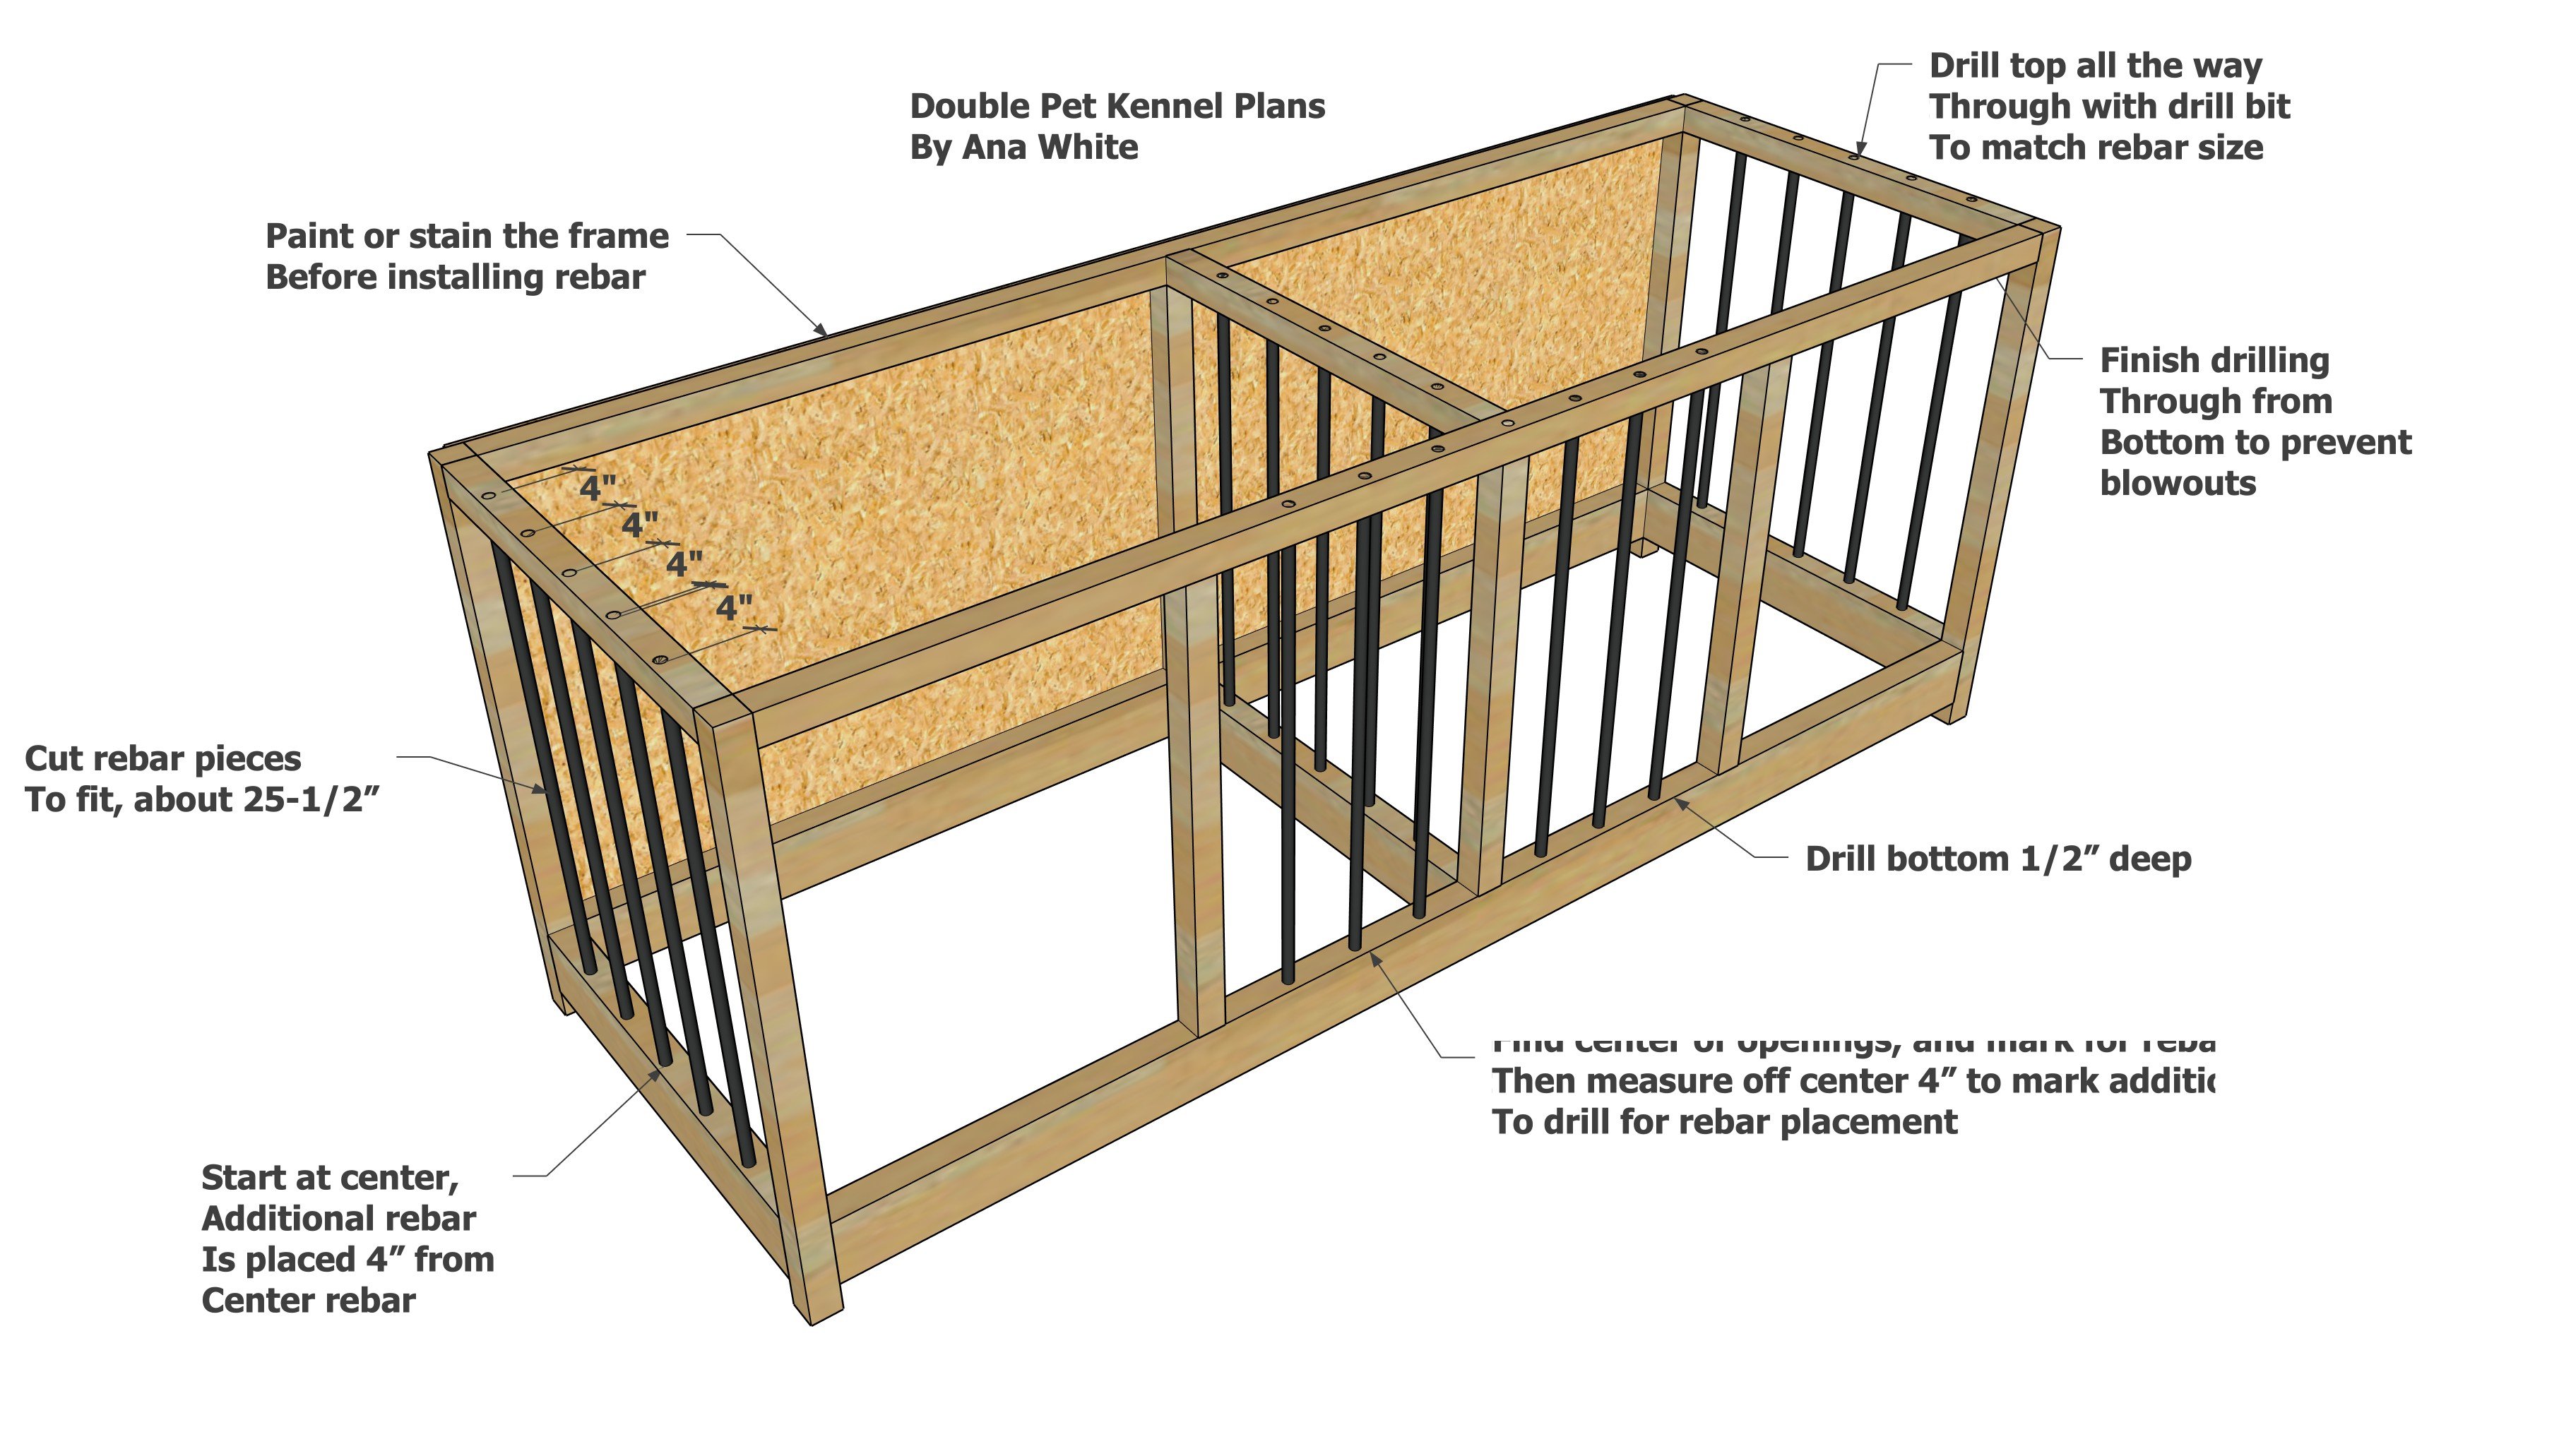
Once the frame is done, we drilled out the frame for rebar.
I drilled through the top, all the way through. On the bottom, we only drilled 1/2" deep. This way the rebar can be threaded through from the top after the frame is painted.
For each opening, I found the center and marked. Then I measured off the center 4" in both directions to add additional rebar.
TIP: We painted the frame before installing the rebar.
Step 6
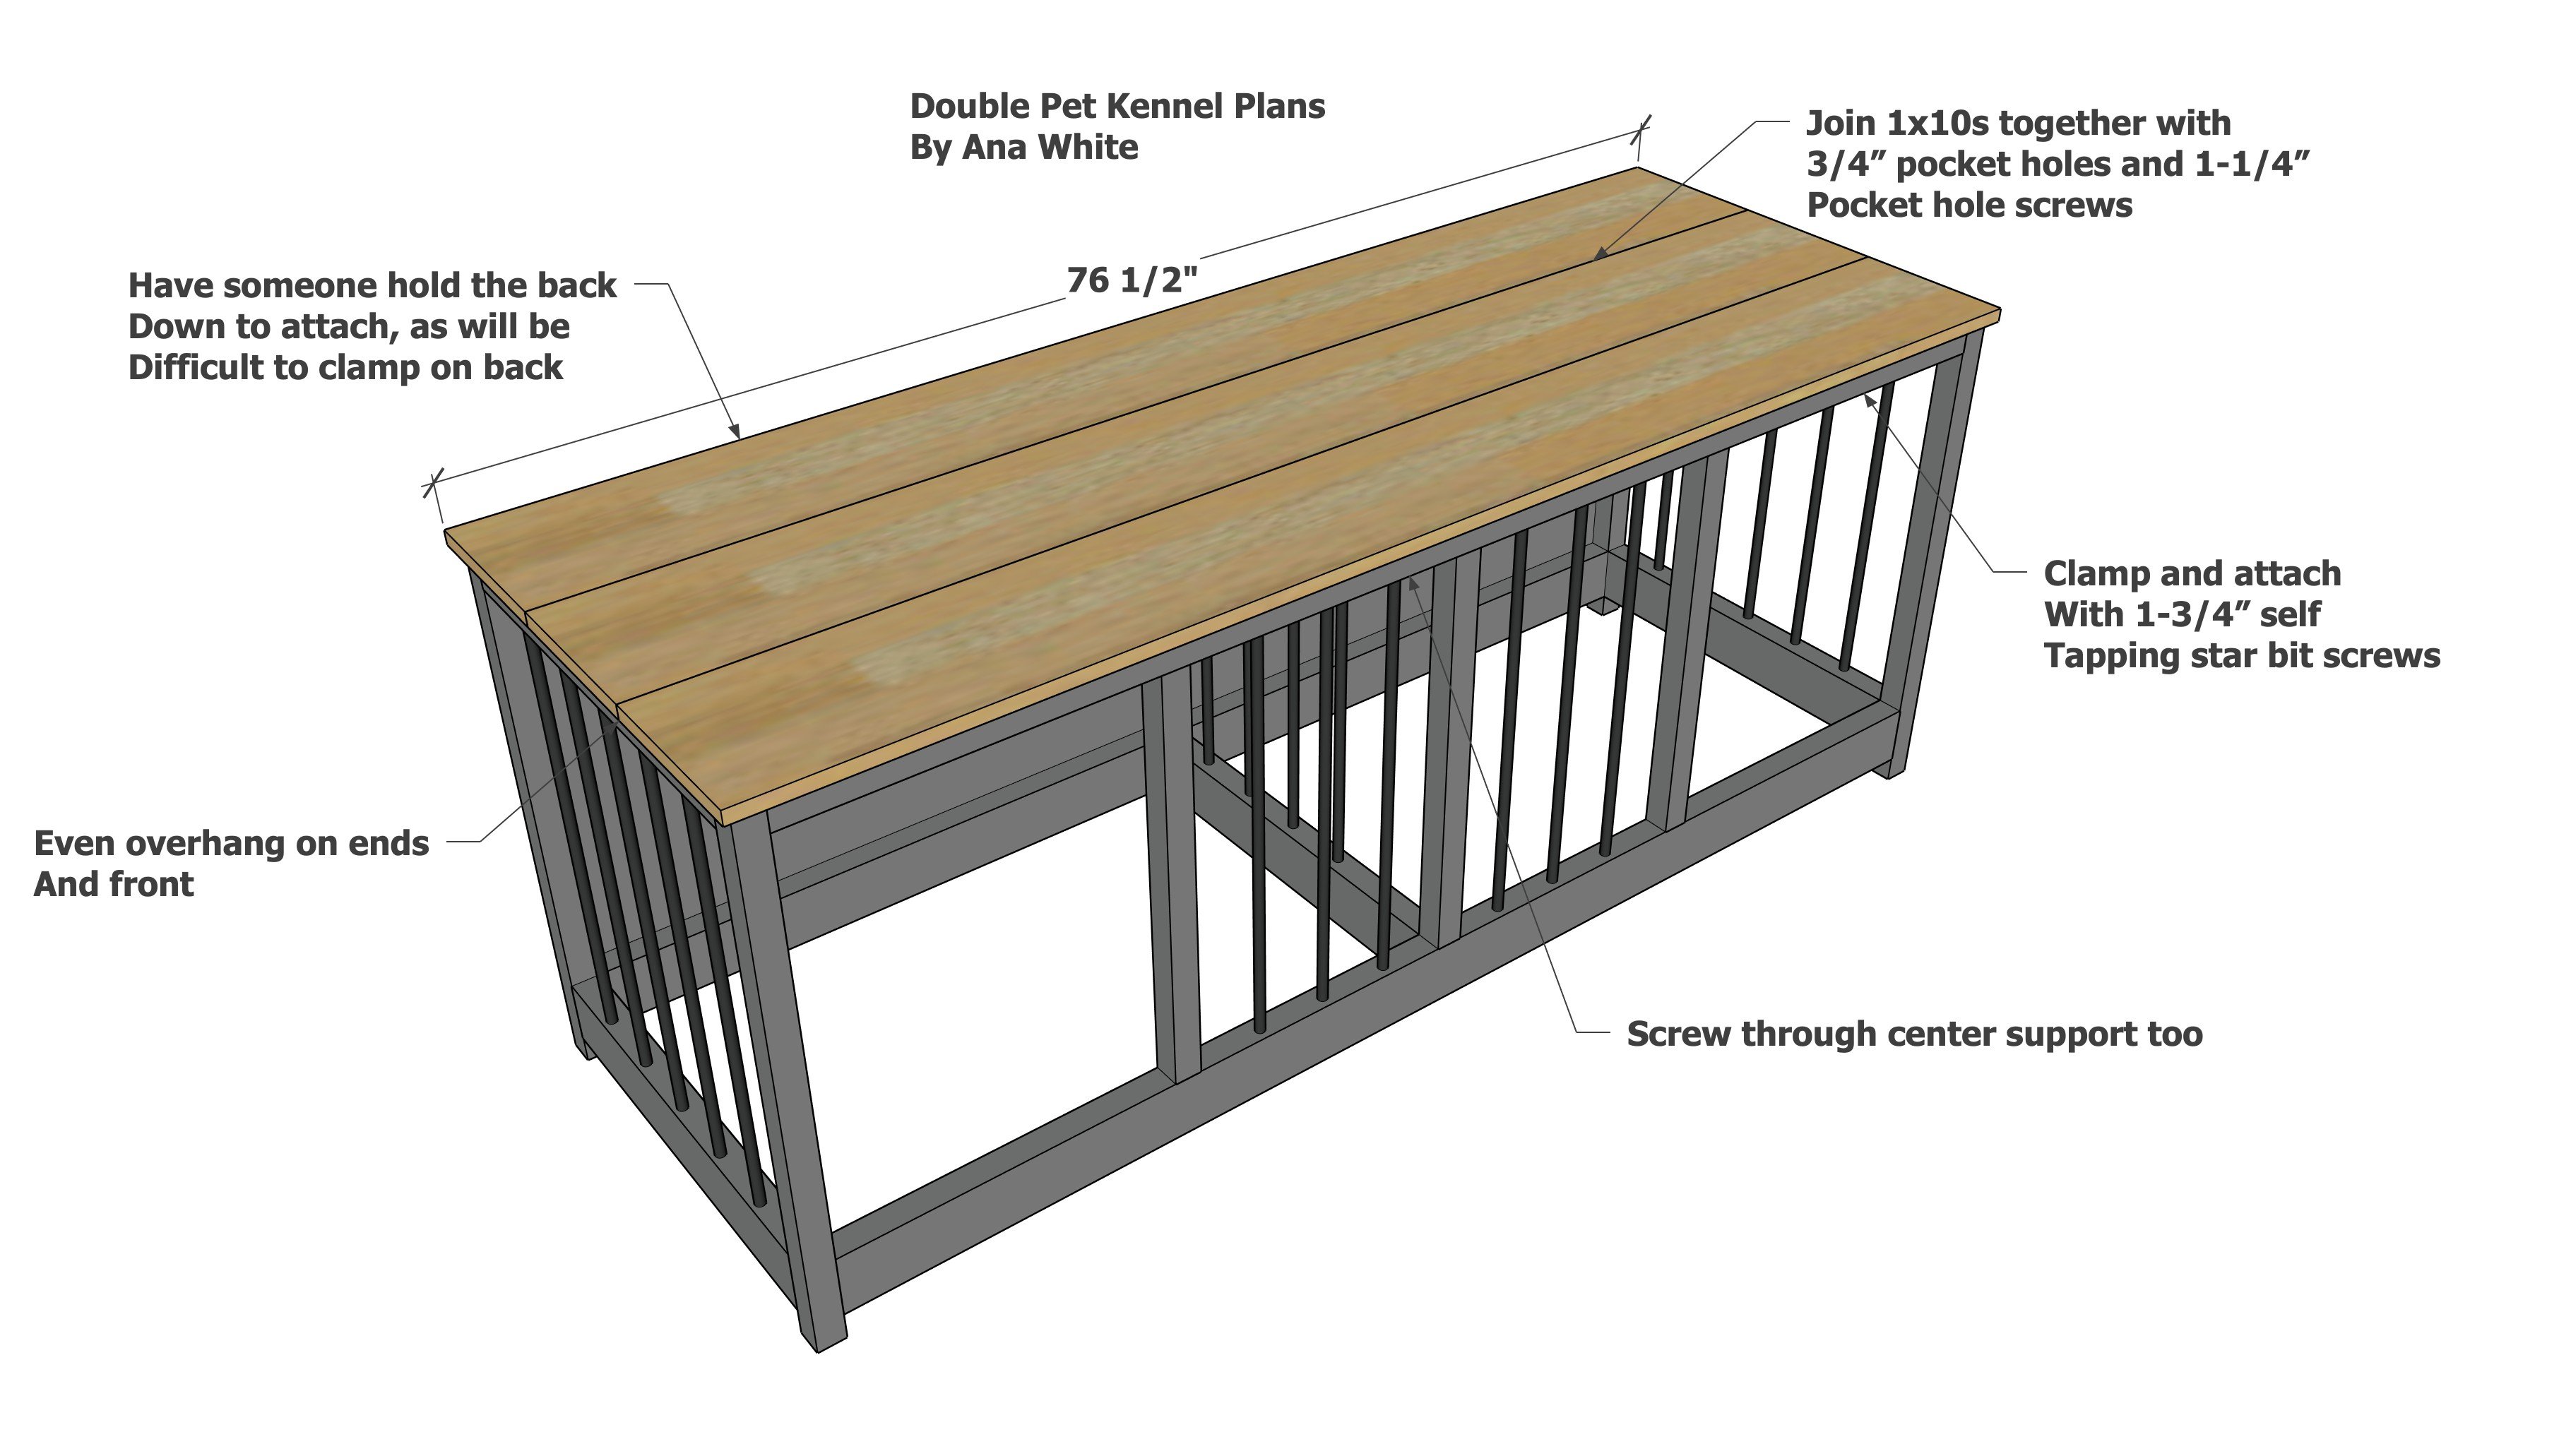
I built the top using 3/4" pocket holes and 1-1/4" pocket hole screws and glue.
I sanded the top well with 120 grit sandpaper, working in the direction of the wood grain.
We stained the top using an aged wood accelerator, but that looked too purple, so we added a golden oak stain on top.
The top is attach with 1-3/4" self tapping screws.
Make sure the overhangs are even as you attach, as this will square up the project.
Step 7
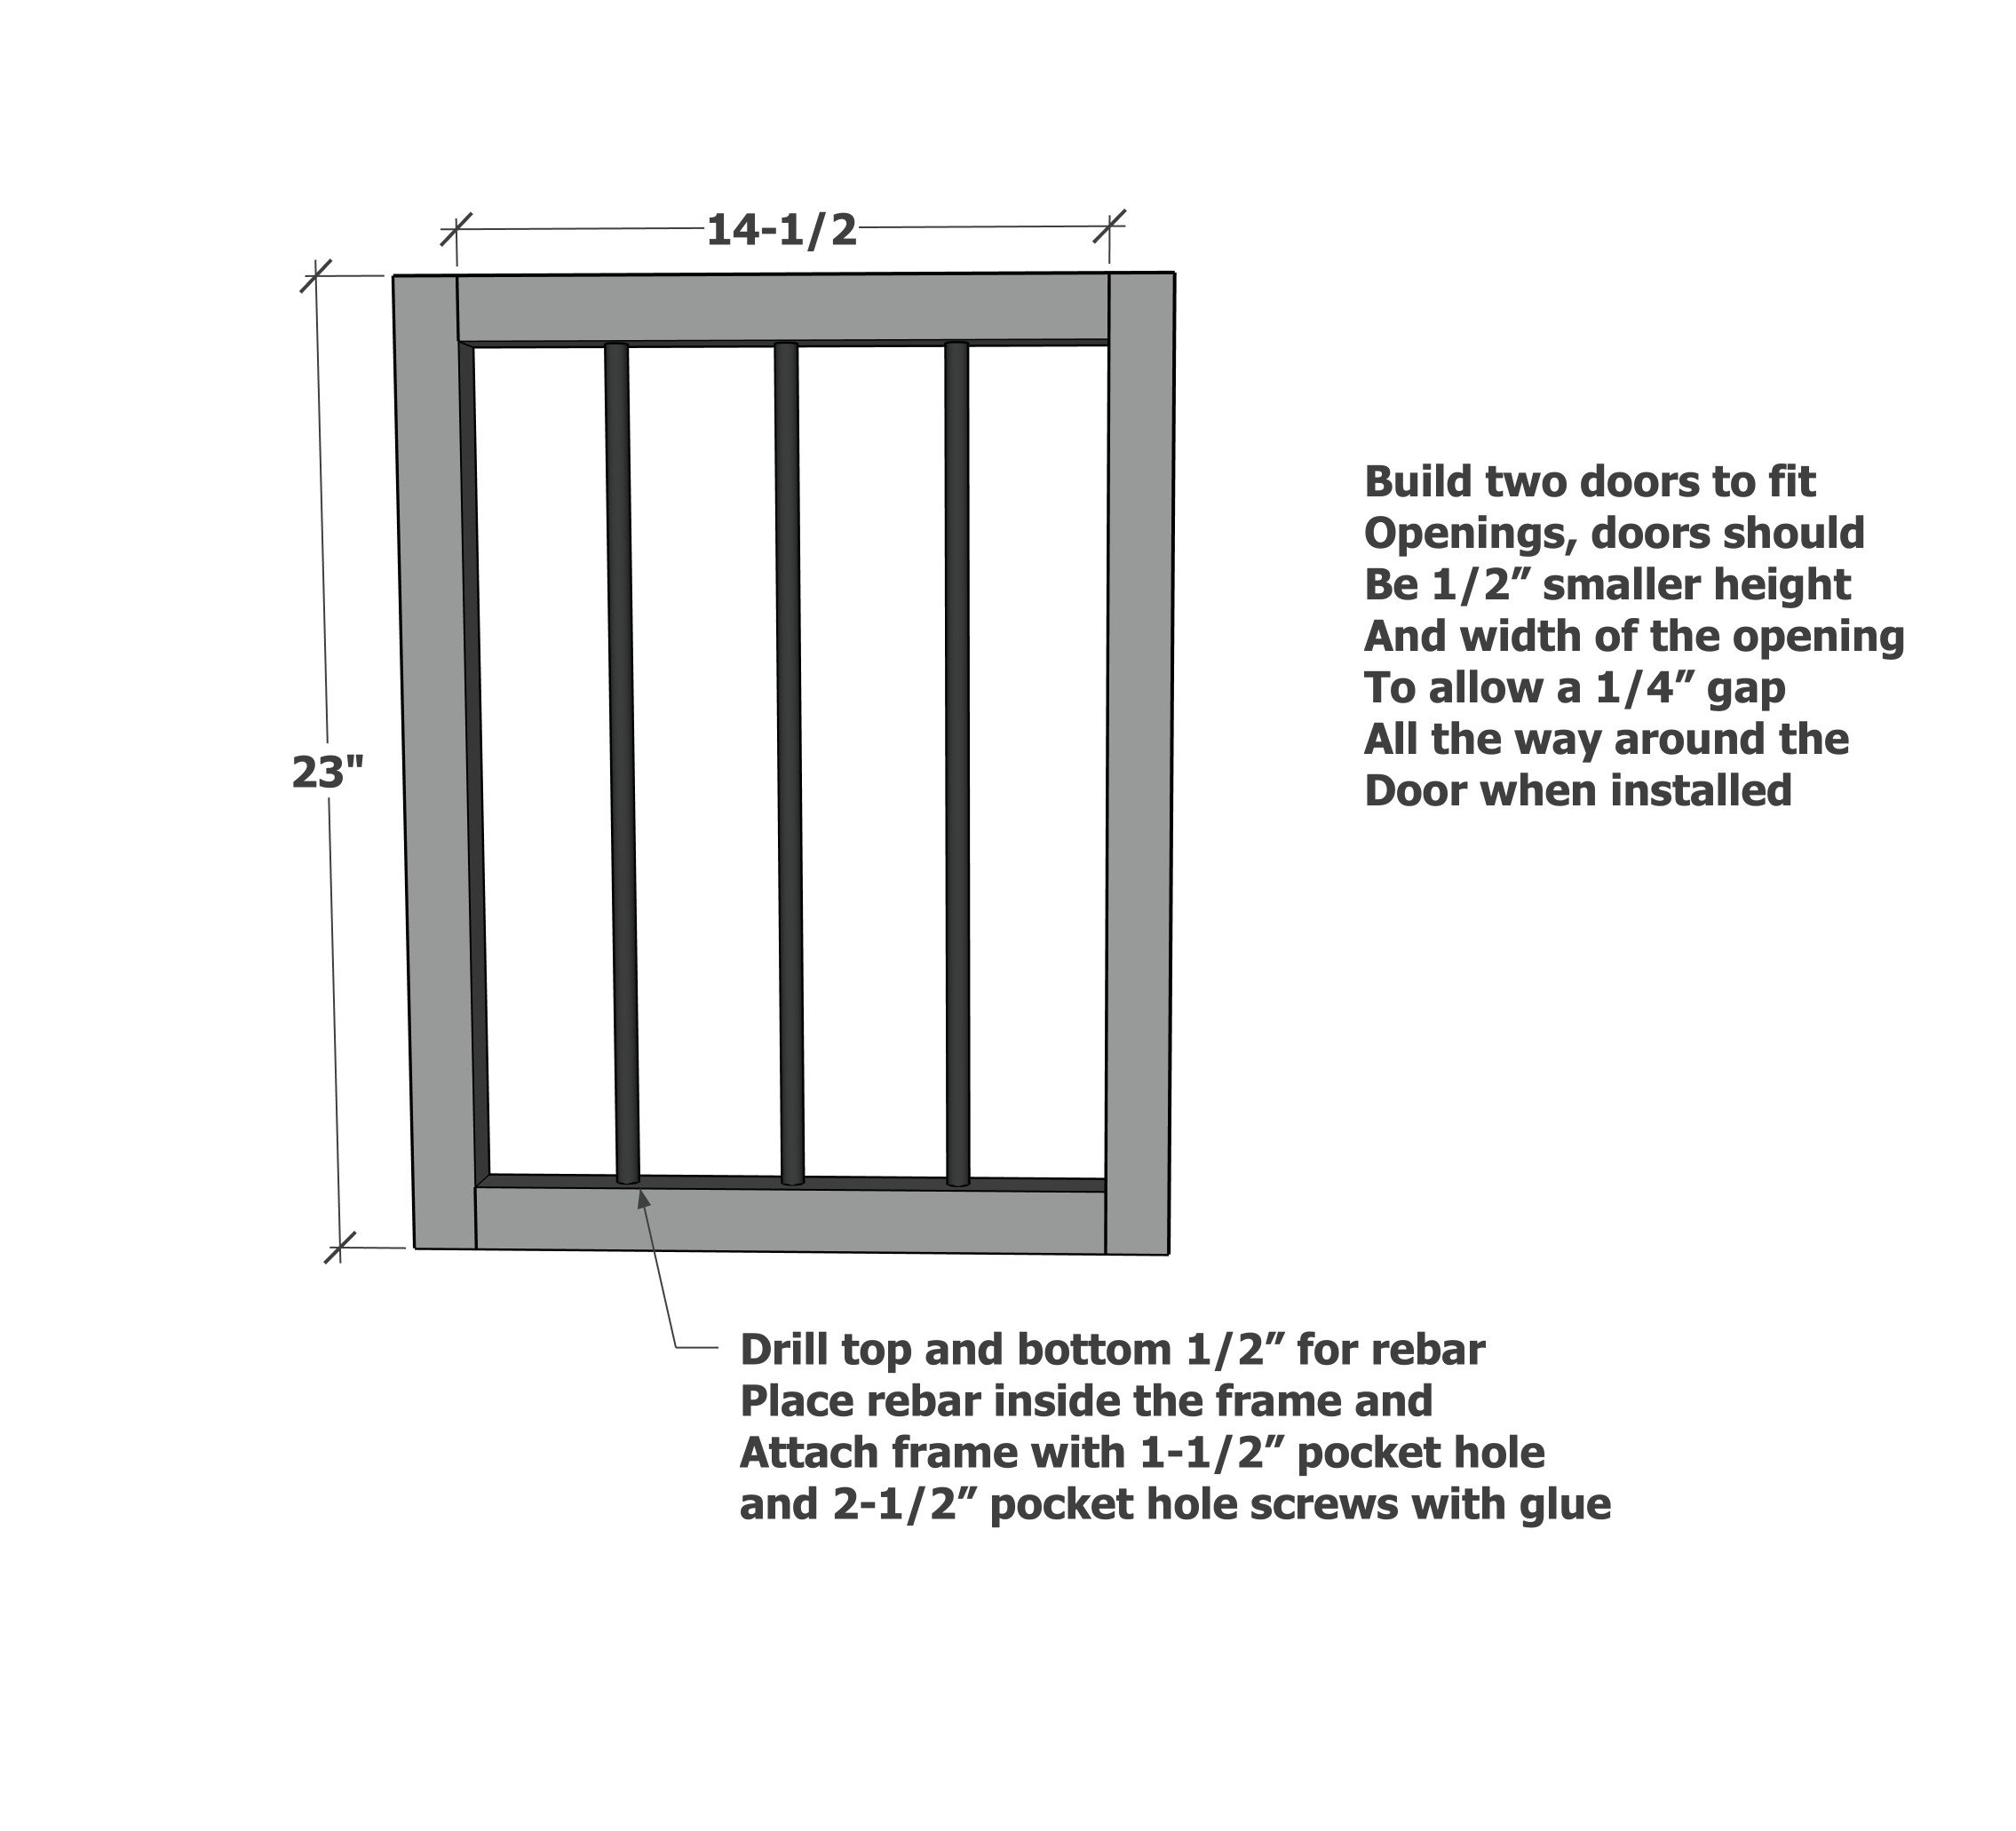
The doors should be built to fit the openings, planning for a 1/4" gap around the door frame.
The rebar has to be placed in the door frame before final assembly. We taped the rebar off to paint the door frames.
Use glue to assemble the door frame.
Try to pick the straightest 2x2 pieces for the doors, as this is the most likely part to warp on you.
Step 8
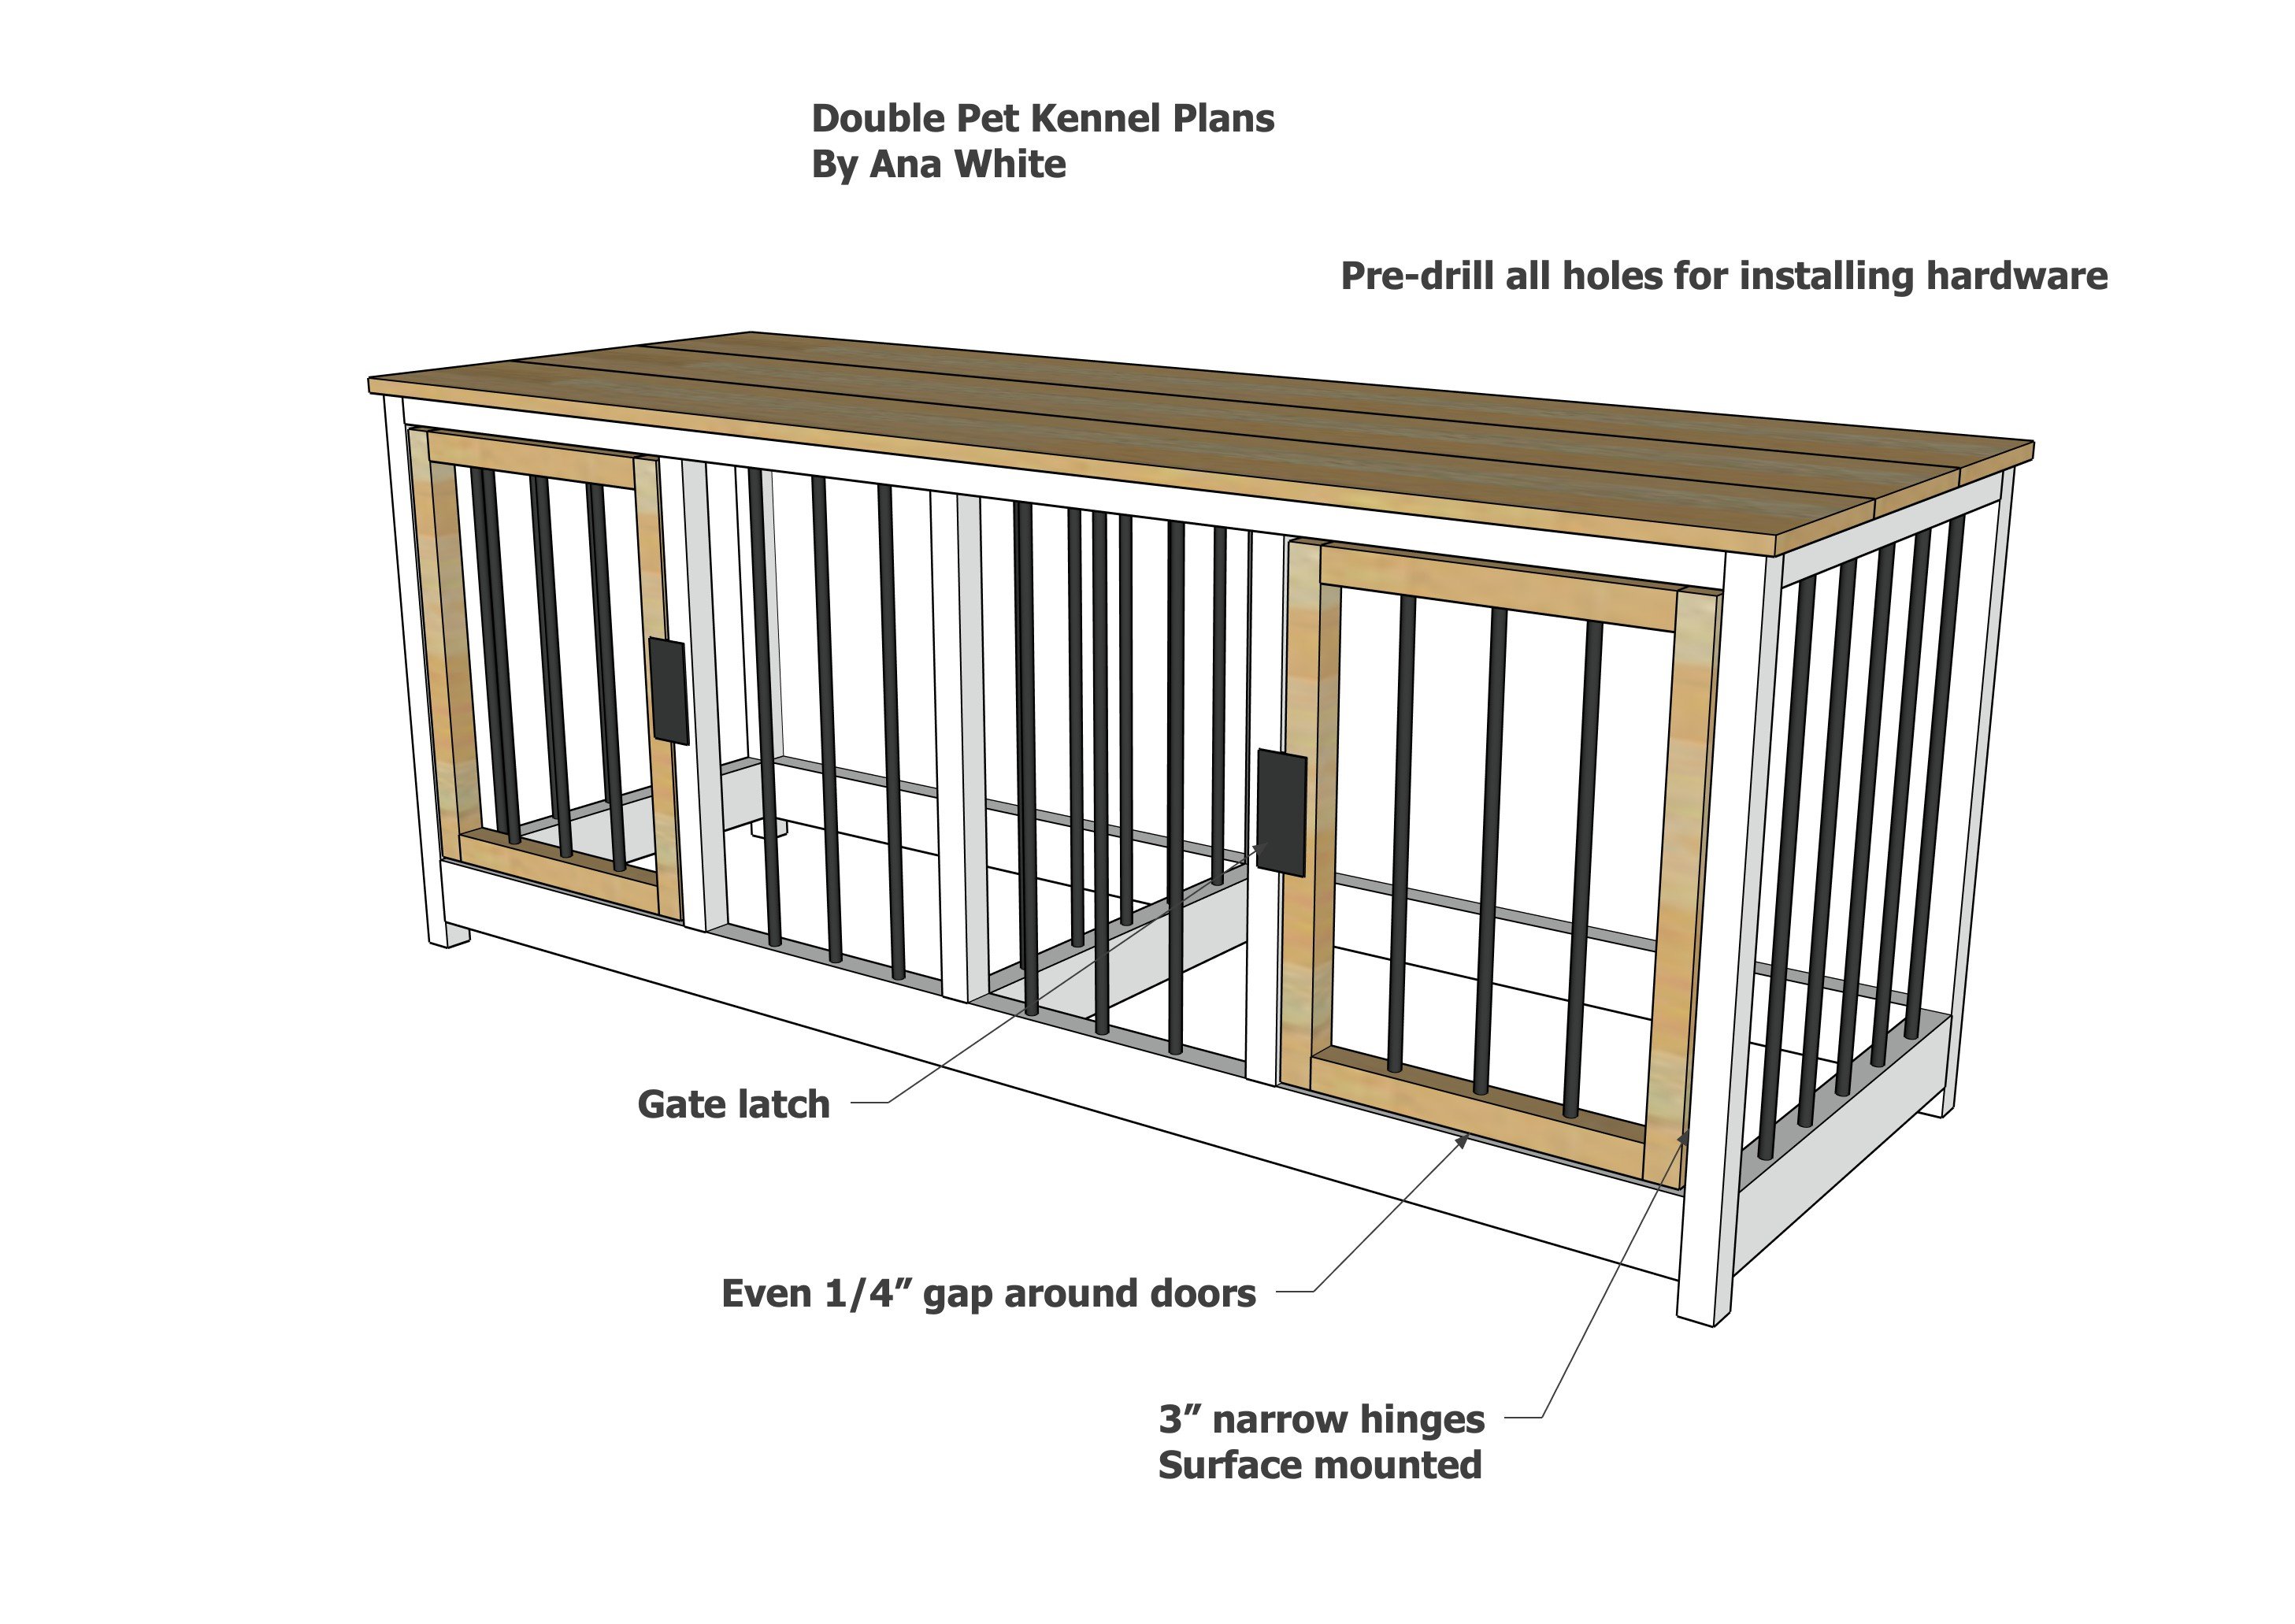
Install the doors in the opening with an even gap around the sides. Predrill all holes to prevent wood from splitting.