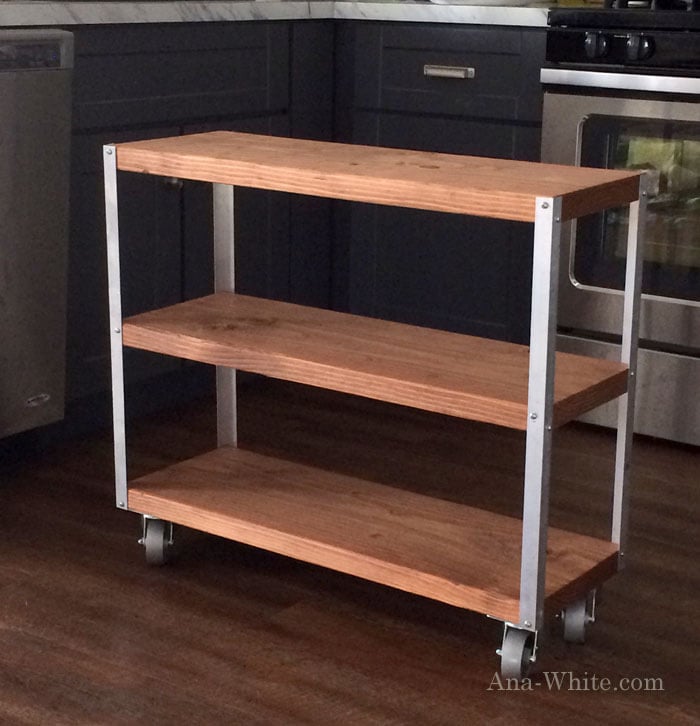


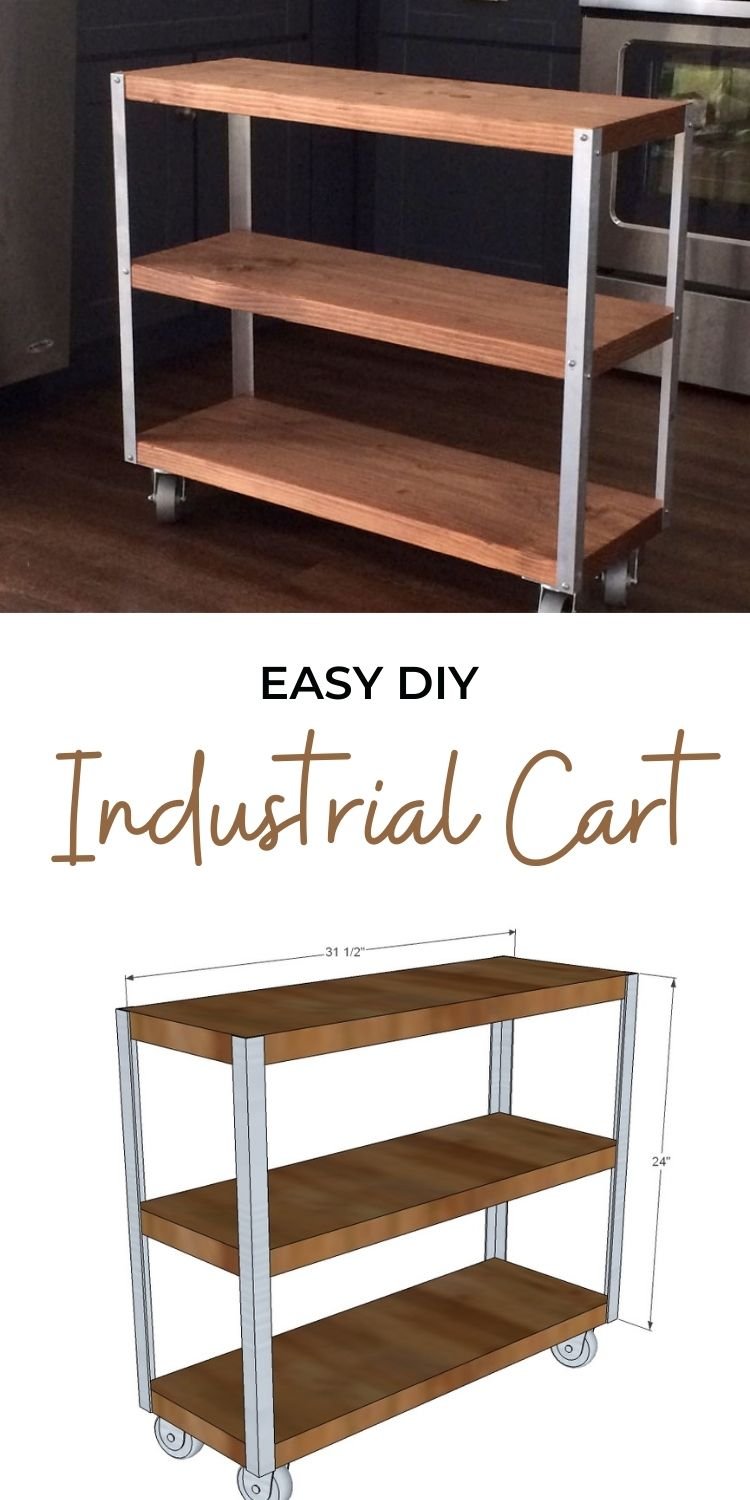
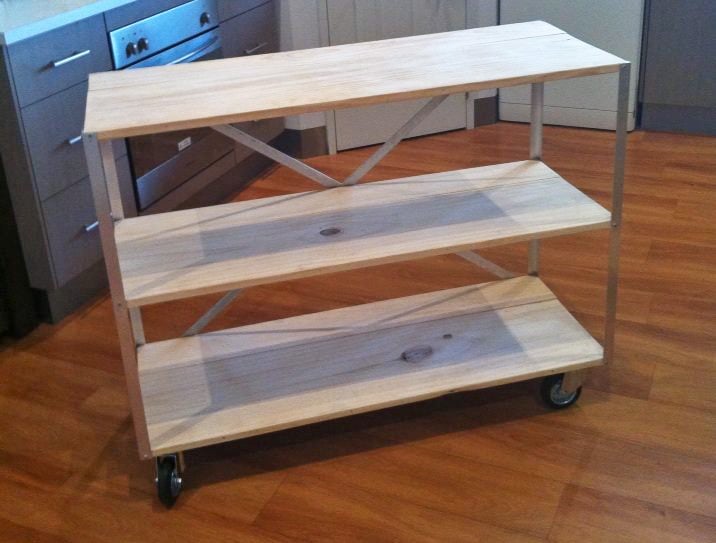
Easiest ever DIY bookshelf with modern industrial styling! Free step by step plans from ana-white.com
This is a fun simple project with big impact! I love the mix of wood and metal.
Oh did I mention it only took 2 hours from start to finish, one board, one stick of “angle aluminum” and some screws!
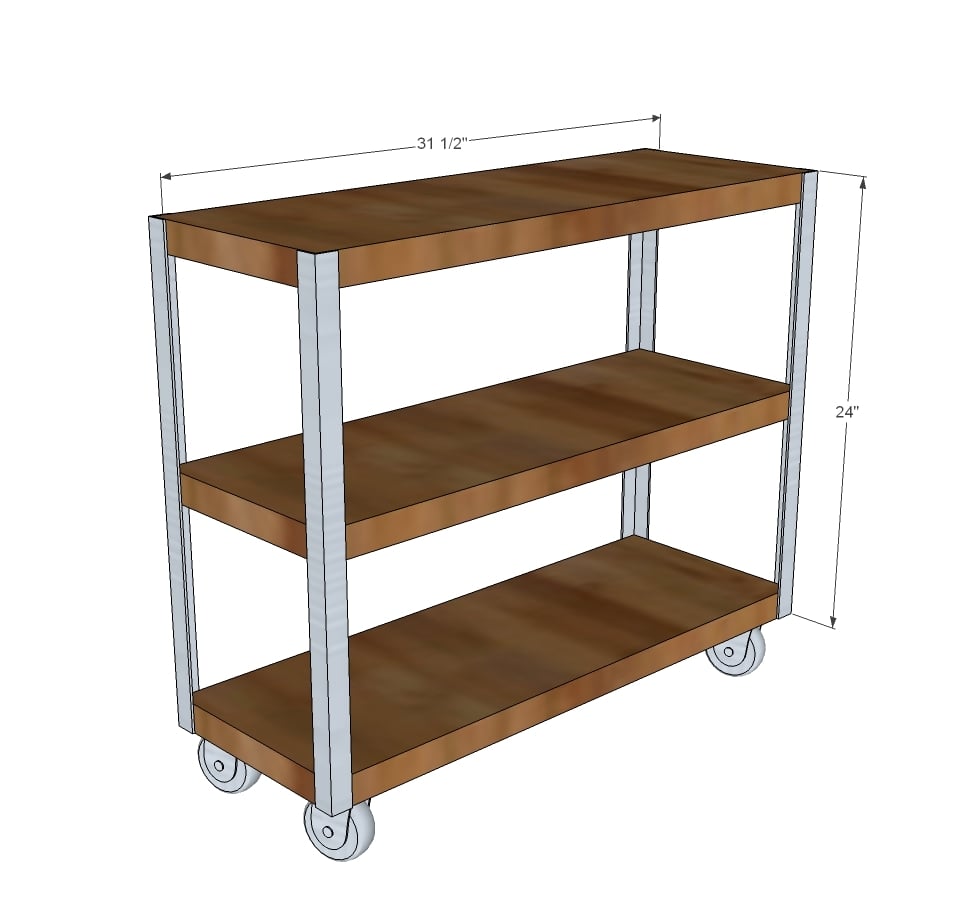
Well, it actually goes finish first on this one! The first step was to cut down my 2 x 12 into 3 pieces at 31 1/2” (so I could get three shelves out of one 8 foot long board). I gave them a good sanding and stained them.

I used Carrington by RustOleum - it's got a slight reddish tint, very pretty!
Now for the aluminum angle. You can find it at most any hardware store, and it's pretty inexpensive -
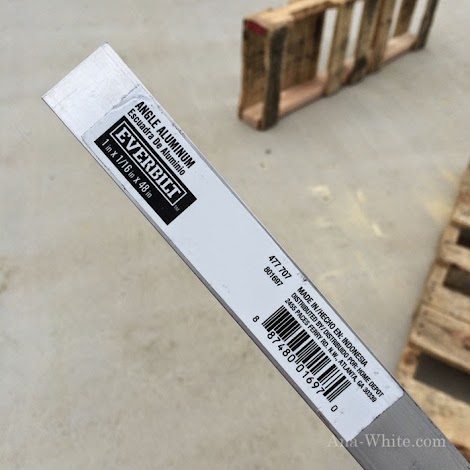
Aluminum angle comes in precut sizes, but mine were 48" in length, so I decided to cut them in half.
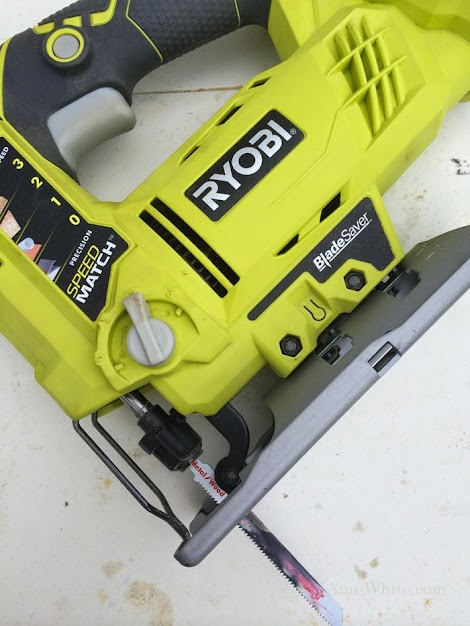
The best way I've found to cut aluminum angle is with a jigsaw with a metal blade.
Just clamp the aluminum angle down,
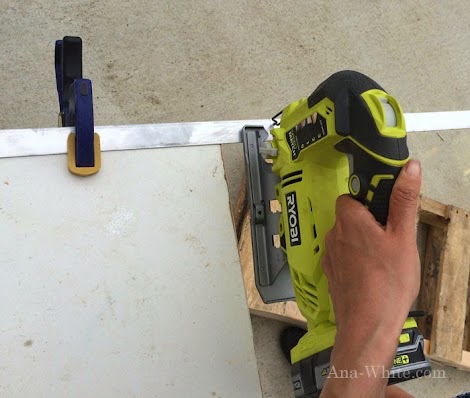
And it cuts like butter!
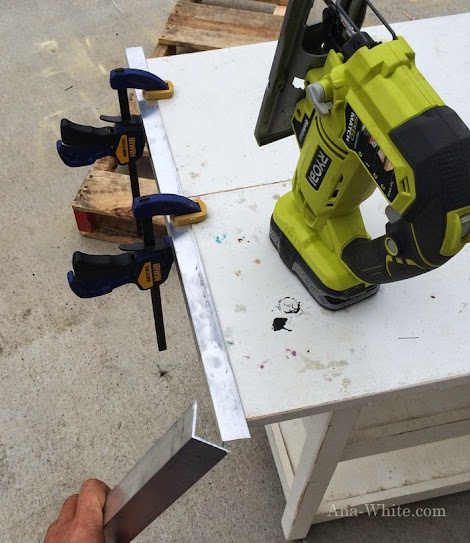
Even easier than cutting wood!
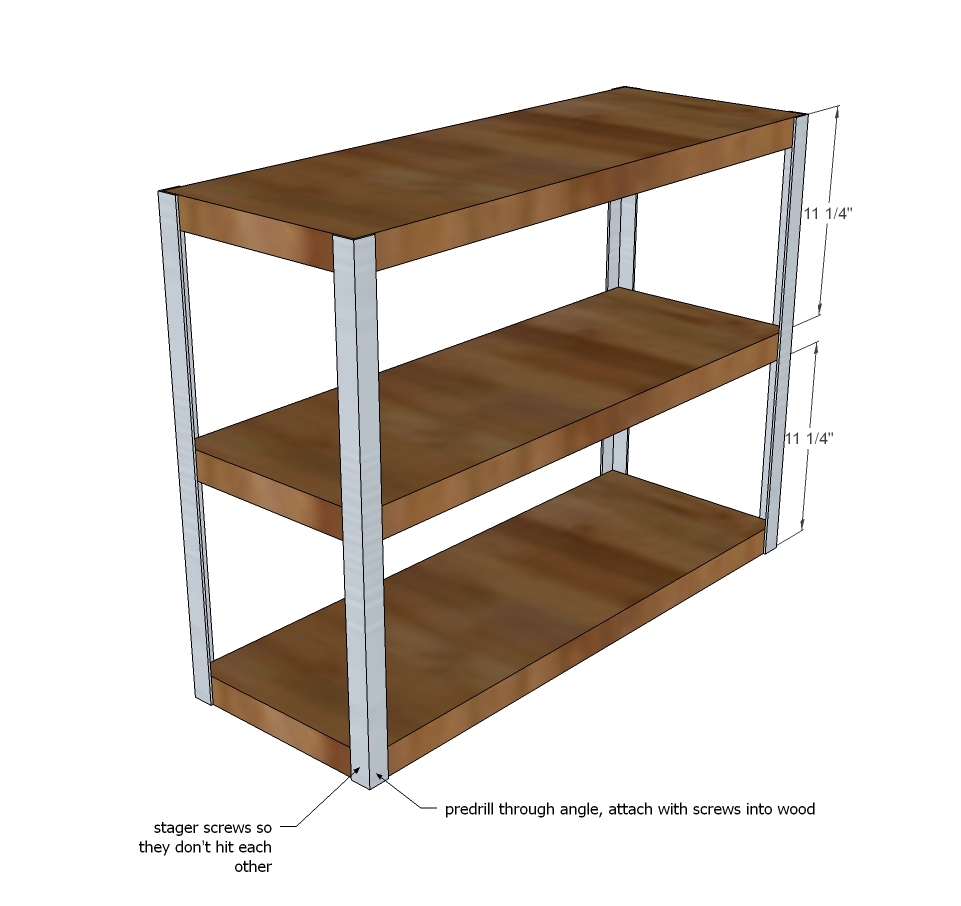
Then it was time add the aluminum angle to the boards.
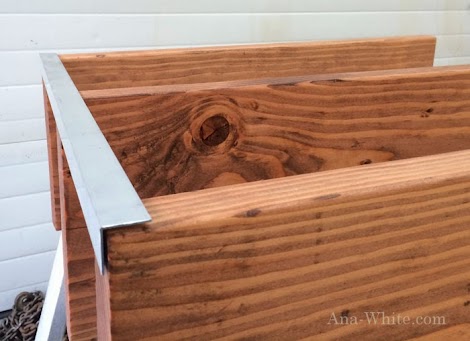
I set my 3 boards on their side on a couple sawhorses, set the first aluminum piece flush with the top and bottom board.
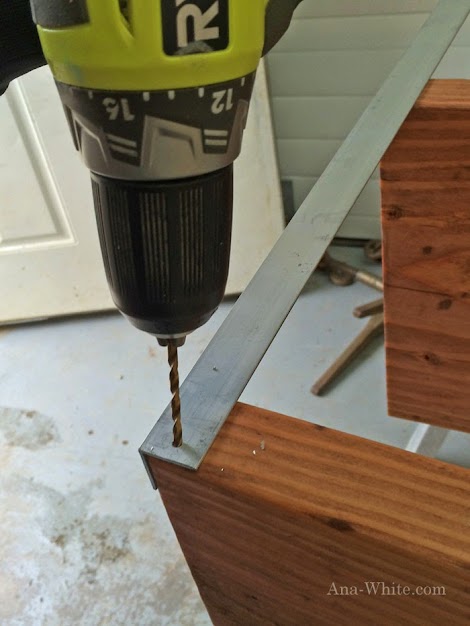
Then I predrilled through just the aluminum where I wanted to place my self tapping screws,
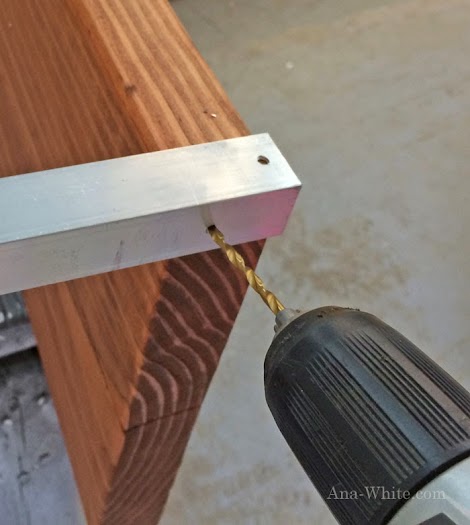
One on each side of the angle piece.
I did the top board first and then the bottom. I measured and marked the middle of the angle piece and set the center of the middle 2 x 12 board and did the same, predrilled and sunk my self tapping screws.
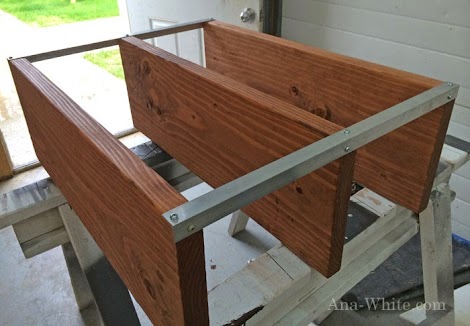
I did the same for all four sides. Almost done.
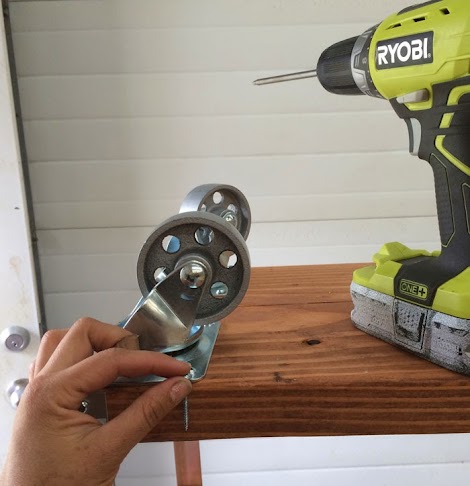
Then I just needed to add these sweet casters! I used 1 1/4” self tapping screws here.
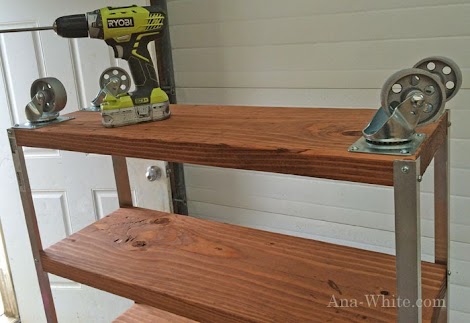
I flipped it up and stood back to admire.
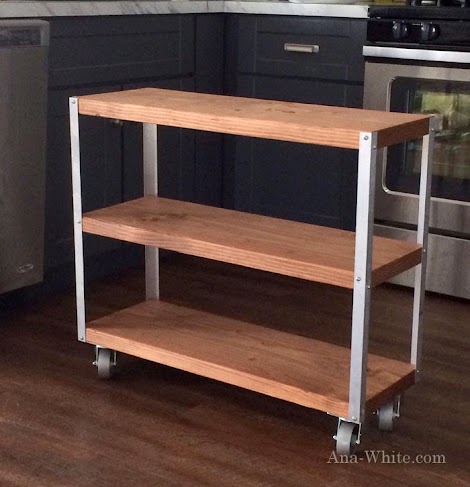
AMAZING! It's really is amazing what 2 hours and few materials can make!
Can I Build This Bigger?
Yes! You can build this project in different sizes. Check out the brag posts for some inspiration. But do keep in mind a 2x12 can span about 4 feet before it starts to sag. And also as you go taller, there might be some wobble - consider adding flat metal bar to the back to create structure as done here:

Photo submitted by JOSS
Plans to Build this Project
Pin For Later!
Preparation
- 1 - 2x12 board, 8 feet long
- 96" of 1" x 1" aluminum angle
- 24 - 1-1/4" self tapping wood screws (yes you can use Kreg Jig screws)
- 4 - caster wheels (we used 4") with 16 screws to attach to base (can use the 1-1/4" screws if using the 2x thick shelves, just make sure your screws are short enough that they don't poke through the bottom shelf)
- 3 - 2x12 @ 31-1/2" (or length of your shelves)
- 4 - aluminum angle @ 24" (or desired height without casters of your shelf)


Please read through the entire plan and all comments before beginning this project. It is also advisable to review the Getting Started Section. Take all necessary precautions to build safely and smartly. Work on a clean level surface, free of imperfections or debris. Always use straight boards. Check for square after each step. Always predrill holes before attaching with screws. Use glue with finish nails for a stronger hold. Wipe excess glue off bare wood for stained projects, as dried glue will not take stain. Be safe, have fun, and ask for help if you need it. Good luck!
Instructions
Step 1
Cut the aluminum angle with a jigsaw with a metal blade.
Cut the wood with a circuclar saw or miter/chop saw to desired lengths.
Predrill holes where the metal angle will attach to the wood shelves.
Attach the metal angle to the wood shelves with the screws.
Step 2
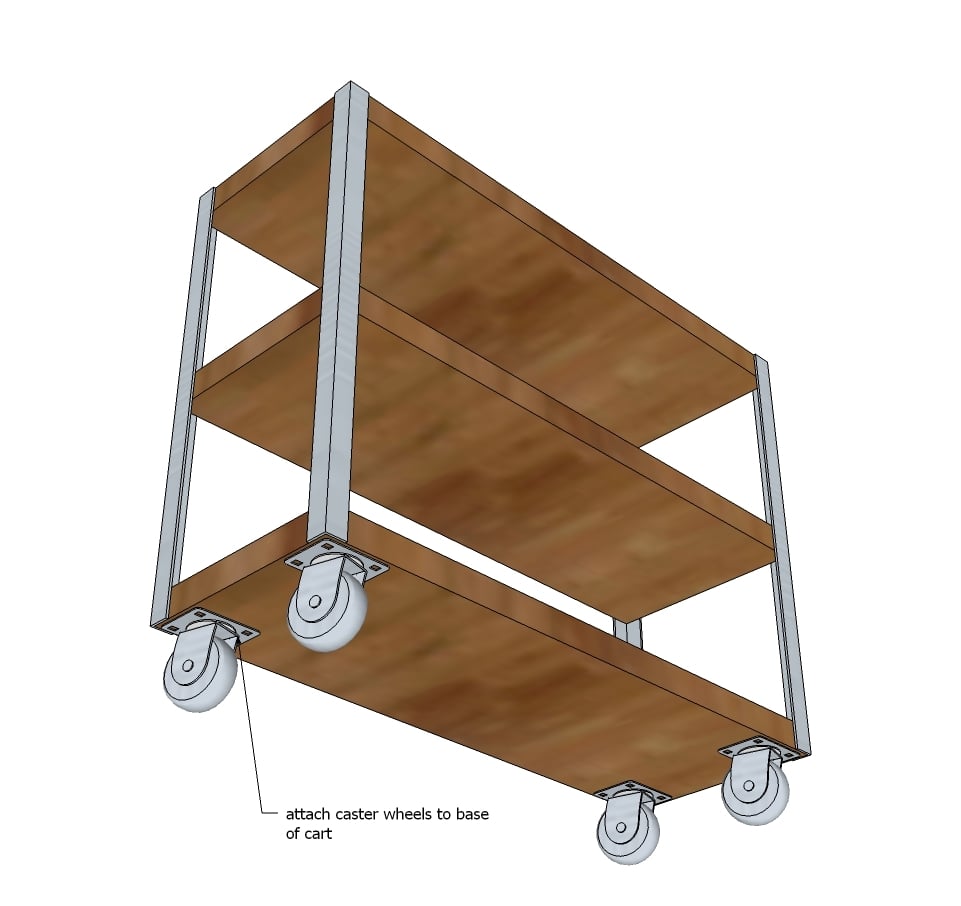
Flip over and attach casters to the base of the project.
Step 3
If wobbly or needs extra support, attach 1" aluminum flat bar to the back with screws.
It is always recommended to apply a test coat on a hidden area or scrap piece to ensure color evenness and adhesion. Use primer or wood conditioner as needed.

Comments
Pam the Goatherd
Wed, 07/30/2014 - 13:53
I love this! But I have a
I love this! But I have a question: With it only being 12 inches deep is it in danger of being tipped over easily?
In reply to I love this! But I have a by Pam the Goatherd
Ana White
Thu, 07/31/2014 - 11:28
Hi Pam, great question!
Hi Pam, great question! Because of the low height, there's really no tipping hazard - the kids are "carting" each other around in it. It's actually very sturdy! I wouldn't suggest going much higher though!
rhondaposey
Wed, 07/30/2014 - 14:48
Height??
Could this be made taller such as 8 feet and still be stable???
juriona
Thu, 07/31/2014 - 08:05
Genius!
I love this idea! Would make a great potting bench or serving cart for outside as well. So many possibilities!
meatloafmonkey
Thu, 07/31/2014 - 08:12
Casters?
Nice. Where'd you get those casters? Thanks!
Reese
Sat, 08/02/2014 - 07:17
Caster info please
Yes I want to know too... Where did you get those awesome casters? Love this cart! Thanks for sharing :)
nimmu9
Fri, 08/29/2014 - 07:26
Would a reciprocating saw cut metal?
I was hoping to get my first bunch of tools- the ryobi bundle from the Home Depot. It includes a circular saw and a reciprocating saw. Would I have to get the jig saw separately- to cut through the aluminum?
booksnotbombs
Fri, 08/29/2014 - 08:15
Nimmu, I got a power tool
Nimmu, I got a power tool bundle from Home Depot, as well, awhile back that also included a reciprocating saw. So far, it has proven worthless. Yes, I think the reciprocating saw will cut your metal with the right blade, but so would some circular saws (with the right blade!), but it would be tough to get it to cut in a straight line or with the correct measurements. The reciprocating saw appears to me to be mostly for demolition. I am a pretty strong woman, but it was difficult for me to control the reciprocating saw enough for it to cut where I wanted it to do so. I quickly abandoned any hopes of using it in woodworking projects.
dyank021
Wed, 09/03/2014 - 15:47
RE: WOULD A RECIPROCATING SAW CUT METAL?
Hi Nimmu,
I don't think the reciprocating saw will cut through the aluminum finely. The jigsaw would be better, but don't make my mistake and use the blade it comes with! That blade will likely be for wood and it just tore the aluminum up, you'll need clamps and a steel blade. Even so, I found that cutting metal with the jigsaw requires some practice so I eventually gave up and bought my aluminum pre-cut at Metals Depot online. I'm still awaiting my aluminum so I'll post once I receive everything...
Copperace
Thu, 03/31/2016 - 11:39
Adaptations
Just saw your garage simple storage shelving video on youtube and it impressed me so much I had to follow to this website and now, can't stop looking around. So, you suckered me in and now I run across this?!! I have been trying, for a while, to come up with a plan to build a cart with wheels to fit into a small pantry to expand storage. I do believe my surprise at seeing this one actually made me smile.
I'll need to widen it a bit but, it should take care of my situation.
Thanks for sharing and teaching. I guess I'm now a fan you and your family!!!
writeaway
Thu, 06/18/2020 - 17:02
Love it!
Still one of my favorite pieces to organize my pantry! Love it years later! https://www.ana-white.com/community-projects/rolling-cart-casters