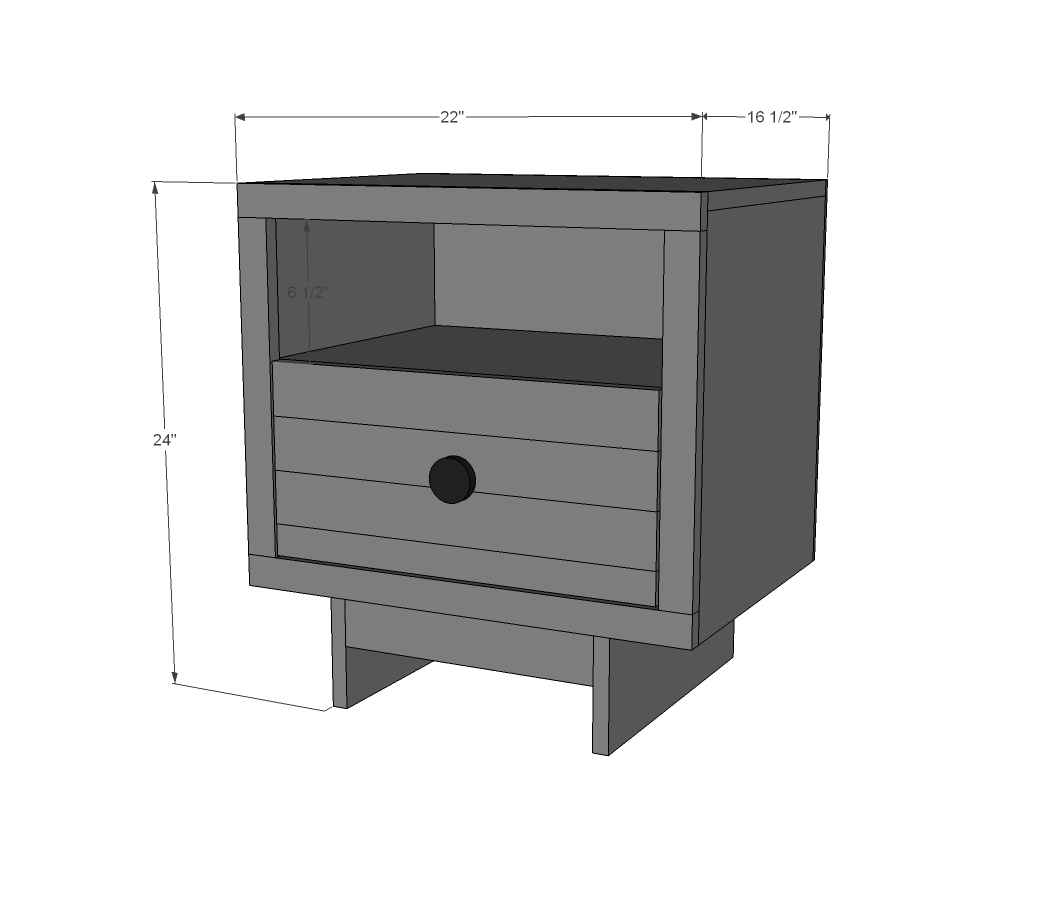
Build a West Elm Emmerson inspired nightstand - free DIY plans from Ana-White.com
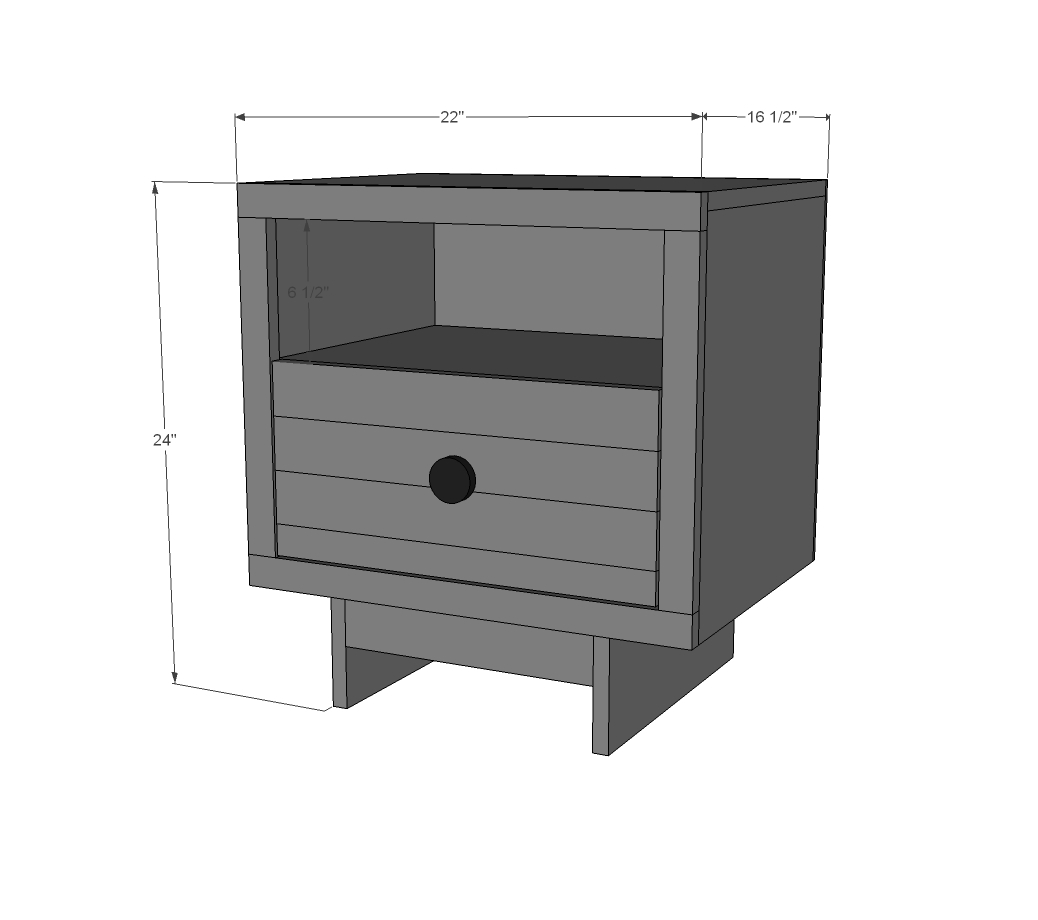
Preparation
4x4 sheet of 3/4" plywood ripped into width of 15 1/2" x 4 feet long (three strips) OR 10 feet of any wide width board (for example a 1x12) if alterning the depth of nightstand
2x4 sheet of 1/4" plywood
1 - 1x6 @ 10 feet long
1 - 1x3 @ 8 feet long
2 - 1x2 @ 8 feet long
Recommended assembly with 1-1/4" pocket hole screws
1 1/4" finish nails
wood glue
knob or pull
may need edge banding to finish off exposed plywood ends of top
BOX
2 - 3/4" plywood @ 15-1/2" x 17-3/4" (sides)
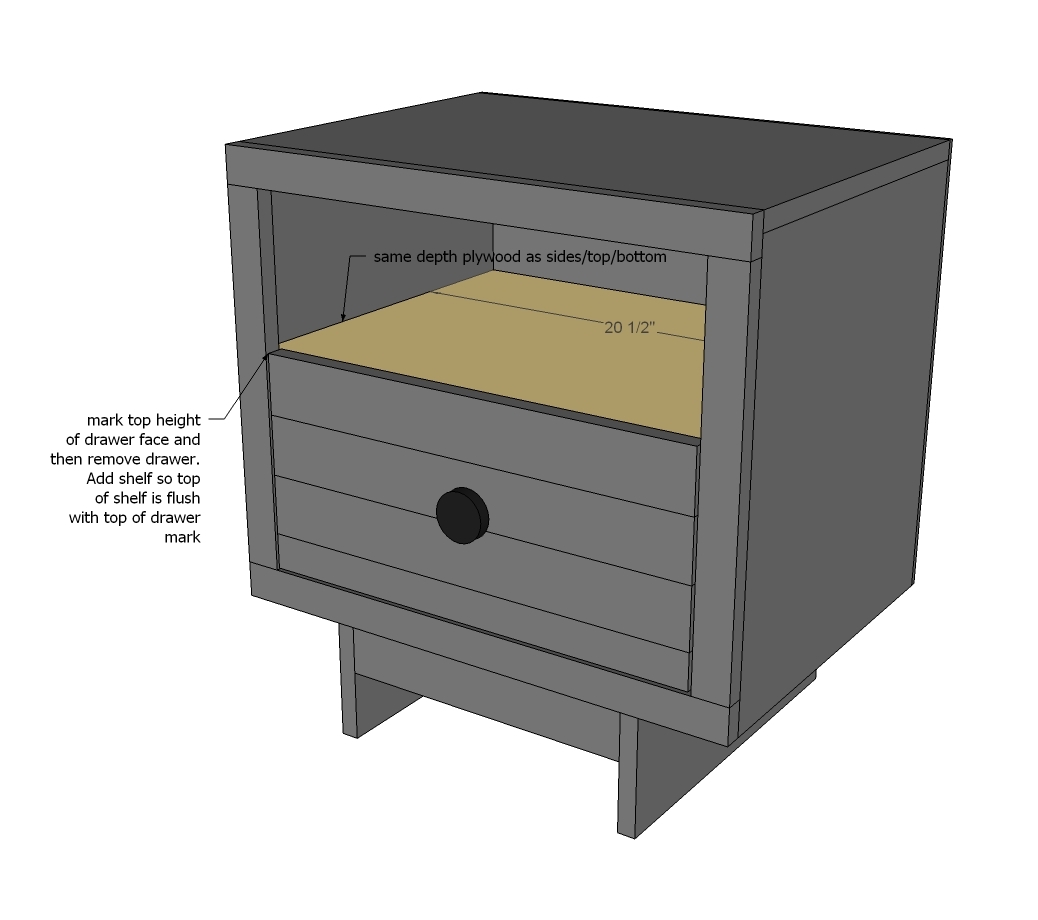
2 - 3/4" plywood @ 15-1/2" x 20-1/2" (shelf and bottom)
1 - 3/4" plywood @ 15-1/2" x 22" (top)
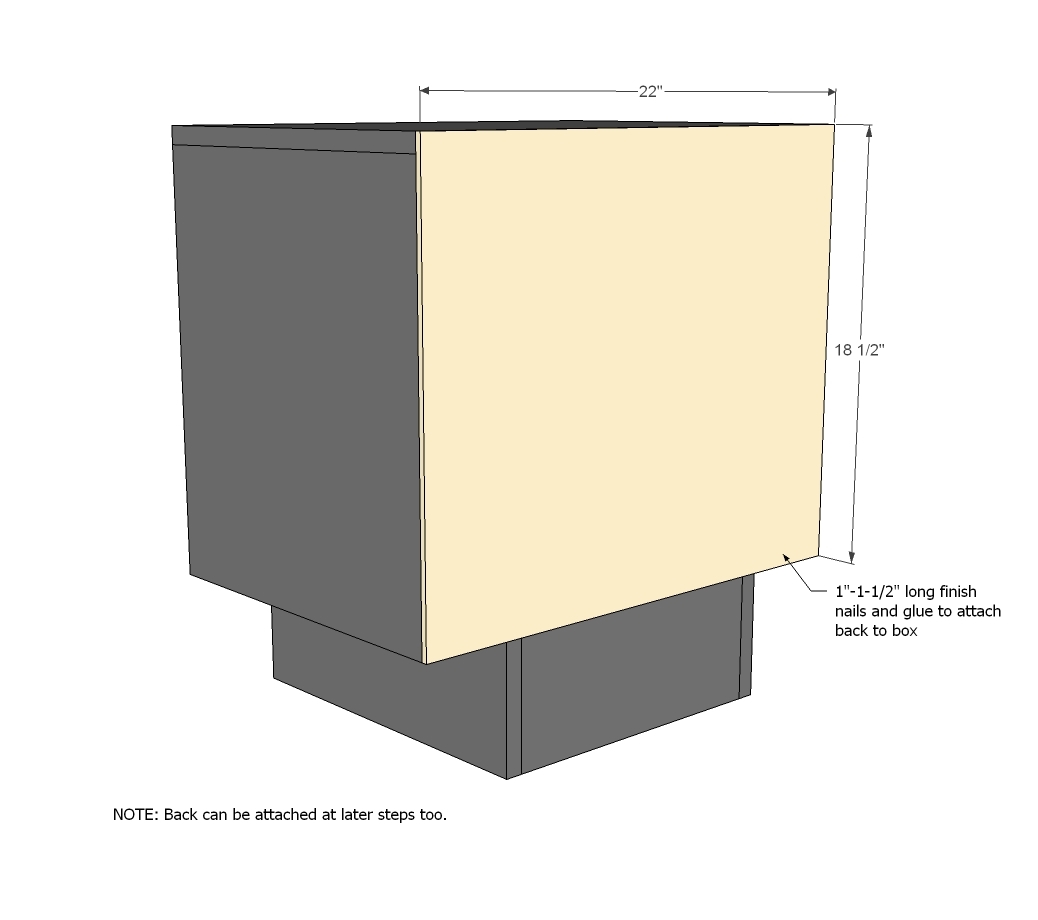
1 - 1/4" plywood @ 22" x 18" (back)
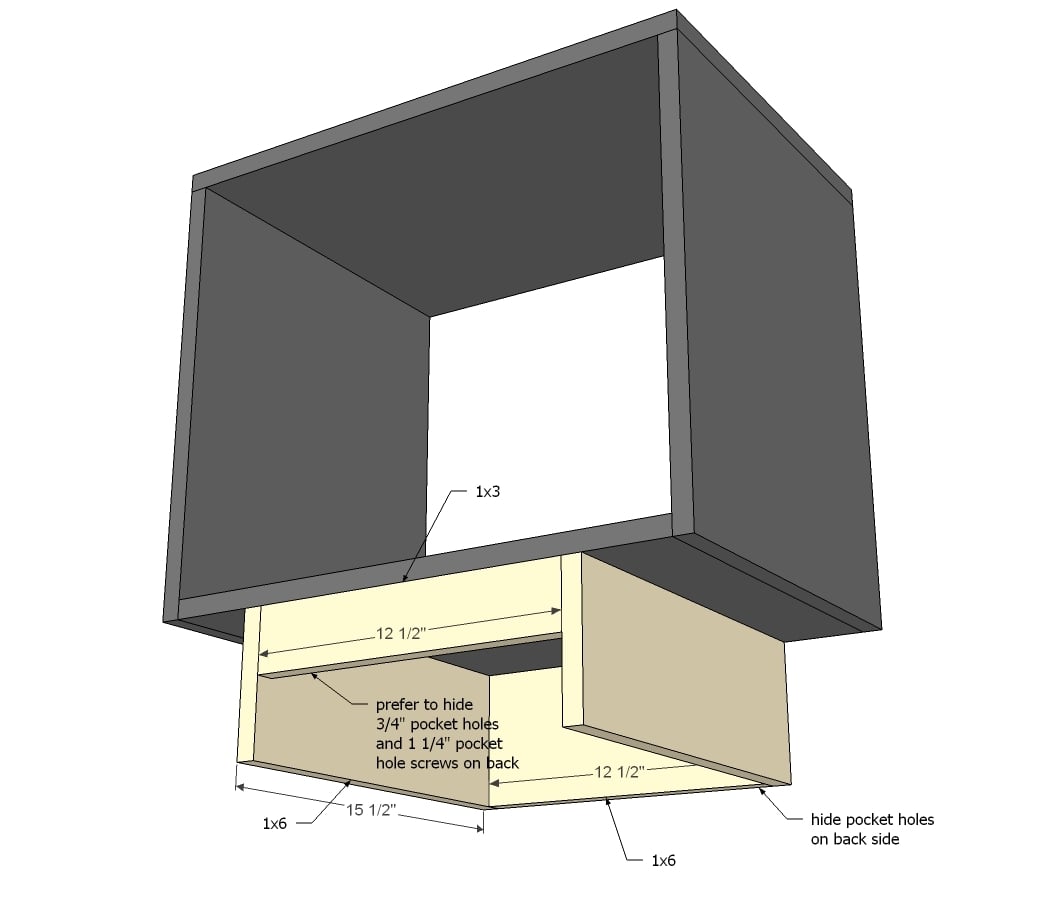
BASE
2 - 1x6 @ 15-1/2" (base sides)
1 - 1x6 @ 12-1/2" (base back)
1 - 1x3 @ 12-1/2" (base front)
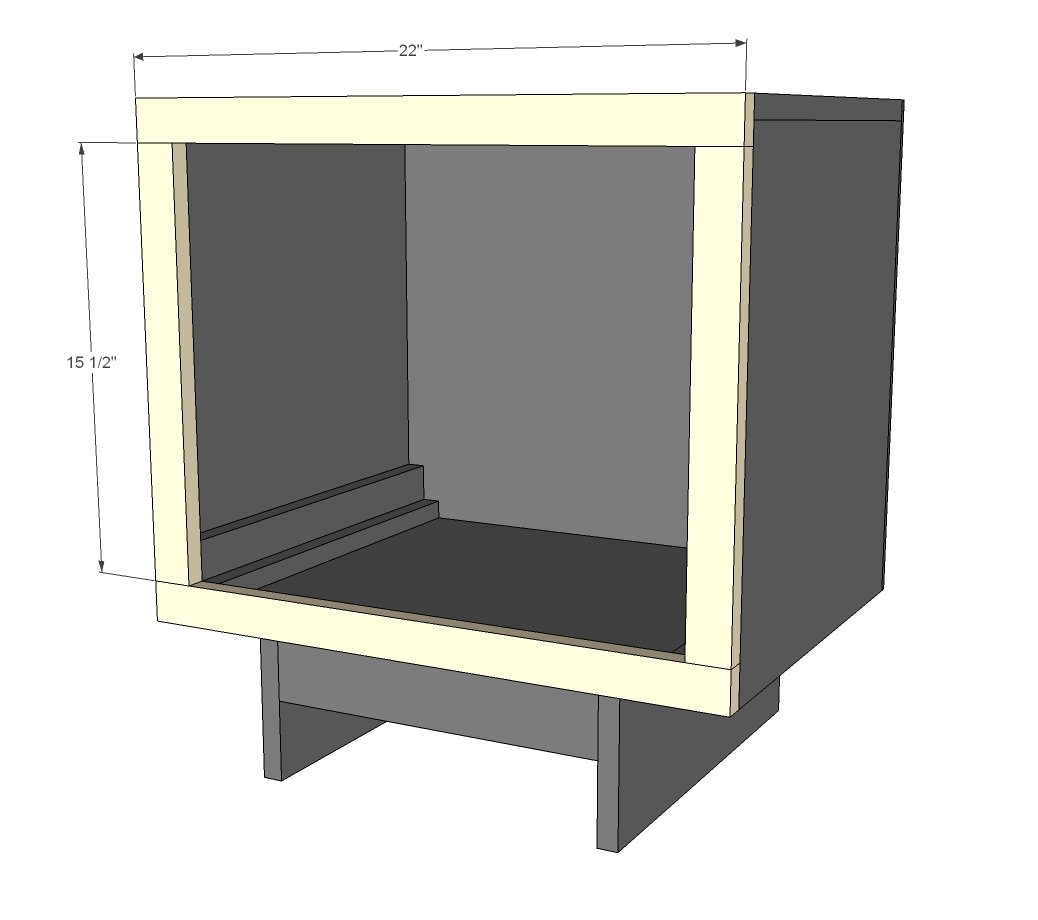
FACE FRAME
2 - 1x2 @ 22"
2 - 1x2 @ 15 1/2"
DRAWER
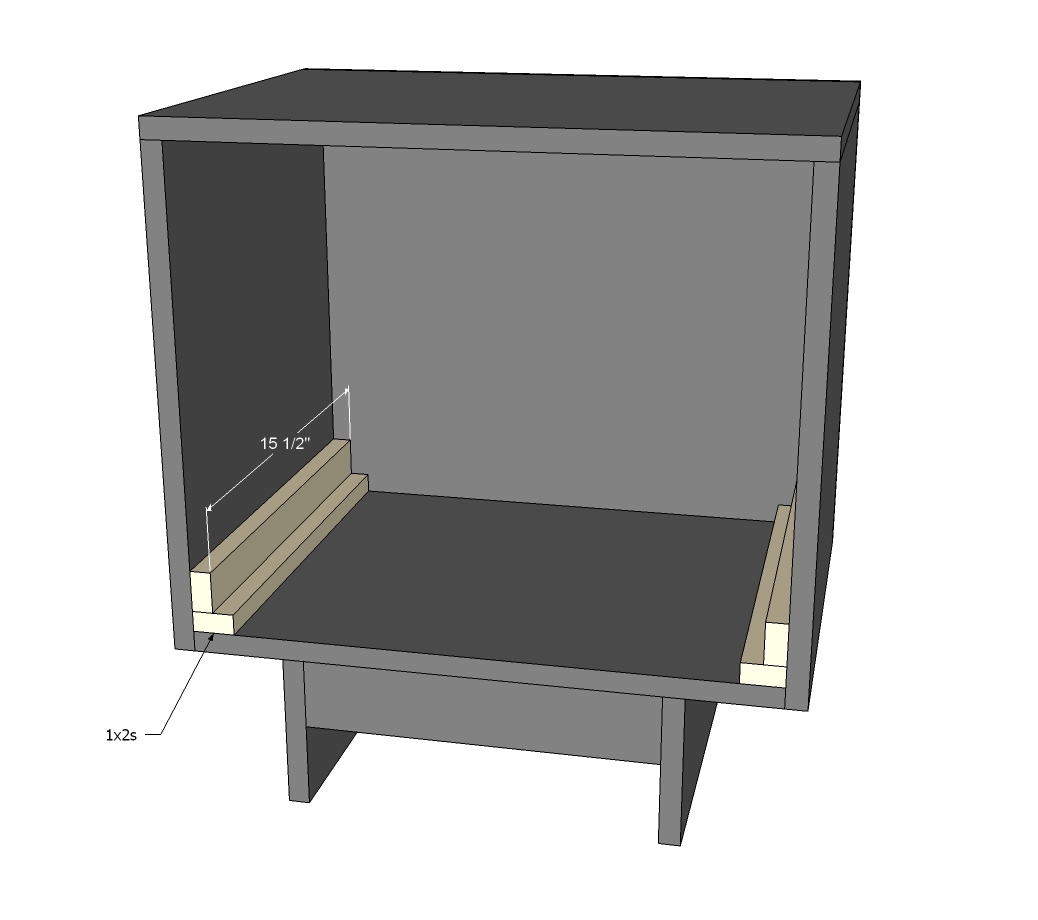
4 - 1x2 @ 15-1/2" (drawer slide pieces)
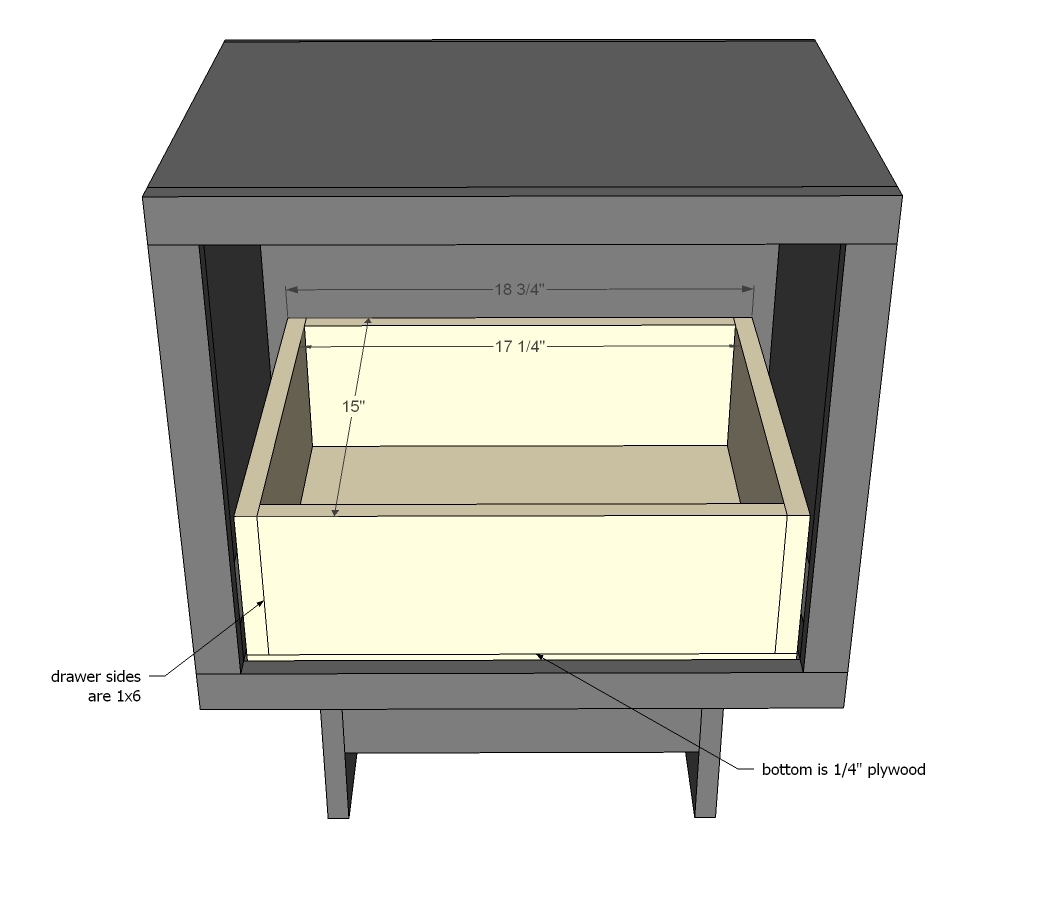
2 - 1x6 @ 17-1/4" (cut these to fit so there is an 1/8" gap on each side of drawer - Expected 17-1/4" length + 1-1/2" for drawer sides + 1/4" for two side gaps = overall opening of 19")
2 - 1x6 @ 15" (drawer sides - made these a little smaller than the opening so the drawer isn't pusing against back)
Cut drawer bottom to fit - expected 15" x 18-3/4"
DRAWER FACE PIECES
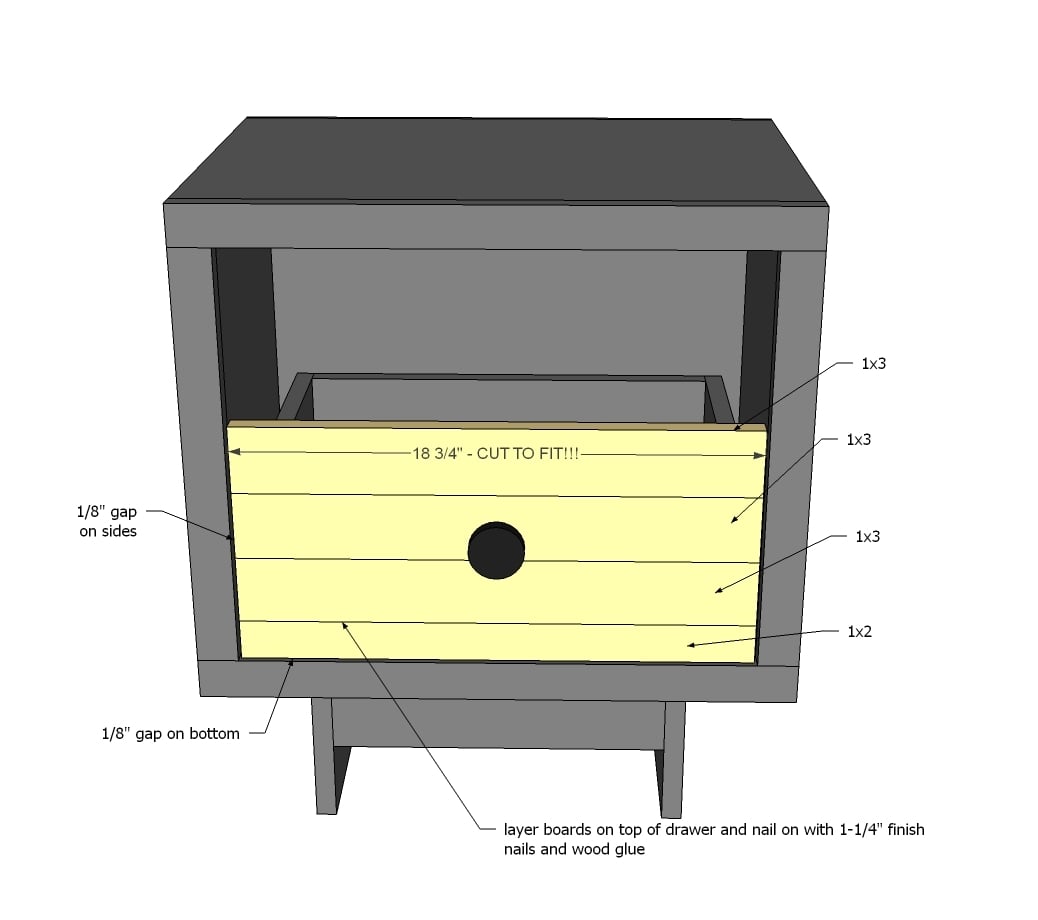
3 - 1x3 @ 18 3/4" (cut to fit drawer width!!!)
1 - 1x2 @ 18 3/4" (cut to fit drawer width!!!)
Please read through the entire plan and all comments before beginning this project. It is also advisable to review the Getting Started Section. Take all necessary precautions to build safely and smartly. Work on a clean level surface, free of imperfections or debris. Always use straight boards. Check for square after each step. Always predrill holes before attaching with screws. Use glue with finish nails for a stronger hold. Wipe excess glue off bare wood for stained projects, as dried glue will not take stain. Be safe, have fun, and ask for help if you need it. Good luck!
Instructions
Step 1
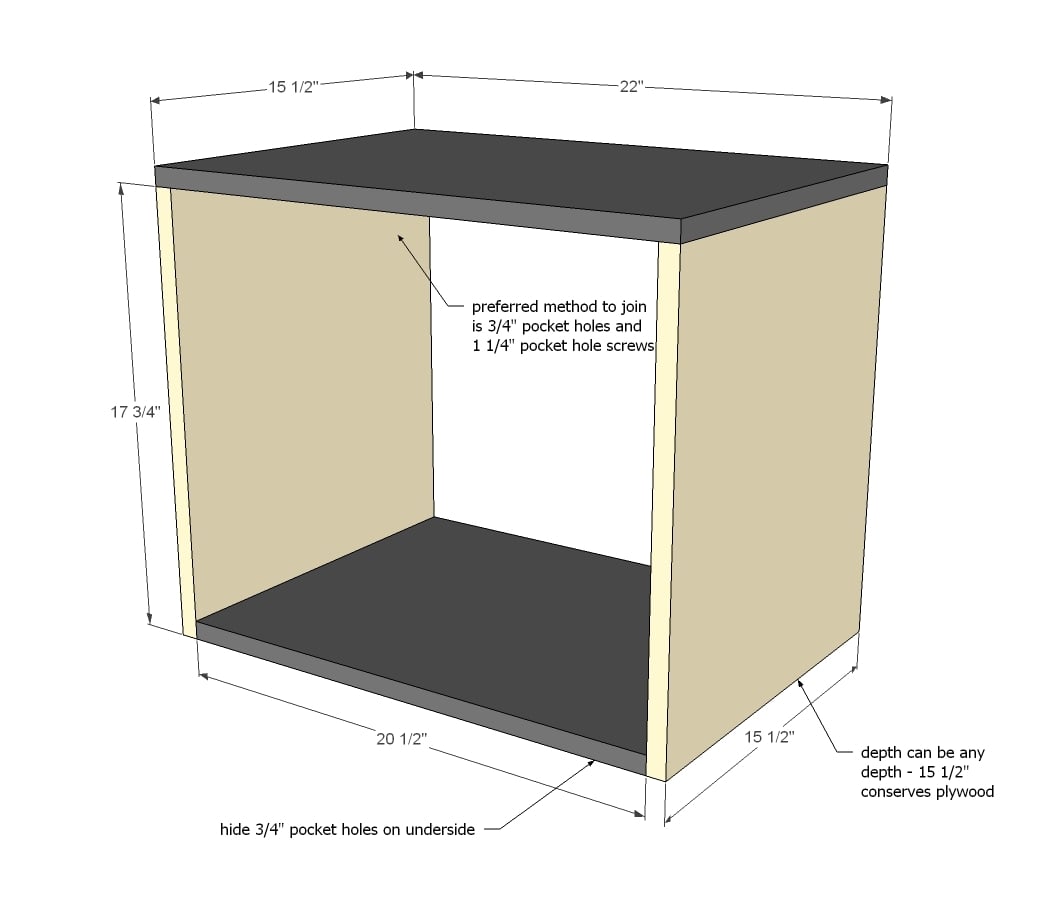
Start by building the basic box for the nightstand. Preferred method - you'll thank me later, I promise - is to use a Kreg Jig set for 3/4" thick material and attaching with 1-1/4" pocket hole screws. You can also assemble with 2" nails or screws, but the screw or nail holes will be visible on top, and it won't have the same lateral strength.
Step 2
Step 3
Step 4
Step 6
The drawer should be build to fit, leaving an 1/8" gap to the sides so the drawer can slide easily in and out. So measure your overall opening, and build to fit the opening.
TIP: Cut the 1/4" bottom plywood first to the opening width (19" x 15"). Test to see how the plywood slides and trim down until it slides perfectly. Then build the drawer sides to fit the bottom dimensions. The bottom can be just nailed to the sides with glue and nails.
Pocket hole users should place 3/4" pocket holes on the front and back boards, on the outsides. The false drawer face will cover them up!
Test fit and adjust as needed.
Step 7
It is always recommended to apply a test coat on a hidden area or scrap piece to ensure color evenness and adhesion. Use primer or wood conditioner as needed.


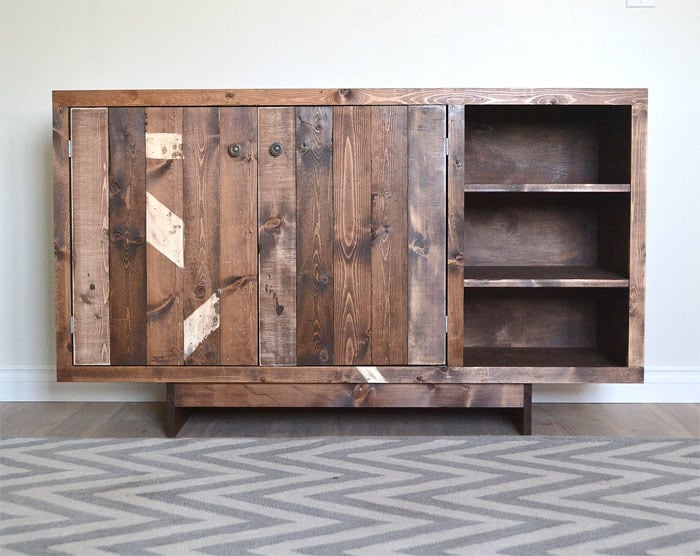


Comments
DecorSanity
Wed, 11/06/2013 - 11:57
Love the West Elm lines...
Thanks for the plans!
kittywings
Wed, 01/14/2015 - 19:59
Wall mounting
Do you think this would work with out the base and the back panel screwed into studs to wall-mount it? I was already attempting to make plans for this very nightstand and you just made my job a million times easier. I kind of have to have a wall-mounted nightstand because the platform bed I made has a drawer that comes out and would hit any nightstand over 8" deep.
richkatw
Tue, 12/08/2020 - 07:36
I absolutely think it would…
I absolutely think it would work. That's what I was envisioning when I saw it. Did you try it?
kittywings
Wed, 01/14/2015 - 20:01
edit
The back would obviously have to be attached more securely in that case, of course.
JessGalle0121
Wed, 08/05/2015 - 12:44
Wood type
Hi Ana, love your site! Question for this piece: the West Elm piece is made from pine? Will using plywood instead give it a rough finish or will that be eliminated when I sand & stain it? I don't mind paying a bit more for wood as I plan to keep the piece for years. Thanks in advance!