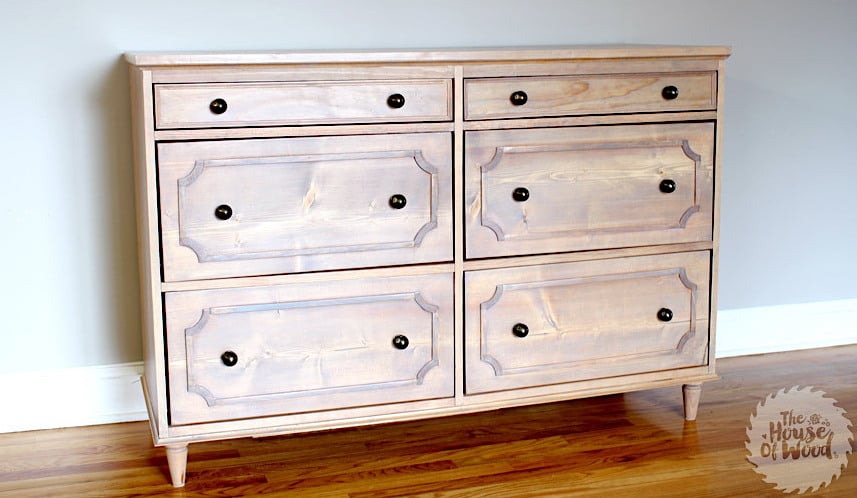
Emily Dresser

The free plans on this website are made possible with advertising and affiliate links.  Thank you for helping us keep plans free.


Free dresser plans
Difficulty
Advanced
| Print this plan

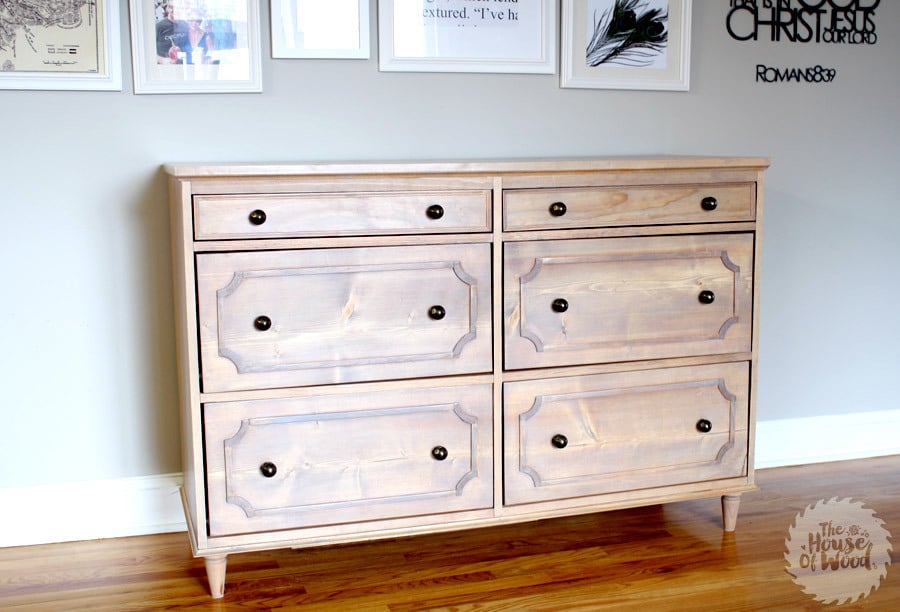
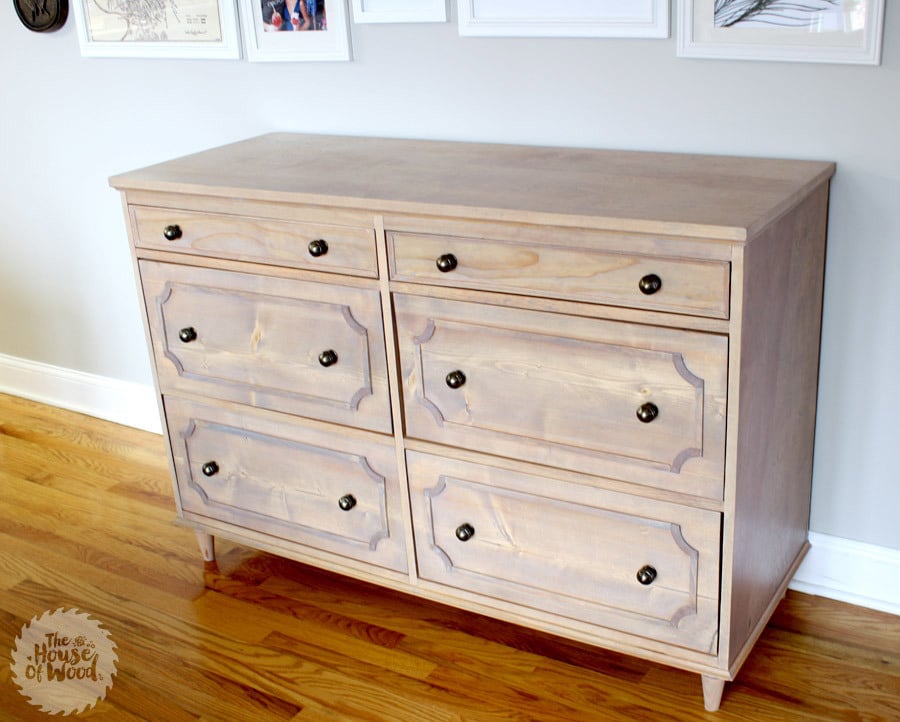
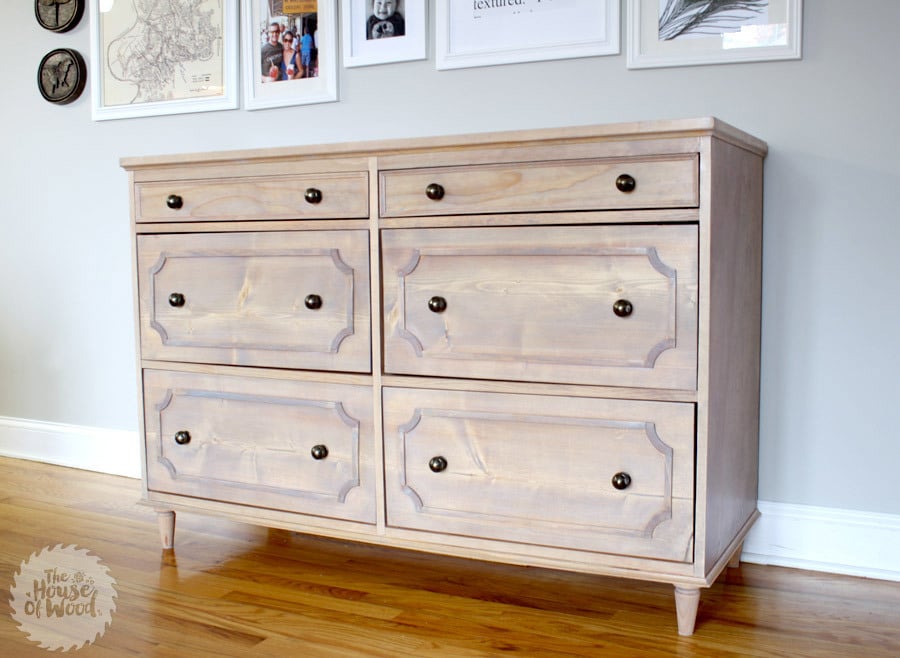
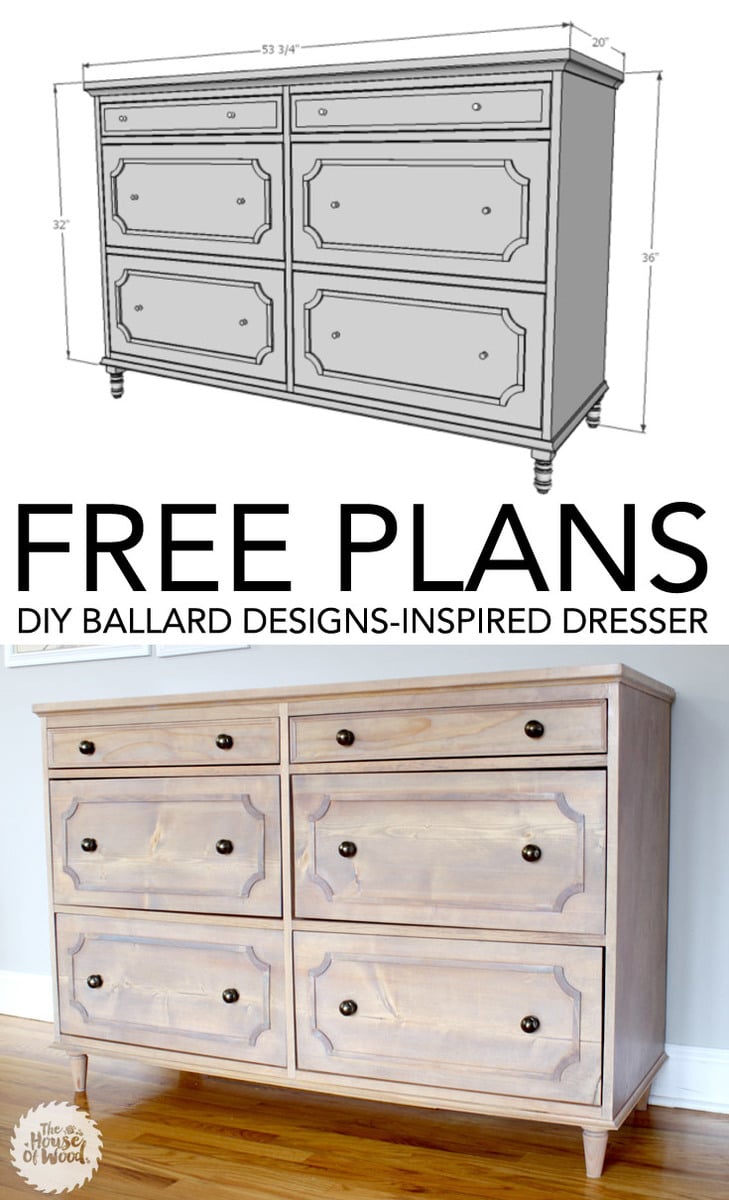
Build this beautiful dresser! Free plans from Ana-White.com Features four large drawers and two smaller drawers.
Free dresser plans
Free dresser plans
Free dresser plans
Free dresser plans

Happy Friday!  

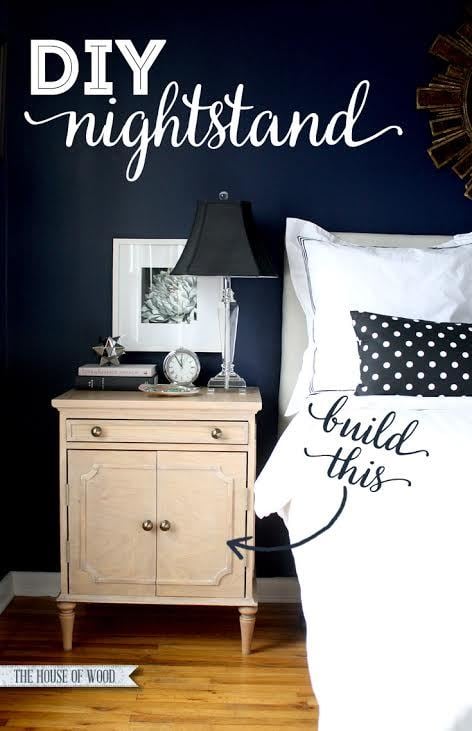
Remember a few weeks back when we shared plans for this amazing nightstand?

Oh. My. Gorgeousness!  Right?

Well, my friend Jen Woodhouse from House of Wood, who teamed up with me to get you those beautiful nightstand plans, also wanted to tackle a matching dresser too!

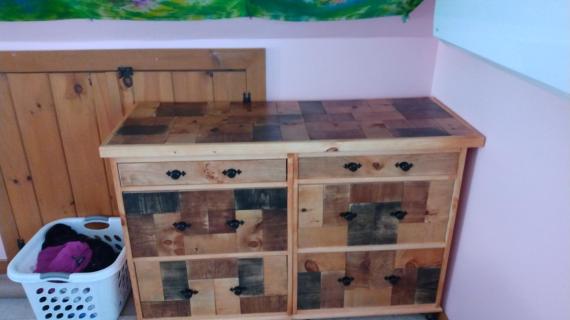
Well, hello equally gorgeous dresser!

I've got you covered below (or if this is the homepage, click Read More below) with the step by step plans that Jen used, but you definitely should go check out Jen's building post - it's chock full of tips and lots more pictures!  Because I know you are dying to know how she got that washed stain color, or cut those moulding pieces herself!

Go check out Jen's building post!

See you back here for plans!

Have a great weekend!

XO Ana

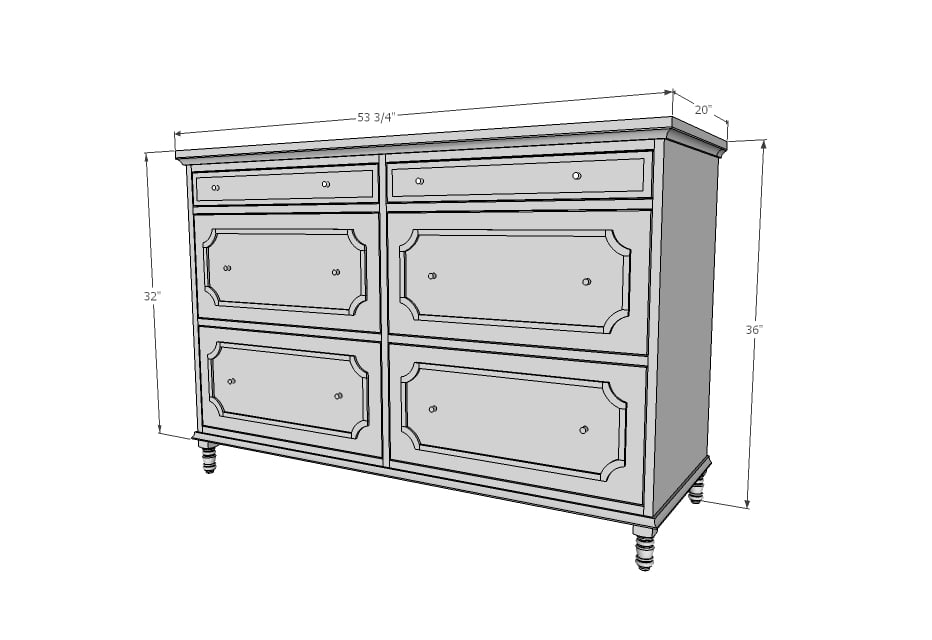
Dimensions
dresser plans
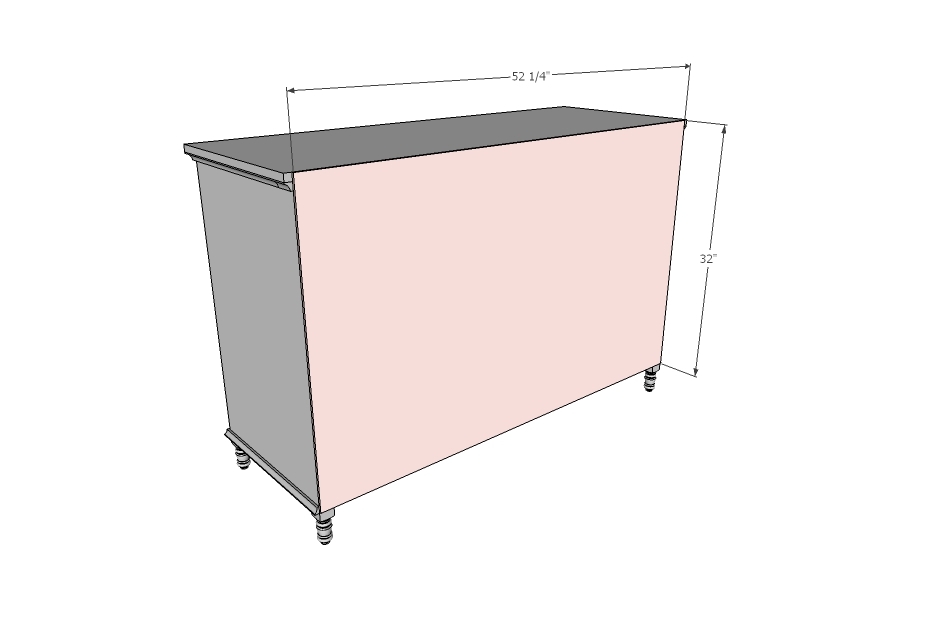
Dimensions shown above

Preparation

Shopping List
  • 1 - 1/2 sheets of ¾” plywood
  • 1 sheet of ¼” plywood or other hardboard
  • 4 – 1x2 @ 8 feet long
  • 27 feet of 1x8 boards
  • 2 – 1x3 @ 8 feet long
  • 1 – 1x4 (MUST be 3-1/2” wide) @ 6 feet long
  • 1 – 1x12 board (MUST be 11-1/4” wide) @ 10 feet long (can also use scrap ¾” plywood)
  • 6 – 16” long white euro drawer slides
  • 4 – 4” turned feet 20 feet of cove moulding (3/4”)
  • 10 feet of edge banding in matching species to plywood
  • Knobs or handles
Common Materials
3/4 inch finish nails
120 grit sandpaper
Cut List
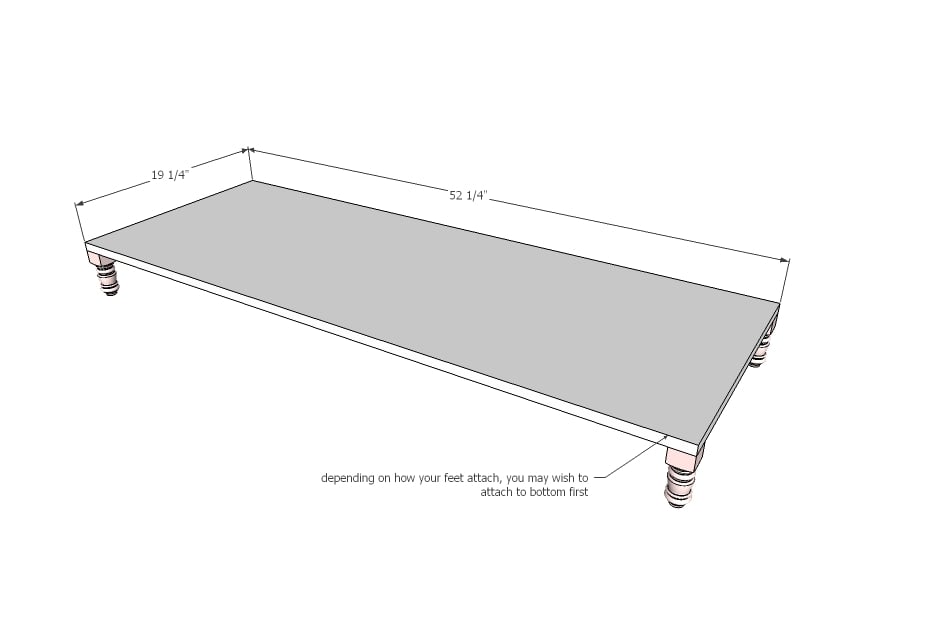
  • 1 – 3/4” plywood @ 19-1/4” x 52-1/4” (bottom)
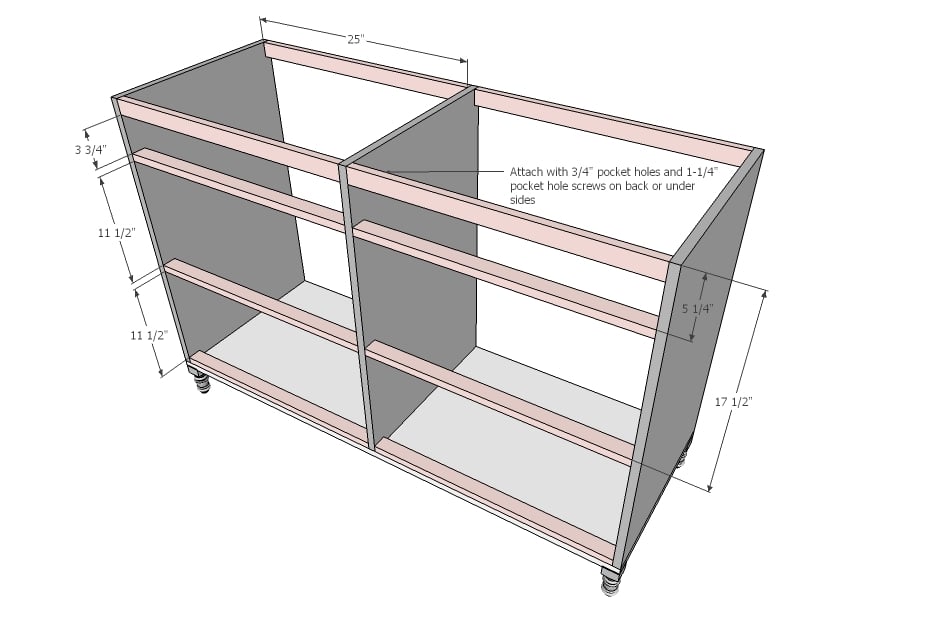
  • 3 – 3/4” plywood @ 19-1/4” x 30-1/2” (sides and divider)
  • 10 – 1x2 @ 25” (trim)
  • 1 – 3/4” plywood @ 20” x 53-3/4" (top)
  • 8 – 1x8 @ 16” (large drawer sides)
  • 8 – 1x8 @ 22-1/2” (large drawer fronts and backs)
  • 4 – 1x3 @ 16” (small drawer sides)
  • 4 – 1x3 @ 22-1/2” (small drawer front and backs)
  • 6 – 1/4” plywood @ 16” x 24”
  • 2 – 1x4 @ 24-3/4” (small drawer fronts)
  • 4 – 1x12 @ 24-3/4” (large drawer fronts)
  • 1 – 1/4” plywood @ 52-1/4” (back)
Tools
Tape Measure
Speed Square
Pencil
Safety Glasses
Hearing Protection
Kreg Jig
Drill
Miter Saw
Table Saw
Brad Nailer
Power Sander
Scroll Saw
Iron for Edge Banding
General Instructions

Please read through the entire plan and all comments before beginning this project. It is also advisable to review the Getting Started Section. Take all necessary precautions to build safely and smartly. Work on a clean level surface, free of imperfections or debris. Always use straight boards. Check for square after each step. Always predrill holes before attaching with screws. Use glue with finish nails for a stronger hold. Wipe excess glue off bare wood for stained projects, as dried glue will not take stain. Be safe, have fun, and ask for help if you need it. Good luck!

Instructions

Step 1

Depending on how your bun feet attach, you may wish to attach at this stage or later on.

Step 2

For a stained finish, apply edge banding to the fronts of the three upright plywood pieces and trim off excess. Then attach with 3/4" pocket holes to the bottom. Also drill 3/4" pocket holes facing upward for attaching the top in later steps. Hide all pocket holes.

Step 3

Carefully attach all front trim and back supports with 3/4" pocket holes and 1-1/4" pocket hole screws. It is very important to get the distances right between the 1x2 front pieces as the drawer faces will fit in between.

Step 4

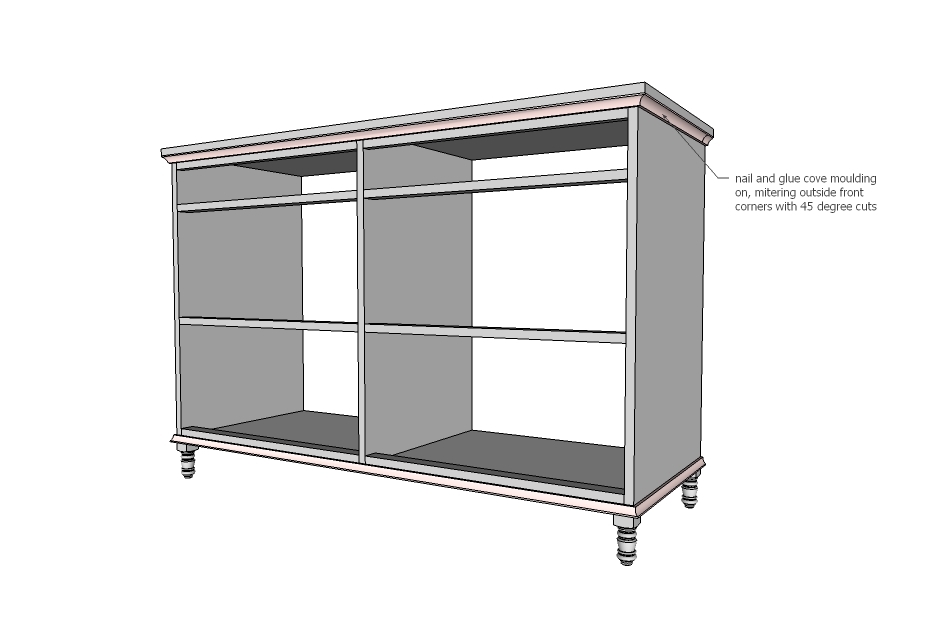
Apply edge banding (if applicable) around the front and sides of the top. Then attach to top of project through pocket holes drilled in earlier steps with 3/4" pocket hole screws.

Step 5

Step 6

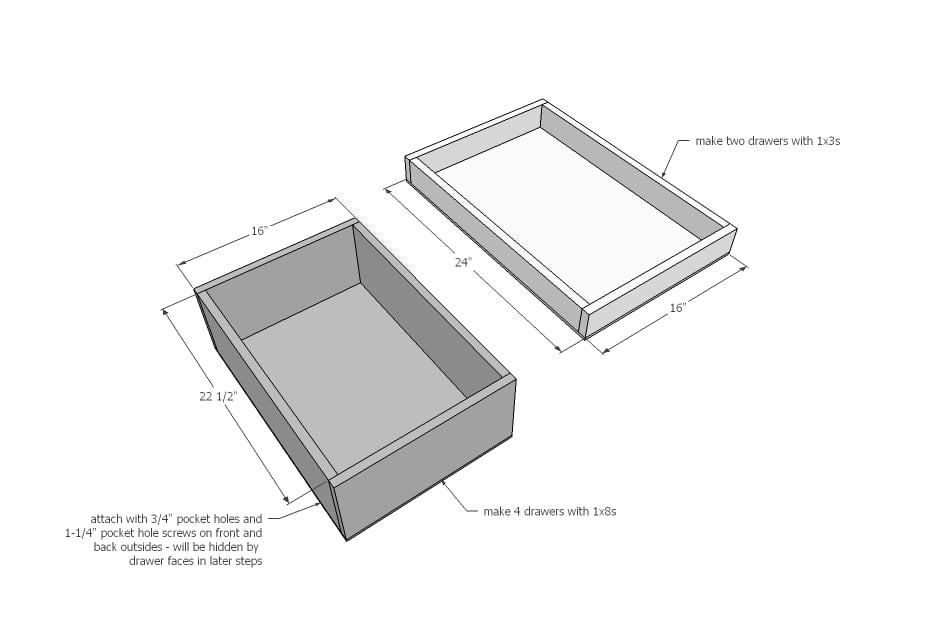
Build your drawers to fit your openings and drawer slides. You can only nail the bottom 1/4" plywood to the bottom if you use the white euro bottom corner mount slides. If you are using side mount slides, you will need to screw the bottom on.

Drawer video - please watch this quick video on how to measure, build and install drawers

Step 7

Install all drawers inset 3/4" from the front of the cabinet (to allow drawer faces to sit inset).

Step 8

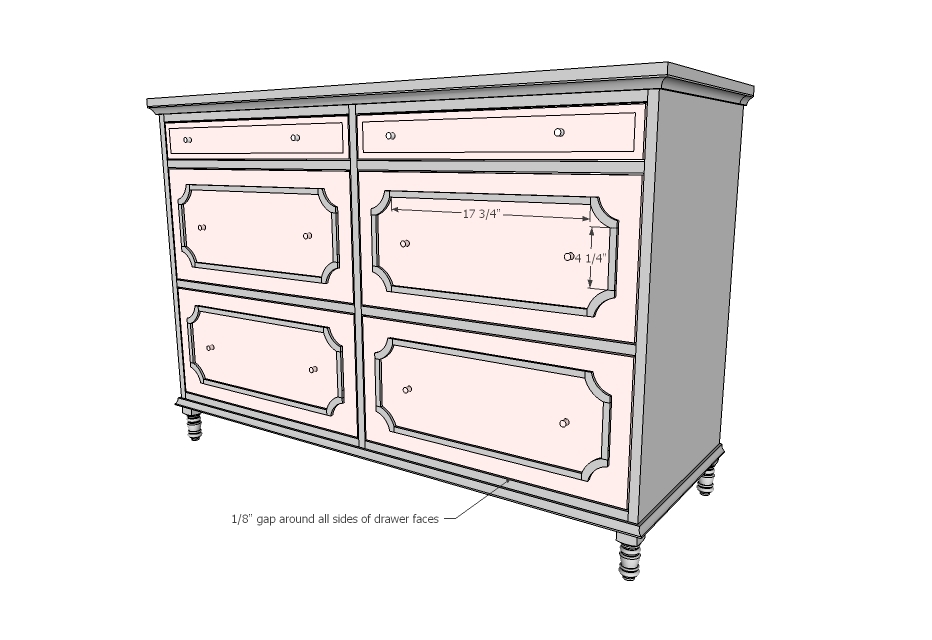
Cut drawer faces to fit, giving 1/8" gap on all sides. Nail drawer faces on with 1-1/4" nails from the front when centered on the opening. Then remove the drawer and add a few screws from the inside. Moulding pattern is in next step - Attach moulding to drawer faces with 3/4" finish nails and glue.

Step 9

Use a scroll saw or jigsaw to cut out moulding pieces from 1/4" plywood. Long moulding strips are 1/4" plywood pieces 1/2" wide. Other moulding can work as well.

Step 10

Attach 1/4" plywood to back with 3/4" nails and glue.

Finishing Instructions
Preparation Instructions
Fill all holes with wood filler and let dry. Apply additional coats of wood filler as needed. When wood filler is completely dry, sand the project in the direction of the wood grain with 120 grit sandpaper. Vacuum sanded project to remove sanding residue. Remove all sanding residue on work surfaces as well. Wipe project clean with damp cloth.

It is always recommended to apply a test coat on a hidden area or scrap piece to ensure color evenness and adhesion. Use primer or wood conditioner as needed.

Comments

dhoop31

Mon, 04/24/2017 - 19:59

Ana,

Quick question.  Wouldn't you need at least a full sheet, maybe two, of the 3/4 plywood?  A half sheet, being only 48" will not give you the 52" cut called for on the bottom and top pieces.  

Love your site and love the plans for this dresser! Keep up the great work! 


Donny