


This entryway cabinet with hooks adds tons of storage in a stylish way. Build it from plywood with free plans by ANA-WHITE.com
Entryway organization is essential for any busy family. Getting out of the house needs to be streamlined and efficient - returning home needs to be welcoming and easy. Having the right entryway cabinet is a must.
We just finished up our big entryway cabinet built-in and man on man has it changed our life!
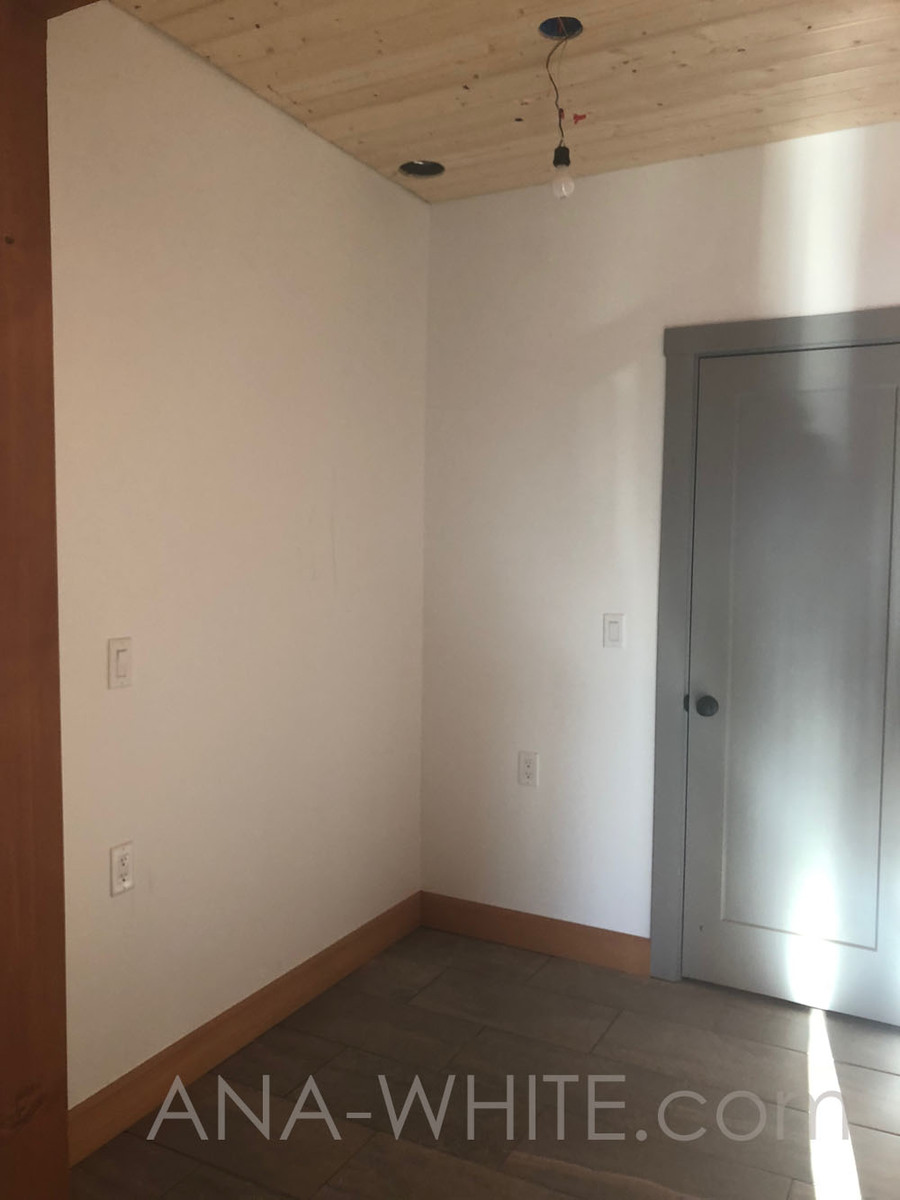
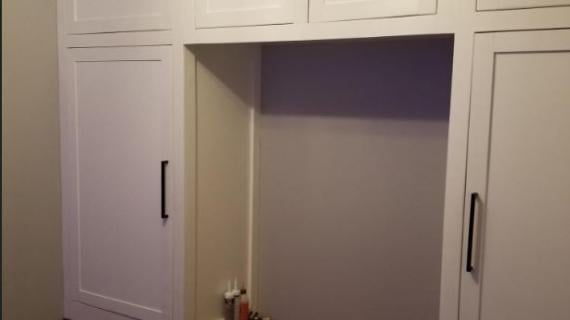
A few weeks ago, our entryway looked like this.
Three sheets of plywood and some 1xs and hardware later ...
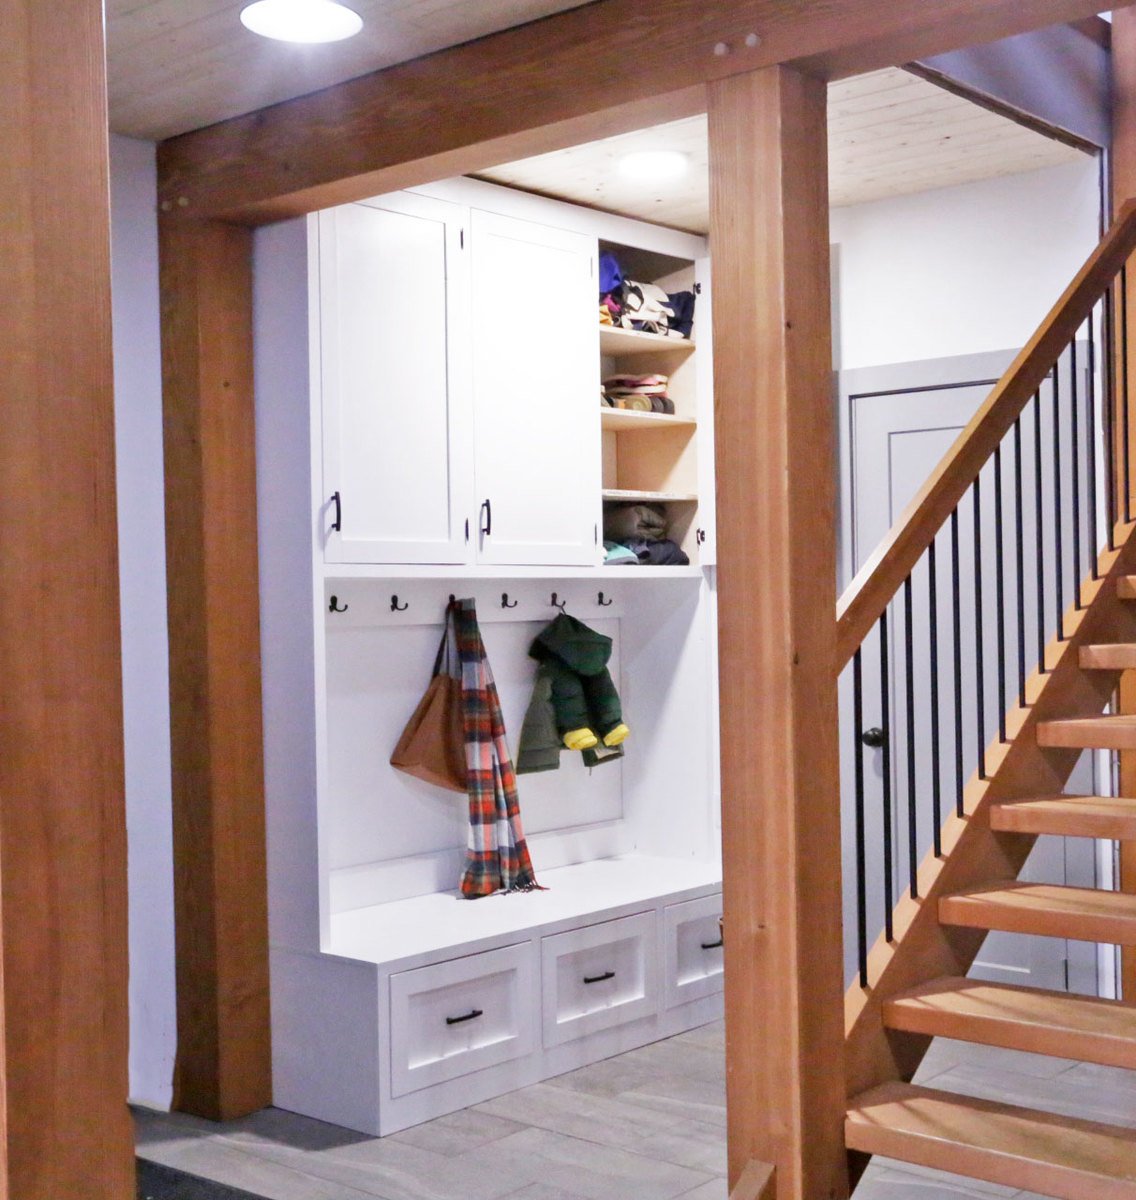
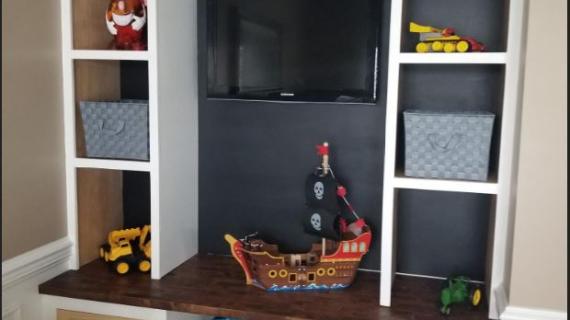
And our entryway has transformed into this!
This one cabinet has cleaned up our entire basement. And now when we come home, I feel happy and organized - not overwhelmed and embarassed.
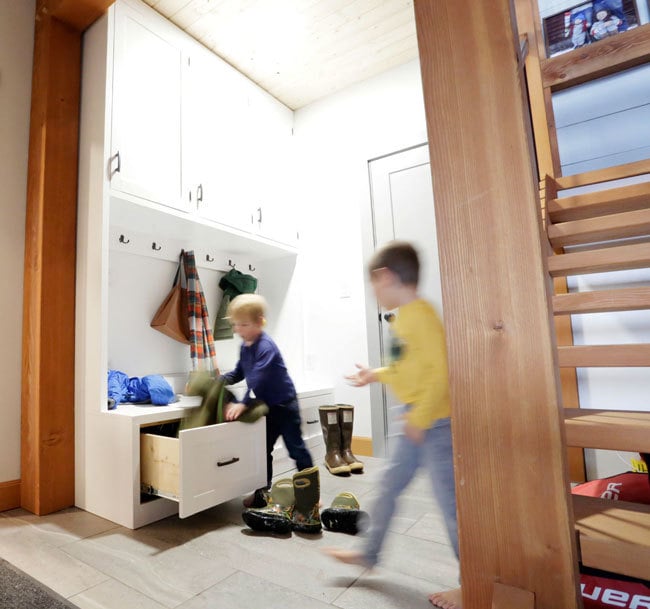
There's somewhere for everything to go, and the necessities are easily accessible. Even if you are four years old.
We are so thankful to have this entryway cabinet - it saves us so much time, space, and my sanity. I know you are going to love this project too, and am excited to share the plans with you.
We built the drawer bench last week, you can grab those plans here.
And the entryway cabinet plans are below.
Enjoy!
Ana
PS - You can watch us build these projects in the following videos -
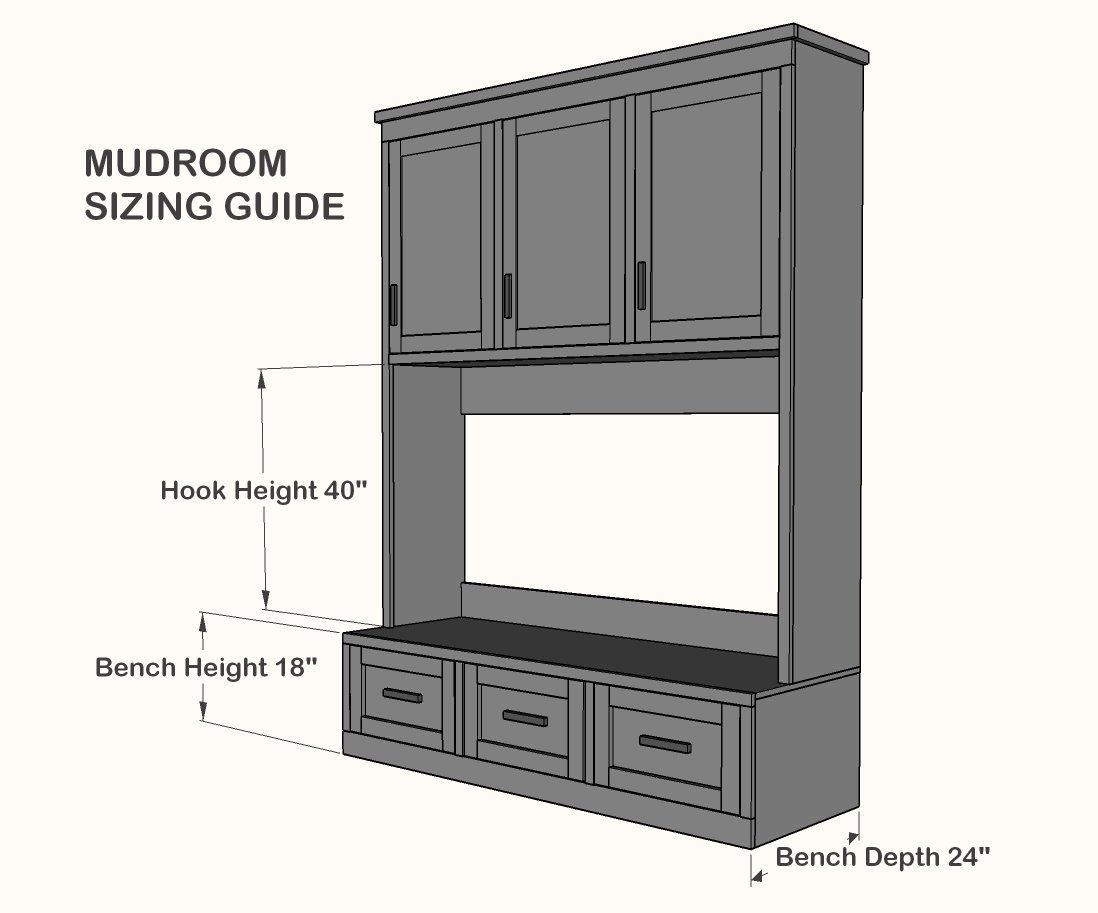
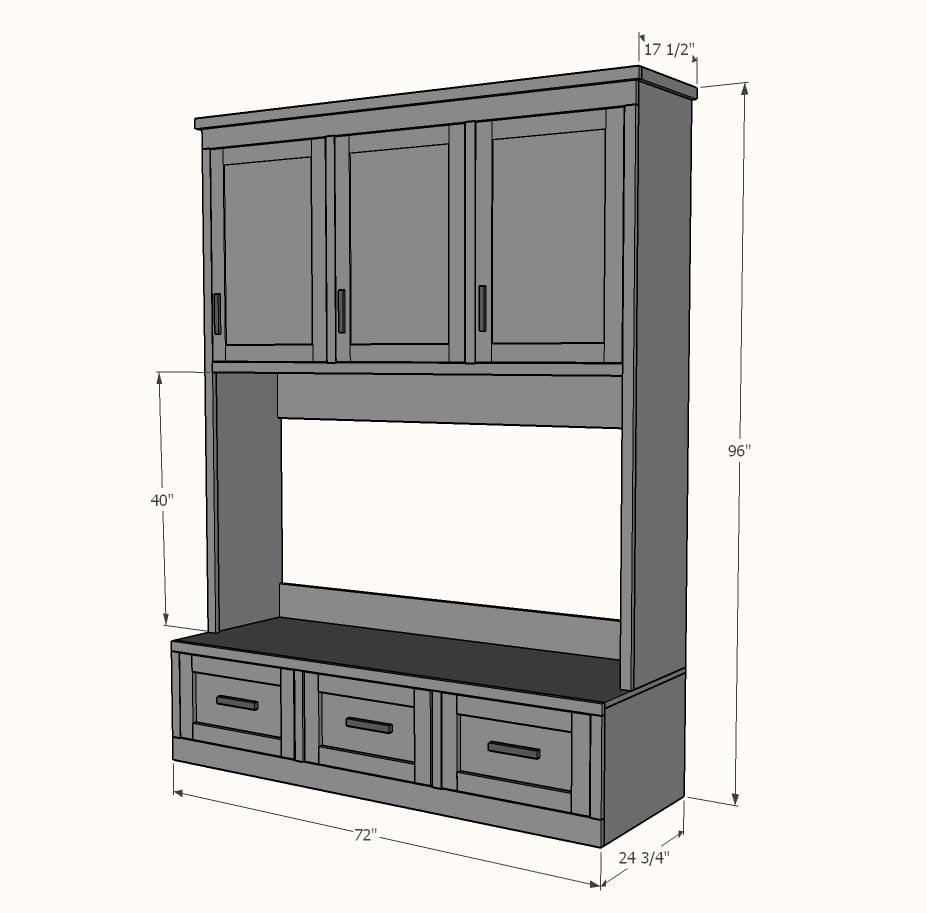
PS - If you are customizing for your own space, here's a few dimensions I thought you might find helpful -
Preparation
2 - sheets 3/4" plywood, ripped into strips 8 feet long x 15-3/4" wide (can also use 1x12s, cabinet will be less deep)
2 - 1x6 @ 6 feet long
2 - 1x4 @ 6 feet long
4 - 1x2 @ 8 feet long
4 - 1x3 @ 8 feet long
3 sets of hinges for inset doors
6 magnetic clasps
3 knobs or pulls
hooks
CARCASS
2 - 3/4" plywood 15-3/4" x 77"
3 - 3/4" plywood @ 15-3/4" x 70-1/2"
2 - 1x6 @ 70-1/2"
1 - 1x4 or similar (1x3 or plywood strip) @ 70-1/2"
FACE FRAME
1 - 1x4 @ 72"
2 - 1x2 @ 73-1/2"
1 - 1x2 @ 69"
2 - 1x2 @ 32"
DOORS
Build to fit with 1x3s and 1/4" plywood


Instructions
Step 1

This project is designed to fit on top of this drawer bench - the plans are here.
Step 2

Drill three 3/4" pocket holes on each end of all the shelf boards. Attach to the sides with 1-1/4" pocket hole screws and glue.
NOTE: For attaching to the bench, you may want to drill 3/4" pocket holes on bottoms of the sides.
Step 3
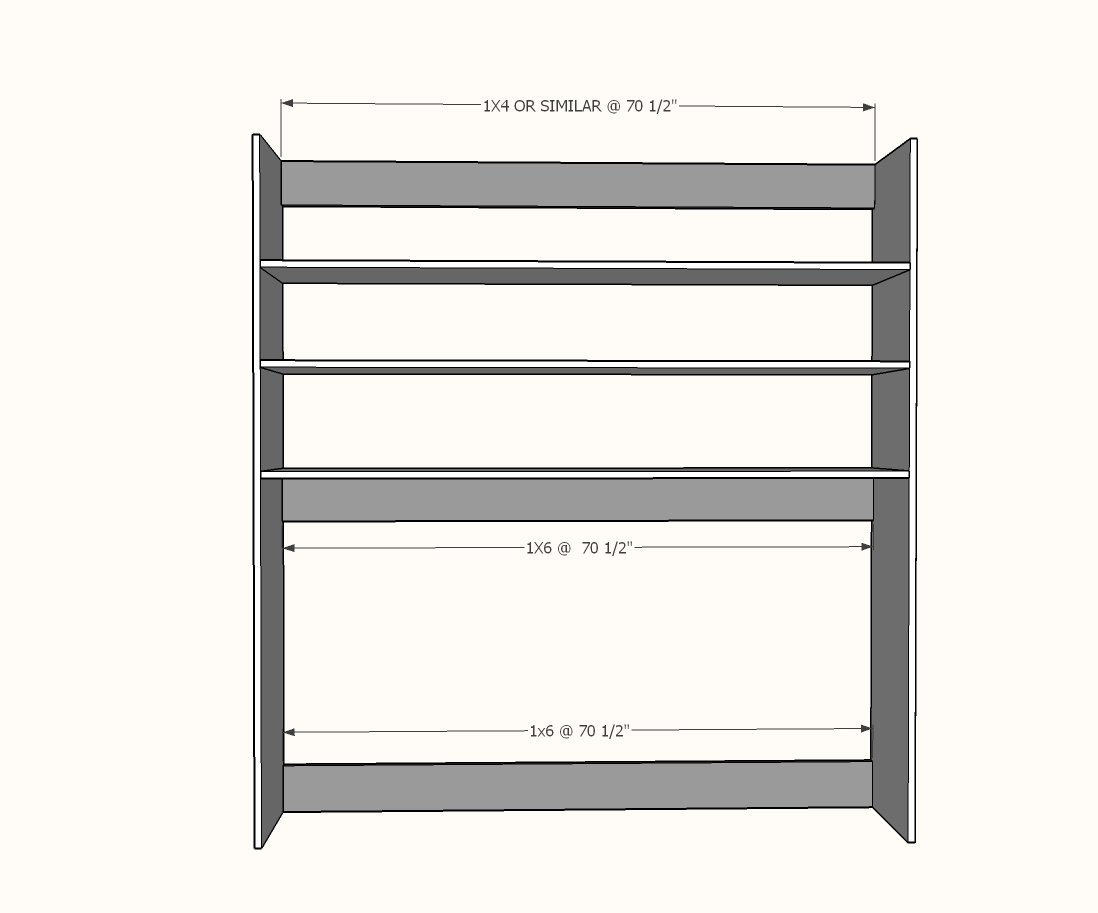
Drill two 3/4" pocket holes on each end of all the 1x6 and 1x4 boards. Attach to the sides as shown in the diagram. Also nail the bottom shelf to the top edge of the middle 1x board (where the hooks go) with 1-1/4" brad nails and glue.
NOTE: If you expect heavy loads on the top two shelves, add a 1x3 under the back edge of the top two shelves (same as you did for the board that will hold the hooks) this will add alot more support to the upper two shelves.
Step 4

Build the face frame seperately with 3/4" pocket holes and 1-1/4" pocket hole screws and glue. Attach to front of cabinet with 1-1/4" brad nails and glue. Make sure you nail to the shelves.
Step 5


Comments
maeve
Tue, 12/04/2018 - 01:50
Build a box concept
Really like this idea. Been wanting to make a faux fireplace surround for an existing electric heater (rarely used, outside stays cool, heat blows out front). Your fireplace is great but larger than what we are able to use.
Not good with the math so trying to adapt it was frying my brain - until you made entryway cabinet bench using the "build a box" concept. Now when I look at the fireplace I see four boxes, making it easier for me to adapt it.
Just wanted to run it by you (and Jacob) to determine the soundness of this idea, or if there was a glaringly obvious reason why it wouldn't work.
Thanks for your inspiration and generosity! (Would have attached a photo of the heater but couldn't figure out how! For future reference, is this possible?)
ShalakoZuni
Tue, 04/27/2021 - 11:36
Mounting the cabinet doors?
How did you mount the cabinet doors? Did you attached to the face frame, carcass, or shelves?