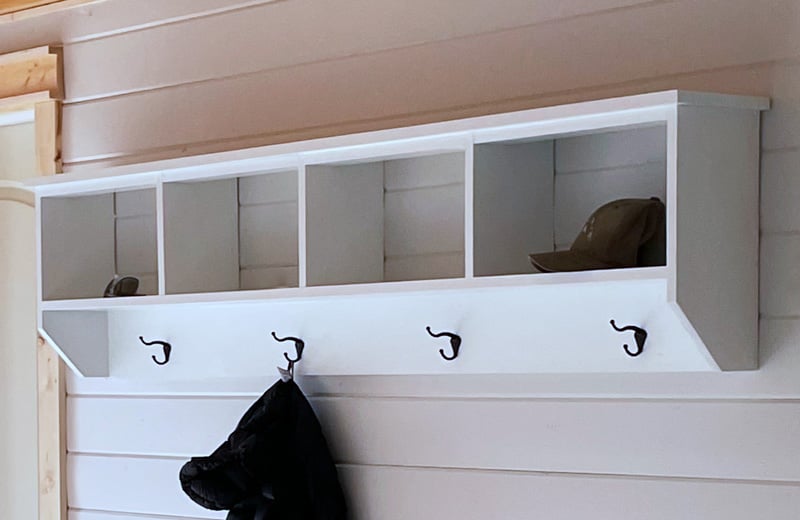


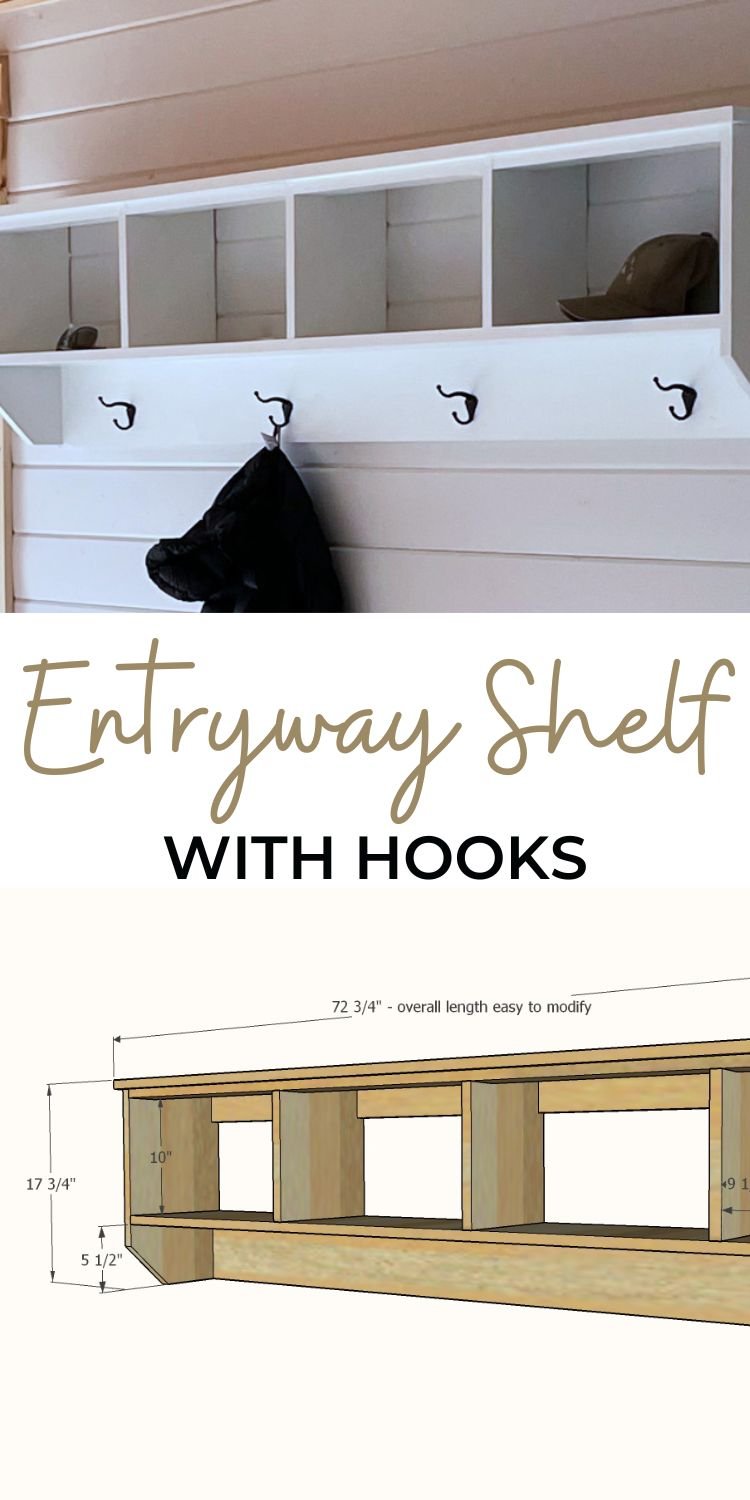
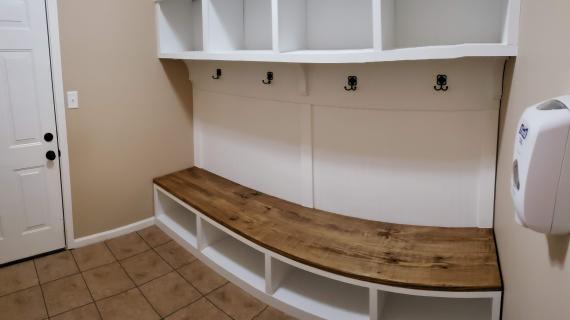
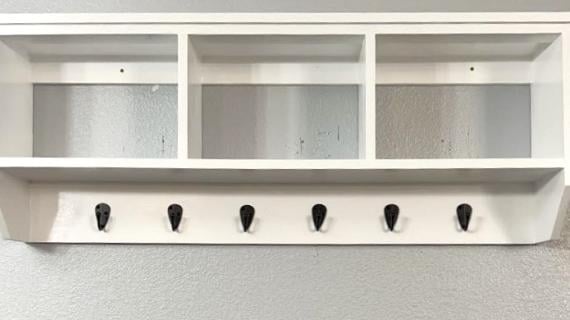
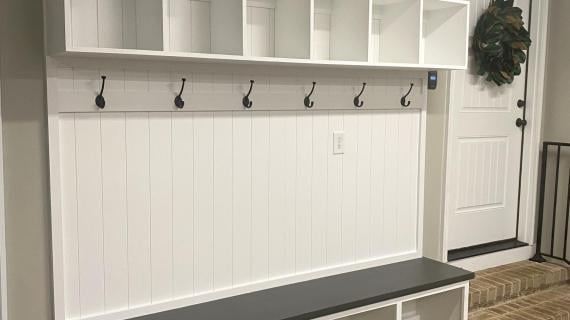
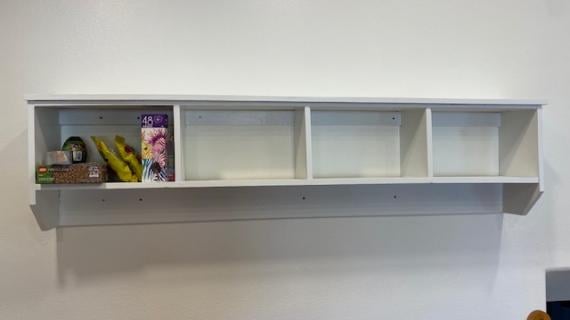
Build your own entryway wall organizer with hooks. This essential piece is a tried and true option for mudrooms and entryways. Easy to adjust in size for a perfect fit for your space and needs. Free step by step plans with build video by Ana-White.com
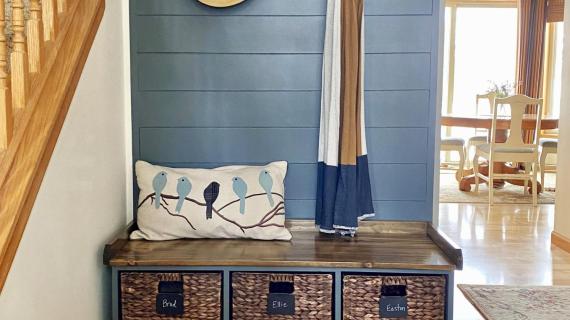
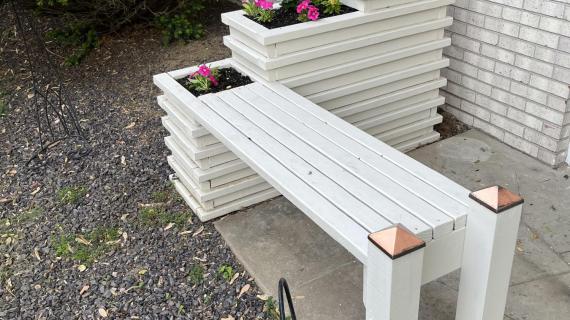
See Also: Essential Entryway Bench Plans
An good entryway or mudroom system is critical for an organized home. You need to know where things are, where they belong, so you can come and go without searching for misplaced items, or wondering where to put things.
Why This Entryway Set is Essential
There are many ways to organize an entryway - everything from built in cabinetry to eclectic solutions. But this system - what I call our "Essential Entryway System" is one I keep coming back to.
- Because it works in small spaces, and in big spaces.
- Because it works in modern spaces, and farmhouse spaces.
- Because it works when you are renting or a homeowner - it is not a permanent fixture.
- Because it works in front entryways and separate mudrooms.
- Because it's easy to modify in size.
- Because it has the right storage for just about any climate and family situation. I use it and I live in Alaska with three kids.
- This system - the wall organizer and matching bench - can work for almost everyone in almost any home.

Why Not a Built-In Mudroom?
For this space, I thought long and hard about adding a full built-in mudroom solution. You know I do love me some built-in mudroom cabinetry.
But ultimately decided against that, since a built-in system would close off and make the space feel smaller. And since this is the main entryway (not a separate mudroom) I did not want it to feel like a back mudroom entrance.
Watch - Entryway Shelf with Hooks Build Video
We took the time to create a video showing how this shelf was built. But in the video, I did not like how the inside supports were added, so I updated this plan to a better method.
Custom Size Entryway Shelf
You can use our free design app to create a custom sized shelf to get the spacing right.
This plan is for just the wall shelf with hooks. You can find the matching bench plans here.
Pin For Later!
Preparation
Shopping List as Shown in Photos (72-3/4" long)
- 1 - 1x10 @ 12 feet long
- 3 - 1x3 @ 8 feet long
- 1 - 1x6 @ 6 feet long
- 1 - 1x8 @ 8 feet long
- 1-1/4" brad nails and wood glue
- 2-1/2" or longer wood screws for hanging to studs in wall, at least 4
For a custom size, create a cut list first, and then figure your materials.
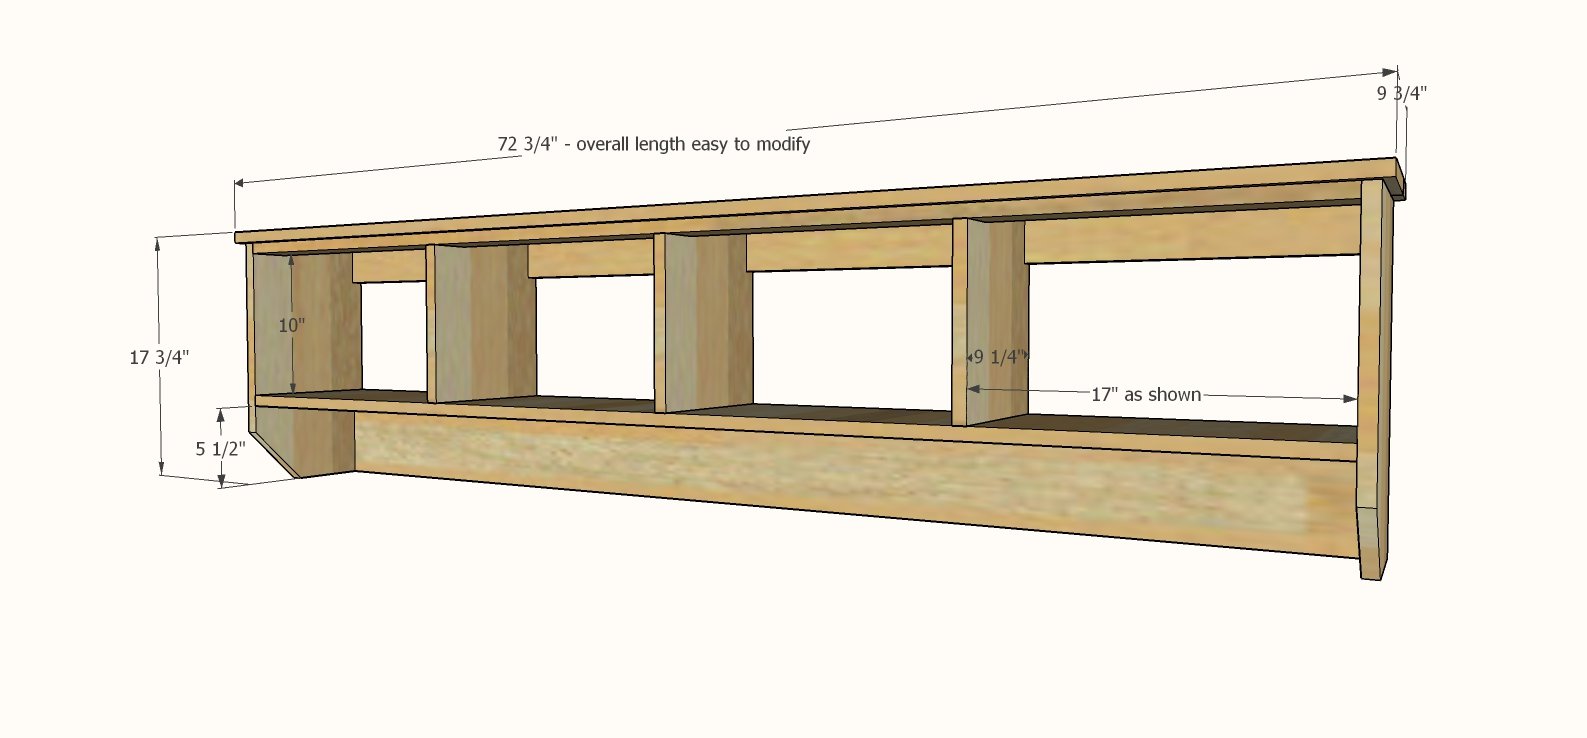
Cut List for 72-3/4" long Shelf (as shown in photos) - but should be modified to fit your space
- 2 - 1x10 @ 17" - sides (same for all sizes)
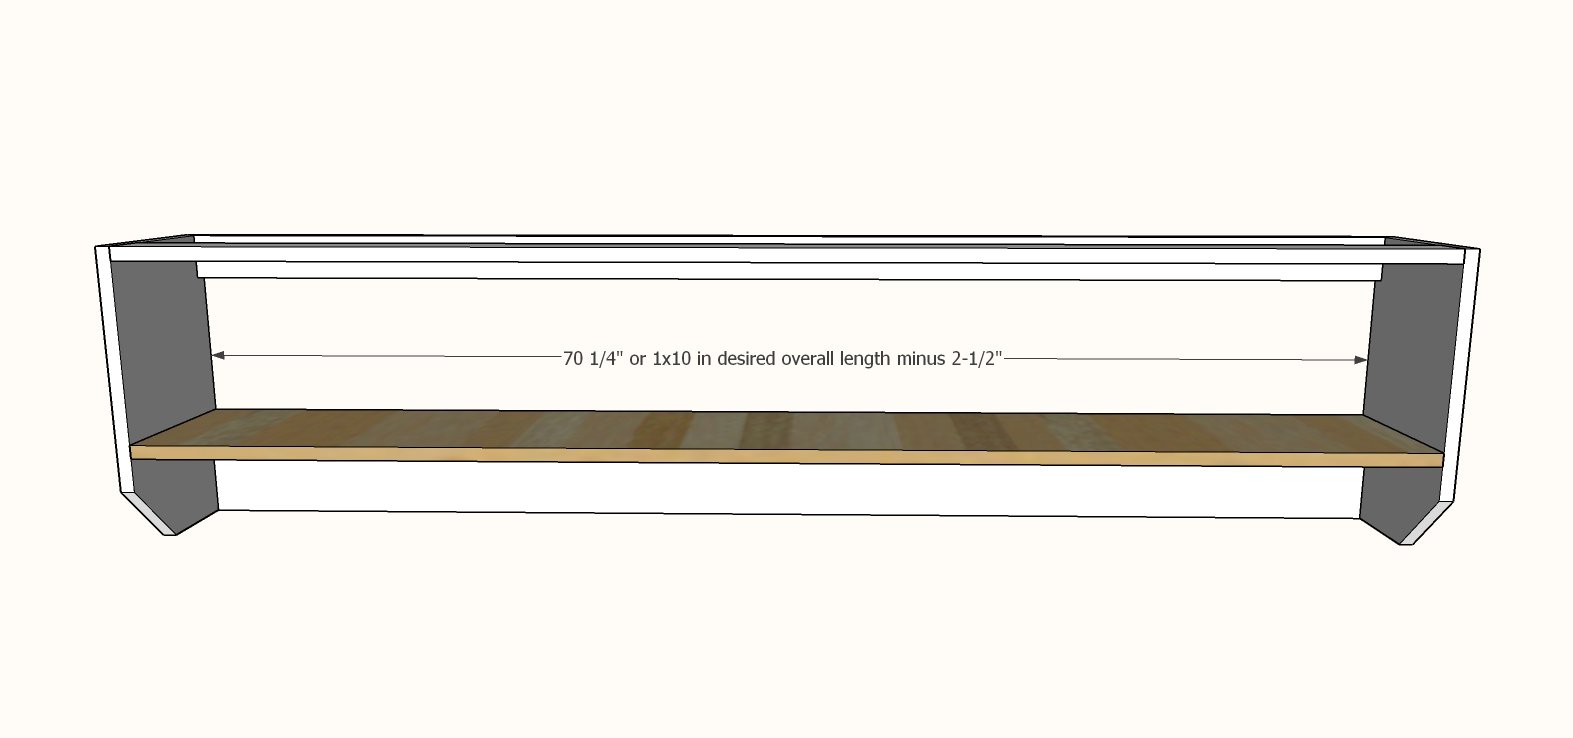
- 2 - 1x3 @ 70-1/4" - top and back supports (Size Modification: 2-1/2" less than overall desired length of shelf)
- 1 - 1x6 @ 70-1/4" - bottom (Size Modification: 2-1/2" less than the overall desired length of shelf)
- 1 - 1x10 @ 70-1/4" - bottom shelf (Size Modification: 2-1/2" less than the overall desired length of the shelf)
- 3 - 1x10 @ 10-3/4" - dividers (Size Modification: 3 dividers for 4 bays, adjust number of dividers needed depending on number of bays)
- 1 - 1x3 @ 72-3/4" - top (Size Modification: overall desired length of shelf)
- 1 - 1x8 @ 72-3/4" - top (Size Modification: overall desired length of shelf)


Instructions
Step 1
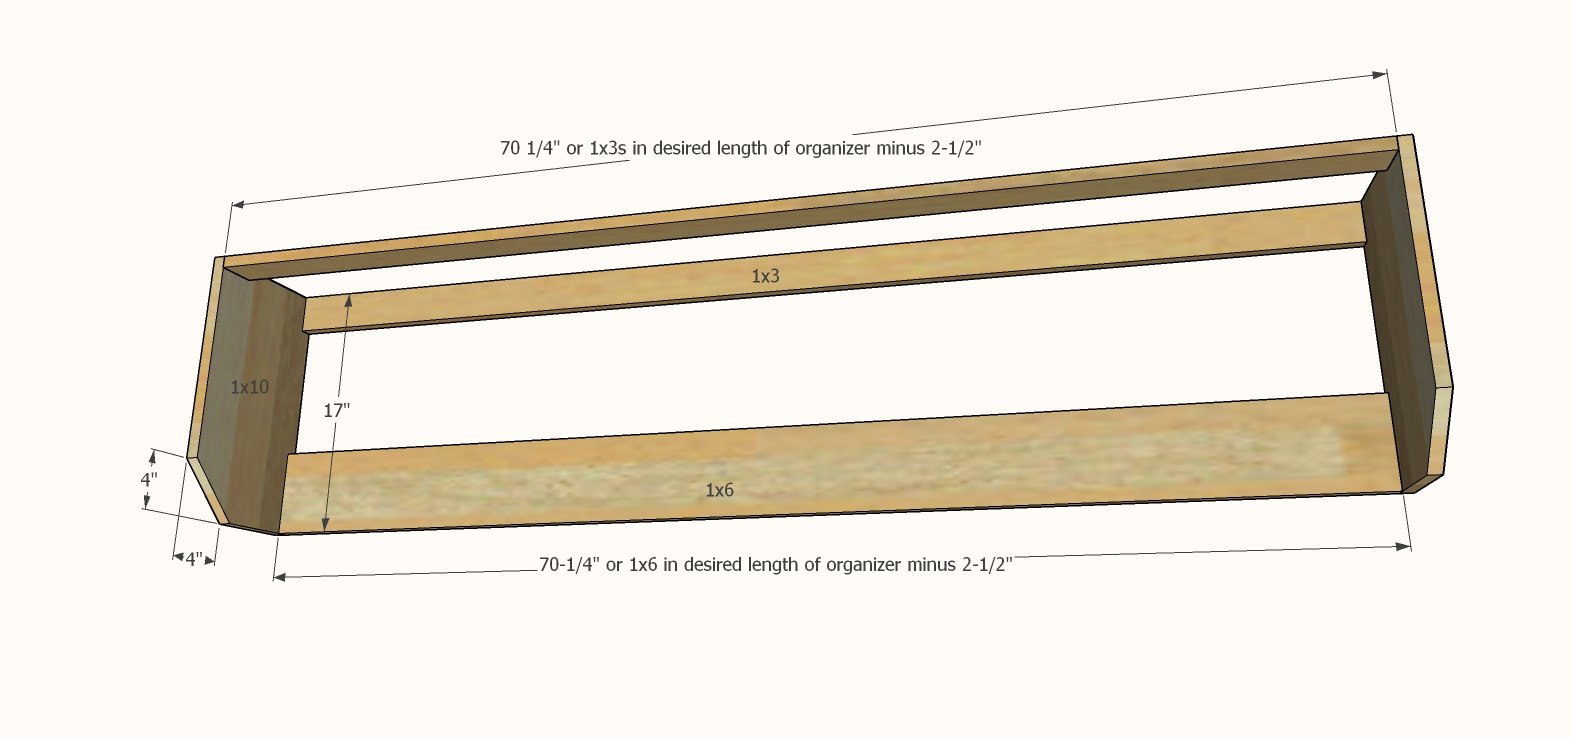
Mark the sides with a carpenter's square and cut off at a 45 degree angle, 4" back and 4" up.
Then attach the back with 1-1/4" brad nails and glue to the two sides. Repeat for the top and back 1x3.
TIP: If you have a pocket hole jig, you can also attach all boards in this step with 3/4" pocket holes and 1-1/4" pocket holes crews, placing pocket holes on the back or top sides so they are hidden when finished.
Step 2
Use your square to mark a square line at the top of your 1x6 board, across your 1x10 side boards (where the bottom of the shelf will be).
Then attach bottom shelf to both the 1x6 bottom and sides with 1-1/4" brad nails and wood glue.
Step 3
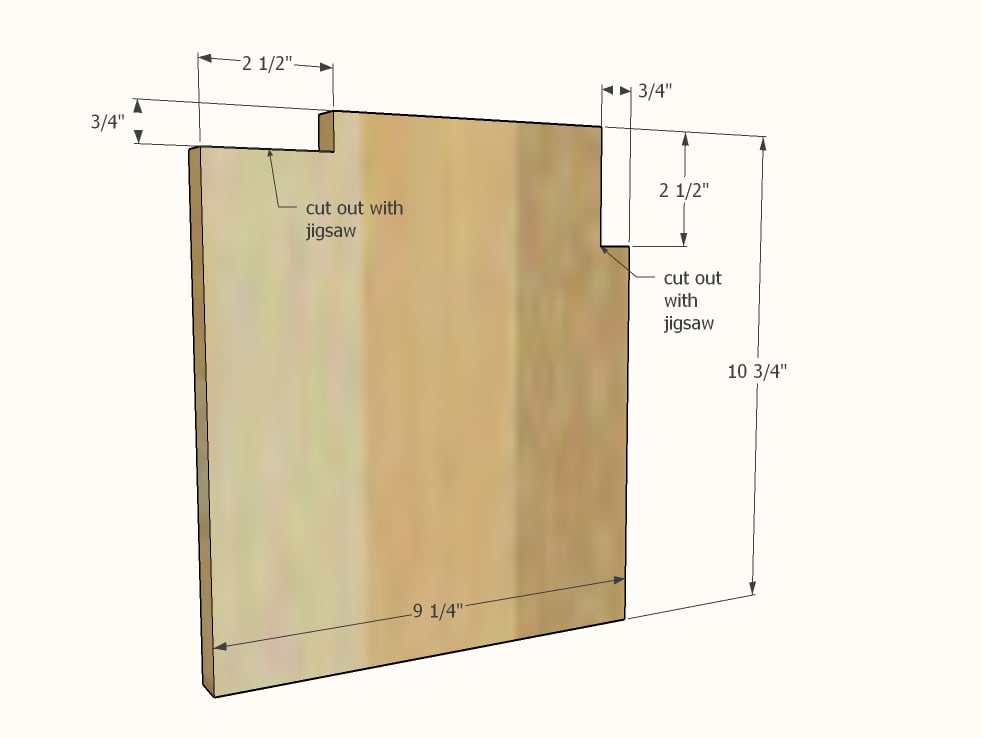
Notch out the dividers at the top and back as shown, to allow a 1x3 to pass through.
Step 4

Place dividers inside the shelf and attach with 1-1/4" brad nails and glue.
You will be able to lay flat, and then rotate upwards to fit inside the shelf.
Step 5
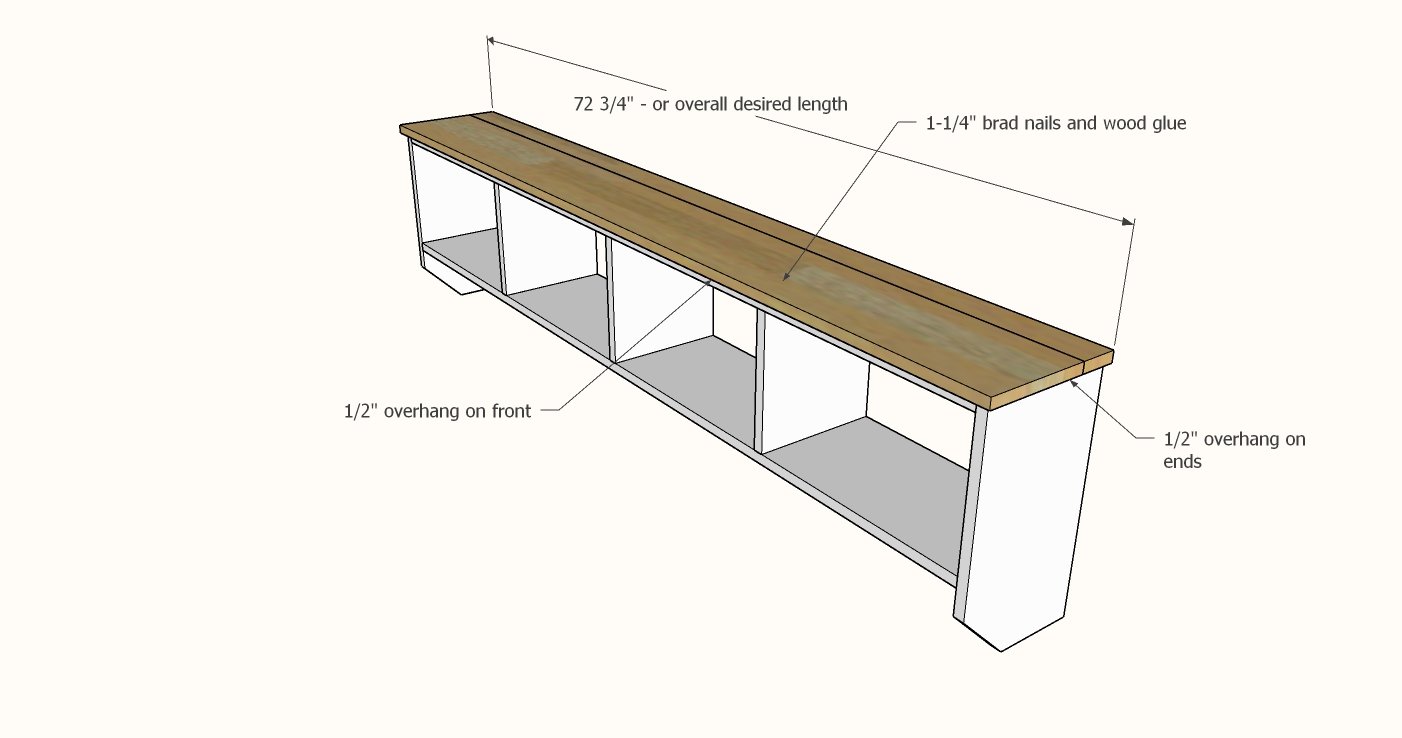
Attach 1x3 to the top, so it is flush to the back and 1/2" overhangs on the ends, with 1-1/4" brad nails and wood glue.
Apply glue to the front edge of 1x3 and top and add the remaining 1x8 top board, so it overhangs 1/2" on sides and front.
Attach with 1-1/4" brad nails and wood glue.
Fill nail holes with wood filler. Lightly sand as needed with 120 grit sandpaper. Paint or stain as desired.
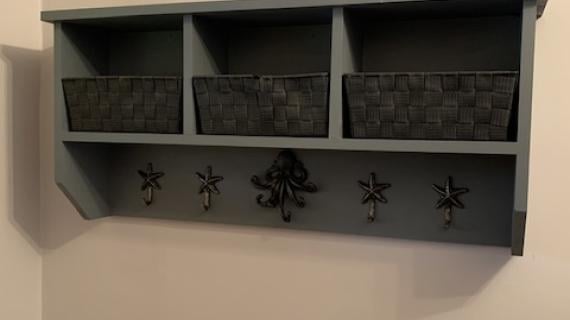
Add hooks, I positioned my hooks centered on each bay, slightly lower than center to allow for easy use of hooks.
Step 6
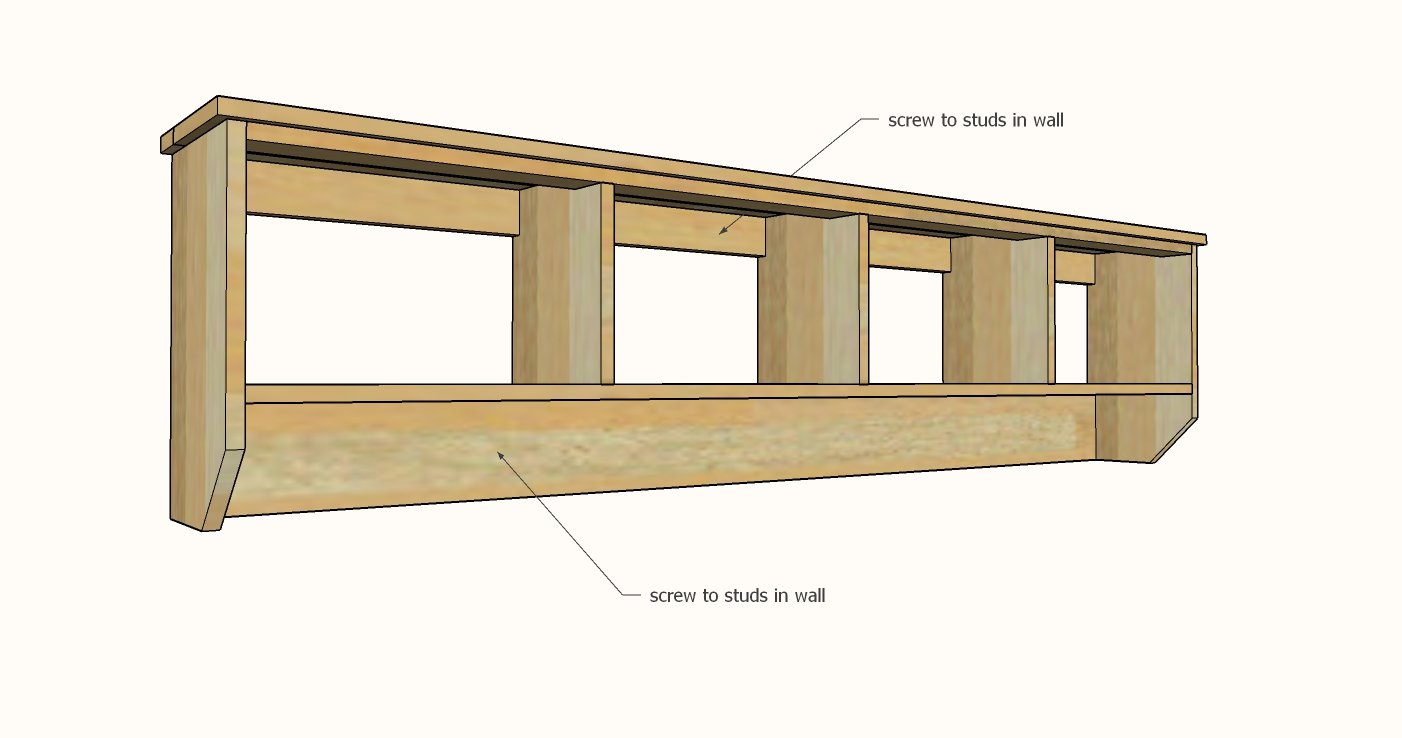
Locate studs in the wall and attach shelf to studs in wall. Use touch up paint to cover up any exposed screw holes.


Comments
sbenington
Mon, 09/13/2021 - 16:33
Love the shelf and your…
Love the shelf and your helper. :)