


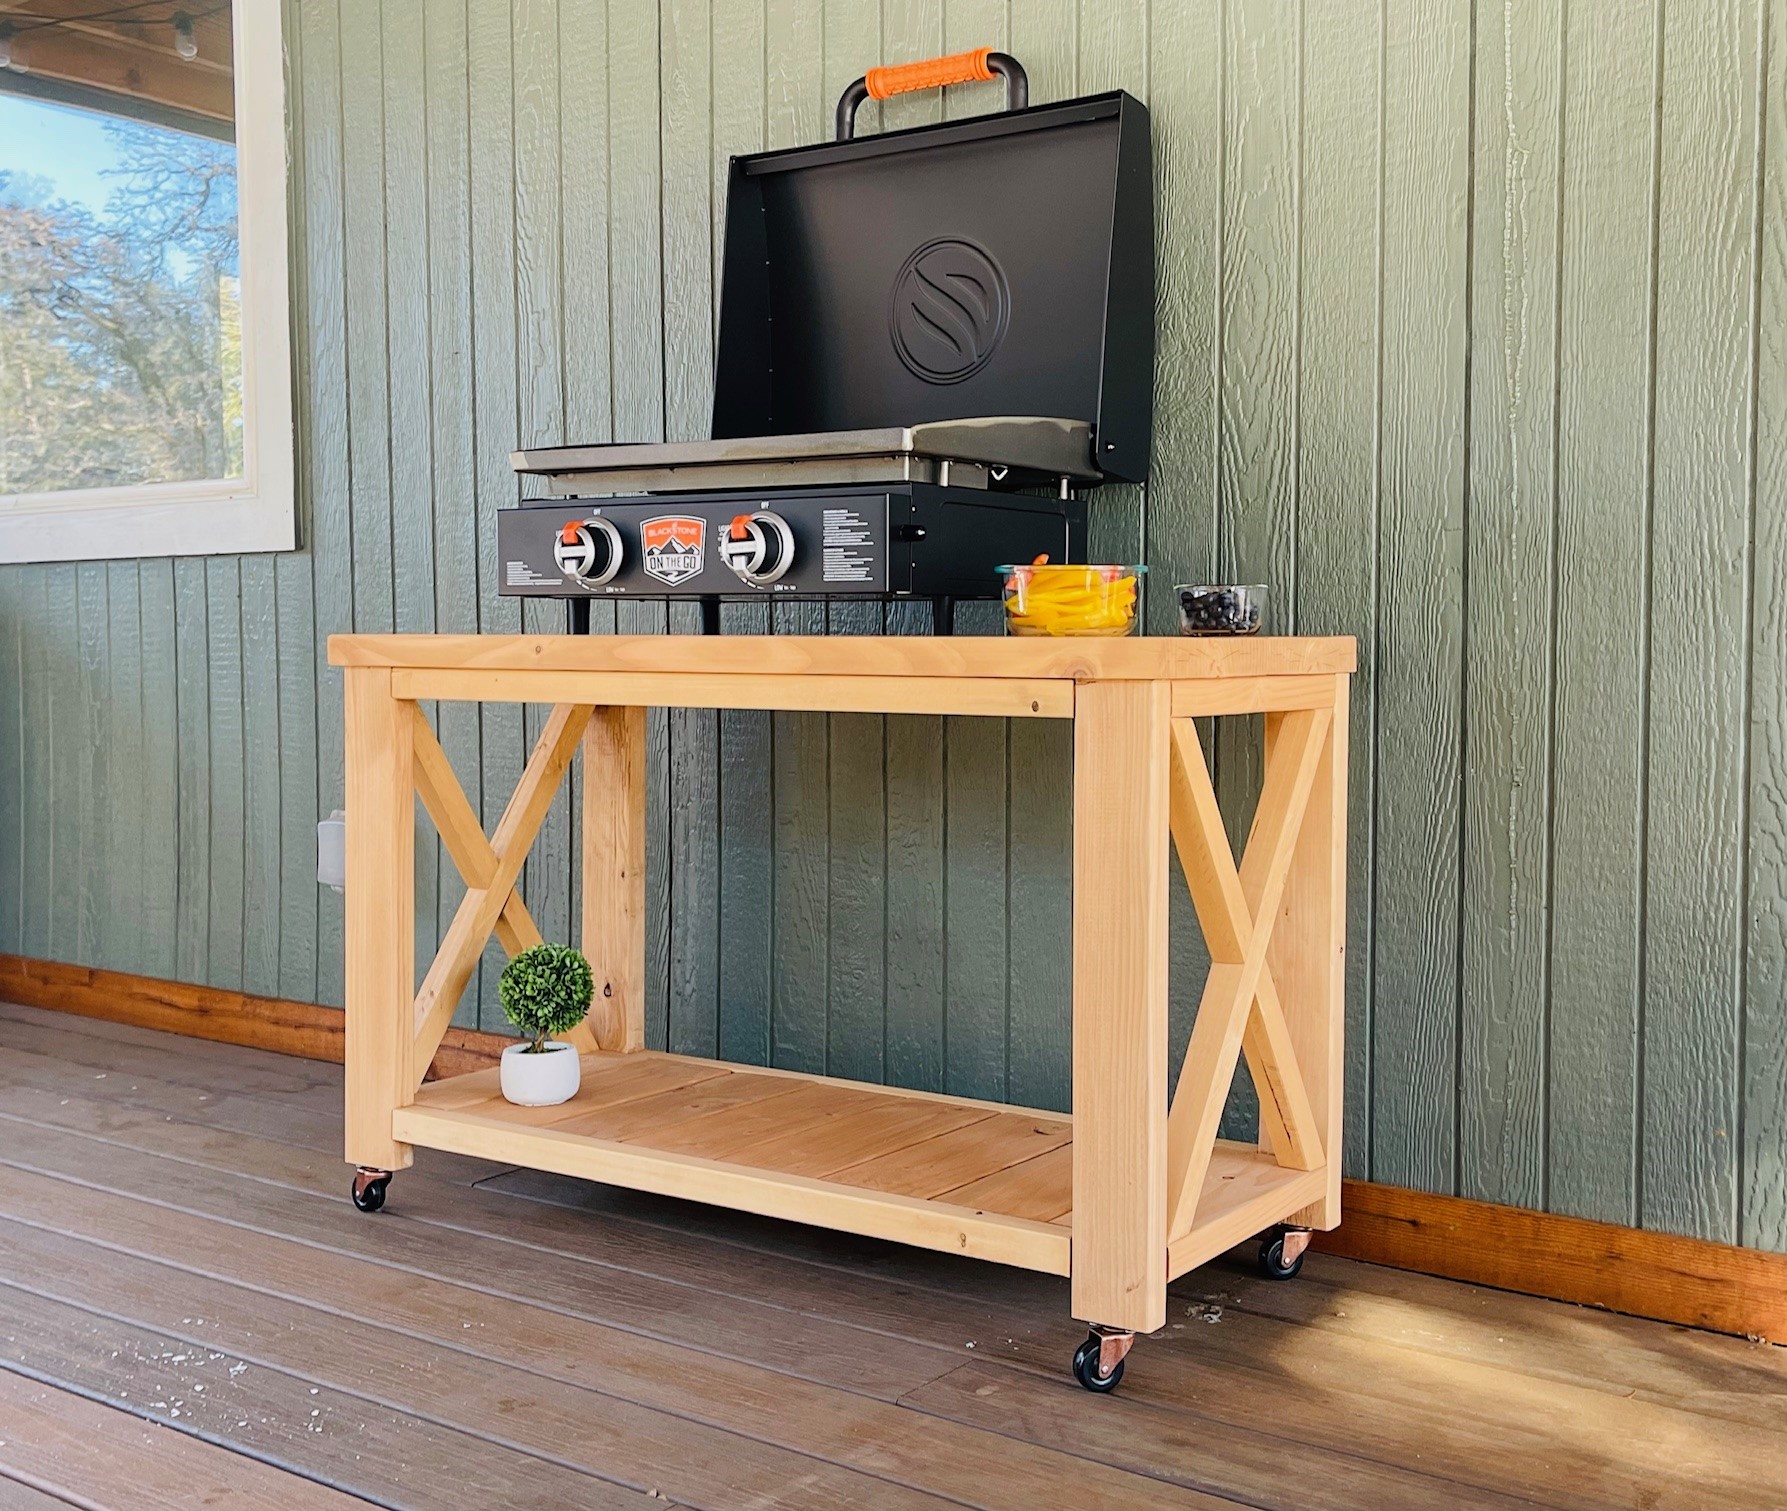
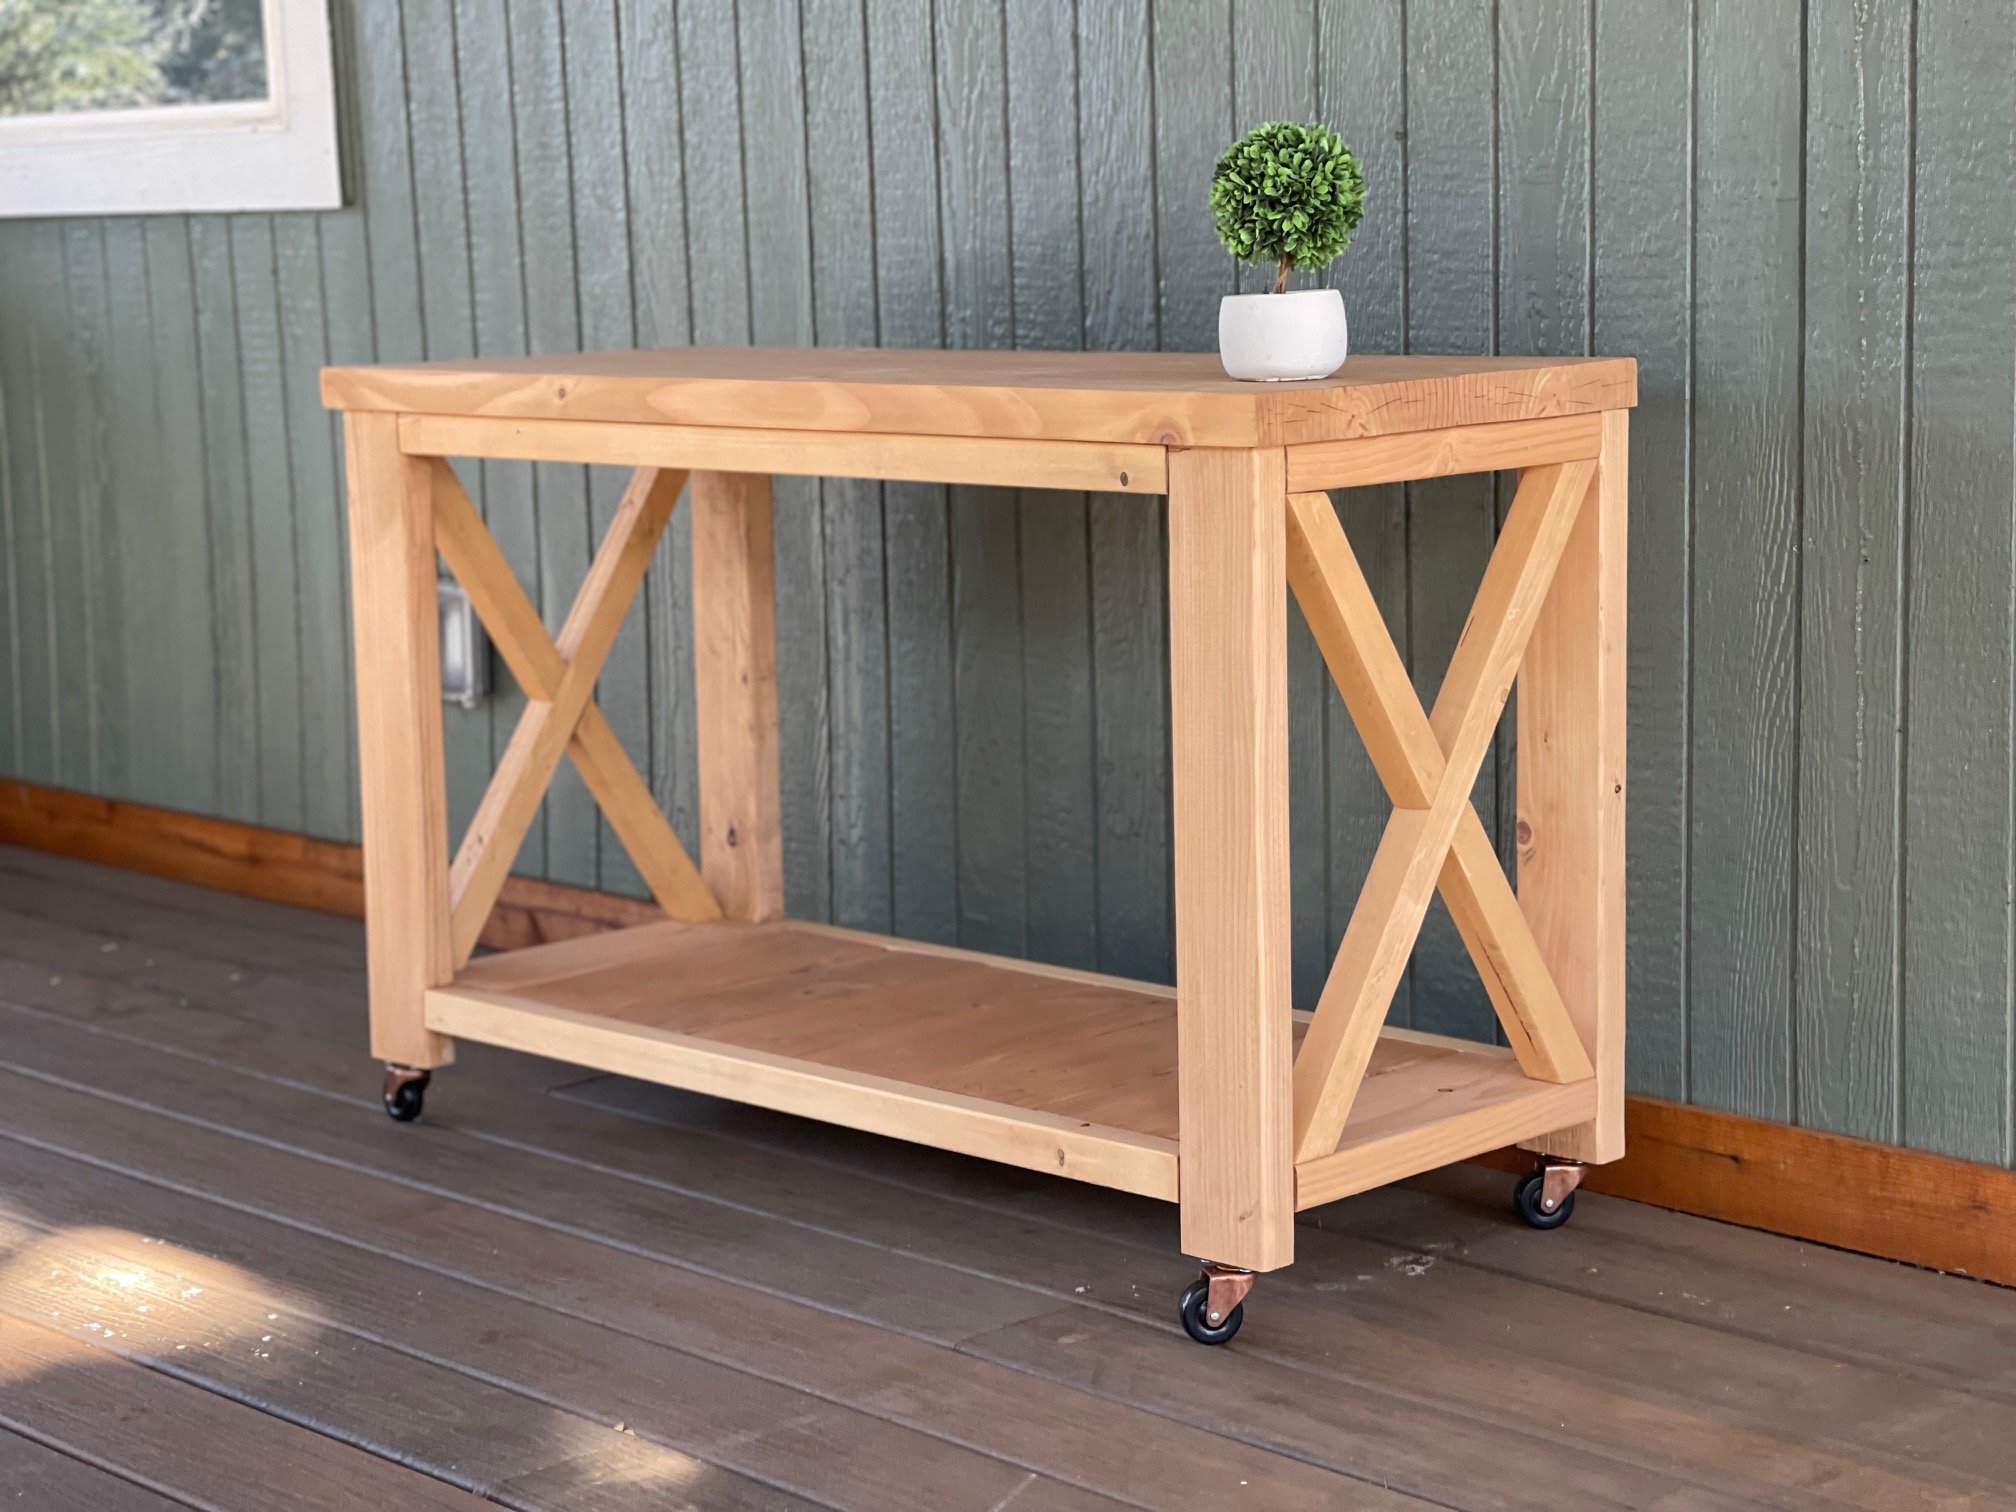
Free plans to build your own console table with farmhouse vibes! This easy to build project can be used indoors or out, and features a good sized top and bottom shelf. Add baskets, bins, or keep open for boots and shoes - this farmhouse console is versatile and beautiful!
The plans are simple and easy to follow with step by step diagrams, shopping and cut list and video tutorial - from Ana-White.com
Pin For Later!

Preparation
- 2 - 2x4x8' - Legs and Top Support
- 3 - 2x2x8' - Aprons and X's
- 2 - 2x6x8' - Slats and Horizontal Supports
- 1 - 2x10x8' - Top
- 4 - 2" Casters
- 2-1/2" pocket hole screws or self tapping wood screws
Legs
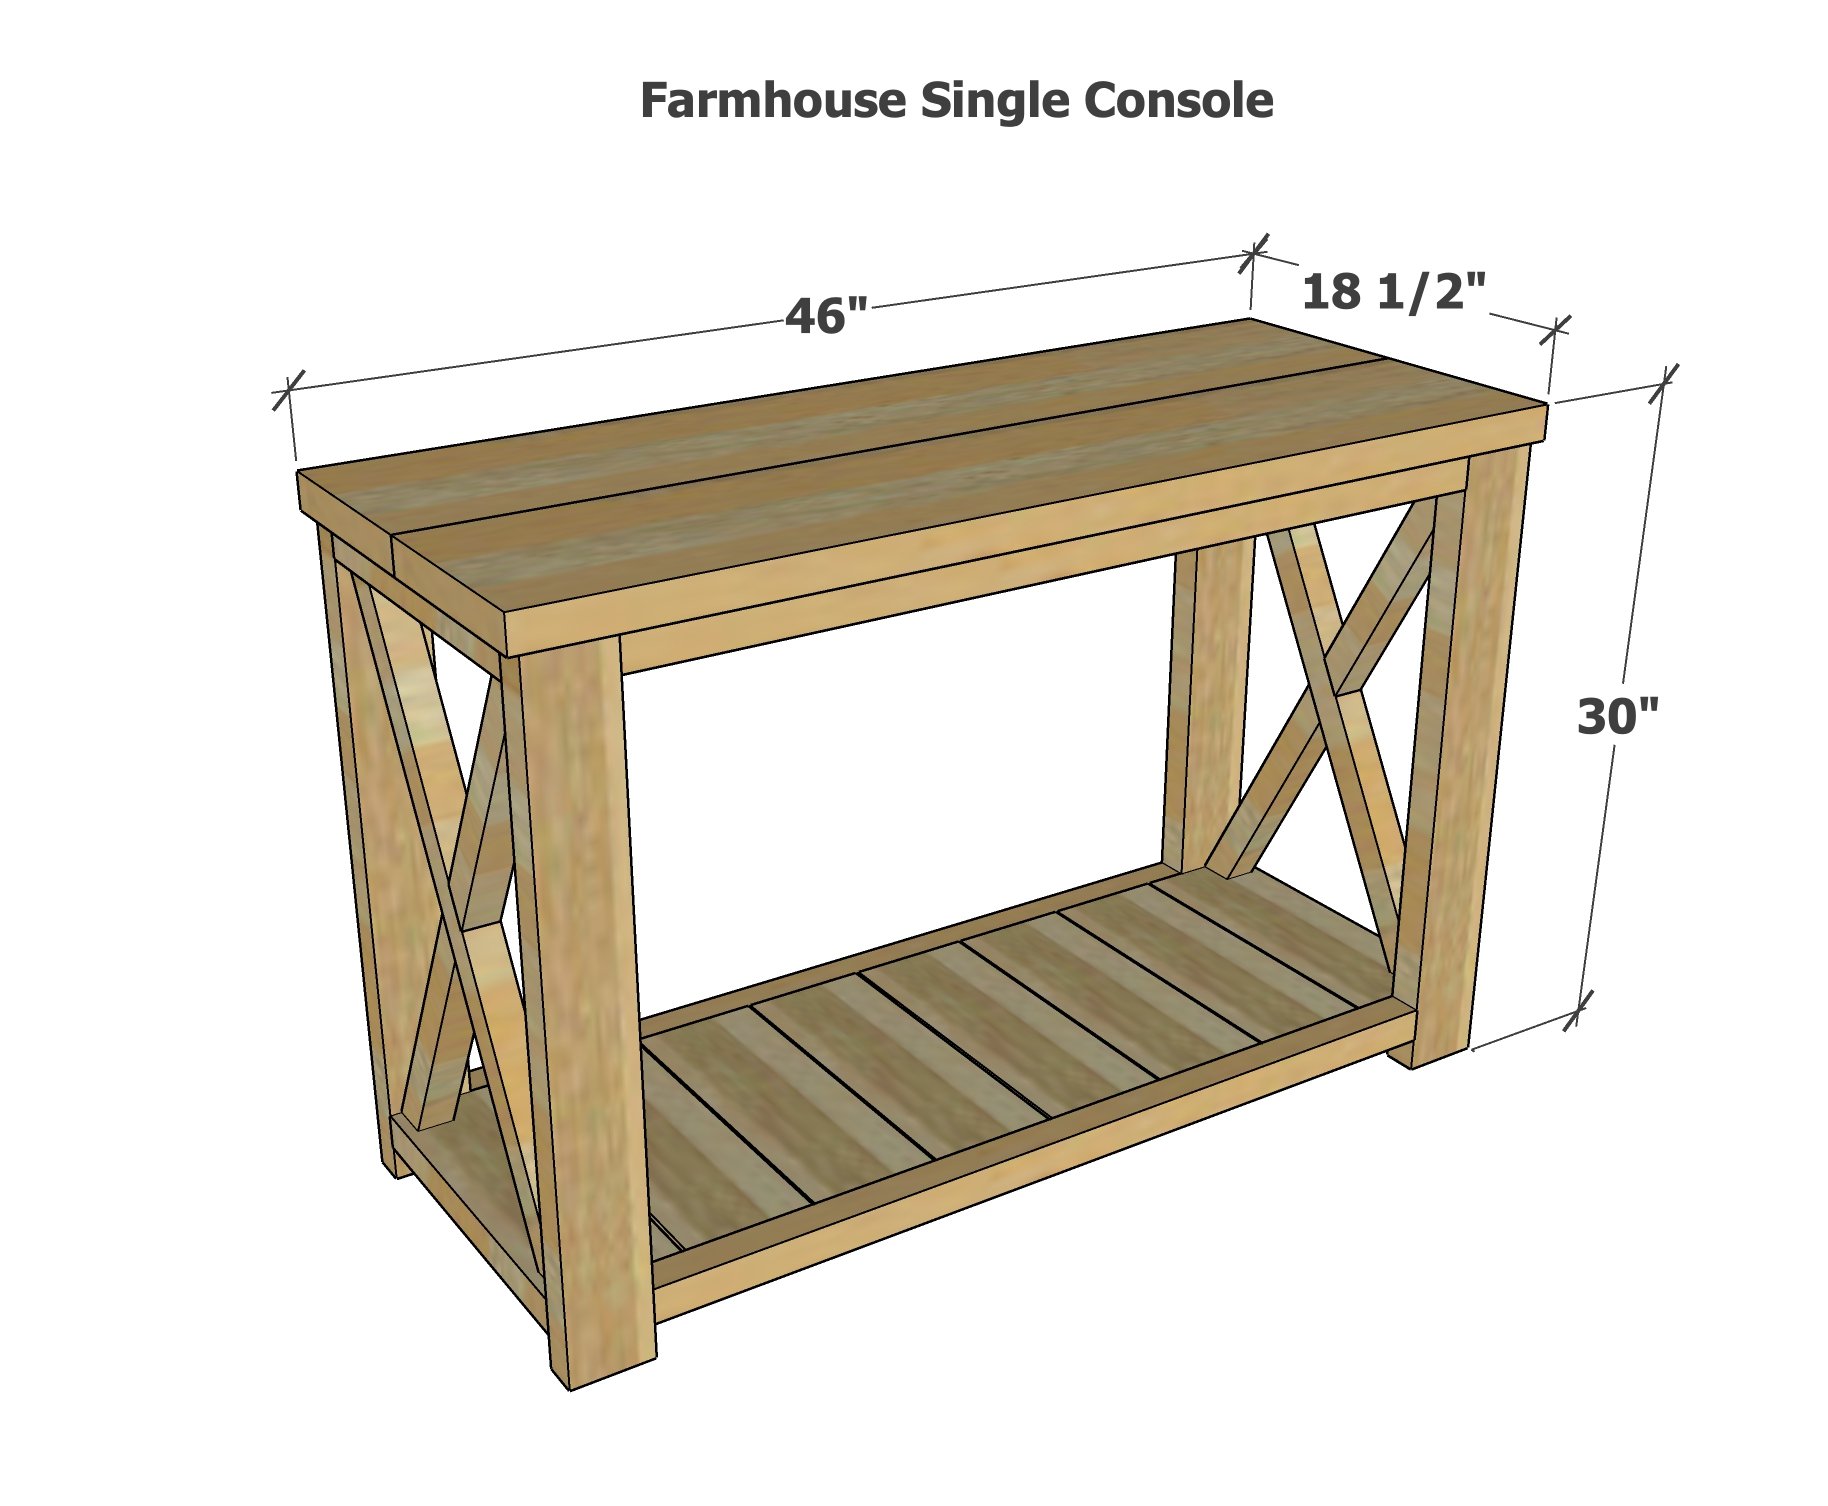
- 4 - 2x4 @ 24.5" with casters or 28.5" without casters
- The leg length with 28.5" will result in a tabletop height of 30" (standard tabletop heights)
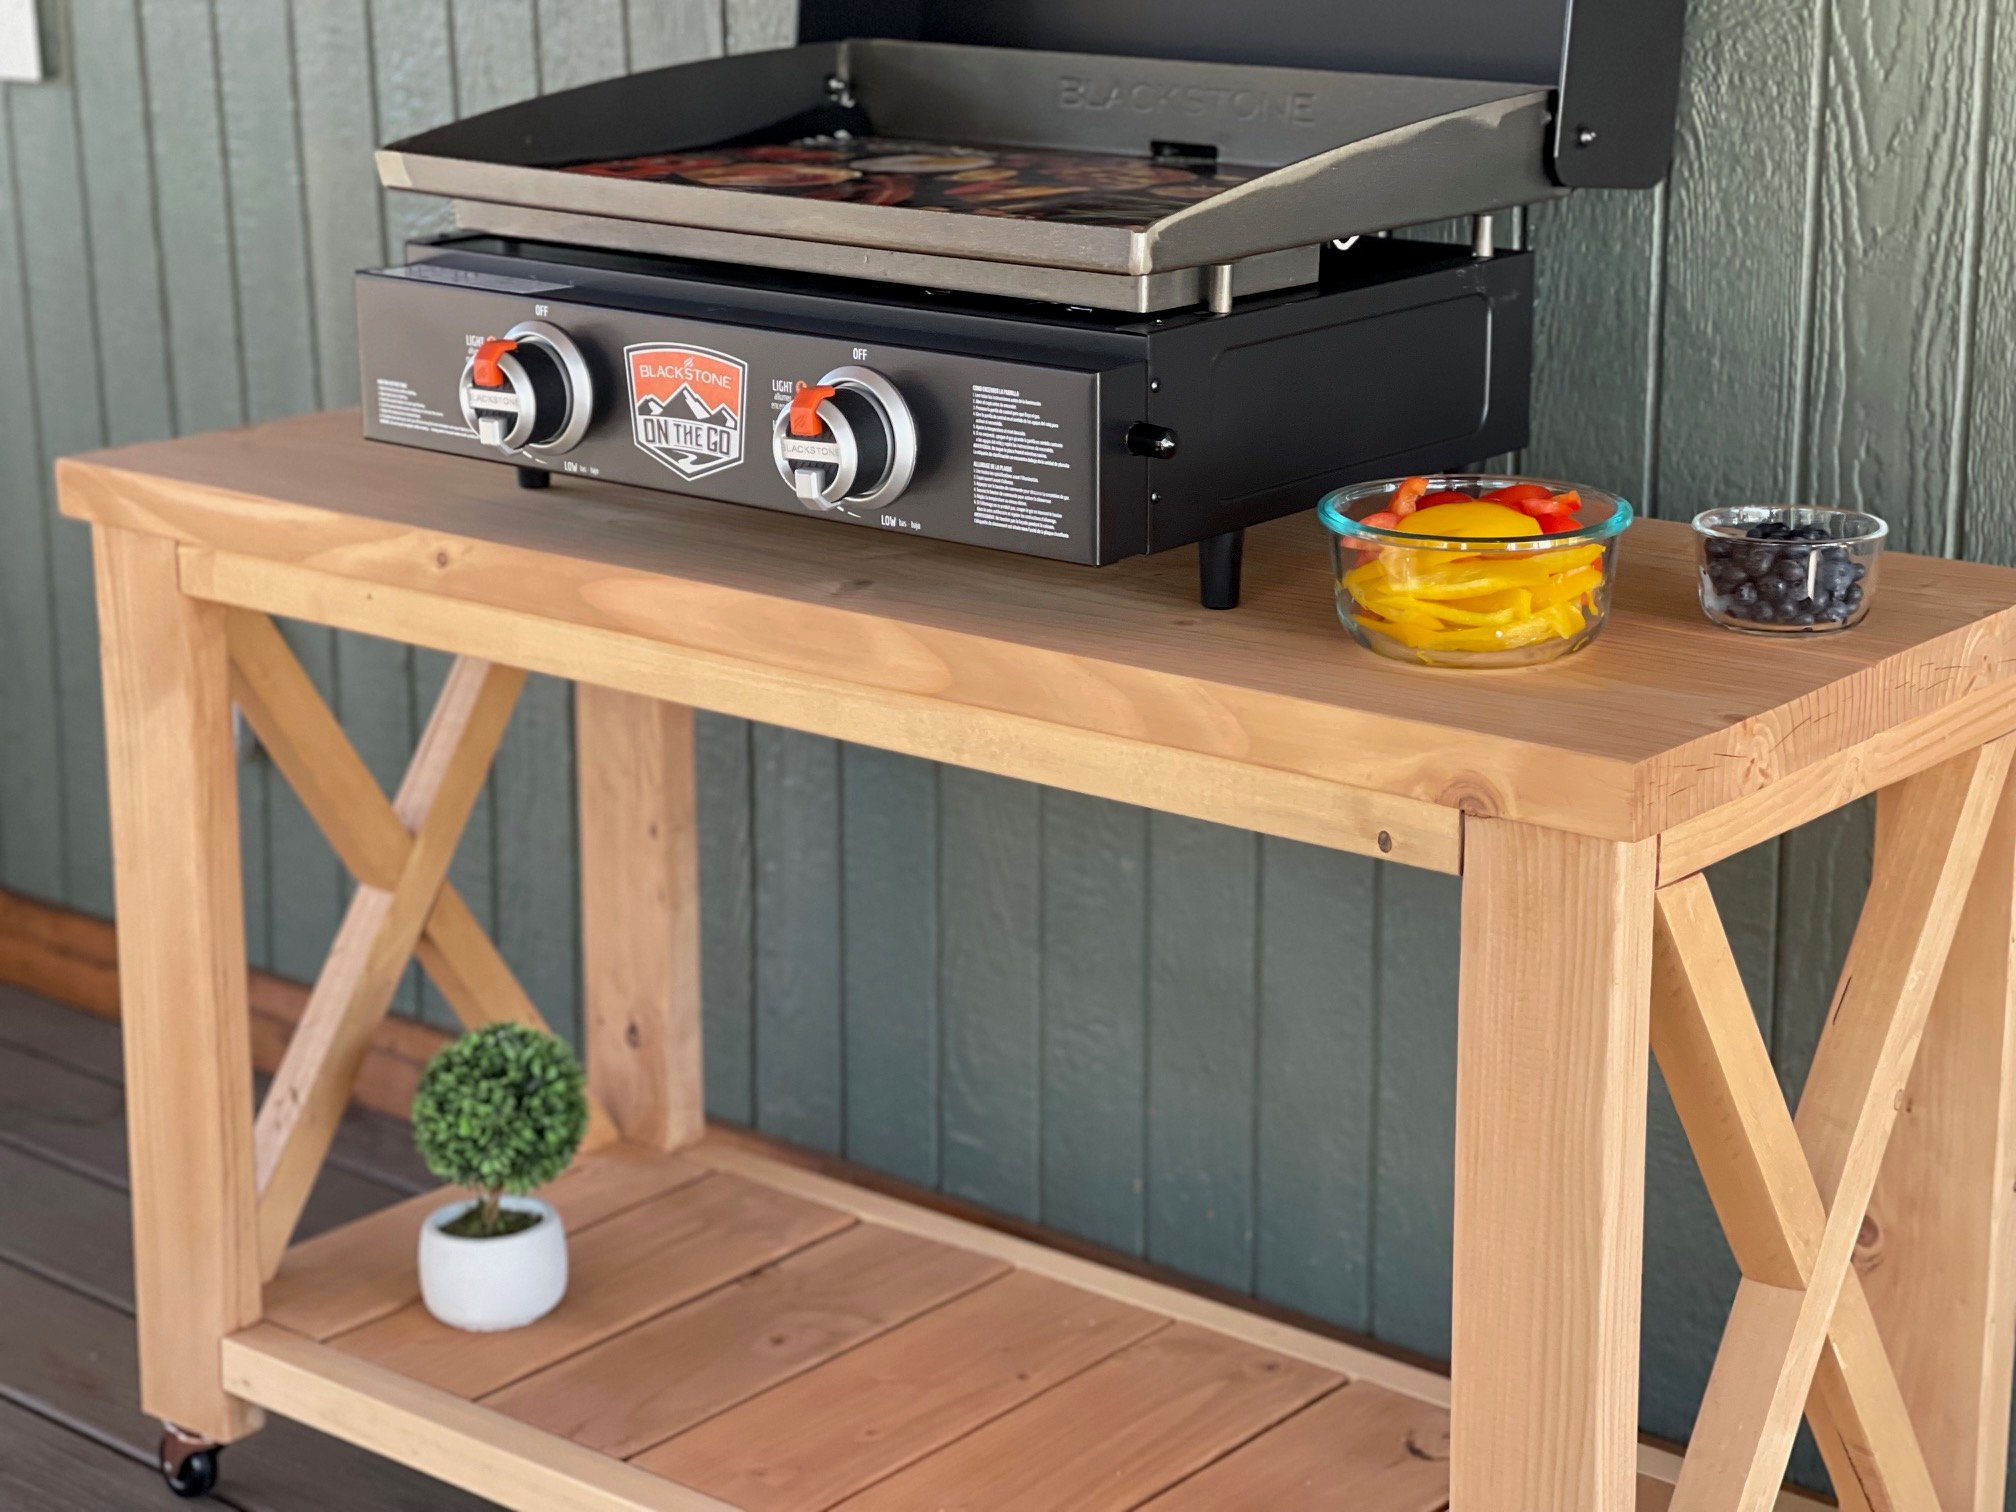
- The leg length of 24.5" with 2" casters will result in a tabletop height of about 27" - this was an ideal height for the blackstone grill top to be at countertop height
Aprons
- 4 - 2x2 @ 38"
Horizontal Leg Supports
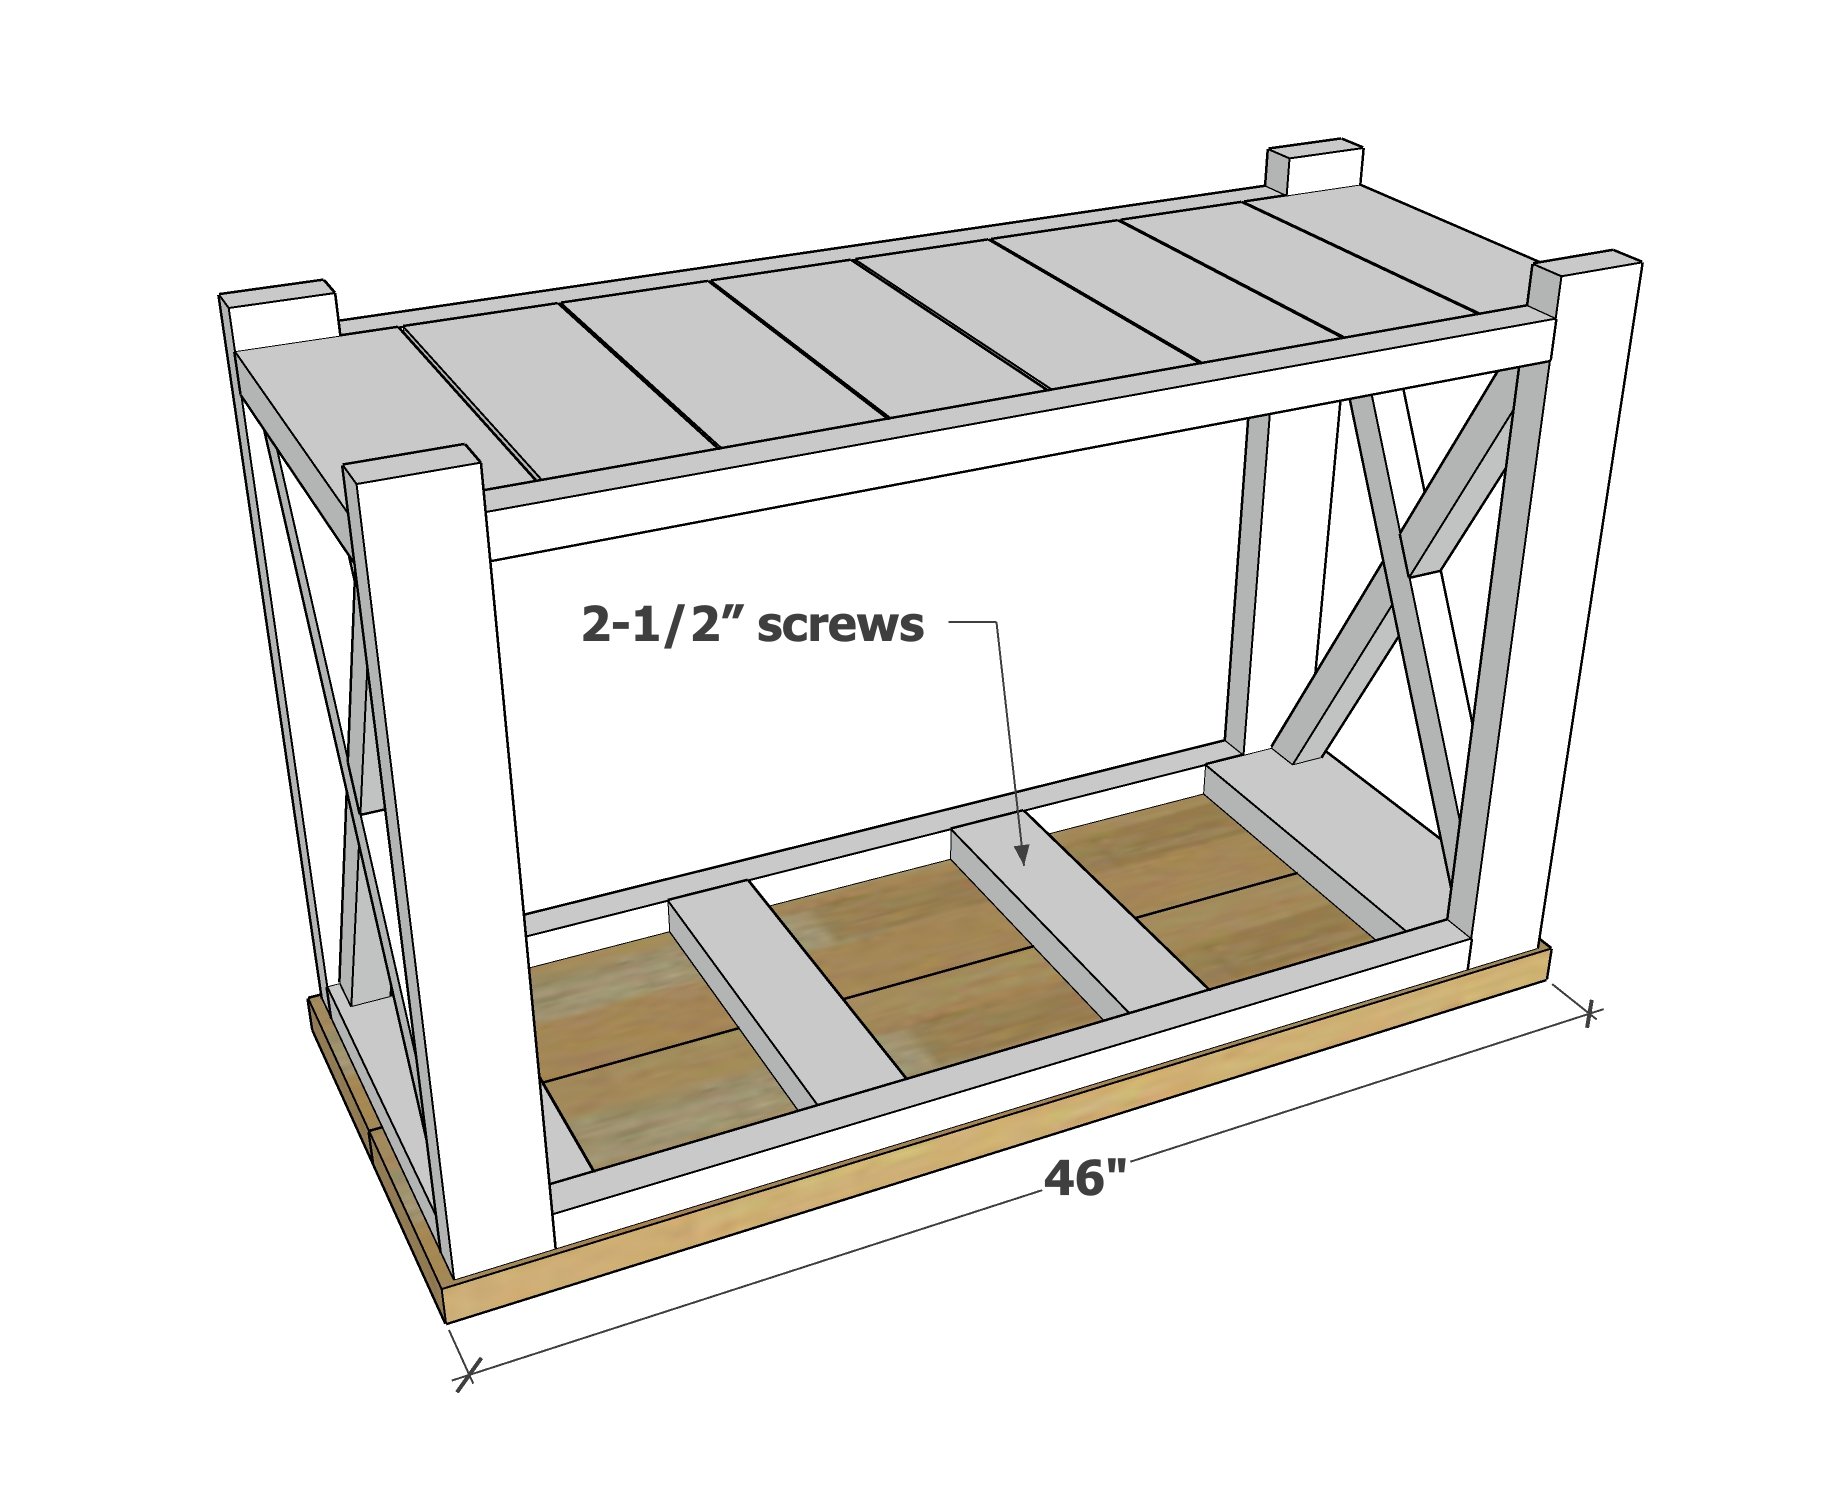
- 4 - 2x6 @ 15"
Bottom Slats
- 6 - 2x6 @ 15"
Side X's
- 4 - Cut to fit, my outside angles were 34 degrees and inside where the x crossed was 24 degrees
Top Boards
- 2 - 2x4's @15" ( added to top frame) for attaching top from underneath
- 2 - 2x10 @ 46", I ripped mine to 9.25" width
4 - 2" Casters
Why We Love this Farmhouse Console Table
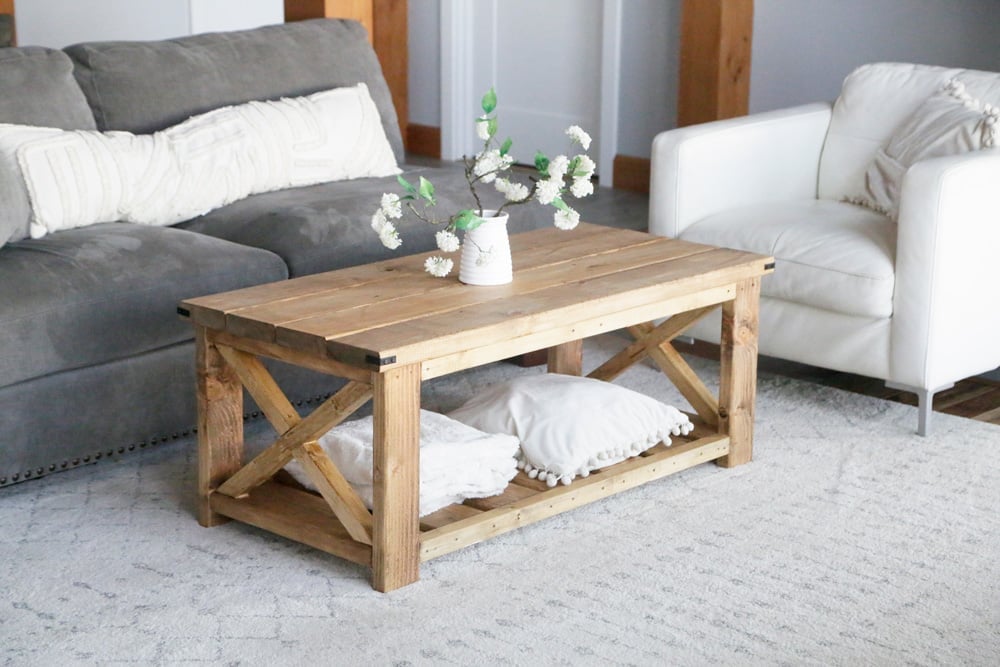
It all started with our farmhouse coffee table, that I built a few years back -
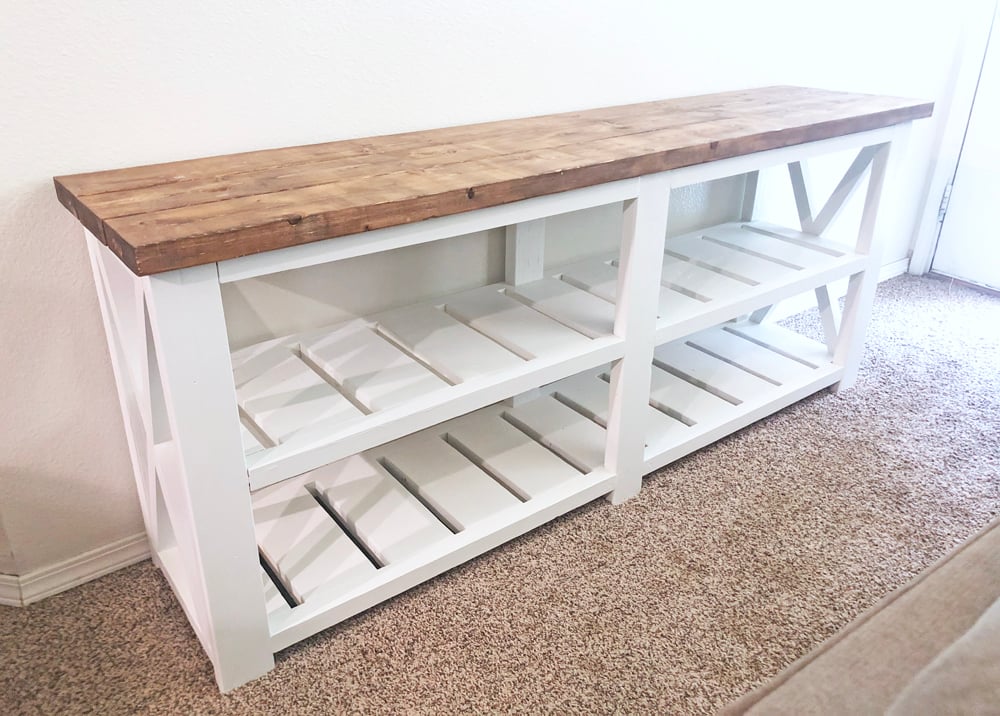
Then came the matching double wide console table -
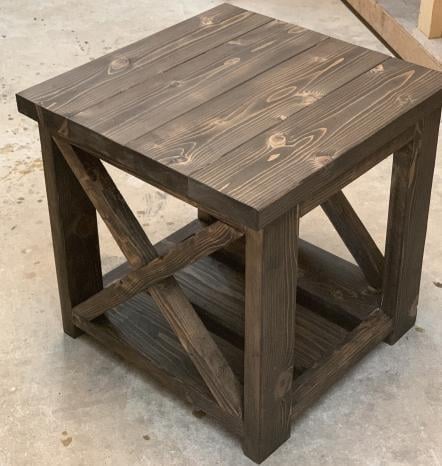
And the farmhouse side tables -
The beauty of this collection is it can be used indoors or out. So when we needed a table to elevate a portable blackstone grill on top of, this was the perfect plan!
How this Farmhouse Console Table was Built
This console is a fairly simple built, here's how it's put together:
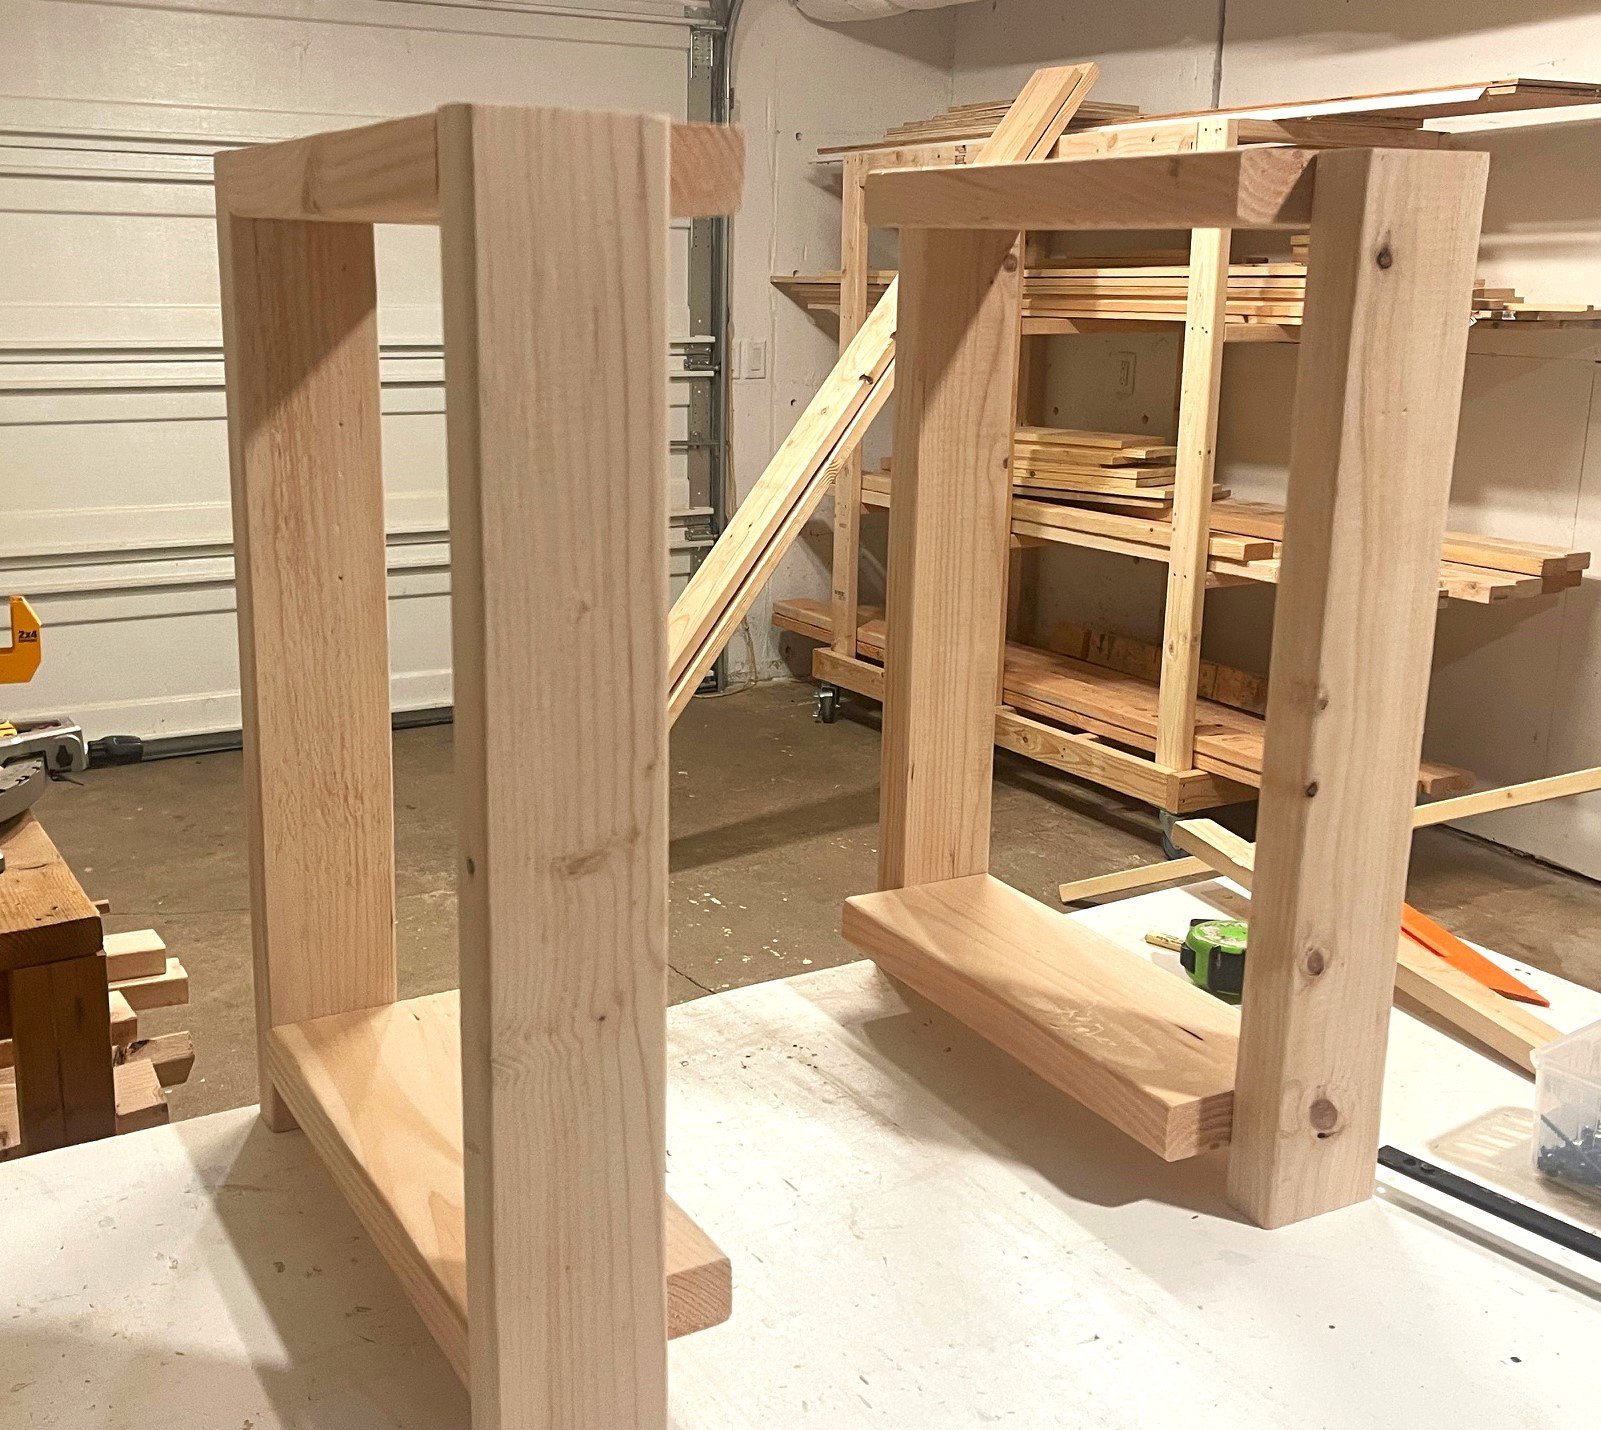
Build two of the leg sets, see how the 2x6 protrudes past?
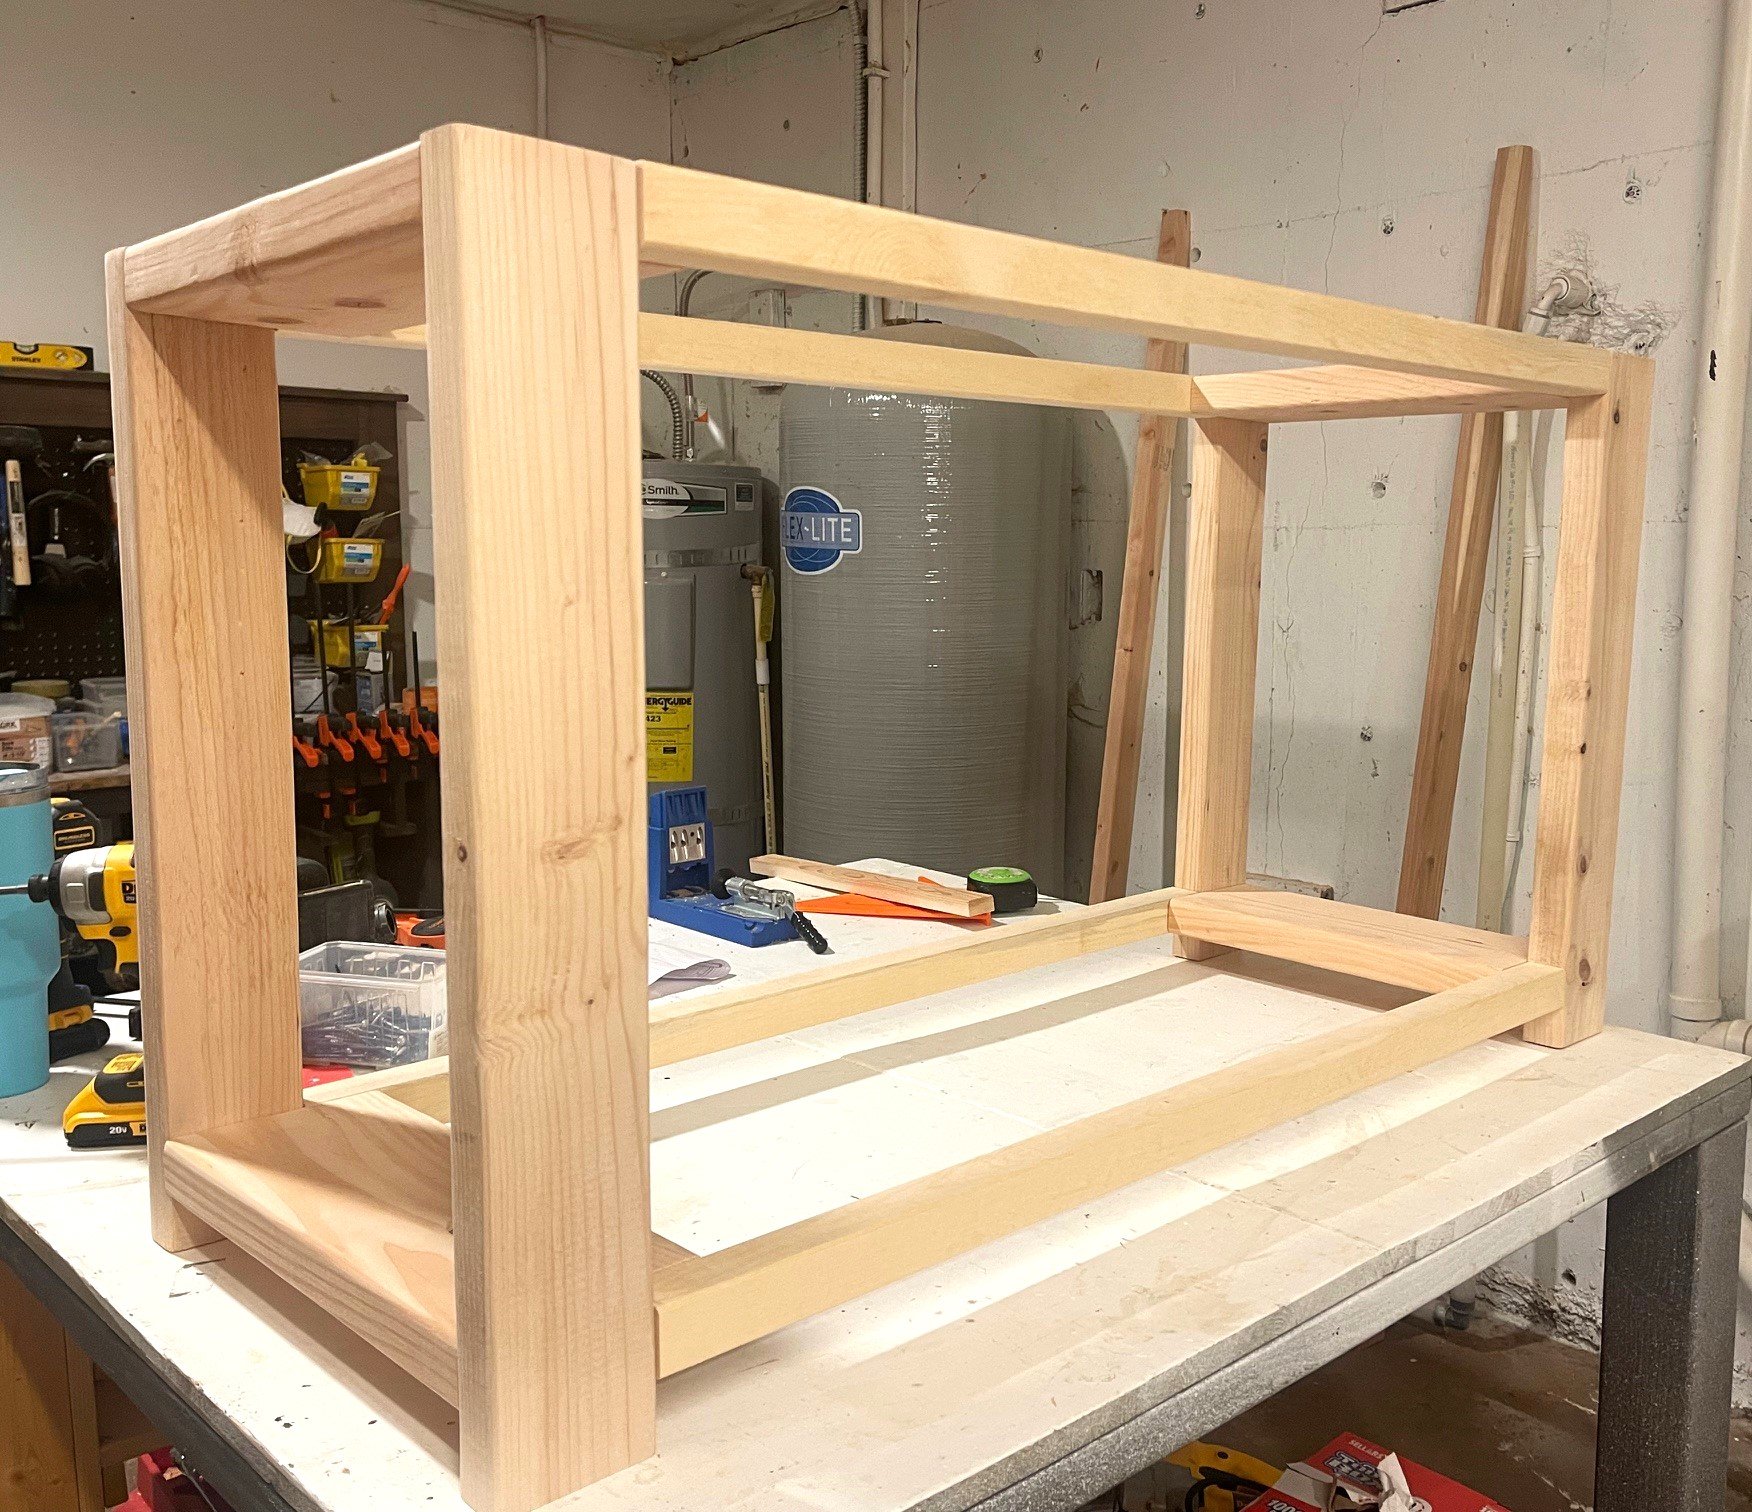
Use the 2x6 overhang to attach 2x2s at the top and bottom to create the overall frame for the console table.
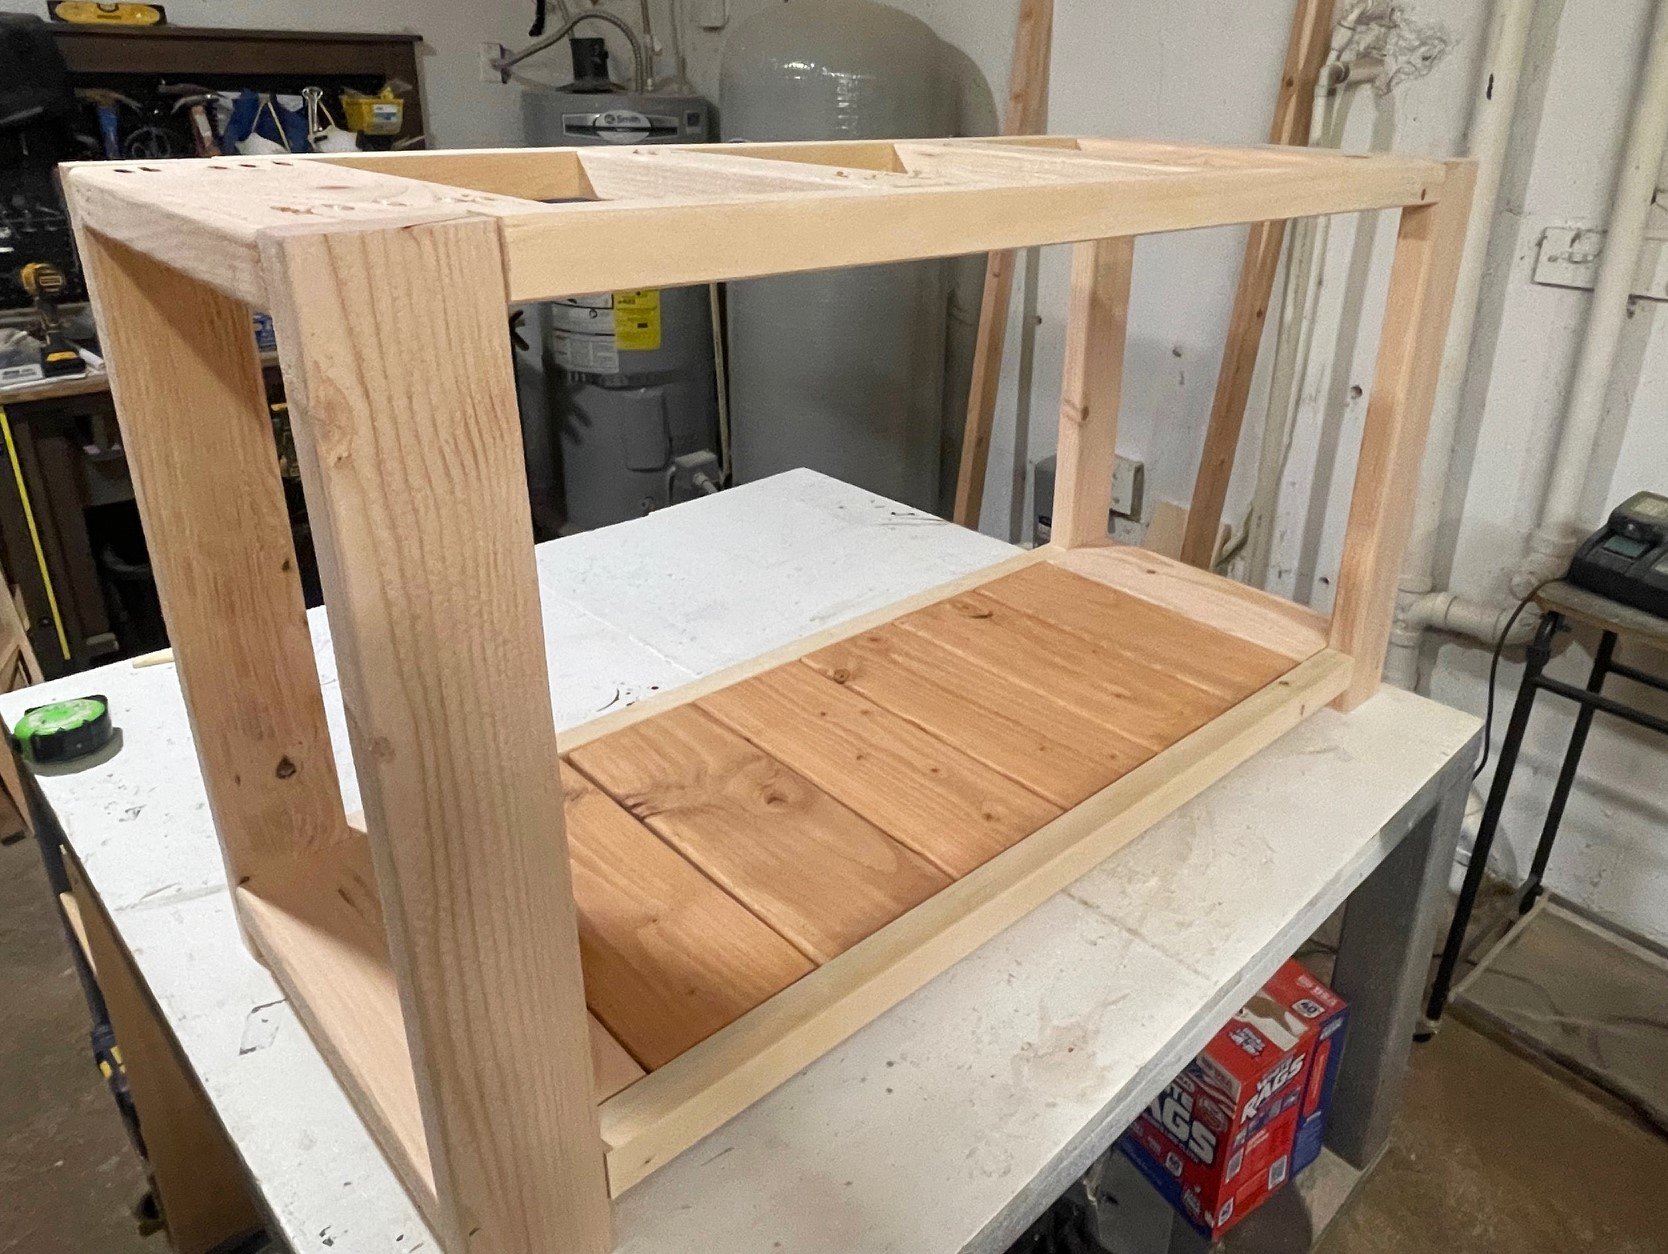
Then just add 2x6 slats for the bottom shelving. In this project, we used pocket holes for hidden fasteners - but you can use self tapping screws too (as done in the coffee table build video here)
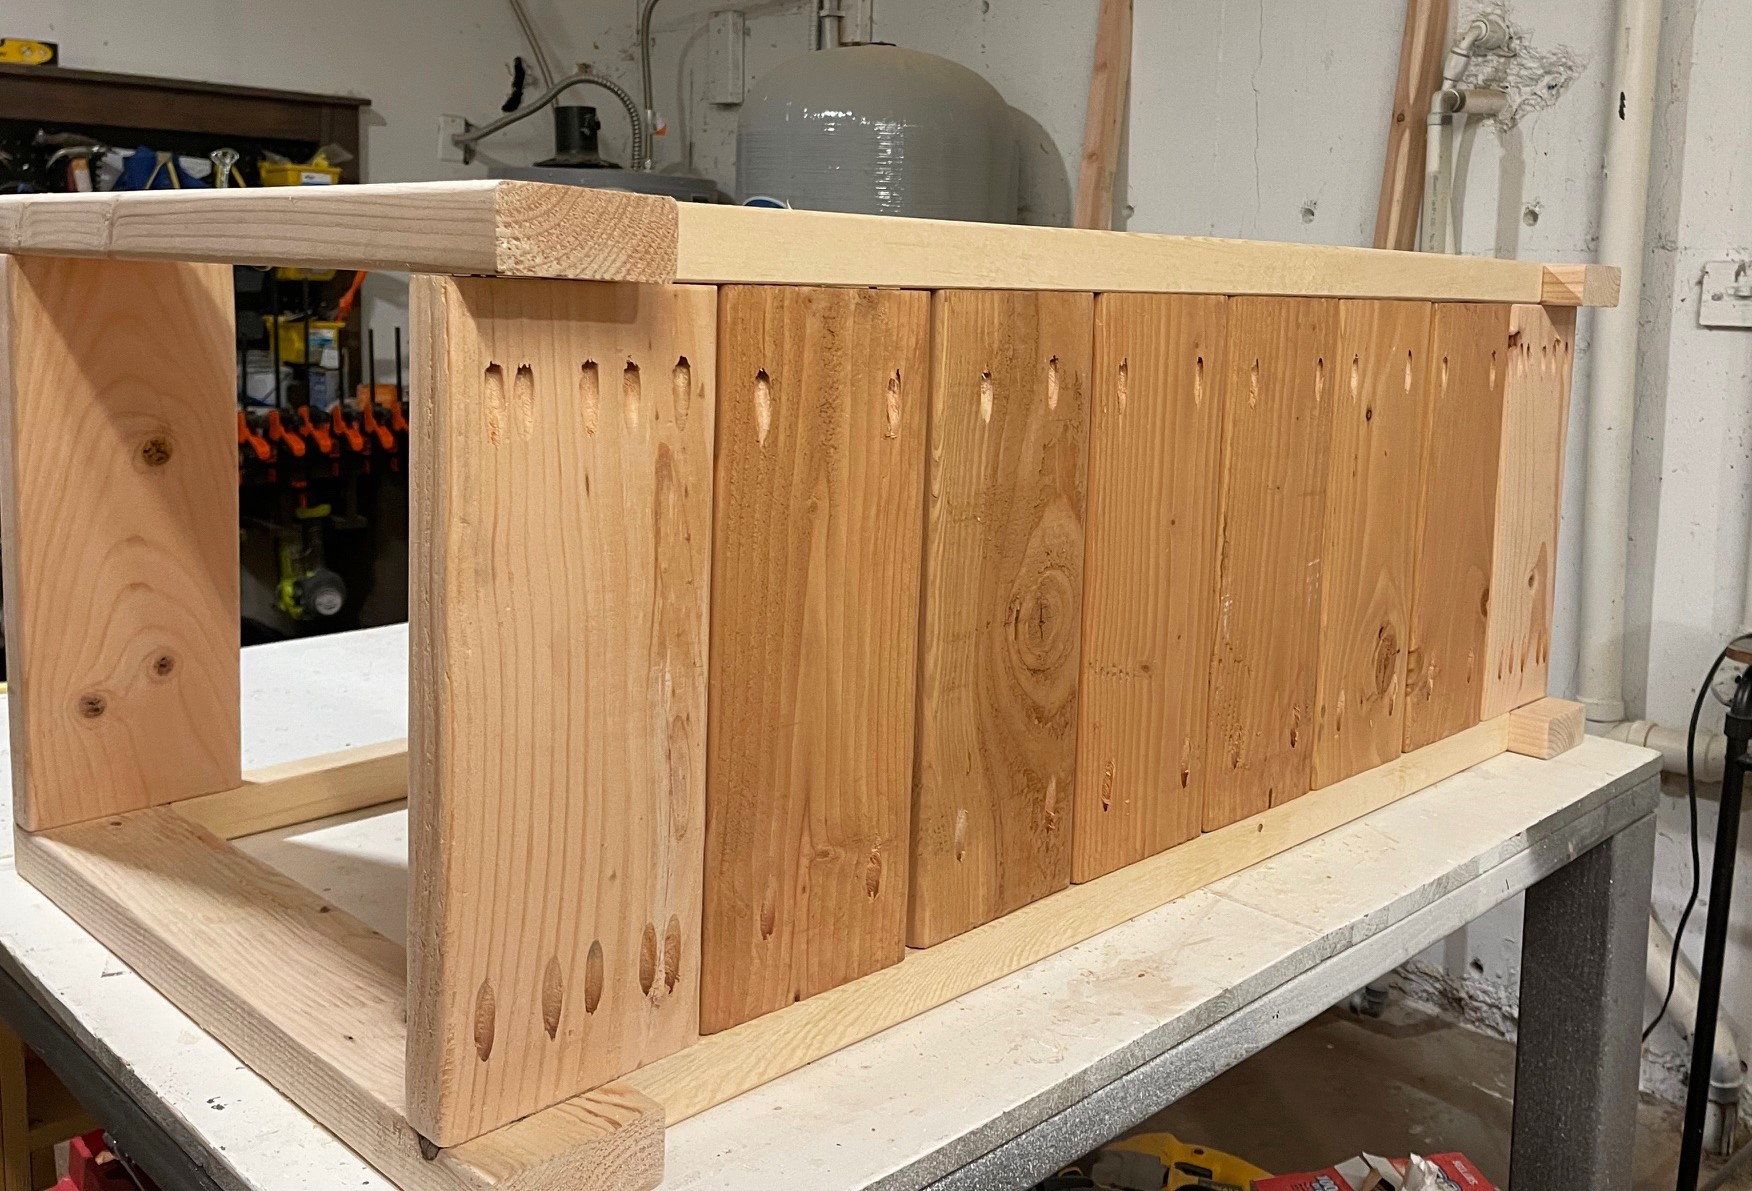
Here's a view of all the pocket holes used.
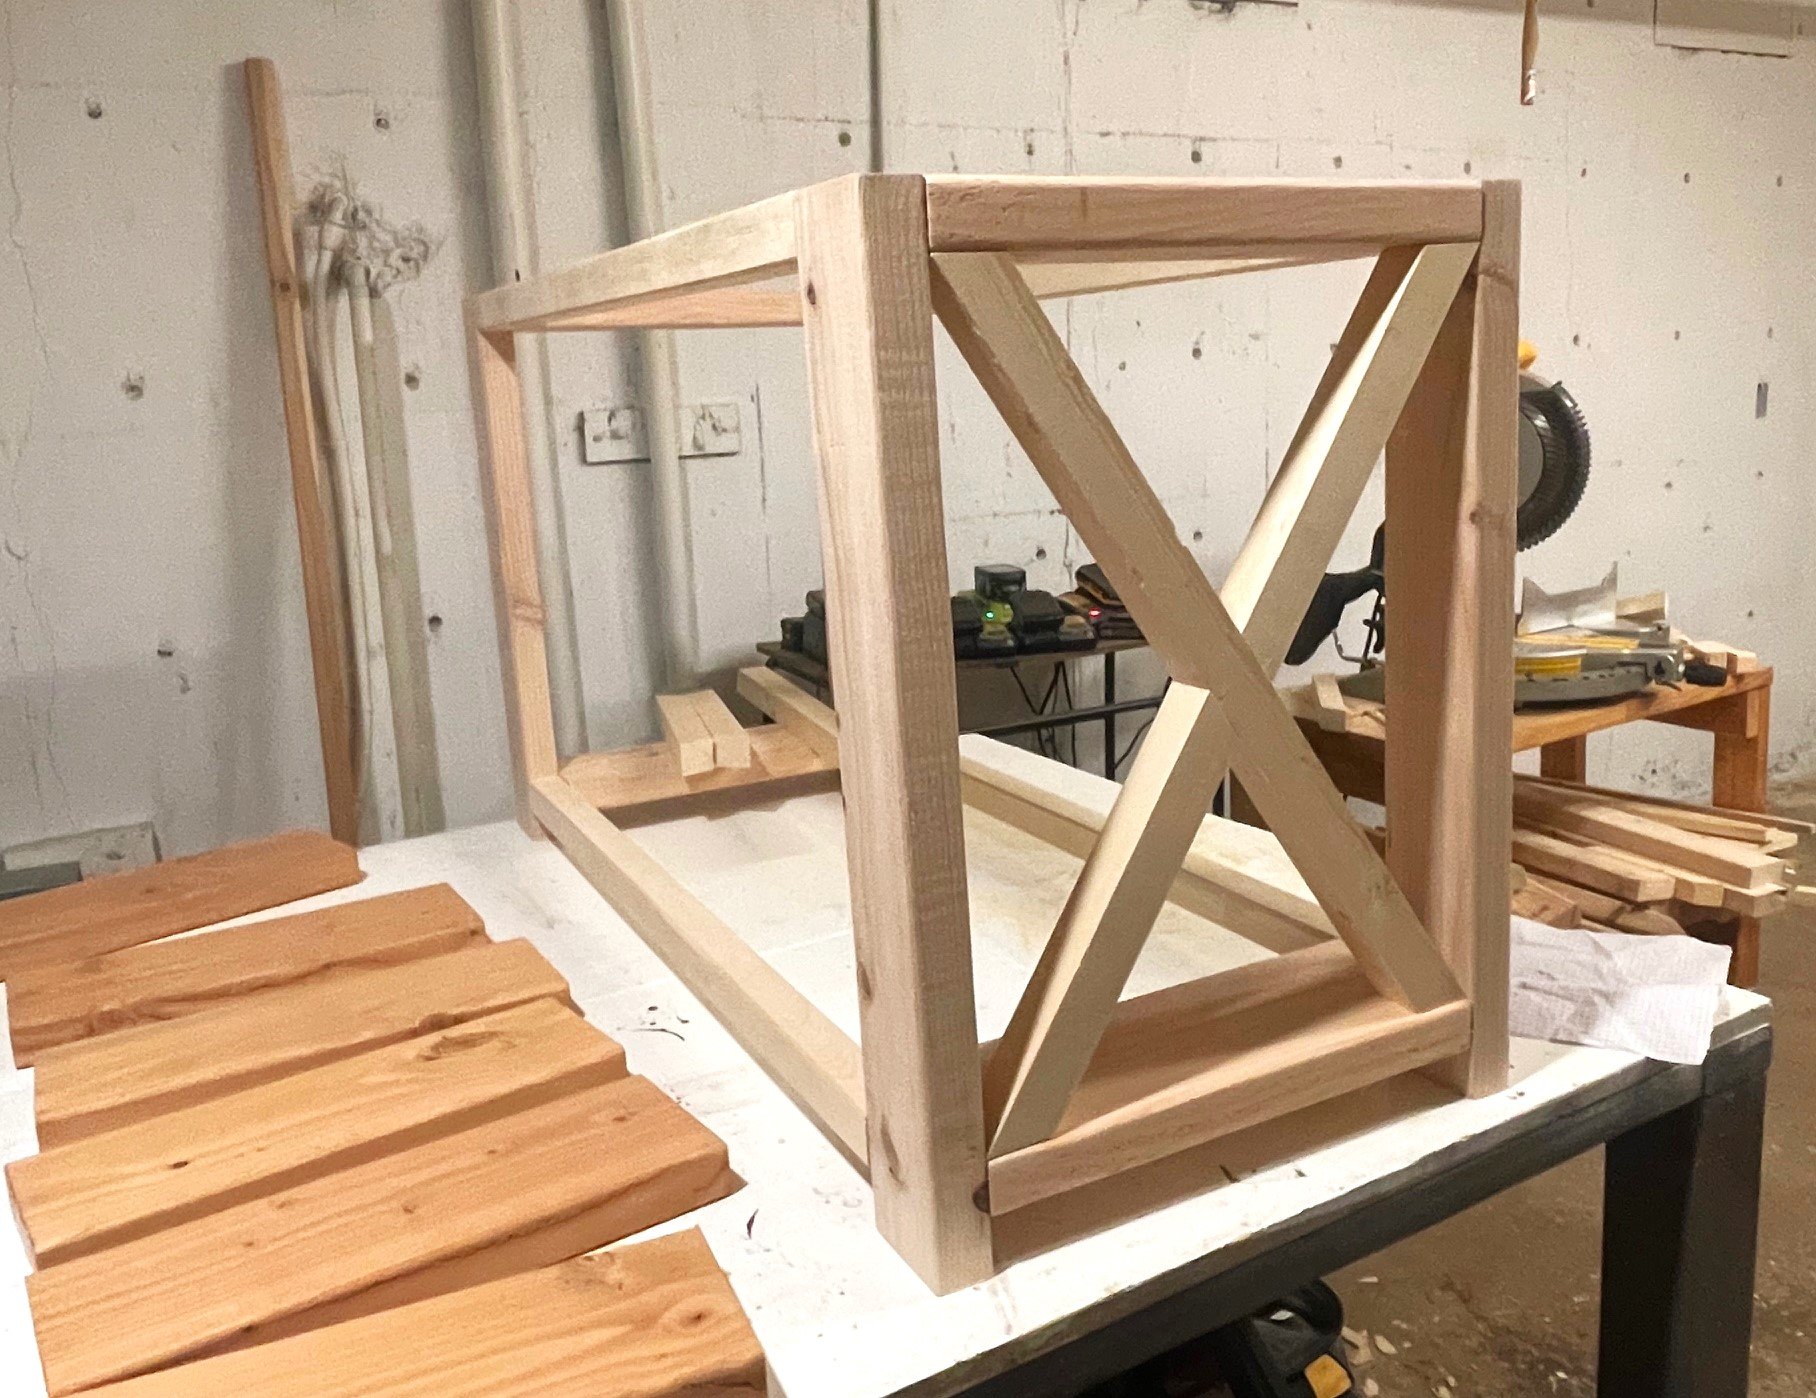
Then just add the X detailing on the end using a scribe and cut method.
Finally, add the top from the underside.
Watch! Build Video for this Farmhouse Console Table
Here's a quick build video showing all the steps used to build this console table:
Free Plans to Build Your Own Farmhouse Console Table in 46" Width
We are happy to be able to provide you with free plans to build this table yourself. Please send in a photo if you build, we do love seeing your photos!


Instructions
Step 1
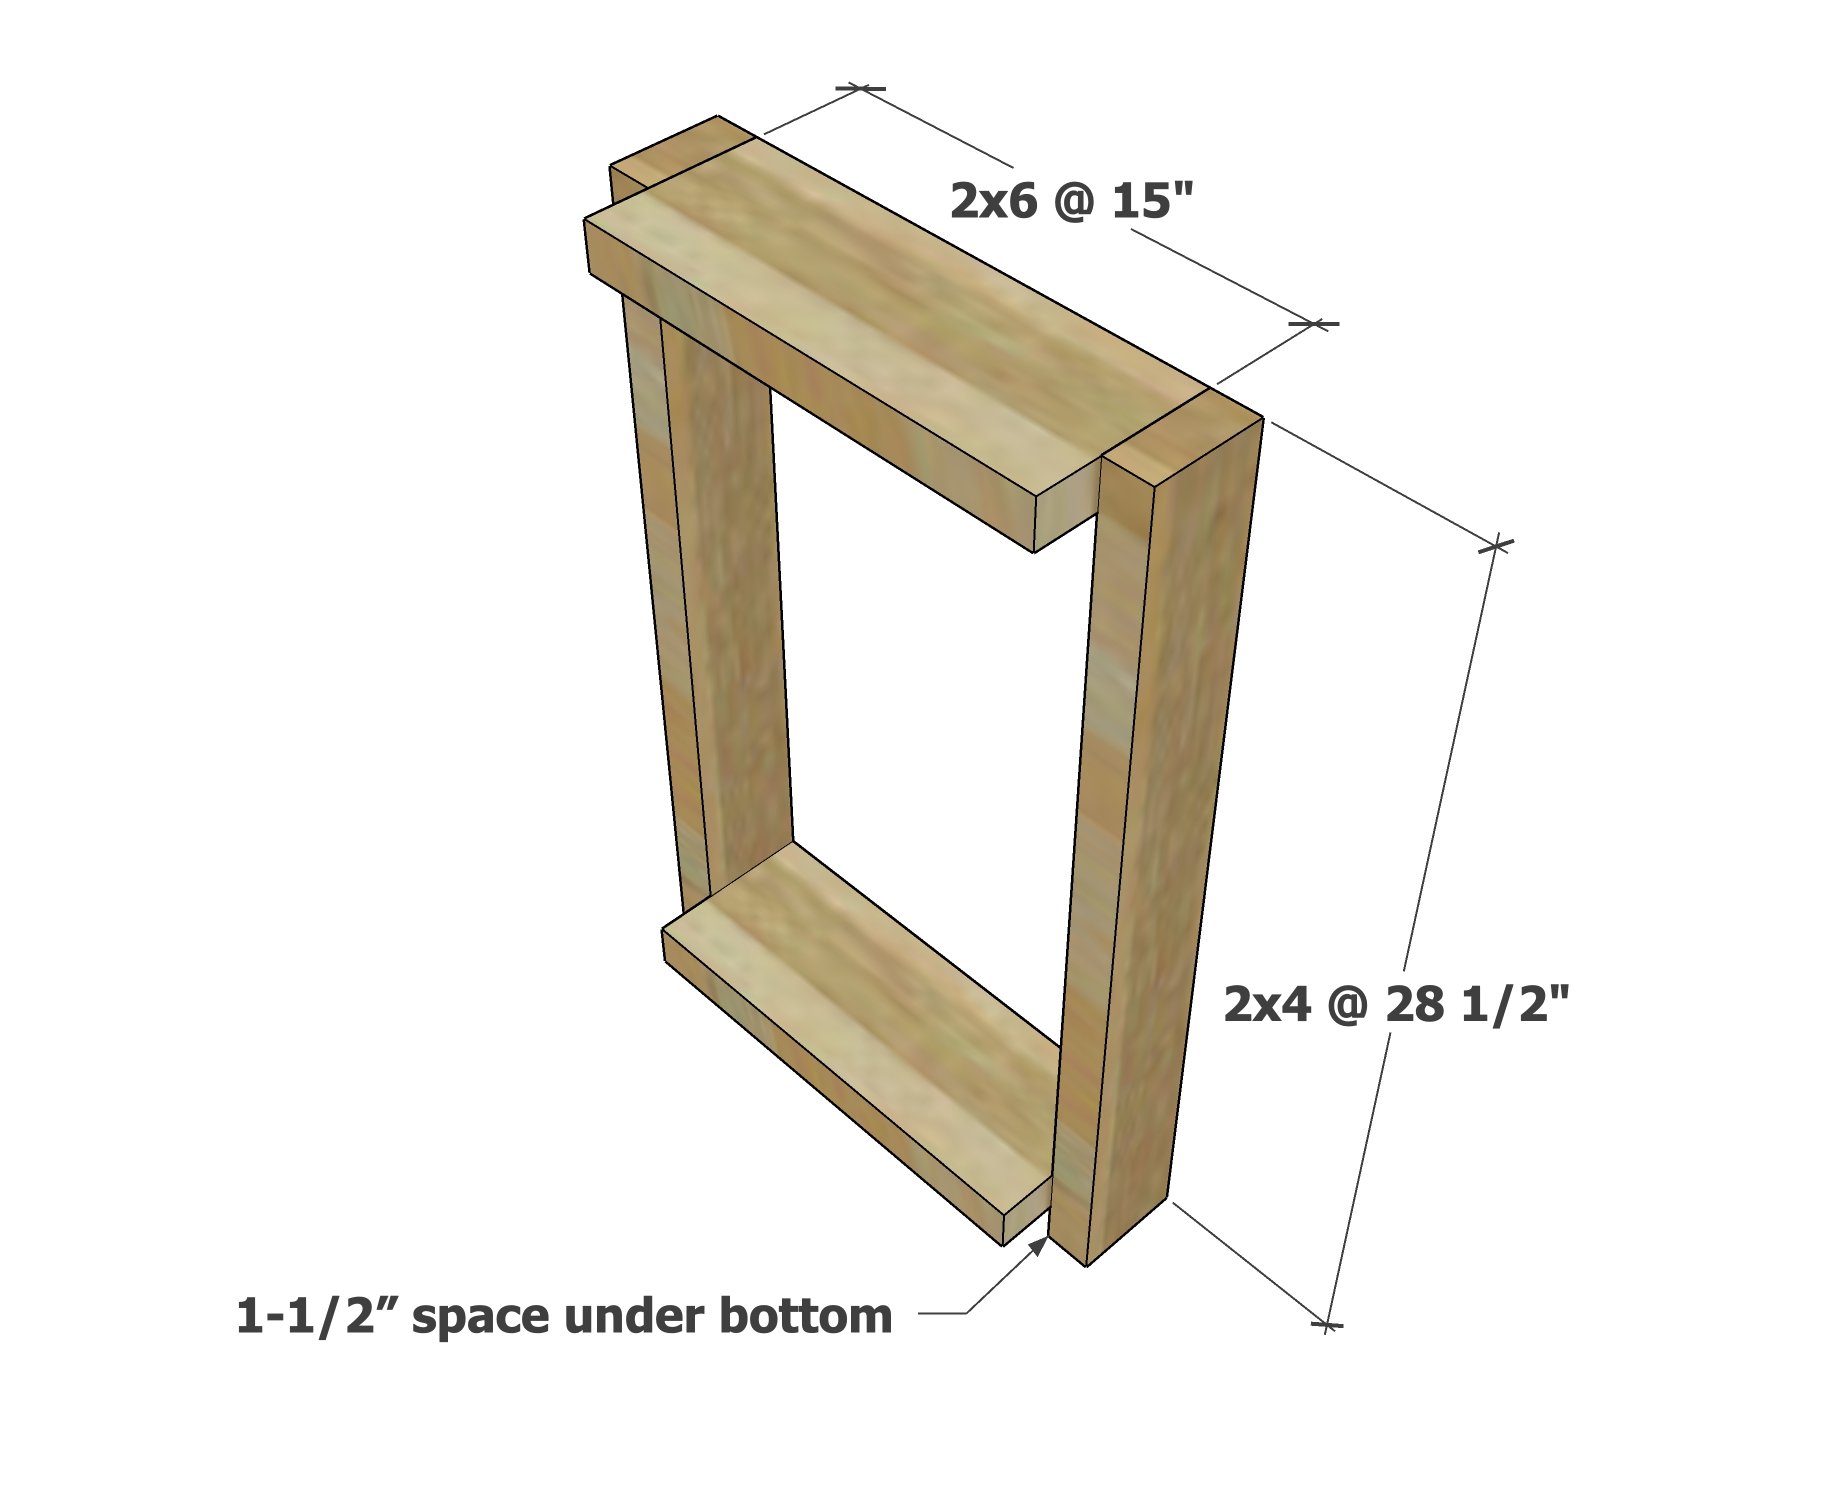
Attach the legs to the 2x6s as shown.
If using 2-1/2" self tapping screws, simply screw the 2x4s to the 2x6 ends.
If using pocket holes, drill 1-1/2" pocket holes on the ends of the 2x6 (also drill two pocket holes for attaching the 2x2 aprons in step 3) and attach to the 2x4 with 2-1/2" pocket hole screws and glue.
Create two leg sets identical.
Step 2
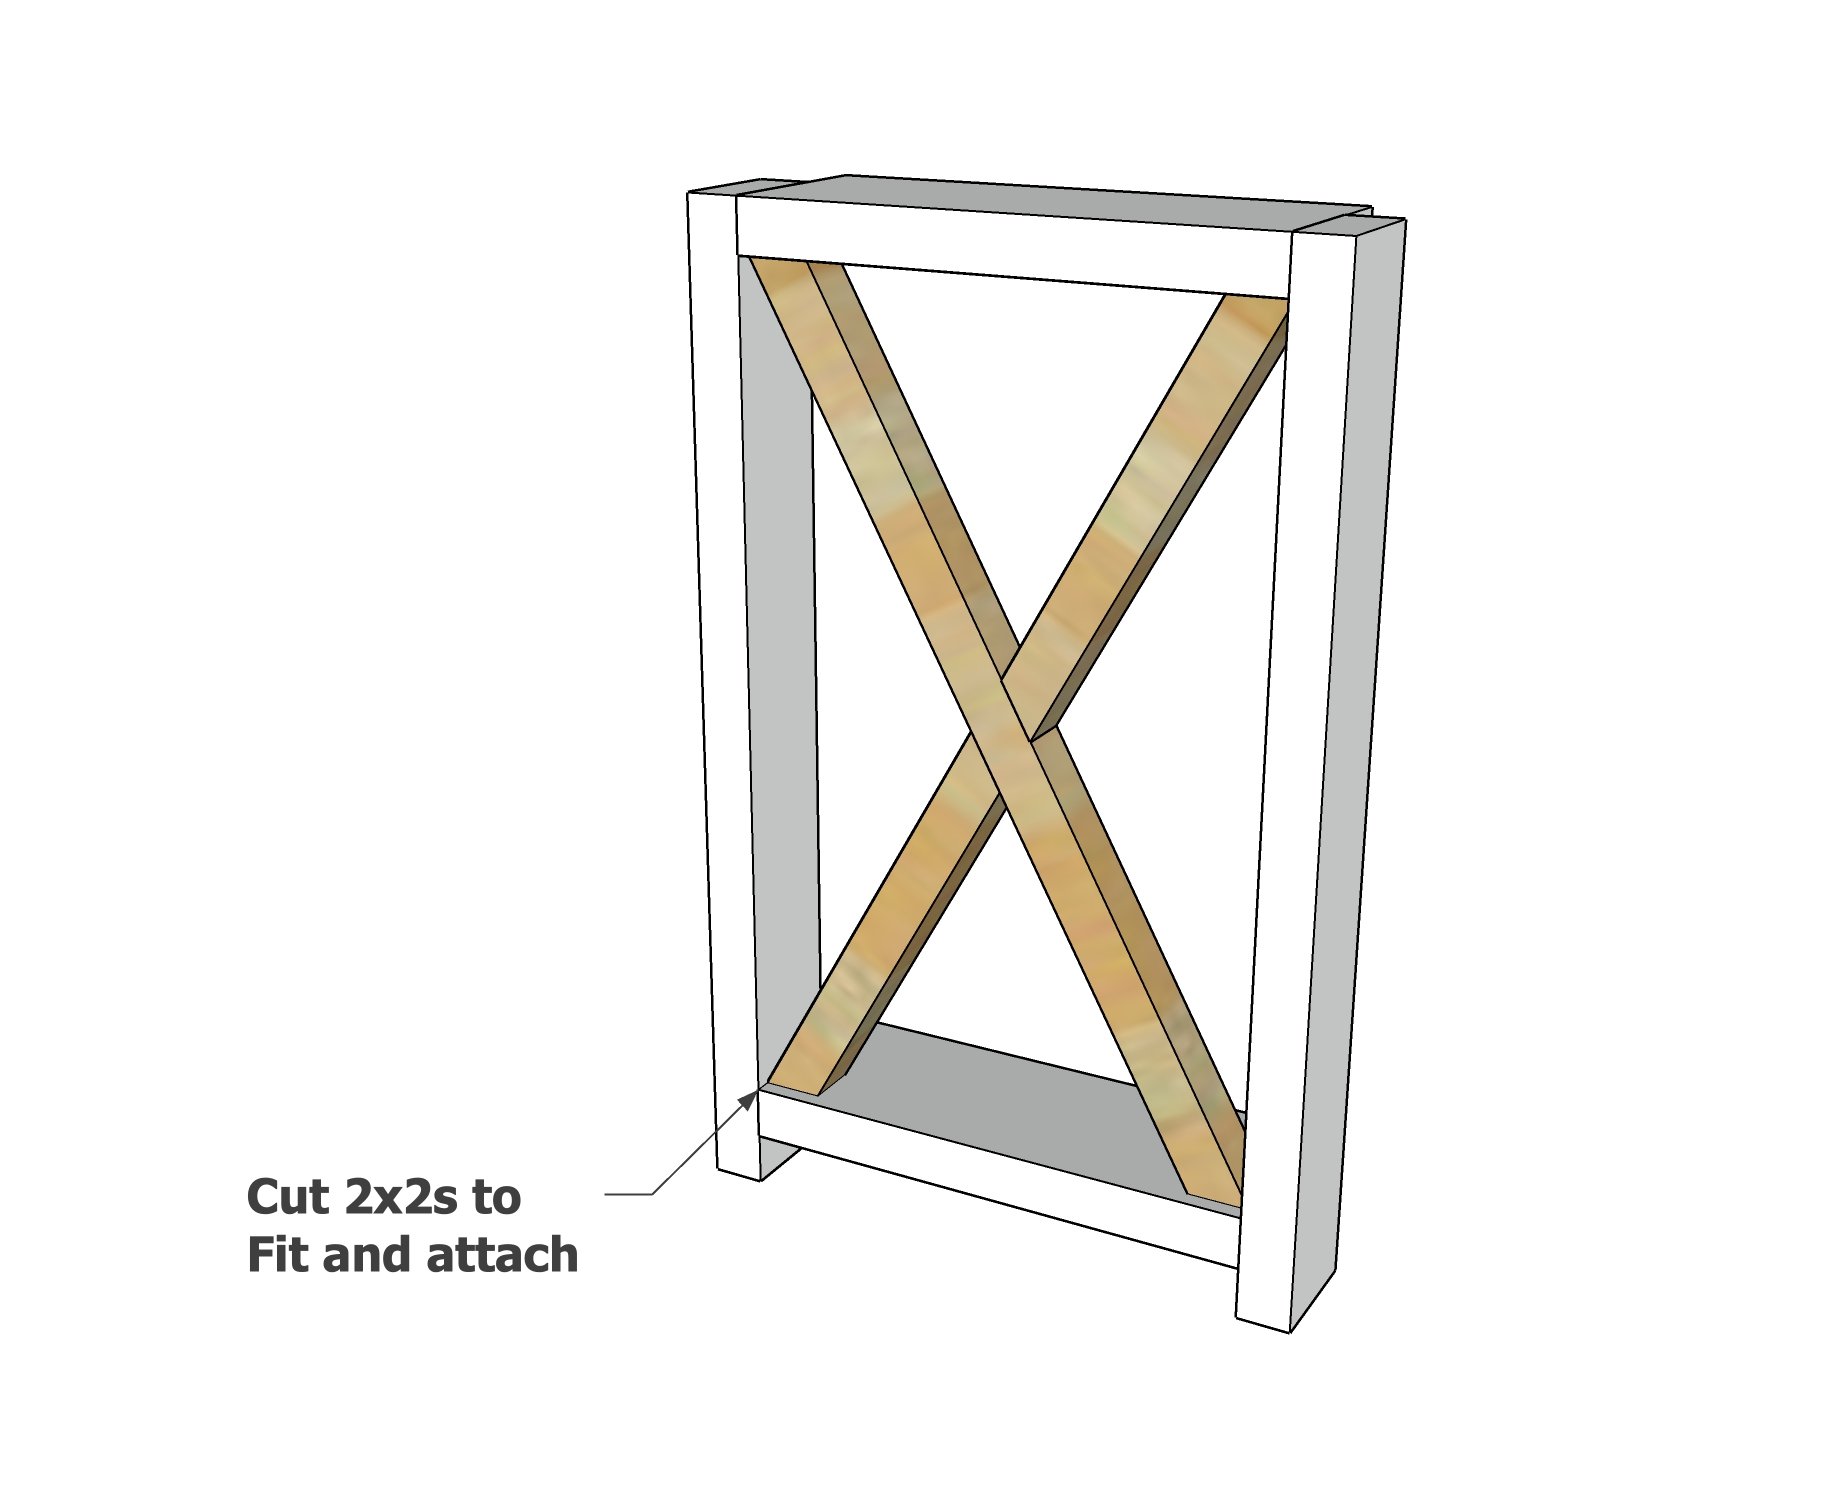
It's easiest to create the X detailing now, before the sides are part of the project.
I recommend a scribe and cut method, where you hold the 2x2 in place, and trace the cuts with a pencil, then cut and attach.
I attach with 2-1/2" self tapping wood screws or 2" brad nails and glue.
Step 3
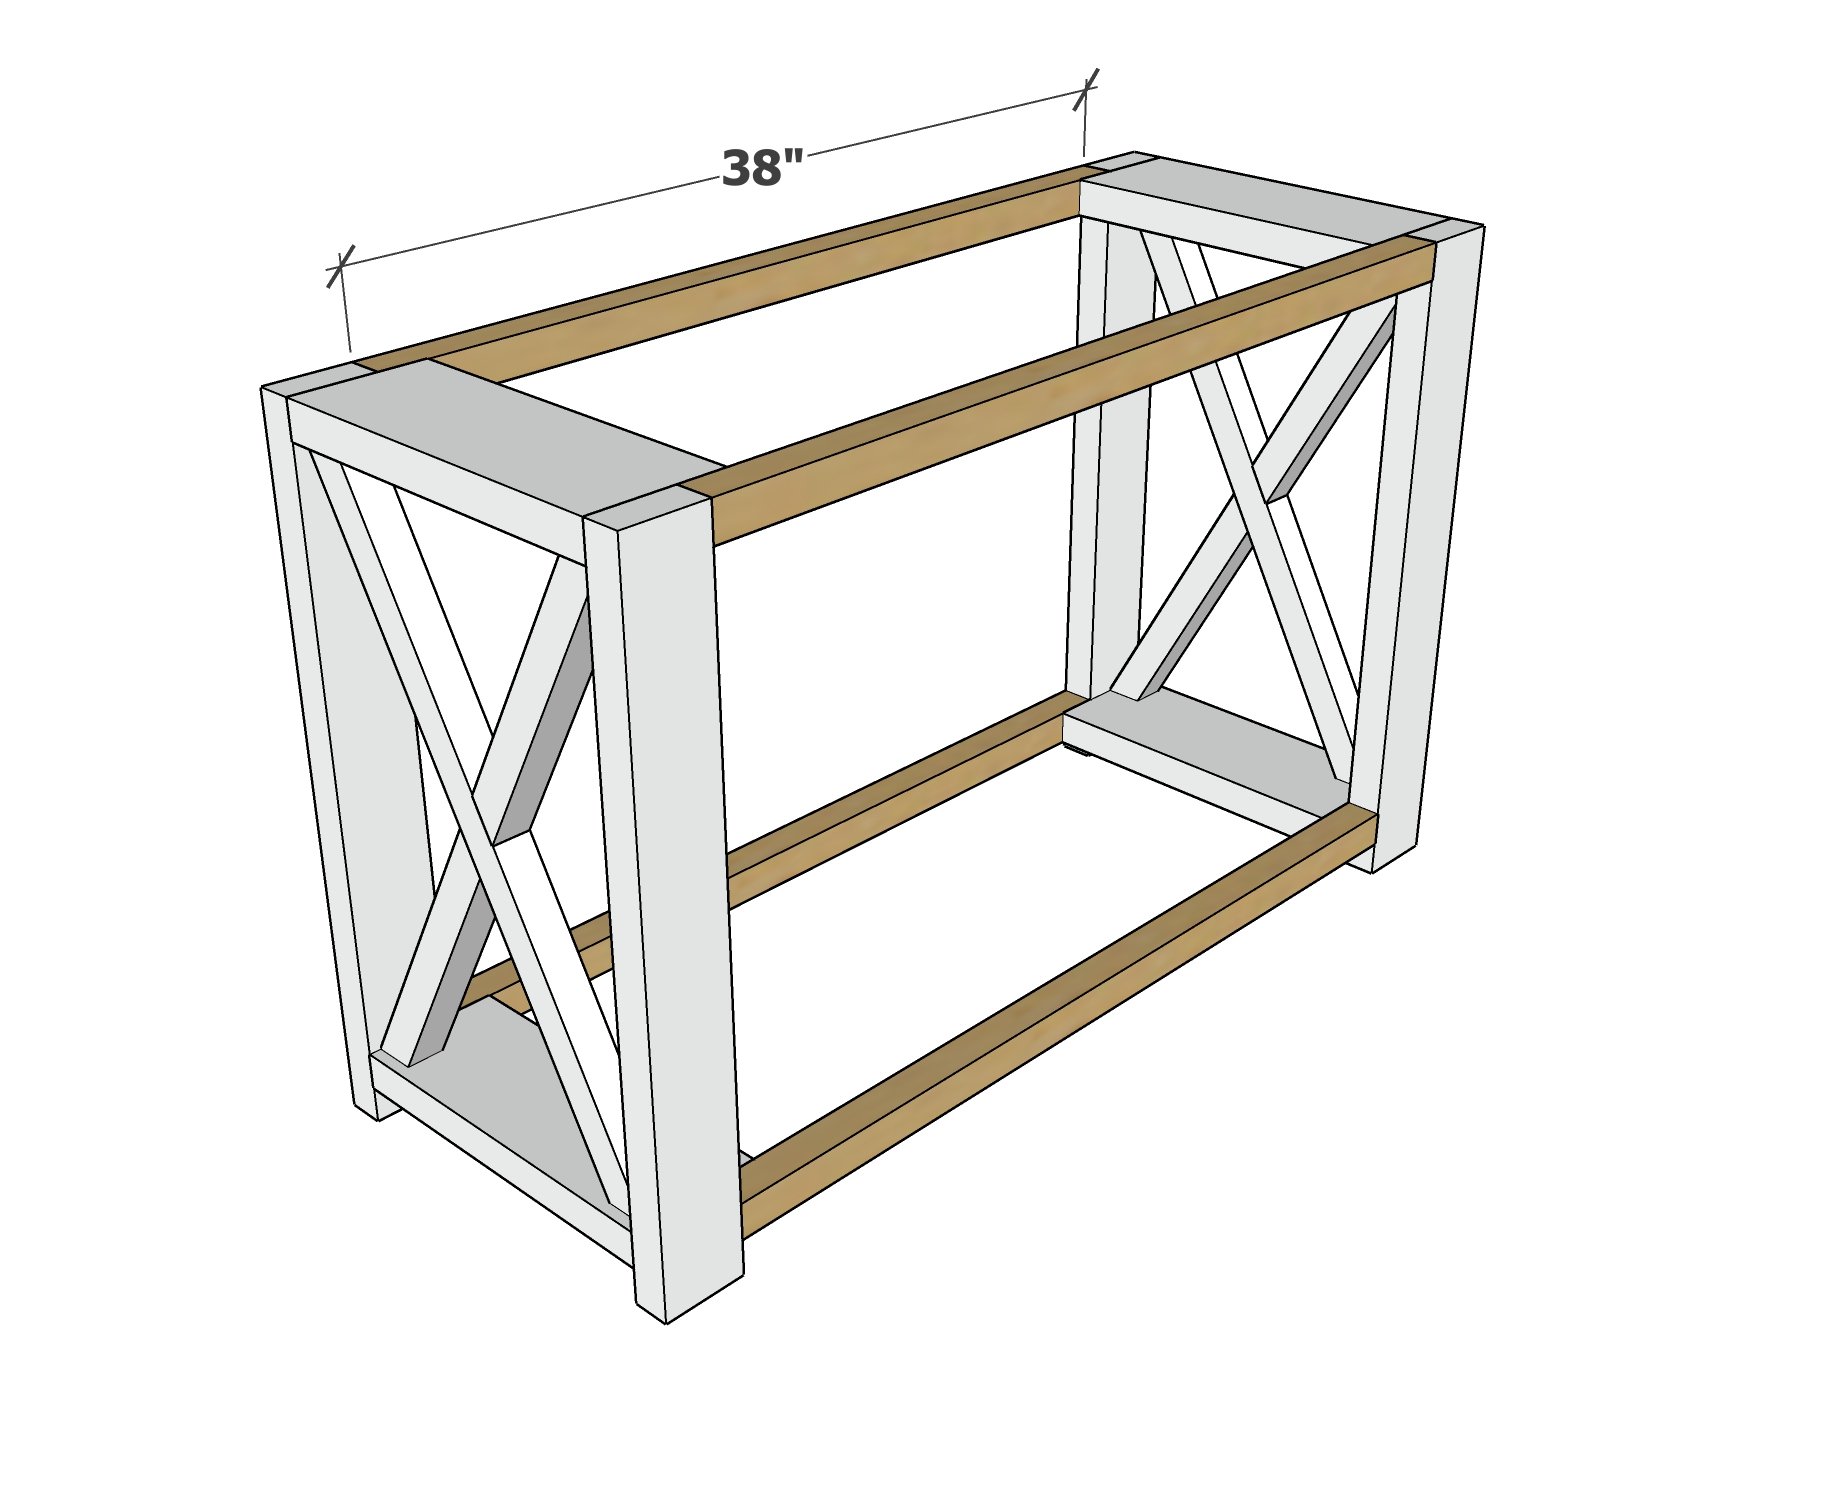
Attach the 2x2 aprons to the 2x6 pieces as shown.
Step 4
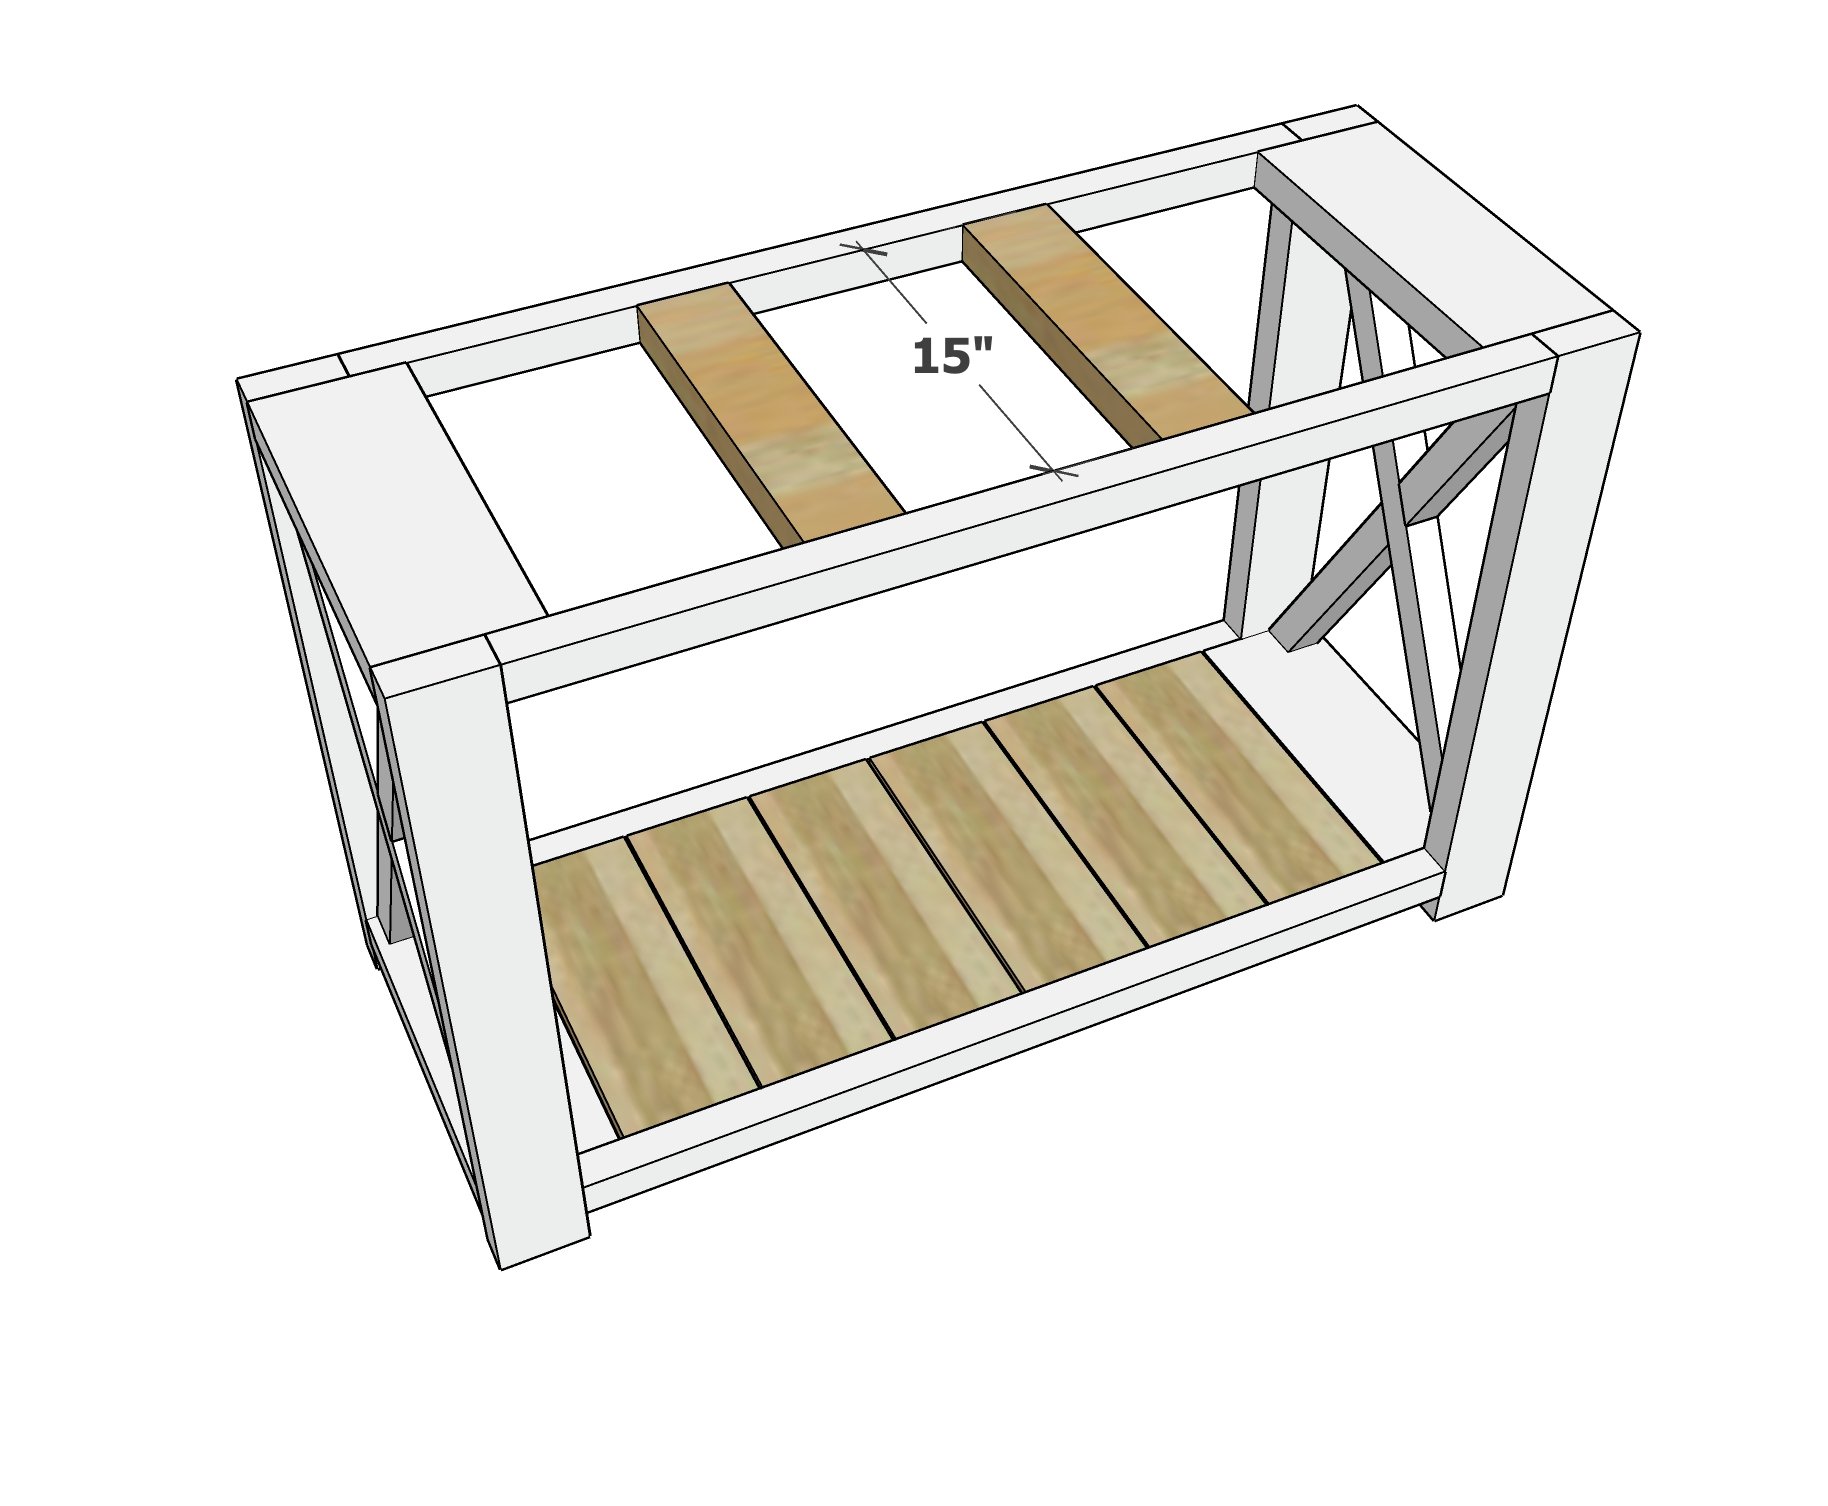
Attach the bottom 2x6 shelving pieces - in this project we used 1-1/2" pocket holes and 2-1/2" pocket hole screws to attach. Spacing between slats on bottom shelf as shown is about 1/8".
Step 5
Attach the top 2x10 boards to the tabletop with 2-1/2" self tapping screws and glue.