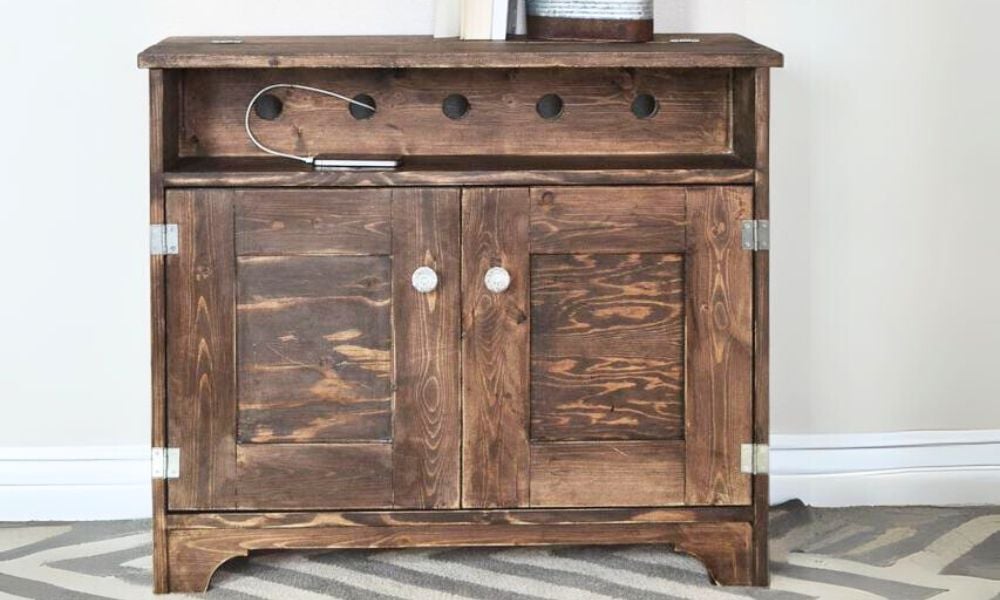
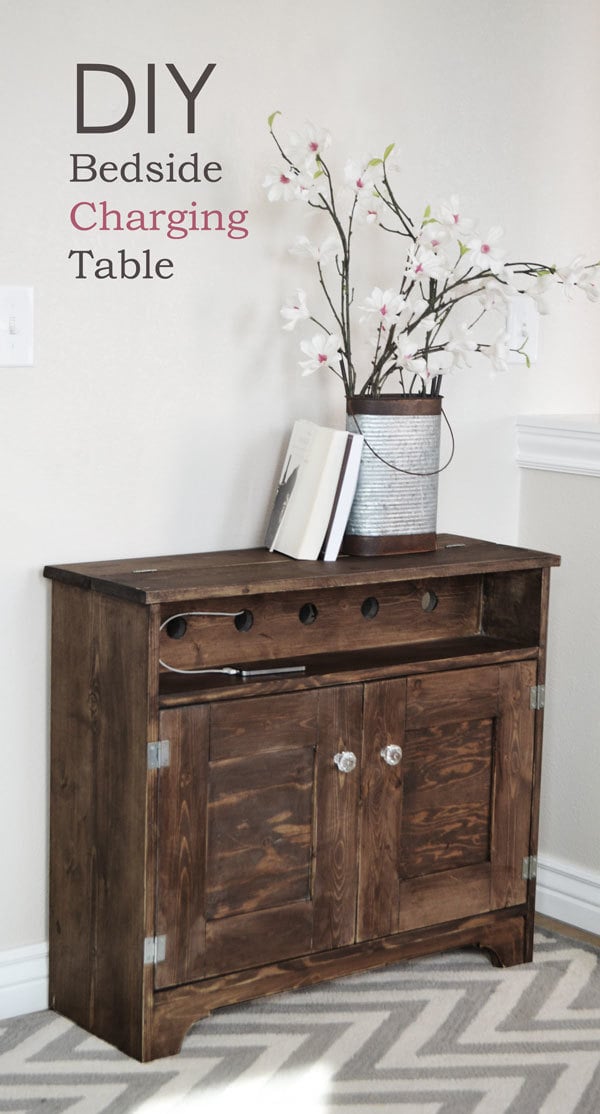
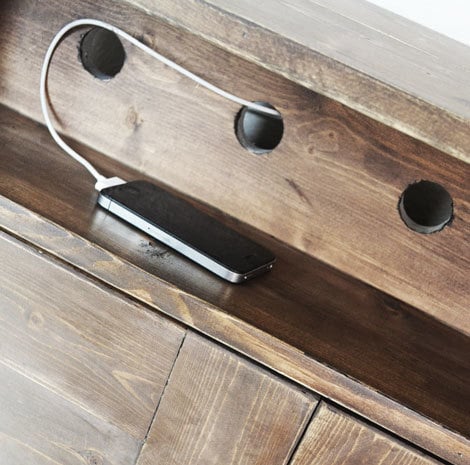
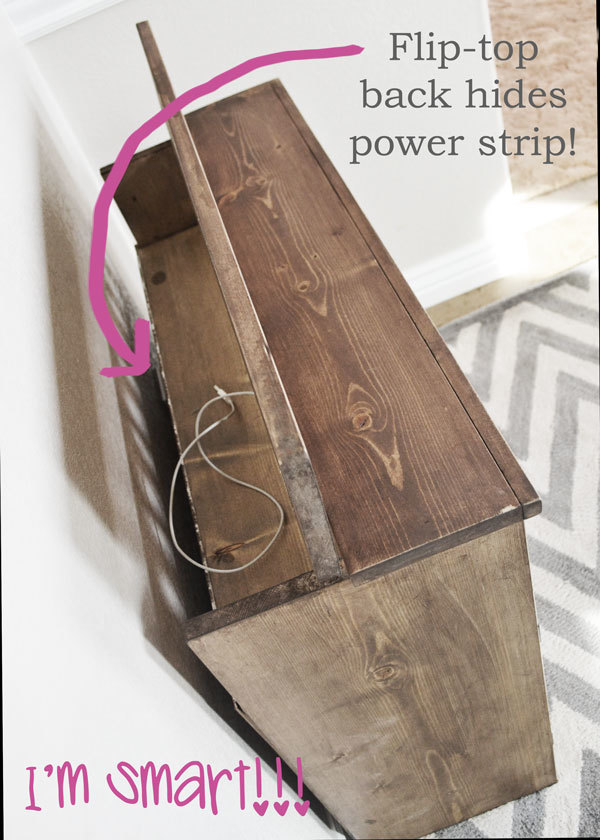
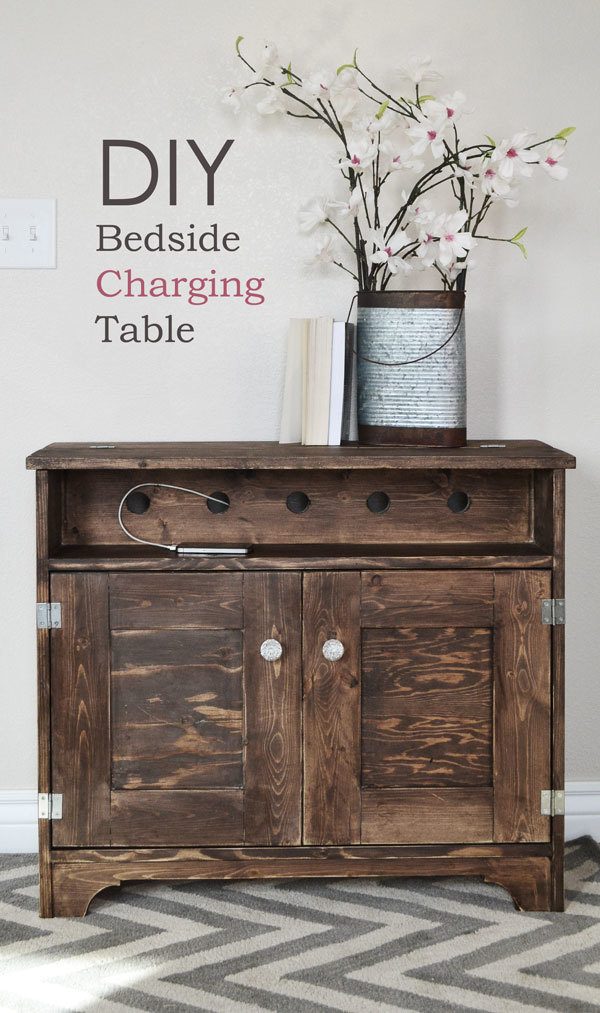
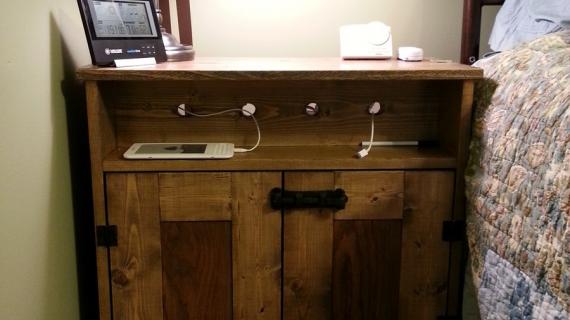
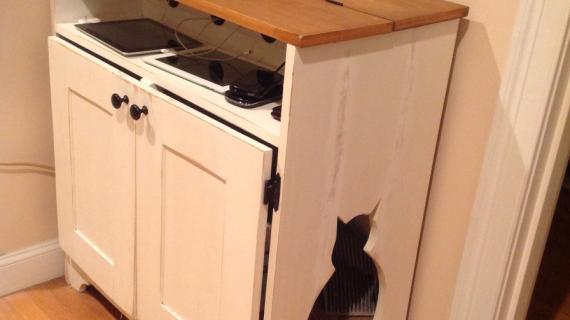
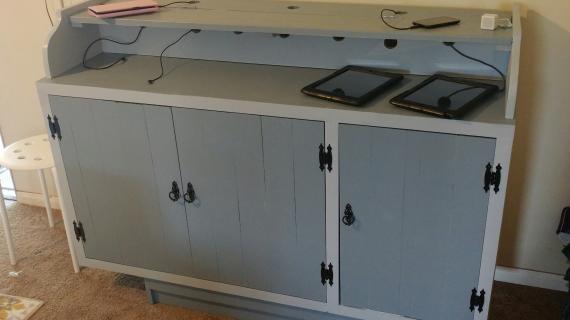
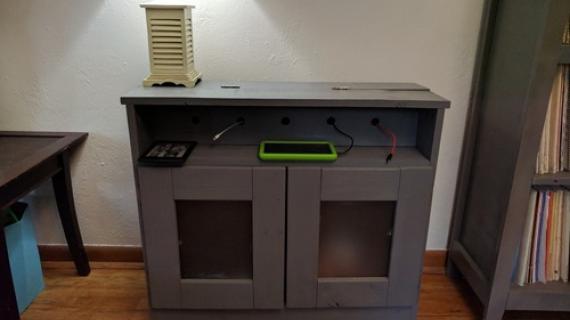
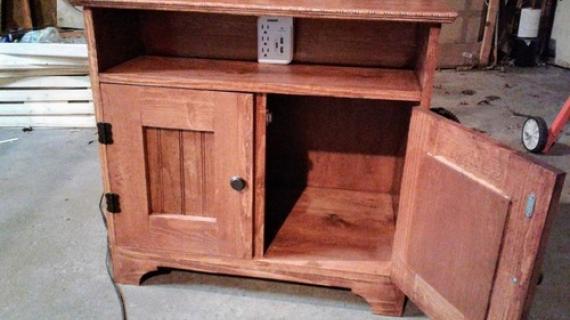
This little console table features a charging area that is easy to access plugs and power strips. You can build it yourself and save with our free step by step plans with diagrams, shopping and cut lists.
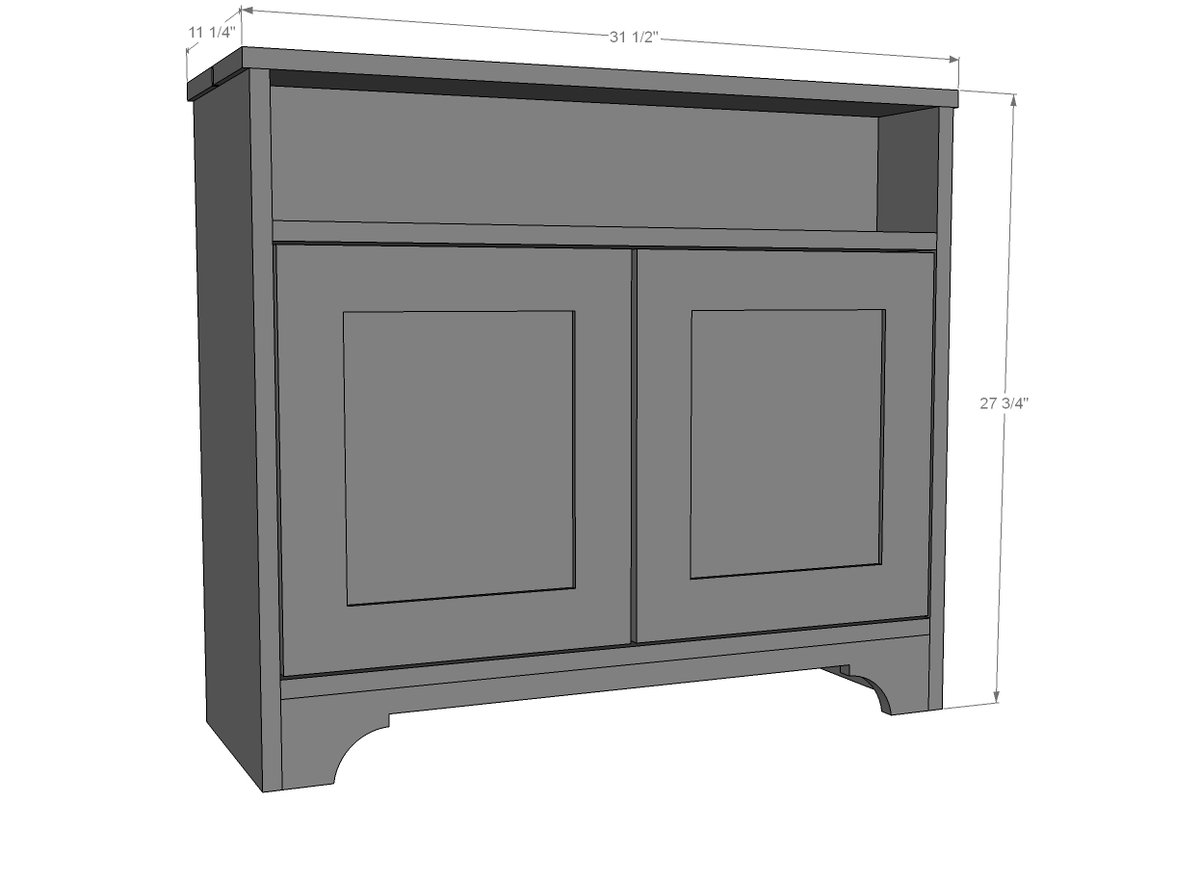
Preparation
- 1 - 1x12 @ 10 feet long (can be cut exactly in half for transport)
- 1 - 1x4 @ 12 feet long
- 1 - 1x6 @ 8 feet long
- 1/4" plywood for back at least 21" x 31"
- 32" of edge moulding (for front top edge)
- 1/2" plywood for center of doors (or you could use 1/4" plywood on backs)
- I used 1 1/4" and 1" pocket hole screws and 1 1/4" finish nails for fastening
- 3 sets of simple butt hinges (I used the smallest ones I could find)
- 2 - 1x12 @ 29-1/4" (sides)
- 2 - 1x4 @ 29 1/2" (bottom footers)
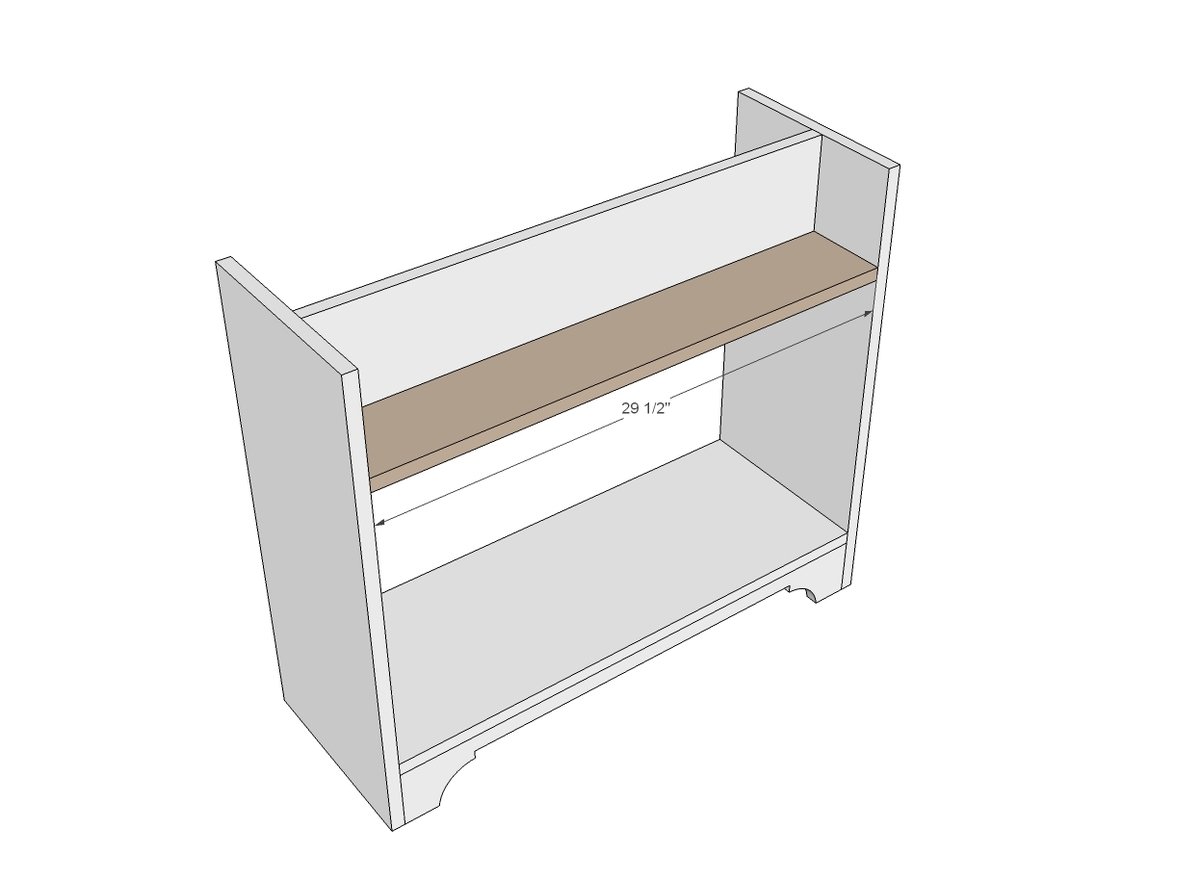
- 2 - 1x12 @ 29 1/2" (shelves)
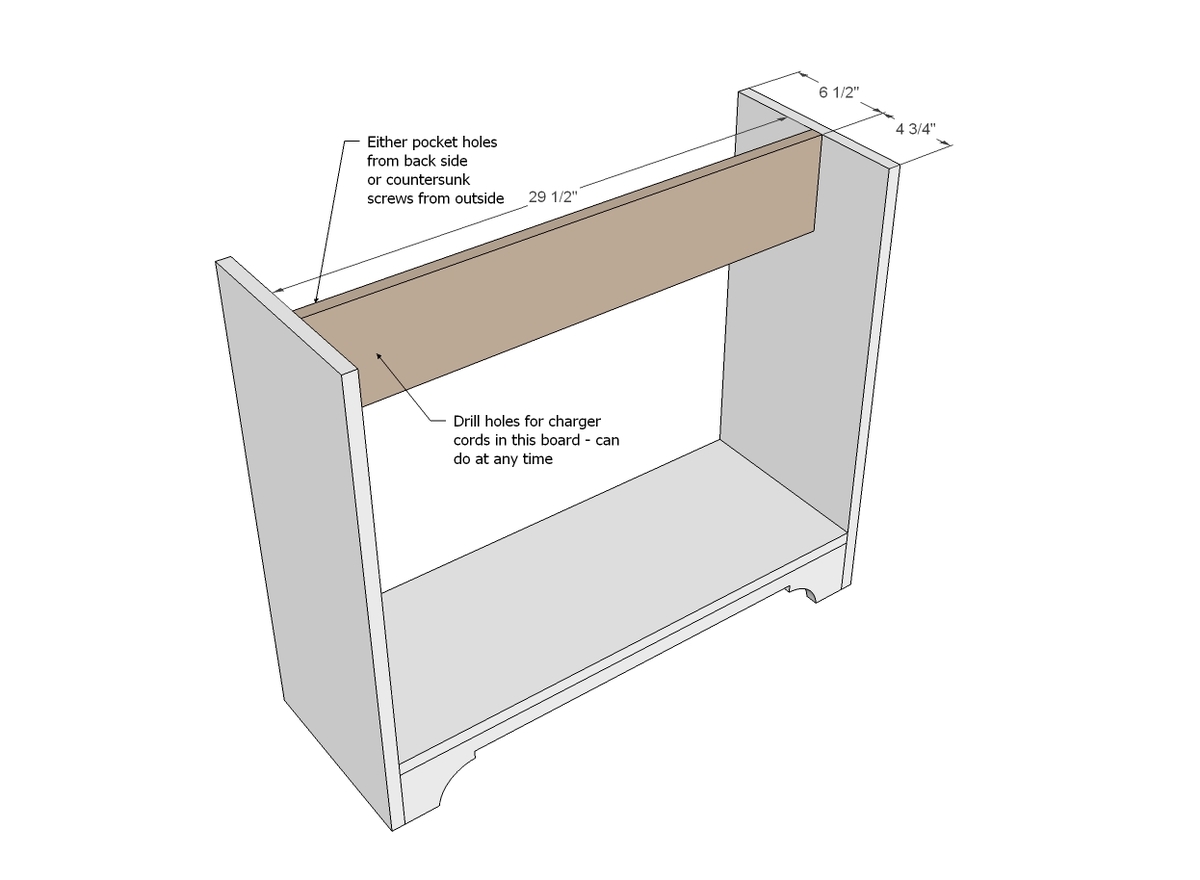
- 1 - 1x6 @ 29 1/2" (charging divider)
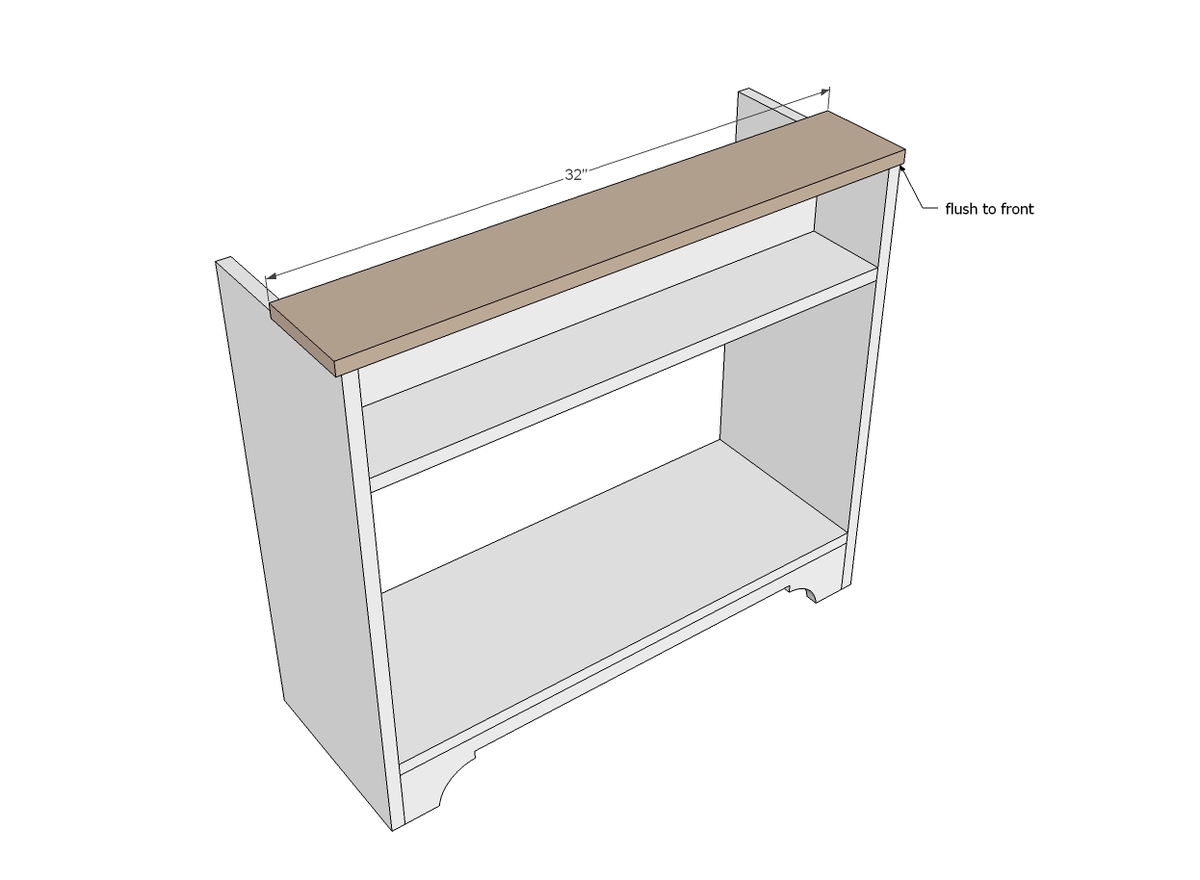
- 2 - 1x6 @ 32" (top)
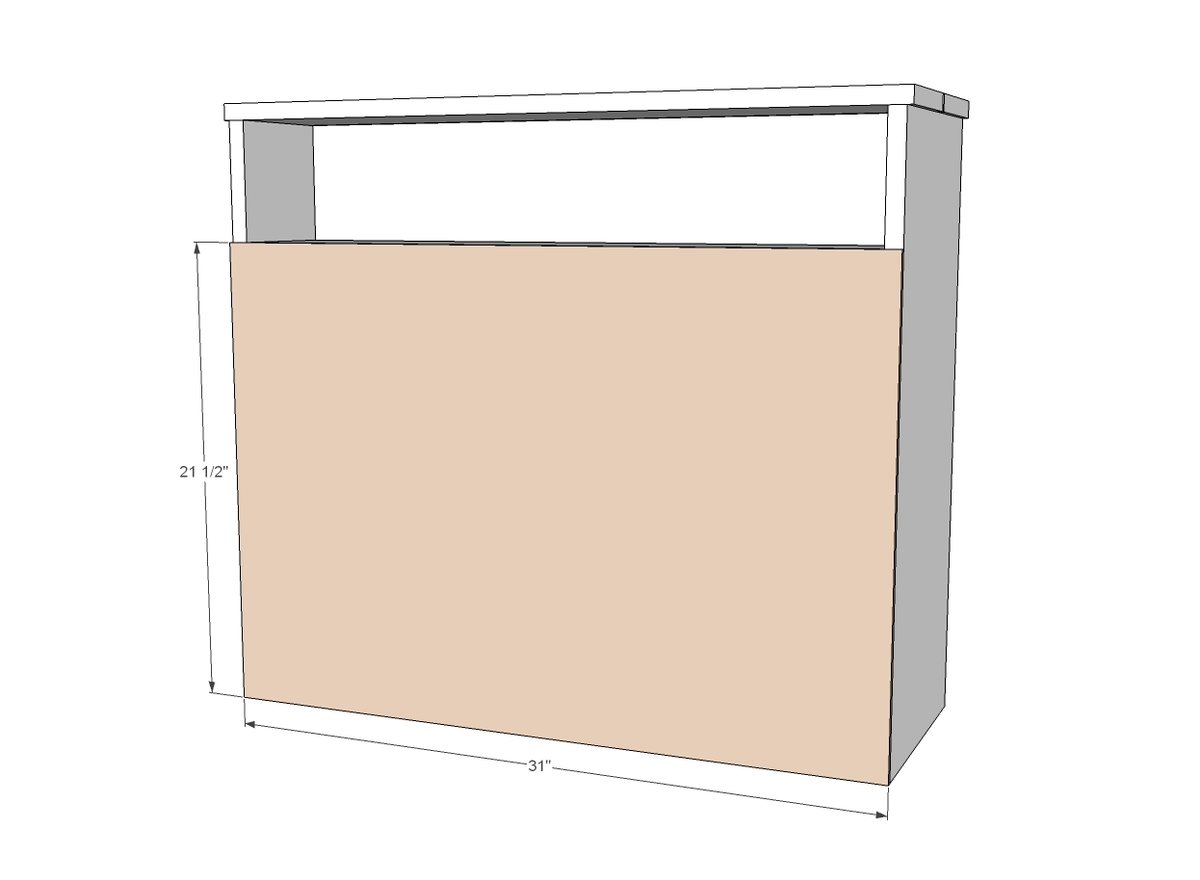
- 1 - 1/4" plywood @ 24" x 31"
- 1 - Edge moulding 32" long x 3/4" thick (for top front edge)
DOORS - Cut to fit - See last step
Please read through the entire plan and all comments before beginning this project. It is also advisable to review the Getting Started Section. Take all necessary precautions to build safely and smartly. Work on a clean level surface, free of imperfections or debris. Always use straight boards. Check for square after each step. Always predrill holes before attaching with screws. Use glue with finish nails for a stronger hold. Wipe excess glue off bare wood for stained projects, as dried glue will not take stain. Be safe, have fun, and ask for help if you need it. Good luck!
Instructions
Step 1
You can build this console table a few different ways -
- I used a Kreg Jig and 3/4" pocket holes and 1-1/4" pocket hole screws
- You can also use 2" self tapping screws
- Or you can nail and glue together with 1-1/4" brad nails
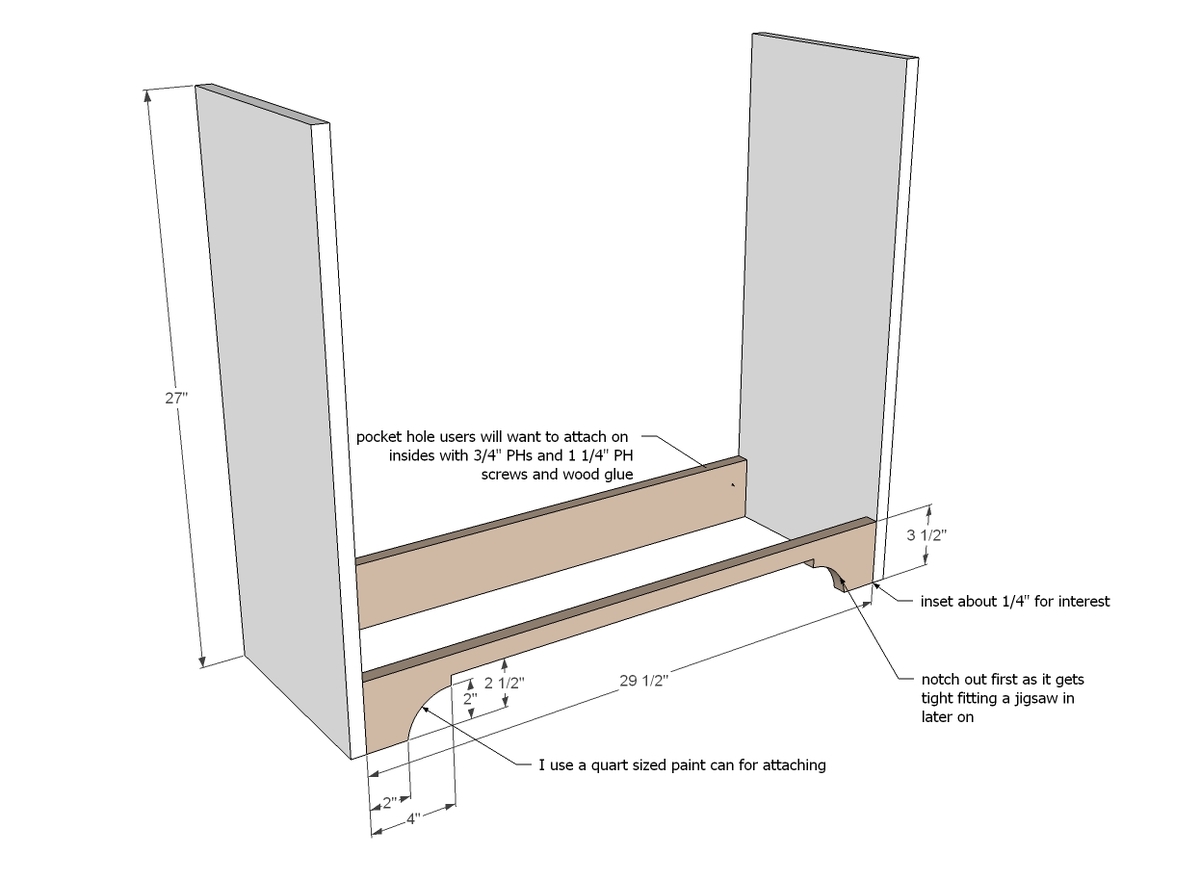
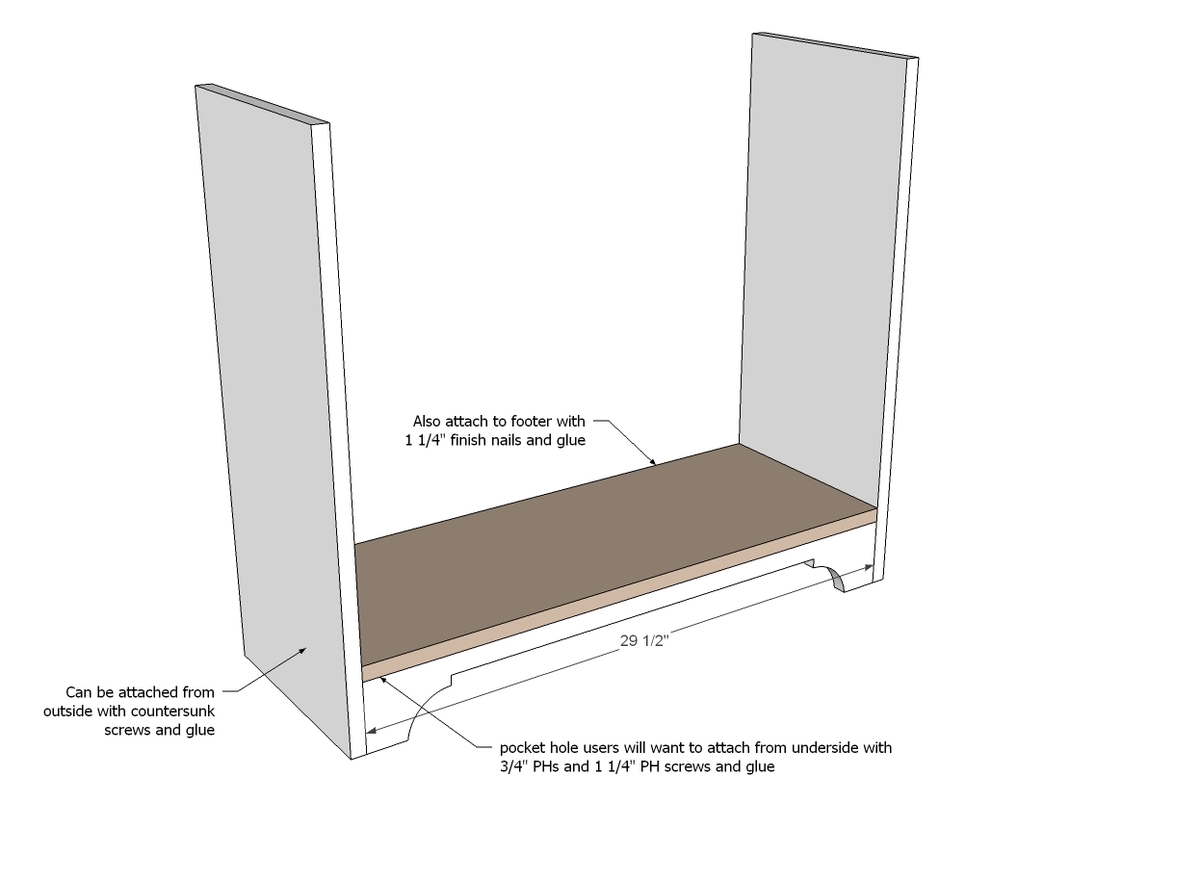
Attach 1x4 bottom footer to the base as shown. You can cut the footer out now, or do it later - use a jigsaw to make the angled cuts.
NOTE: The sides have been increased in height by 2-1/4" to make the overall height 30" The sides listed in the cut list (29-1/4") ARE correct.
Step 4
Step 6
Step 8
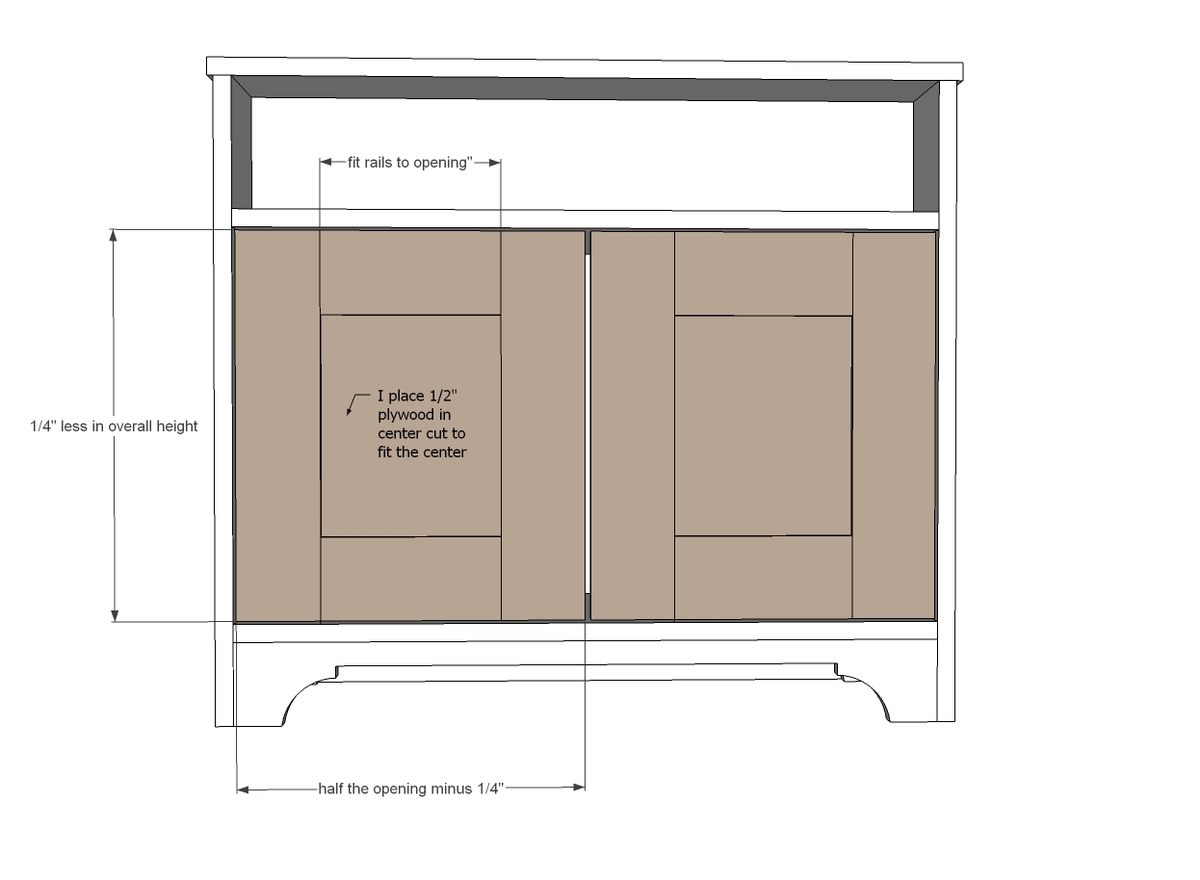
And then finally the doors. I made my doors to fit. Each door I left about 1/8" clearance on all sides, so the door itself is 1/4" less in height and width than the opening. For my doors, I used 1/2" plywood in the centers framed by 1x4 rails and stiles. I joined the 1x4s together into a frame with 3/4" pocket holes and 1 1/4" pocket hole screws. Then I carefully cut out 1/2" plywood to exactly fit the openings, and drilled 1/2" pocket holes around the sides of the plywood. Then I attached the plywood to the inside of the frame with 1" pocket hole screws and glue. Very easy, very sturdy door - and with the 1/2" plywood in the middle, it helped stiffen up the door and will resist warping/expanding/contracting or otherwise behaving like wood. Get building!!!
It is always recommended to apply a test coat on a hidden area or scrap piece to ensure color evenness and adhesion. Use primer or wood conditioner as needed.







Comments
Margy Mercer
Thu, 05/02/2013 - 12:29
Thank you!
I like the 5 slots! I have a phone, a tablet, a baby monitor, and a heated blanket! I recently drilled a hole in the back Of my bedside dresser, so I can have all my charging things in the top drawer hidden away. But this is a much better idea! Thank you!
YankeeBelle
Thu, 05/02/2013 - 17:37
Perfect Idea for organizing all those blasted wires!
Not two minutes before I saw this post, I said to my husband I was sick of all the bedside knots of wires from chargers for:
Kindle
Phone
Heated mattress pad
Computer
IPod
I feel like I spend my life untangling! I love this Ana!! Thank you!!
apriltottle
Fri, 05/03/2013 - 12:13
Entryway Storage Hutch??
I think this would be amazing as some sort of storage buffet looking thing in an entryway. Adjust the dimensions to make it taller/wider and put in a shelf or two on the inside. Also make a false drawer front that hinges open like a keyboard drawer but no slide. For my house it would be perfect to charge all our stuff by the front door and I would use the shelves for shoe storage and the kids' Bible bags and the diaper bag and my purse. Place a decorative bowl on the top for keys and dog leash, etc.
Dyaffe
Wed, 05/15/2013 - 16:52
Stain!?
I love this stain. Can you please tell us what color and technique you used on this table?
Campbell
Tue, 07/23/2013 - 08:02
How much?
How much are materials for this amazing nightstand? I wanna try but am a little nervous. Thanks :)
VMSommers
Sun, 04/06/2014 - 10:48
I need some help
I want to make two of these at half the length (one for each side of the bed), and with the charging shelf 4 inches from the top instead of 6. what in the shopping list would i need to change?
I was also going to use the plans for the kentwood night stand for the doors, would this work? how would that change the shopping list?
KC4180
Sat, 03/28/2020 - 12:26
Questions about Step 6 Assembling the top boards/hinges
I am in the process of making this charging station cabinet. I’m at the step where the second top piece is to be installed with the hinges. I’m confused about how to install the hinges so that only the hinge pin shows on top. Which boards do I screw the hinge flaps into? And I lined the first top board up flush to the front but there will be a significant gap in between the two top boards if the back is supposed to be flush with the second top board too. If you have any helpful tips for this part of the plans I would greatly appreciate it!