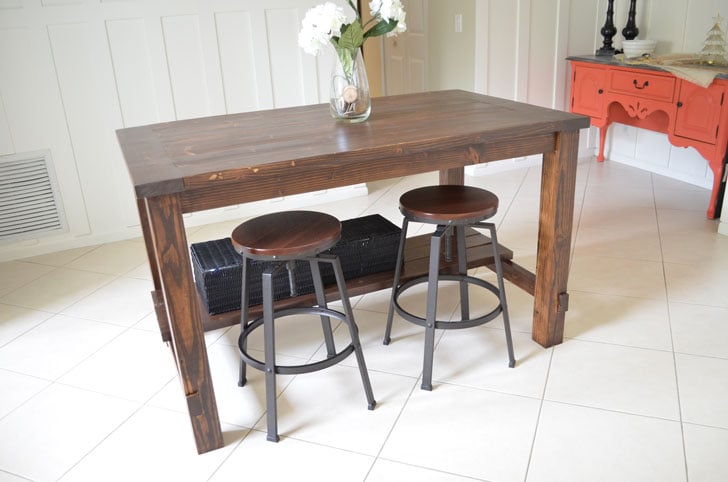
Farmhouse Style Kitchen Island for Alaska Lake Cabin

The free plans on this website are made possible with advertising and affiliate links.  Thank you for helping us keep plans free.


farmhouse style kitchen island
Difficulty
Intermediate
| Print this plan

Farmhouse style kitchen island, sturdy and solid wood. Built using off the shelf lumber and basic tools. Free step by step plans by Ana-White.com
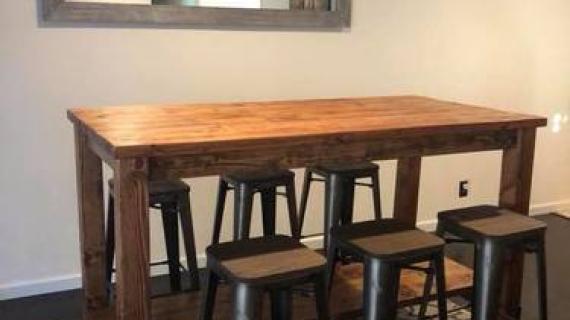
Reader submitted photo by BUILTBYJESSE

Dimensions
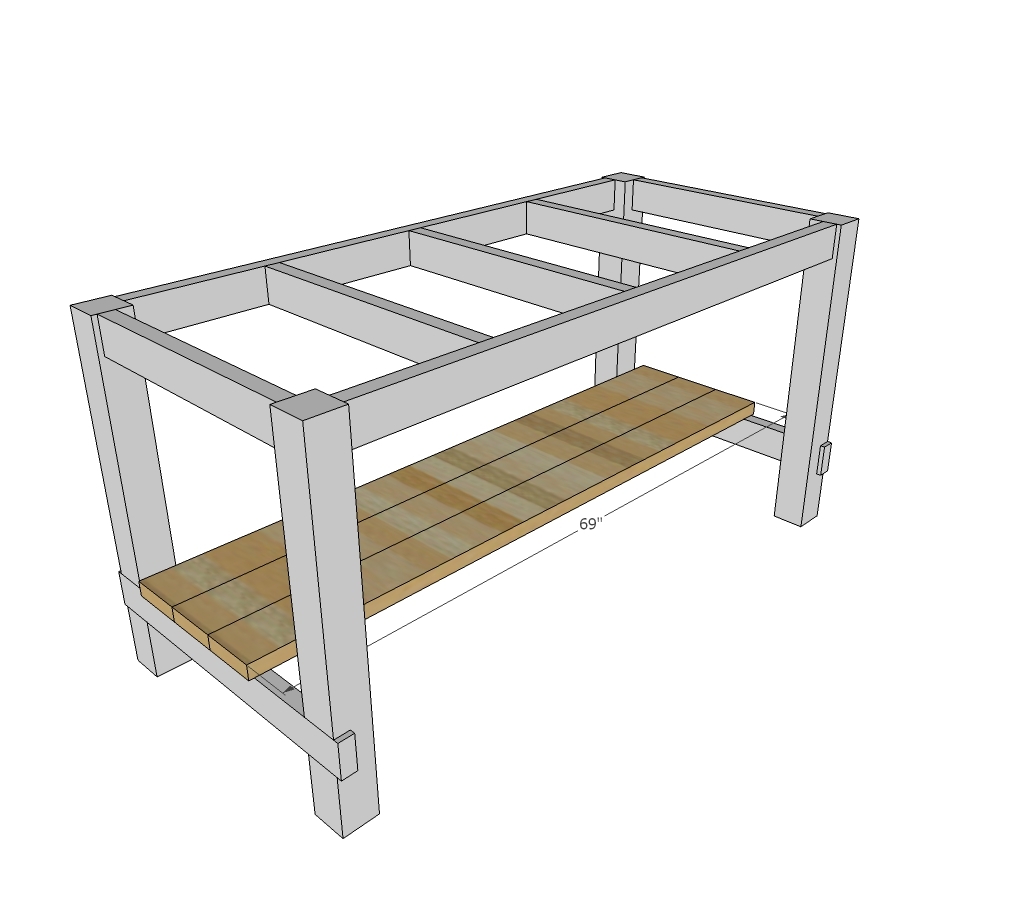
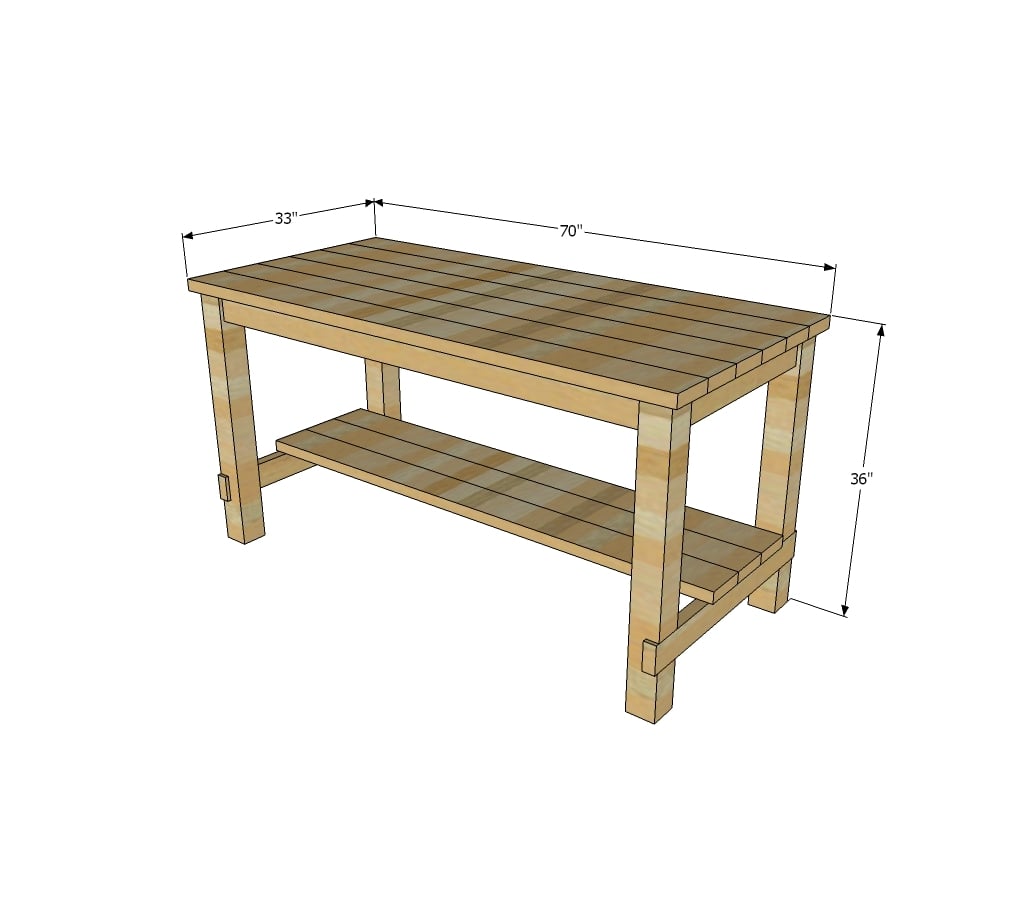
farmhouse style kitchen island
Dimensions shown above, standard countertop height, fits three stools

Preparation

Shopping List

2 - 4x4 @ 6 feet long

4 - 2x4 @ 8 feet long

9 - 2x6 @ 6 feet long (cut 12 footers in half)

Common Materials
2 1/2 inch screws
120 grit sandpaper
Cut List

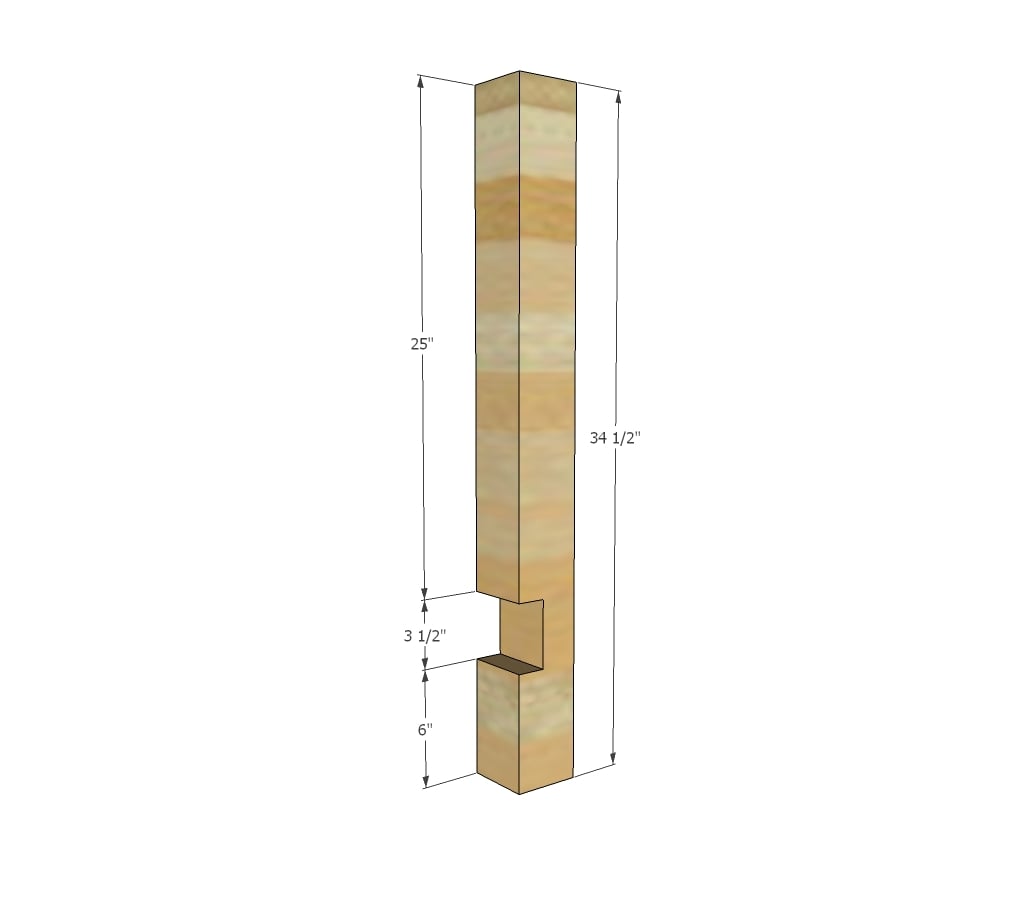
4 - 4x4 @ 34-1/2" - legs

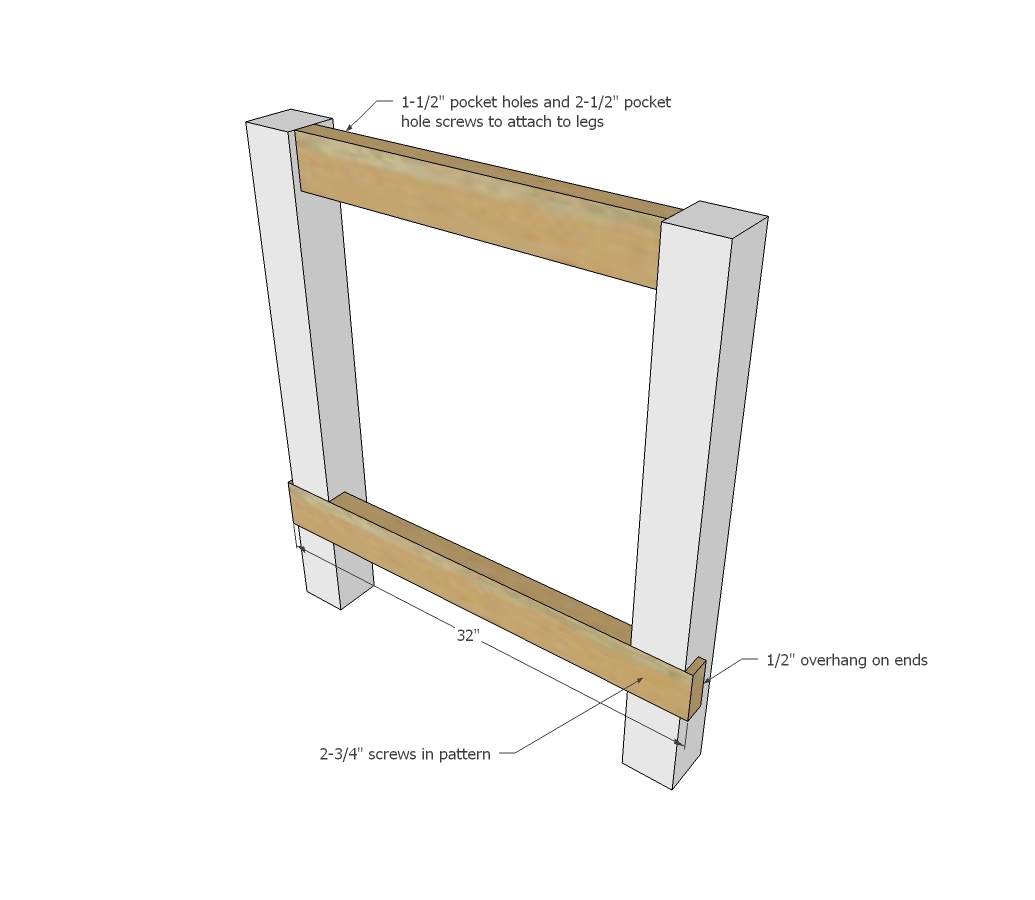
2 - 2x4 @ 32" - bottom stretcher

2 - 2x4 @ 24" - end aprons

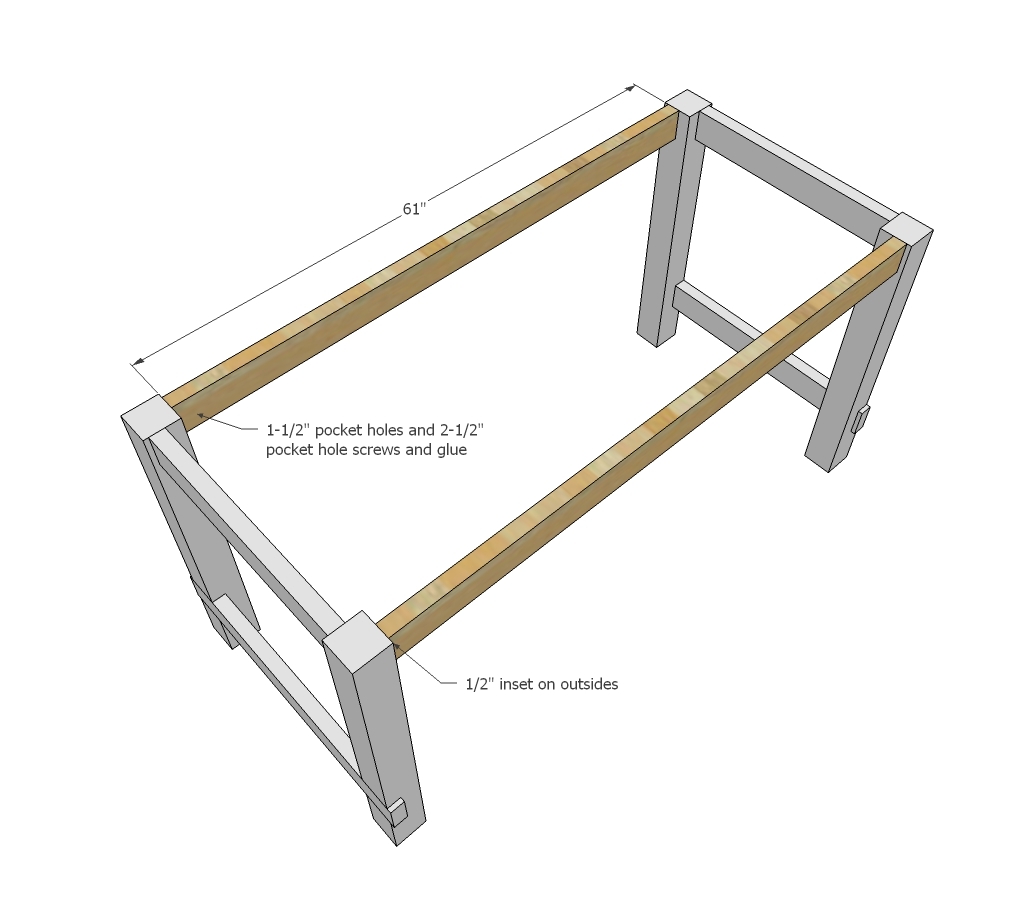
2 - 2x4 @ 61" - side aprons

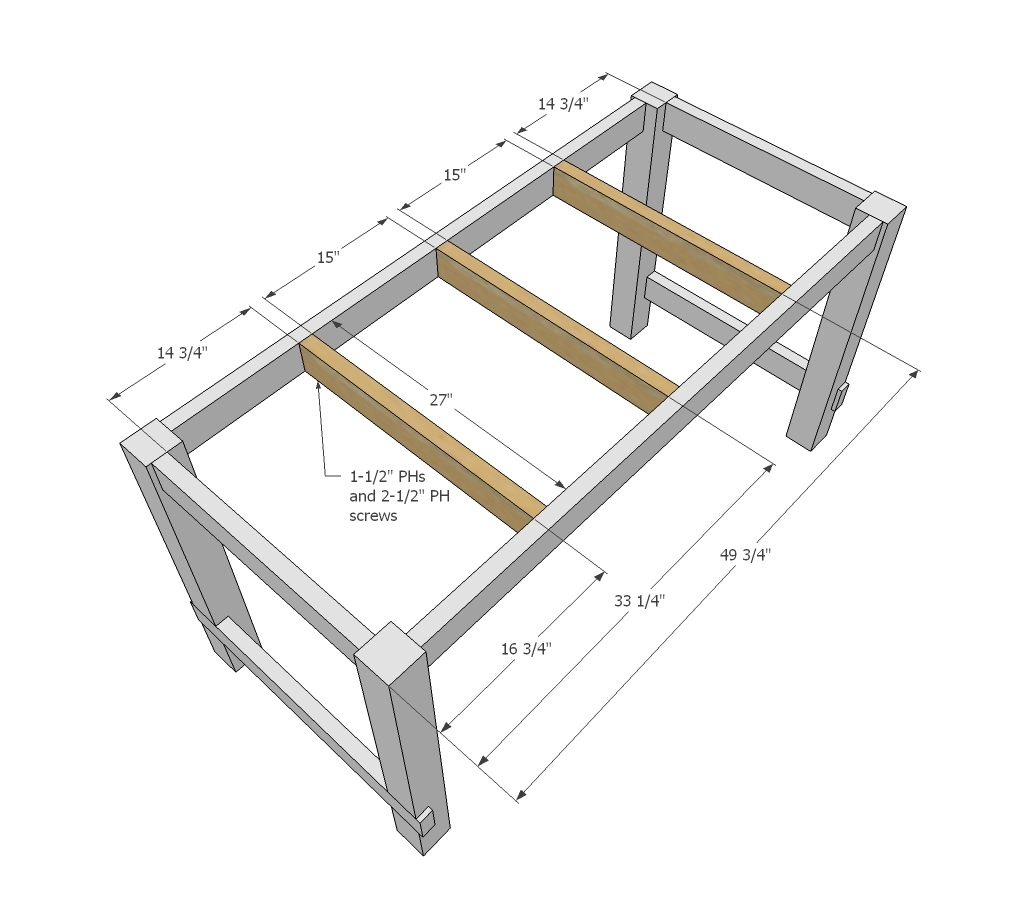
3 - 2x4 @ 27" - under table supports

3 - 2x6 @ 69" - shelf

6 - 2x6 @ 70" - tabletop

Tools
Tape Measure
Speed Square
Pencil
Safety Glasses
Hearing Protection
Kreg Jig
Drill
Circular Saw
Miter Saw
Power Sander

Instructions

Step 1

Notch each of the 4x4 legs out with a circular saw. To do this, set your circular saw blade depth to 1-1/2". Then make cuts in the notch out area every 1/4". Remove the material with a chisel.

Step 2

Attach bottom stretcher in notched out area with 2-1/2" screws and wood glue. Then drill two 1-1/2" pocket holes on each end of the top end apron board. Attach to legs. Check for square. Build two leg sets. TIP: Drill 1-1/2" pocket holes facing upward on inside of aprons for attaching tabletop in later steps.

Step 3

TIP: Drill 1-1/2" pocket holes facing upward on inside of aprons for attaching tabletop in later steps. Drill two 1-1/2" pocket holes on each end of the 2x4 side apron boards. Attach to 4x4 legs with 2-1/2" pocket hole screws and glue. Adjust for square.

Step 4

TIP: Drill 1-1/2" pocket holes facing upward on inside of supports for attaching tabletop in later steps. Use pocket holes to attach the supports to the side aprons with 2-1/2" pocket hole screws.

Step 5

Step 6

Build tabletop - here is a good tutorial -


And then attach tabletop to the aprons.