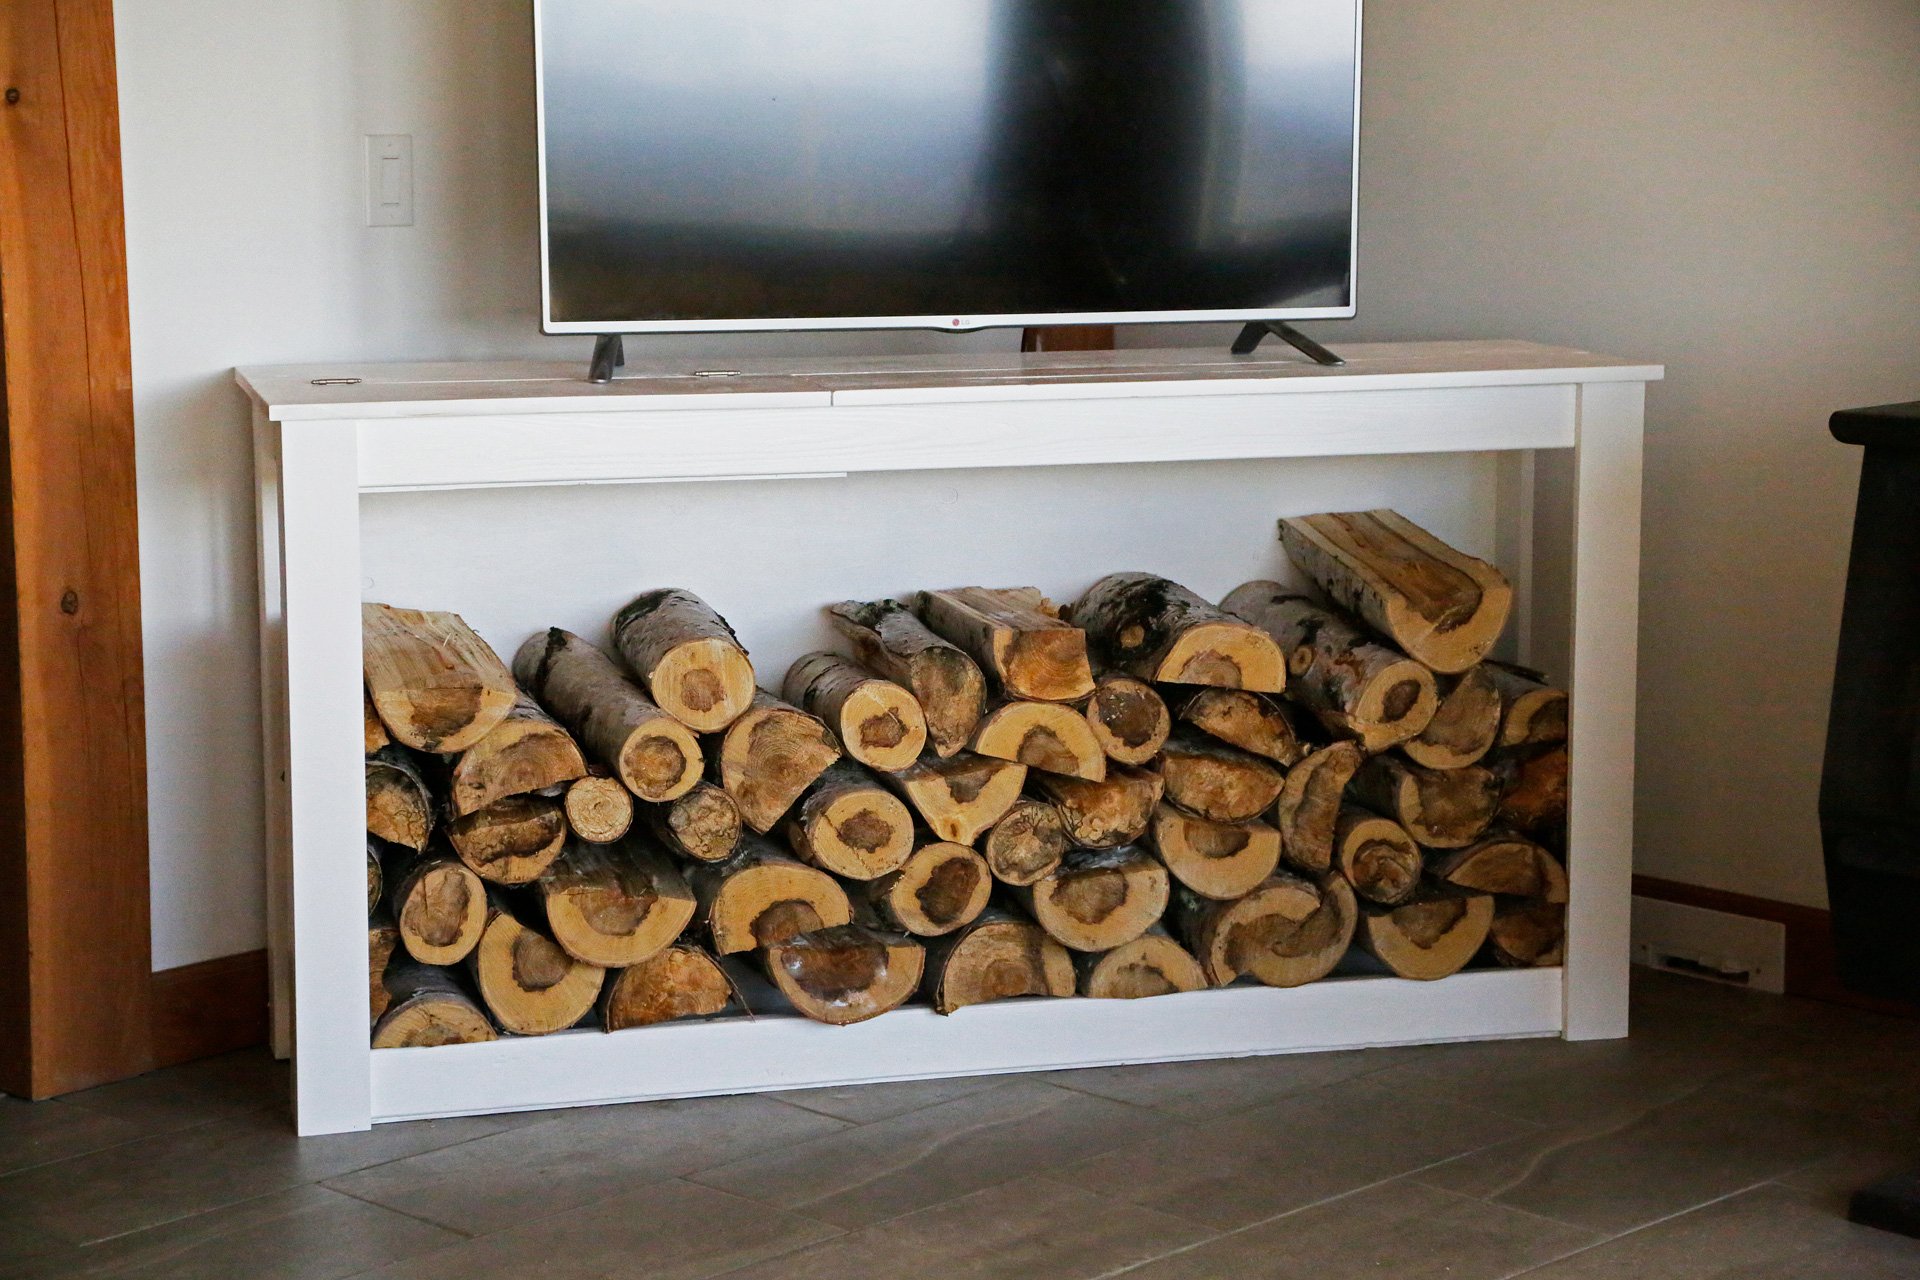


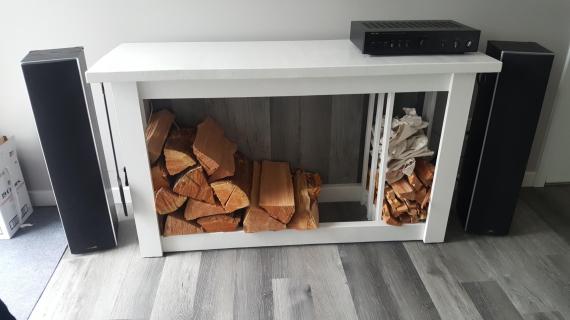
Build your own firewood holder console table with our free plans. Designed just for firewood, features a tray for catching bark, full back to protect walls, and ends to secure firewood. Also features hidden storage for lighters and firestarter. Project lumber cost about $65.
Burning wood for heat in Alaska has been part of my life for as long as I can remember. We love wood heat because it's more cost effective than oil, is renewable, and harvesting wood is good for our forests - certainly more ideal than wildfires burning up the forests if they aren't managed.
For our cabin, we need to store wood inside so it dries out and is free of snow, but the space is limited. So I designed a new project just for firewood.
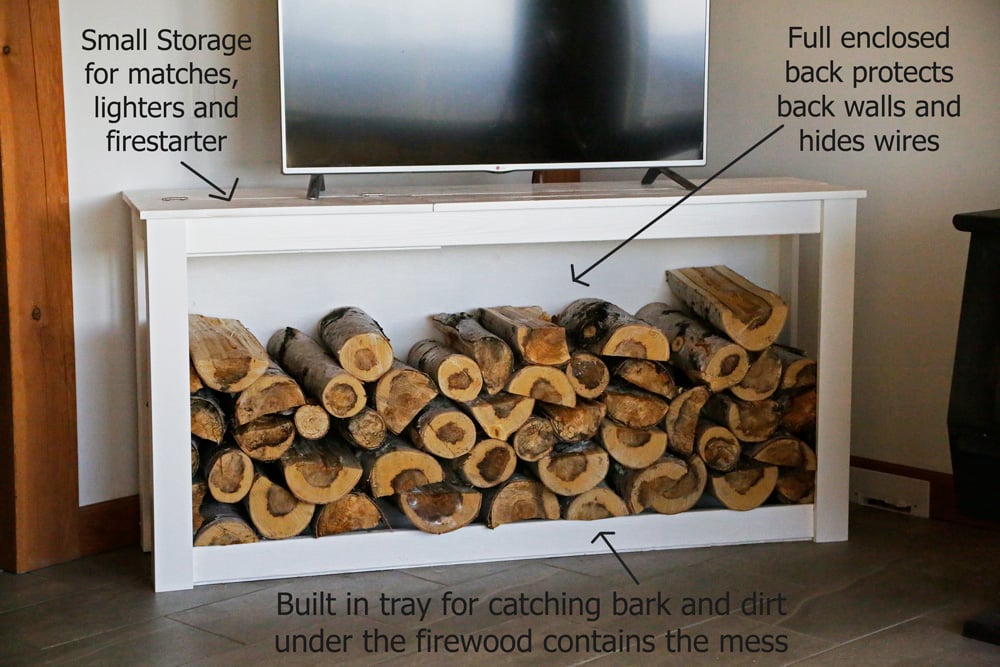
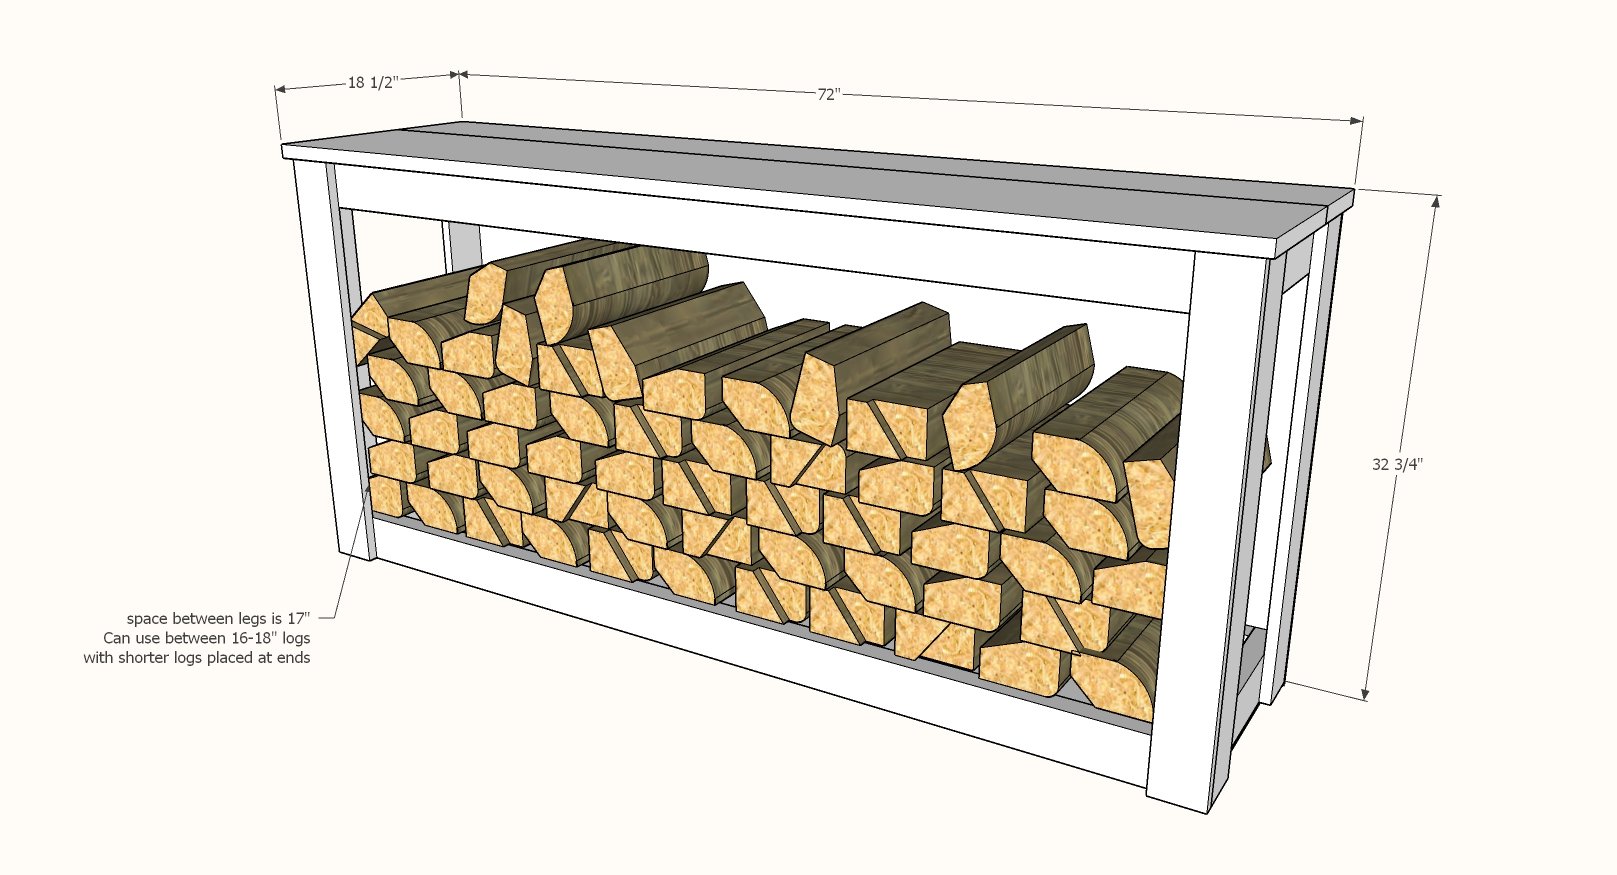
We love that it functions like a console with useable space on top, but is designed to accommodate firewood. I'm going to warn you though - this project is HUGE - measure and make sure it fits before building.
Video Tutorial
In this video tutorial, we show all the steps on how we built it. Also watch if you want to add the hidden storage area.
Preparation
- 1 - sheet 3/8" plywood
- 2 - 1x4 @ 8 feet long
- 4 - 2x4 @ 8 feet long or 8 foot stud length (92-5/8")
- 1 - 1x8 @ 6 feet long
- 1 - 1x12 @ 6 feet long
- 3" self tapping wood screws like these
- 1-1/4" and 3/4" brad nails
- wood glue
- paint or stain
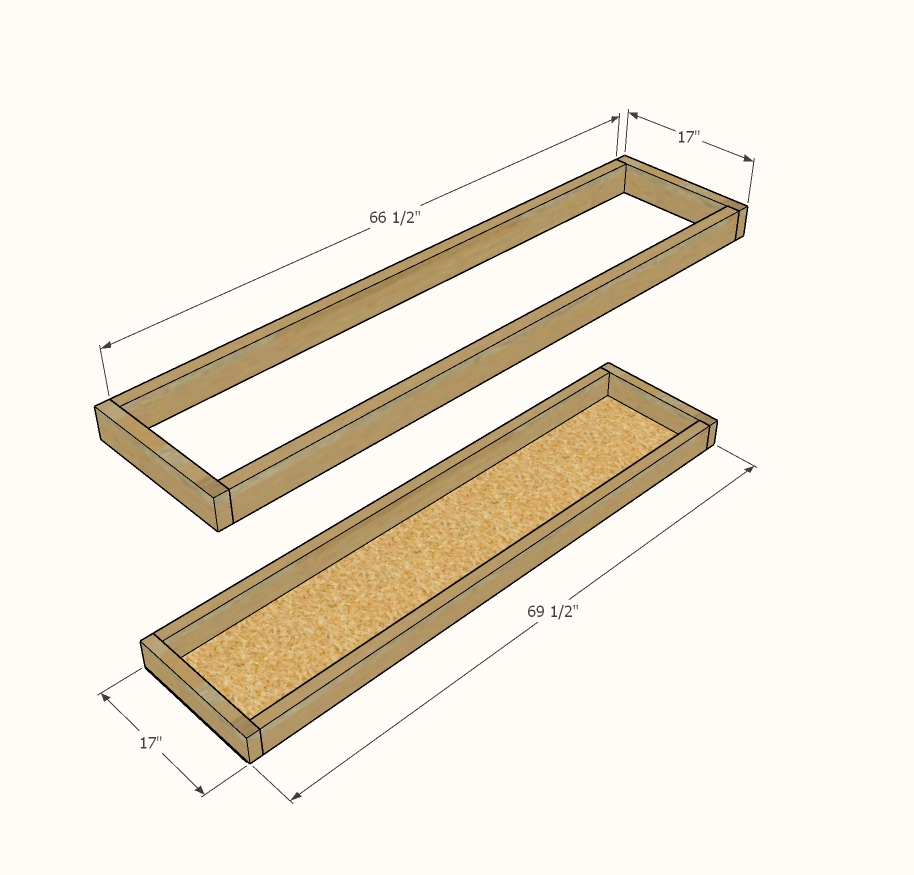
- 4 - 2x4 @ 66-1/2"
- 4 - 2x4 @ 17"
- 1 - 3/8" plywood @ 16-1/2" x 69-1/2"
- 6 - 1x4 @ 31-3/4"
- 1 - 3/8" plywood @ 31-1/2" x 71"
- 1 - 1x8 @ 6 feet long
- 1 - 1x12 @ 6 feet long
Rip the 3/8" plywood lengthwise at 16-1/2" x 8 feet. Cut the bottom tray plywood to length from this piece.
From the remaining piece, cut the back to length.


Instructions
Step 1
Use the 3" screws to build two frames out of the 2x4s, two screws per joint.
On the bottom tray, attach 1/4" plywood with the 3/4" brad nails and wood glue.
Step 2
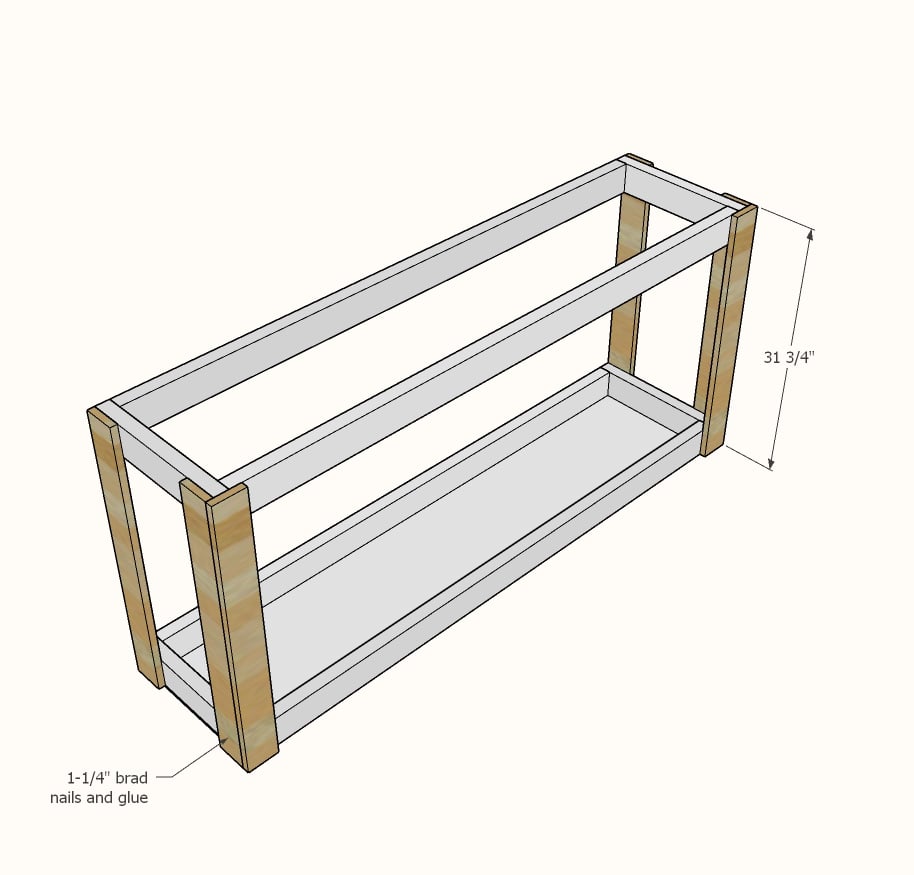
Build two front legs with 1-1/4" brad nails and glue.
Attach to front of trays, all outside edges flush.
Add the single back legs with 1-1/4" brad nails and glue.
Step 3

Attach back to project with 3/4" brad nails and glue.
Step 4

Attach top with 1-1/4" brad nails and glue.
Additional supports or hidden storage can be added to the top - see how this is done in the video.
Comments
ejejonesy
Sat, 10/03/2020 - 08:16
Hinges
What hinges did you use for the hidden compartment? We couldn’t find the right ones at Lowe’s and are looking to order some.