


Want to start building projects but space is limited? This folding workstation only takes up 4 square feet, and has lots of storage. It folds out to create a good sized work space.
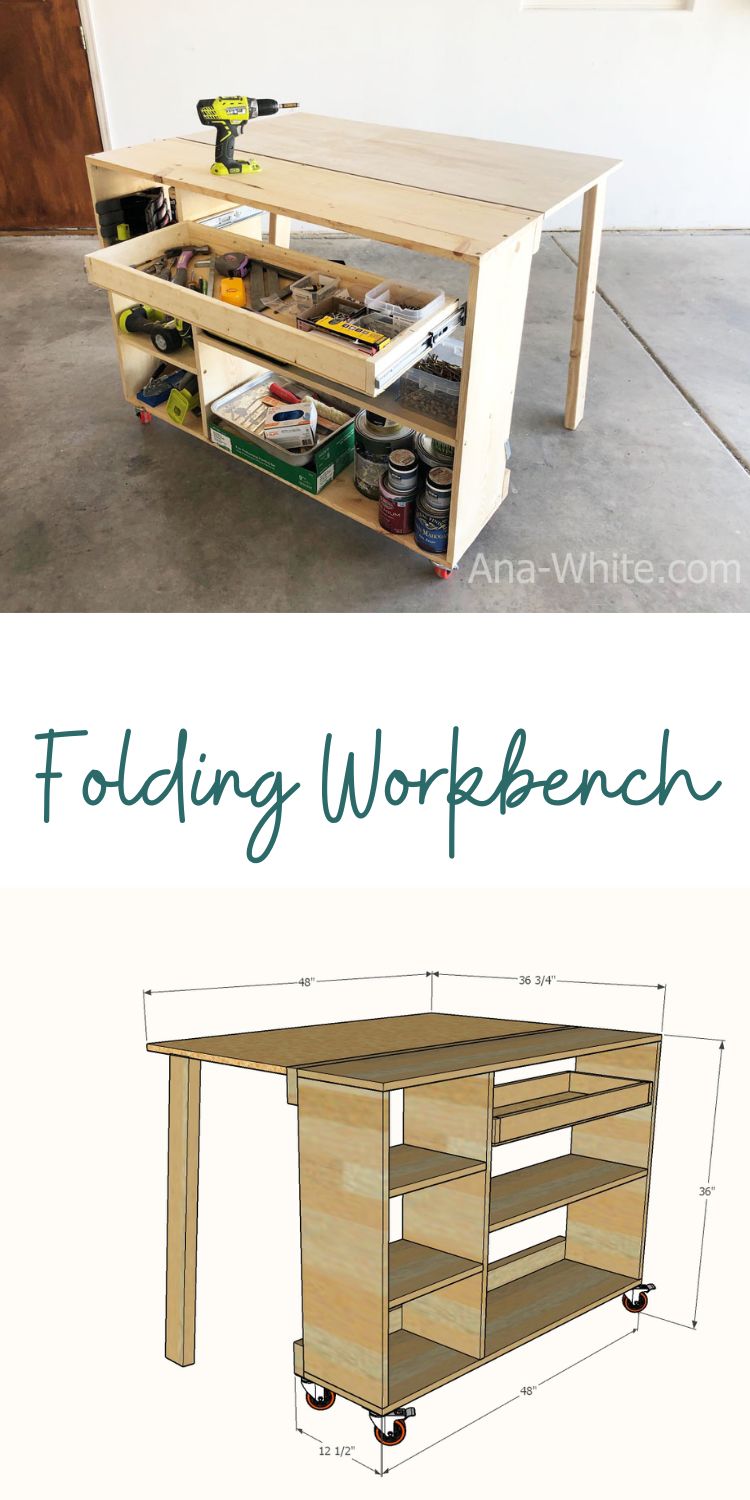
Free step by step plans with diagrams and shopping and cut list from Ana-White.com
Building projects is so much like cooking meals. If you have a kitchen and the basic tools, anything is possible. But if you are cooking on the ground, without your appliances, utensils and knives stored in random places though your home, it's next to impossible to create anything.
The same is true of building projects. You need a dedicated work center with your tools all in one place. So when you want to work on a project, you know exactly where everything is, and you have a workspace that is clean and ready for your creativity.
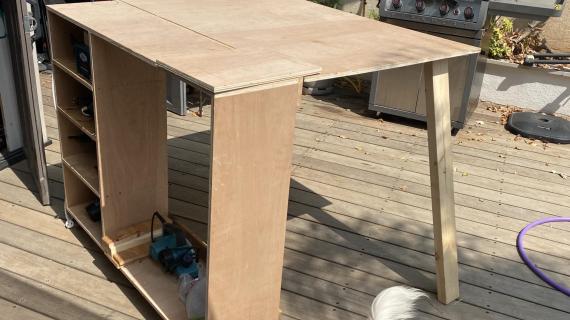
But what if you don't have alot of space? I just returned from visiting my sister, and we were able to create a folding workbench that holds all the essential tools in just 4 square feet, but it folds out to a 12 square foot tabletop.
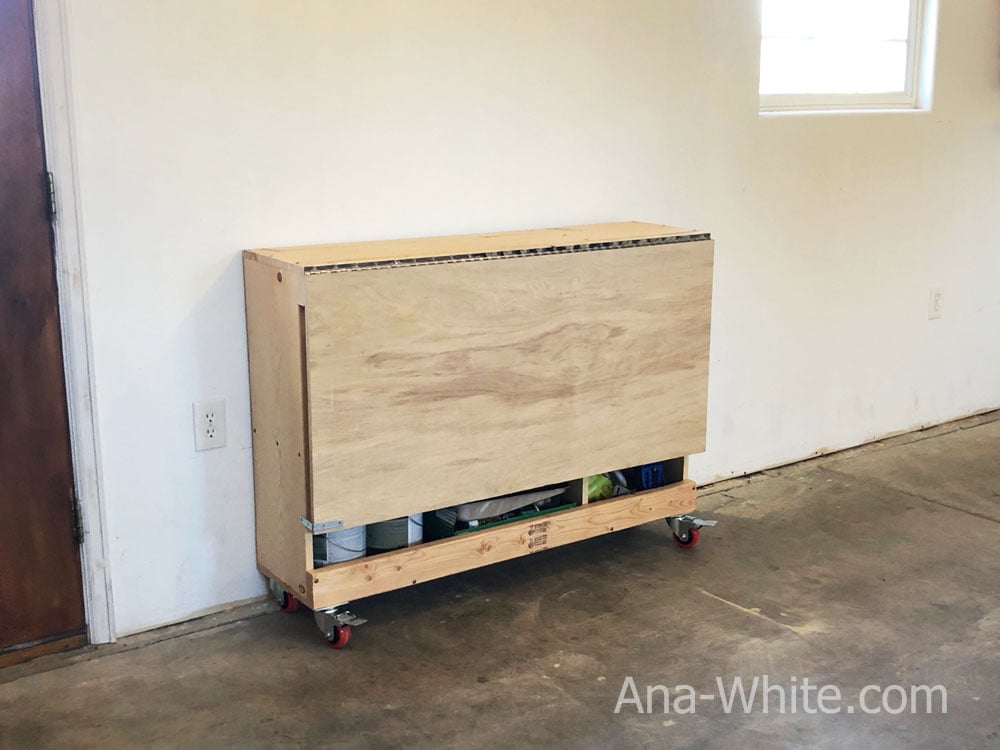
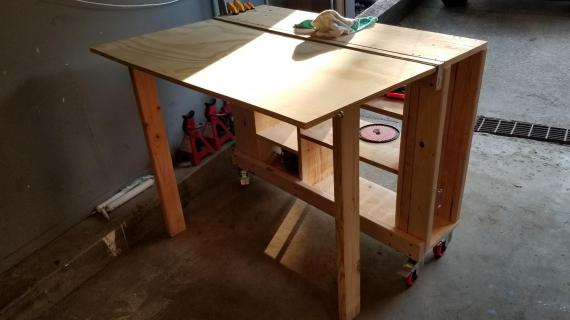
It's narrow, so you can place it against the garage wall and still easily walk around it.
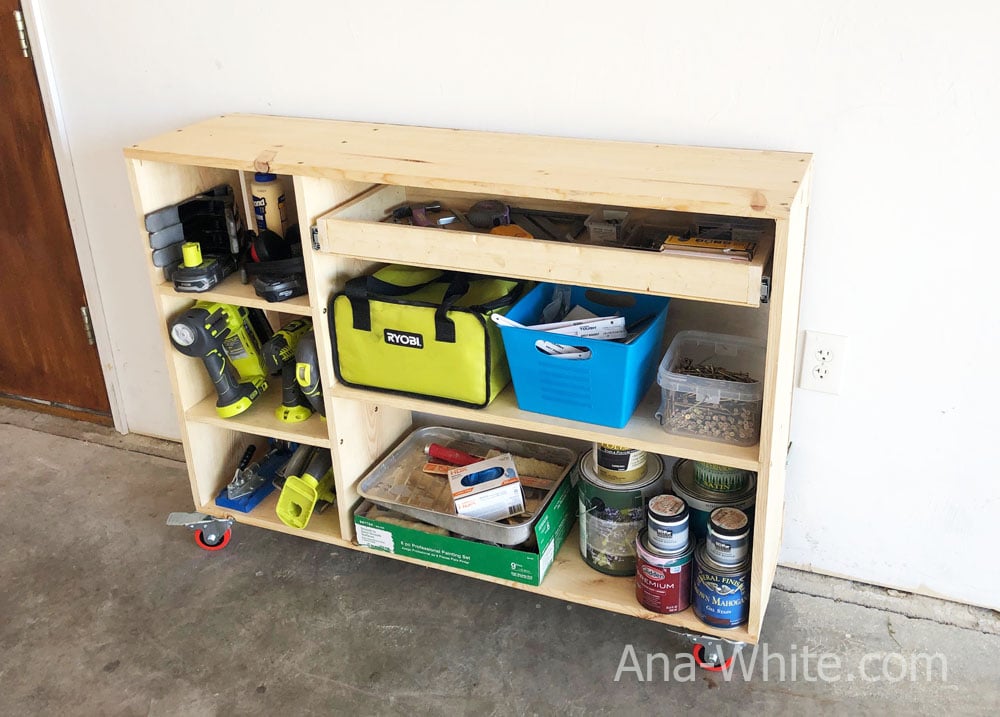
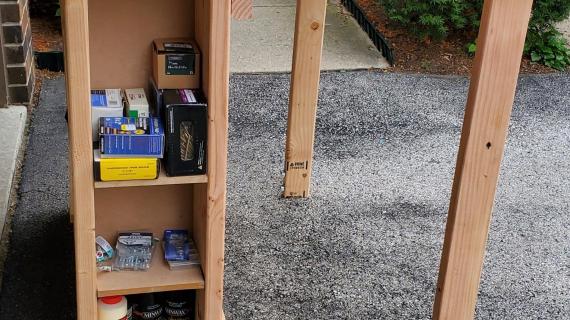
You can also store the folding workbench with the tools outward - so accessing your drill or hand tools is a always easy.
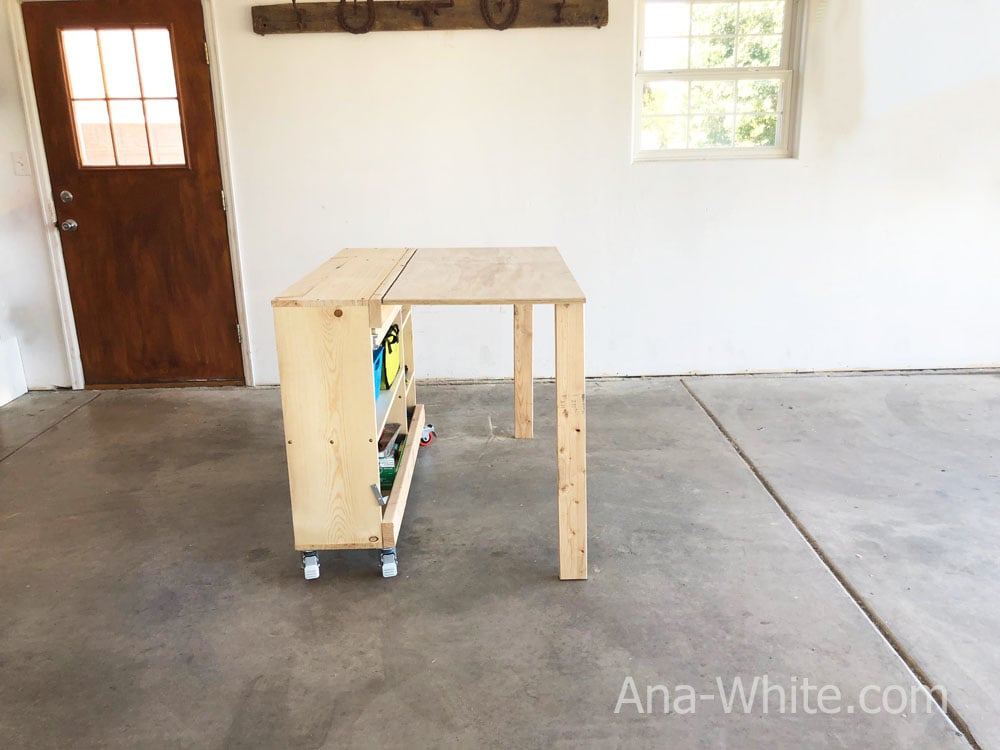
To use, simply wheel the workbench out, lock the caster wheels, and fold the tabletop up. The tabletop is simply a 3/4" thick piece of plywood, in an off the shelf 4' x 2' size (no cutting required).
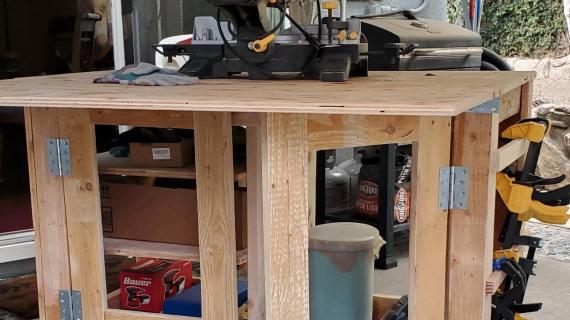
The simple design allows for easy clamping to the plywood.
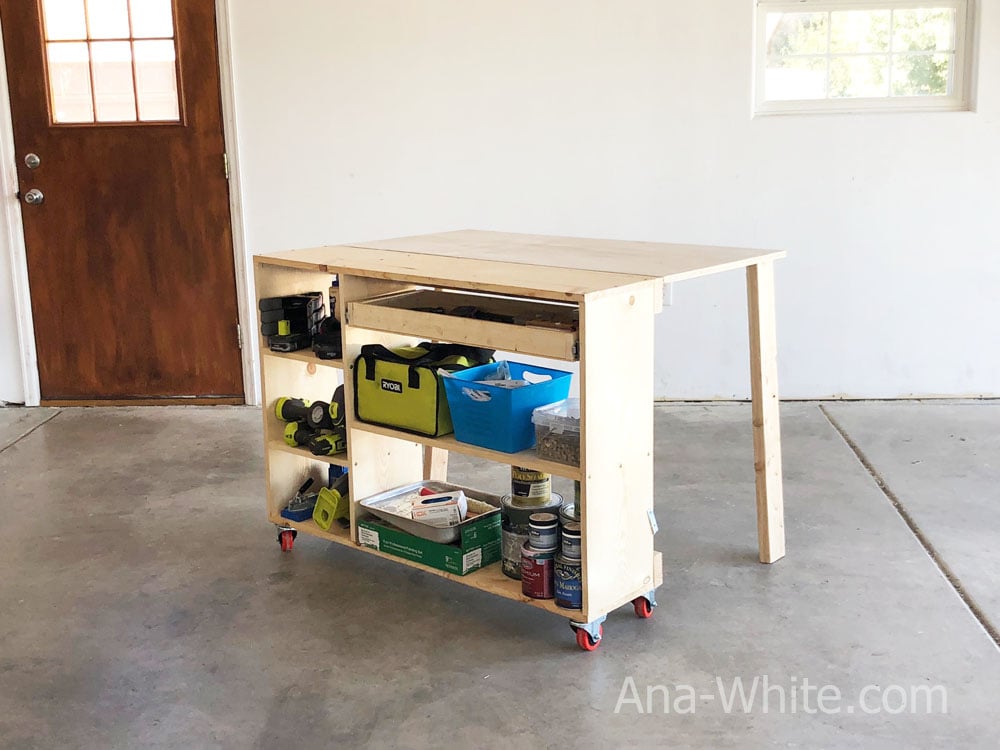
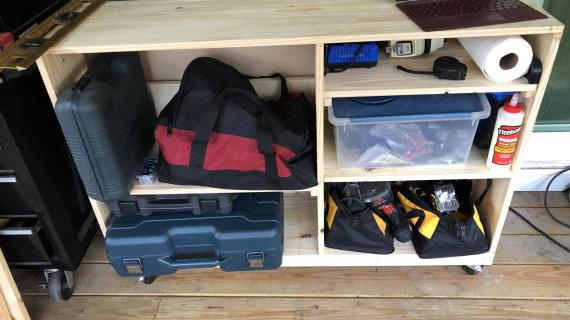
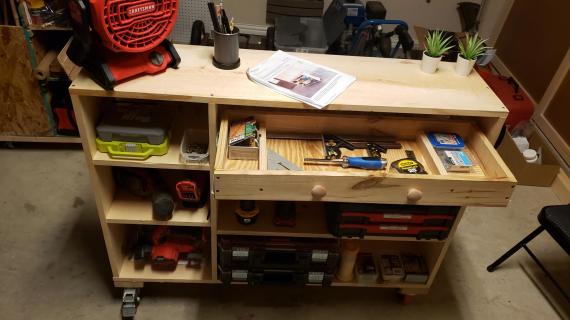
The storage and tools is very accessible when the workbench is in use.
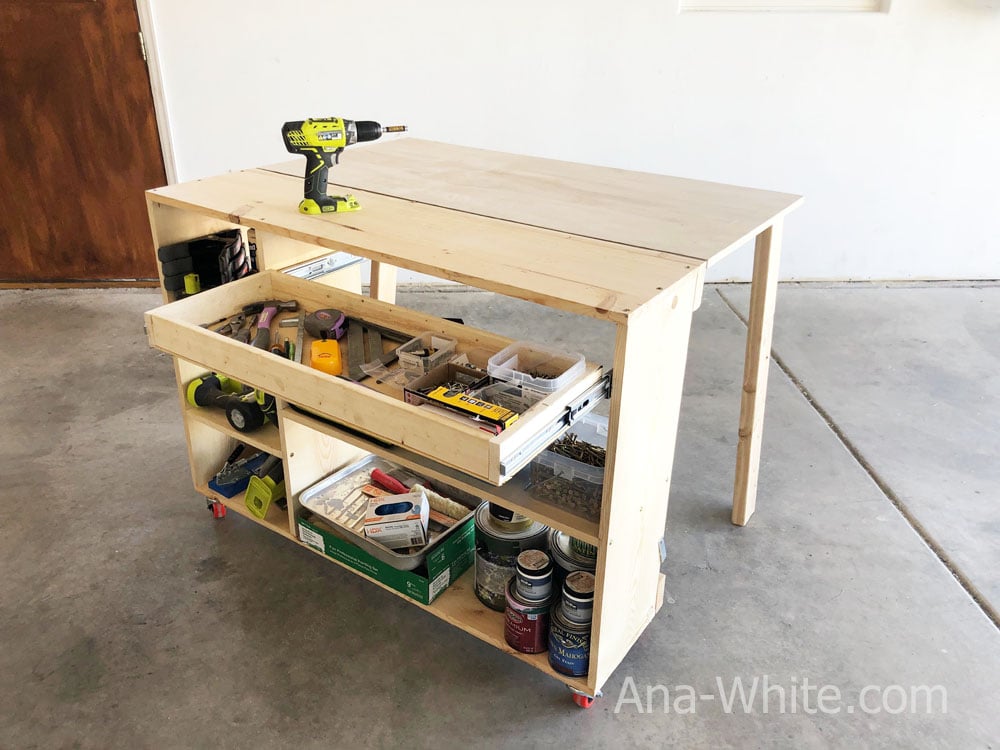
We added a drawer for small tools and screw organization - but the tools are completely optional.
This folding workbench is perfect for someone who wants to work on occasional projects, doesn't have alot of space, and wants all their tools in order.
Folding Workbench Video Tutorial
We did film this build process, it's a pretty easy build. Watch the tutorial for lots of tips and tricks
Folding Workbench Plans
The plans for this folding workbench follow. If you build, please share a post, we love seeing how your projects turn out.
Pin For Later!
Preparation
- 2 - 1x12 @ 8 feet long
- 1 - 1x12 @ 6 feet long (use for the shelves)
- 2 - 2x4 @ 8 feet long
- 1 - 3/4" plywood @ 4' x 2'
- 1 - 48" piano hinge
- 4 - 4" caster wheels with locks
- 16 - 3/4" long wood screws for caster wheels, make sure the screw head won't pull through the caster wheel holes
- 2 - 3" hinges with screws
- 2 - magnetic clasps
- 1 - hook and eye closure
- 2" self tapping cabinet screws (about 50)
- 2-1/2" self tapping cabinet screws (about 20)
Optional Drawer
- 1 - 1x3 @ 8 feet long
- 1/4" plywood for drawer bottom
- 1 - 12" full extension drawer slide
- 3/4" brad nails and wood glue for attaching the 1/4" plywood to the bottom
- 2 - 1x12 @ 48"
- 3 - 1x12 @ 30-1/2"
- 2 - 2x4 @ 48"
- 1 - 1x12 @ 31-3/4"
- 2 - 1x12 @ 14"
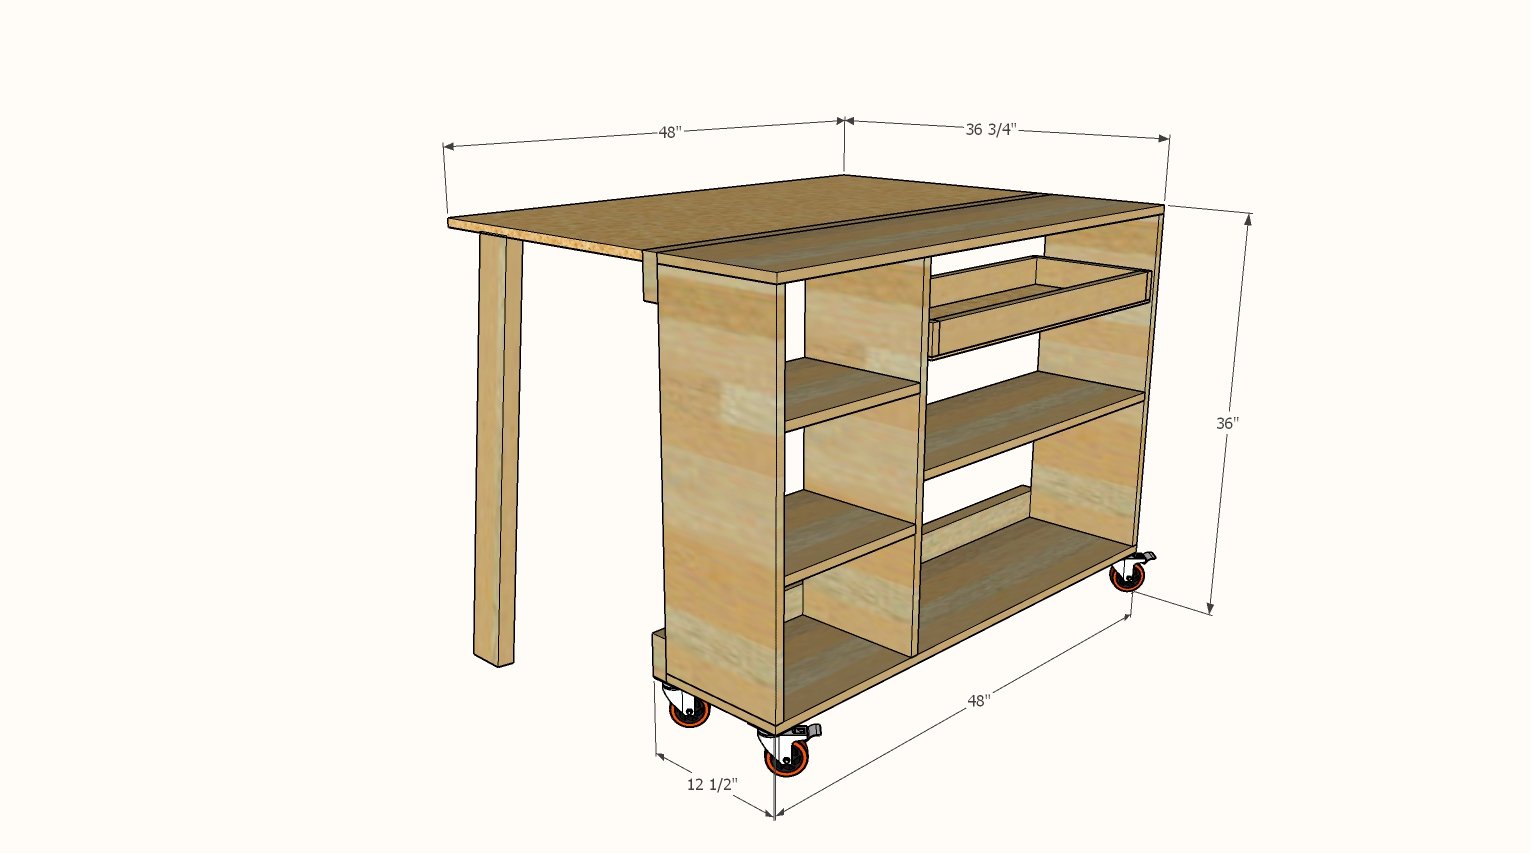
- 1 - 3/4" plywood @ 48" x 36"
- 2x4 legs are cut at 5 degree bevel to fit the height of the casters
Drawer should be cut to fit as follows -
- 2 - 1x3 @ 12"
- 2 - 1x3 @ about 29" - measure the smallest part of the opening, subtract 1" for drawer slides, 1-1/2" for the drawer sides, and then an additional 1/4" for play
- Drawer bottom is 12" x about 30-1/2" or 1-1/2" larger than the drawer front and back 1x3


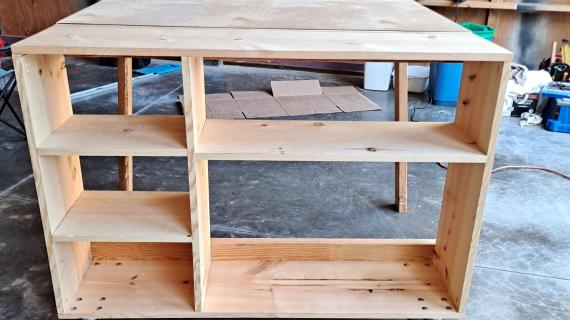
Instructions
Step 1
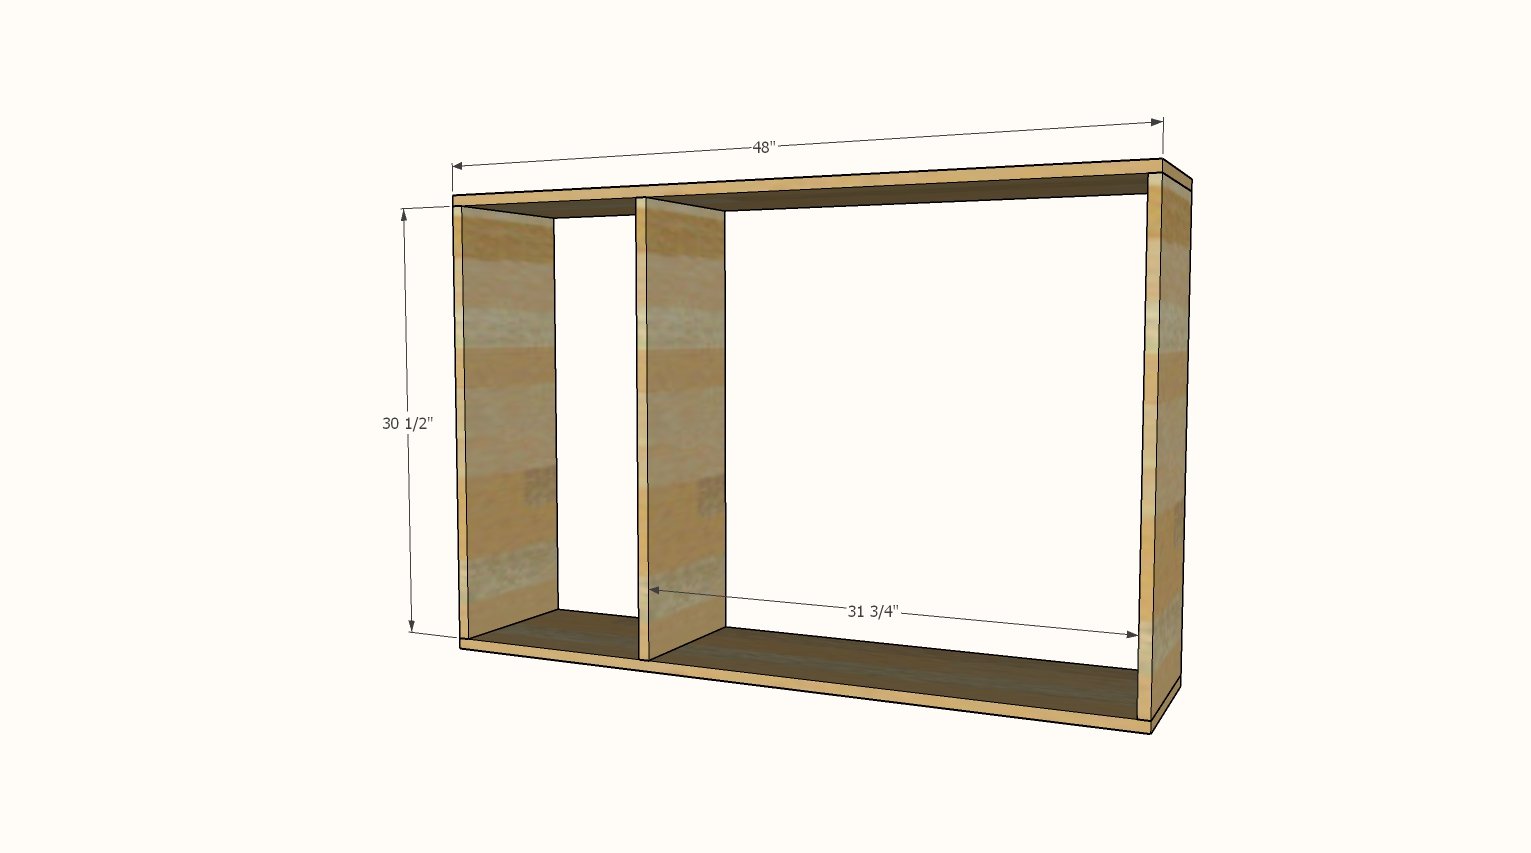
Attach the top and bottom to the dividers and sides with 2" screws, use three screws per joint.
Step 2

Check the project for square by taking opposite diagonals and making sure the opposite diagonals match. Adjust if necessary.
Attach 2x4s to the back with 2-1/2" screws into the top, bottom and sides and dividers.
Step 3
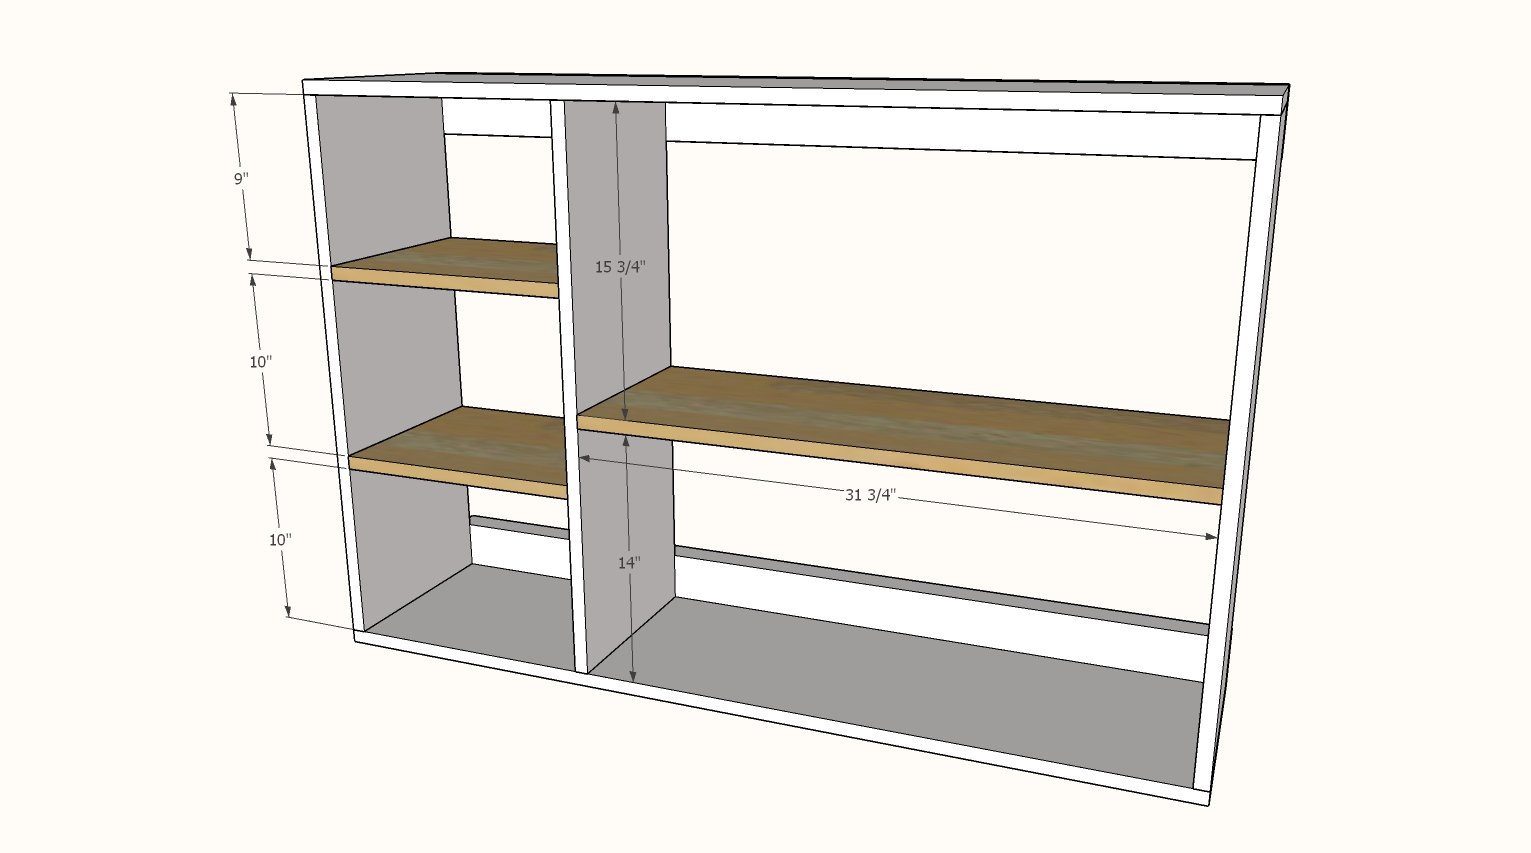
Attach longer shelf first with 2" screws, three screws per joint.
Then add the smaller shelves.
Shelf height can be placed at any height, more shelves can be added.
Step 4

Optional Drawer:
Measure the inside with of where you want the drawer placed. Measure at the front, back and middle to find the smallest spot.
Cut the drawer to fit, most drawer slides need 1/2" clearance per drawer slide. You'll also need to factor in the thickness of your 1x3 drawer sides. I like to also leave about 1/4" less just to make sure the drawer can fit - you can always shim the drawer slides later if the drawer is too small, but a too big drawer is tough to fix.
Use 2" screws to build the drawer, and 3/4" brad nails to attach the bottom on the drawer.
Step 5
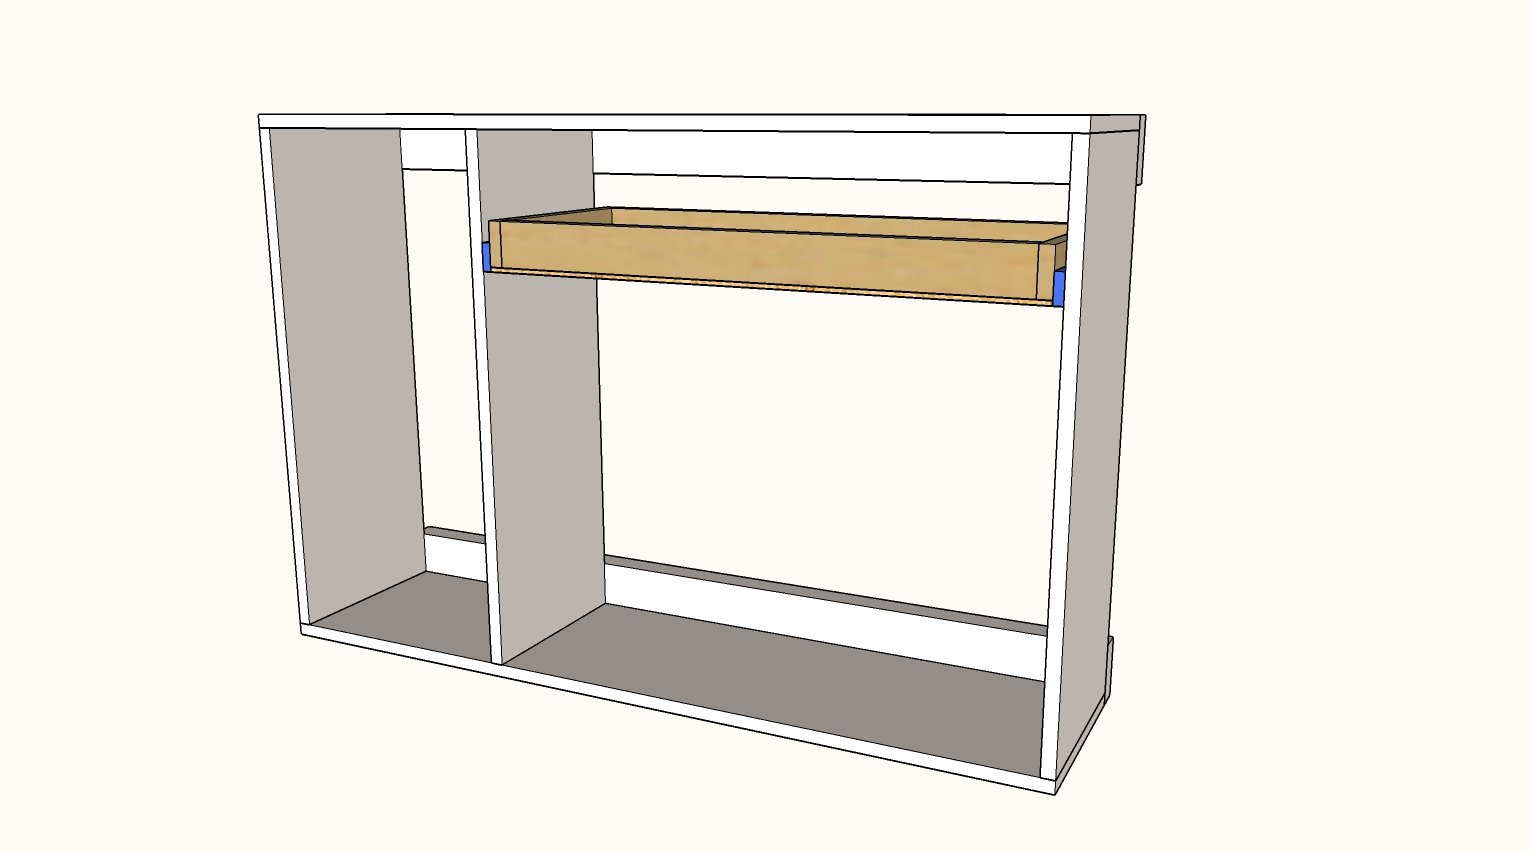
Install the drawer on the slide so it is below the back 2x4.
The video has alot of tips on installing this drawer, so please watch - it will save you time.
Step 6
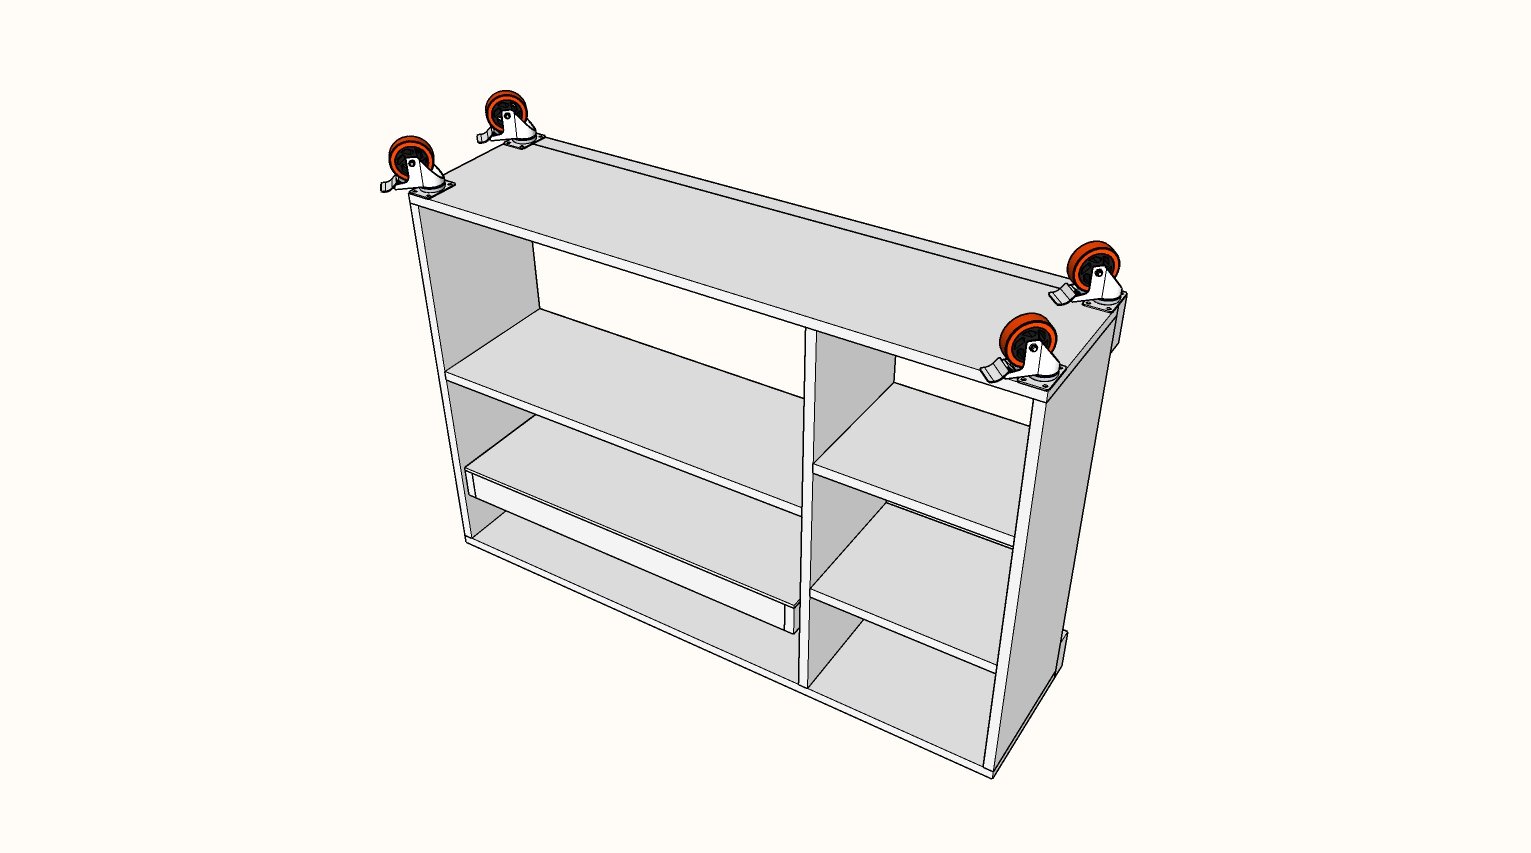
Screw caster wheels to the base of the project.
Step 7
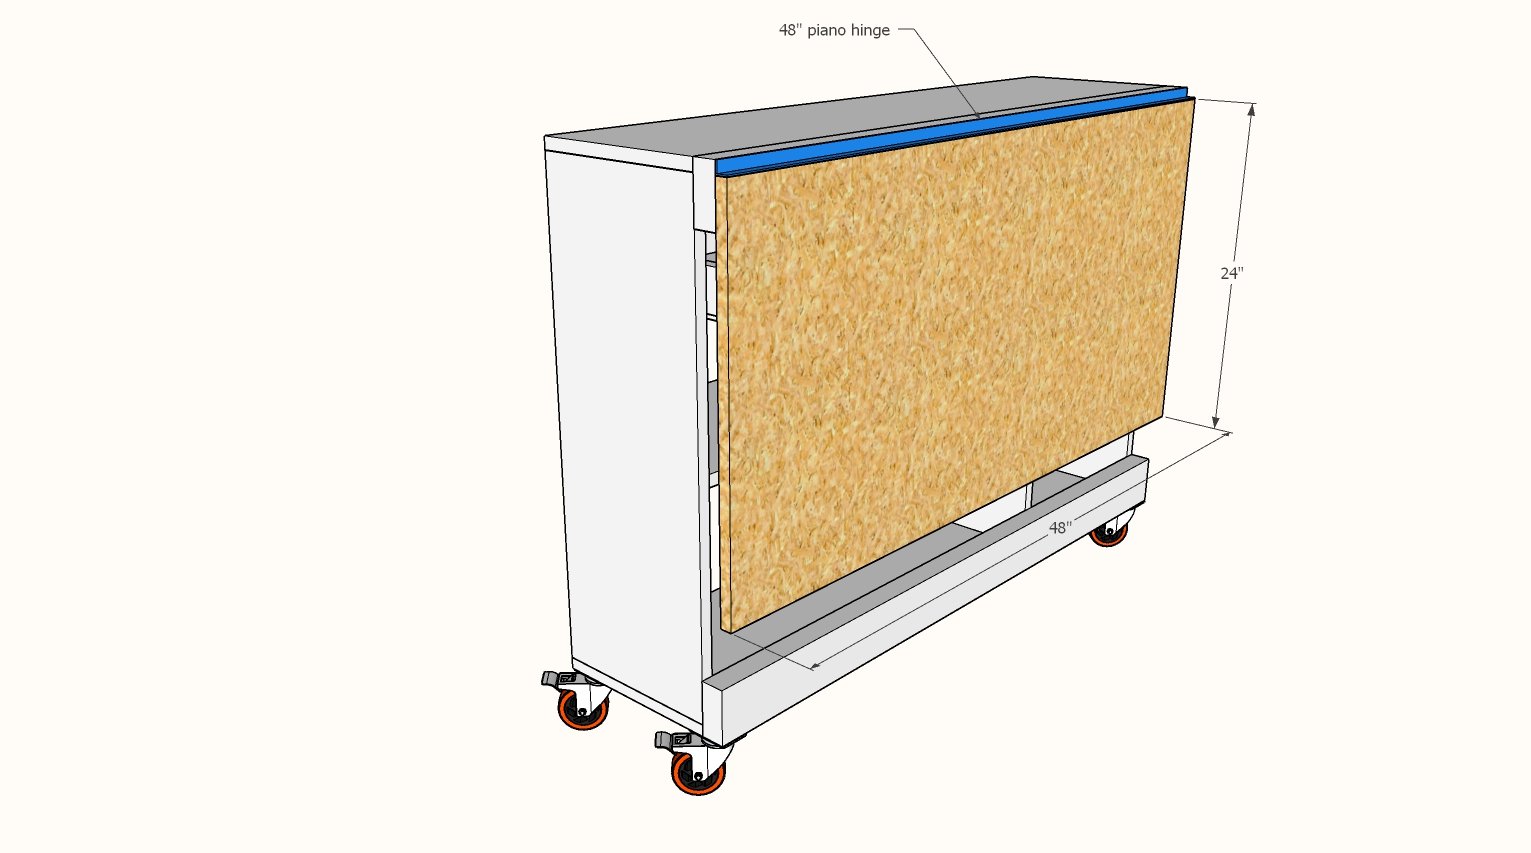
Attach the 3/4" plywood panel to the workbench 2x4 with the piano hinge. When hinged down, the piano hinge will be fully exposed.
Step 8
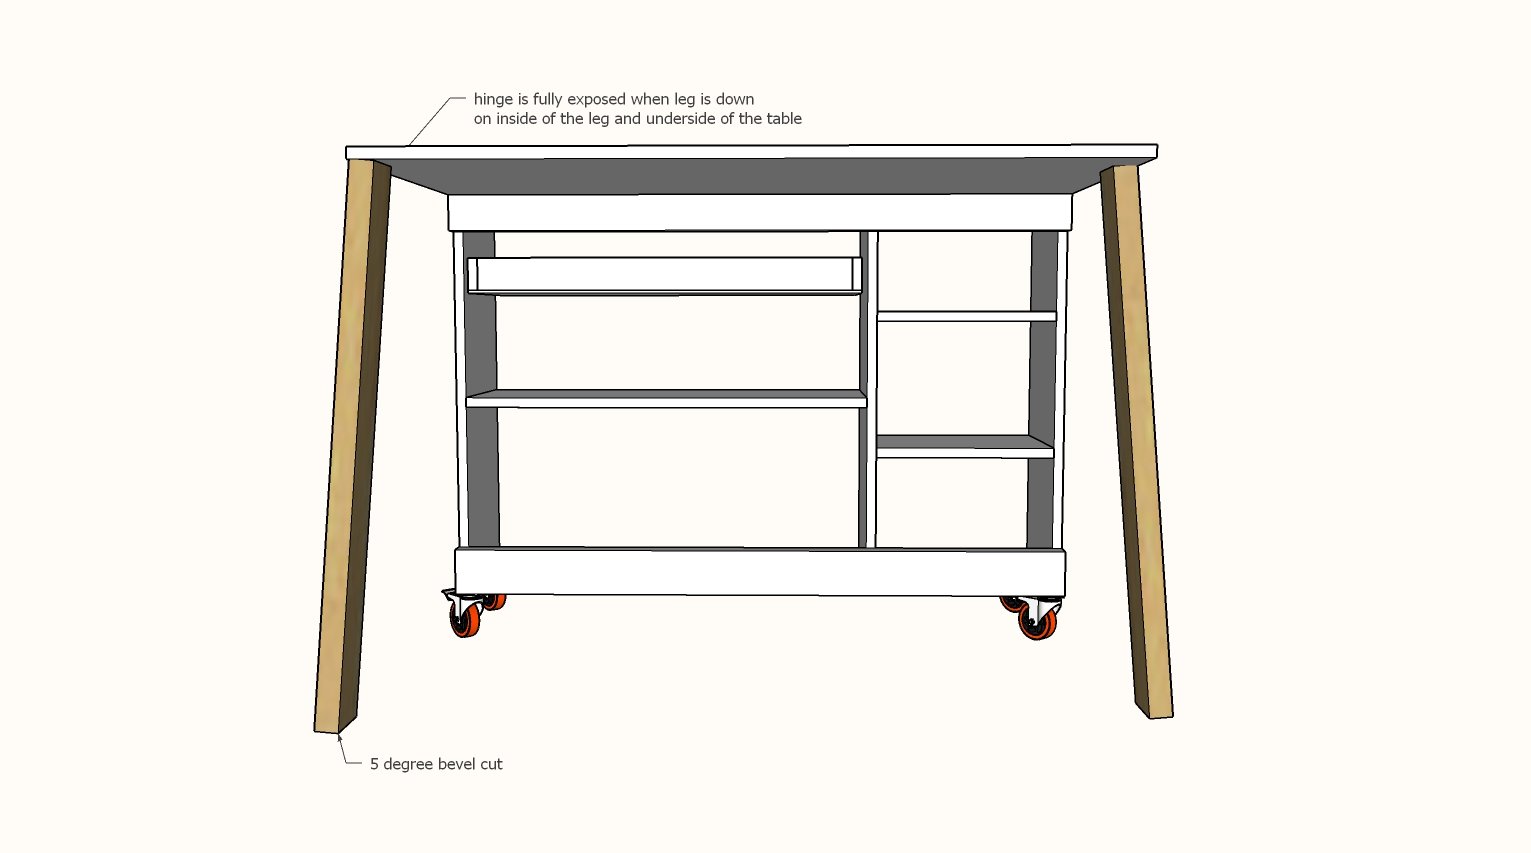
Cut one end of the remaining 2x4 at a 5 degree bevel.
Hold the work table up so it is level to the ground.
Place the 2x4 with the 5 degree bevel on the ground alongside the tabletop, and trace where it meets the underside of the tabletop.
Cut the line with a 5 degree bevel.
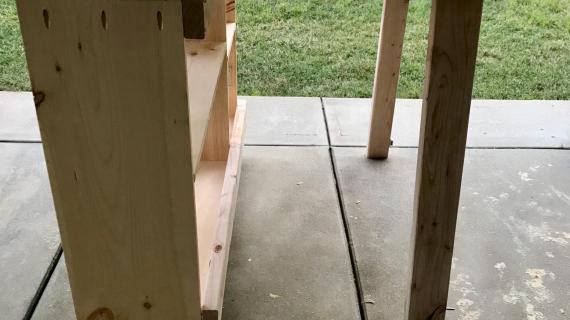
Install the leg with the 3" hinge.
Repeat for second leg.
Install magnetic closure so the flat magnetic piece is on the underside of the tabletop, and the larger magnetic piece is on the side of the legs, magnetic pointing toward the underside of the tabletop.
Also install a hook and eye closure on the side of the 1x12 to keep the project closed when not in use.

Comments
MaryWSC
Sat, 05/23/2020 - 18:01
This is a great plan. I…
This is a great plan. I made mine 48” x 24”. I need to add the drawer and paint it. Love it!!!
Katiejk21
Mon, 05/25/2020 - 15:00
Magnetic Clasps
Where did you purchase the magnetic clasps? I'm purchasing everything from Lowe's and I can't find anything like that. Thanks!
jgruffydd
Tue, 05/26/2020 - 17:20
folding workbench
Did anyone build this and find it top heavy and a bit dangerous when in folded position? I built it with exactly the same specs as the plans , same wheel size etc. Any ideas for widening the base on this so wheels can be further apart to support the weight better?
Katiejk21
Thu, 05/28/2020 - 11:40
I’m in the process of making…
I’m in the process of making this. Would you mind telling me where you purchased the magnetic clasps?
mamabuilds
Mon, 10/12/2020 - 17:51
dangerous and unstable.
I built it and yes, just that. This is extremely dangerous. I could blow on it and it wants to fall over. I am thinking of hanging plywood on the other side to balance out the weight distribution. I would never recommend it to anyone. It was a big disappointment. I've built other plans from Ana that are great. But this was a fail.
segwayne
Fri, 02/26/2021 - 04:26
Help for it being "top heavy"
Great point about the width of the cabinet and having a board hanging off one side making it a bit unstable. As I see it, there a a few ways to maybe counter this;
1) Mount a second 24 x 48 board to the front identical to the rear. This has the benefit of making your workspace 2 feet longer when extended, but makes it harder to get to anything in the cabinet.
2) On the front side of the cabinet, on the inside lip of the shelves, both top and bottom, cut and put in 2x4's as braces. This takes away some of the shelf space, but puts more weight up front. You could also add doors to the front which would help keep dust out and add weight to the front for balance.
3) Instead of building it out of 12" wide boards for the frame, extend that to either 16" or (preferably) 24" wide pieces of plywood to space out the wheels and better accommodate the load.
Drspear98
Wed, 05/27/2020 - 18:19
I wonder if something like…
I wonder if something like this could be made into a craft table. I would love to have some type of storage for all my craft supplies.
Drspear98
Wed, 05/27/2020 - 18:19
I wonder if something like…
I wonder if something like this could be made into a craft table. I would love to have some type of storage for all my craft supplies.
In reply to I wonder if something like… by Drspear98
jenth
Wed, 09/02/2020 - 11:42
It’s a crafting cart!
I certainly plan on trying it out for crafting… once we get moved into our new home next week and I have time to build it. If this works well, maybe I can make one for each of my different craft types. That way, I can easily move it around the house to where I need it, it will store neatly, and it will keep my husband from complaining about my crafting materials migrating all over the place and being left out.