


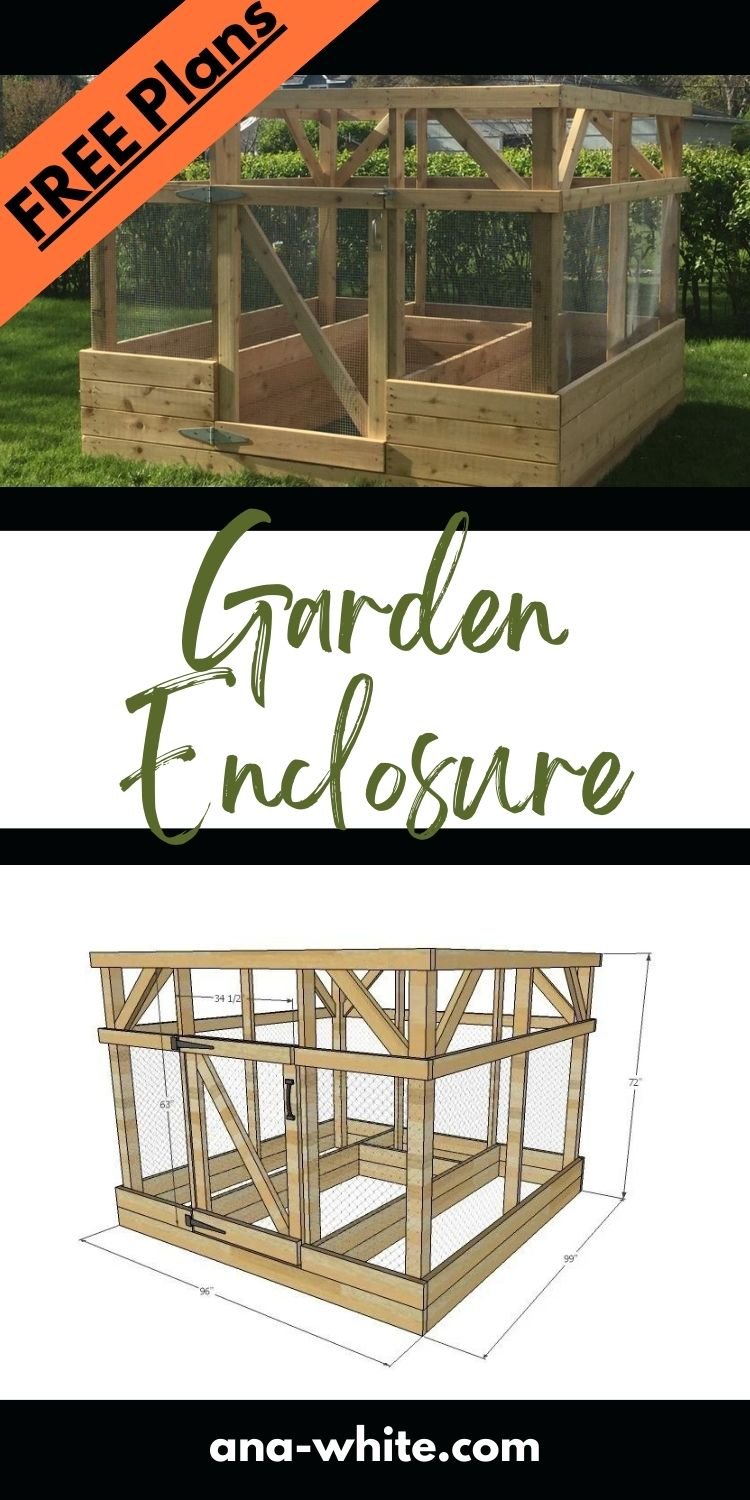
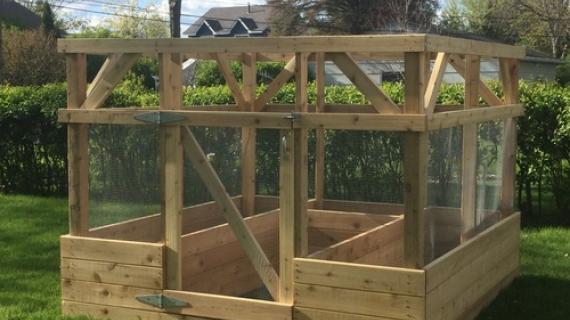
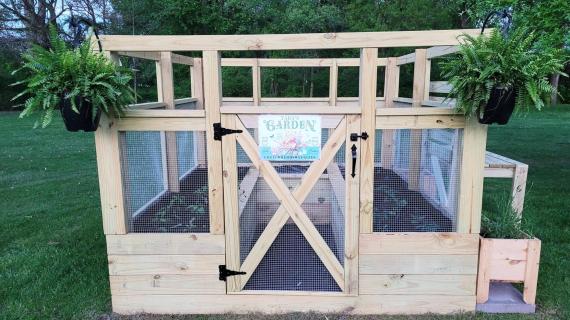
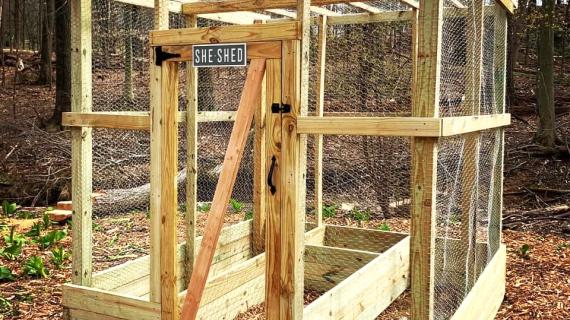
Easy DIY Garden enclosure plans by ANA-WHITE.com - minimal cutting and easy assembly!
Photo by Furniture Dreamer with increased raised bed height.
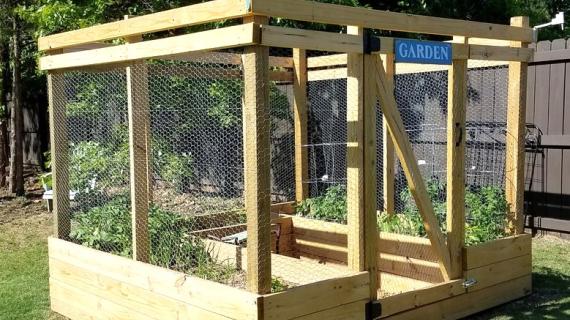
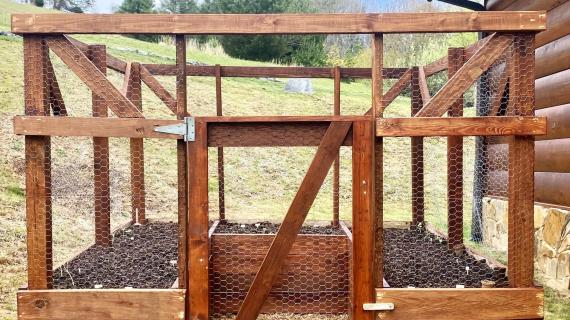
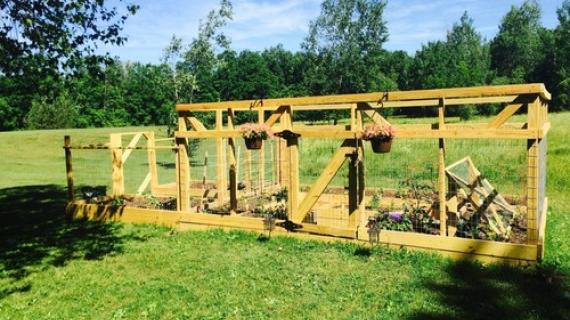
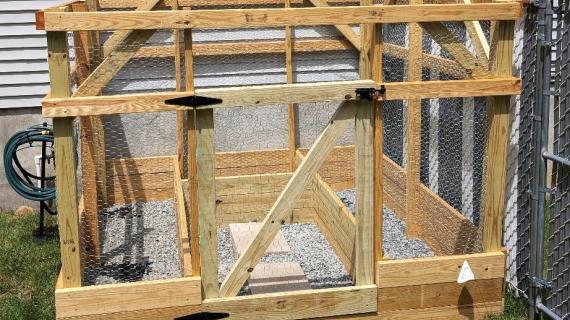
Build your own garden enclosure and keep your plants safe and contained!
Garden Enclosure Features
- Minimal board cutting and less waste
- Beginner friendly - you'll only need a drill and a saw to complete
- Finish in a weekend
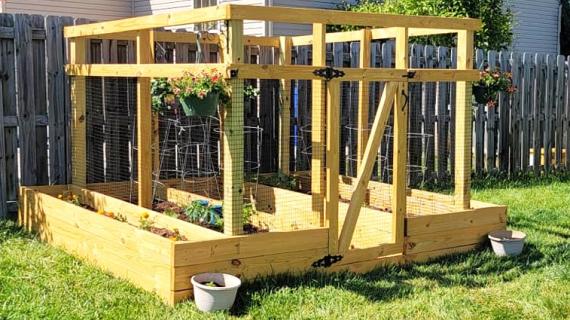
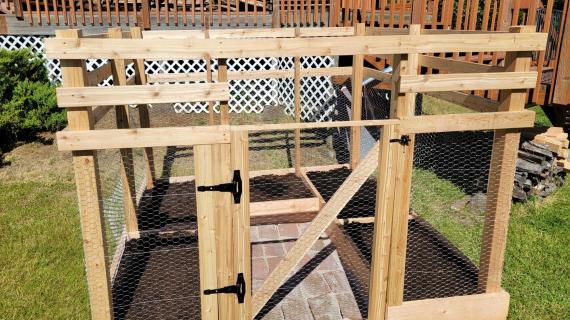
- Built in raised beds for planting
- Keeps animals and pests out of the garden
- Keeps garden area enclosed

What type of wood to use?
The ideal wood choice is cedar. If you don't have cedar or cedar is too expensive, you can use regular framing lumber. We recommend douglas fir if possible, treated with a non toxic exterior stain or oil (ask at your local hardware store stain for raised beds).
Pin For Later!

Preparation
- 4 – 4x4 @ 72”
- 3 – 2x4 @ 144” (cut the 72” long 2x4s from these)
- 13 – 2x4 @ 96” long
- 14 – 2x6 @ 96” long
- 1 – 1x2 @ 6 feet long (Recommend exterior grade lumber)
- About 200 - 3” self tapping exterior decking screws (I like these ones)
- 32 feet of 48” width chicken wire or mesh
- Staples for attaching chicken wire
FRAME
- 4 – 4x4 @ 72”
- 6 – 2x4 @ 72”
- 7 – 2x4 @ 96”
- 7 – 2x6 @ 96”
- 2 – 2x6 @ 30-1/2”
- 2 – 2x4 @ 30-1/2”
- 8 – 2x4 @ 31” – Long point to long point measurement, both ends cut at 45 degrees off square, NOT parallel
RAISED BED
- 4 – 2x6 @ 96”
- 4 – 2x6 @ 38”
DOOR - suggest cutting door to fit the final opening
- 2 – 2x4 @ 46”
- 2 – 1x2 @ 33-1/2”
- 1 – 2x4 @ 53”
- 1 – 2x4 @ 33-1/2”
- 1 – 2x6 @ 33-1/2”


Instructions
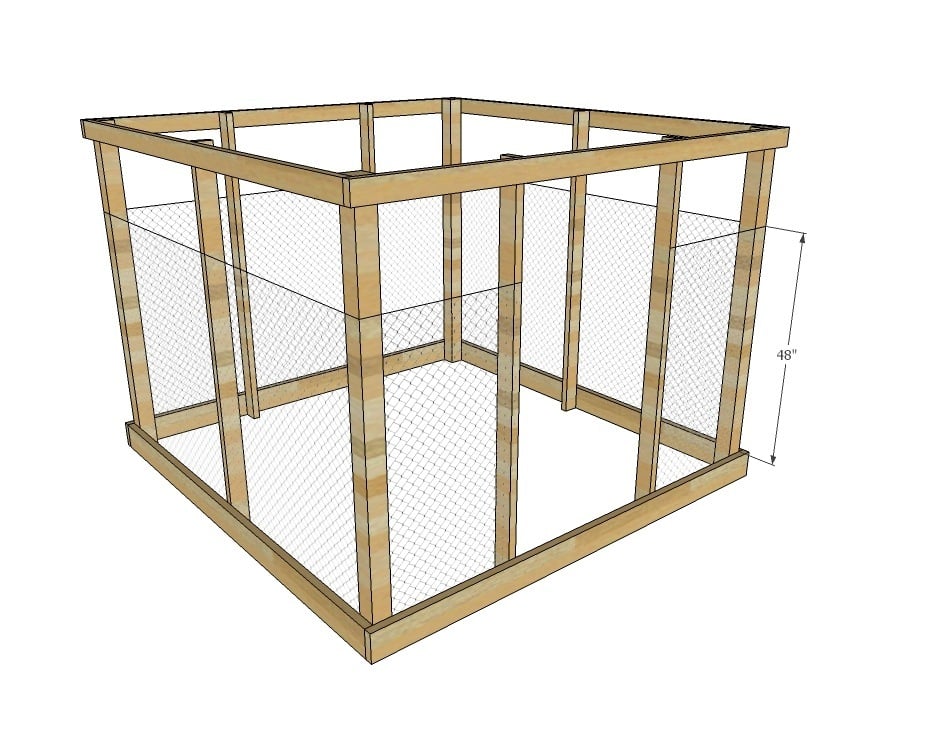
Step 1
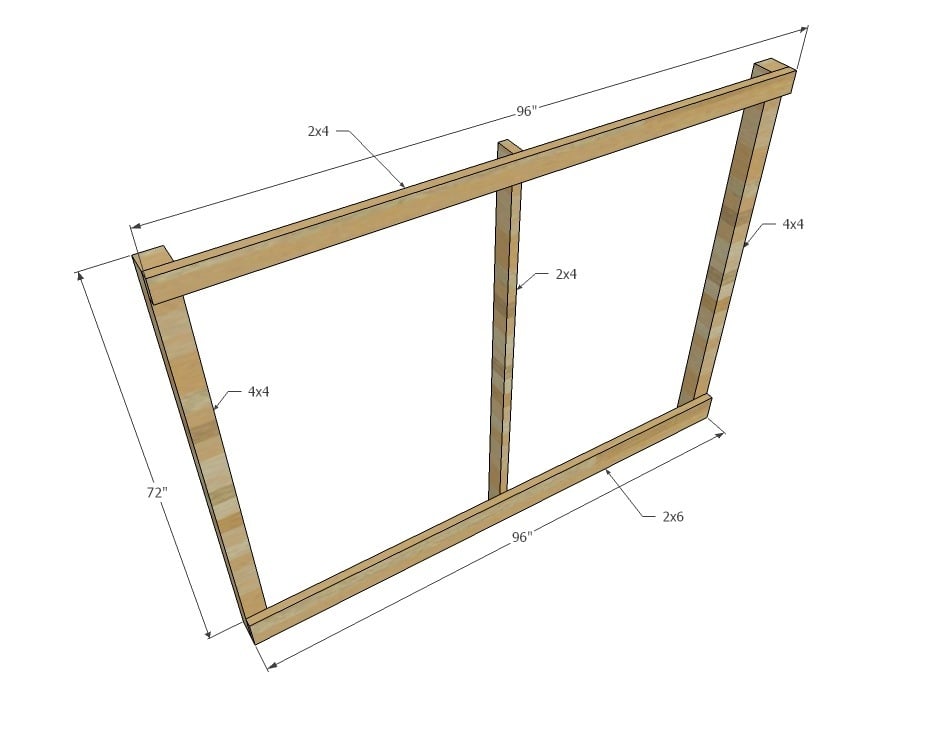
On a flat, level surface, lay the 4x4 posts out and attach the 2x4 and 2x6 to the top and bottom with 3” wood screws and exterior glue. Attach to the center a 2x4 @ 72” long on edge. Adjust for square by taking diagonal measurements and making sure the two measurements match. Build two side walls.
Step 2
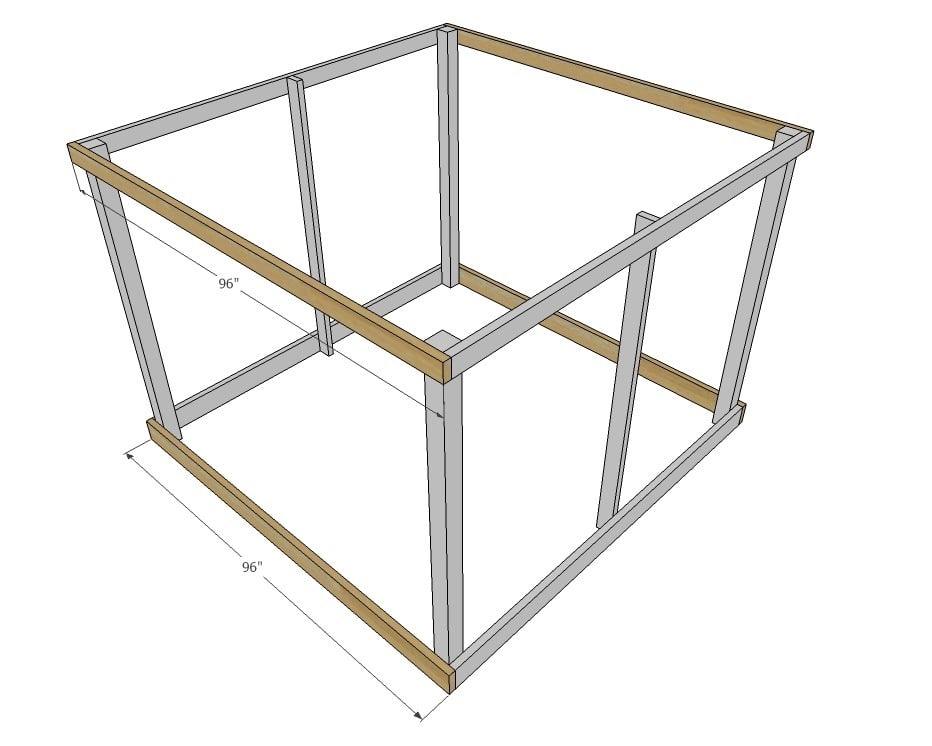
Use 3” wood screws and exterior wood glue to attach 2x4s to top and 2x6 to bottom to create the front and back wall framing. Adjust for square by taking diagonal measurements. At this point the enclosure should be placed in final position.
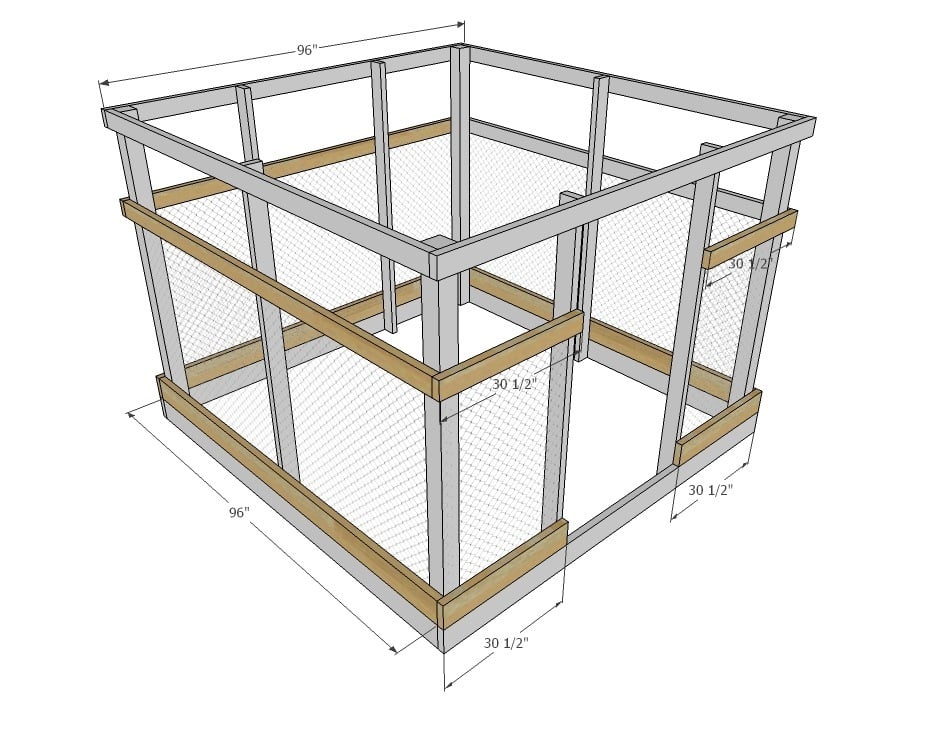
Step 3
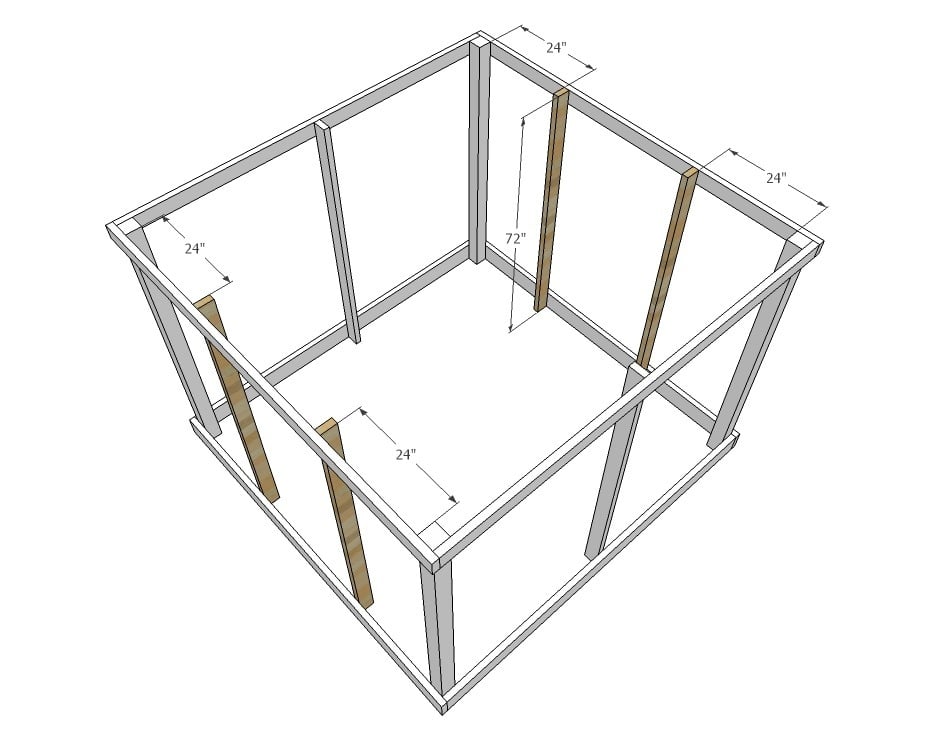
Attach remaining 2x4 @ 72” long on edge to front and back walls, 24” fron the 4x4 corner posts. Use the 3” exterior screws and exterior wood glue.
Step 4
Wrap the bottom exposed 4 feet of the enclosure in chicken wire or mesh, securing with staples. Leave opening for door between 2x4 @ 72”long.
Step 5
Add additional rows of wood to cover the ends of the chicken wire with screws.
Step 6
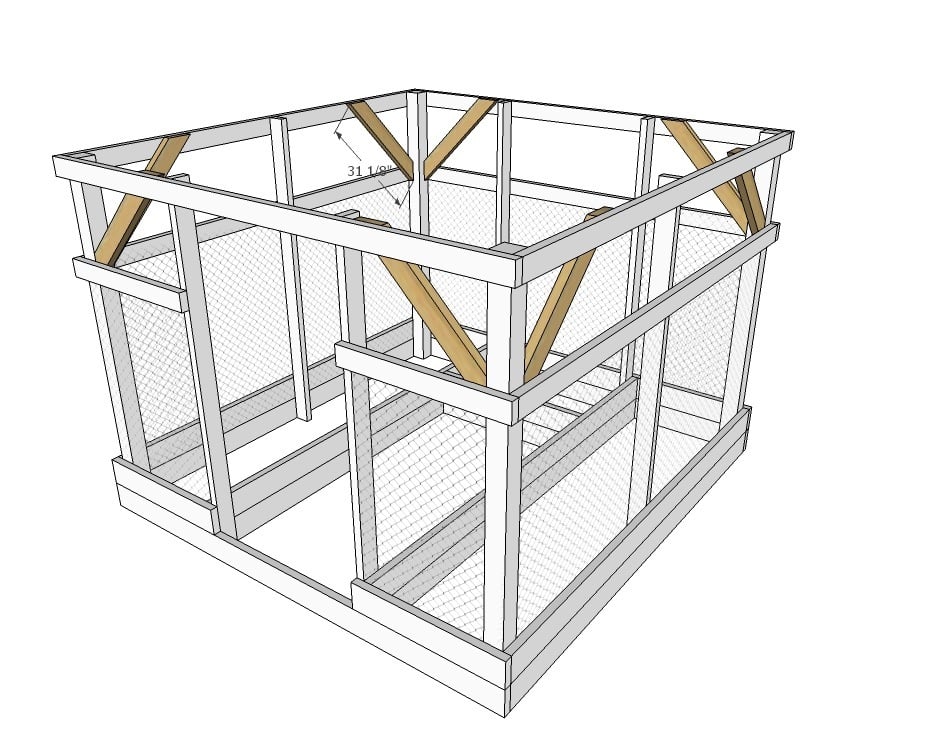
Ensure the enclosure is square. Then attach cross supports to insides of project with 2-1/2” exterior wood screws and exterior glue.
Step 7
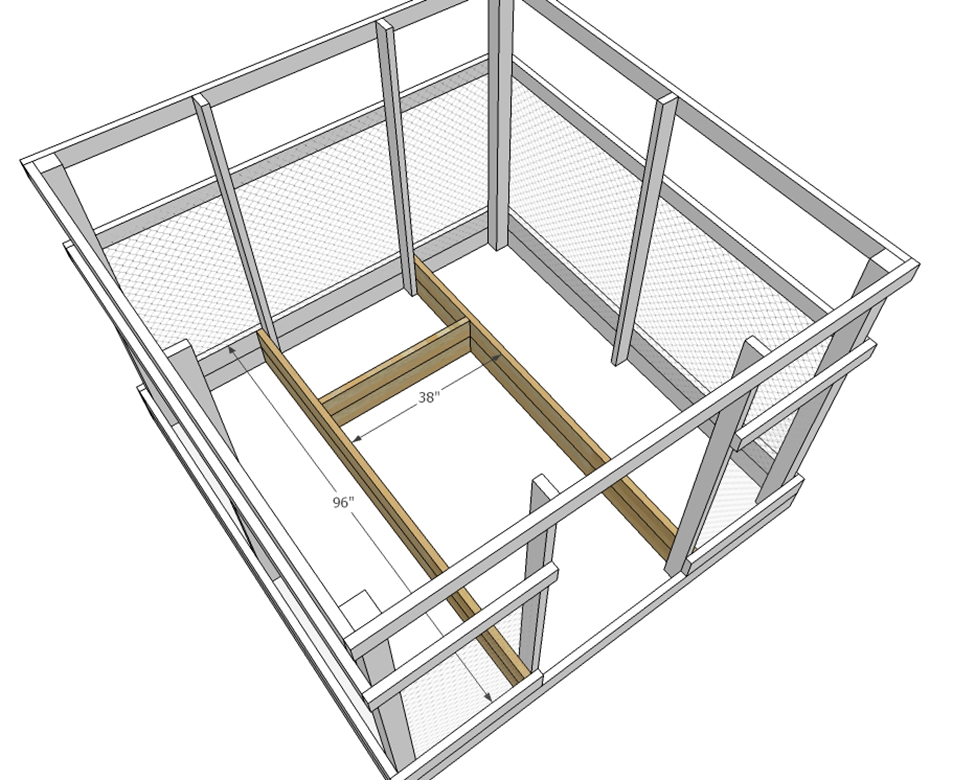
Attach 2x6 boards to inside to create raised beds. 2x12 boards can also be used. Use 2-1/2” exterior screws.
Step 8
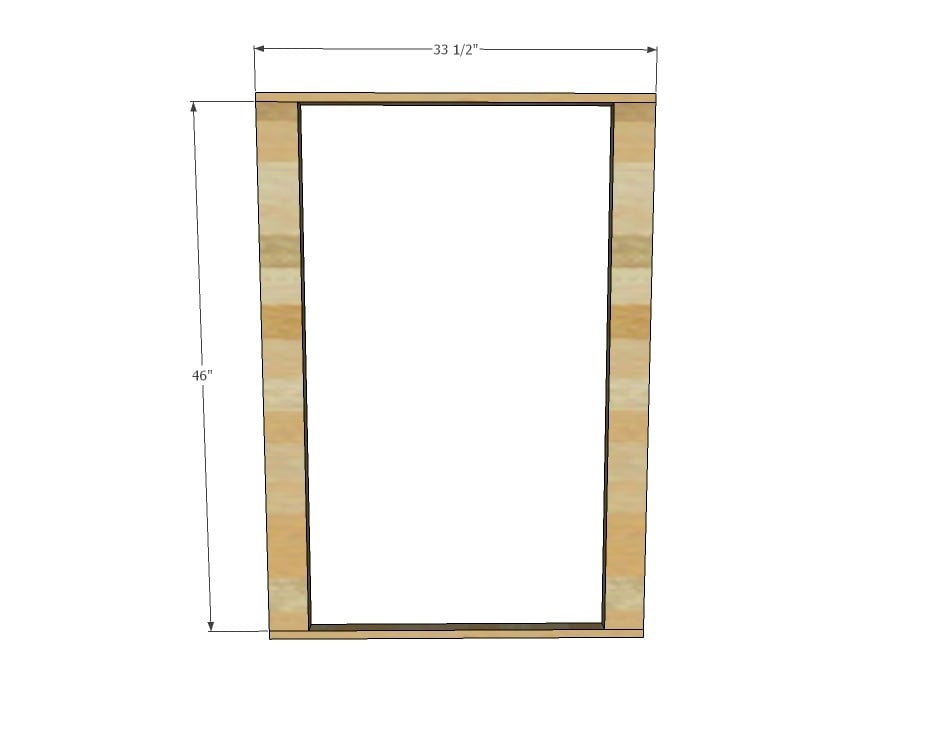
Attach 1x2s to top and bottom of 2x4 boards to create door frame. Use 2-1/2” exterior wood screws. Check and adjust door frame for square.
Step 9
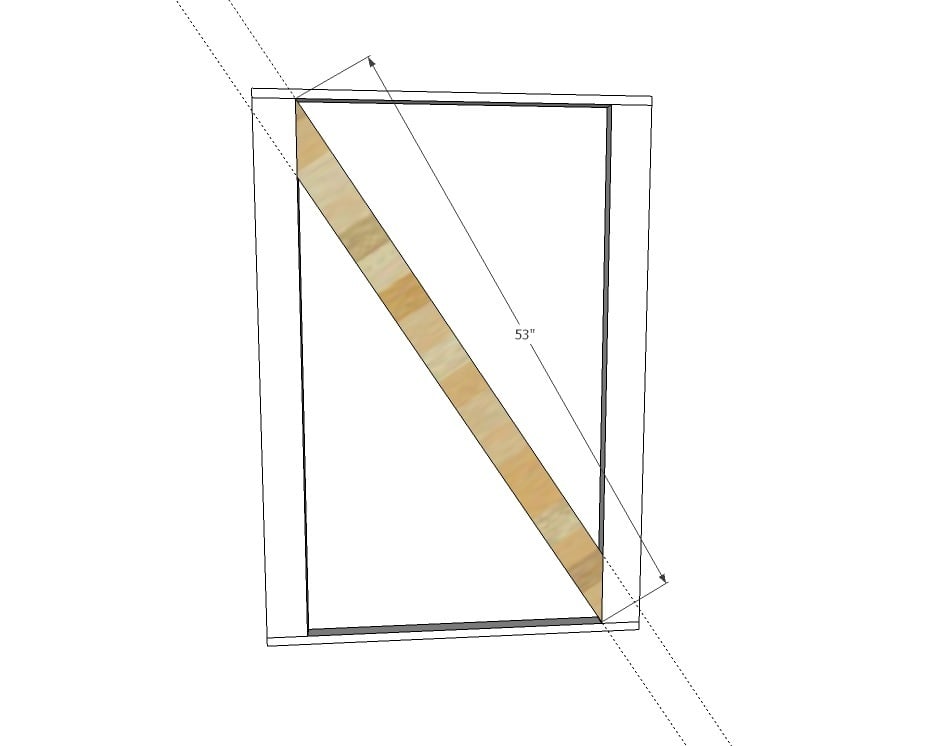
Lay cross support board over door frame. Mark with a pencil. Cut off ends with a circular saw or jigsaw.
Step 10

Staple mesh or chicken wire to the door frame.
Step 11
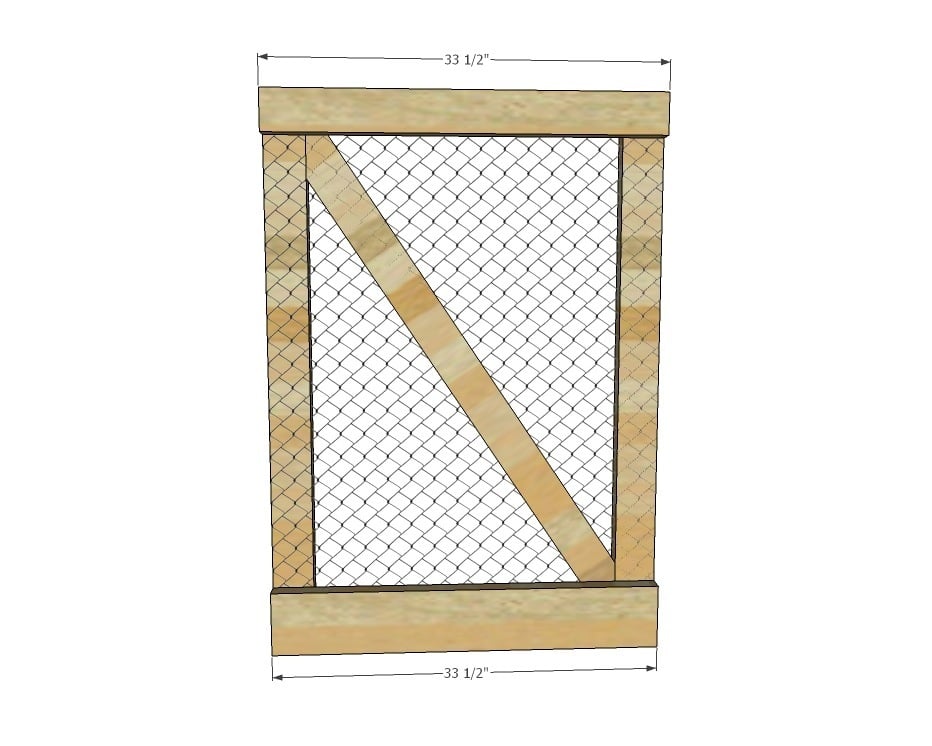
Attach 2x4 and 2x6 door trim to the door frame with 2-1/2” screws. Also attach cross support.
Step 12

Attach door to enclosure with gate hinges.
It is always recommended to apply a test coat on a hidden area or scrap piece to ensure color evenness and adhesion. Use primer or wood conditioner as needed.


Comments
dblalack
Sat, 06/13/2015 - 10:14
for lisa
for lisa
balloongal247
Thu, 12/31/2015 - 09:57
Bears
Would this garden enclosure be sufficient to deter bears? My area apparently has some kind of bear problem, but I'd still like to be able to have a vegetable garden.
balloongal247
Thu, 12/31/2015 - 09:58
Bears
Would this garden enclosure be sufficient to deter bears? My area apparently has some kind of bear problem, but I'd still like to be able to have a vegetable garden.
Yukon-Joel
Fri, 04/08/2016 - 17:16
No bear proof
Bears wouldn't care about this being in their way.
balloongal247
Thu, 12/31/2015 - 09:59
oops double post
Oops, sorry for the double post. It wasn't showing that my post went through.
scottu
Mon, 01/13/2020 - 09:27
Note - Gate support in cad…
Note - Gate support in cad drawing is on backwards. Gate support in main photo is correct.
support should point down into the hinge, or gate will sag.
Love the design