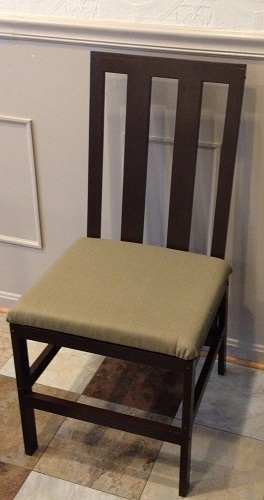
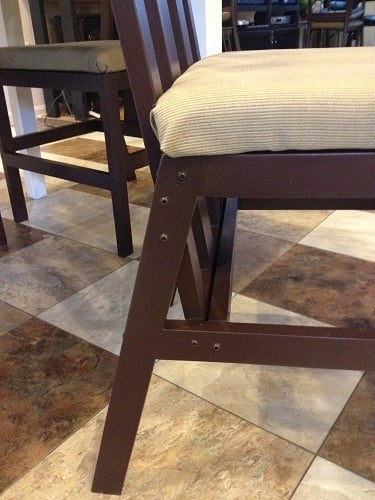
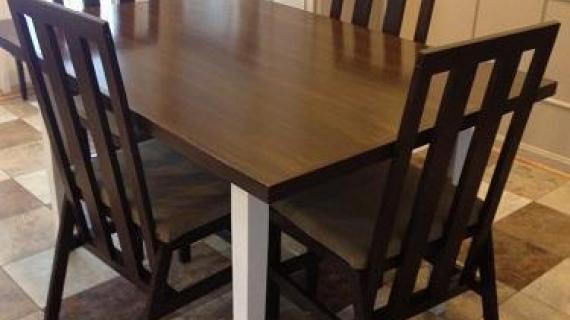
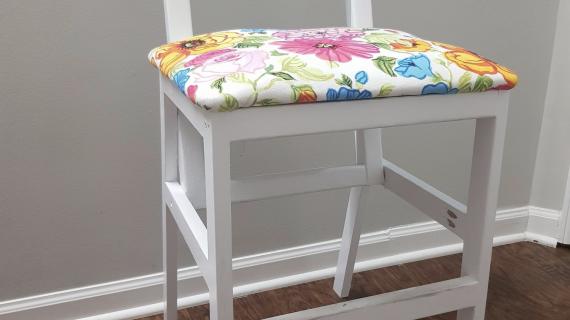
Modifications made to the Harriet Chair plan, to add a padded seat, slat back, and increase chair width by 2 inches.
Preparation
Shopping list for 1 chair:
4 – 1x2x8 select pine boards
1 – 1x3x8 select pine board (will use part of this, use the rest of this piece for your next chair)
1 – 1x16x36 edge glued project panel (use half for this chair, and half for your next chair) OR ¾” plywood panel, 2’ x 2’ (buy a 4 x 4 piece of plywood, if you are making 4 chairs)
1 8’ pc ¾” x ½” S4S moulding (1 8 foot piece is enough for all 4 chairs)
1/2 yd of 1” thick high density foam by-the-yard (24" wide) -- you will need to cut this down to 16” x 18” for 1 chair
3/4 yard of 45" wide batting by-the-yard (each chair will need 1 pc batting, 22” x 24”, so the 3/4 yard piece is enough for 2 chairs)
3/4 yard of 54" wide fabric (each chair will need 1 pc fabric, 22” X 24”, so the 3/4 yard piece is enough for 2 chairs)
Staples for heavy duty stapler
2” finish nails and 1” finish nails (used nail gun)
4 – 2 ½” flat head wood screws (for attaching back top to slats)
1 ½” round washer head screws (Attaching slats to seat, and attaching legs to back sides - you will only use a few of these – 1 box of 50 was more than enough for all 4 chairs)
2” round washer head pocket hole screws (for attaching seat to bottom)
2 ½” round washer head pocket hole screws (you’ll need a lot of these – get 2 boxes of 50 if you’re doing 4 chairs)
Spray Adhesive
Wood glue
Wood filler
Paint or stain of your choice
Cut list for 1 chair:
2 – 1x2 @ 13” (side apron) (short point, one end cut at 15 degrees off square) (shaped like this:) /__________|
2 - 1x2 @ 15” (side supports) (short point, one end cut at 15 degrees off square) (shaped like this:) /_____________|
2 – 1x2 @ 17 7/8 (back legs, both ends cut at 15 degrees off square, parallel to each other) (shaped like this: /_____________/
2 1x2 @ 17 ¼” (front legs)
6 – 1x2 @ 16 ½” (2 - front apron, 1 – bottom front support, 1 bottom back support, 1 – top back apron, 1 – back bottom)
1 – 3/4” thick project panel or plywood @ 16” x 18” (for seat)
2 – 1x2 @ 29” (back sides)
1 – 1x2 @ 13 1/2” (back top)
2 – 1x3 @ 27 ½” (back slats)
1 - 3/4 x 1/2" S4S moulding, @ 16 1/2" (back, top trim)
Upholstery:
1 – 16” x 18” high density foam
1 – 22” x 24” batting
1 – 22” x 24” fabric
All cutting on this build was done with my sliding miter saw (moved inside to my sewing room, due to extreme hot weather). For the project panel (seat) I cut 12" worth with the sliding miter saw, flipped it over, and finished the rest of the cross cut. I used the project panel instead of plywood for the seat so I could cut this on the miter saw (it was just too hot in my garage to use the table saw). ;)
Please read through the entire plan and all comments before beginning this project. It is also advisable to review the Getting Started Section. Take all necessary precautions to build safely and smartly. Work on a clean level surface, free of imperfections or debris. Always use straight boards. Check for square after each step. Always predrill holes before attaching with screws. Use glue with finish nails for a stronger hold. Wipe excess glue off bare wood for stained projects, as dried glue will not take stain. Be safe, have fun, and ask for help if you need it. Good luck!
It is always recommended to apply a test coat on a hidden area or scrap piece to ensure color evenness and adhesion. Use primer or wood conditioner as needed.




Comments
alamanda973
Sun, 07/15/2012 - 17:46
Good Job!!
I love the chairs and the tutotial is very clear. I think I will change my dining room chairs! :-)
JoanneS
Mon, 07/16/2012 - 01:50
Thanks so much!
Alamanda, Thank you! What a nice comment! I was real nervous about submitting a plan for the first time. I'm so glad it was clear enough. PS - I think the parson chairs that you built in your dining room are spectacular! :)
JoanneS
Mon, 07/16/2012 - 01:50
Thanks so much!
Alamanda, Thank you! What a nice comment! I was real nervous about submitting a plan for the first time. I'm so glad it was clear enough. PS - I think the parson chairs that you built in your dining room are spectacular! :)