

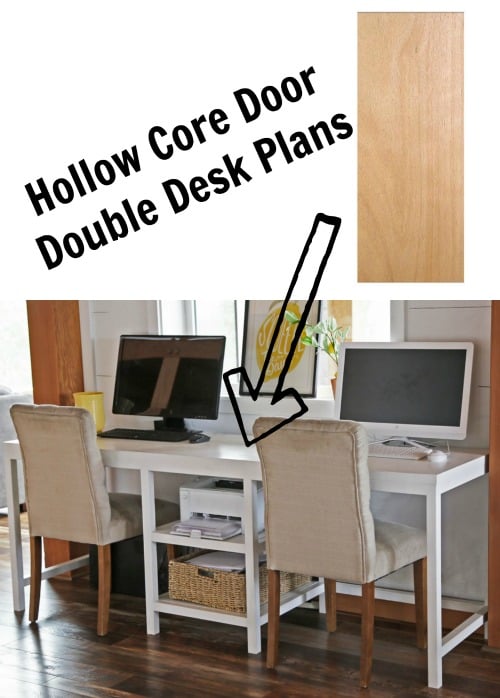
Build a double computer desk for about $100! The secret? We use a hollow core door for the top.
There's plenty of room for storage and even a printer. Perfect for a shared office or homeschool room. Ready to build it? Free step by step plans with diagrams, shopping list and cut list by Ana-White.com
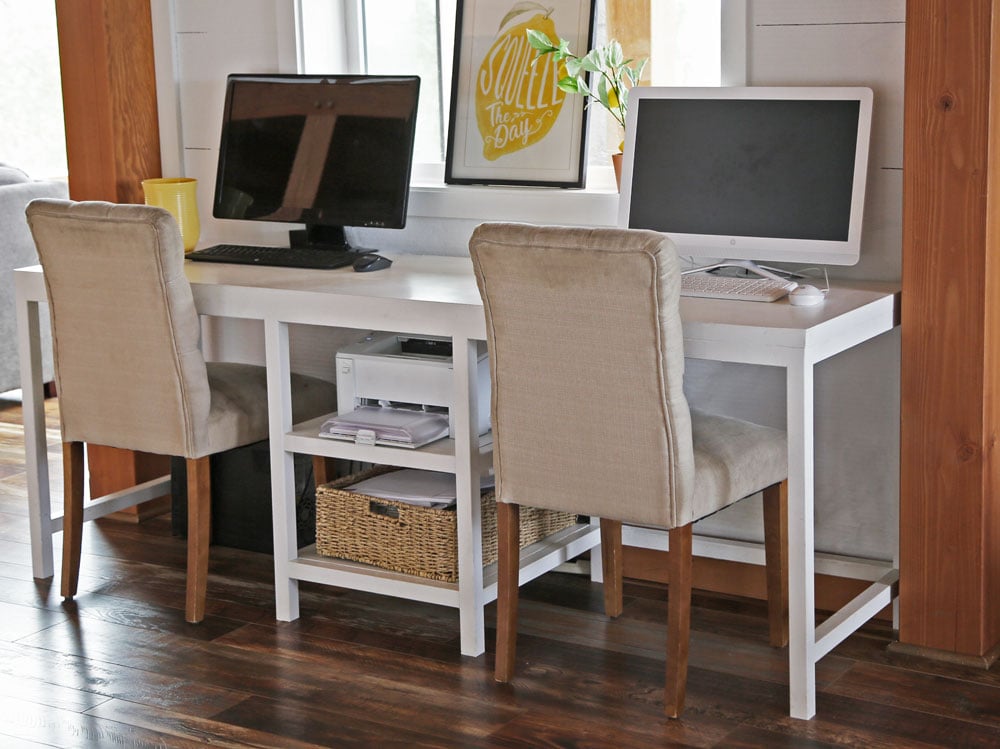
When we moved into our new home, we needed a desk for two. I planned to eventually build a built-in desk that matches our kitchen cabinetry, but with a million other projects to tackle, and needing a desk immediately, and not wanting to spend a few hundred dollars on double desk, I decided to use up a hollow core door I had laying around.
Why Use a Hollow Core Door for a Desktop?
The hollow core door is inexpensive, perfectly smooth, finished on all sides and the perfect size. I just needed a good support base with some storage.
Using 2x2 furring strips (about $2 each) and some scrap plywood and pocket hole screws, we built a door desk. We worked in space for a printer and even a basket for keeping paper and office supplies close.
How Did the Desk Hold Up?
Two years later, the desk looks like this:
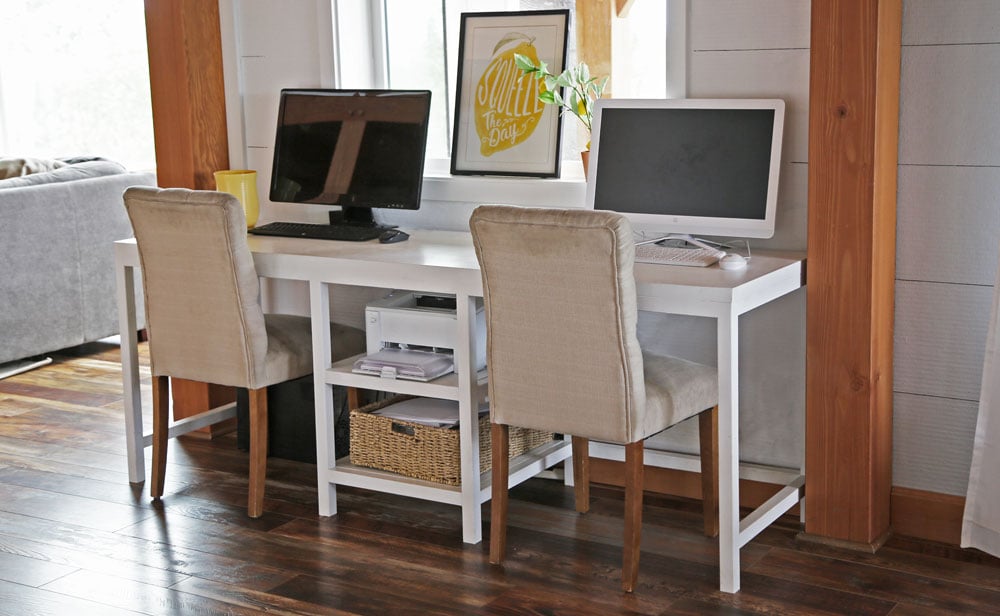
No chips, no dents, no sagging. Even the paint gets a regular scrubbing and still looks pretty new.
That's amazing, considering I work full time at this very desk, that my daughter homeschools from this desk, that my husband uses this desk too. And we only spent about $100 on it.
Someday we will get that built in desk, but by the way this one is performing, there's no hurry.
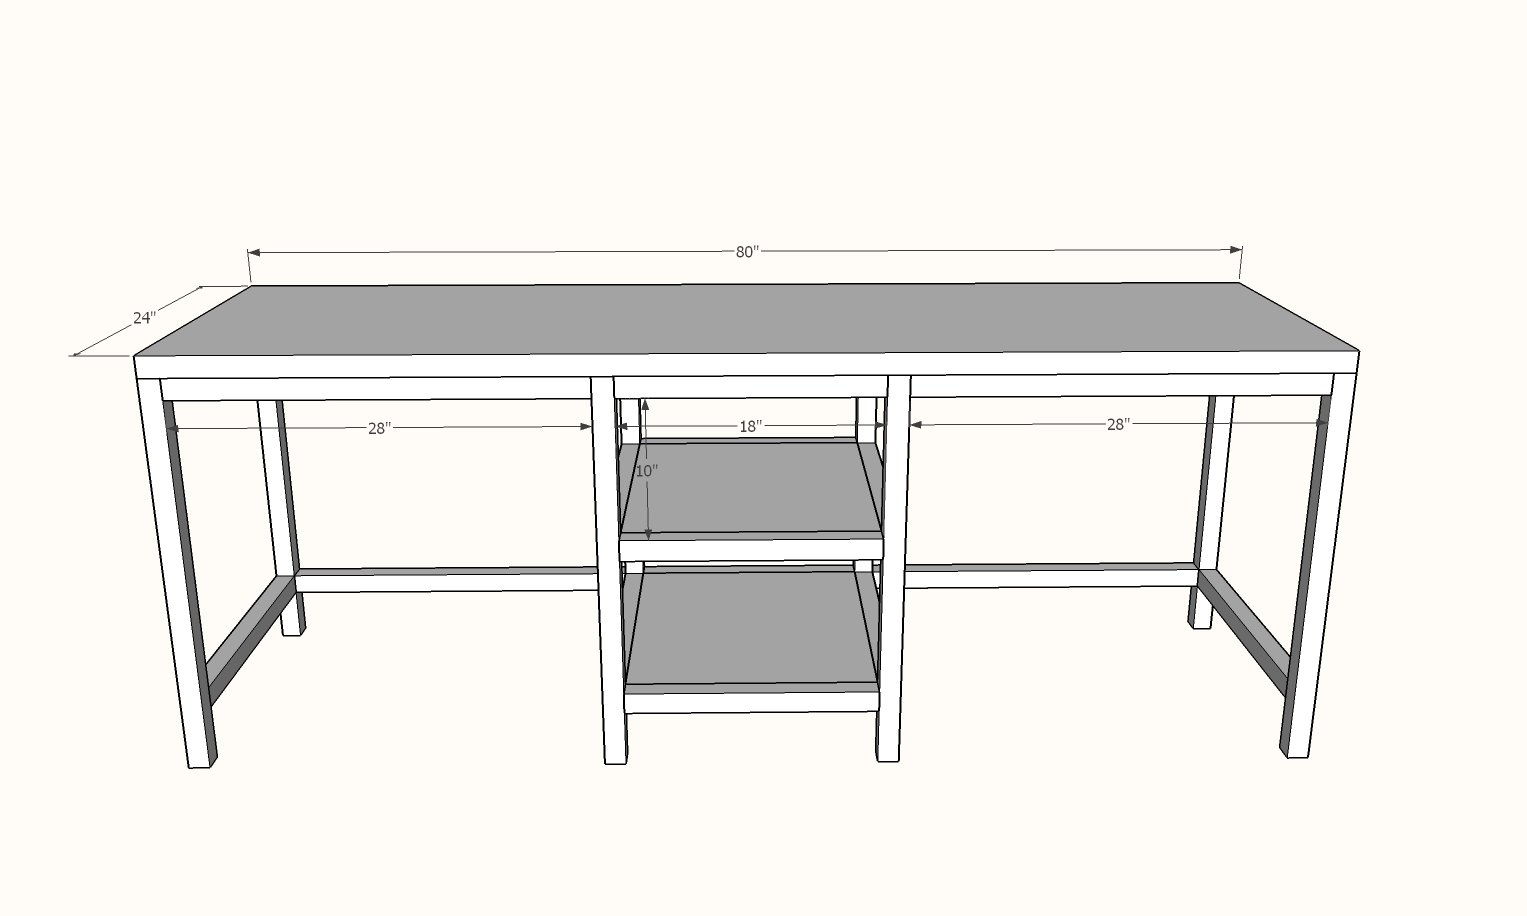
Hollow Core Door Desk Plans
This desk is a pretty easy build - just cut and screw boards together. Check out the free step by step plans with diagrams below.
Preparation
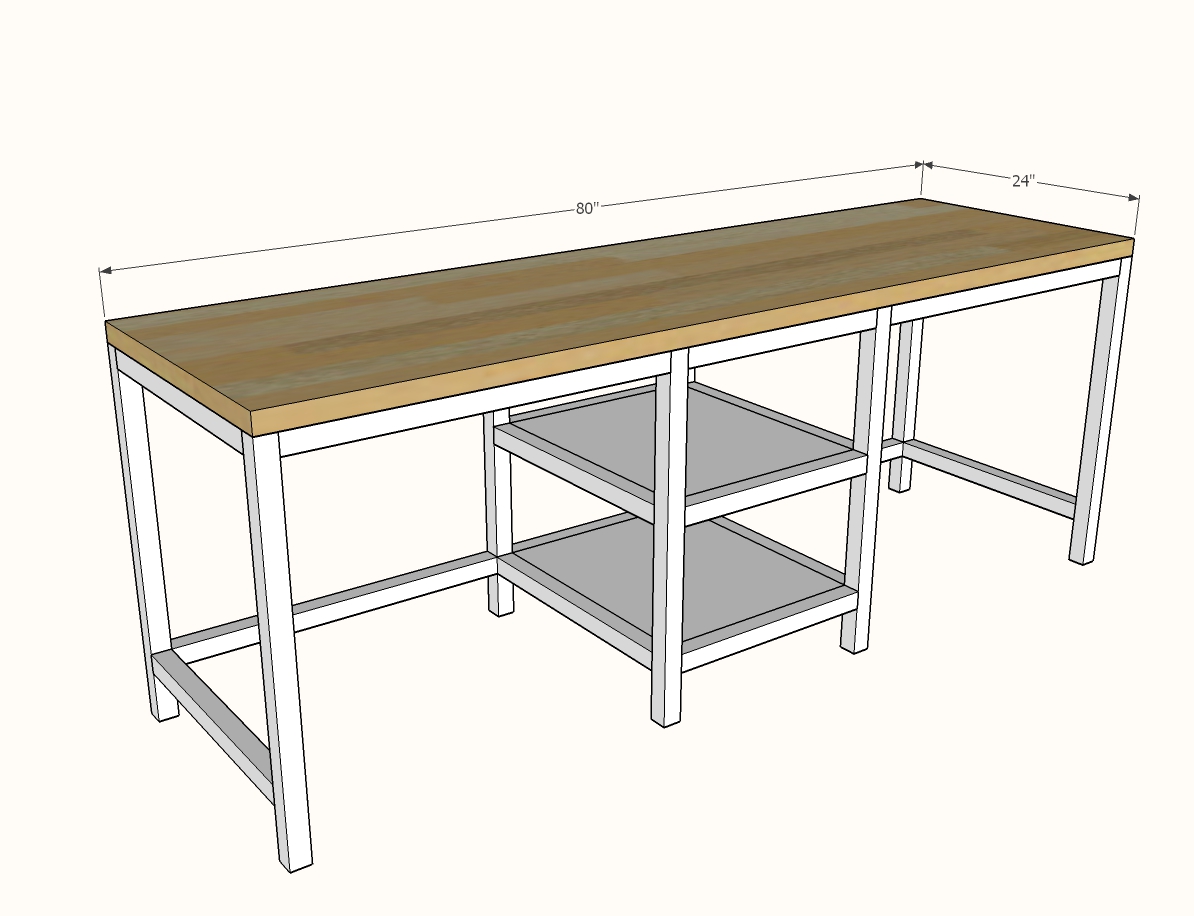
1 - 24" x 80" Hollow Core Door (like this one from Home Depot)
8 - 2x2 @ 8 feet long
1 - 3/4" plywood or MDF panel @ 24" x 48"
8 - 2x2 @ 28-1/2" - legs
10 - 2x2 @ 21"
6 - 2x2 @ 18"
2 - 3/4" plywood or MDF @ 18" x 21"
6 - 2x2 @ 28"
50 - 2-1/2" Kreg Pocket Hole Screws
24 - 1-1/4" Kreg Pocket Hole Screws


Instructions
Step 1
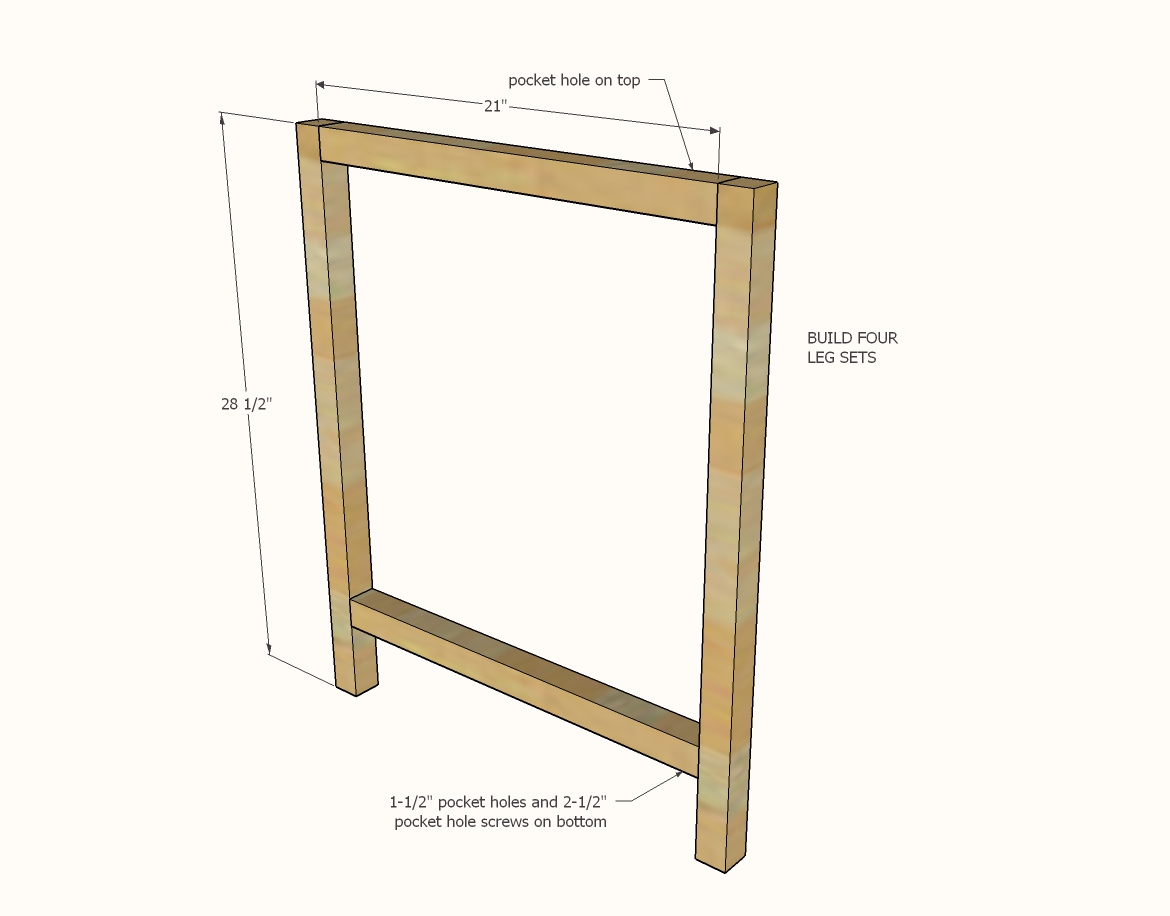
Drill a 1-1/2" pocket hole on each end of every 2x2 except for the legs.
Build four leg sets as shown in diagram, using glue and 2-1/2" pocket hole screws.
Step 2

On two of the leg sets, add the shelf trim pieces.
Step 3
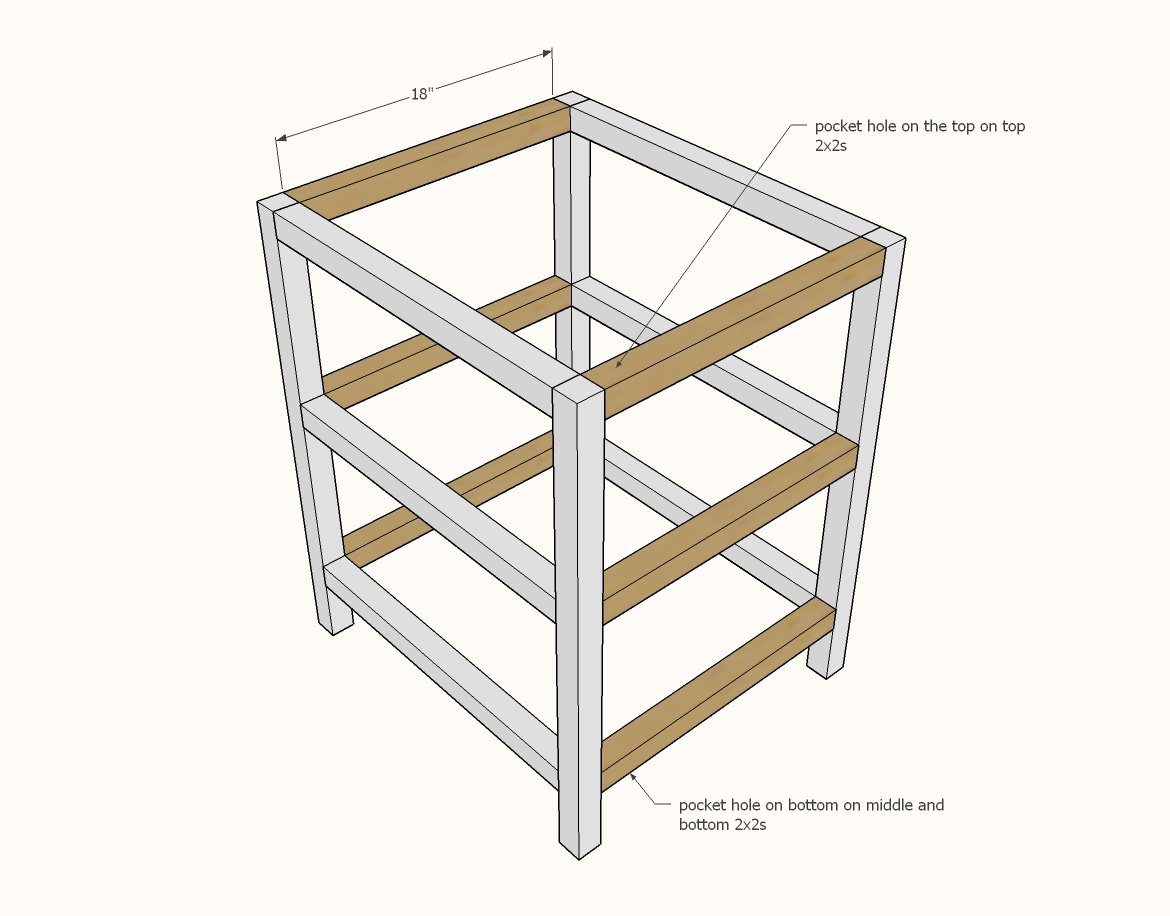
Attach the two center leg sets together with the shelf trim pieces.
Step 4
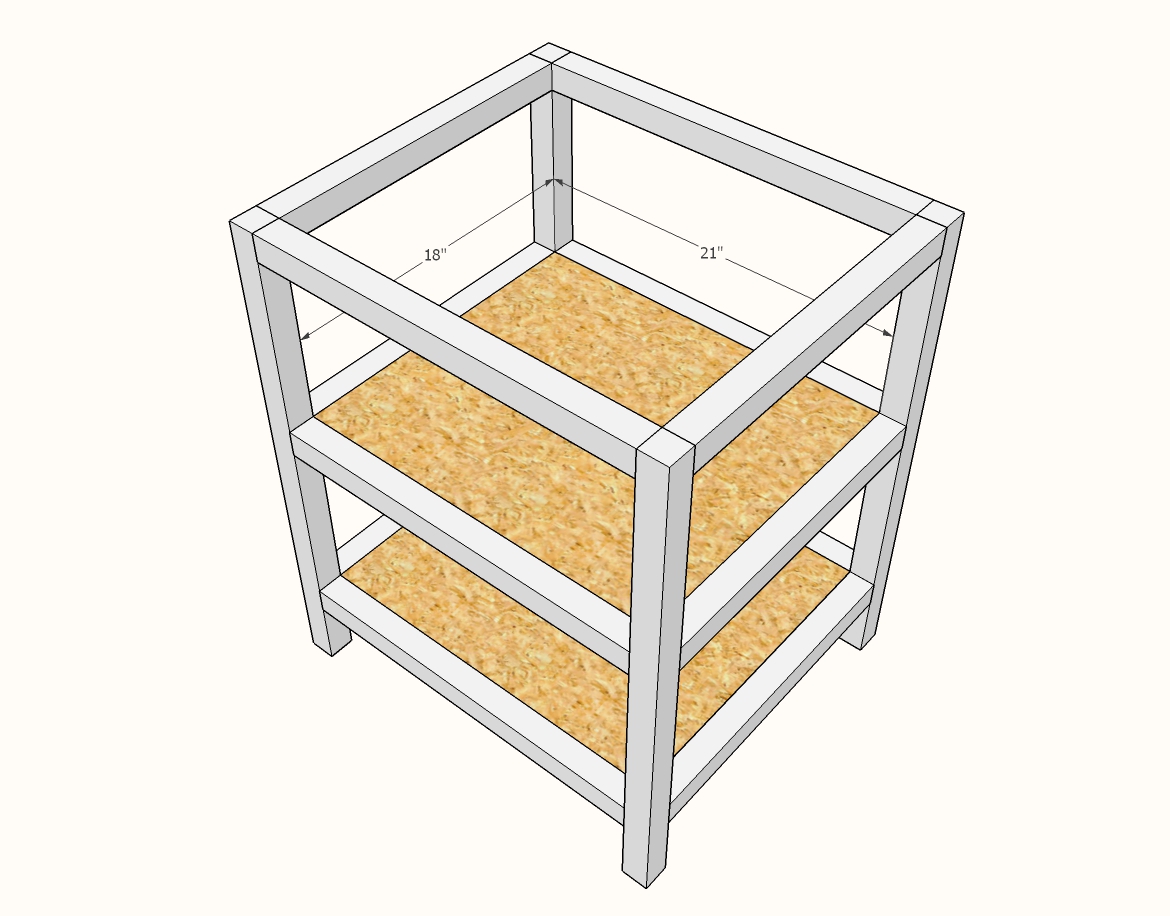
Measure and cut the plywood with a cicular saw or table saw.
Drill 3/4" pocket holes around all sides.
Attach inside the 2x2 openings with 1-1/4" pocket hole screws.
Step 5
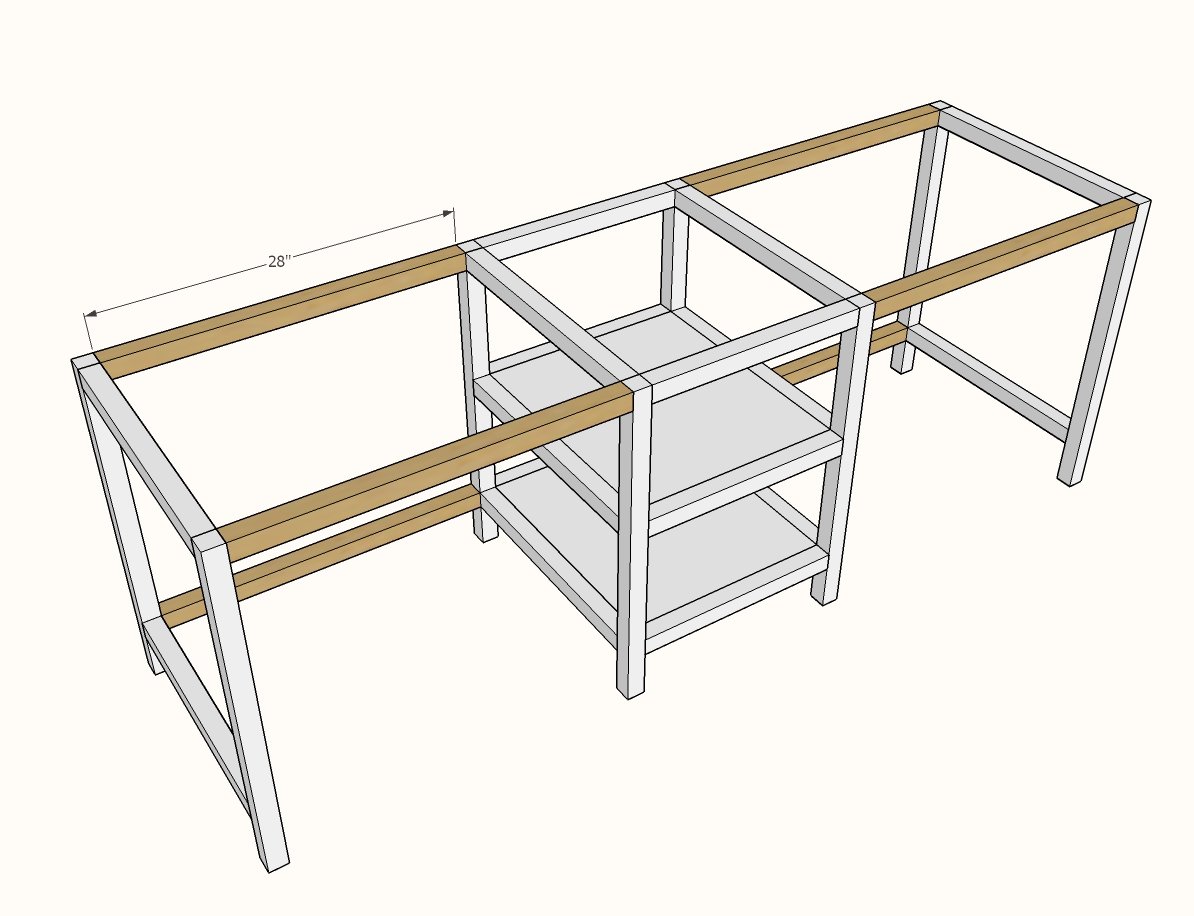
Attach remaining leg sets to the center storage area with 2x2s.
Step 6
Place the hollow core door on top.
I used leftover 2-1/2" pocket hole screws (you'll only need a few) to attach the door to the frame from the underside.
Comments
Debcor
Mon, 11/08/2021 - 08:25
Splitting issue
This is such a cool project! My husband and I are having fun building it. We're new to woodworking and to using the Kreg jig (such a cool tool!). However, I'm wondering if there's an error in planning or if we screwed up somewhere. In Step 5, 3 screws come together at the same point in a 2x2, from 3 different sides, and when putting in the final screws, it split the wood when the last screw hit one or two of the others. We were able to salvage it, but we cut off 1/2" from the final screws to avoid that happening after the first one. I feel as if we followed the directions very well. Any thoughts? Thanks for such a great project! I'll come back and post pictures when it's done!