Kids Storage Bookshelf

The free plans on this website are made possible with advertising and affiliate links.  Thank you for helping us keep plans free.


Difficulty
Beginner Projects
| Print this plan

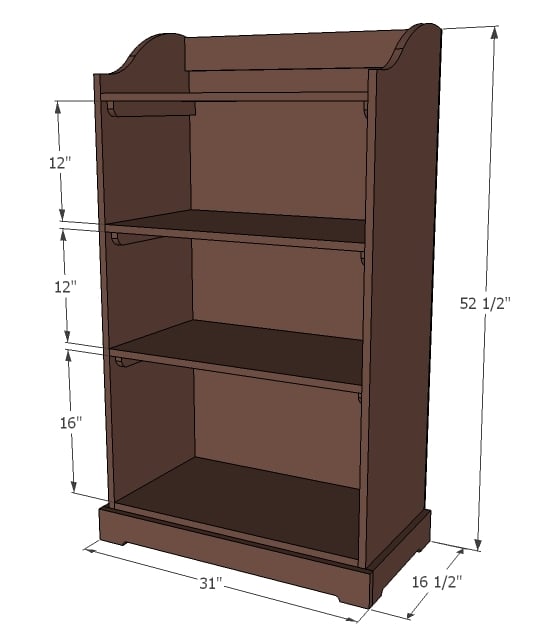
Simple bookshelf plans from free plans from Ana-white.com Features deep shelves and curved top.
Hey everyone!  We are almost home from the book/media tour.  Our family is back together again, and of course Gracie brought me a present ... the flu.  Yeah ... sooooo ... we are really ready to be home!

But the thing I miss the most about being home is the feeling of progress.  That each day I can do something to make our lives better, more organized, or easier.  Even when on vacation I miss home and would take a good day in the shop over day 6 of sitting on the beach.  You know exactly what I'm talking about!

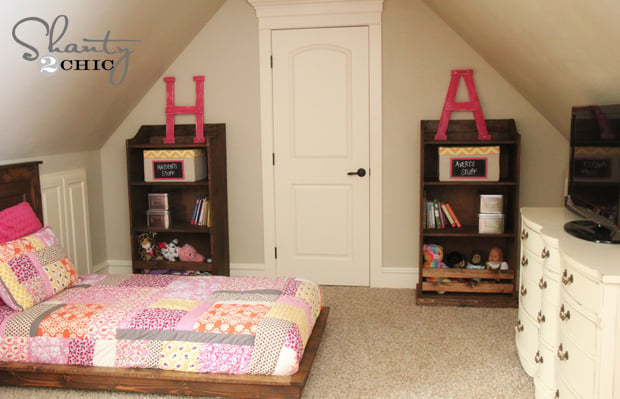
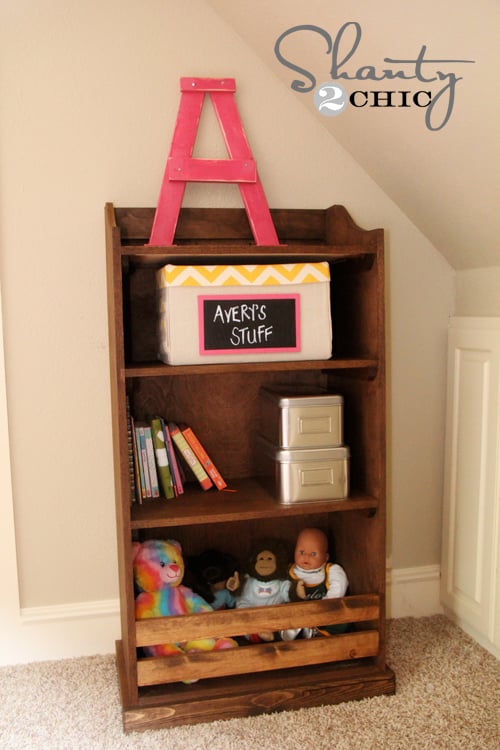
My friend Whitney from Shanty2Chic has been working on her girls rooms, and after building amazing beds for them, wanted to add some storage bookshelves.  So I drew up some plans for her ... and check out this DIY cuteness .... 

Here's from Whitney:


After DIYing the girls beds and nightstands, they started begging me for bookcases.  I told Ana, and she came to my rescue with these super cute bookcases that fit the awkward space I have perfectly!  They aren't super tall which makes them perfect for the kiddos! I was able to modify the bottom a bit, and now have perfect storage for their dolls and stuffed animals.  I made them for around $80 a piece, and I LOVE them.  The girls do too!  Thanks so much Ana!


Whitney made the bookshelves using Purebond Formaldehyde free plywood - functionality, not formaldehyde, please - to keep the room air quality clean and support American made materials.


Thank you Whitney for sharing!  And of course, we wanted to share the plans with you too!  So just scroll down, and the plans follow.  But first, go read all the details from Whitney on building this bed!  Whitney shows you how she applies edge banding and cuts the top patterns with her jigsaw and has lots more construction photos that will be useful to anyone who builds any project - go see Whitney.  You simply must.


You can make these beds too.  Plans are here.  The nightstand plans are also here.


Dimensions

Preparation

Shopping List

1 – 3/4” plywood cut into 3 strips 15 3/4” wide x 8 feet long
2 – 1x2 @ 8 feet long
1 – 1x4 @ 8 feet long
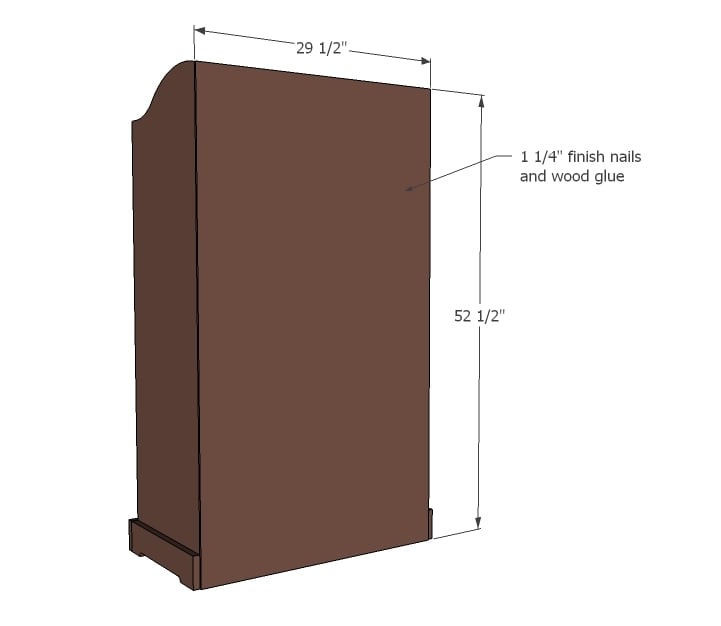
1 sheet 1/4” plywood for back (beadboard would be cute!)

Cut List

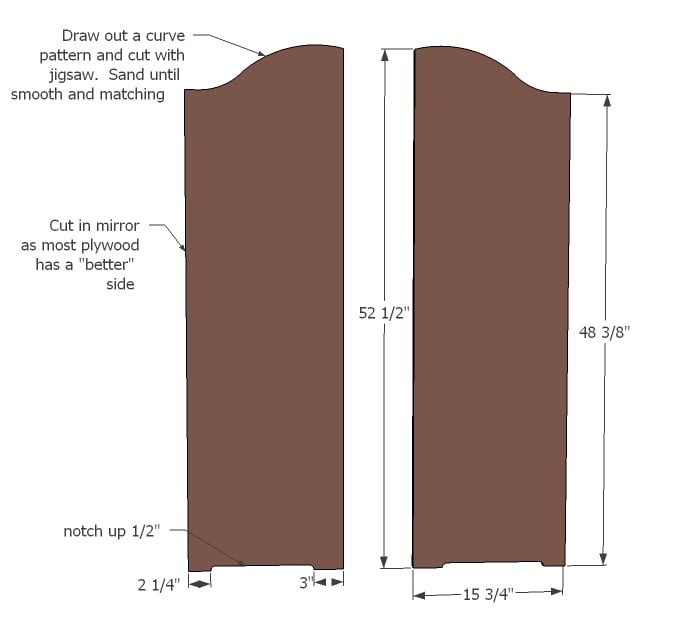
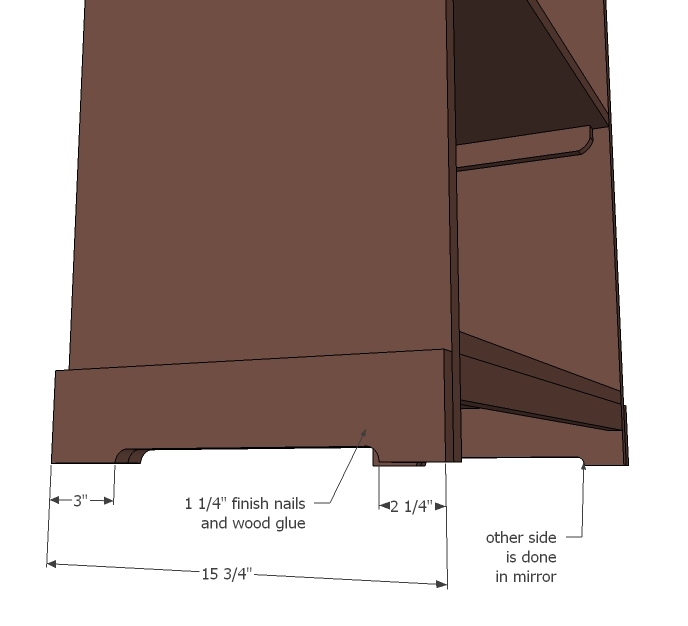
2 – 3/4” plywood @ 15 3/4” x 52 1/2”
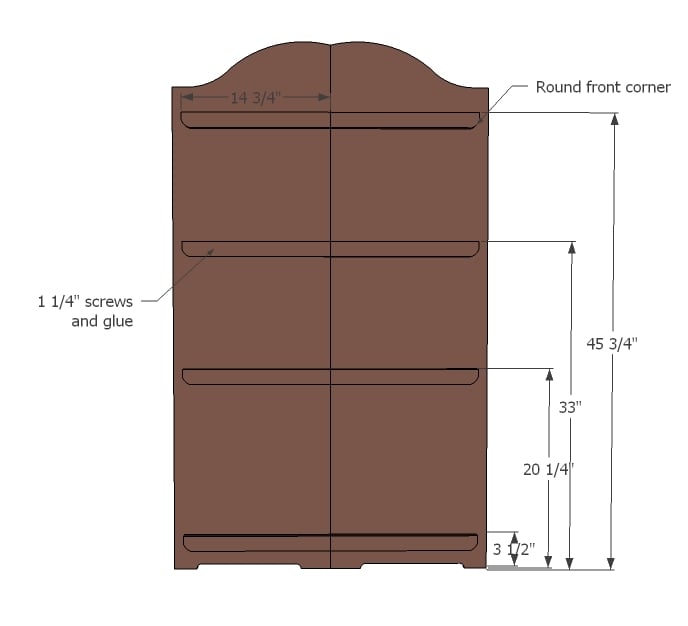
8 – 1x2 @ 14 3/4”
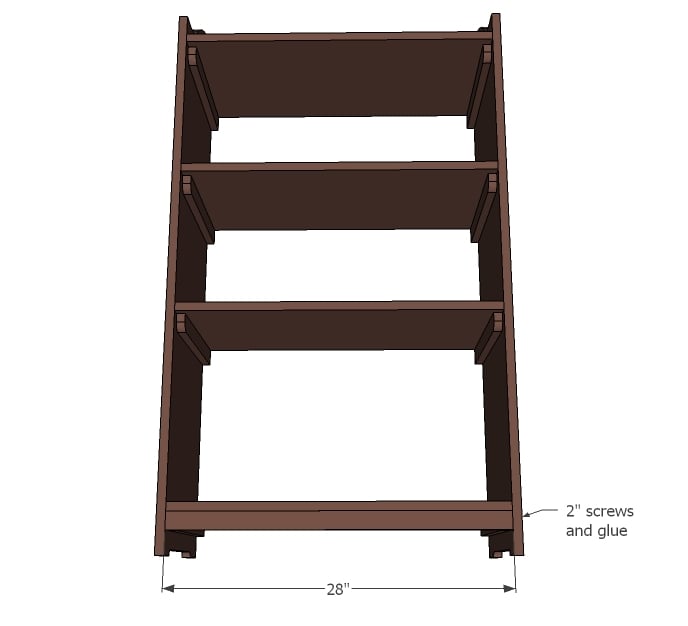
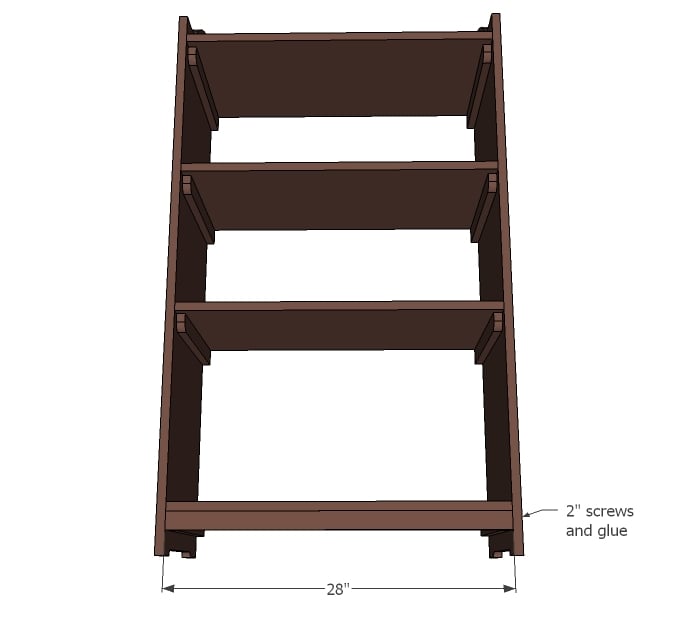
4 – 3/4” plywood @ 15 3/4” x 28”
1 – 1x4 @ 28”
1 – 1x2@ 28”
2 – 1x4 @ 15 3/4”
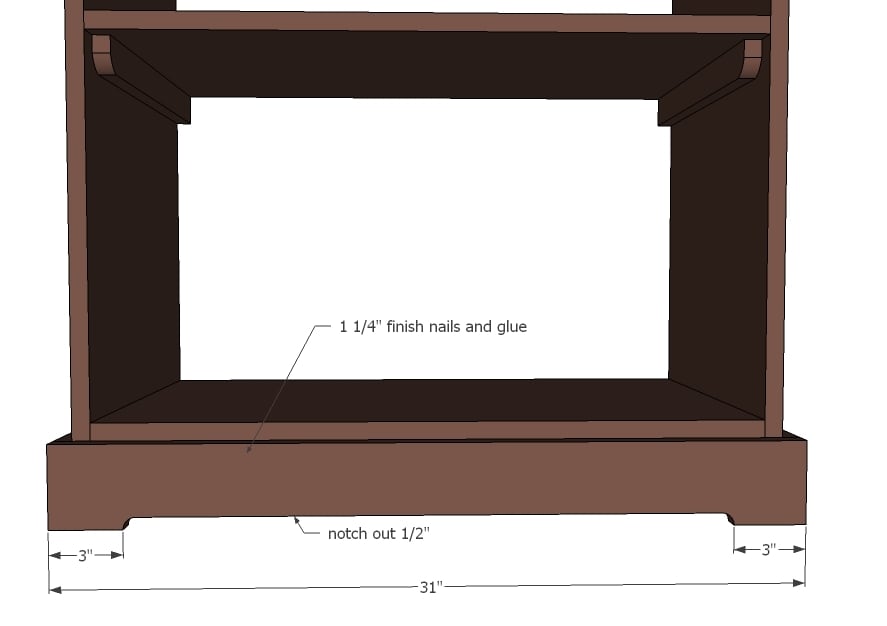
1 – 1x4 @ 31”
Back is 29 1/2” x 52 1/2”

Tools
Tape Measure
Speed Square
Pencil
Safety Glasses
Hearing Protection
Drill
Circular Saw
Jigsaw
Brad Nailer
Power Sander
Drill Bit Set
General Instructions

Please read through the entire plan and all comments before beginning this project. It is also advisable to review the Getting Started Section. Take all necessary precautions to build safely and smartly. Work on a clean level surface, free of imperfections or debris. Always use straight boards. Check for square after each step. Always predrill holes before attaching with screws. Use glue with finish nails for a stronger hold. Wipe excess glue off bare wood for stained projects, as dried glue will not take stain. Be safe, have fun, and ask for help if you need it. Good luck!

Instructions

Step 1

Step 2

Step 3

Step 4

Step 5

Step 6

Step 7

Step 8

Step 9

Finishing Instructions
Preparation Instructions
Fill all holes with wood filler and let dry. Apply additional coats of wood filler as needed. When wood filler is completely dry, sand the project in the direction of the wood grain with 120 grit sandpaper. Vacuum sanded project to remove sanding residue. Remove all sanding residue on work surfaces as well. Wipe project clean with damp cloth.

It is always recommended to apply a test coat on a hidden area or scrap piece to ensure color evenness and adhesion. Use primer or wood conditioner as needed.