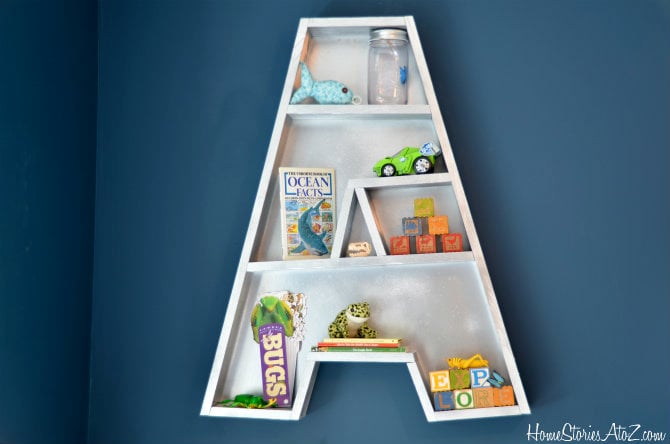
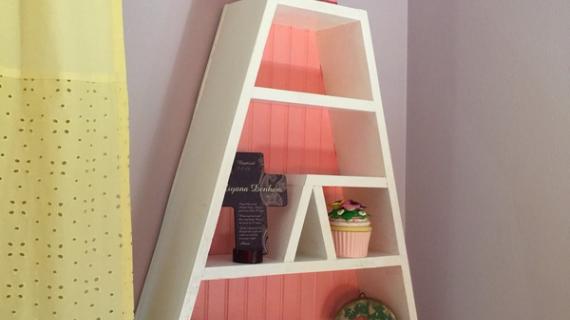
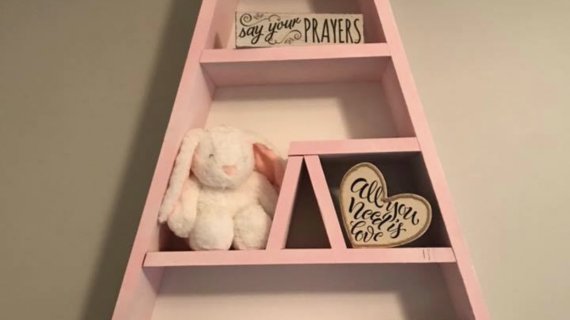
How to build a giant letter A Shelf with free plans from Ana-White.com
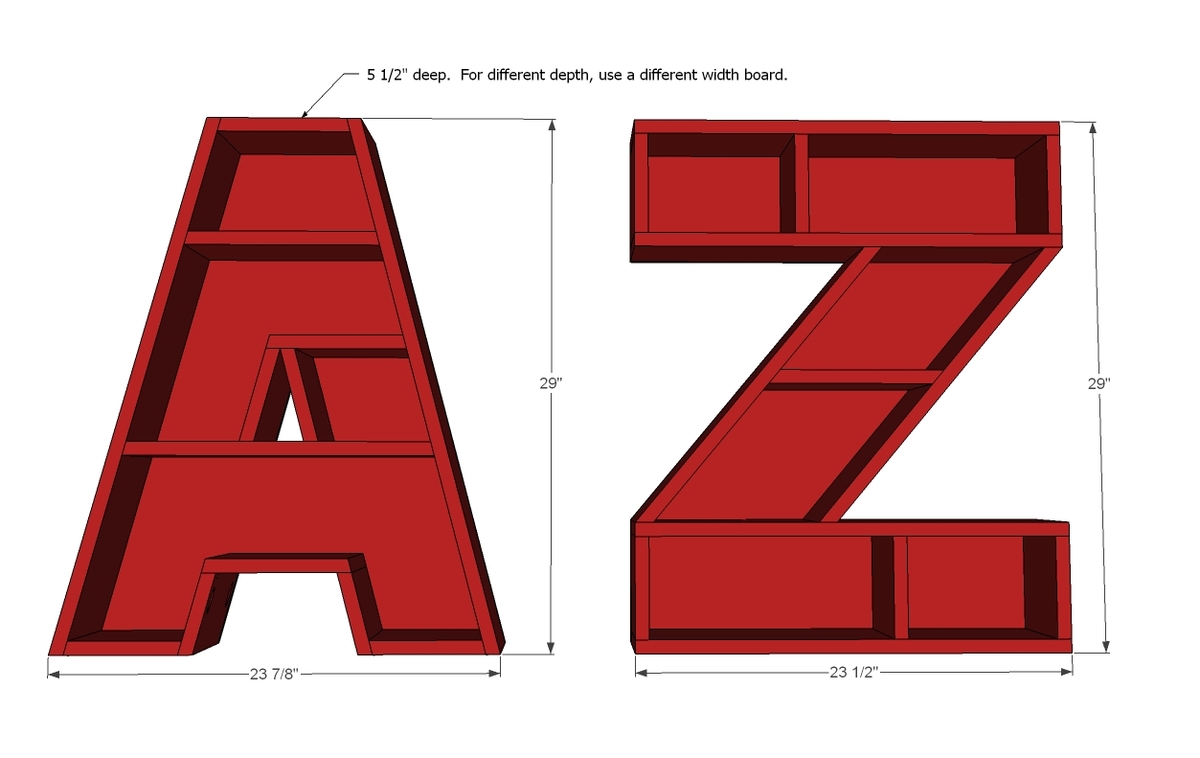
Preparation
2 – 1x6 @ 8 feet long
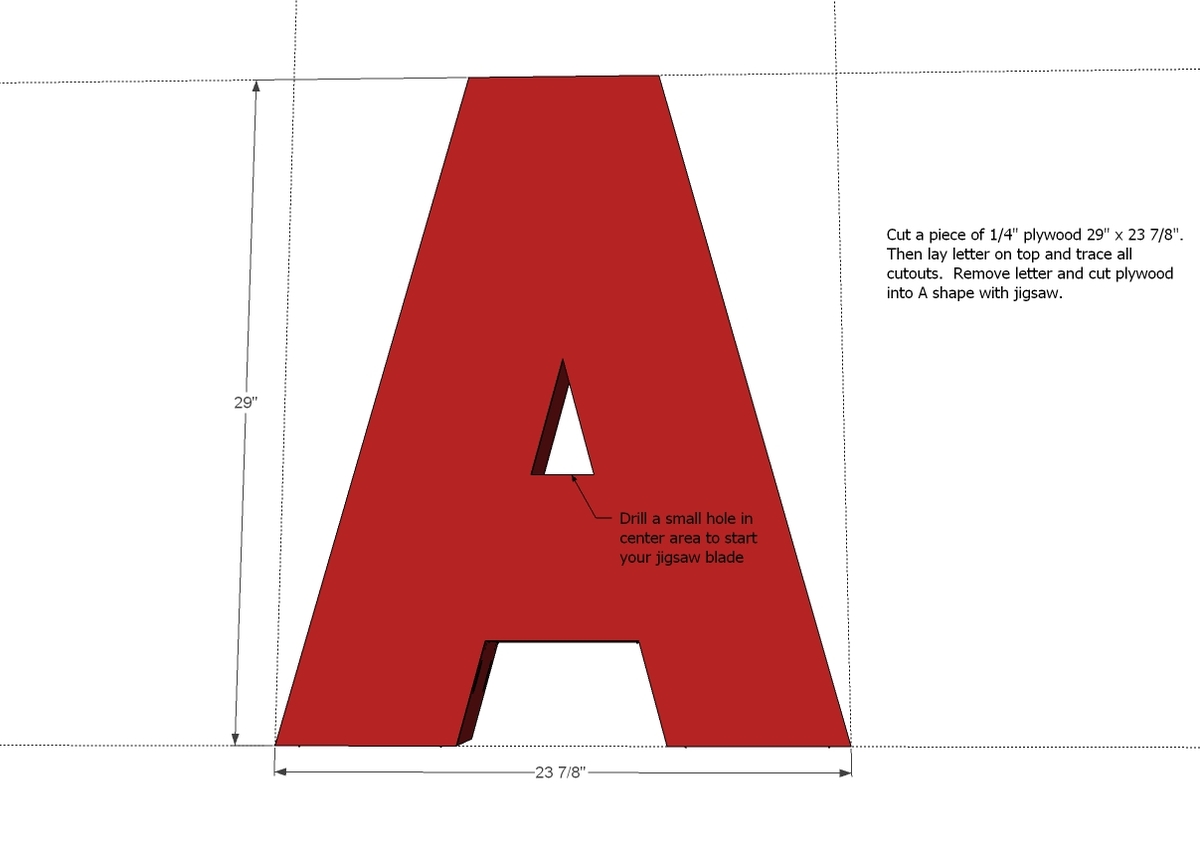
1 – 1/4” plywood 23 ½” x 29”
(for both A and Z letters buy a 1/2 sheet of 1/4" plywood)
1 1/4" Pocket Hole Screws
2” (could get away with smaller) finish nails and wood glue
Hanging Bracket/Hardware that attaches to back (try heavy duty hooks)
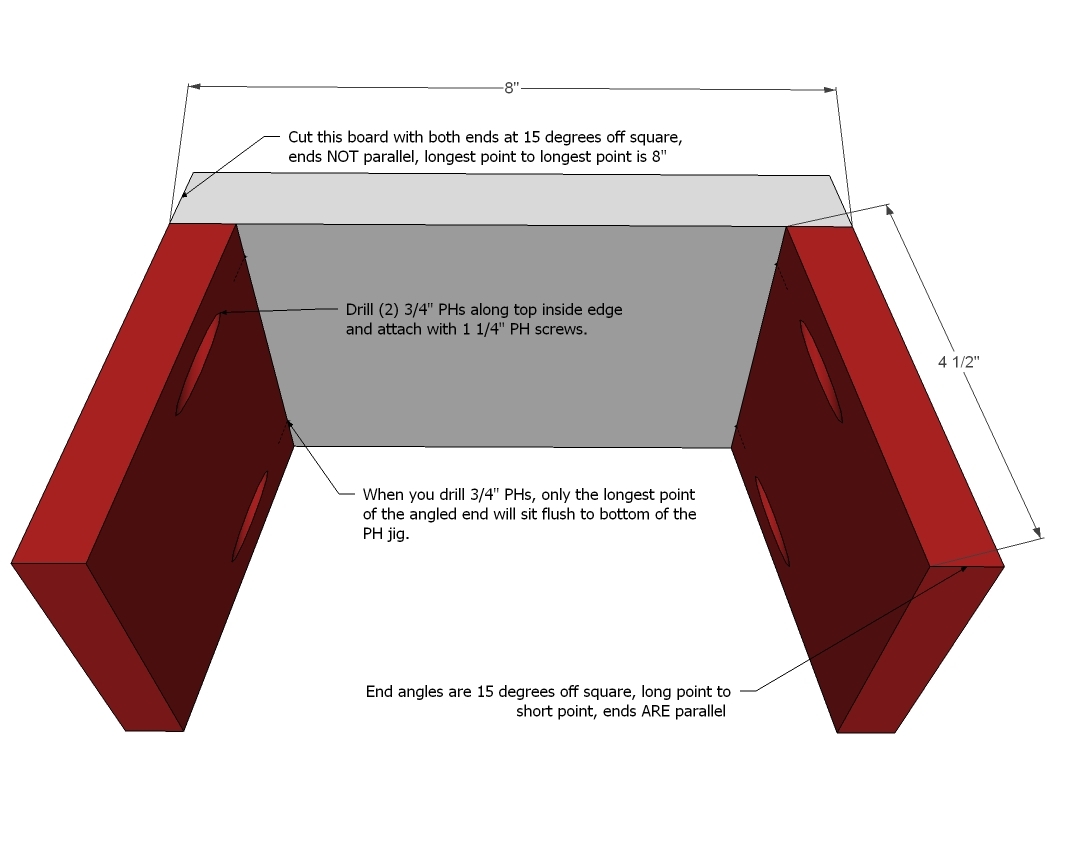
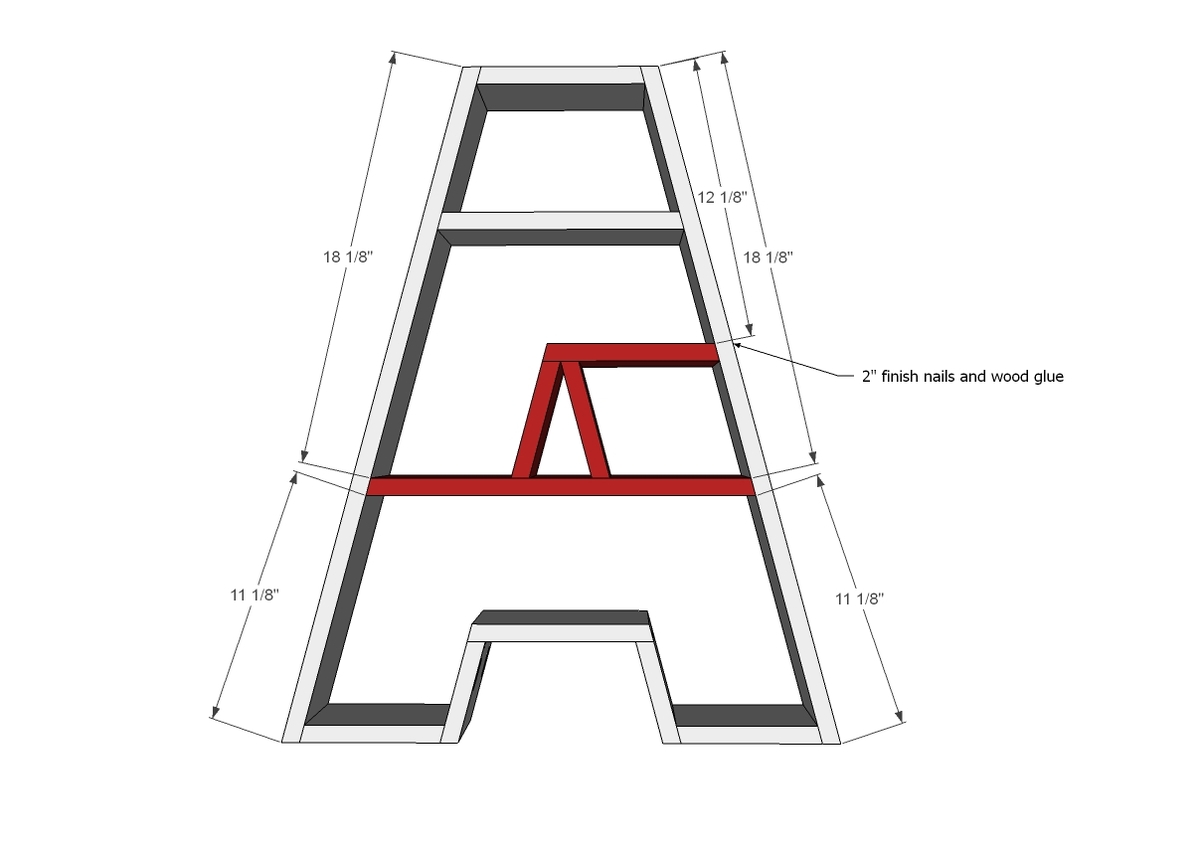
1 – 1x6 @ 8” (long point to long point, both ends cut at 15 degrees off square, ends NOT parallel)
2 – 1x6 @ 4 1/2” (long point to short point, both ends cut at 15 degrees off square, ends ARE parallel)
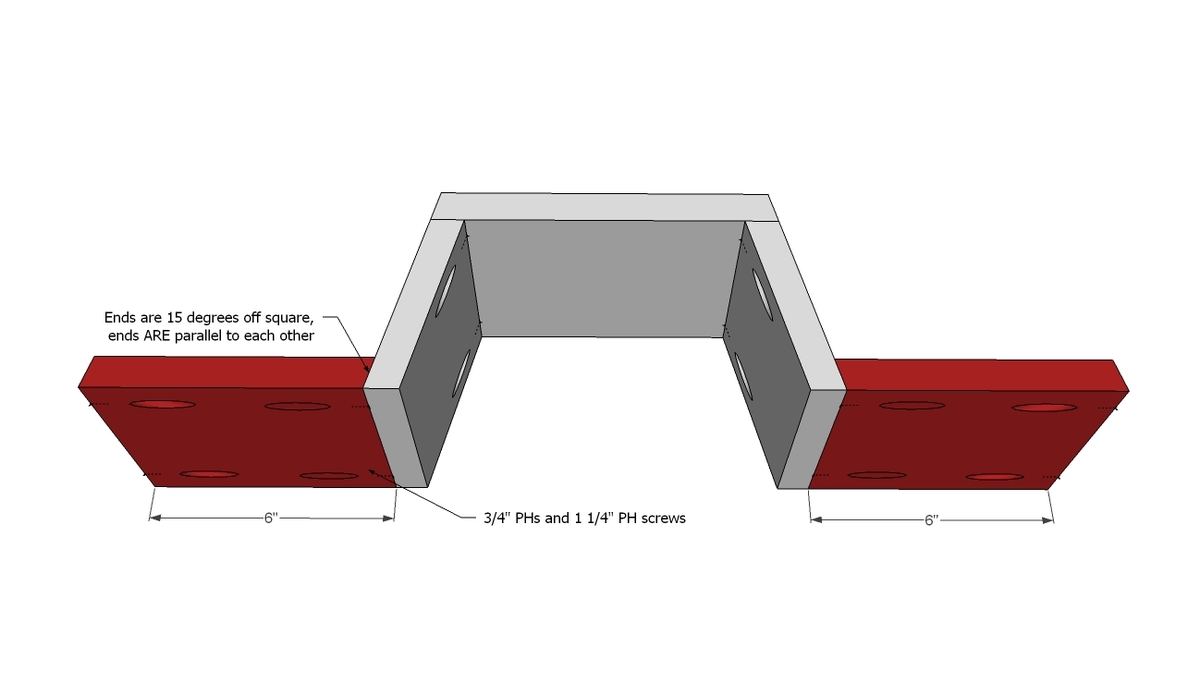
2 – 1x6 @ 6” (long point to short point, both ends cut at 15 degrees off square, ends ARE parallel)
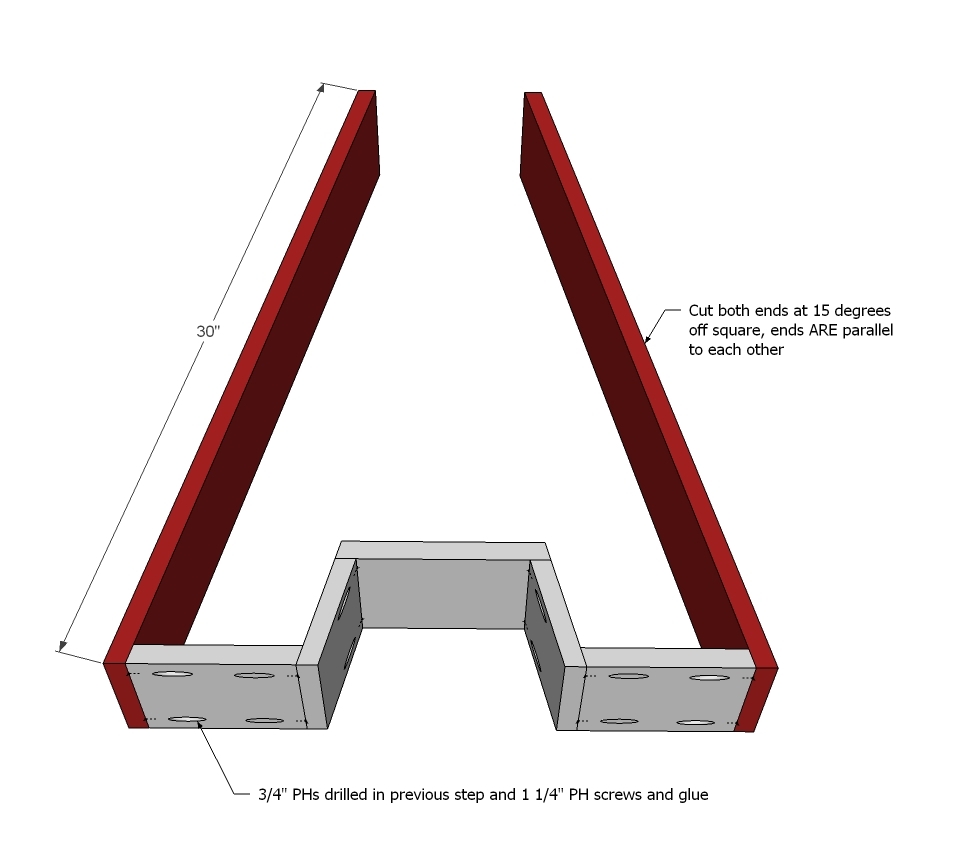
2 – 1x6 @ 30” (long point to short point, both ends cut at 15 degrees off square, ends ARE parallel)
1 – 1x6 @ 7 1/4” (long point to long point, both ends cut at 15 degrees off square, ends NOT parallel)
1 – 1x6 @ 10 5/8” (long point to long point, both ends cut at 15 degrees off square, ends NOT parallel)
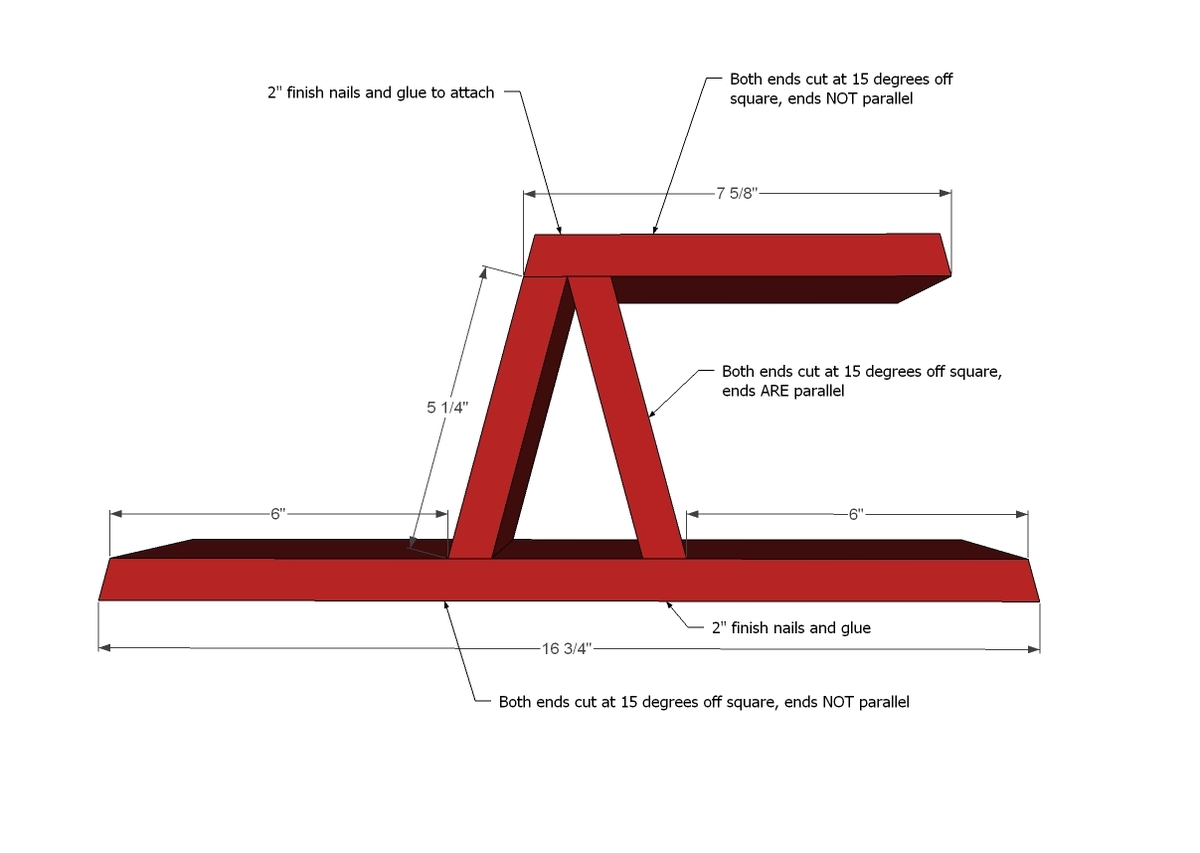
1 – 1x6 @ 16 3/4” (long point to long point, both ends cut at 15 degrees off square, ends NOT parallel)
2 – 1x6 @ 5 1/4” (long point to short point, both ends cut at 15 degrees off square, ends ARE parallel)
1 – 1x6 @ 7 5/8” (long point to long point, both ends cut at 15 degrees off square, ends NOT parallel)
1 – 1/4" Plywood @ 29” x 23 7/8”
Please read through the entire plan and all comments before beginning this project. It is also advisable to review the Getting Started Section. Take all necessary precautions to build safely and smartly. Work on a clean level surface, free of imperfections or debris. Always use straight boards. Check for square after each step. Always predrill holes before attaching with screws. Use glue with finish nails for a stronger hold. Wipe excess glue off bare wood for stained projects, as dried glue will not take stain. Be safe, have fun, and ask for help if you need it. Good luck!
Instructions
Step 1
TIP - If you cut your back plywood first, you can use it as a template for assembling all the pieces! So lay the back plywood down, and then build on top of it - just be careful not to drip glue and stay inside the rectangle. I'd suggest marking centers as well to keep everything square and symmetrical.
Start by attaching the center to the two short legs.
Step 8
Step 9
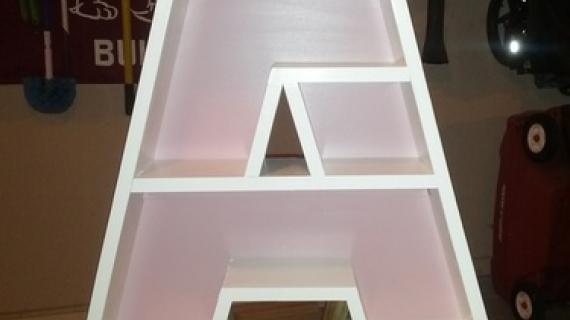
For hanging the shelves, I highly recommend adding some 1x2s inside the letter to give you something to screw directly into the wall into a stud in the wall. These shelves will be very very heavy and we don't want them falling off the wall! When you do hang it, it is very important to secure the structure of the letter (the 1x6s or the added 1x2 cleats) into a stud in the wall and use the appropriate hanging system for the weight of your shelf. Also consider added weight of shelf objects in hanging this shelf.
DISCLAIMER: This shelf will be heavy. Hang and use at your own risk.
It is always recommended to apply a test coat on a hidden area or scrap piece to ensure color evenness and adhesion. Use primer or wood conditioner as needed.







Comments
Beth@ A to Z (not verified)
Thu, 09/13/2012 - 14:46
Thanks girl!
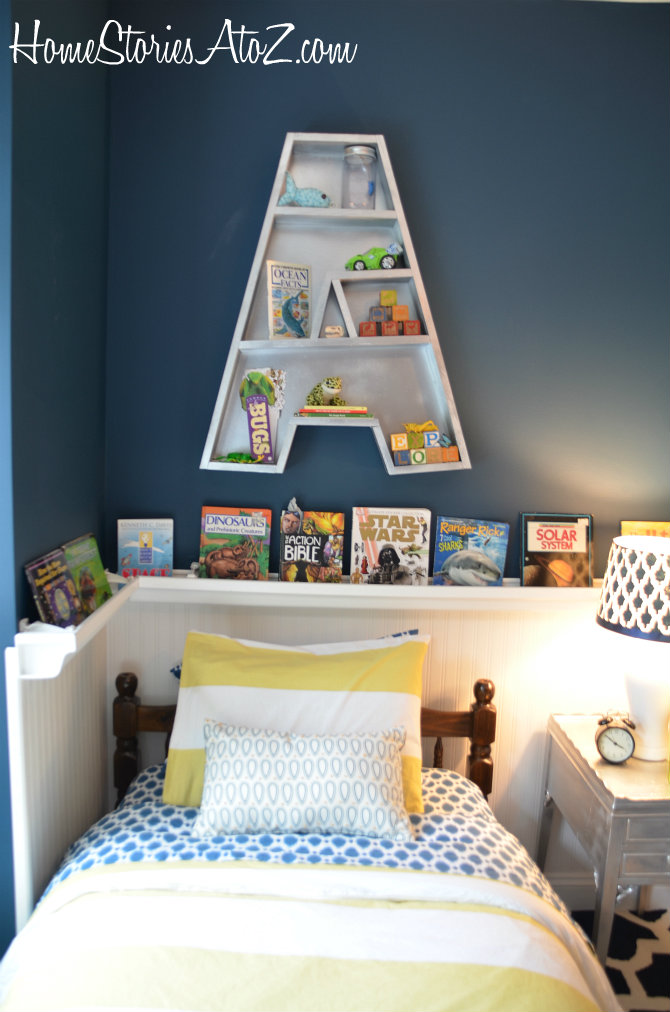
Thanks love for the shout out and thank you so much for the bookshelf plans! My boys LOVE being able to decorate their own little space.
Melinda Greer (not verified)
Fri, 09/14/2012 - 08:52
Too bad I named my kids with Curvy first letters:(
Had only know that one day I'd like to make initial shelves I would have never used names that start with C, S, or J.
Great looking plans Ana and Beth.
Chris Sheppard (not verified)
Fri, 09/14/2012 - 09:31
Good Job! One small note..
Great job!!!!! I love this plan and will be making one for my Isabel. One small thing in the video….. The way that you crosscut the board initially is very unsafe. On a table saw of that size I don’t see a crosscut sled working out very well (At least not with mine). The only way to use a table saw fence and crosscut is to attach a small block of 3/4" plywood behind the blade and set your fence for 3/4" more than the required cut dimension. Start with your work piece against the plywood and push the wood through the cut with the miter gauge. This will make sure that the cut piece does not get pinched between the blade and the fence causing kickback. This is a pretty eye opening video that I found on the Kreg channel. It is not my intention to tell you what to do but I have seen what kickback can do to a person and would hate to see it happen to anyone. Here is the video it shows what happens when the work piece get caught. http://youtu.be/u7sRrC2Jpp4
Chris Sheppard (not verified)
Fri, 09/14/2012 - 09:32
Good Job! One small note..
Great job!!!!! I love this plan and will be making one for my Isabel. One small thing in the video….. The way that you crosscut the board initially is very unsafe. On a table saw of that size I don’t see a crosscut sled working out very well (At least not with mine). The only way to use a table saw fence and crosscut is to attach a small block of 3/4" plywood behind the blade and set your fence for 3/4" more than the required cut dimension. Start with your work piece against the plywood and push the wood through the cut with the miter gauge. This will make sure that the cut piece does not get pinched between the blade and the fence causing kickback. This is a pretty eye opening video that I found on the Kreg channel. It is not my intention to tell you what to do but I have seen what kickback can do to a person and would hate to see it happen to anyone. Here is the video it shows what happens when the work piece get caught. http://youtu.be/u7sRrC2Jpp4
Ali Smith (not verified)
Tue, 09/18/2012 - 10:00
Wonderful!
Hi Ana,
I have discovered your blog and am officially addicted! I especially enjoy reading the updates on the Momplex.
But today I am glad my name starts with an A so I can make this shelf! I can't guarantee it will turn out anywhere close to your A or Beth's A but I will give it my best shot and hope for the best!
Thanks for your creativity and willingness to share it.
Ali
Deborah Lester (not verified)
Tue, 10/09/2012 - 12:14
Letters G and N
Hi Ana:
LOVE the letter shelves! Would you consider creating plans for the letters G and N for my two little boys Nik and Gregor who share a room?
I am re-doing their rooms with your Storage Collection beds, built-in cubbies in their closet that I ripped out (my kids have no use for hangers so might as well make better use of a closet!). Have already redone my mudroom with your smiling mudroom plan with a few modifications. Ripped out my daughter's closet and did a built in desk, storage bench and wall shelves using your Brookstone collection for part of the plans. Love all of them. Now, if I didn't have to sleep, I'd get so many more of your projects done! Thanks for inspiring us moms to try something new!
Deborah
JK (not verified)
Fri, 12/21/2012 - 17:44
Curious as to how sturdy this
Curious as to how sturdy this would be without the plywood backing? I like the look of the shelves, but thought that might cut down on the weight. Not sure if you'll see this, but thought I'd ask! Thanks!
Bill Campbell (not verified)
Fri, 12/28/2012 - 06:24
Weight; sturdiness; SAFETY
Without the plywood backing, the shelf would be extremely weak. You would be much better off cutting down the weight by using 1/2" rather than 3/4" wood. Also, use glue along with the nails to attach the back; and since the whole thing is getting spray-painted anyway, don't use coated board for the back, as glue (and the paint, for that matter) may not stick anyway. Finally, I second the poster above who noted that the way she uses her table saw in the video is unsafe. The danger is compounded if the blade is tilted, because the workpiece is all the more likely to get jammed between the blade and the fence, and then thrown back in your face. It's shocking, really, that 3M's lawyers didn't step in, because there's a lot of liability involved. There are some really good table saw safety videos on the website of Fine Woodworking magazine.
doro von Hand … (not verified)
Mon, 01/14/2013 - 00:45
great! I linked to your
great!
I linked to your tutorial on my blog - thanks for sharing!
doro K.
*Silky* (not verified)
Fri, 01/18/2013 - 01:44
Right now I'm planning the
Right now I'm planning the redecoration of my sons' room. I will definitely using this idea! Their names start with an A and a B. I can use the A instructions and for the B I'm going to use the shape used in this font:
http://www.cubeecraft.com/blog/punched-out-font/
Check it out if you want to build a shelf for a curved letter.