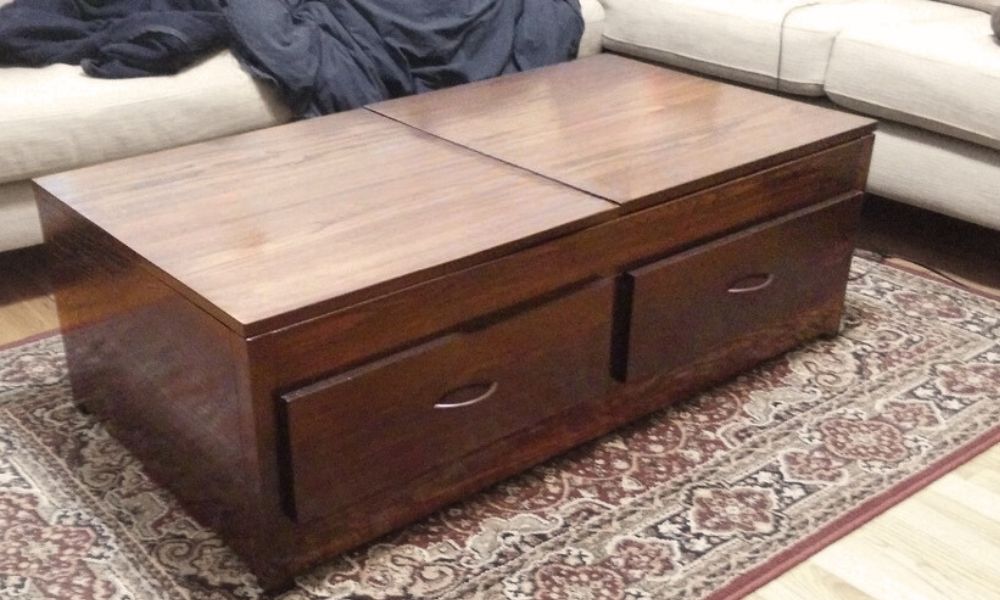
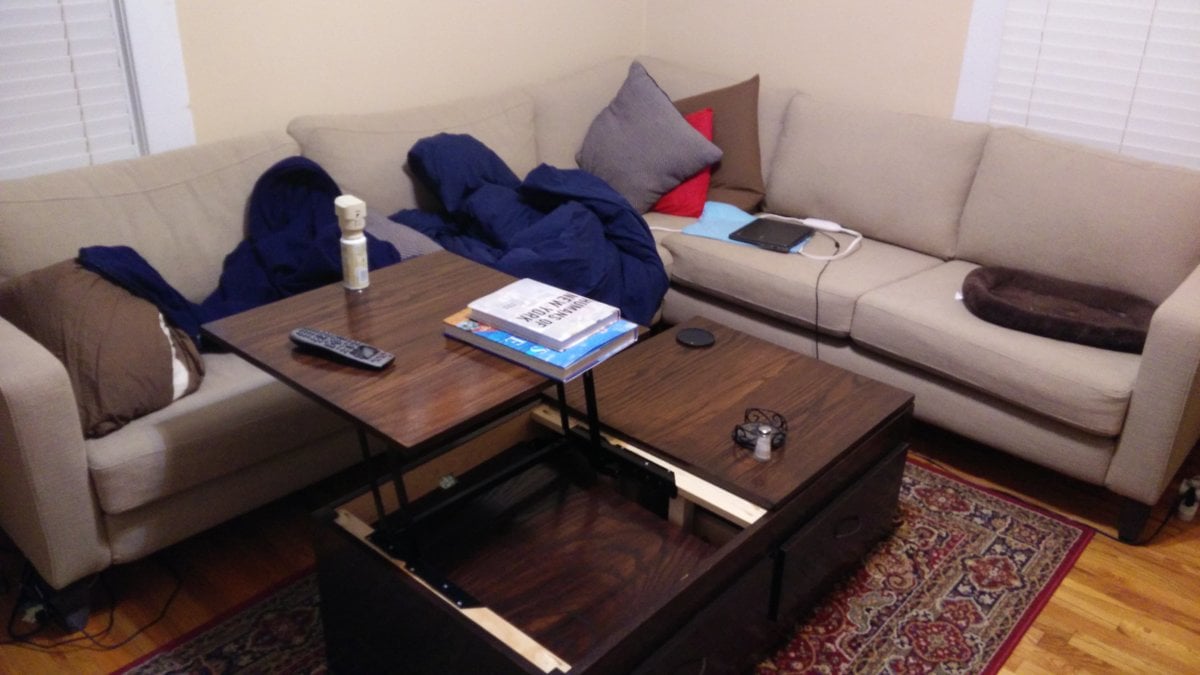
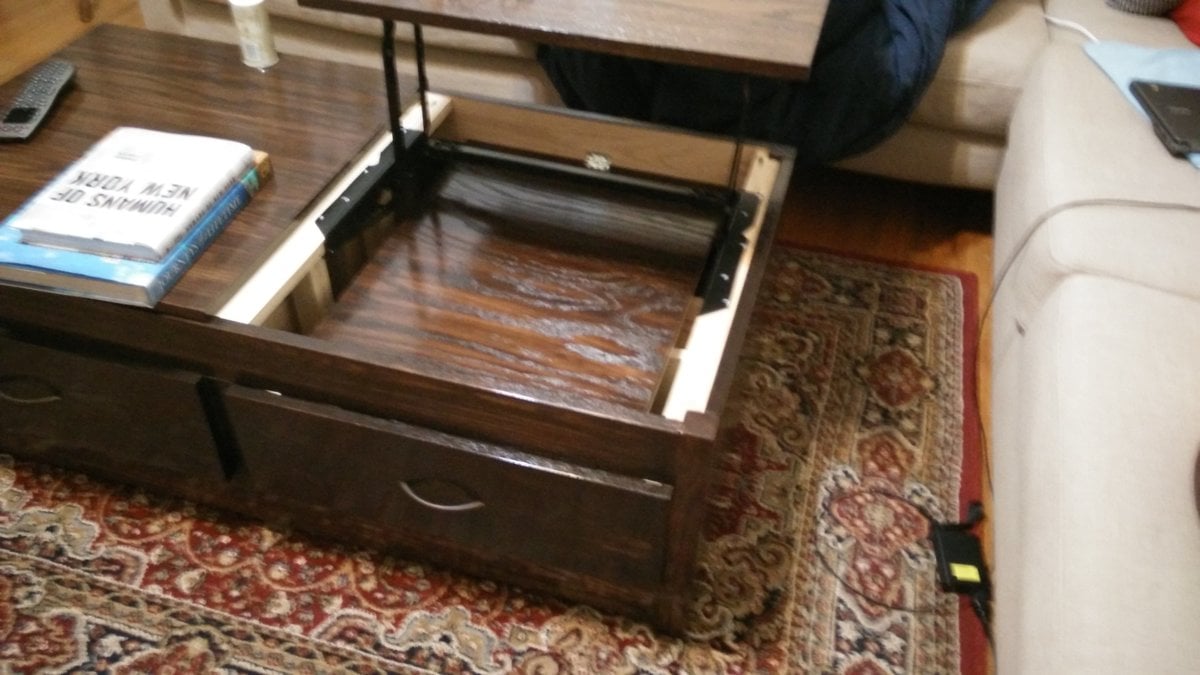
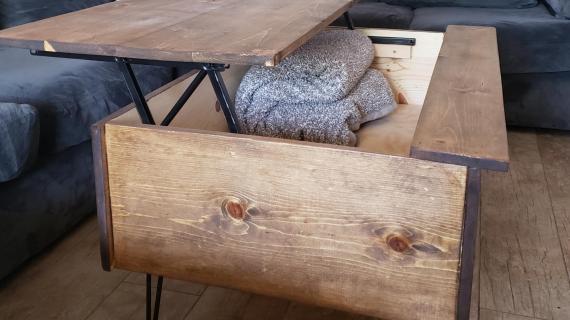
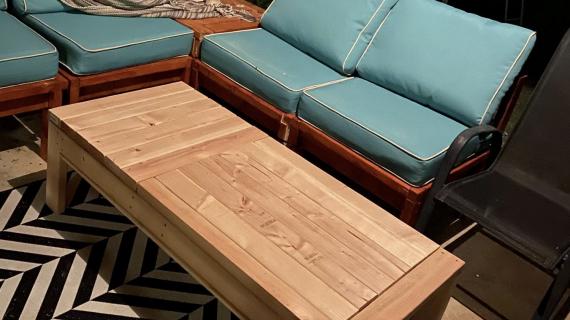
The mission was to create a pop-up (lift top) coffee table that had dual tops so that when my significant other and I are sitting on the couch, one of us could have their side up and the other one could leave theirs down. I'm going to upload the drawings and step by step instructions shortly!
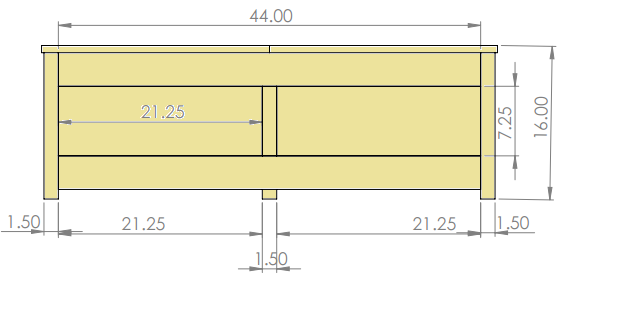
Preparation
Clamps! SO MANY CLAMPS!
Wood glue
Number of boards Size (nominal)
Oak (nice wood for show pieces):
- 1 1x4x6
- 3 1x4x8
- 2 1x8x8
- 3 2x2x3
- 2 1x12x6
Pine/poplar (whatever is cheap):
- 2 1x2x8
- 1 1x4x6
- 2 1x6x8
- 1 2x2x8
Also needed:
- Half sheet of 1/2" plywood
- Whole Sheet of 1/8" plywood (drawer bottoms)
- 10" drawer slides (found on Amazon)
- Drawer hardware
Table Frame:
- 4 x Side trim 0.75" x 3.5" x 22.5"
- 2 x Sides 0.75" x 7.25" x22.5"
- 4 x Legs 1.5" x 1.5" x 15.25"
- 2 x Front/Back Vertical 1.5" x 1.5" x 7.25"
- 4 x Front/Back Horiz. 0.75" x 3.5" x 45.5"
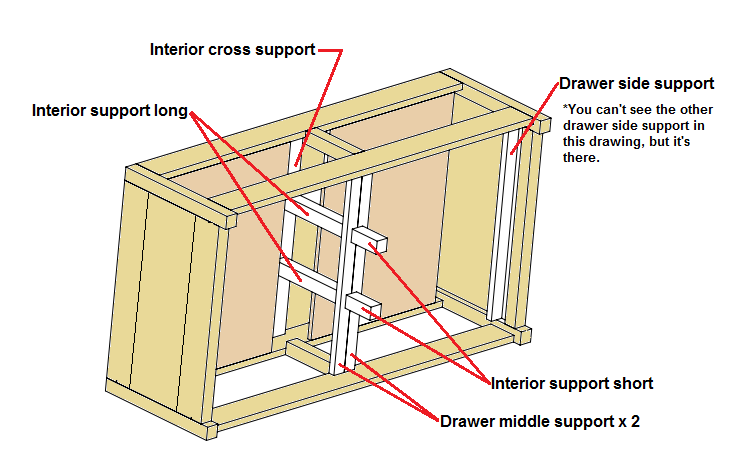
- Drawer Mid. Supports 0.75" x 1.5" x 24"
- Drawer Side Supports 0.75" x 1.5" x 22.5"
- Interior Support Long 1.5" x 1.5" x 9.8125"
- Interior support Short 1.5" x1.5" x 3.75"
- Interior Cross Support 0.75" x 3.5" x 24"
Drawers:
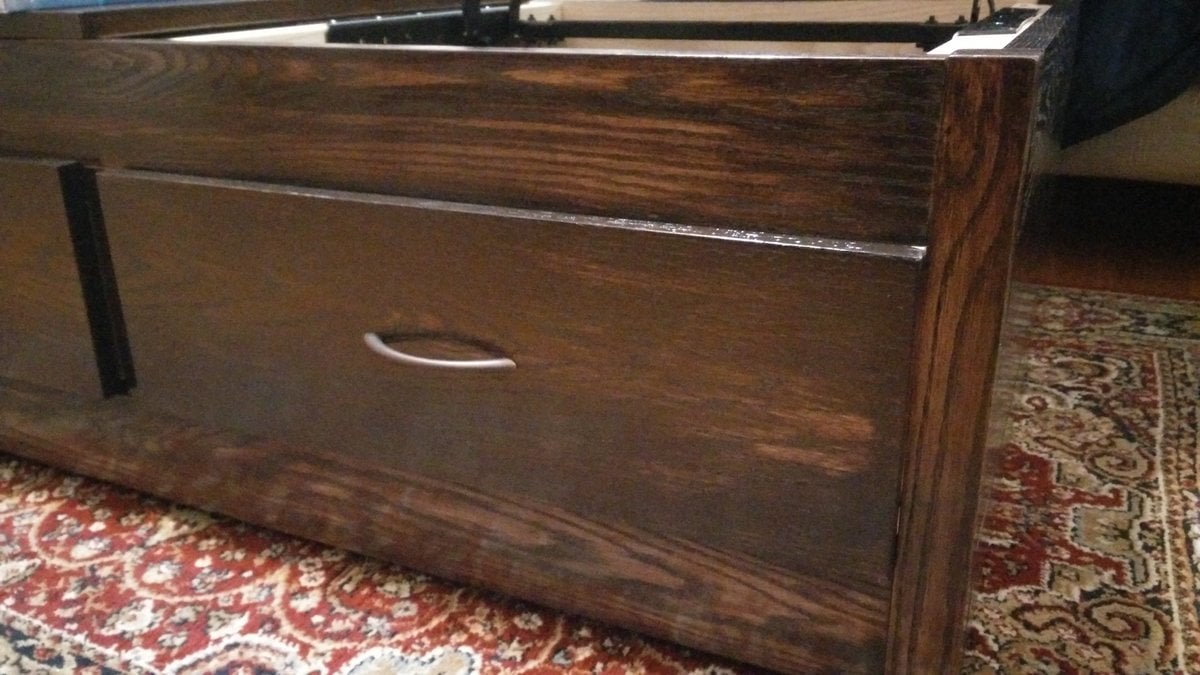
- 4 x Drawer Face 0.75" x 7.25" x 22" (you might cut about 1/8" off all sides of the drawer face to fit flush in the frame instead of outside like mine)
- 8 x Drawer Side 0.75" x 5.5" x 10.75"
- 4 x Drawer Back 0.75" x 5.5" x 18.25"
- 4 x Drawer Bottom 0.125" x 10.75" x 19.75"
Tops:
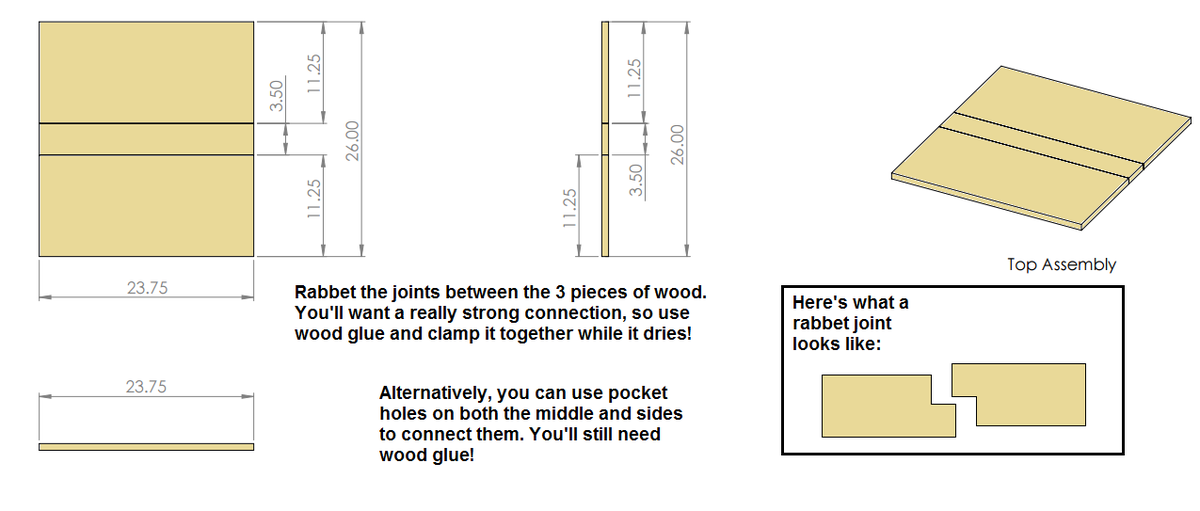
- 4 x Front and Back 0.75" x 11.25" x 24.5"
- 2 x Middle 0.75" x 3.5" x 24.5"
Please read through the entire plan and all comments before beginning this project. It is also advisable to review the Getting Started Section. Take all necessary precautions to build safely and smartly. Work on a clean level surface, free of imperfections or debris. Always use straight boards. Check for square after each step. Always predrill holes before attaching with screws. Use glue with finish nails for a stronger hold. Wipe excess glue off bare wood for stained projects, as dried glue will not take stain. Be safe, have fun, and ask for help if you need it. Good luck!
Instructions
Step 1
Make all the cuts. I put the actual dimensions of the boards. For the complete novice, don't forget that when I say 0.75, I mean 3/4", and if a cut has a dimension of 0.75x3.5x22.5, that means you'll be cutting a 22.5" from a 1"x4" board. If you bought your lumber from L0wes or H0meDep0t, a 1"x4"x8' board will actually be 3/4" x 3.5" x 8' because of how much they plane off to make the sides smooth.
My advice to you is to keep the tops, drawers, and frame parts separate. It's going to be a big pile of wood, and you don't want to put a pocket hole where it doesn't belong!
Step 2
At this point, I decided to put together the tops. If you bought some really straight oak boards, you'll probably be looking at a pretty good fit together. If you bought some not so straight boards, you may end up having to take a bit off with a jointer (or a router, like I did). Otherwise, you'll get gaps, and that'll look weird.
Get your 1" x 12" tops, and the 1" x 4" middles, and pick the best matches. Look at the grain and color of the wood and just take your best guess. If you're going to use pocket holes to join them, you'll want them on both sides. You'll also need to use wood glue and some pretty large clamps to hold them together for you. It's a process. If you don't want to use pocket holes, you can make a much stronger joint by rabbeting the interior edges with a router. Watch a lot of youtube videos before you try it for your first time, and definitely practice on some scraps!! This is where I ended up having to take too much off, and it left my tops a little short.
Step 3
Drawers!
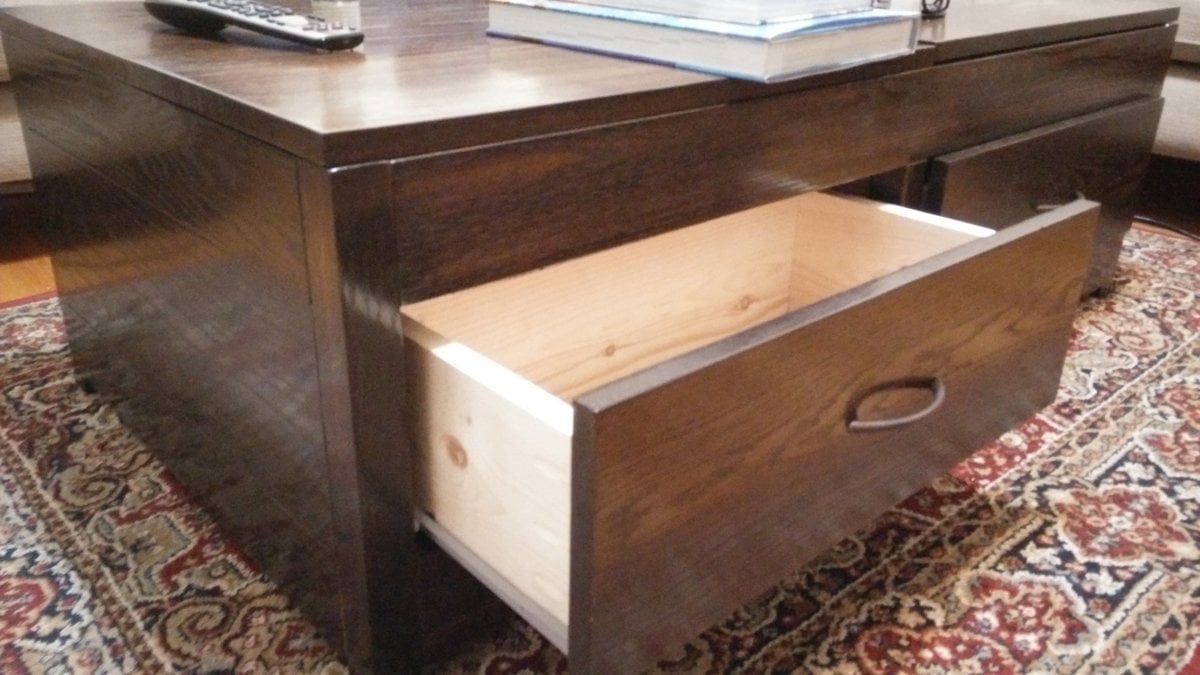
These should be pretty simple. You'll use pocket holes to put together the sides and backs. I used a brad nailer to attach the 1/8" plywood bottoms. I didn't attach the faces at this point because I wanted to stain/finish them first. You can attach them now and stain/poly after the fact if you want. I saved the drawer hardware for the very, very end of the project. The drawer slides should wait until you've got the frame assembled to help you figure out where to mount them.
Step 4
Pocket holes! Pocket holes EVERYWHERE!
Get out your kreg jig, and start making pocket holes. You'll need them on the 1x4x45.5's in three spots (sides and the middle where the verticals mount), all of the side pieces, and the really short oak middle pieces. You'll also need them on the interior supports. Since the vast majority of your connections are 3/4" to 3/4" wood, you'll need mostly only 1-1/4" pocket hole screws, and you won't need to reset your kreg jig for much of anything.
Step 5
Assembly
Time to put together the sides. You should have already put pocket holes in the backs of the 1x4's and the 1x8's, so get your clamps out. I suggest getting one leg, start with one of the 1x4's, make it flush to the top of the leg, glue the edge, and then screw it on. Then get the 1x8, glue the edge (top and leg side), then clamp it flush to the leg and the 1x4, then screw it in. Next, grab the second 1x4, glue the top and side edge, clamp to the already installed parts, and screw it in. Wipe the excess glue away fast!! It'll harden and then turn into a gross mess otherwise. Finally, glue the opposite edges of the 1x4's and 1x8, and clamp the other leg in place. Carefullly line it up, clamp it together, and make it flush. Screw it together, and you've got a side (pictured above).
Step 6
Now that you've got the sides, it's time to mount those long pieces in the front. Mount the top 1x4x45.5 piece flush to the top of the legs. Use wood glue and at least two pocket holes to attach them. Measure carefully down or use the front/back verticals (1.5x1.5x7.25) to figure out exactly where to mount the bottom 1x4x45.5. You'll start seeing the shape of the coffee table come together now!
Step 7
Interior support structure...
You'll need to mount those front/back verticals with pocket holes. Measure VERY CAREFULLY to find the exact middle of your 1x4x45's horizontals, and that'll tell you where to mount them. I actually drilled the pocket holes in the 1x4x45.5's exactly in the middle back in step 2. If you've gotten all of the pocket holes drilled for the supports, this will go pretty quickly. You'll notice that I've left space for the lift hardware. This is important, or the tops won't sit flush. The picture doesn't show all of the supports. You'll need left and right side supports to hold the lift mechanism. I think it should be fairly obvious about where they mount, and they're in the cut list. Just make sure they're about 3/16" low to account for the thickness of the metal on the lift mechanism.
It is always recommended to apply a test coat on a hidden area or scrap piece to ensure color evenness and adhesion. Use primer or wood conditioner as needed.






Comments
Ana White Admin
Tue, 03/31/2015 - 10:20
Totally Awesome!
Thanks for sharing your fantastic creation!
Angelo
Thu, 04/09/2015 - 22:05
lift top coffee table
I like it...but i could not see the plan. where can I find the plan step by step?
Dave M
Fri, 04/10/2015 - 05:53
Working on it
I'll get the plans up shortly. It's taking me a while to make the individual cut lists and such. Sorry about that.
Woodie49
Tue, 07/14/2015 - 21:13
Pop-Up Coffee Table Mechanism
Do you have the Seller Name you got the Mechanism from?
Thanks,