Little Sloan Leaning Bookshelf

The free plans on this website are made possible with advertising and affiliate links.  Thank you for helping us keep plans free.


Difficulty
Intermediate
| Print this plan

Free plans from Ana-White.com to build a little leaning bookshelf inspired by Land of Nod Little Sloan Leaning bookshelf. Make your own with free step by step plans!
Hey guys!

Sorry I didn't get this posted for you all yesterday! Just been working long hours away from home. I am traveling this week, with Monday and Tuesday spent at Home Depot filming how-to videos for what I can't help but admit are my most favorite Adirondack Chairs yet, and the matching footstool and coffee table. 

 (for those of you on instagram or twitter ... this is old news already)

Home Depot has asked me to host the June Do-It-Herself workshop - so you'll be able to join a free workshop in your area to see first hand THIS VERY Adirondack Chair being built! So stay tuned for more details - it's going to be super fun!!! 

I know I'll be at my local Home Depot at the workshop!  It's a great way to make local building friends and discover new DIY ideas.  Hope you can make it too - I'll keep you posted as the event gets closer!

And I did promise you a matching little leaning bookshelf, too, didn't I?

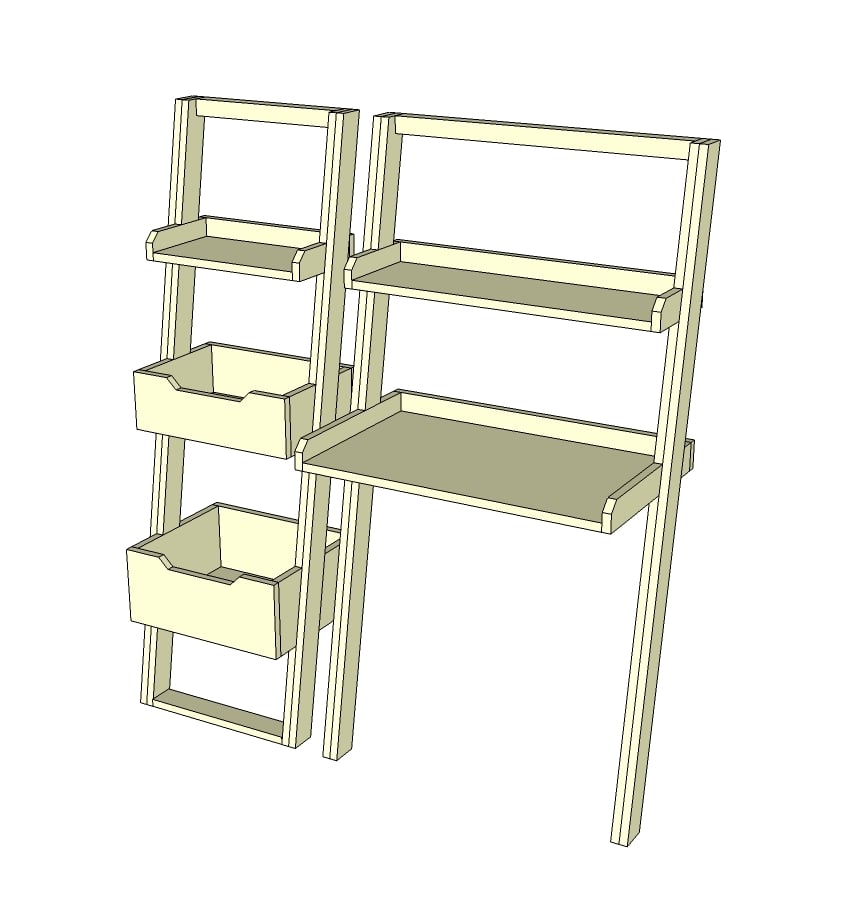
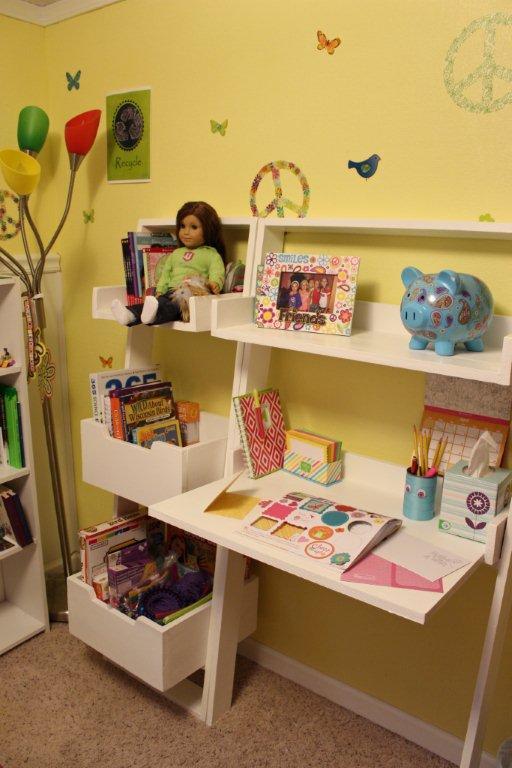
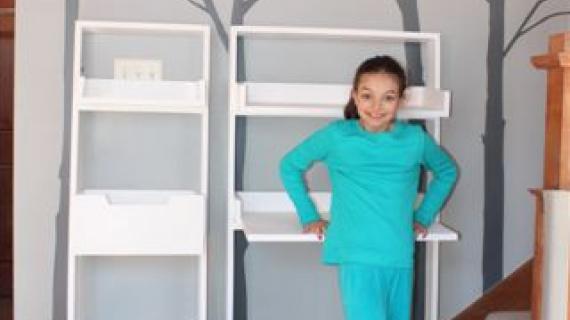
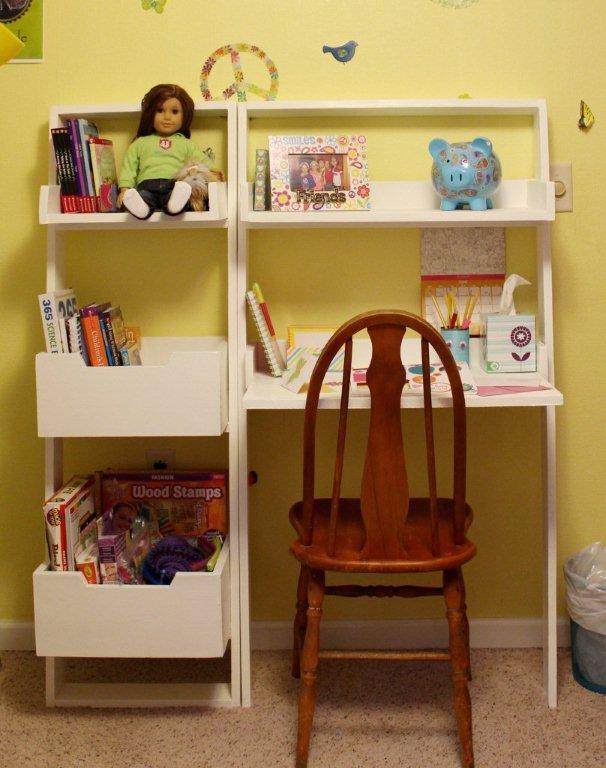
This set is inspired by the bookshelf and desk Jaime made for her niece.

Jaime added new photos - isn't it a cute set?

Now you can make your own too -the plans for the desk are here - and the bookshelf plan follows.

Enjoy the plans!

XO Ana

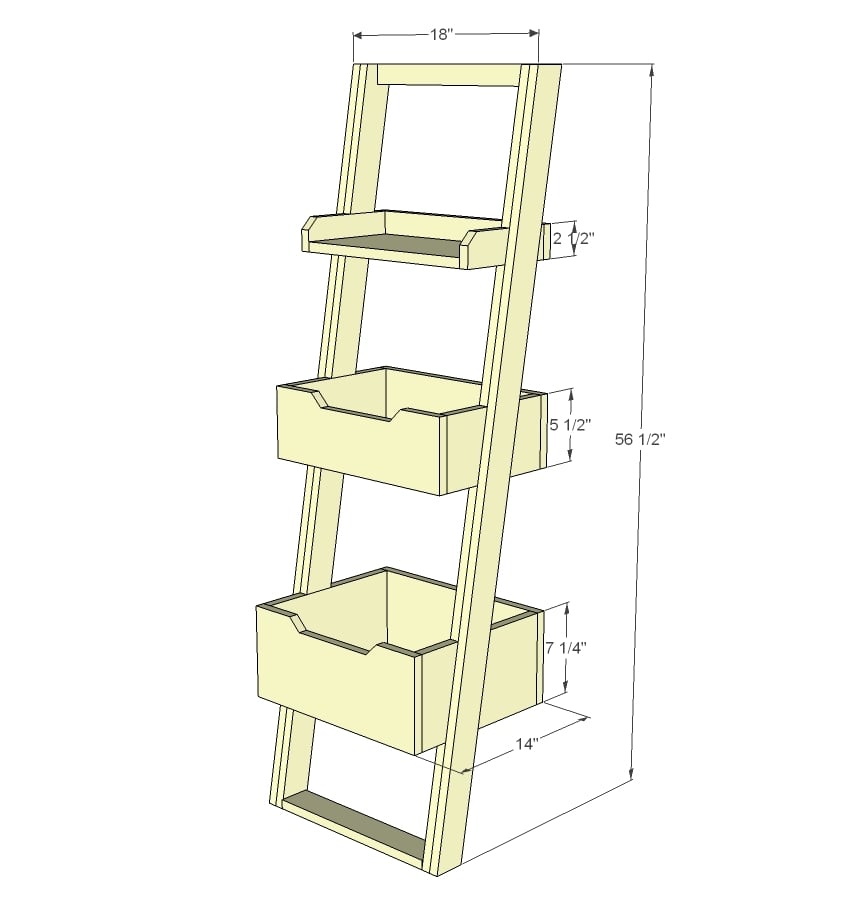
Dimensions
Dimensions are shown above

Preparation

Shopping List

3 - 1x3 @ 8 feet long
1 - 1x8 @ 6 feet long
1 - 1x6 @ 6 feet long
1 - 2x2@ 15" long
3/4" plywood piece at least 15 1/2" x 31"
(can use MDF, project panel etc)
3" or longer screws (2 or more) for attaching frame to wall
1 1/4" finish nails
Recommend 1 1/4" pocket hole screws

Cut List

FRAME
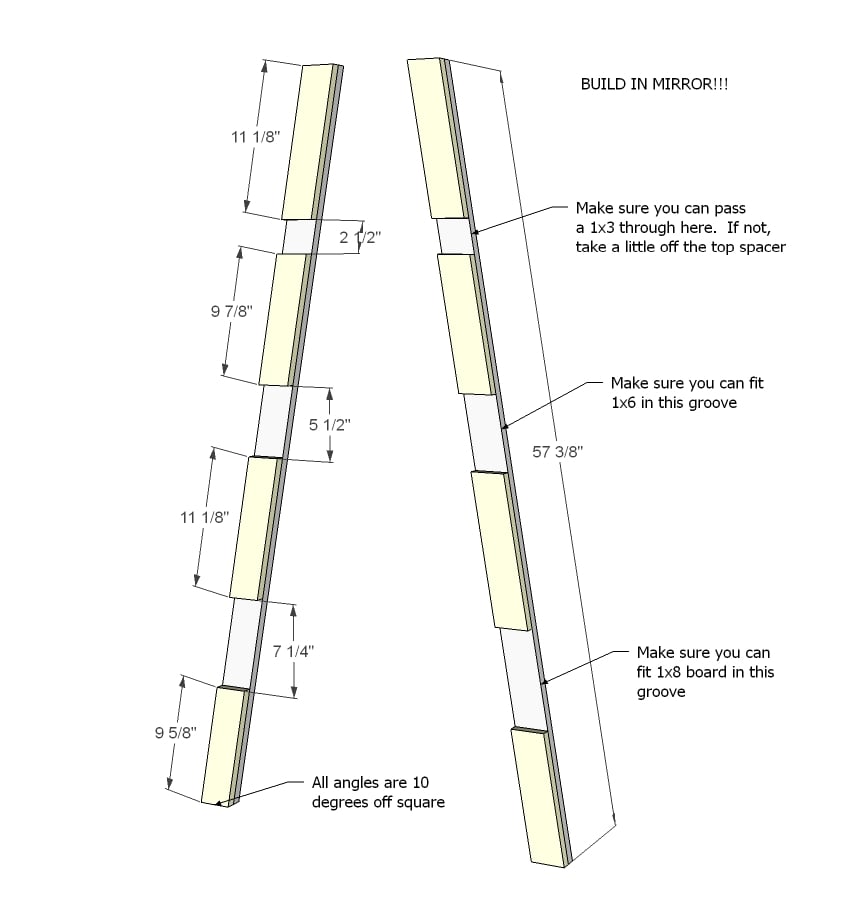
2 - 1x3 @ 57 3/8" (both ends are cut at 10 degrees off square, ends ARE parallel, long point to short point measurement)
2 - 1x3 @ 29 3/4 (both ends are cut at 10 degrees off square, ends ARE parallel, long point to short point measurement)
2 - 1x3 @ 11 3/8" (both ends are cut at 10 degrees off square, ends ARE parallel, long point to short point measurement)
2 - 1x3 @ 11 1/8" (both ends are cut at 10 degrees off square, ends ARE parallel, long point to short point measurement)
1 - 2x2 @ 15" top
1 - 1x3 @ 15" bottom

TOP SHELF
1 - 3/4" plywood @ 15" x 8"
1 - 1x3 @ 16 1/2"
2 - 1x3 @ 8"

MEDIUM BOX
1 - 3/4" plywood @ 15" x 10"
2 - 1x6 @ 10"
2 - 1x6 @ 16 1/2"

LARGE BOX
1 - 3/4" plywood @ 15" x 12 1/2"
2 - 1x8 @ 12 1/2"
2 - 1x8 @ 16 1/2"

Tools
Tape Measure
Speed Square
Pencil
Safety Glasses
Hearing Protection
Kreg Jig
Drill
Miter Saw
Brad Nailer
Power Sander
Drill Bit Set
General Instructions

Please read through the entire plan and all comments before beginning this project. It is also advisable to review the Getting Started Section. Take all necessary precautions to build safely and smartly. Work on a clean level surface, free of imperfections or debris. Always use straight boards. Check for square after each step. Always predrill holes before attaching with screws. Use glue with finish nails for a stronger hold. Wipe excess glue off bare wood for stained projects, as dried glue will not take stain. Be safe, have fun, and ask for help if you need it. Good luck!

Instructions

Step 1

Start by building the two leg sets IN MIRROR by attaching the spacers to the full leg boards. Make sure the gaps are wide enough to fit your boards easily in between - it will be easier to adjust now instead of later on.

Step 2

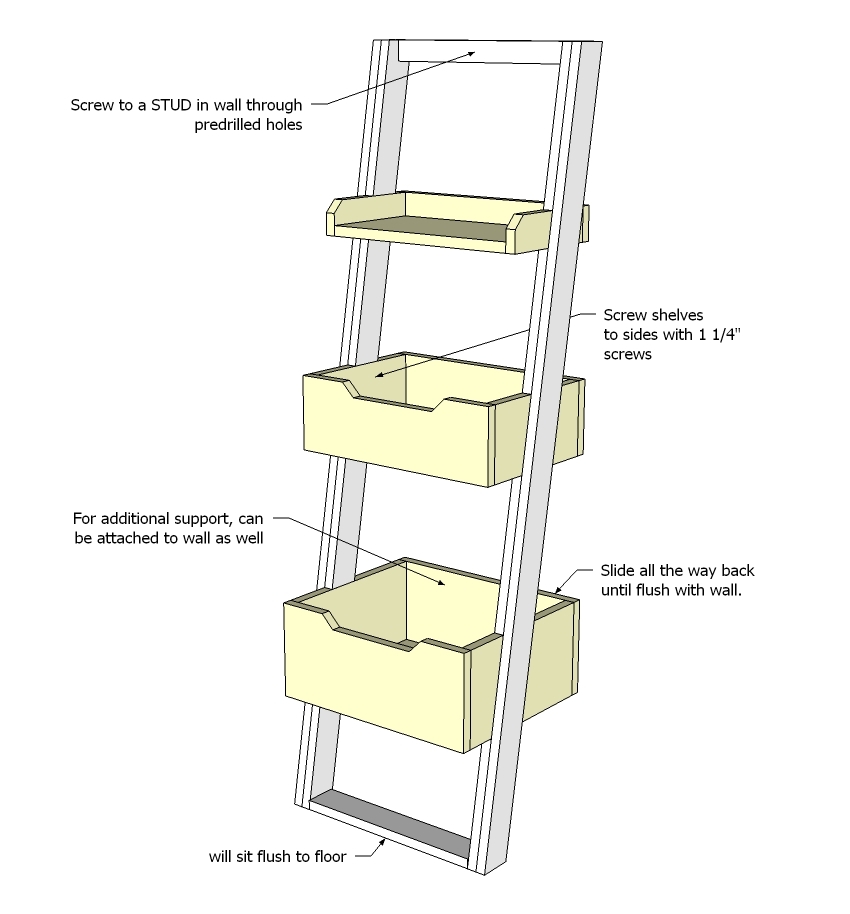
Then attach top and bottom to sides as shown above.

Step 3

Build your shelf and boxes either with 2" nails or 3/4" pocket holes/ 1 1/4" pocket hole screws and glue.

Step 4

Mount the frame to the wall attaching to studs in the wall. Then slide the boxes and shelf in place, screwing to sides.

Finishing Instructions
Preparation Instructions
Fill all holes with wood filler and let dry. Apply additional coats of wood filler as needed. When wood filler is completely dry, sand the project in the direction of the wood grain with 120 grit sandpaper. Vacuum sanded project to remove sanding residue. Remove all sanding residue on work surfaces as well. Wipe project clean with damp cloth.

It is always recommended to apply a test coat on a hidden area or scrap piece to ensure color evenness and adhesion. Use primer or wood conditioner as needed.

Comments

Pam the Goatherd

Fri, 04/19/2013 - 19:23

Drat! I can't wait til June to make those Adirondack chairs! I want to make a pair for my husband's birthday, which is at the end of this month. I guess I'm just going to have to do my best to adapt them on my own.