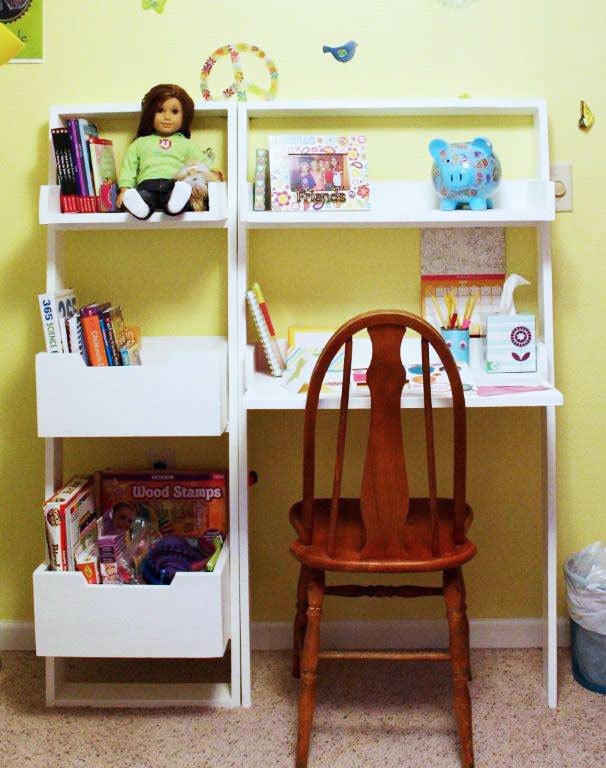
Free plans to build a kids leaning wall desk from Ana-White.com
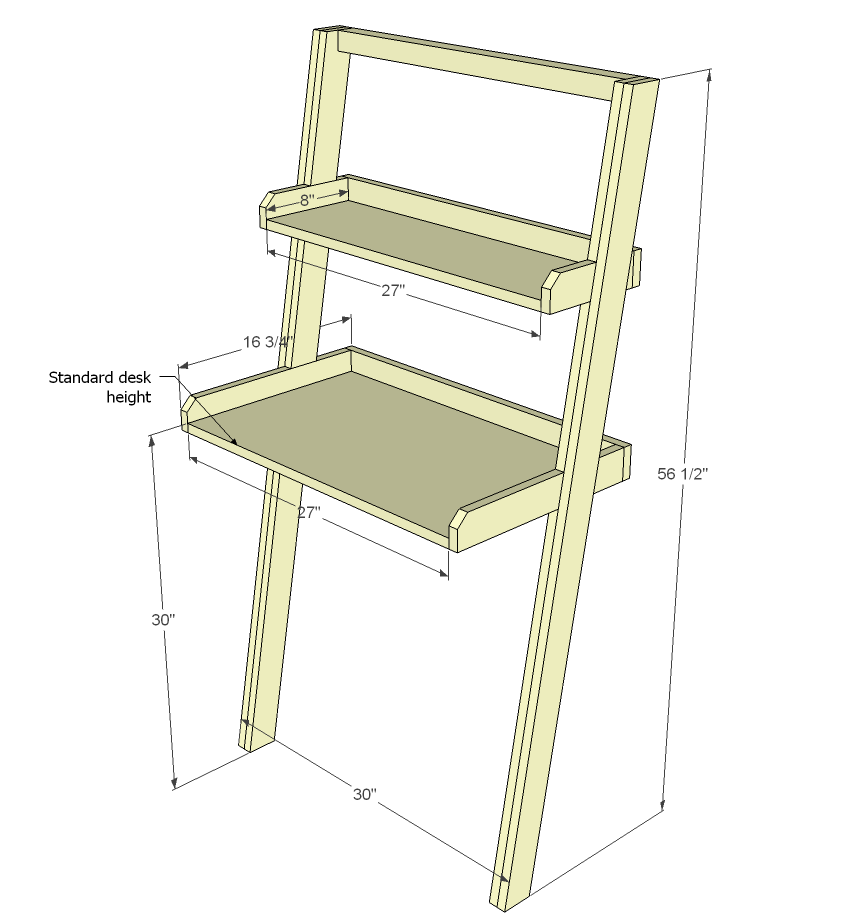
Preparation
4 - 1x3 @ 8 feet long
1 - 2x2 @ 30" long
1 - piece of plywood at least 27" x 32" (can use MDF, project panel etc)
3" or longer screws (2 or more) for attaching frame to wall
1 1/4" finish nails
Recommend 1 1/4" pocket hole screws
FRAME
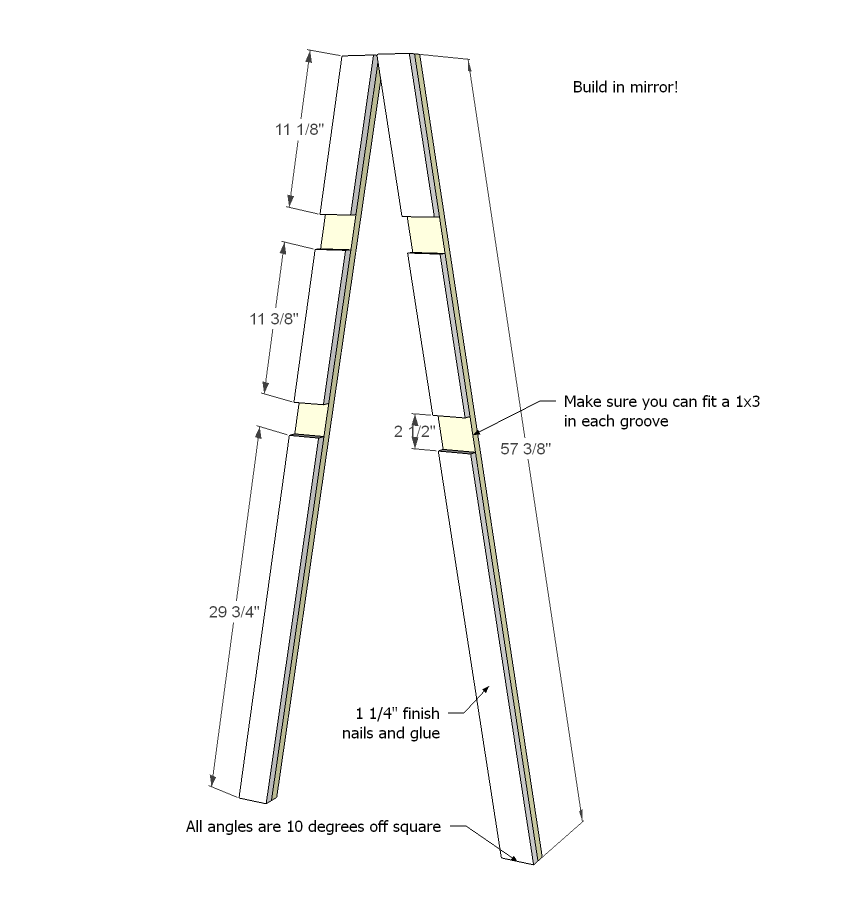
2 - 1x3 @ 57 3/8" (both ends are cut at 10 degrees off square, ends ARE parallel, long point to short point measurement)
2 - 1x3 @ 29 3/4 (both ends are cut at 10 degrees off square, ends ARE parallel, long point to short point measurement)
2 - 1x3 @ 11 3/8" (both ends are cut at 10 degrees off square, ends ARE parallel, long point to short point measurement)
2 - 1x3 @ 11 1/8" (both ends are cut at 10 degrees off square, ends ARE parallel, long point to short point measurement)
1 - 2x2 @ 27"
SMALL SHELF
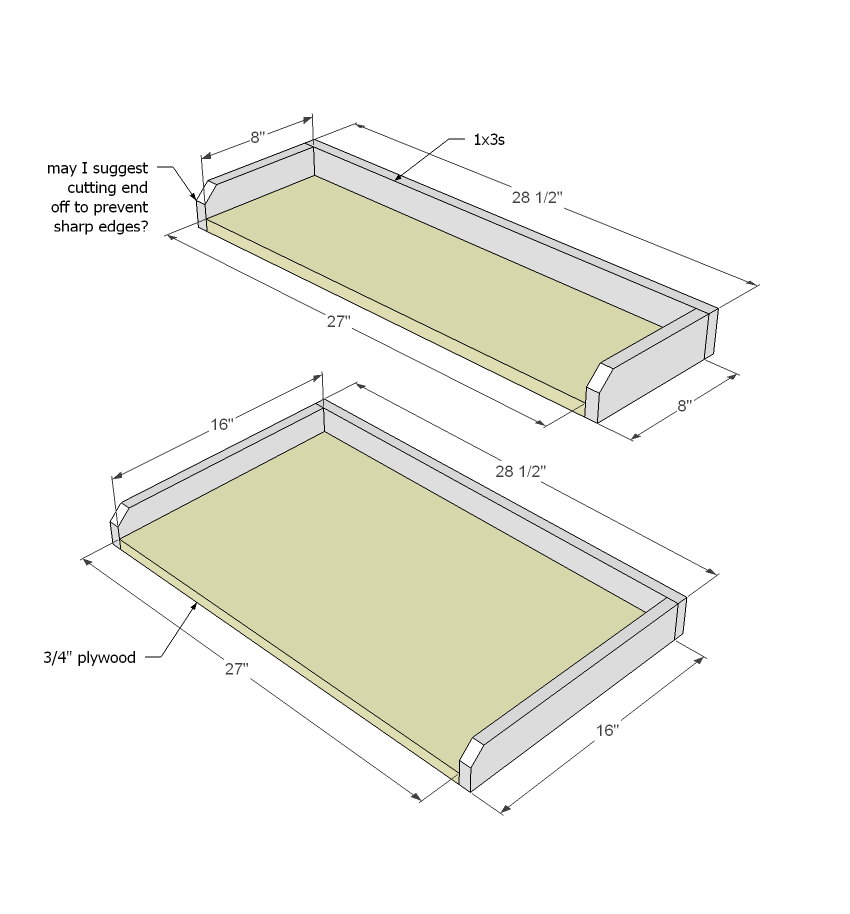
1 - 3/4" plywood 27" x 8"
1 - 1x3 @ 28 1/2" (back)
2 - 1x3 @ 8" (sides)
LARGE SHELF
1 - 3/4" plywood 27" x 16
1 - 1x3 @ 28 1/2" (back)
2 - 1x3 @ 16 (sides)
Please read through the entire plan and all comments before beginning this project. It is also advisable to review the Getting Started Section. Take all necessary precautions to build safely and smartly. Work on a clean level surface, free of imperfections or debris. Always use straight boards. Check for square after each step. Always predrill holes before attaching with screws. Use glue with finish nails for a stronger hold. Wipe excess glue off bare wood for stained projects, as dried glue will not take stain. Be safe, have fun, and ask for help if you need it. Good luck!
Instructions
Step 1
You will need to lay these guys out in mirror. The most important thing is making sure the two sides match, and the grooves will fit your 1x3 boards. Start at the bottom and work your way upward, nailing the filler boards on to the legs with 1 1/4" finish nails.
Try to get 1x3s with square edges if you can. The rounded edges will be hard to disguise. You may wish to at this step fill the joint facing forward between the 1x3s to give the illusion of a solid leg and then sand.
Step 2
Step 3
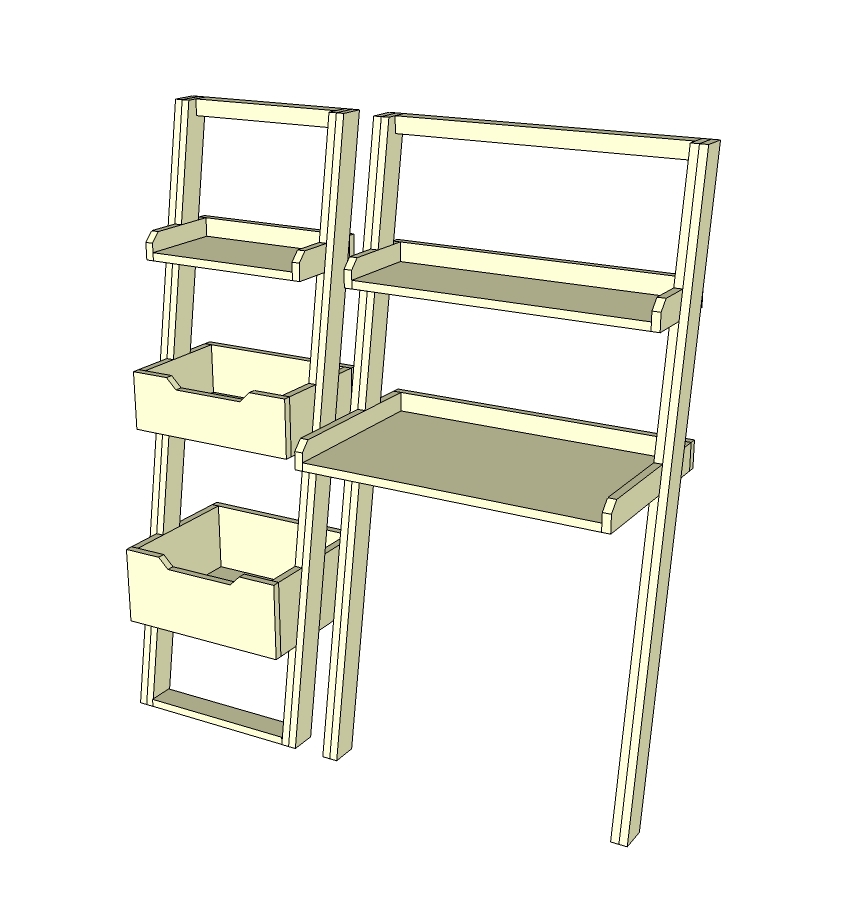
Build your shelves as shown here. The best way is 3/4" pocket holes drilled on three sides of each shelf bottom, and then the sides attached with 1 1/4" pocket hole screws and glue. You could also join the back side with the sides with 3/4" PHs and 1 1/4" PH screws on the back side that will be placed against the wall.
Step 4
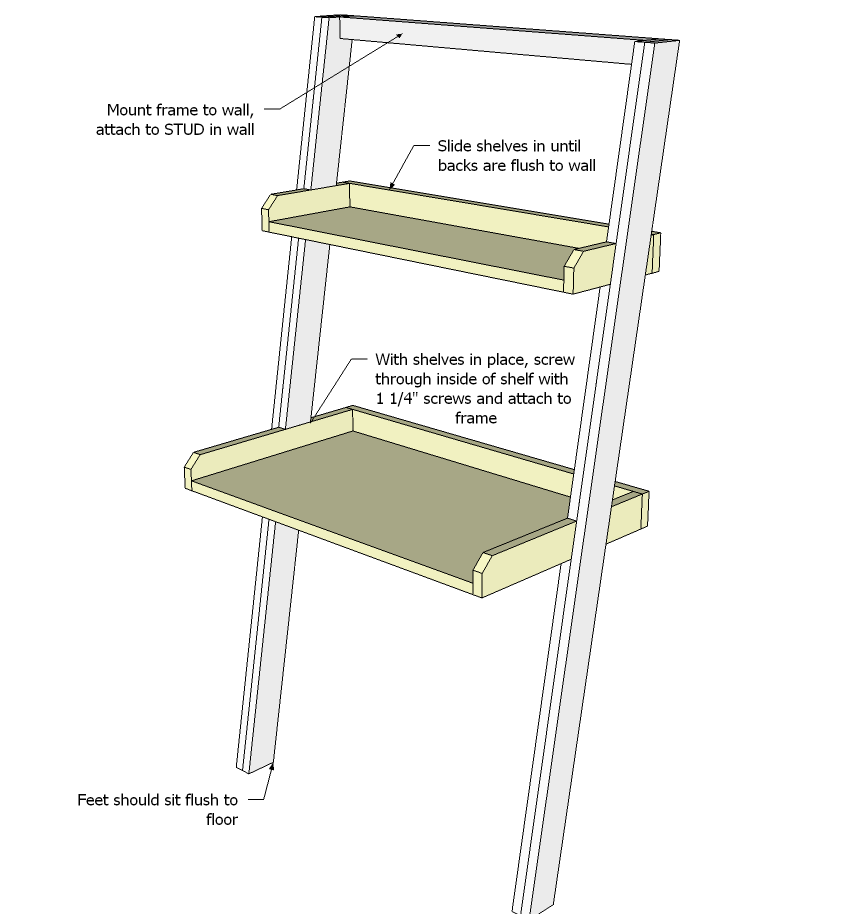
I recommend finishing the piece first, but make sure you still can fit the shelves in the grooves. Then anchor the frame to the wall where you want the desk, screwing through the 2x2 through a predrilled hole into a stud in the wall. Depending on your wall composition, you may need different fasteners - for a standard dry-walled wall, you'll need at least a 3" screws - at least two. Try to hit two different studs.
Make sure the angle is right so that your feet are flush to the floor, and the 2x2 sits square to the wall.
Then slide shelves in and attach to frame with 1 1/4" screws.
It is always recommended to apply a test coat on a hidden area or scrap piece to ensure color evenness and adhesion. Use primer or wood conditioner as needed.





Comments
jaime19861
Mon, 04/15/2013 - 17:55
Updated Little Sloane pictures
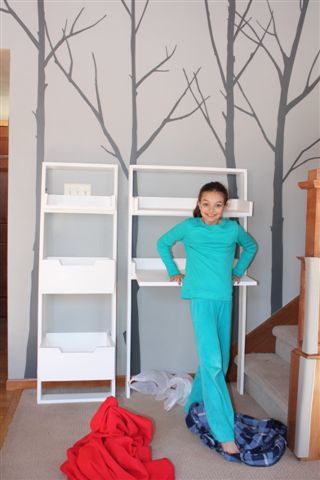
I just added some pictures to the Brag post of the desk and bookshelf after it was anchored to the wall and set up.
dansmith
Mon, 04/22/2013 - 22:30
That is so good, very nicely
That is so good, very nicely build and is given a good finishing.