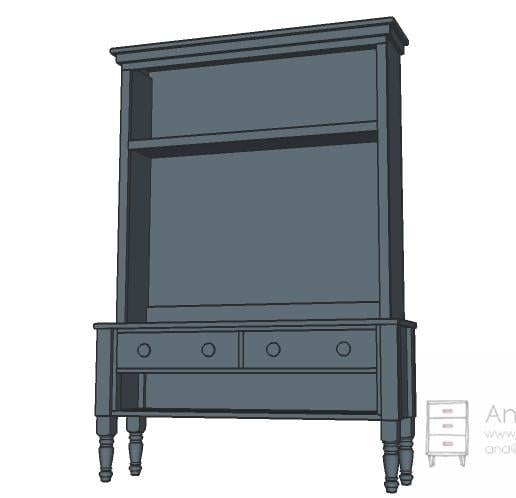


A media hutch for the turned leg media console. Features simple styling, large top shelf.
My TV sits on the Turned Leg Media Console and makes your flat panel pretty!

My TV sits on the Turned Leg Media Console and I absolutely love it! One of our readers asked for the matching hutch, so here goes! The hutch makes your flat panel pretty!
Preparation
2 – 8 foot 1×12 Boards
4 – 8 foot 1×2 Boards
1 – 8 foot 1×4 Board
1/2 sheet of 1/4″ plywood
2″ screws or 1 1/4″ pocket hole screws
2″ finish nails
1″ finish nails
wood filler
wood glue
Paint and Finishing Supplies
Tip Resistant Kit
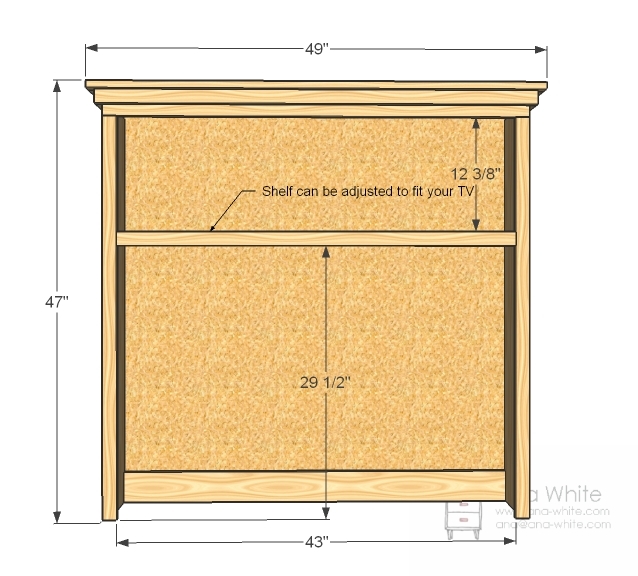
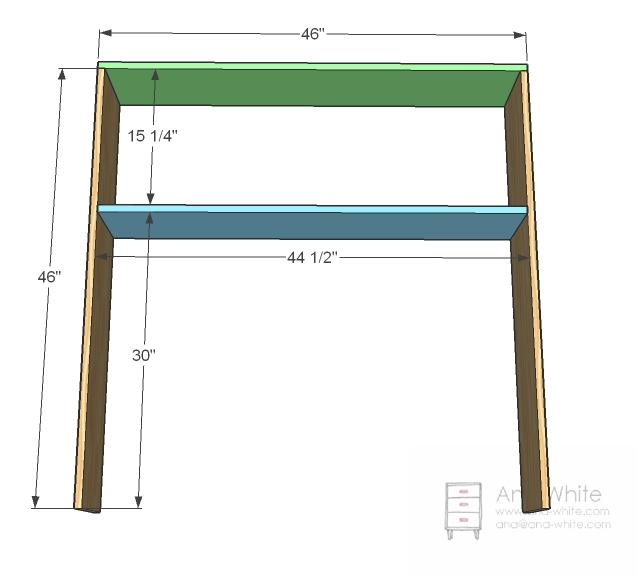
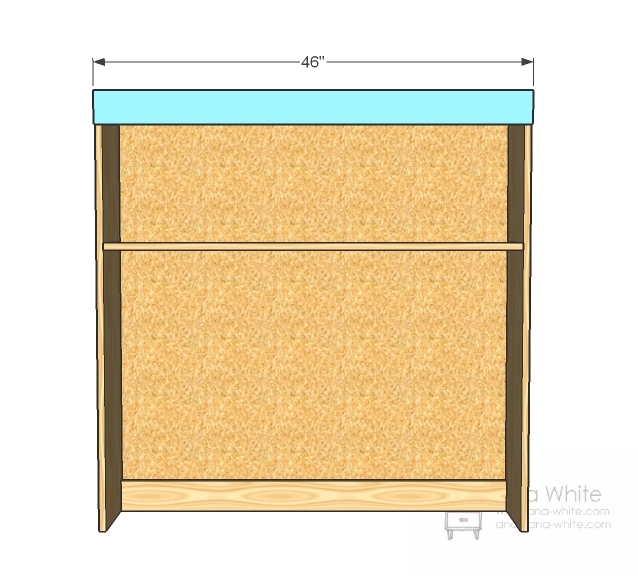
3 – 1×12 @ 46″ (Sides)
1 – 1×12 @ 44 1/2″ (Shelf)
1 – 1×4 @ 44 1/2″ (Bottom Support)
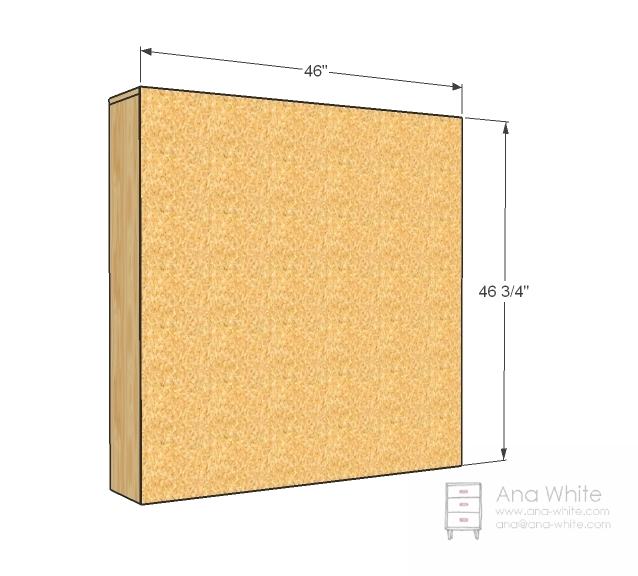
1 – 1/4″ plywood or paneling @ 46″ x 46 3/4″ (Back)
1 – 1×4 @ 46″ (Header)
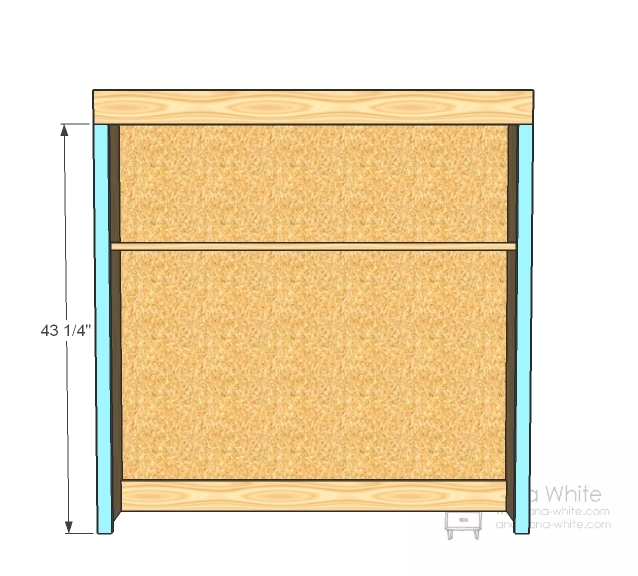
2 – 1×2 @ 43 1/4″ (Sides)
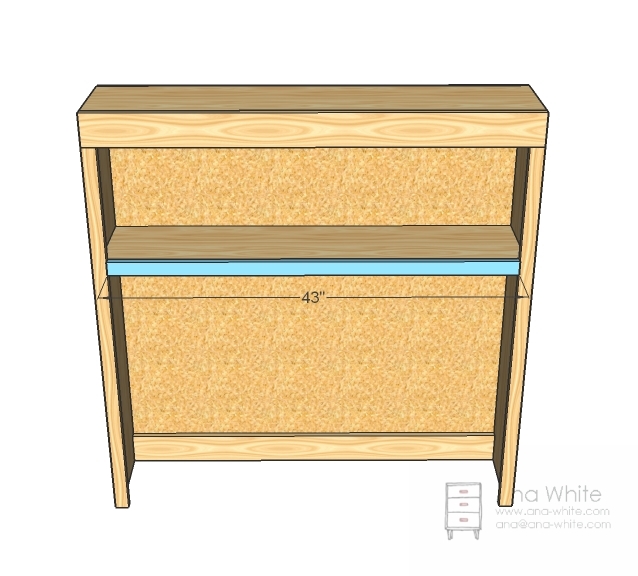
1 – 1×2 @ 43″ (Shelf Trim)
1 – 1×2 @ 47 1/2″ (Bottom Crown, Front)
4 – 1×2 @ 12 1/4″ (Crown, Sides)
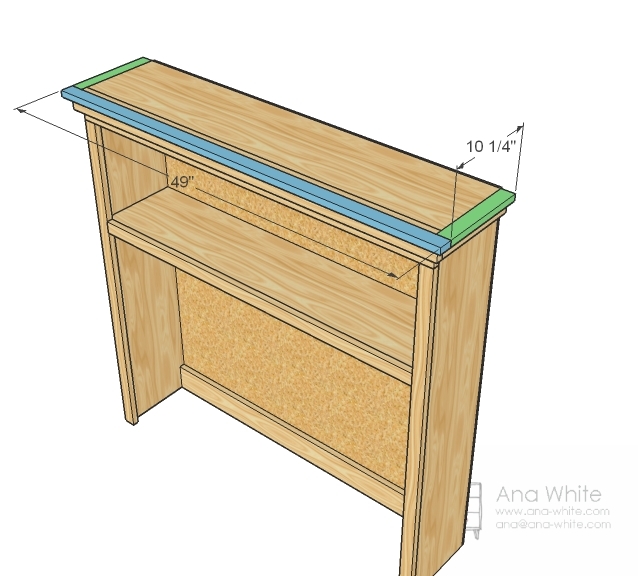
1 – 1×2 @ 49″ (Top Crown, Front)


Instructions
Step 1
Box
Build your box as shown in the diagram out of 1x12s. Note, you can use a different width board (ie 1×10 or 1×8) if your TV is slimmer and will take up less space. Use either pocket holes or 2″ screws and glue. Adjust for square.
You can also adjust the height of the shelf to fit your specific TV size.
Step 2
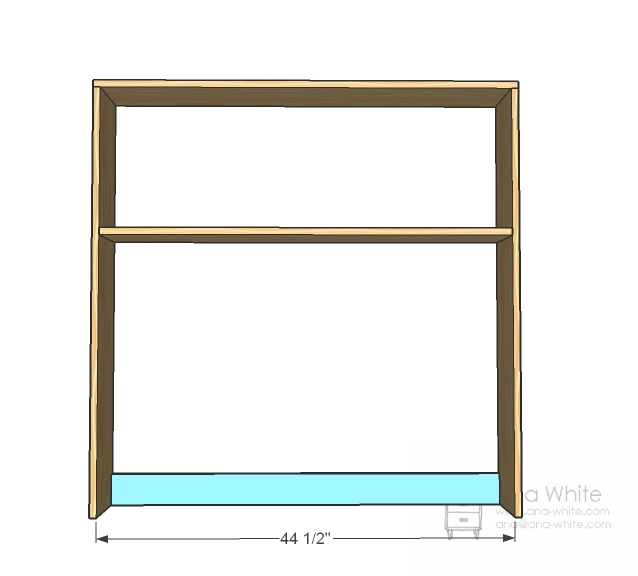
Base Support
After you have your box built, add a support (1×4) to the back as shown in the diagram to give you something to nail your plywood to and keep the back in line. Use pocket holes from the back or 2″ screws predrilled from the outsides and glue.
Step 3
Back
Tack the back on with finish nails and glue. One thing to note – when you nail into the bottom support, use 1″ nails and glue to keep from poking your nails through. Make sure you attach to the shelf to to make that shelf stronger. Make sure everything is very square – the back plywood will set everything and it will be hard to readjust after the glue dries. Possibly impossible.
Step 4
Header
Header. Attach the header to the front with 2″ finish nails and glue.
Step 5
Step 6
Shelf Trim
Now the shelf. Same thing, finish nails and glue.
Step 7

Bottom Crown
There are any number of ways that you can do crown. This is just the cheapest and easiest way. Attach 1x2s around the top, 3/4″ from the top, with finish nails and glue. Use the 1″ (or 1 1/4″ if you have them) nails here.
Step 8
Top Crown
Then add the top. Use 2″ finish nails through the face of the tops into the shelf. Do not forget the glue. It will hold everything in place.
Step 9
Safety
Hutches should be secured to the wall behind with a tip resistant kit to keep from tipping forward.