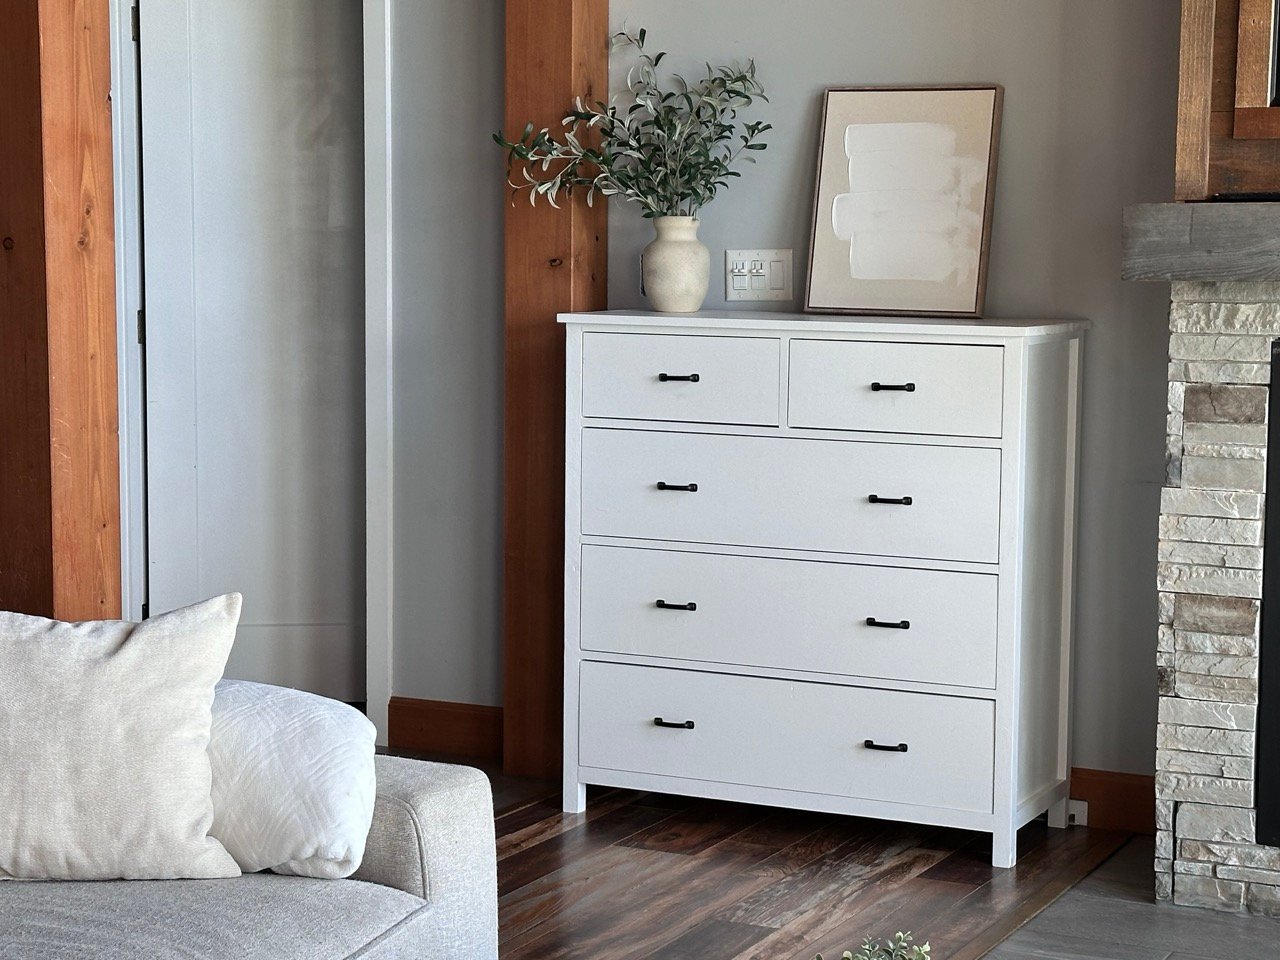


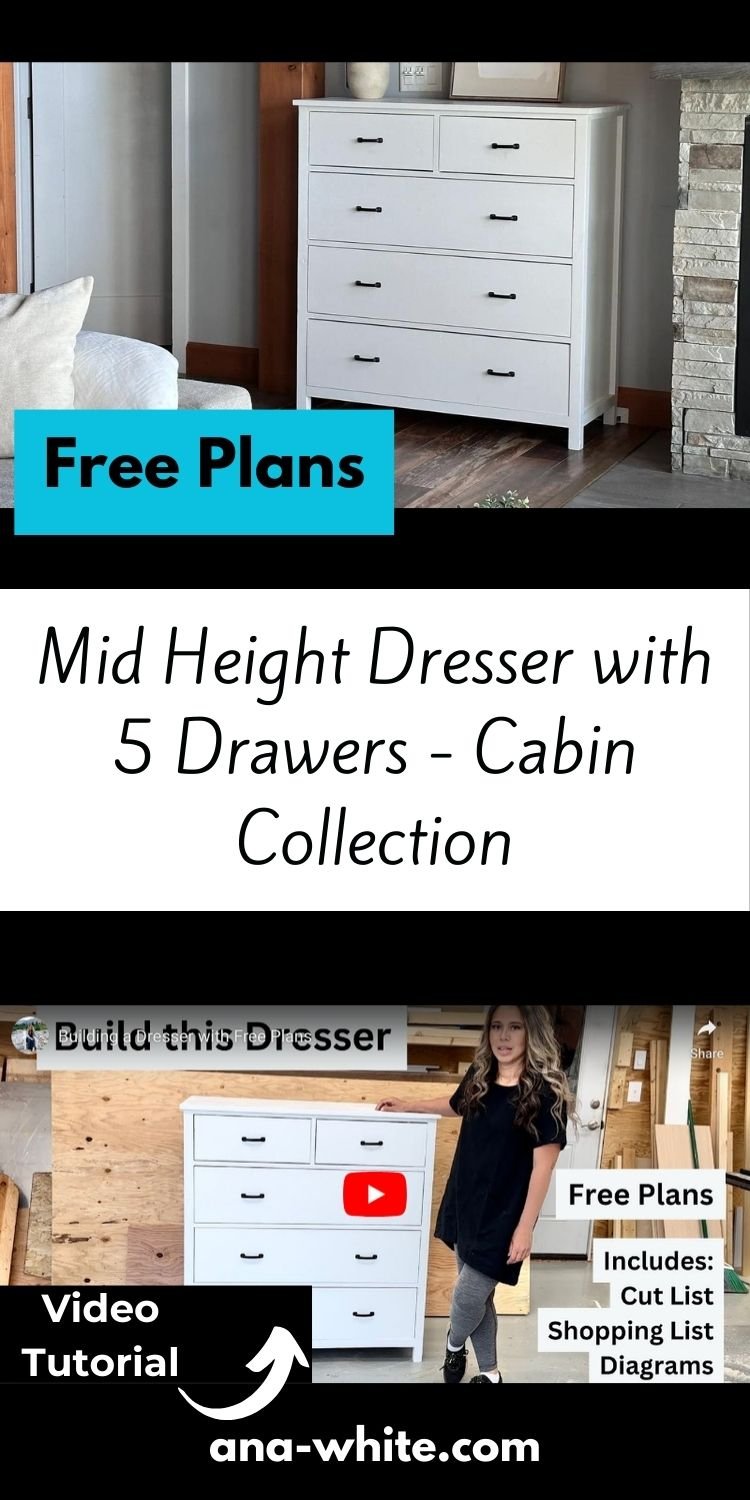
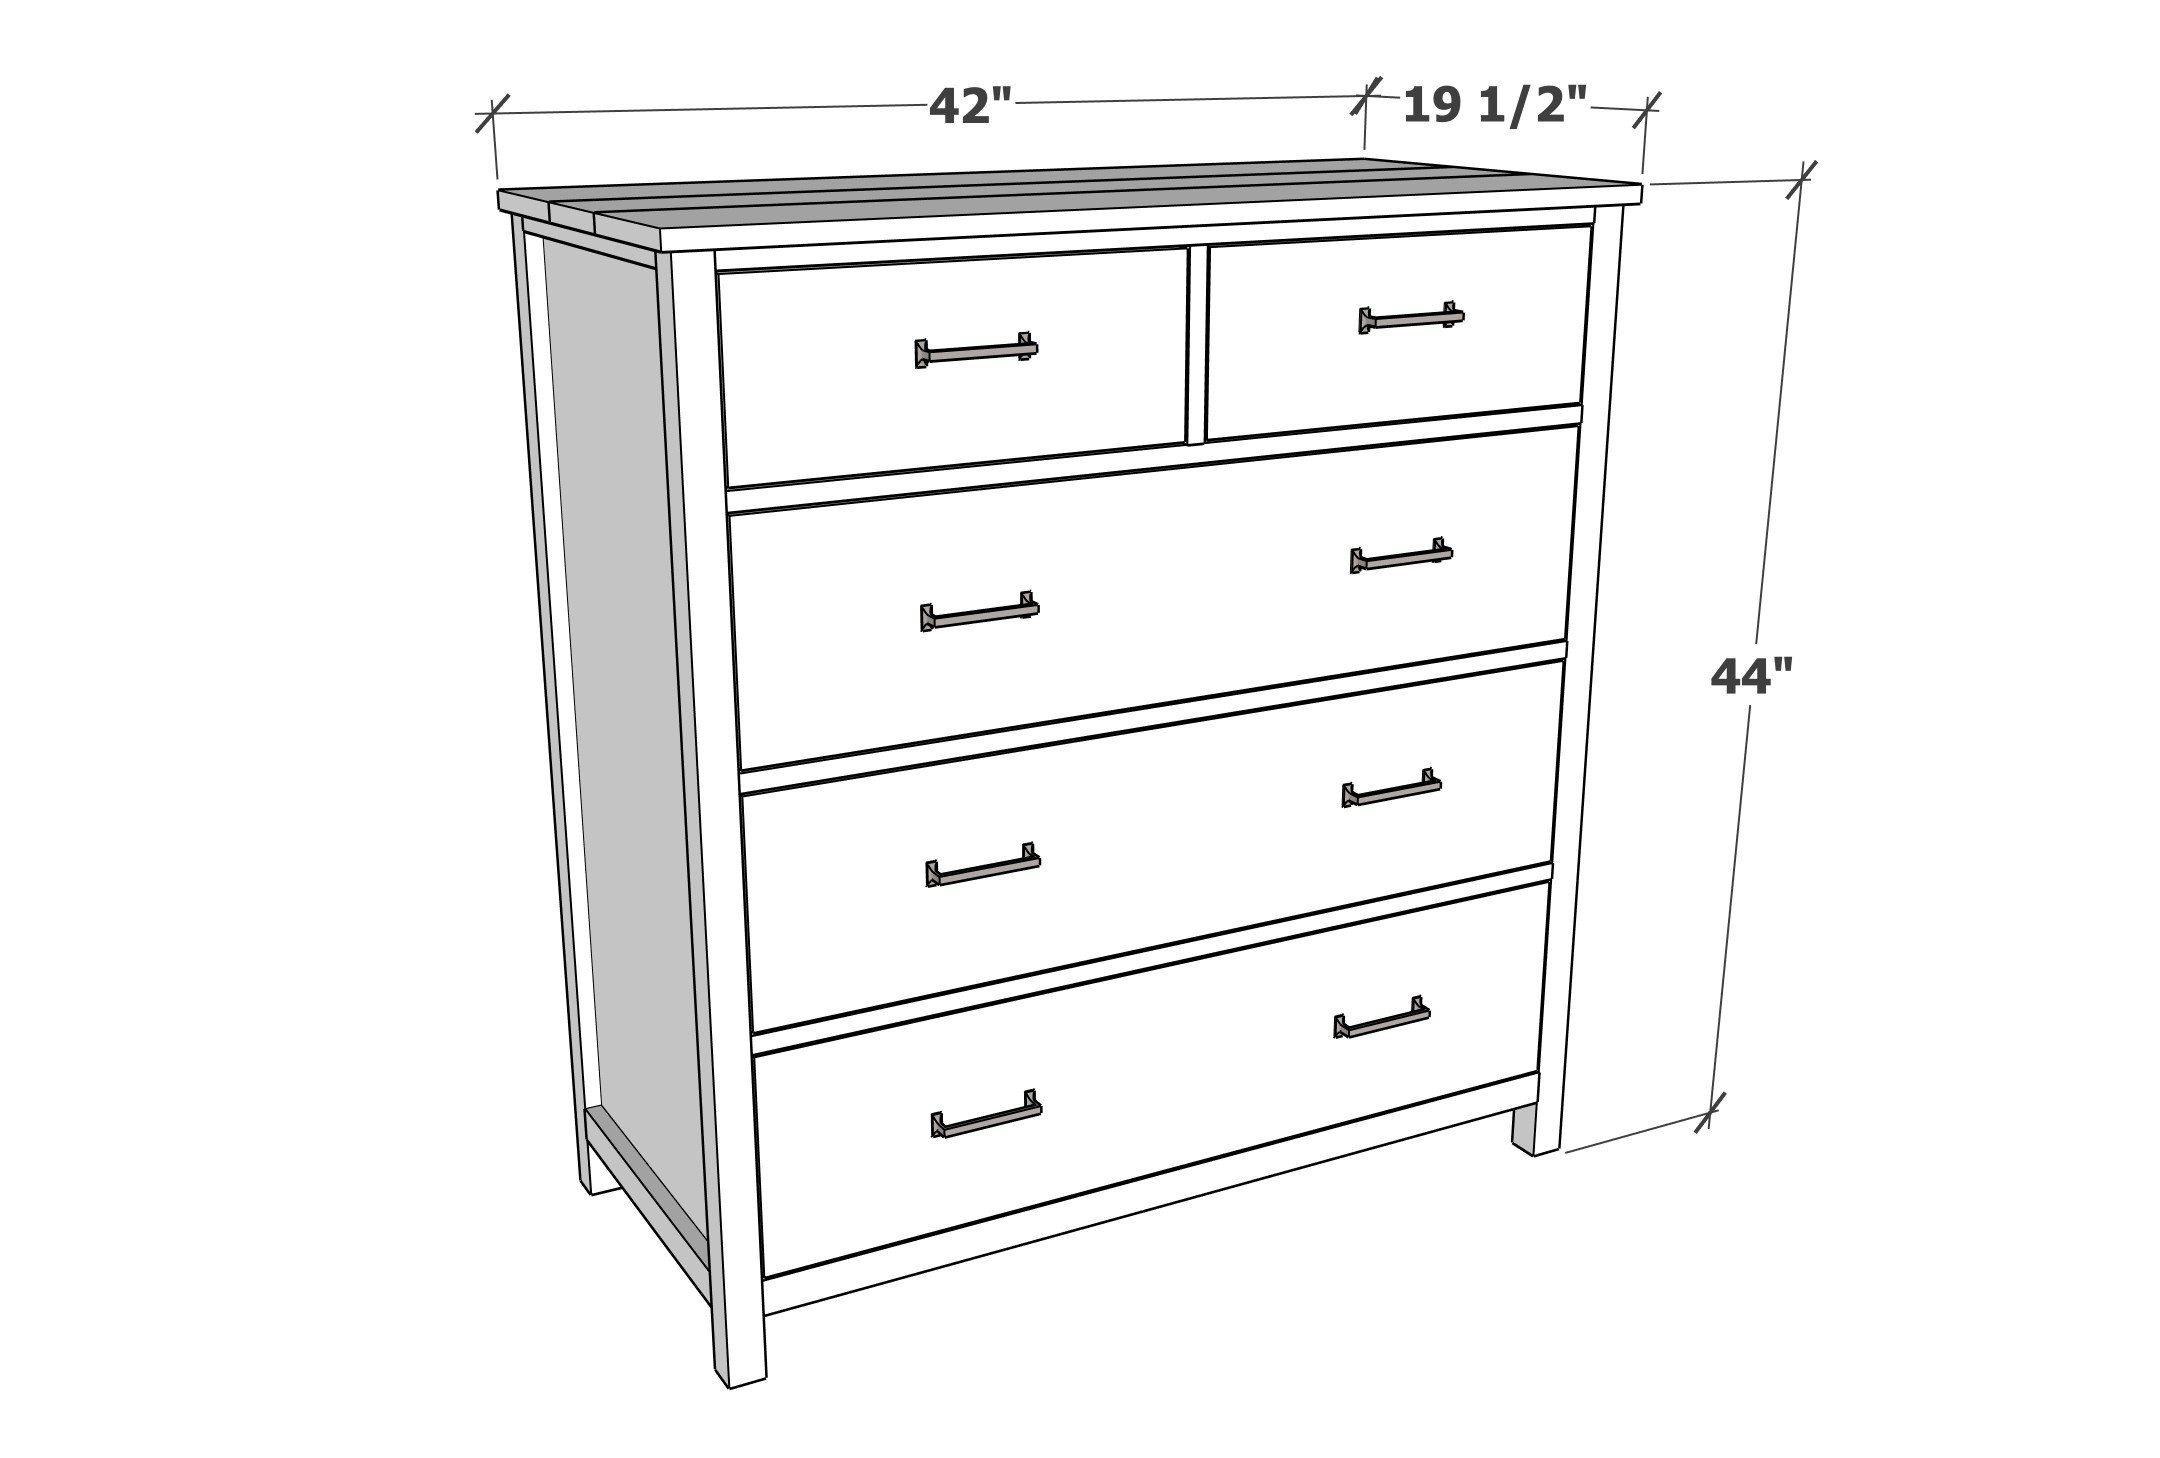
Free plans to build your own mid height dresser with five drawers. This solid wood dresser features two mid sized drawers and three large drawers, all in a compact footprint. The build style uses pine boards and half a sheet of 3/4" plywood. This is a free step by step plan with detailed diagrams, shopping and cut list - check it out and build today!

Why I Built this Dresser
There was a time when I dreaded building dressers, they are not as quick and easy as other storage projects, and you do need to take extra time and care to make sure the drawers slide smoothly.
But after building so many dressers, I've realized a few things -
- Dressers are super easy to paint or stain - you just are finishing the exterior - no reaching inside and painting open shelves. The extra time spent building the drawers is made up in the simplified finishing process
- Dressers have the storage built in - so no spending money and time sourcing baskets or bins to fit in your open shelves
- Dresser hide it all, so you don't have to coordinate the contents
- Dressers are super functional and powerhouse storage centers in the home.
This dresser I built for my son. It's a great joy to be able to build him a high quality, very sturdy dresser, that will last, and looks great. The good news is I can also build him matching beds, nightstands, whatever he wants - and match the style and finish for a complete set for his room.
I love the size of this dresser - it is a smaller footprint, and a little taller, but not so tall that the upper drawers aren't reachable. The top surface can still be used as a shelf too. The two smaller drawers are perfect size for socks and underwear. The three larger drawers are perfect for pants and shirts.
How I Built this Dresser
This dresser wasn't hard to build - it did take some time, about three days, working on it for a few hours a day. The painting part was very fast, as all I painted was the exterior. Here's a quick video showing how I built this dresser:
More Plans in This Collection
We love this style of plan so much, we made many matching plans! Here's what we recommend:
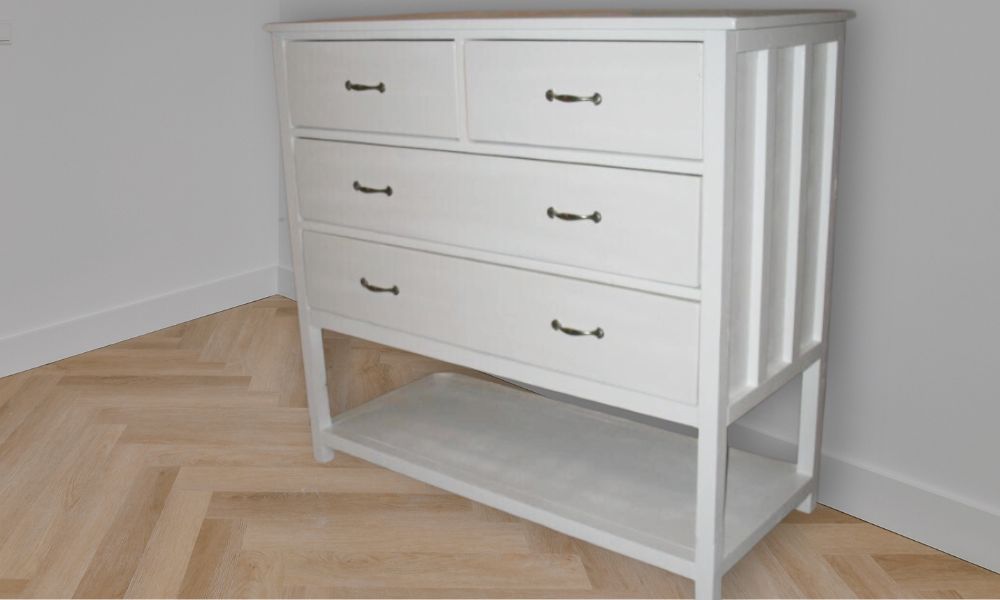
Mid height dresser with open bottom shelf - this dresser is very similar to the dresser in this plan, but with an open bottom shelf.
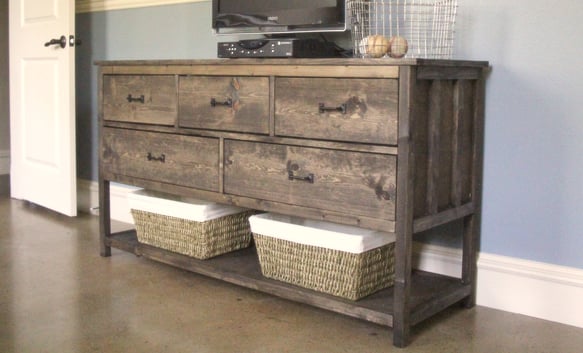
Wide dresser with open bottom shelf - this dresser is similar in construction style, but wider with an open bottom shelf.
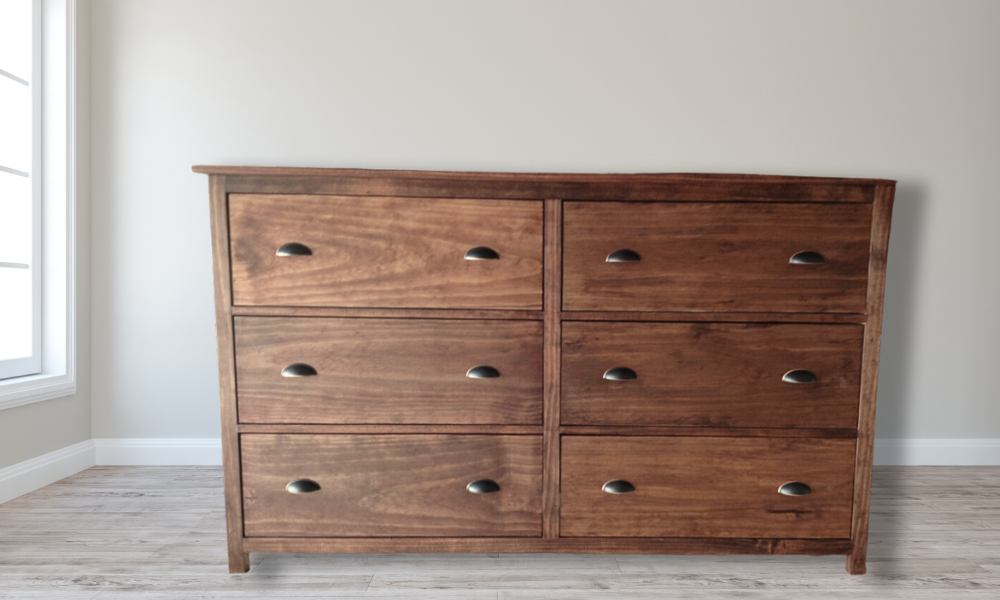
Wide 6 Drawer Dresser - for all the storage, this wide dresser features six big drawers and a large top surface.
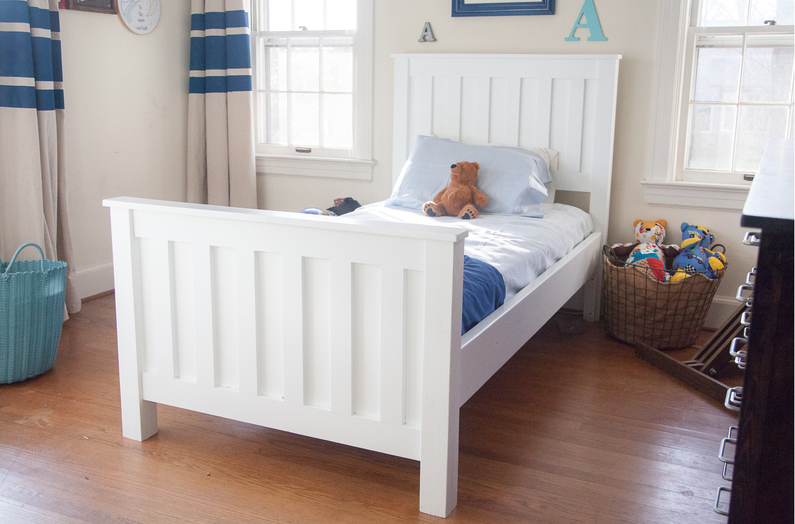
Panel Bed -This bed is the perfect pairing for this dresser
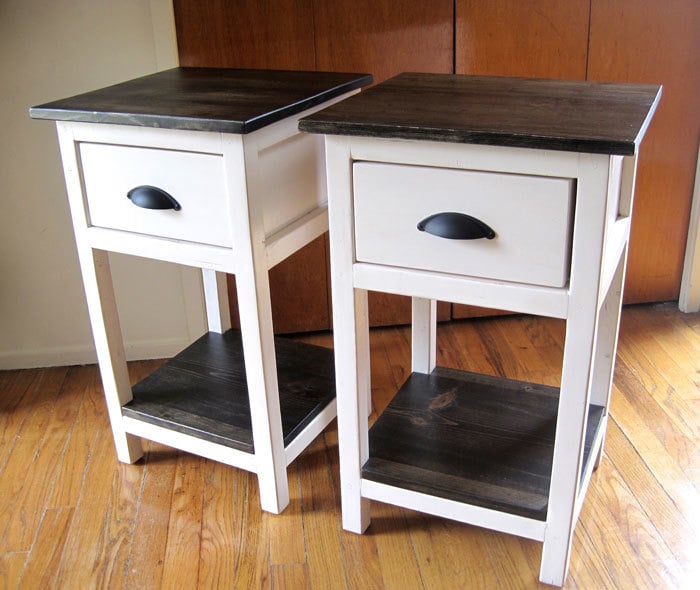
These Nightstands are built using the same materials and style
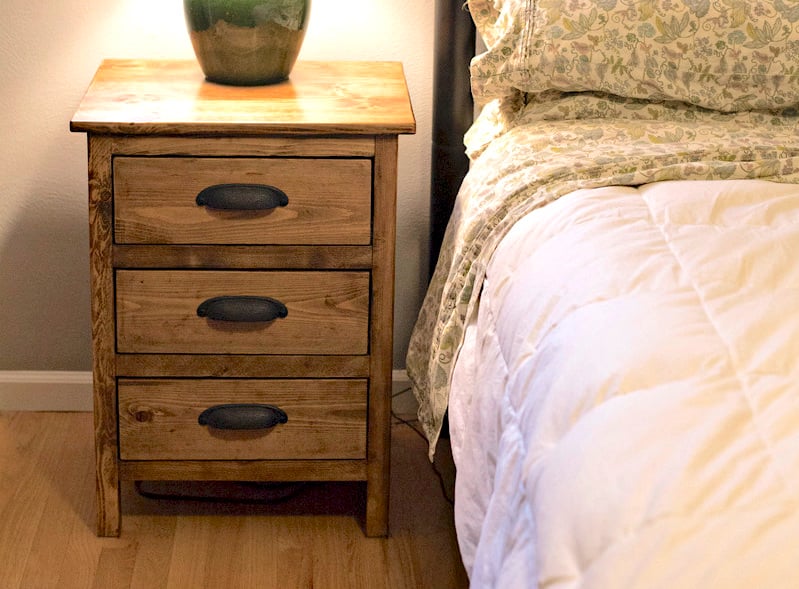
Need more drawers? This nightstand with three drawers uses the same materials and building style.
Free Plans to Build Your Own Mid Height 5 Drawer Dresser
Love this dresser? Make it yours and build it with free plans below.
Pin For Later!
Preparation
- 3 - 2x2 @ 8 feet long
- 4 - 1x2 @ 8 feet long
- 1 - 3/4" plywood panel, 48" x 48"
- 12 linear board feet of 1x6
- 30 linear board feet of 1x8
- 10 linear board feet of 1x10
- 1 sheet of 1/4" plywood - I used underlayment (for drawer bottoms)
- 1-1/4" pocket hole screws (about 75)
- 2-1/2" pocket hole screws (I used 4)
- 1-1/4" and 3/4" brad nails
- wood glue
- 5 sets of 16" euro drawer slides (bottom corner mount, usually white in color)
- 8 handles or pulls
- edge banding in matching wood veneer (about 7 feet needed)
I used spruce for all 1x boards, I ripped a 2x6 into three pieces for the 2x2s since I couldn't find straight 2x2s.
Dresser Frame
- 4 - 2x2 @ 43-1/4" - legs
- 4 - 1x2 @ 14" - side panel top and trim
- 2 - 3/4" plywood @ 14" x 39-3/4" - side panels
- 2 - 2x2 @ 38" - front frame, bottom
- 6 - 1x2 @ 38" - front frame
- 2 - 1x2 @ 7-1/2" - front frame
- 1 - 3/4" plywood @ 17-1/2" x 42" - top
Drawers
- 8 - 1x6 @ 16" - small drawers sides (could also use 1x4 boards)
- 2 - 1/4" plywood @ 16" x 17-1/2" - smaller drawers bottom
- 2 - 1x8 @ 18-3/8" - drawer face, measure and cut to fit
- 6 - 1x8 @ 16 - larger drawer sides
- 6 - 1x8 @ 35-3/8" - larger drawers front and back
- 3 - 1/4" plywood @ 16" x 36-7/8"- larger drawer bottoms
- 3 - 1x10 @ 37-3/4" - drawer face, measure and cut to fit


After building the dresser in the video, I changed up the steps to make it easier to build. Please follow the steps here for the recommended building process.
For long term durability and more professional results, I recommend using a pocket hole joinery system for wood joints. Here is a video with tips for using a pocket hole jig:
Instructions
Step 1
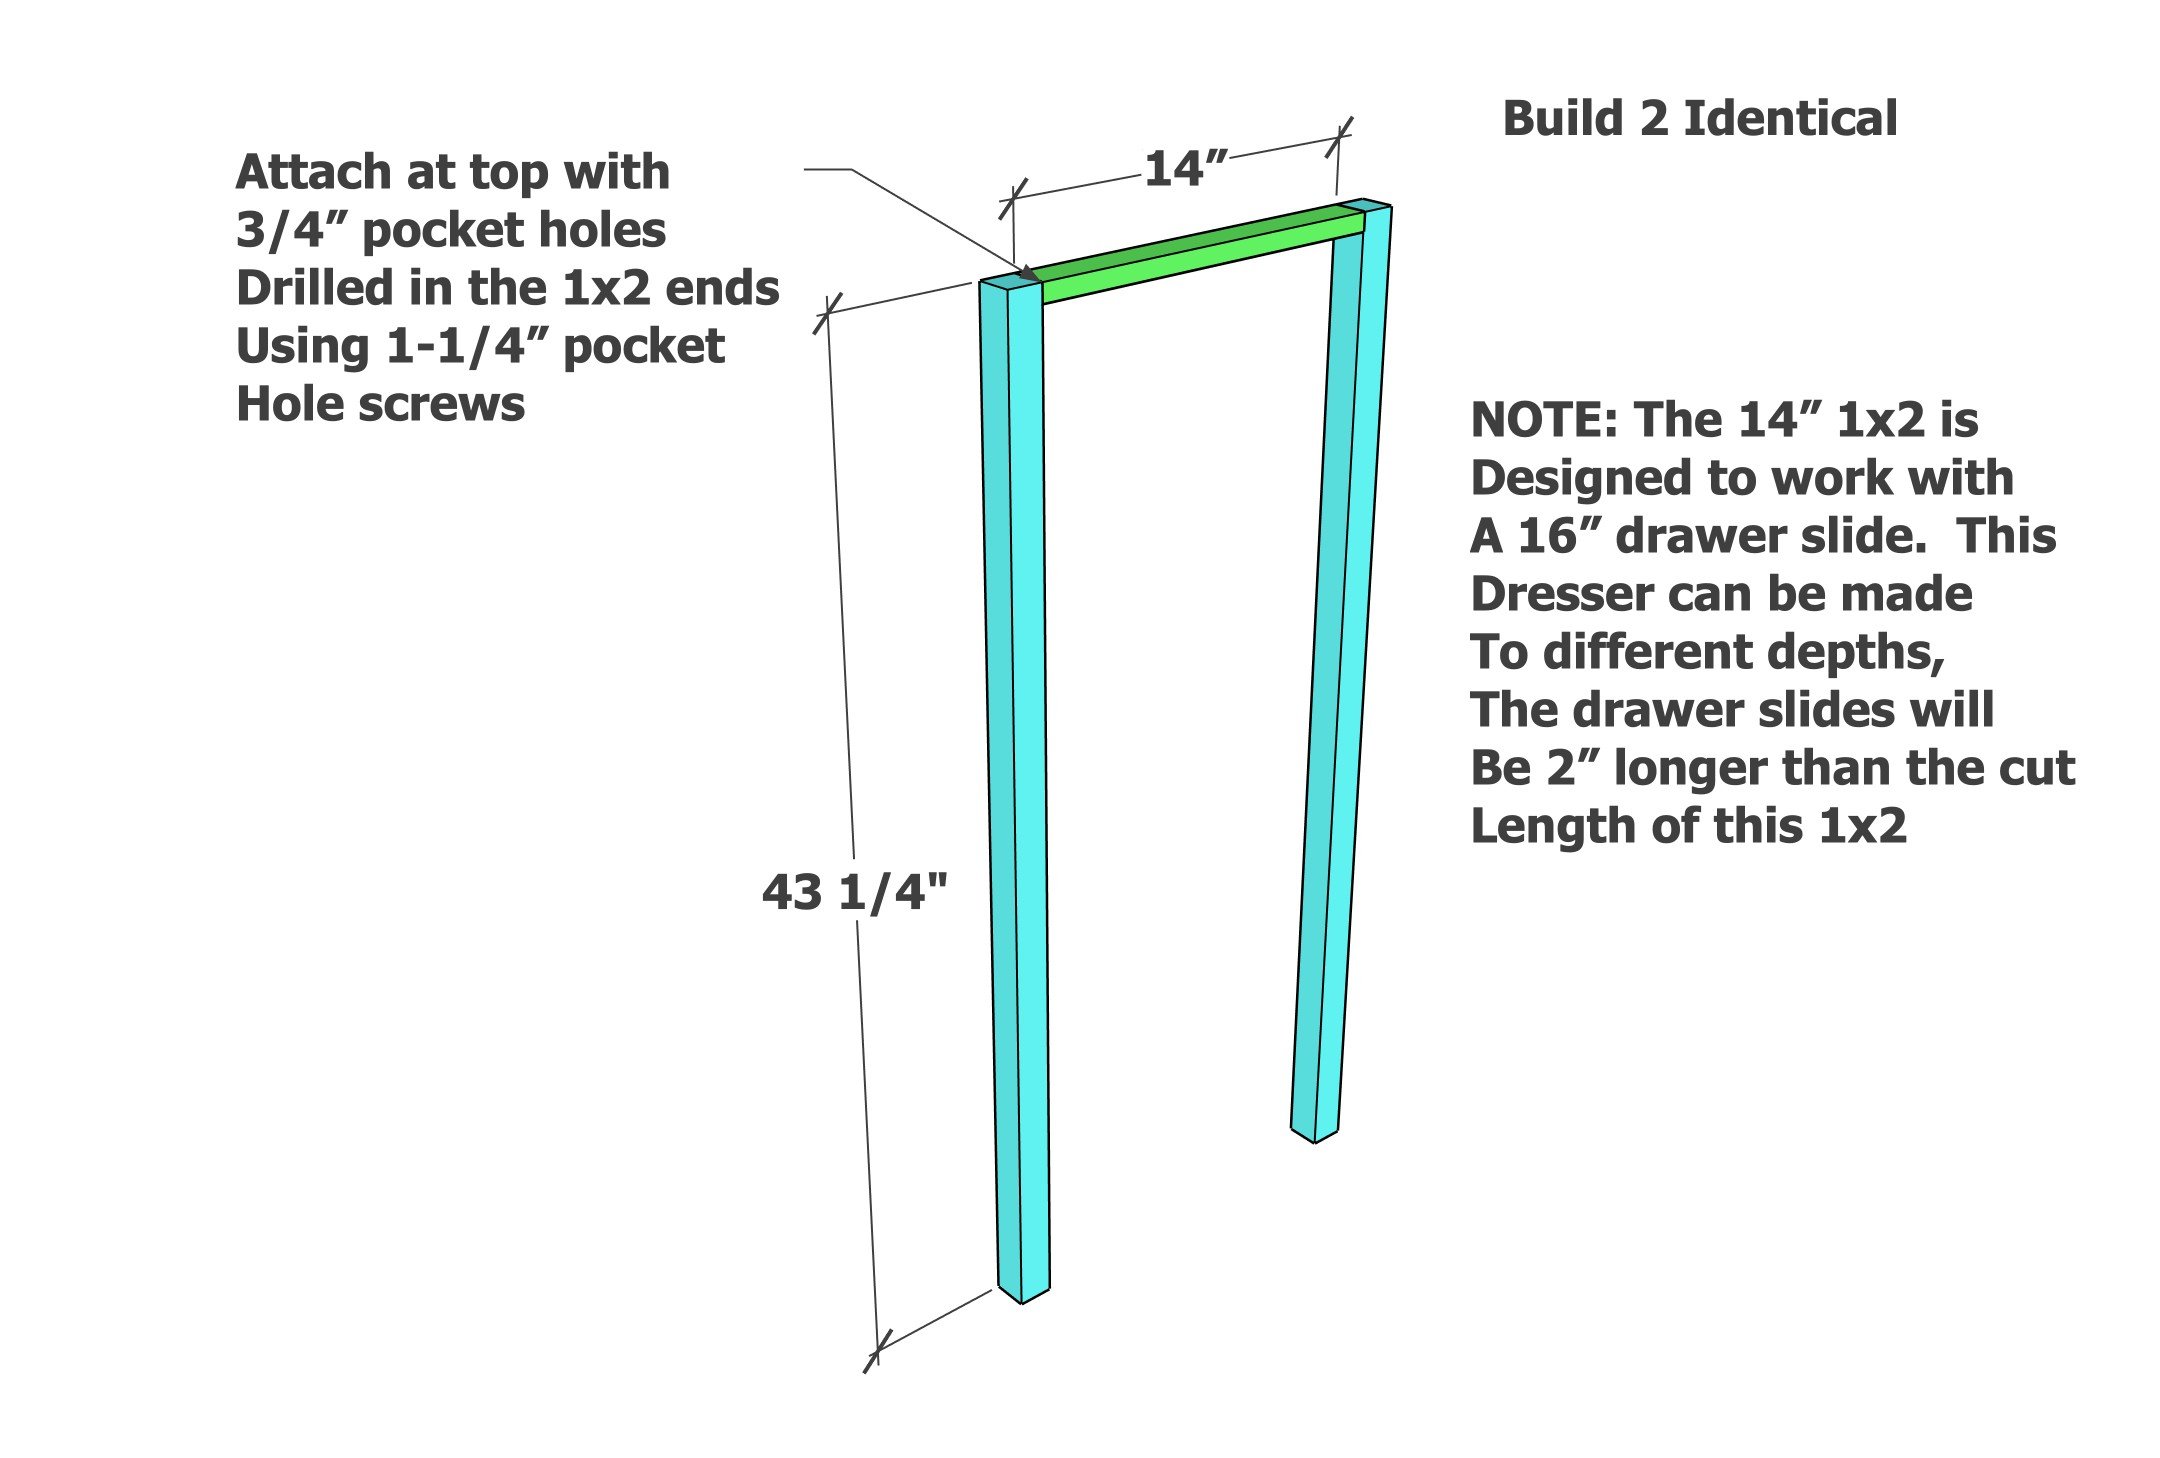
Build the frame for the sides by attaching the 1x2 to the top of the 2x2s as shown. Place the pocket holes on the top.
NOTE: I only used one pocket hole and glue for my joints. This is plenty strong, as there will be many pocket holes in the plywood panel to reinforce.
Step 2
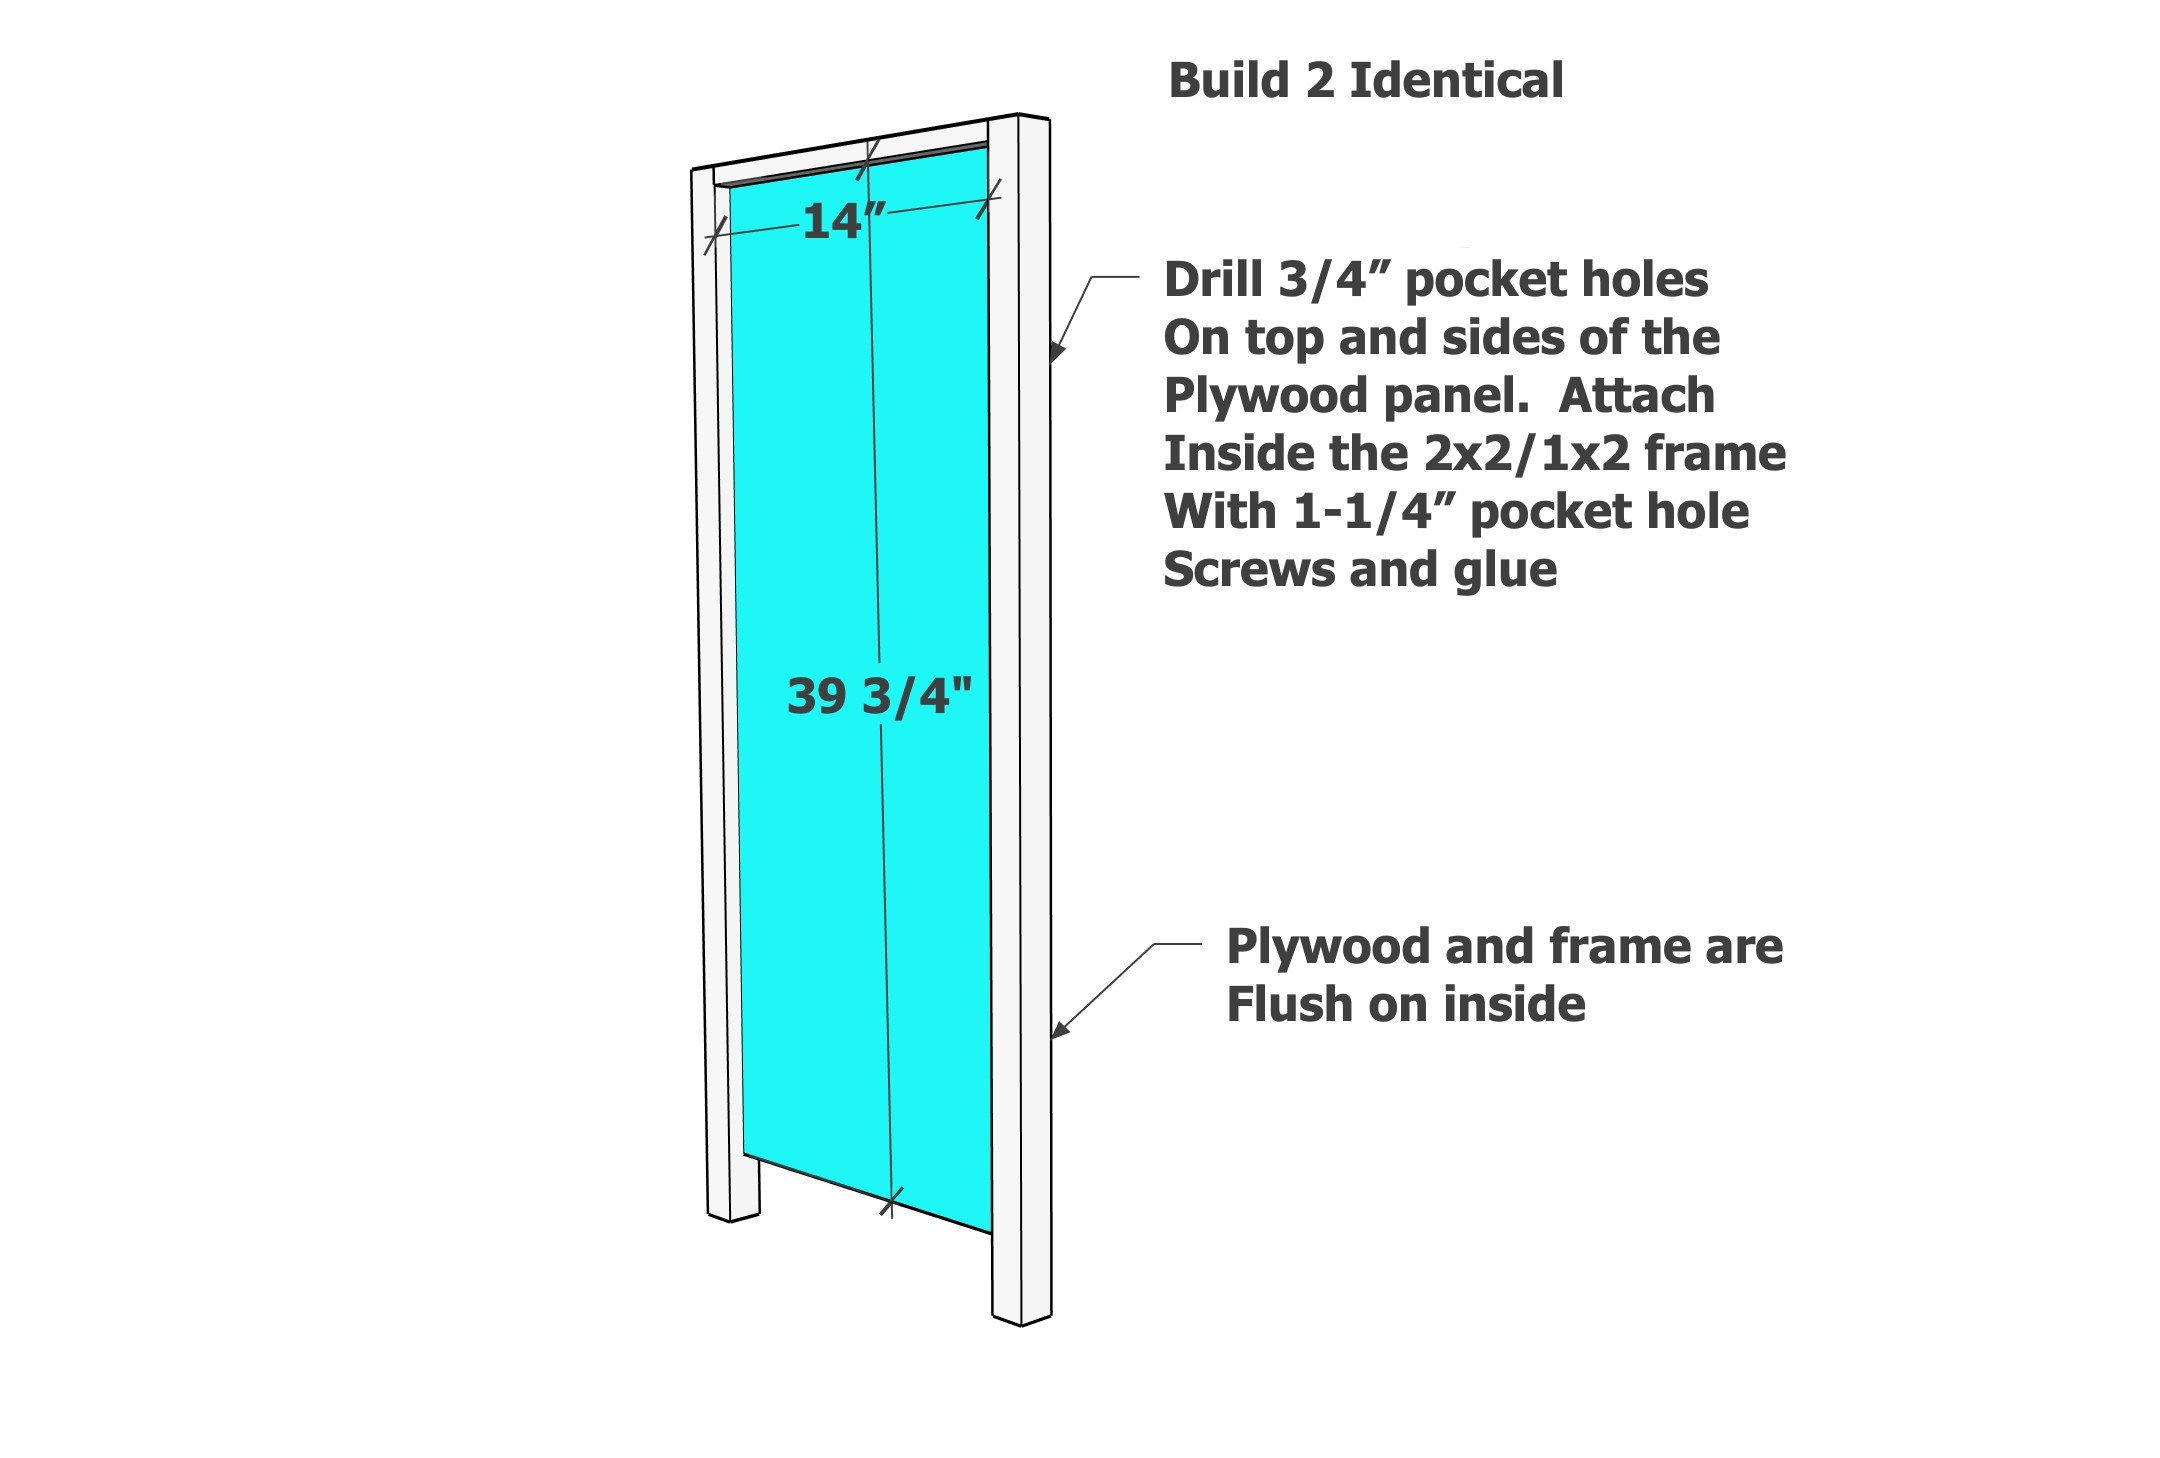
Rip the 3/4" plywood along the direction of the wood grain into two strips, 14" wide. Save the remaining piece for the top of the dresser. Cross cut to the height needed. Drill 3/4" pocket holes along top and side edges and attach with glue inside the frame built in step 1.
Step 3
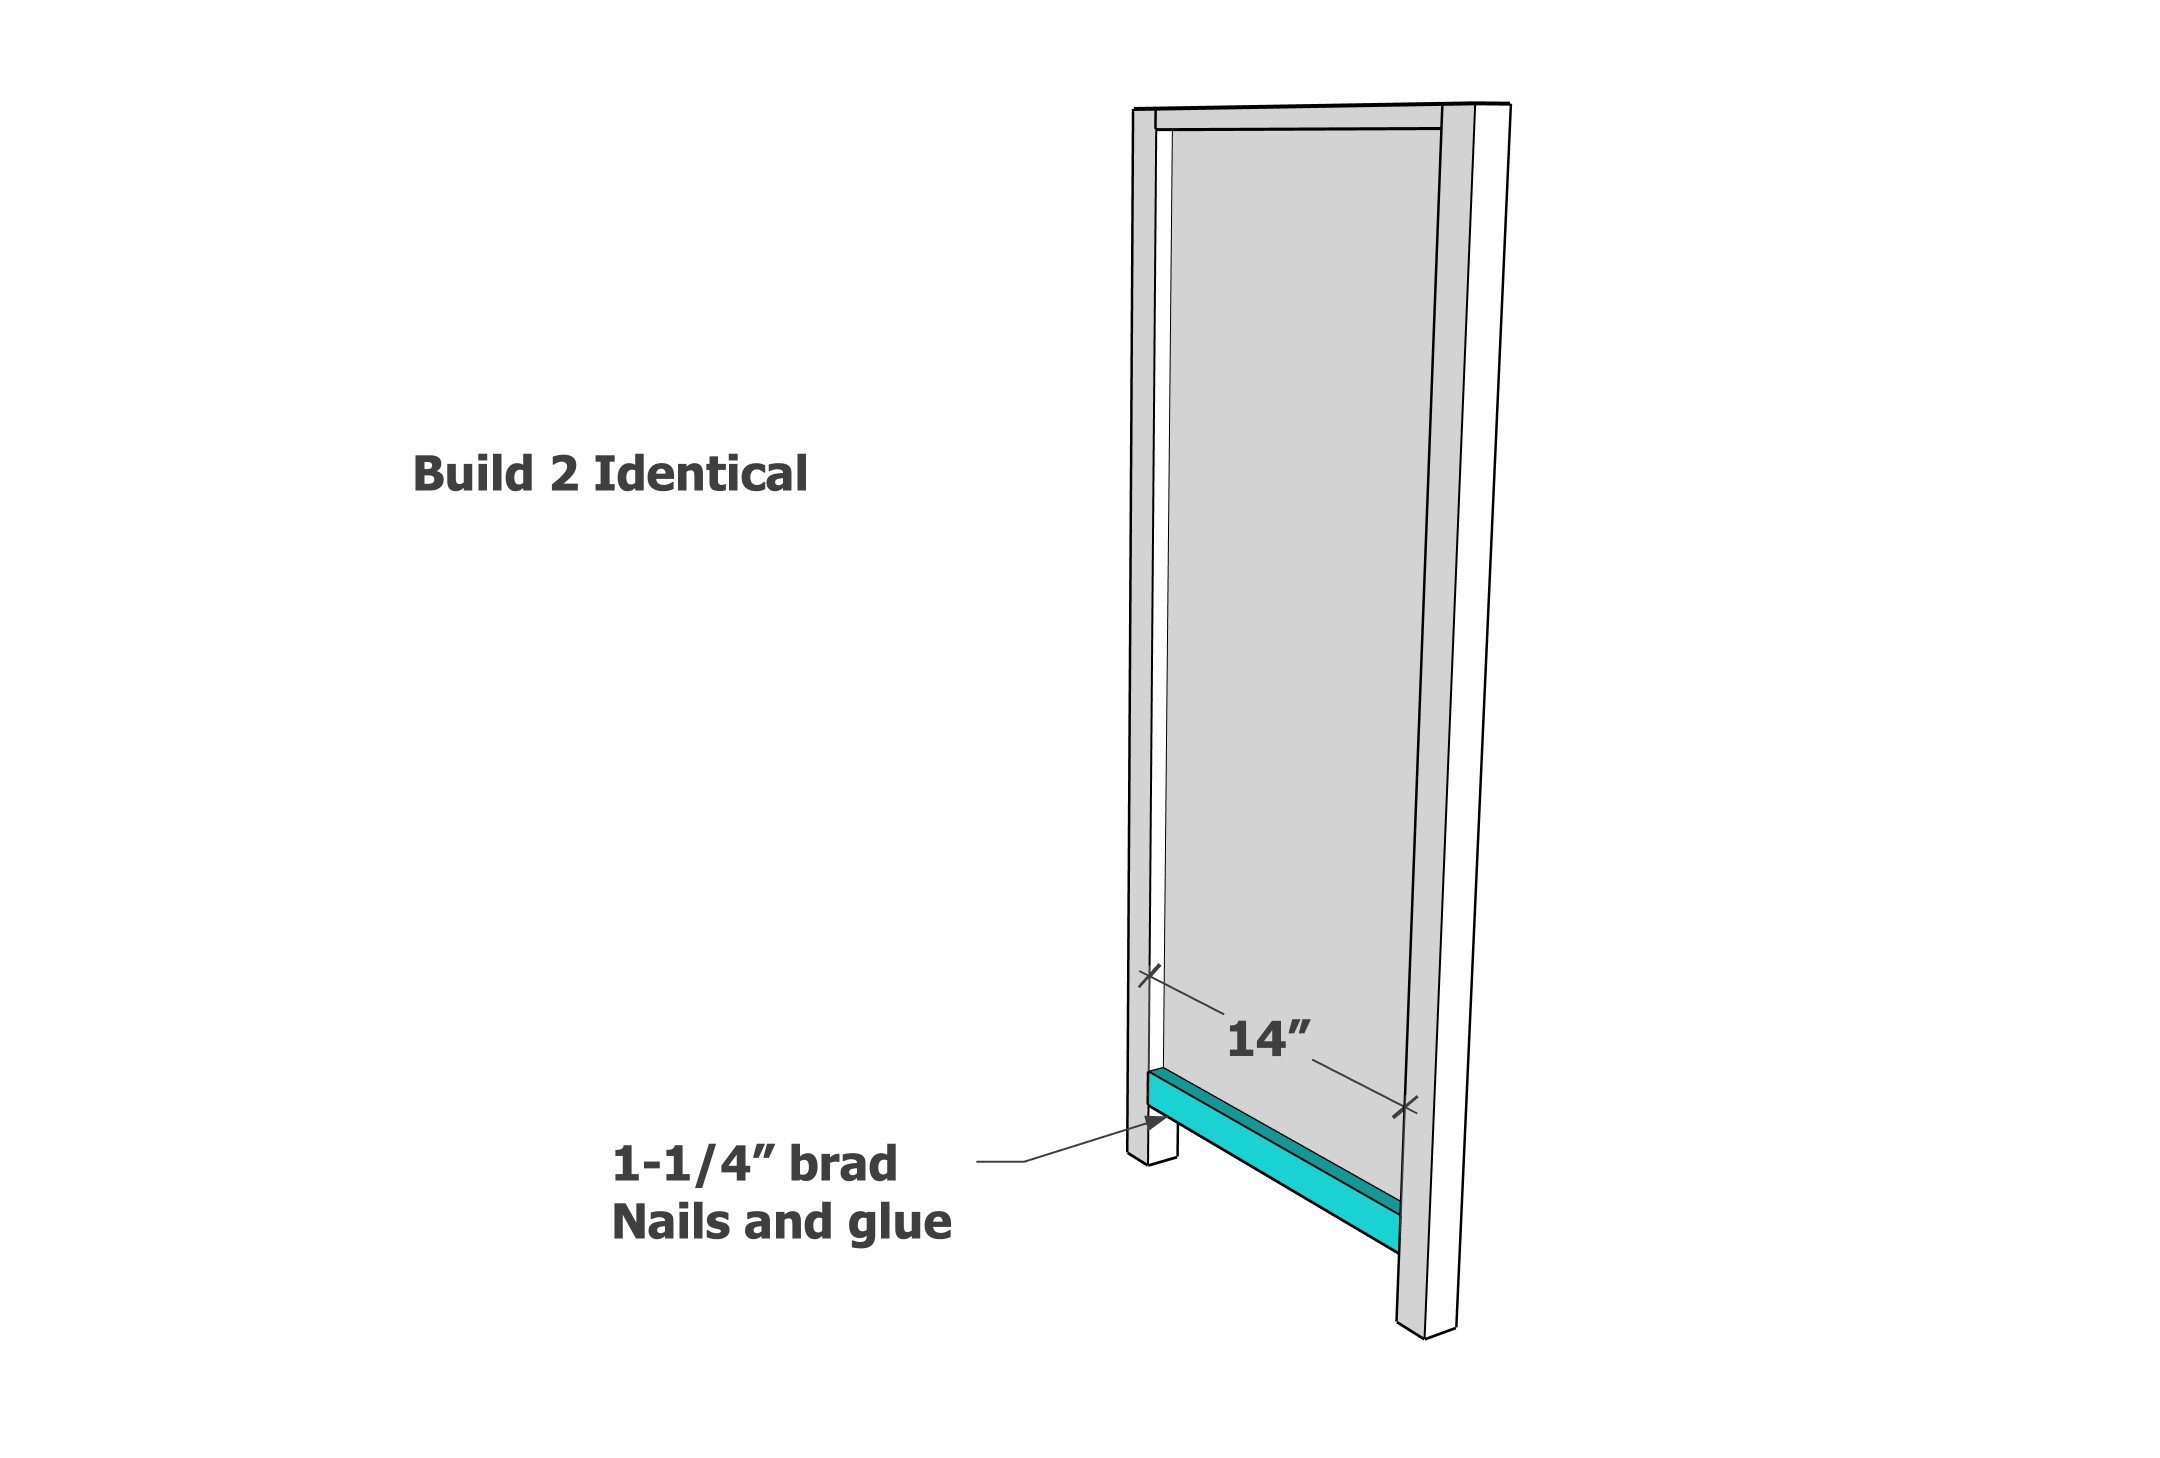
Attach the remaining 1x2 to the bottom with 1-1/4" brad nails and glue.
Step 4
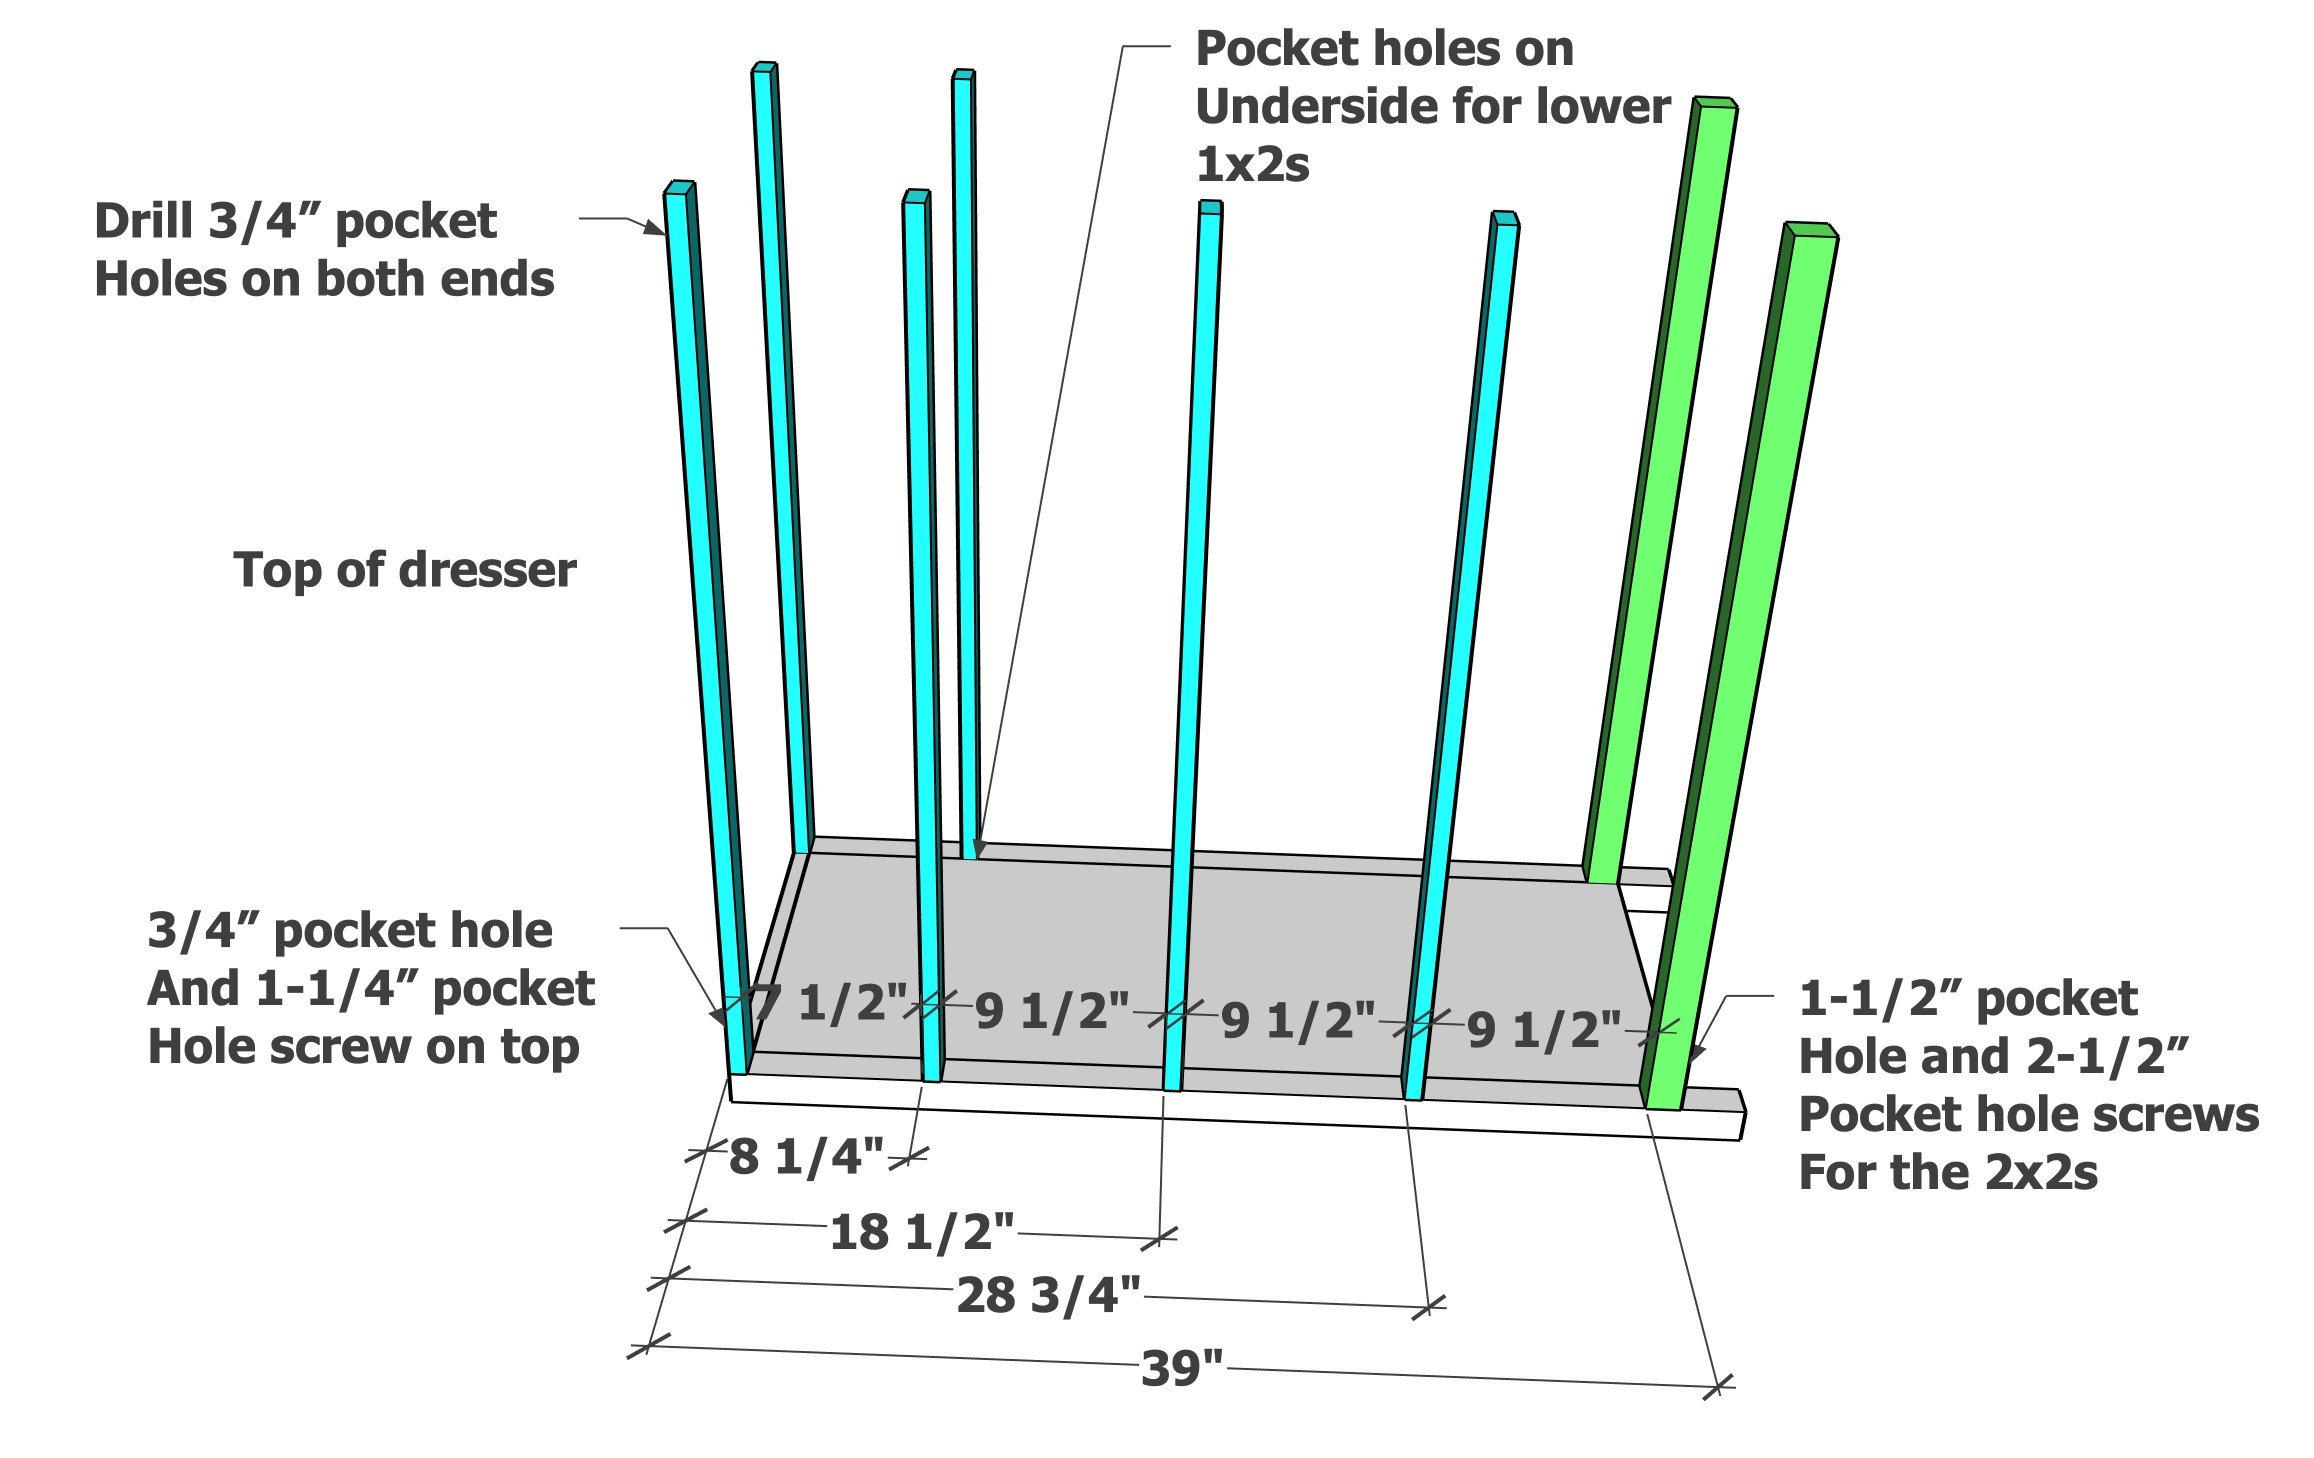
Attach the frame boards as shown. It is very important that these boards are placed accurately, as they will be between the drawer faces.
I used one pocket hole and glue for all joints.
For the bottom 2x2 to 2x2 joint, switch to a 1-1/2" pocket hole and 2-1/2" pocket hole screw.
Step 5
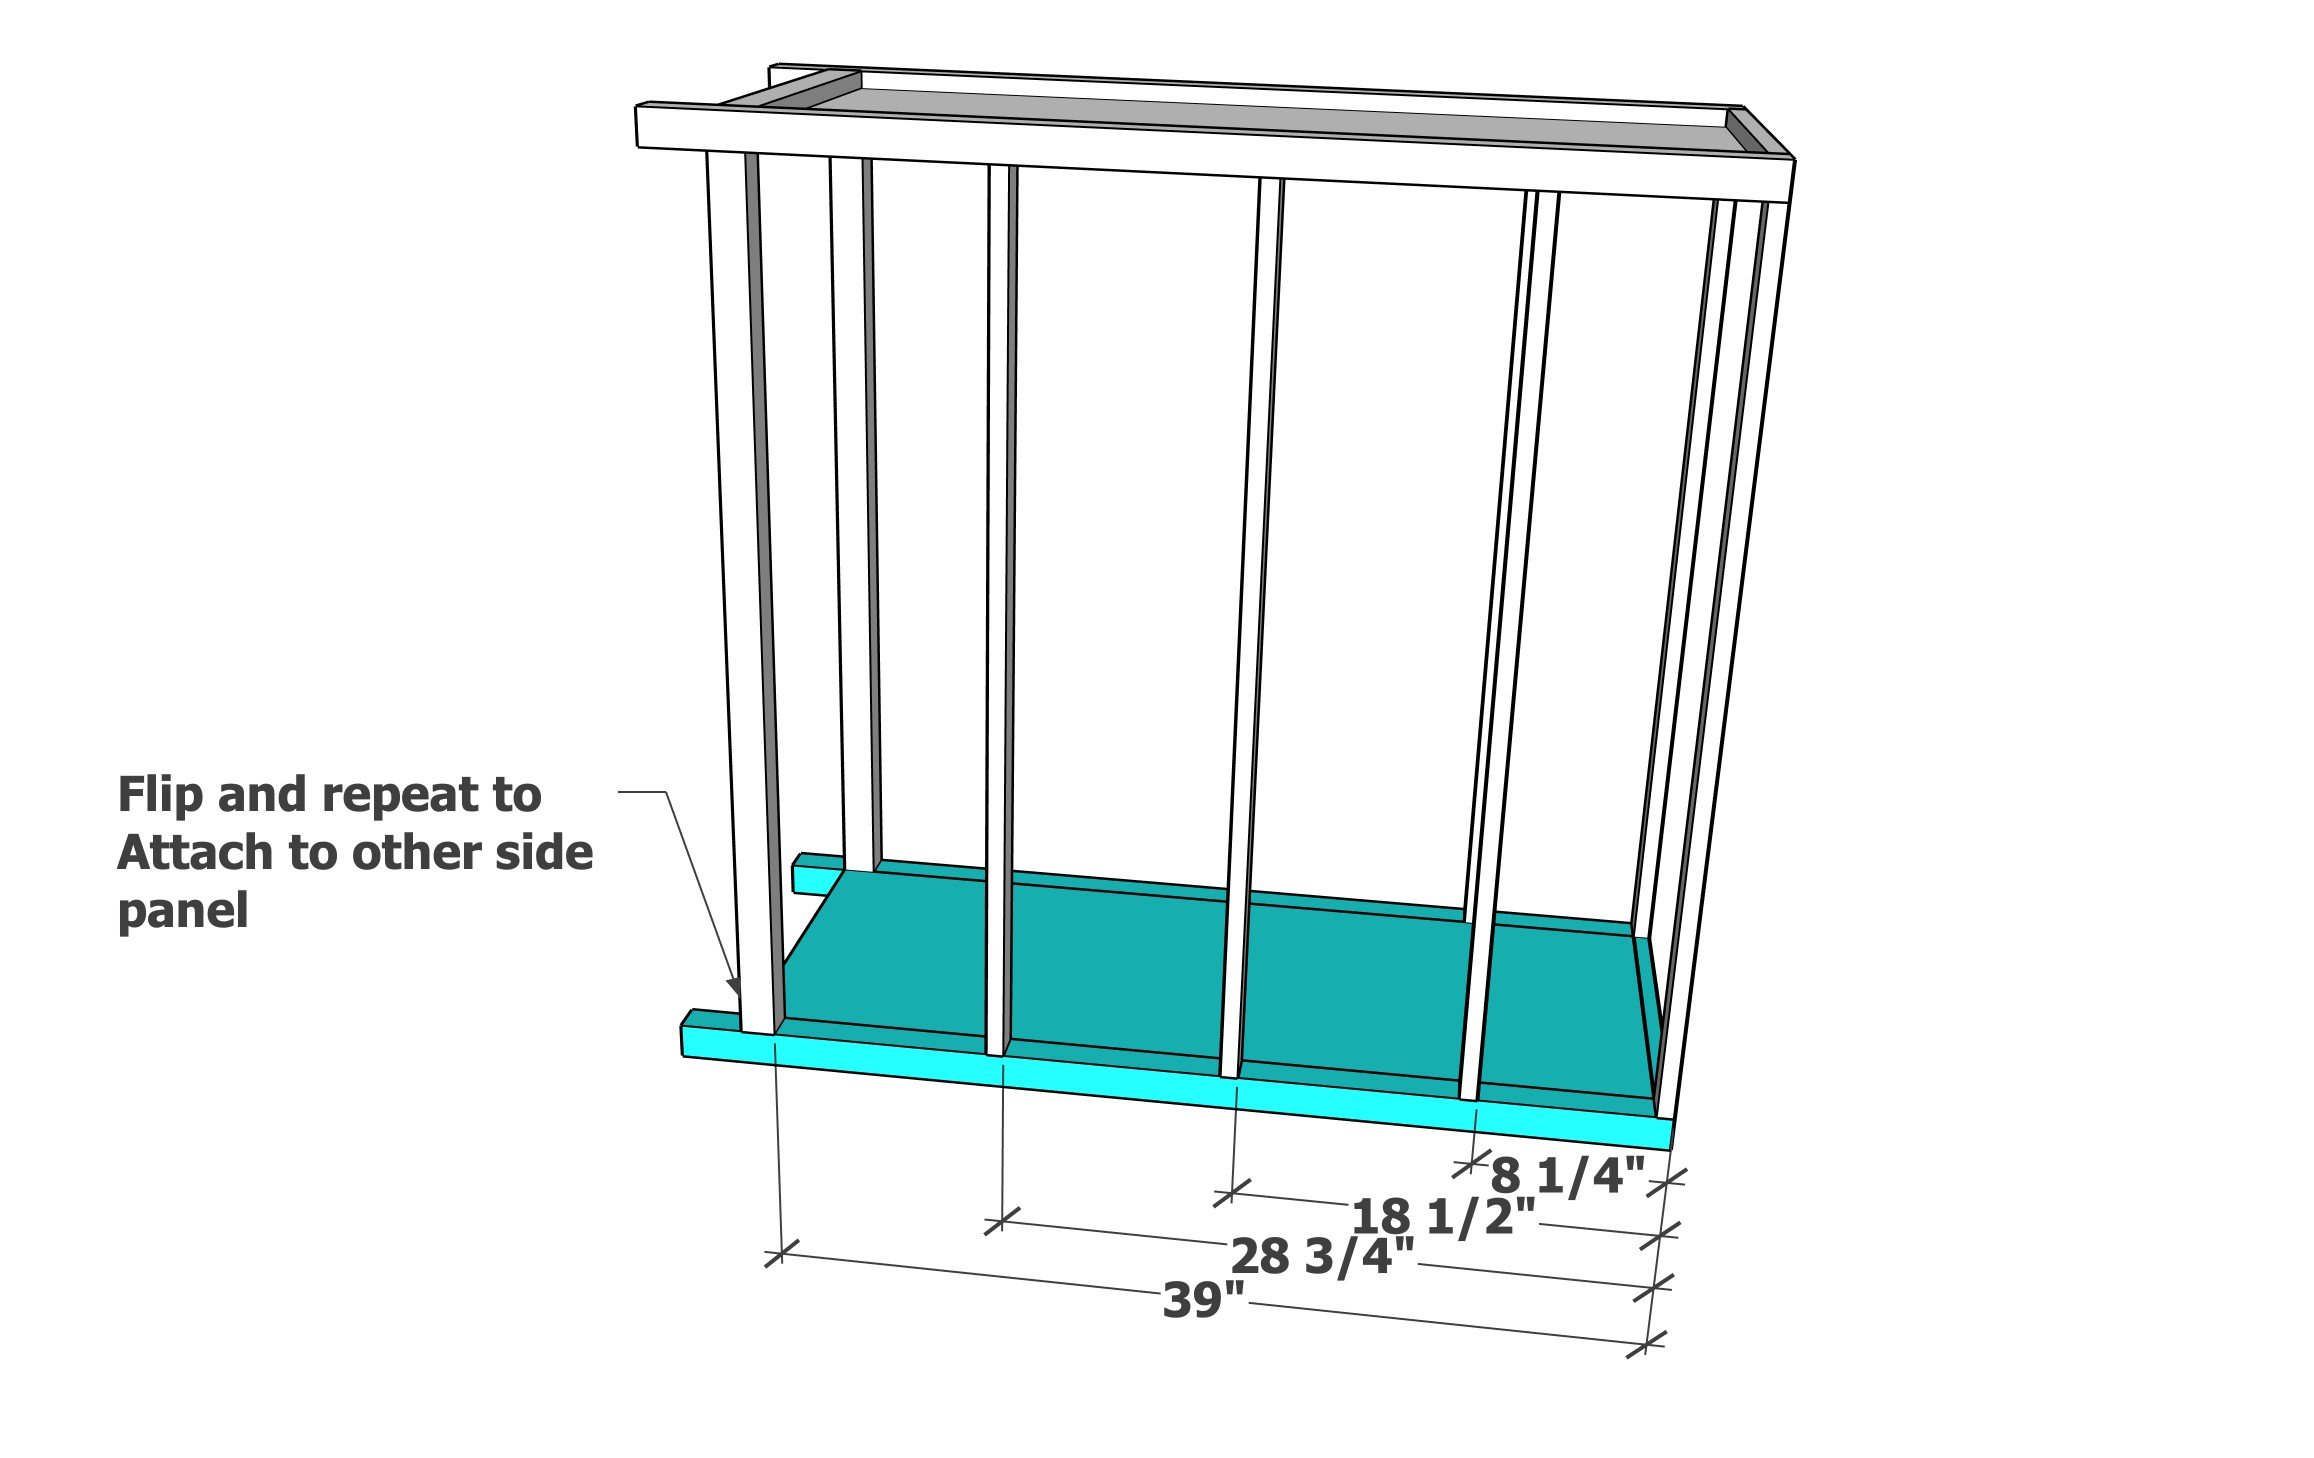
Flip and repeat to the attach to the second side panel.
Step 6

Carefully measure out the location of the center divider and attach with brad nails and glue.
Step 7
Cut the top and apply edge banding to the outer edges with an iron. Here is a my video tutorial on applying edge banding.
NOTE: I used a 1x top in for my dresser, I used one 1x6 and two 1x8s joined edge to edge with pocket holes.
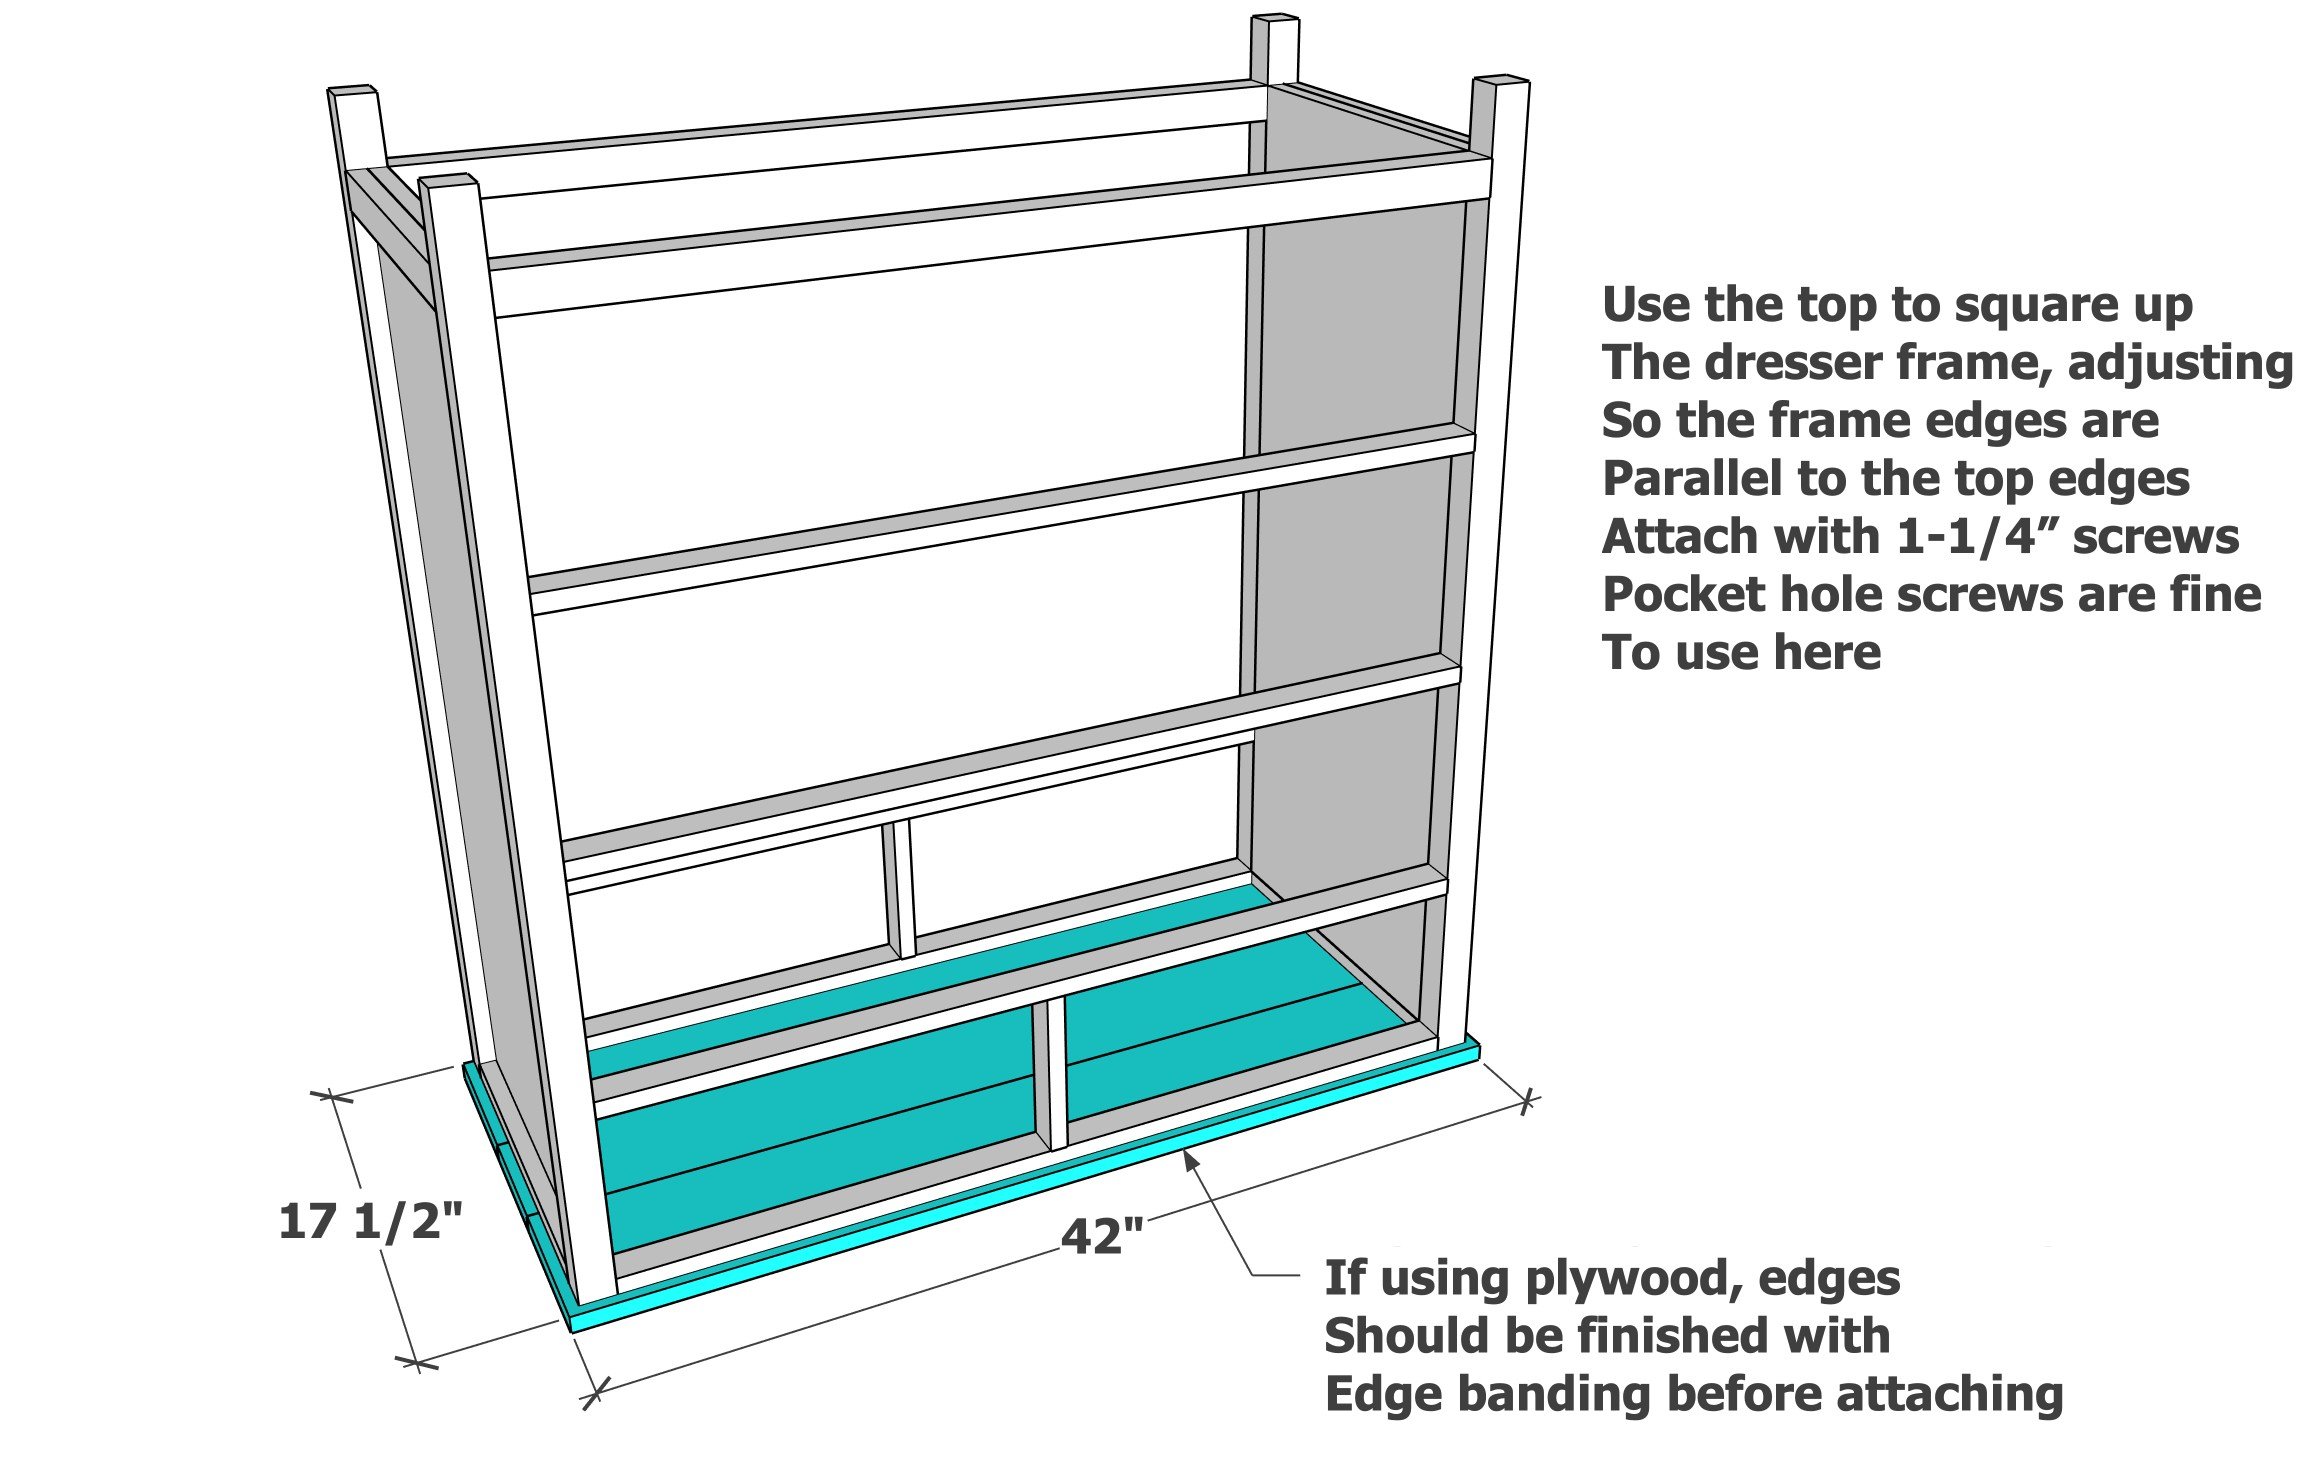
Place the top on a flat level surface. Then place the dresser frame on the top, flush to the back, with even overhangs on the front and sides.
Use the top to square up the dresser frame, making sure the overhangs are even on all sides, with frame lines running parallel to the top edges. This is very important step to get right.
Attach with 1-1/4" pocket hole screws through the 1x2s at the top.
Step 8

Measure the openings and check to make sure the opening match the diagrams.
Build the drawer boxes with 1-1/4" brad nails and glue, attach the 1/4" plywood bottoms with 3/4" brad nails and glue.
Step 9

Here is my easy method for installing drawer boxes:
Use this method to install the drawer slides inset inside the frame by 13/16".
Step 10
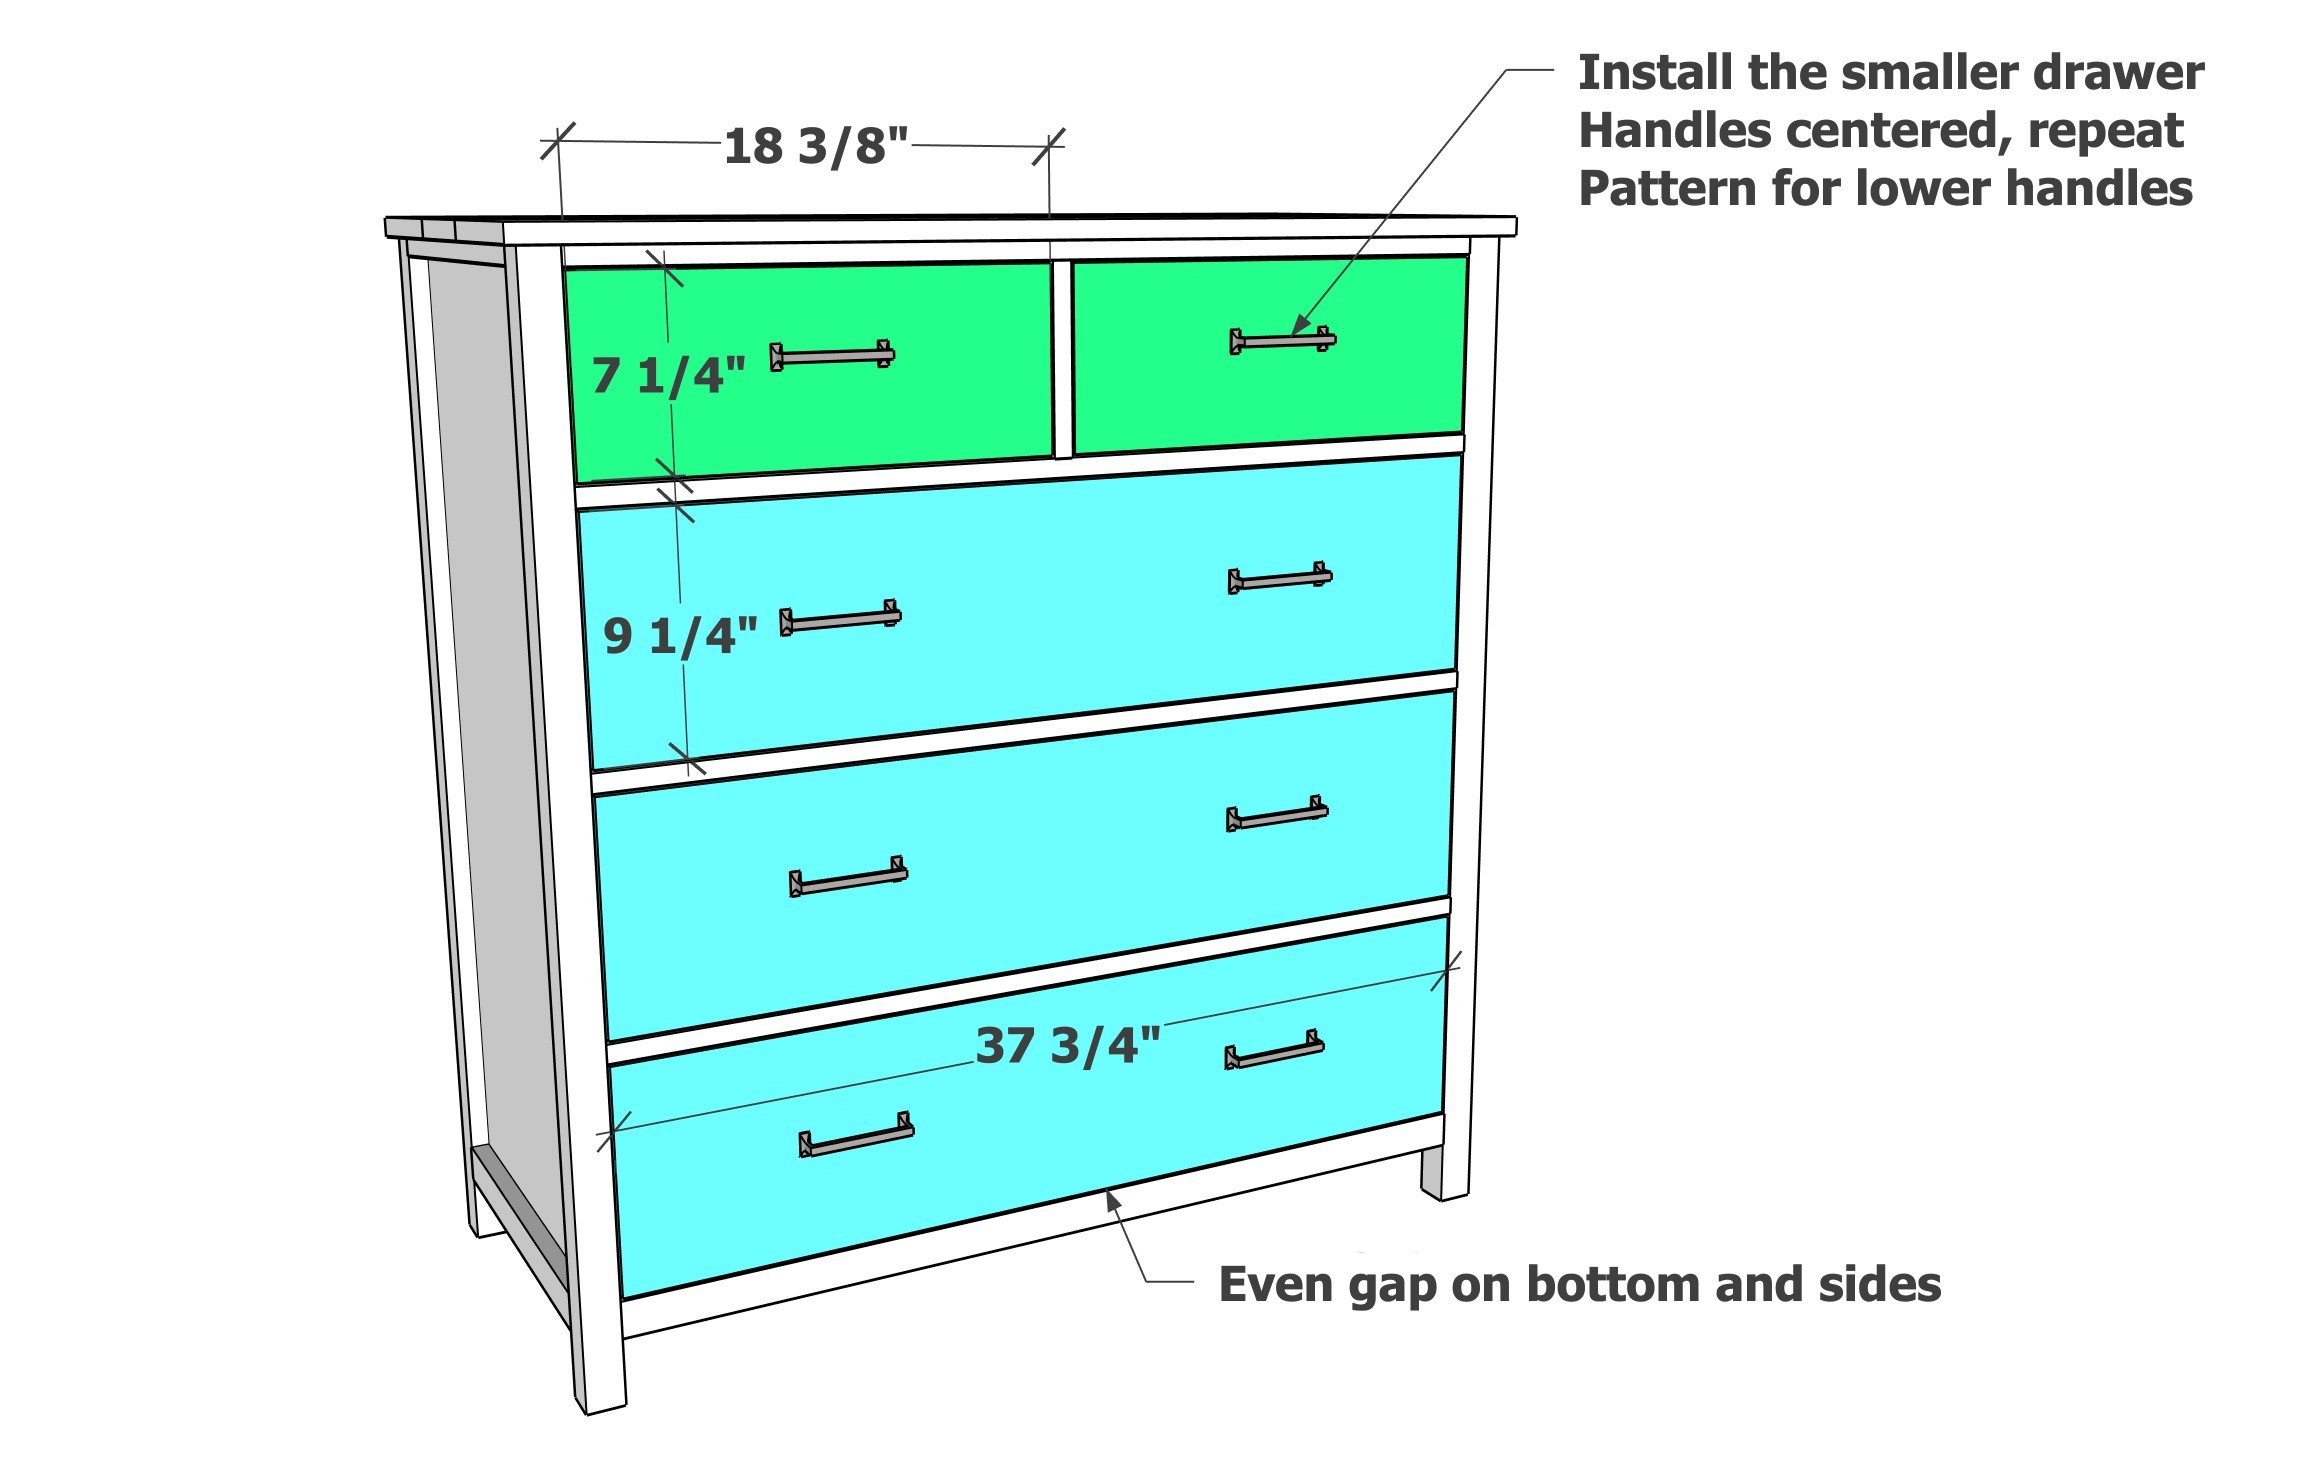
Measure and cut the drawer faces about 3/16" smaller than the opening. Use shims to hold in place and center, so there is an even gap on all sides.
Attach the drawer face to the drawer boxes with 1-1/4" brad nails, avoiding areas where hardware will be attached.
Remove the drawers and secure from inside with 1-1/4" screws (I used pocket hole screws). The hardware in the center will help hold the drawer face to the box, so I only place screws in the four outer corners.
I the drawer faces aren't setting right, the slides can be adjusted for a perfect fit.
Install the pulls to the drawer fronts. Here is the pulls that I used (very pleased with this hardware company, not sponsored by them)
I then sanded well with 120 grit sandpaper, working in the direction of the wood grain.
I then removed all sanding residue with a brush and then wiped clean with a damp, lint free cloth.