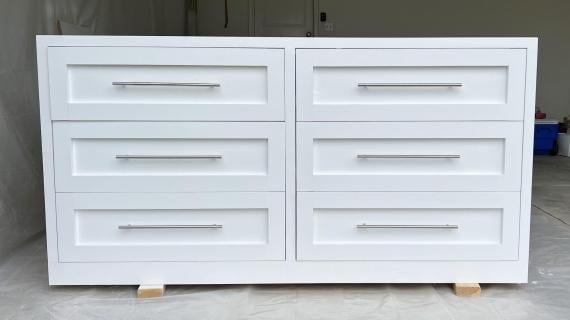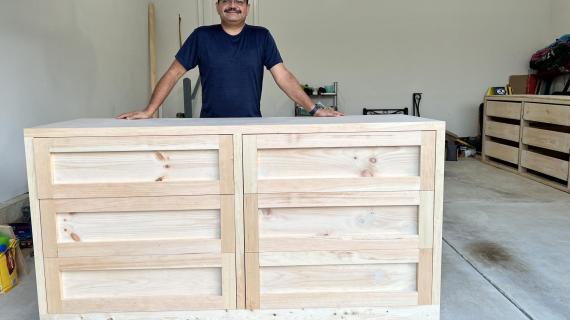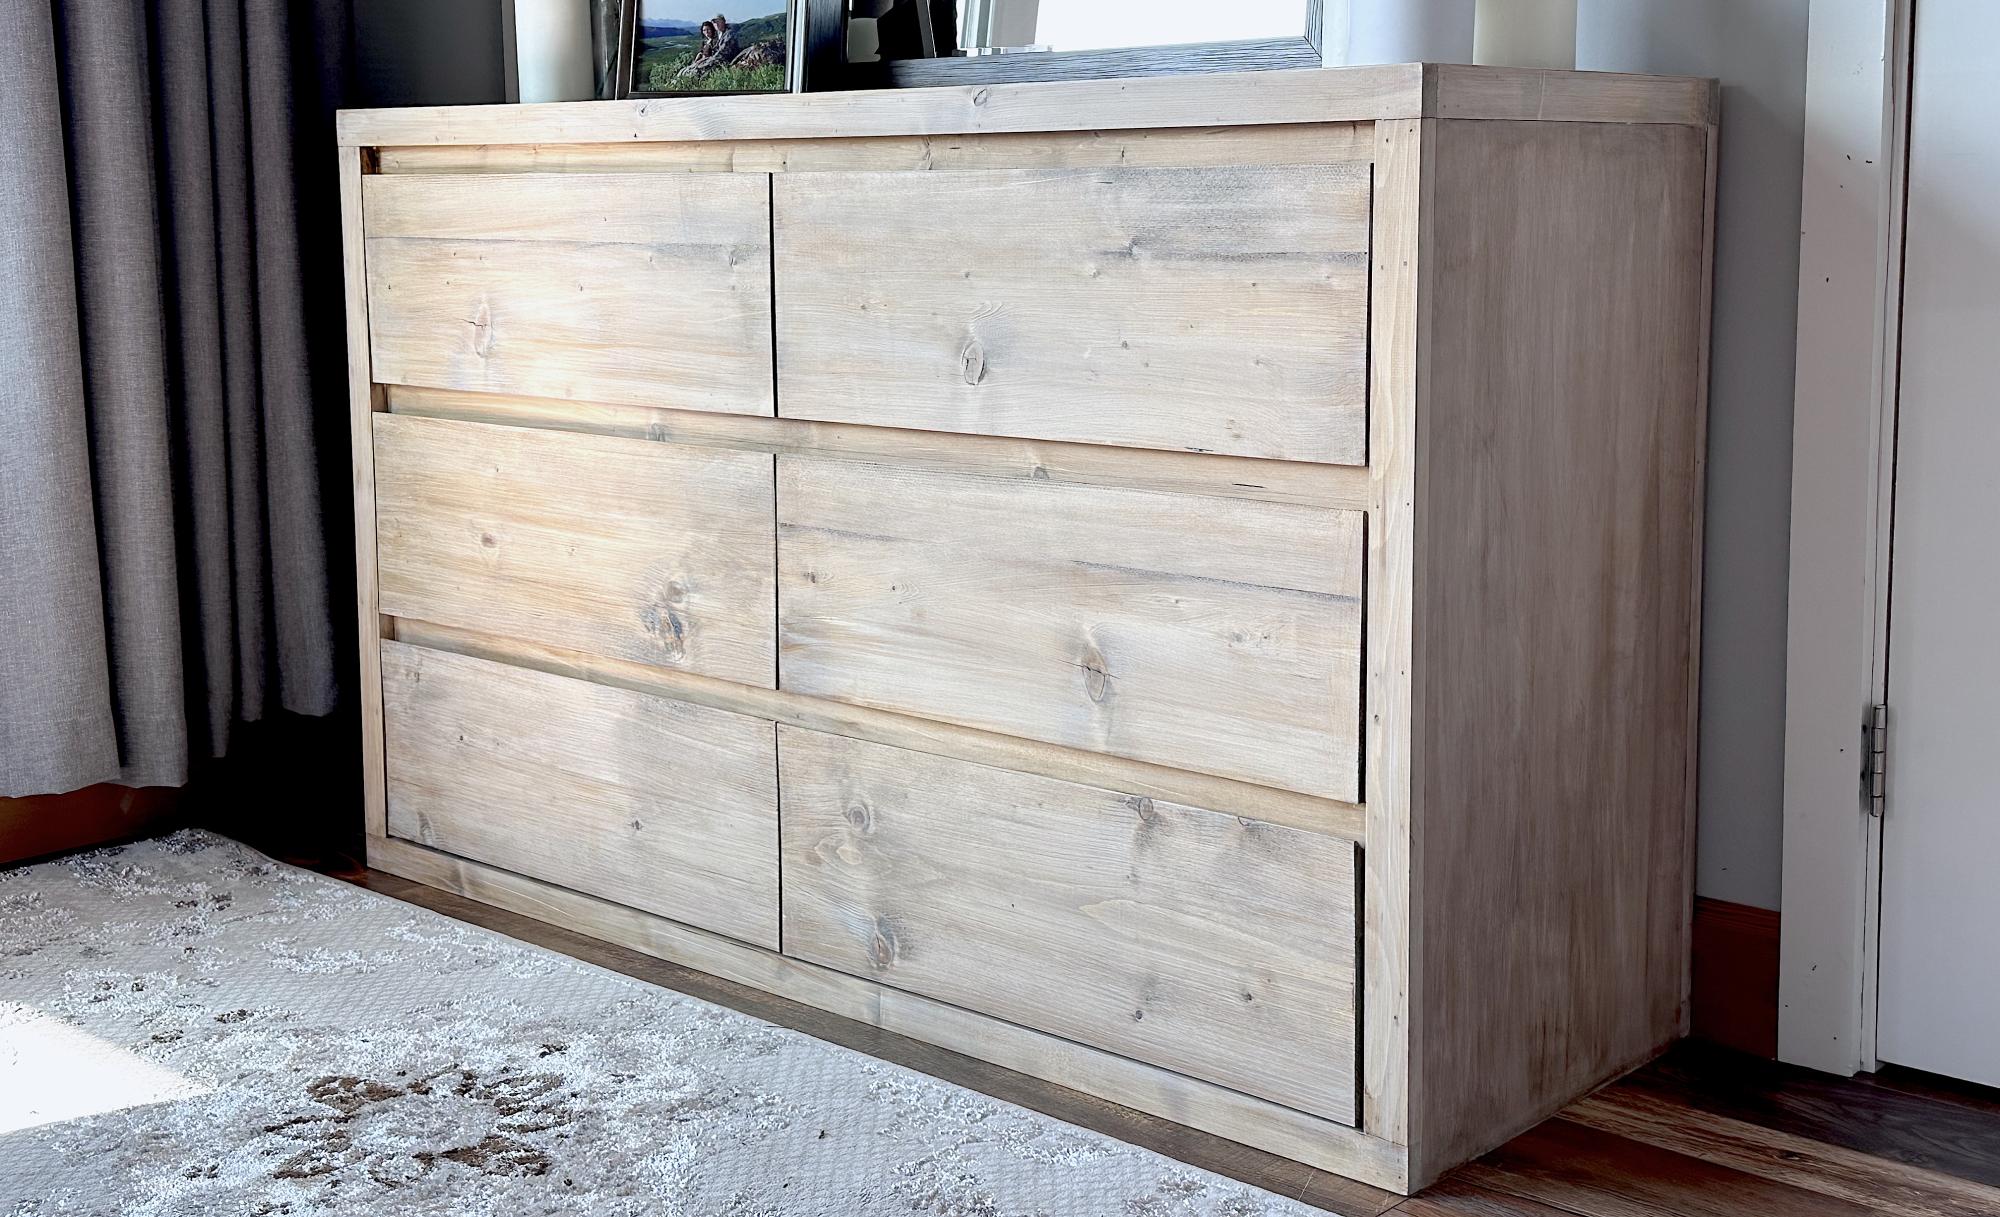

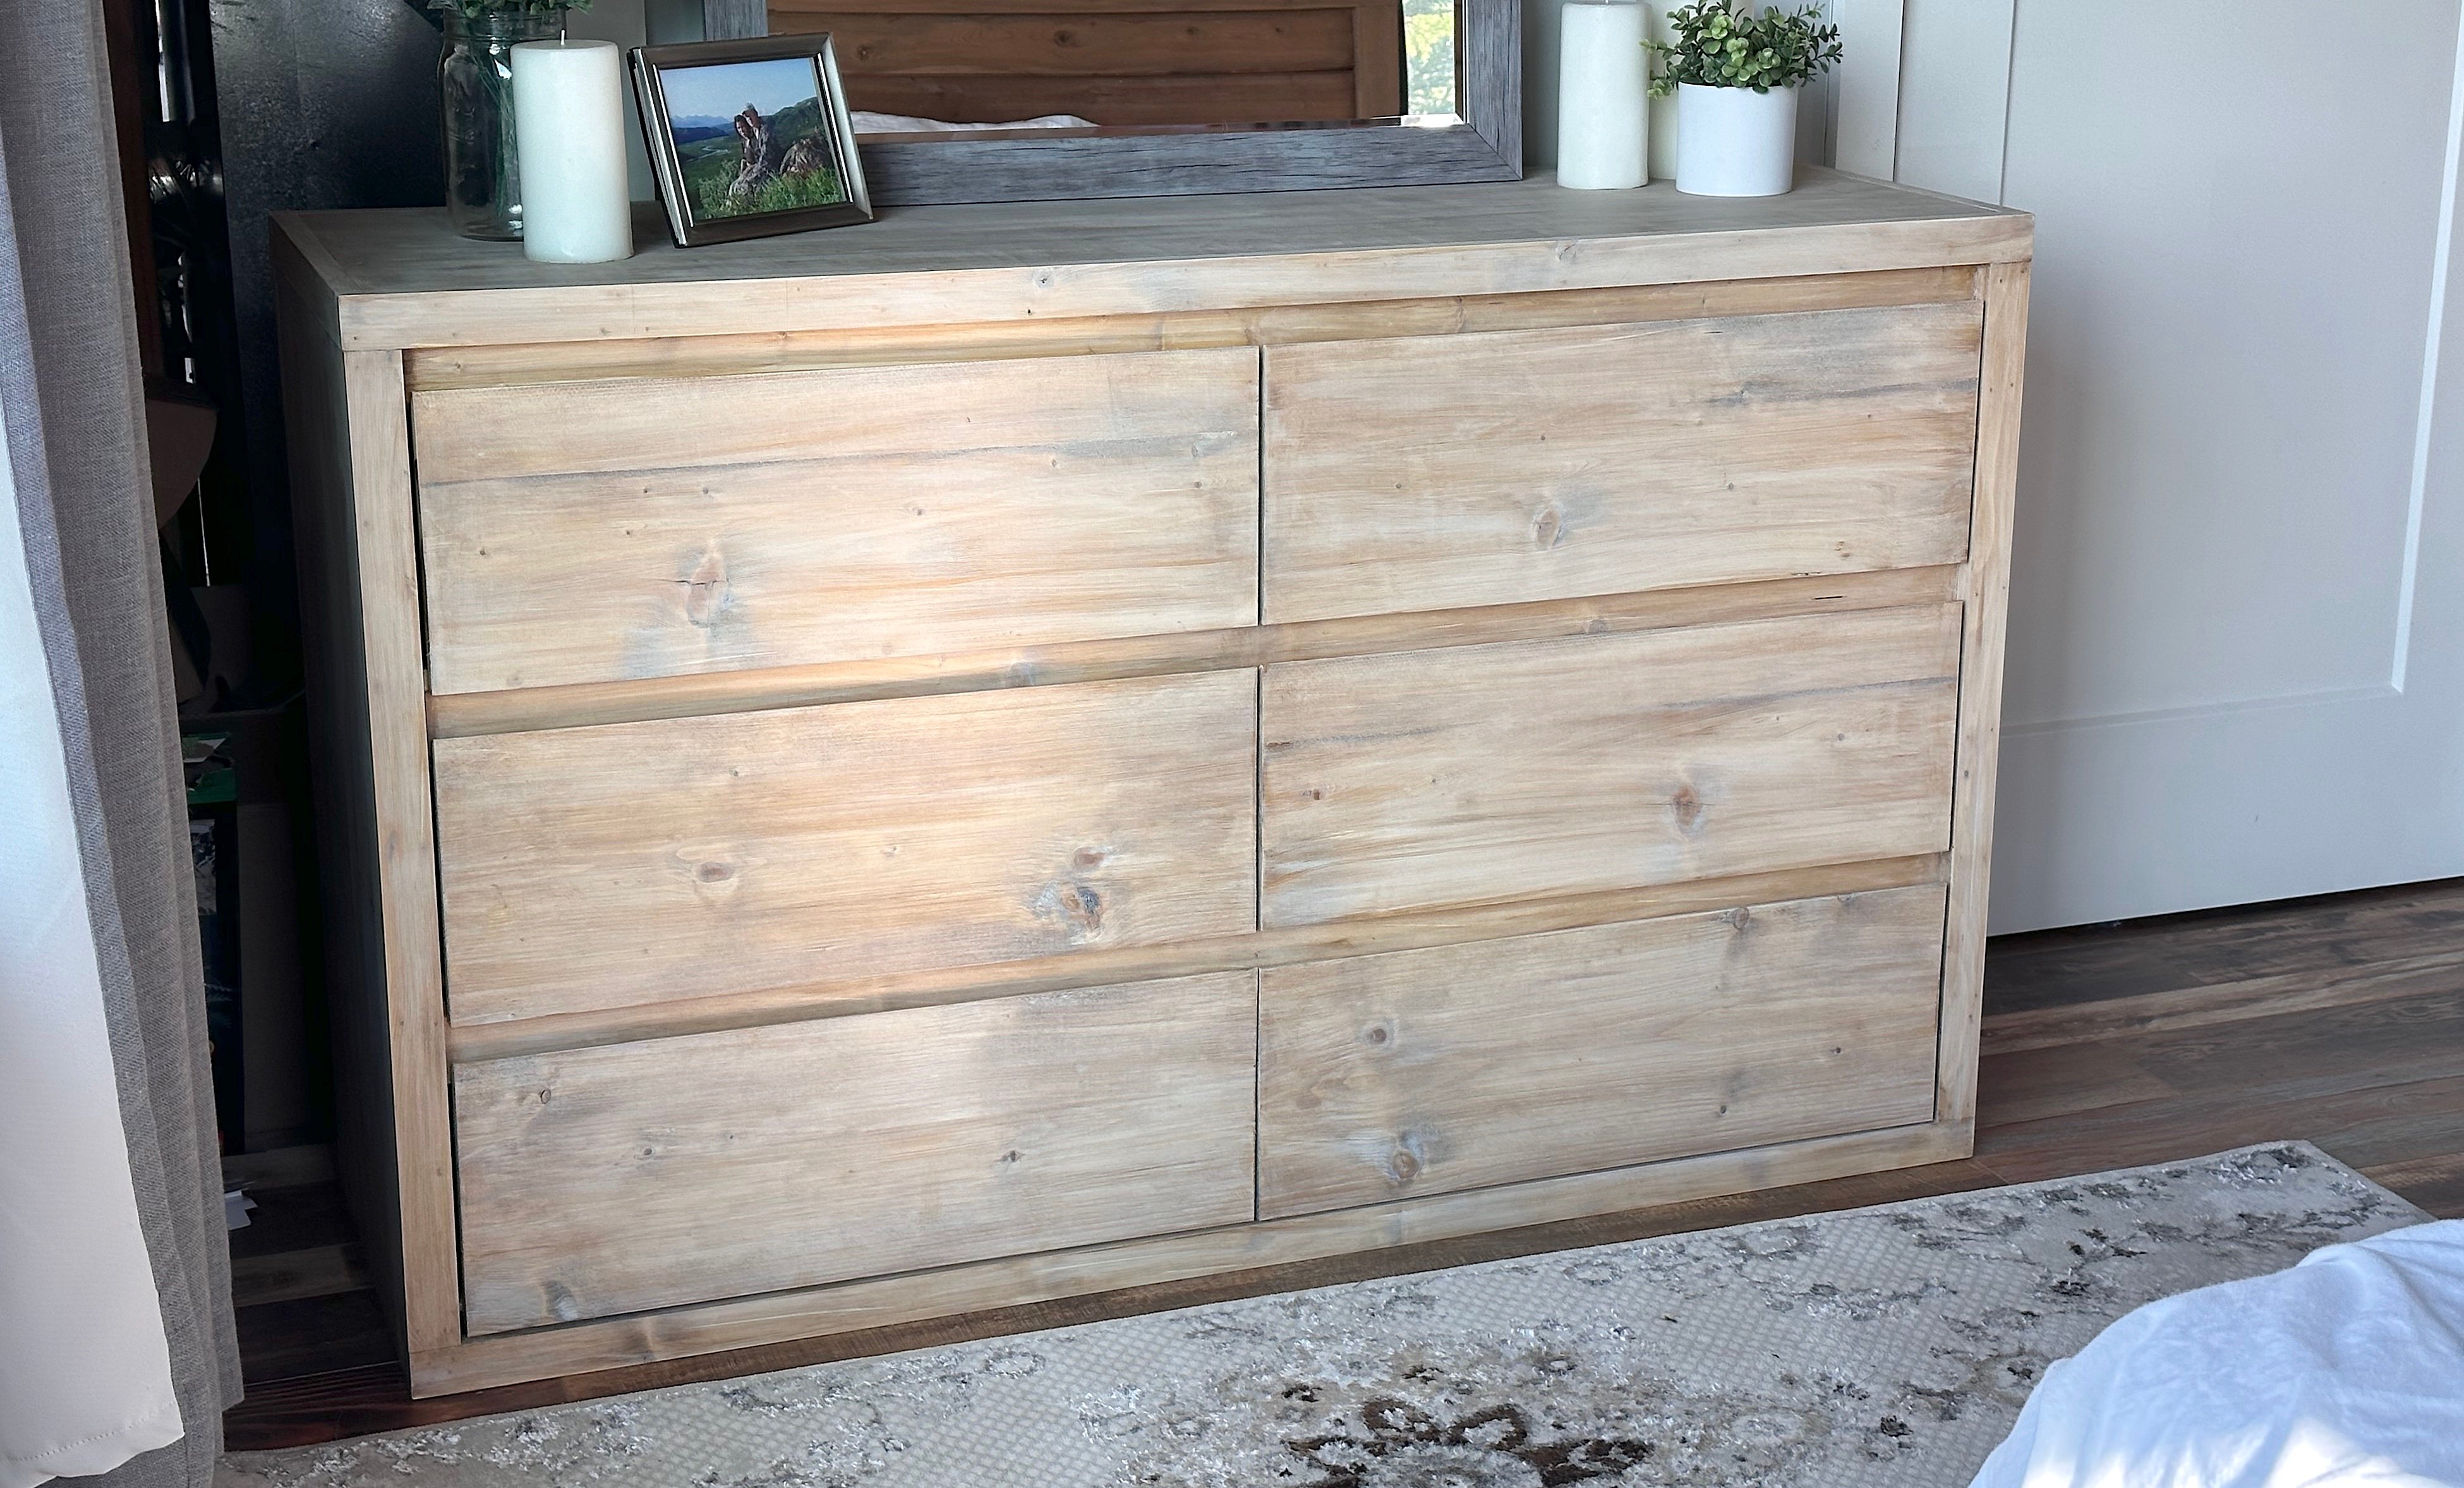
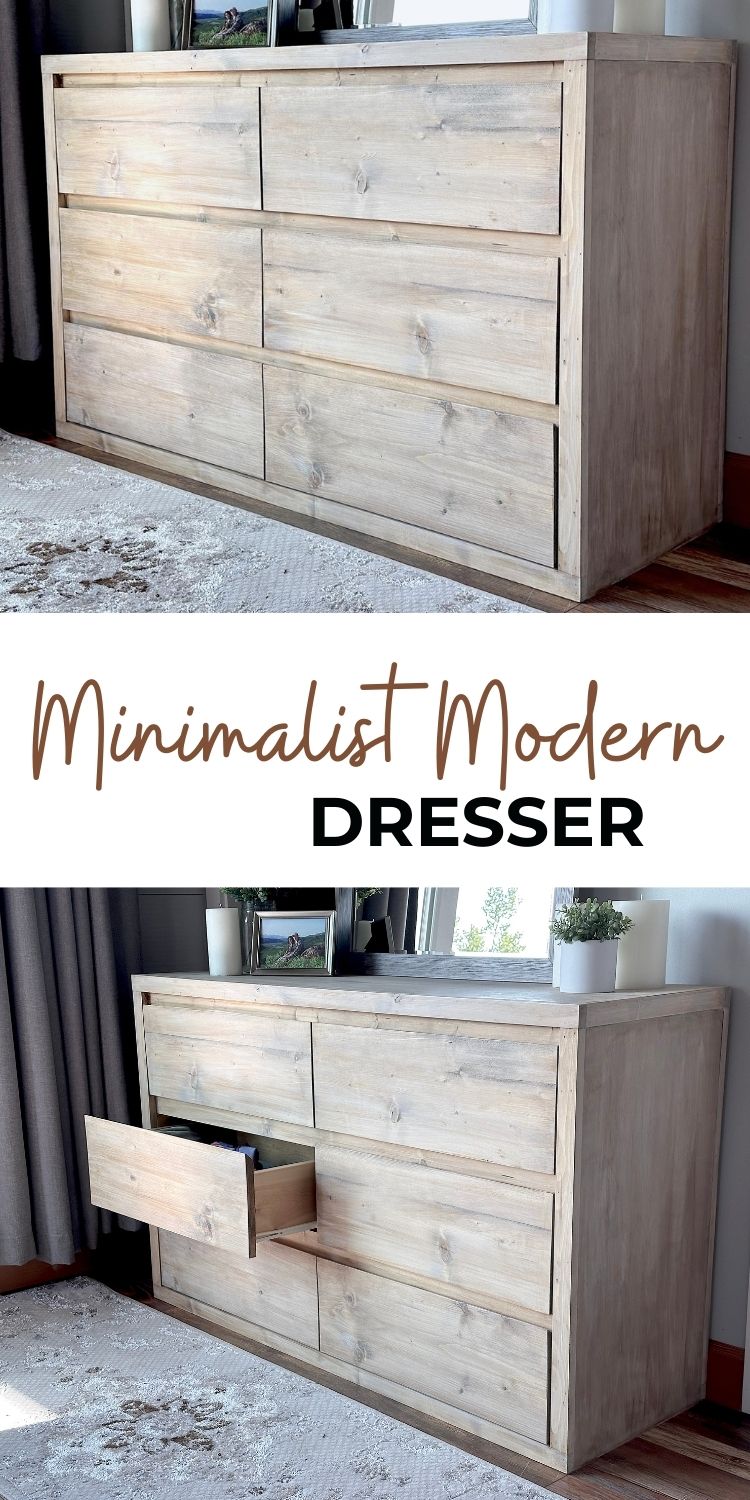
I built my own minimal modern dresser! It turned out so beautiful my kids said "whoa, that looks like it cost $2000!" I spent about $250 on it, and worked on it a few hours a day over a few days. This wasn't a quick and easy project, but it is SO worth it for how beautiful, durable, and fun it was to build.
I'm sharing the free project plans with video tutorial here, if you'd like to see how I built it or build your own! This is a NO POCKET HOLES project - yep, that's right, no pocket holes! I put it together with a brad nailer and some screws for the drawer slides. Free plans from Ana-White.com
Why I Built My Own Minimalist Modern Dresser
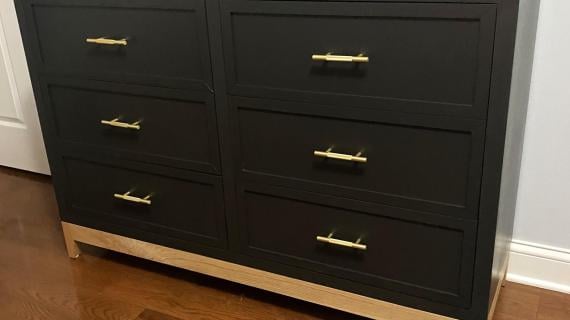
- Its gorgeous, the depth and beauty of this piece is stunning. Even my kids remarked on how beautiful it is.
- To save money - similar style dressers run in the thousands of dollars. I spent about $250 on this dresser build.
- Because I didn't want to wait - by building the dresser myself, I was able to get it in a few days. I didn't have to wait for shipping or delivery.
- I used local materials - the wood in my dresser is milled about 50 miles from my home. You can't get more local than that for furniture. This is much more responsible than shipping a dresser around the globe.
- Building is fun! I can't think of a better way to be active and create value for our home and family than by building my own furniture!
Other Plans that Match this Dresser
We loved this build so much, we went on to build more plans to match!
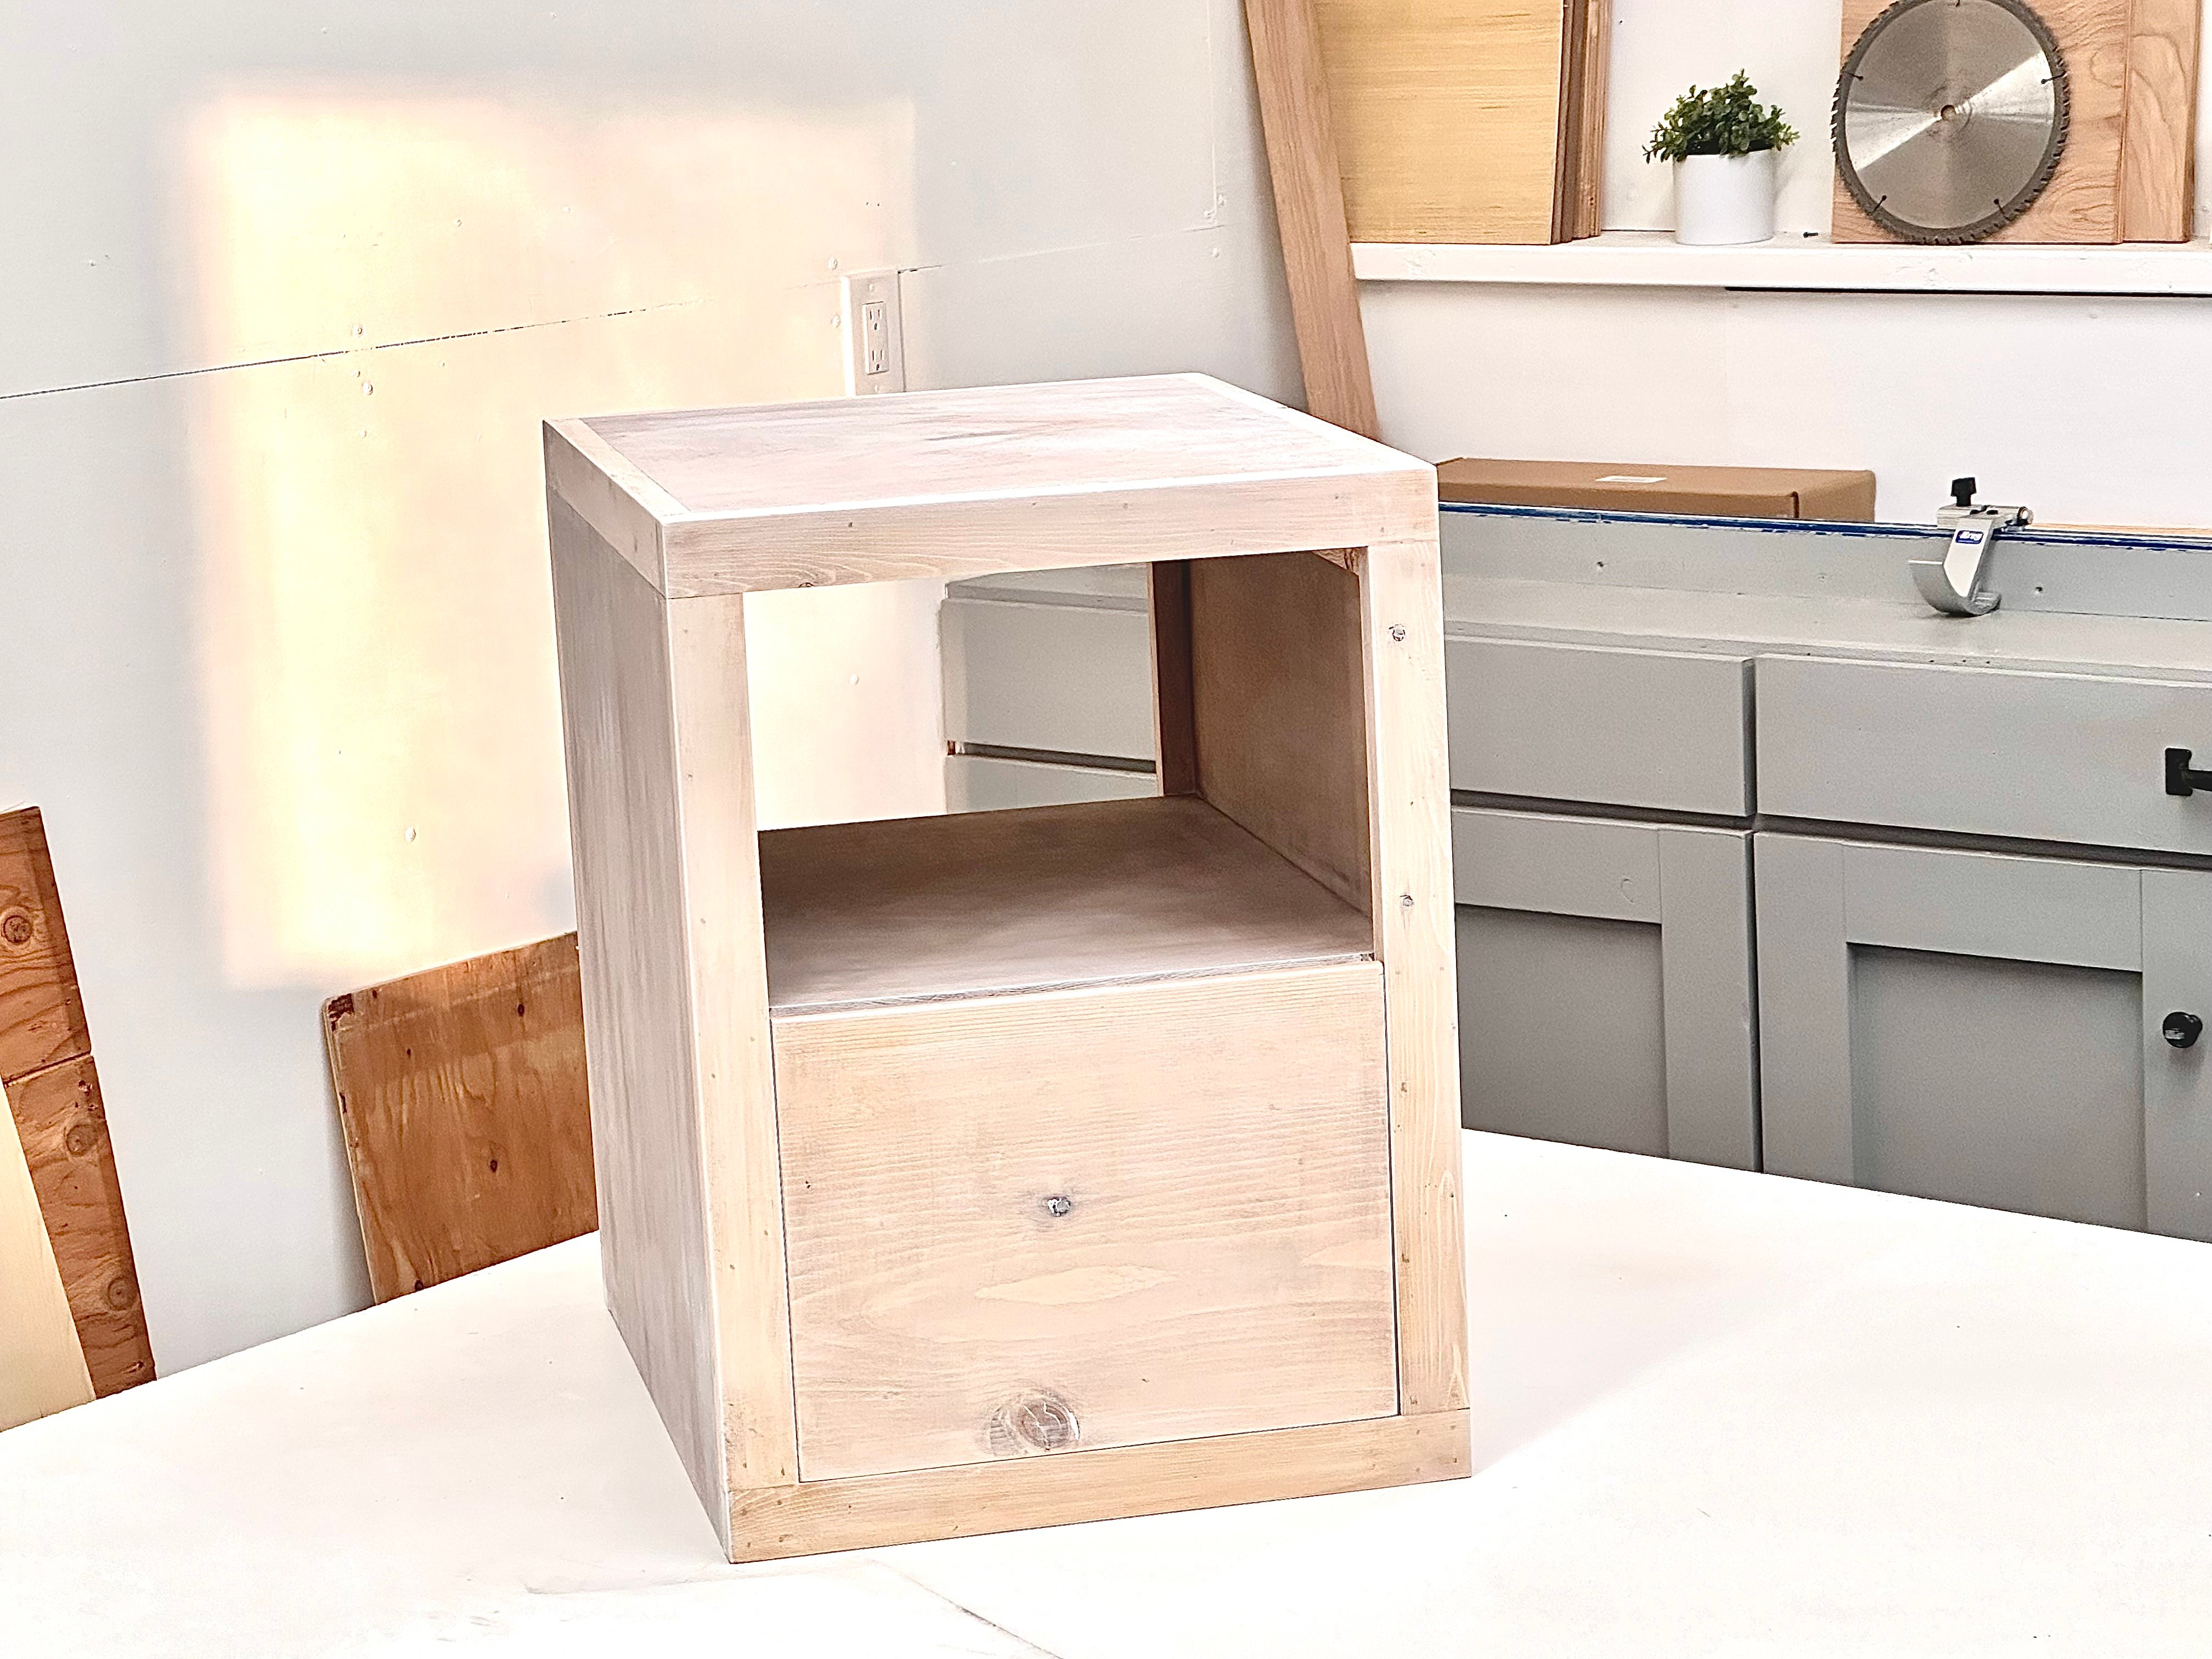
This dresser is building off the success of a nightstand project I did a few months back that turned out really well, was easy to build, and also only used a nail gun for assembly. I also did a bed plan too, and hope to do a few more plans in this collection.
- Minimalist Modern Nightstand Plans
- Minimalist Modern Nightstand (Narrow) Plans
- Minimalist Modern Bed Plans (all mattress sizes)
- Minimalist Modern Tall Dresser
- Minimalist Modern Dining Table Plans
Watch! How I Built this Dresser
Here's a quick video showing the steps to build this dresser. It was pretty fun and easy to do!
Pin For Later!

Preparation
- 4 - 1x3 @ 8 feet long
- 4 - 1x2 @ 8 feet long
- 5 - 1x6 @ 8 feet long
- 2 - 1x10 @ 8 feet long
- 1 - 3/4" plywood cut into two strips 16" wide x 8 feet long
- 1/4" plywood (for drawer bottoms)
- 1 - 2x2 @ 4 feet long
- 6 - 16" bottom corner mount drawer slides (usually white in color)
- 1-1/4" and 5/8" brad nails
- wood glue
- wood filler
- stain and finishing supplies
Carcass Cut List
- 4 - 1x3 @ 31-1/4"
- 3 - 1x3 @ 49"
- 1 - 1x2 @ 31-1/4"
- 2 - 1x2 @ 7-1/4"
- 1 - 1x2 @ 9-1/4"
- 4 - 1x2 @ 52"
- 2 - 1x3 @ 29"
- 2 - 1x2 @ 29"
- 2 - 1x2 @ 16"
- 2 - 3/4" plywood @ 16" x 30-1/2"
- 1 - 3/4" plywood @ 16" x 50-1/2"
- 1 - 2x2 @ 31-1/4"
Drawers should be cut to fit, see step 8


Use a level surface to assemble.
Precise cutting is very important to the success of this project.
This is a more advanced project, it is not recommended as a first or beginner project.
Instructions
Step 1
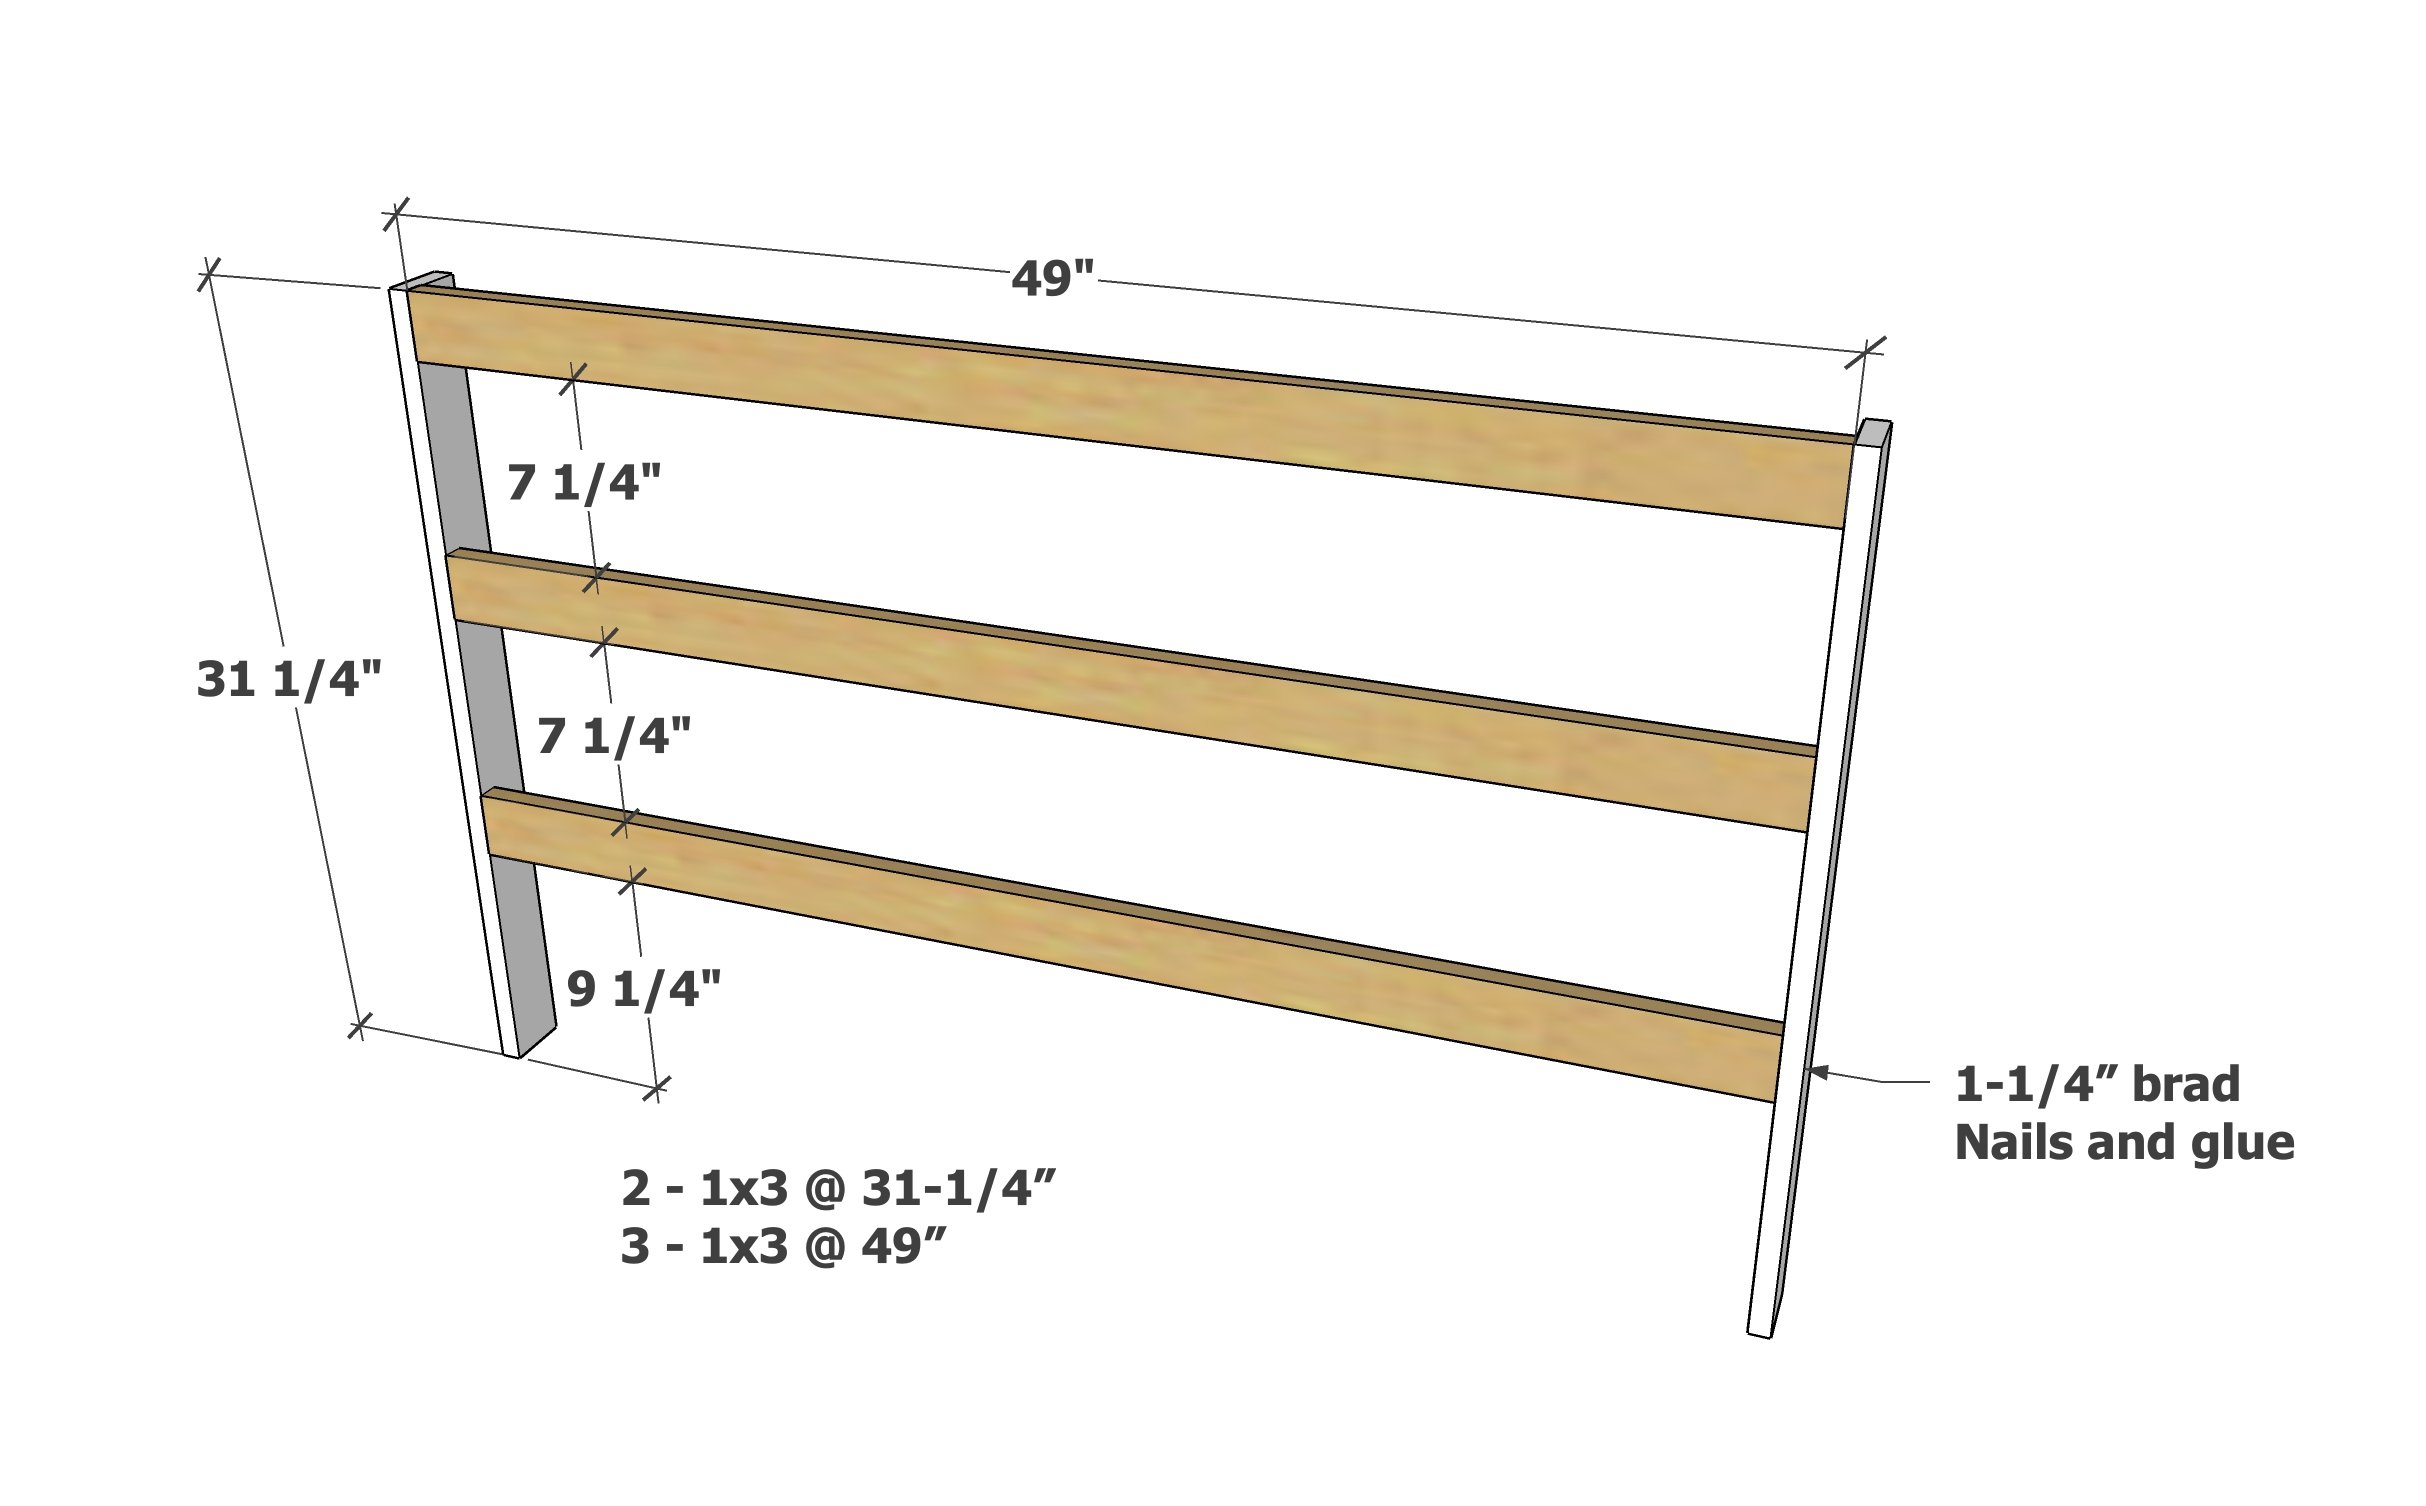
Build the front frame first with the 1x3s as shown. Use glue and 1-1/4" brad nails, three nails per joint.
Check the frame for square by taking opposite diagonals and making sure the opposite diagonal measurements match. If they do not match, your frame is a parallelogram instead of a rectangle. Square up by pushing the longer diagonal points together until you have adjusted so the diagonals match.
Because the front frame is supporting the drawer slides, it is super important that it is square.
Step 2
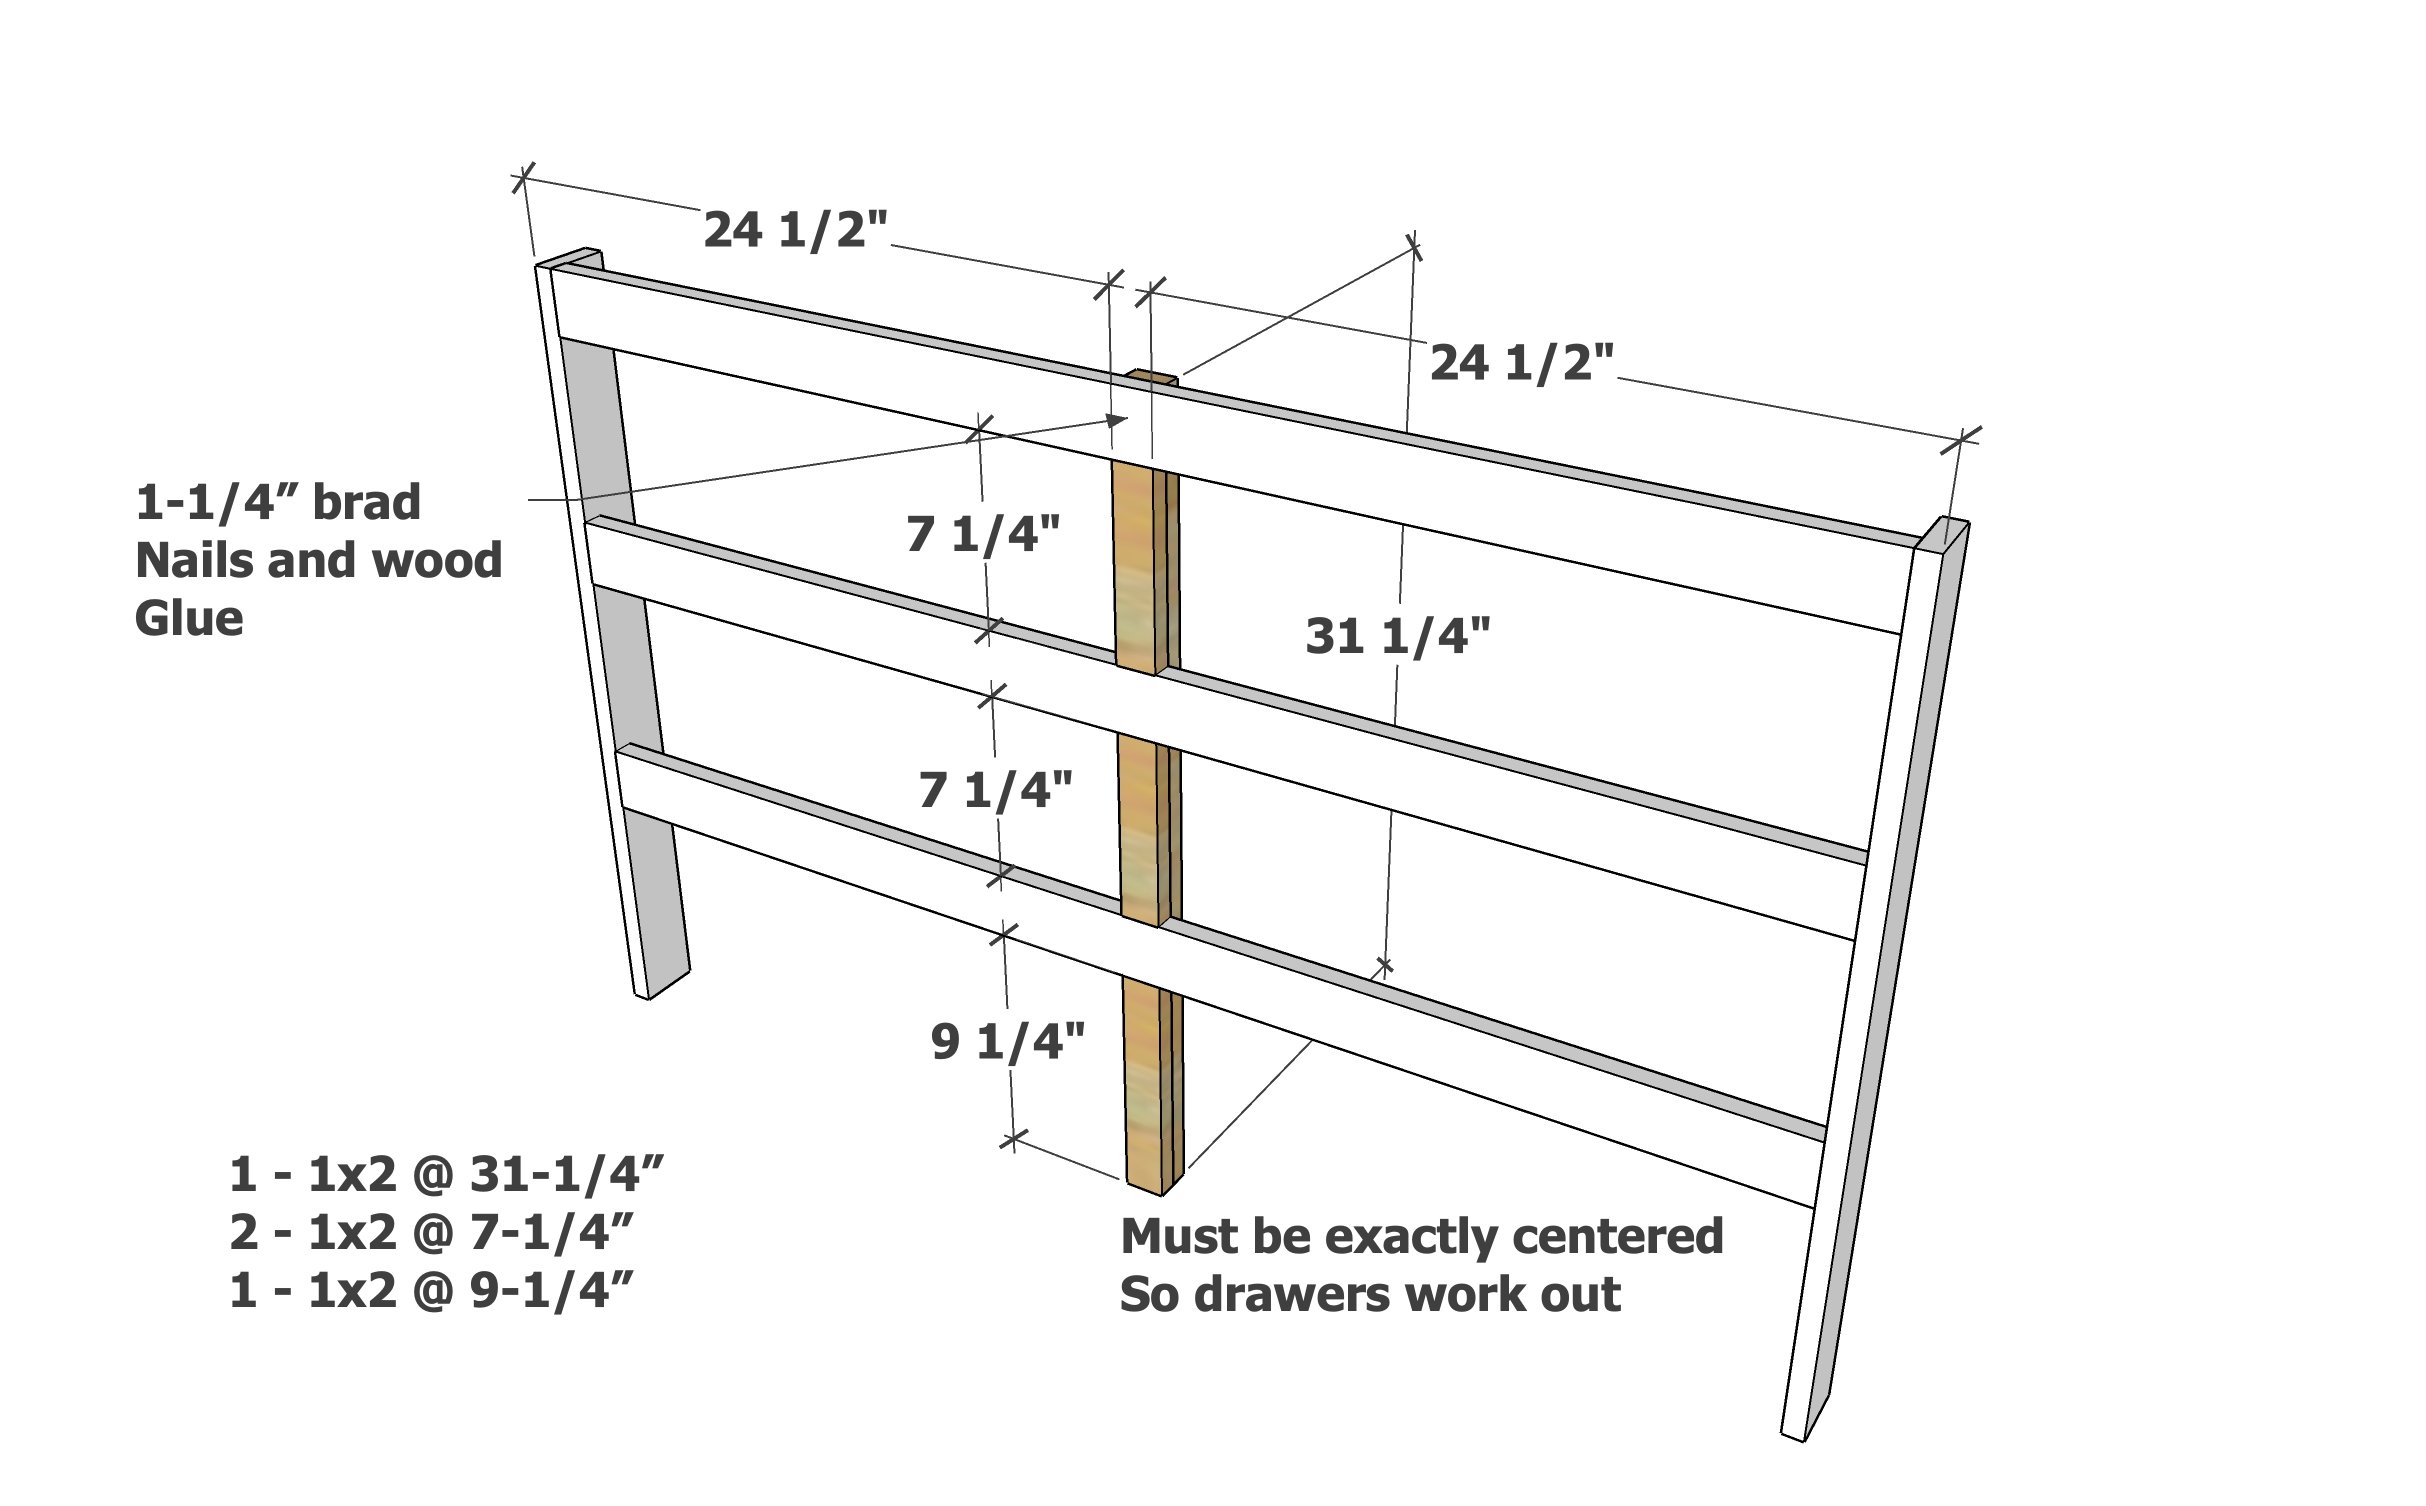
Add the center piece to the front frame, exactly centered in the openings. Use 1-1/4" brad nails and glue to attach.
Step 3
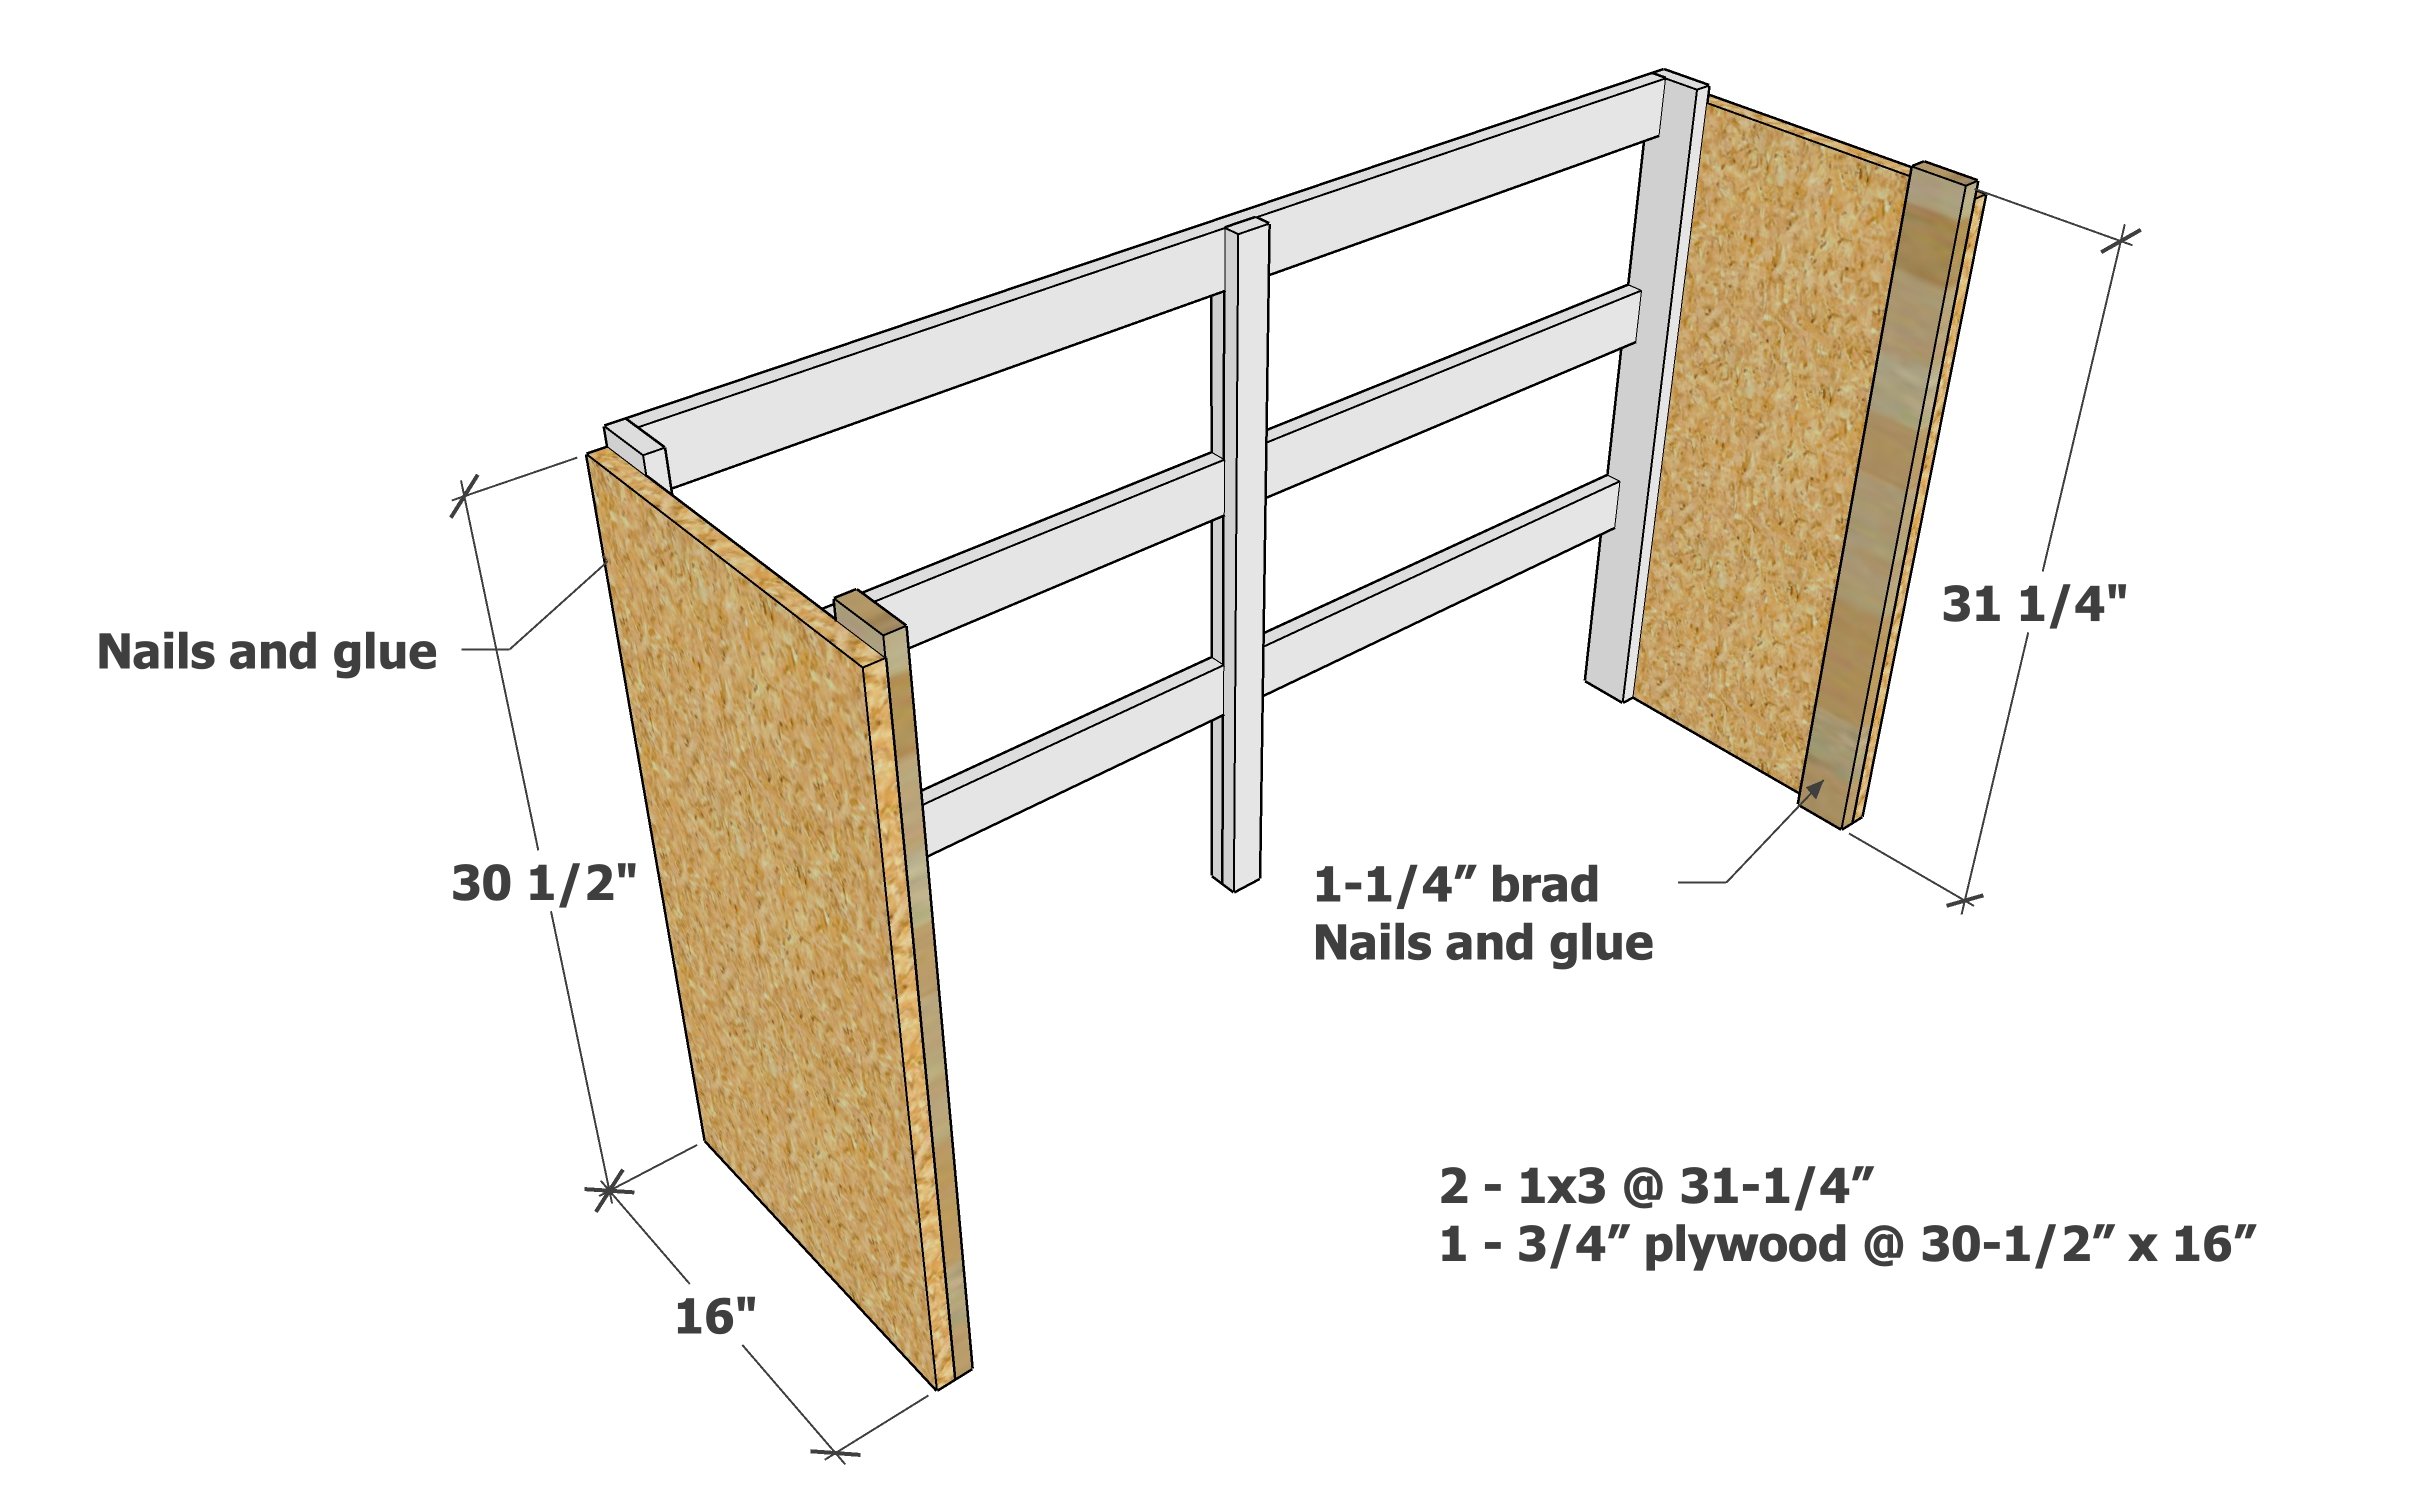
First, on the side pieces of plywood, attach 1x3s flush on the bottom and back edge - it will overextend on the top 3/4". Use glue and 1-1/4" brad nails.
Then attach the plywood pieces to the front frame with brad nails, so front and bottom edges are flush.
Step 4
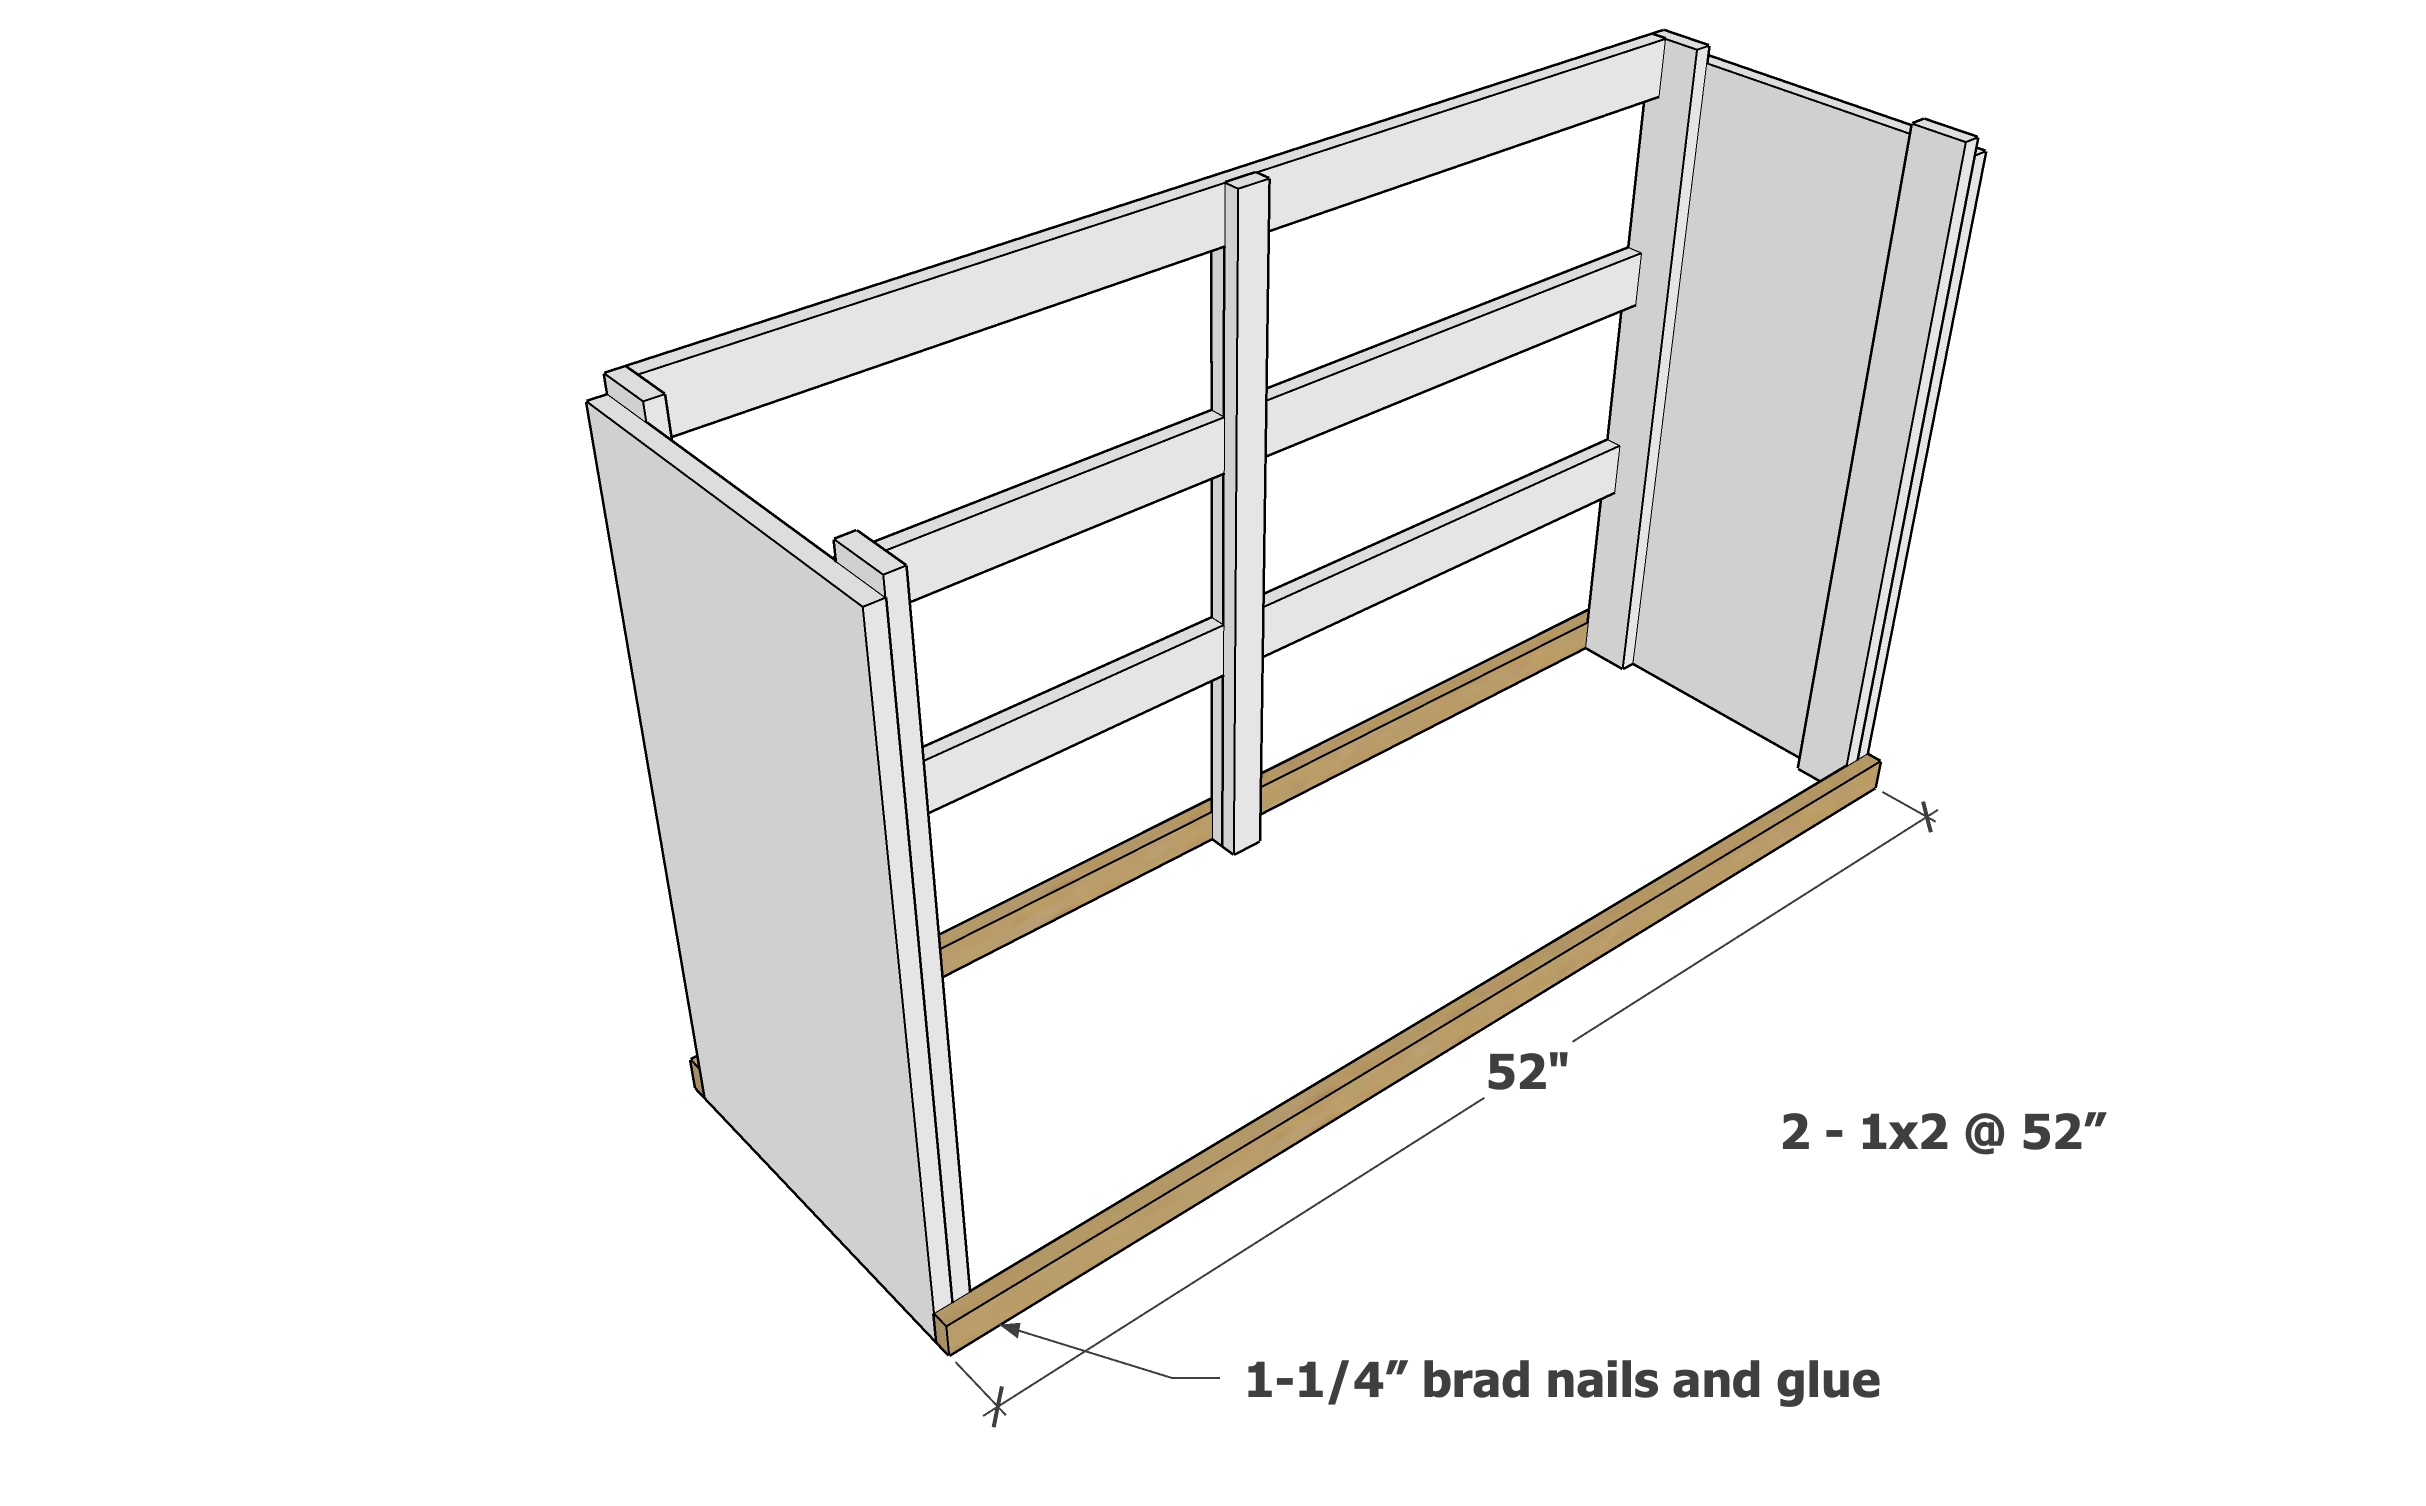
Make sure the dresser is on a level surface.
Attach the bottom trim to the bottoms of the dresser frame.
Step 5
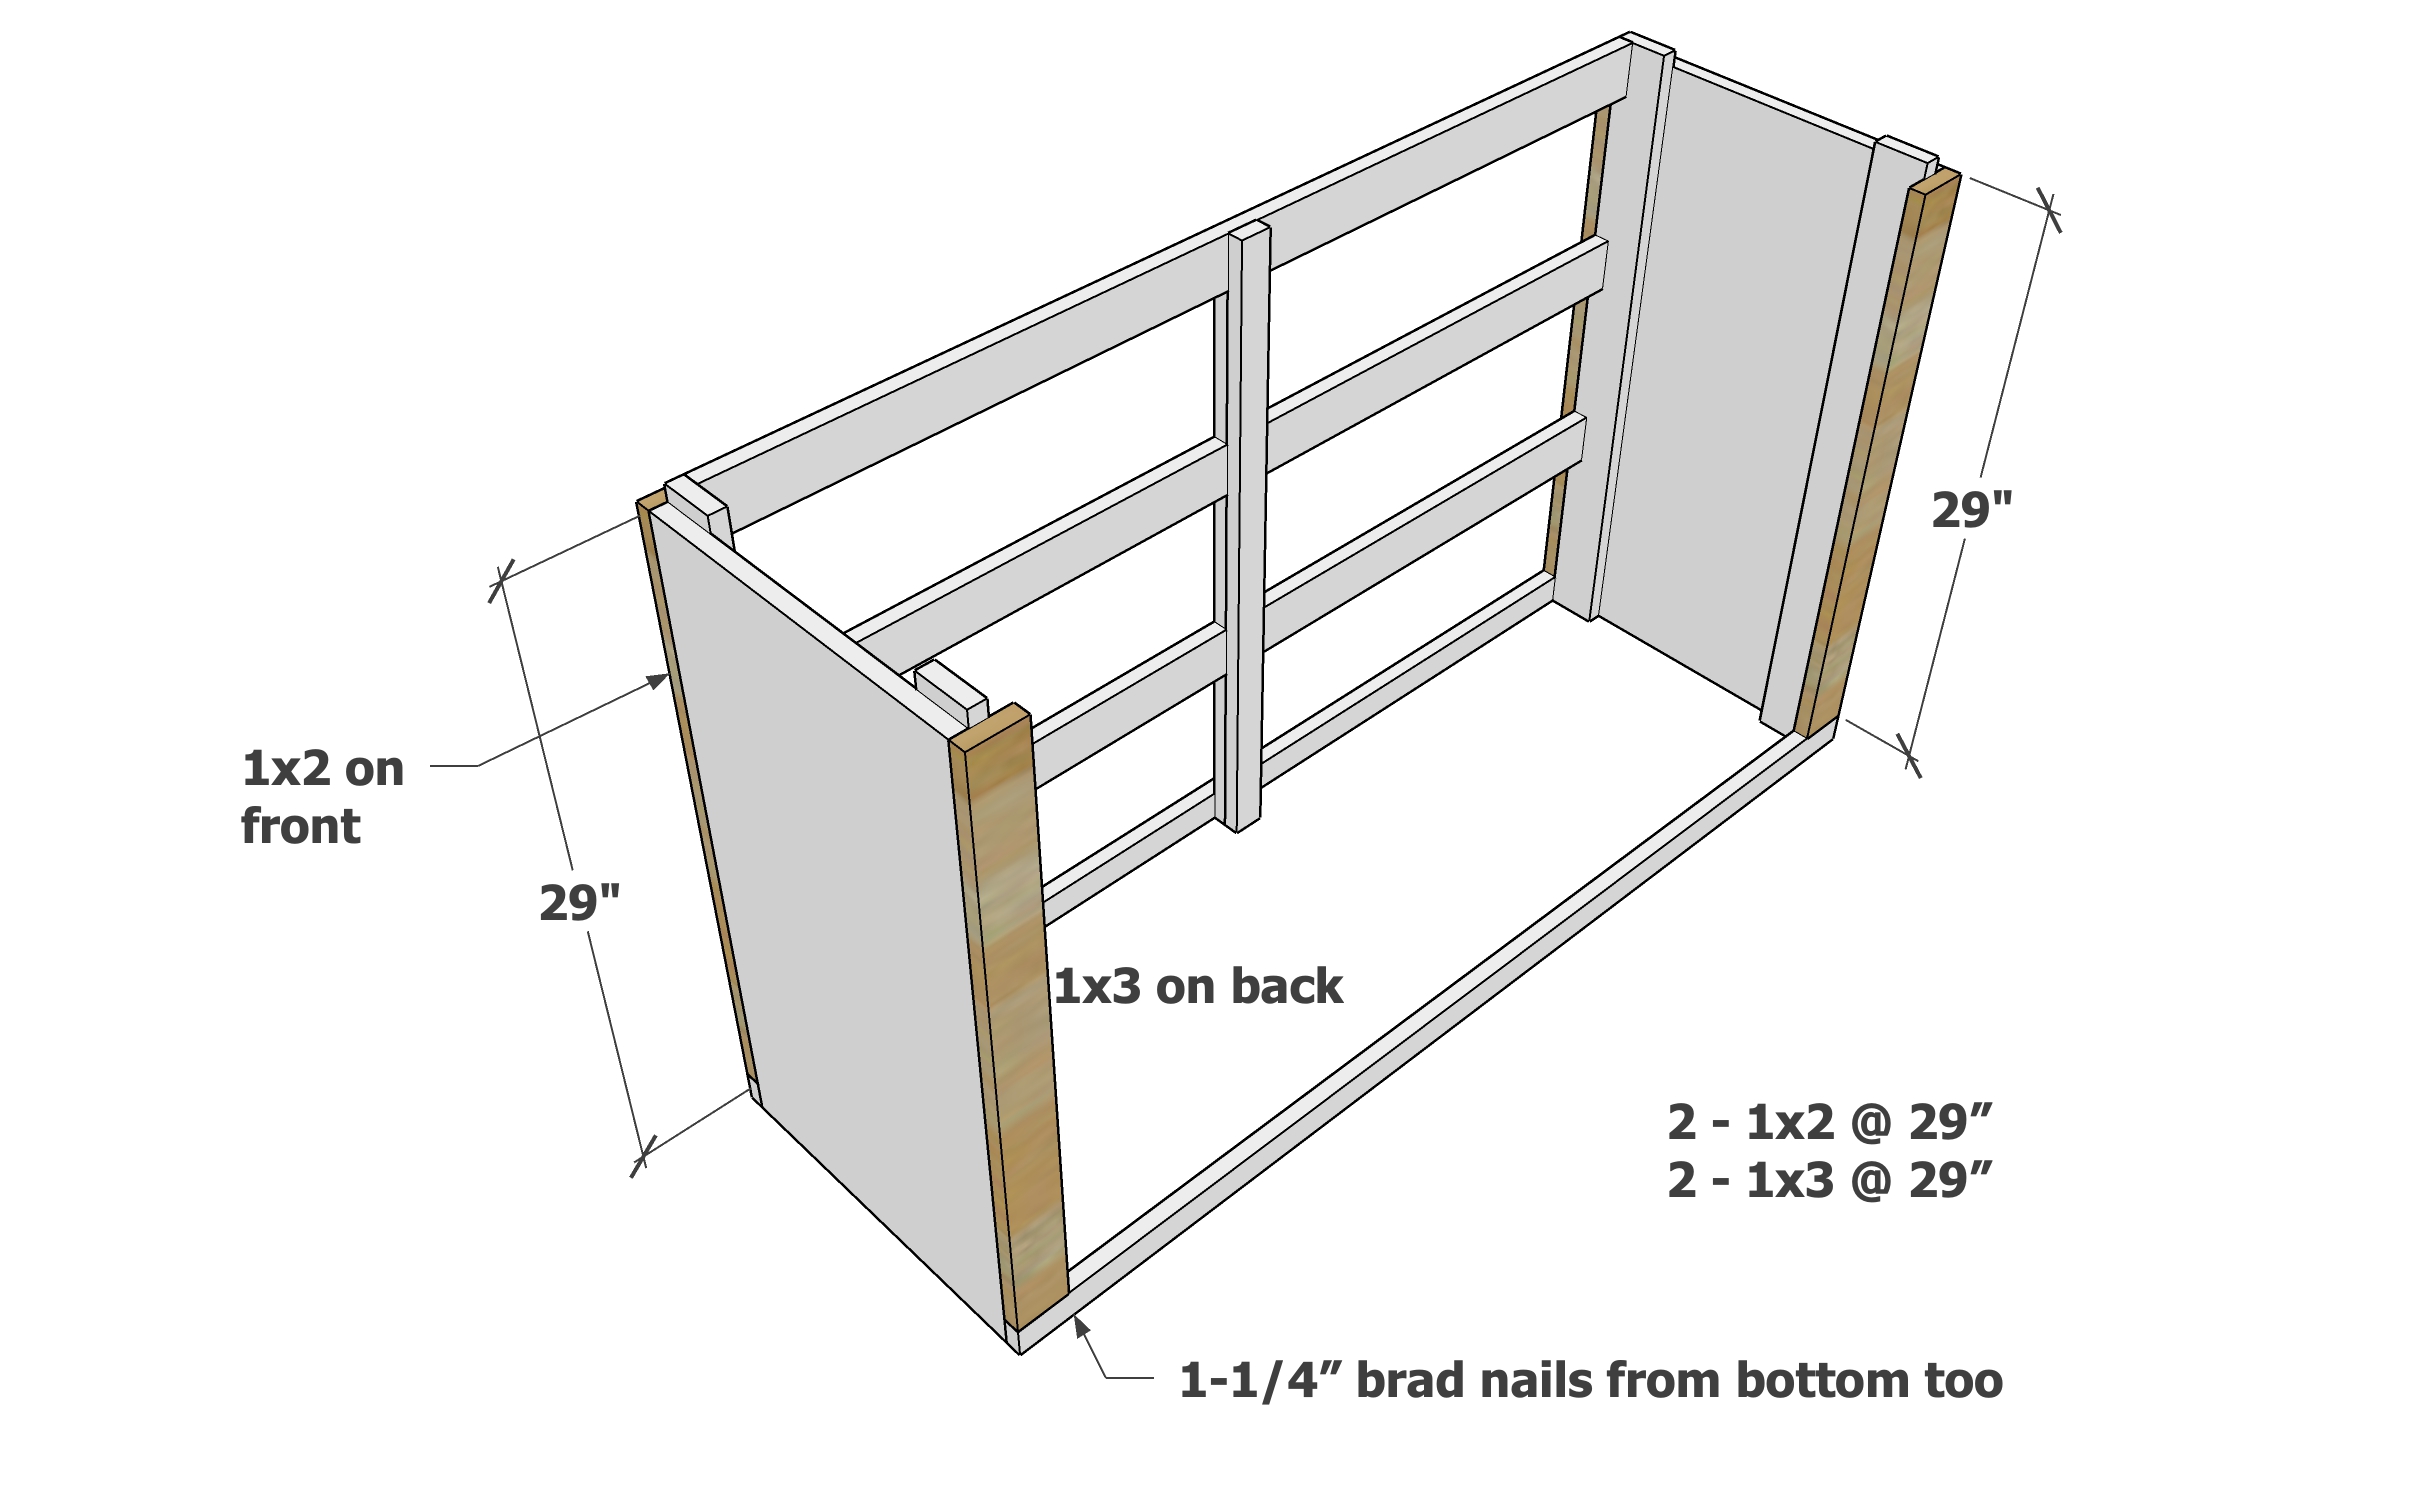
On the back of the dresser, add the 1x3 @ 29" to the back edges of the plywood.
On the front of the dresser, use the 1x2 @ 29".
Attach with glue and brad nails.
Step 6
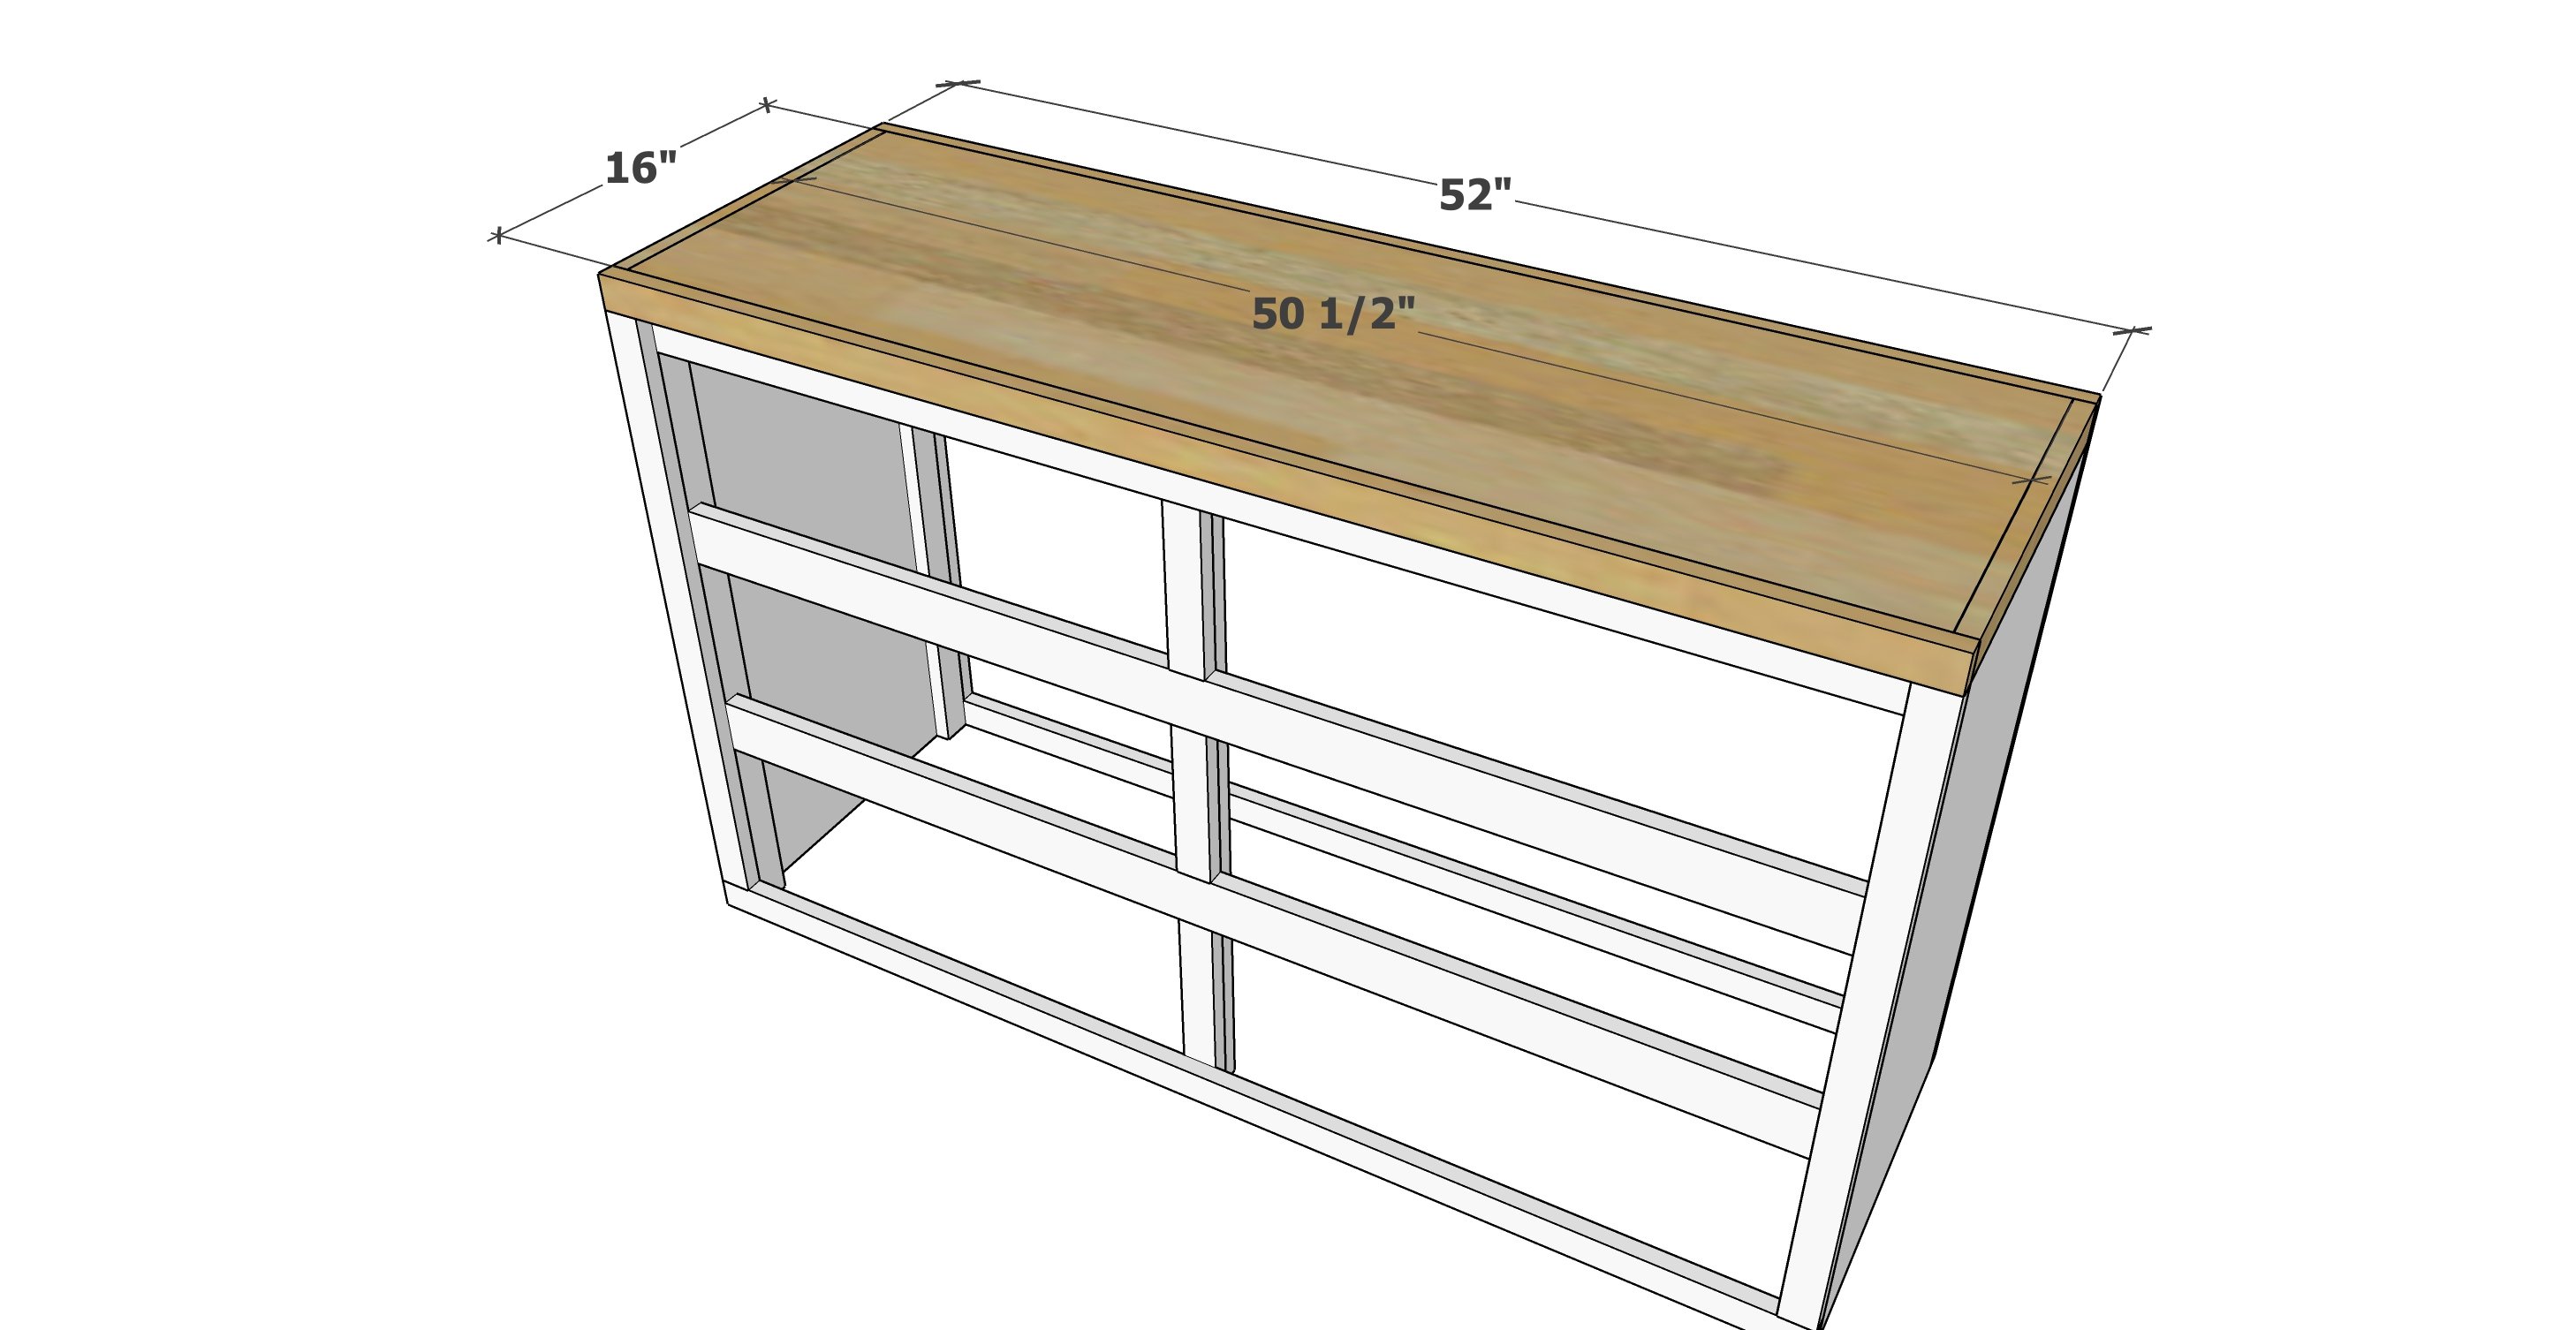
Build the top first - first attach the 1x2 @ 16" to the ends, then attach the 1x2 @ 52" to the front and back, all with wood glue and 1-1/4" brad nails.
Then attach the entire completed top to the top of the dresser with glue. Nail in all possible directions, the top will square up the dresser and add substantial structure to the project.
Step 7

Attach the back 2x2 exactly centered on the back of the project and nail and glue in place.
Step 8
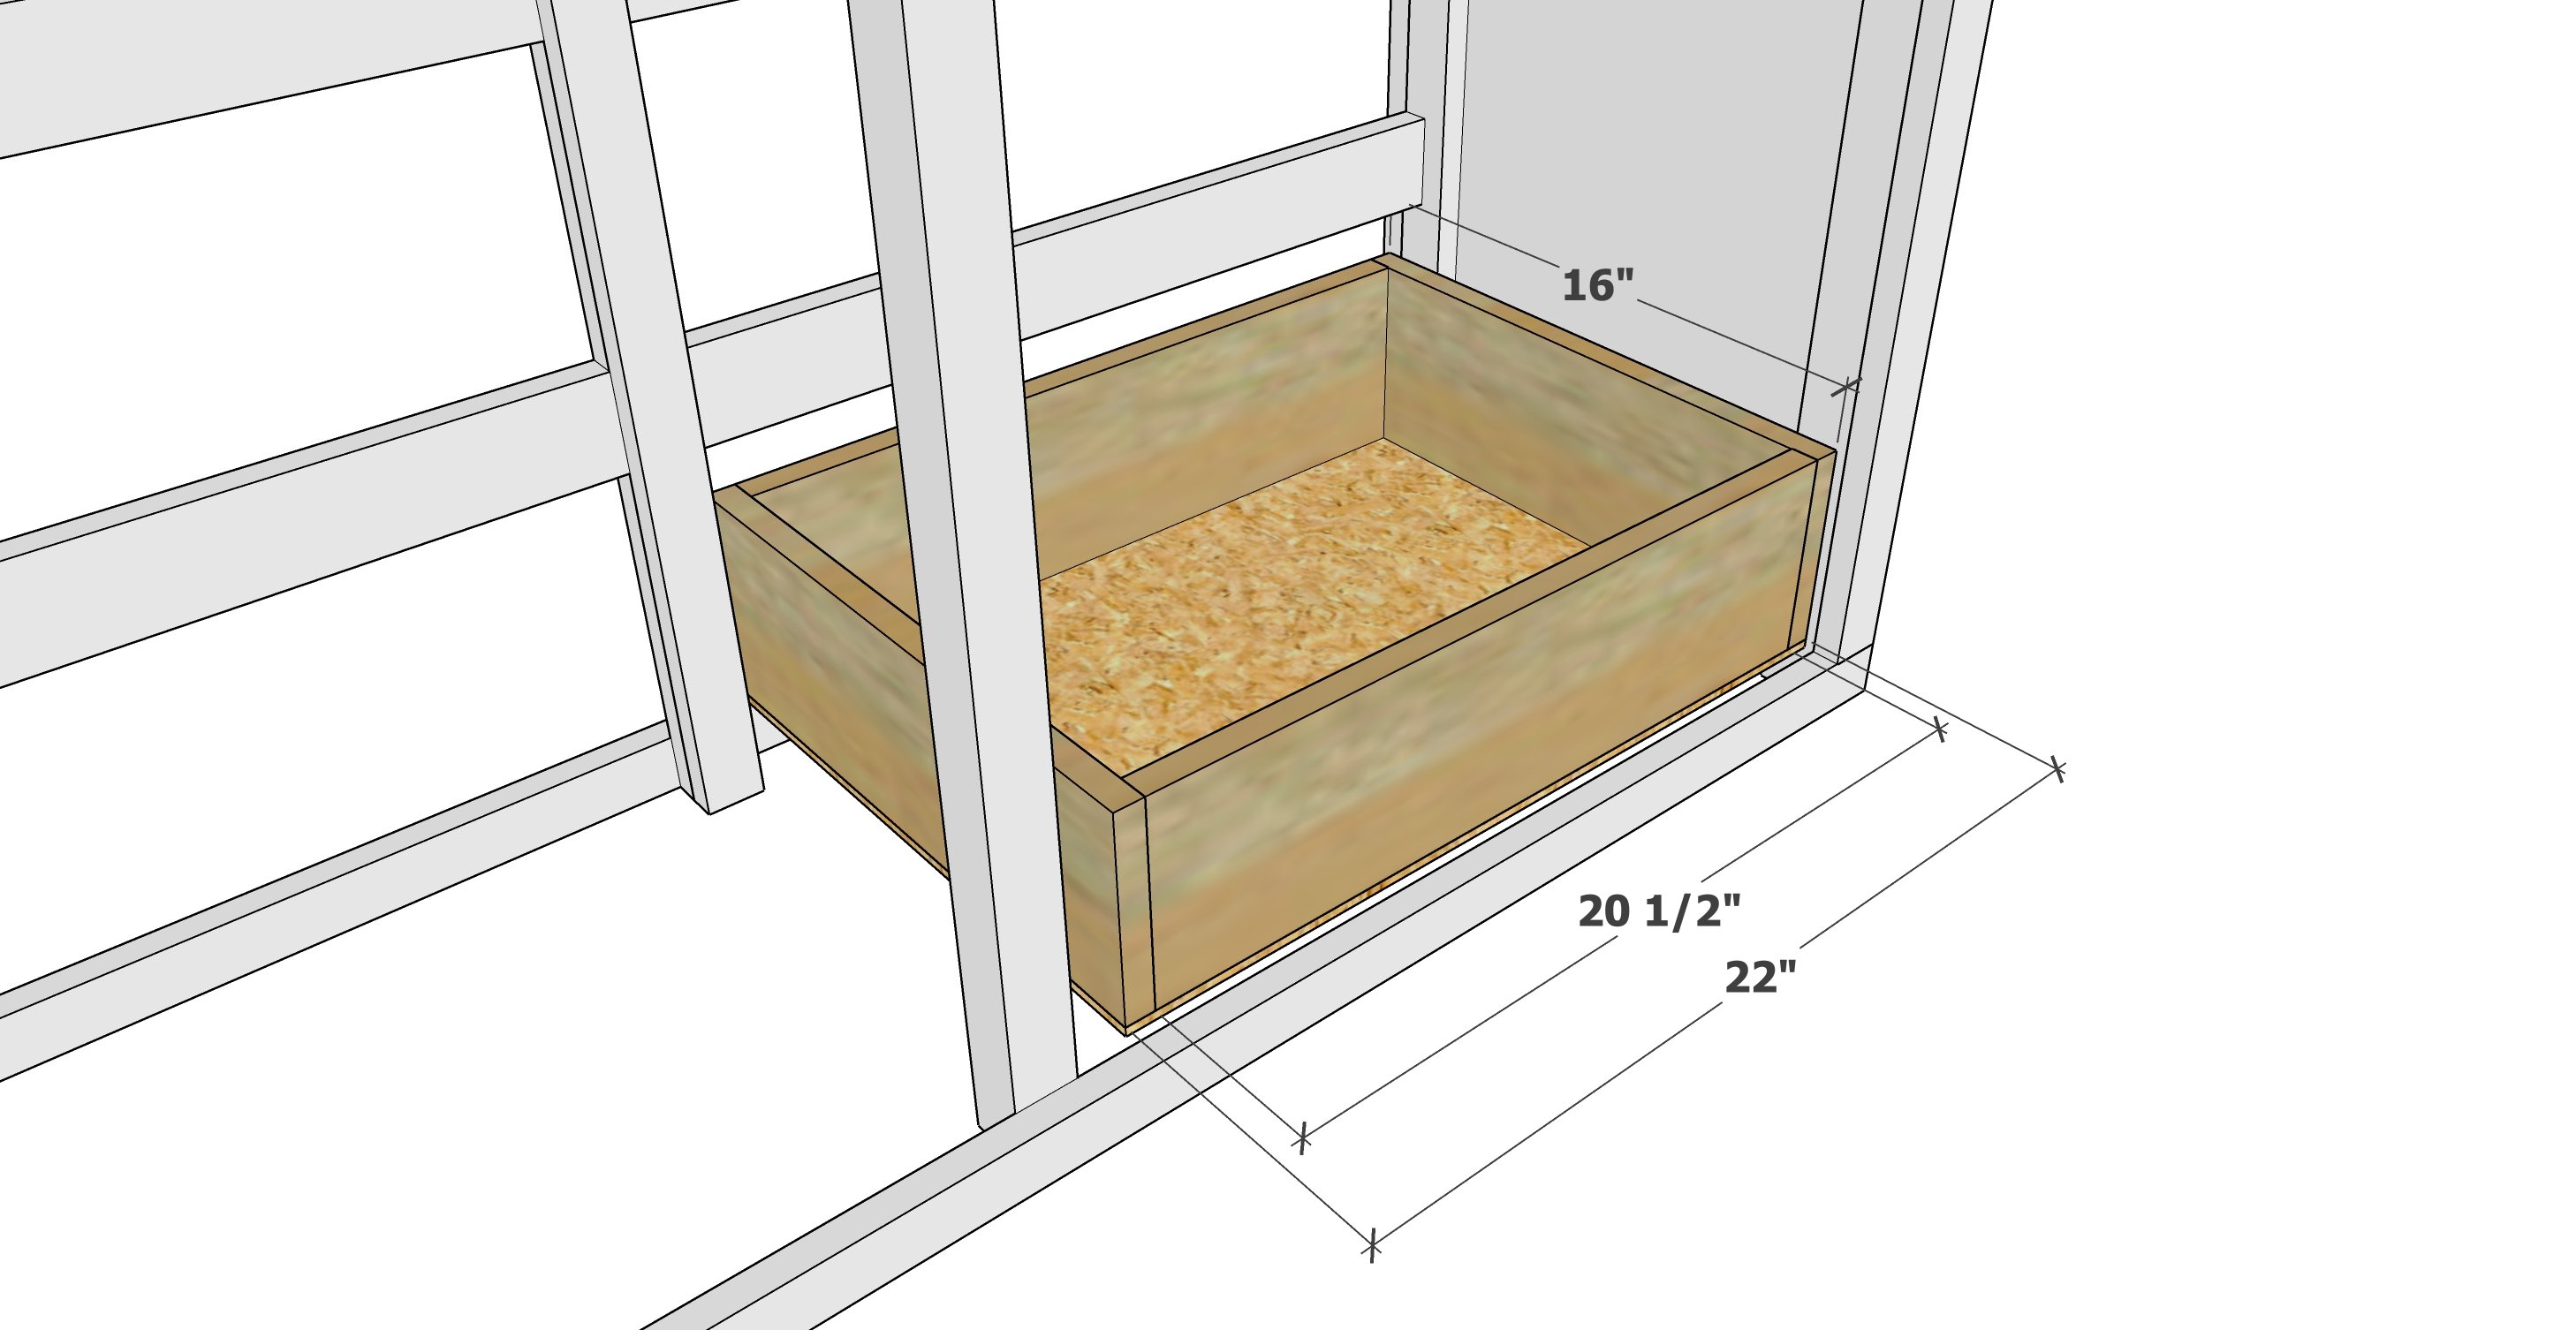
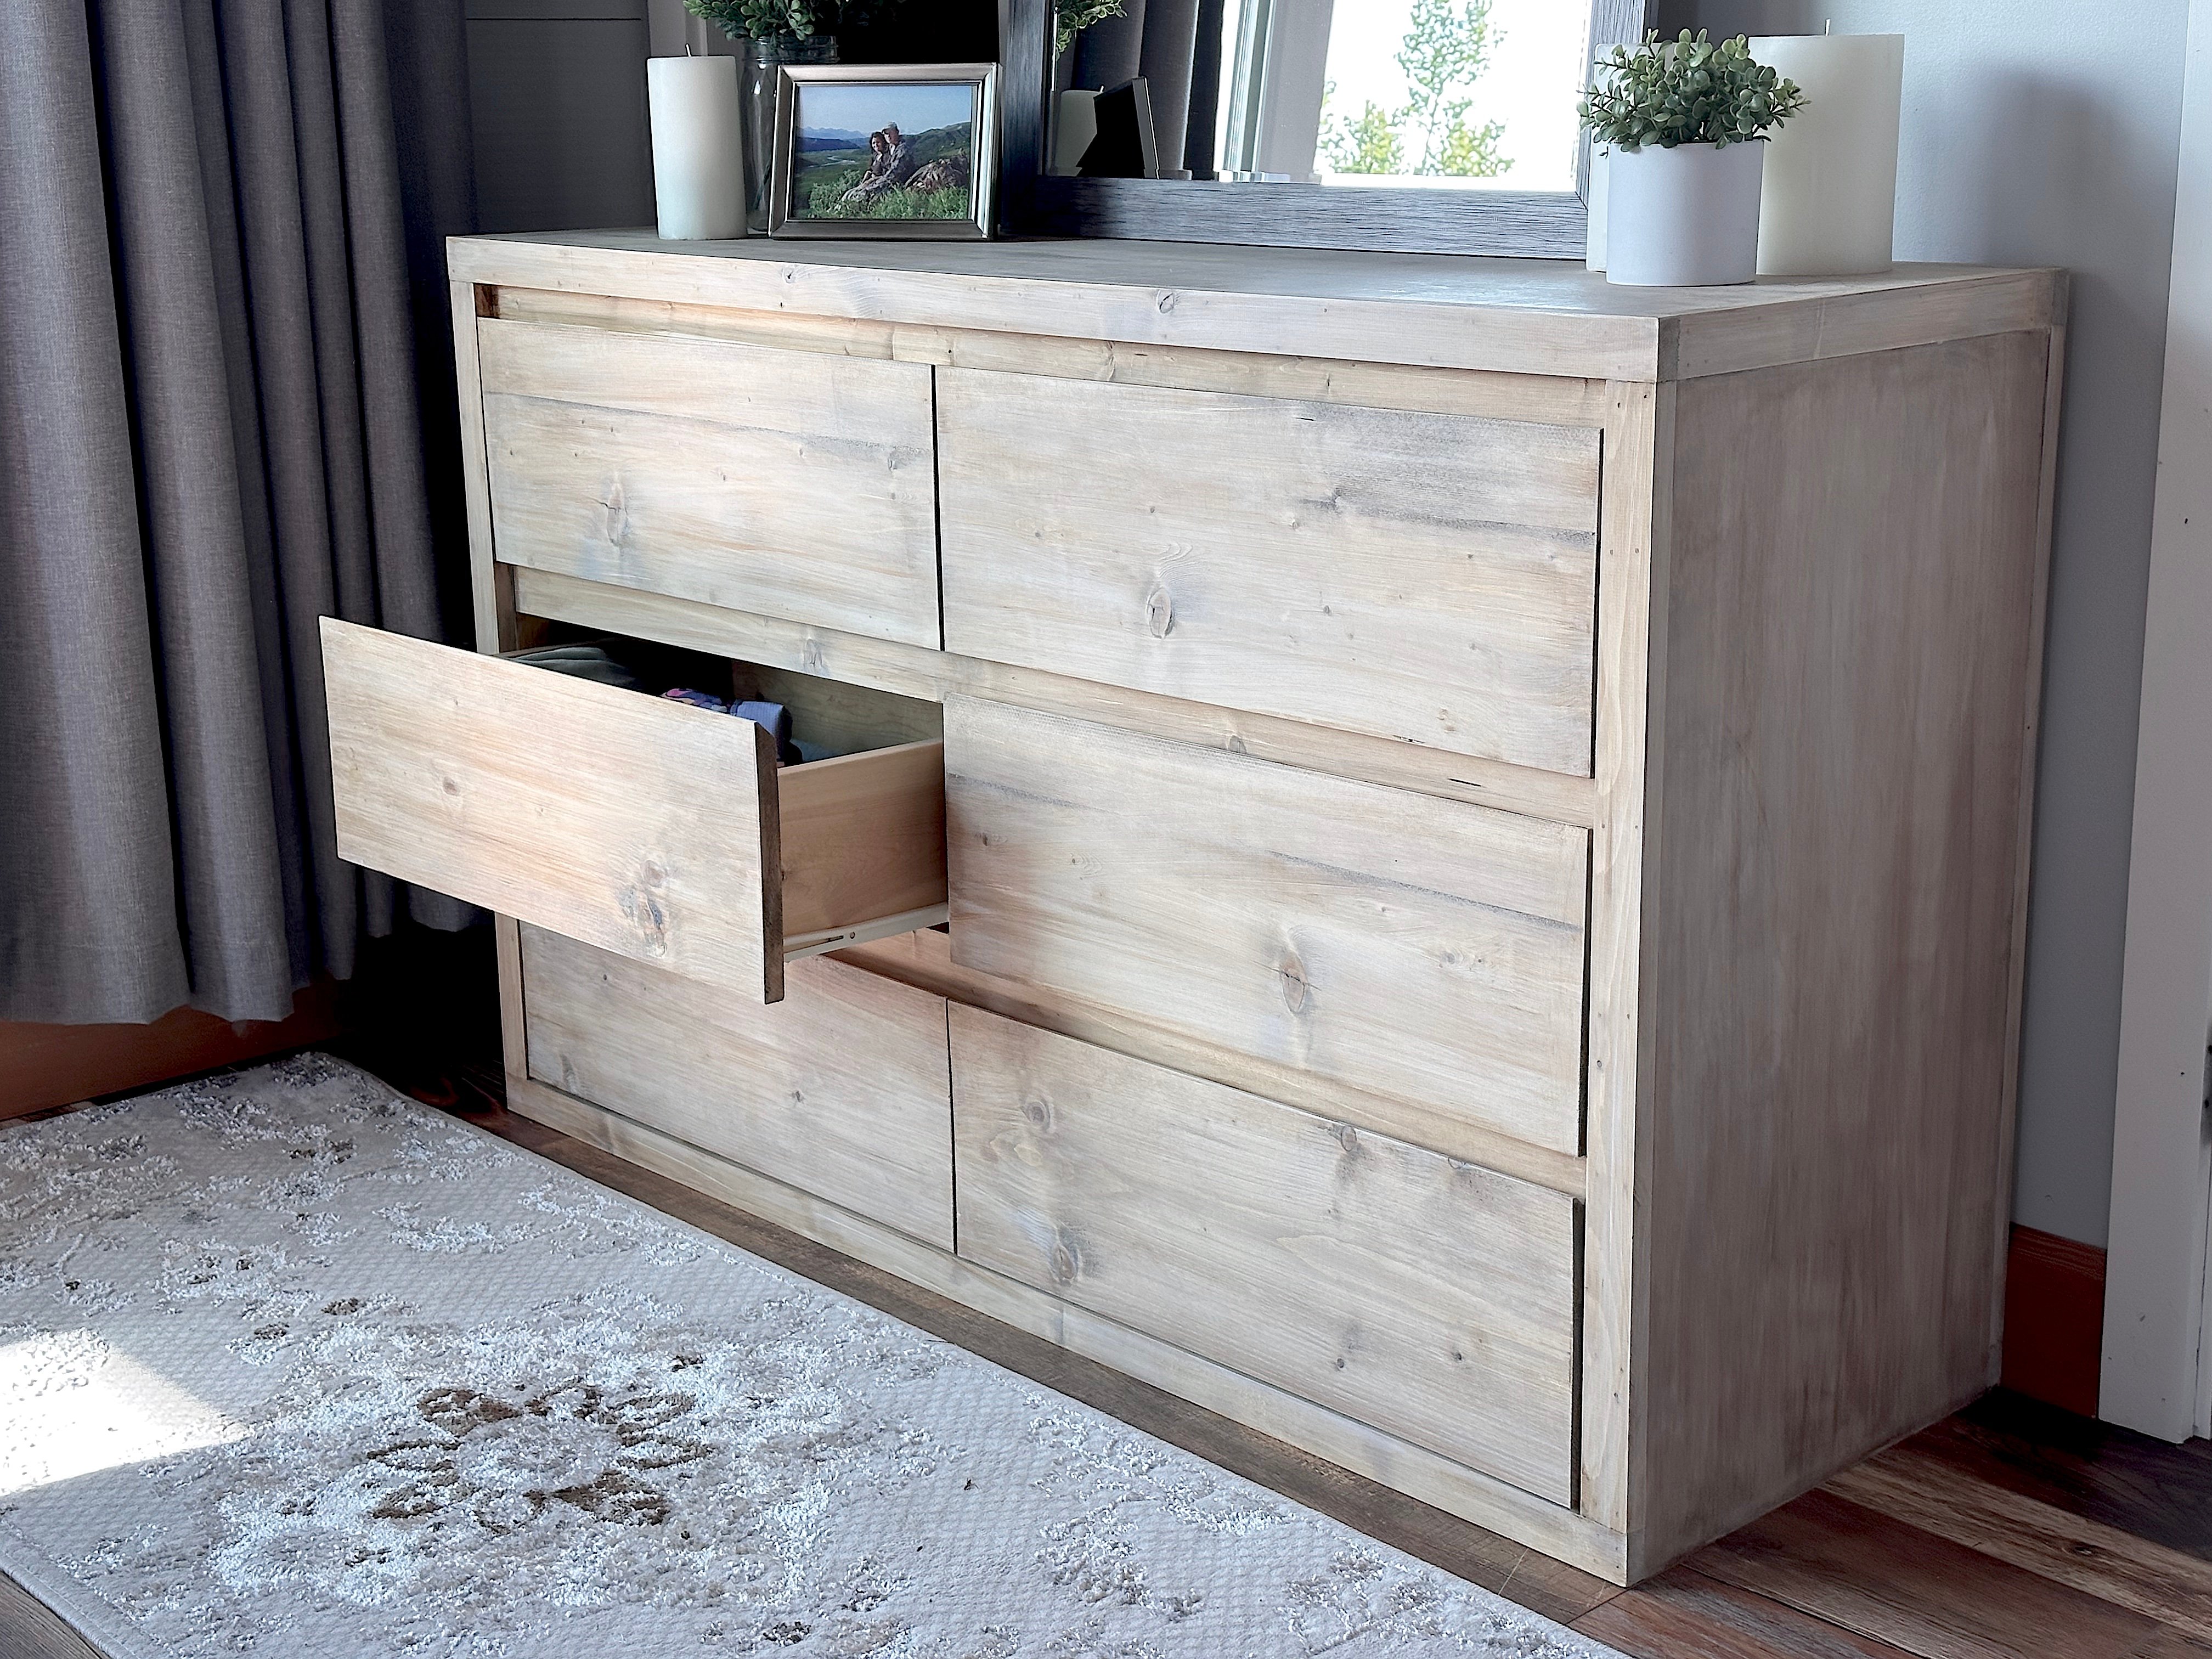
Drawers - I recommend building one drawer first, to make sure it slides right, and then build the remaining. It is better to build slightly smaller in width as the drawer slides do have some adjustment if the drawer is small, but a too large drawer will need to be cut down in size.
- Drawer sides - cut 6 drawer sides to 15-3/4" - to match the length of the drawer slide hardware.
- Drawer front and back - The drawer front and back measurements need to be figured, and it is important they are right on. Measure the width opening for the drawers - it should be right at 23". Double check that your drawer slides require 1/2" clearance each. If your opening is 23" and your drawer slide clearance is 1/2" each, then cut the drawer fronts and backs to 20-1/2" (or 2-1/2" less than the opening).
- Drawer bottom - cut the drawer bottoms to match the overall bottom size of the drawers.
Assemble the drawers with glue and 1-1/4" brad nails, add the bottom with glue and 5/8" brad nails.
Install the drawer members of the hardware to the bottoms of the drawers, wheels to the back, drawer slides flush to the front. Screw into the openings in the drawer slides that allow for side to side adjustment (oval shaped, with the oval running widthwise to the drawer). Set the screw so the drawer slide can be adjusted outward.
Install the drawer slides in the cabinet carcass, so the front edge of the drawer slide is matched with the front edge of the 1x3 on the plywood sides. On the center, the drawer slide will match the front edges of the short pieces of 1x2s.
Test the first drawer and adjust if needed.
Make any adjustments and build the remaining drawers and install.
Here is a video showing the drawer slide installs.
Step 9
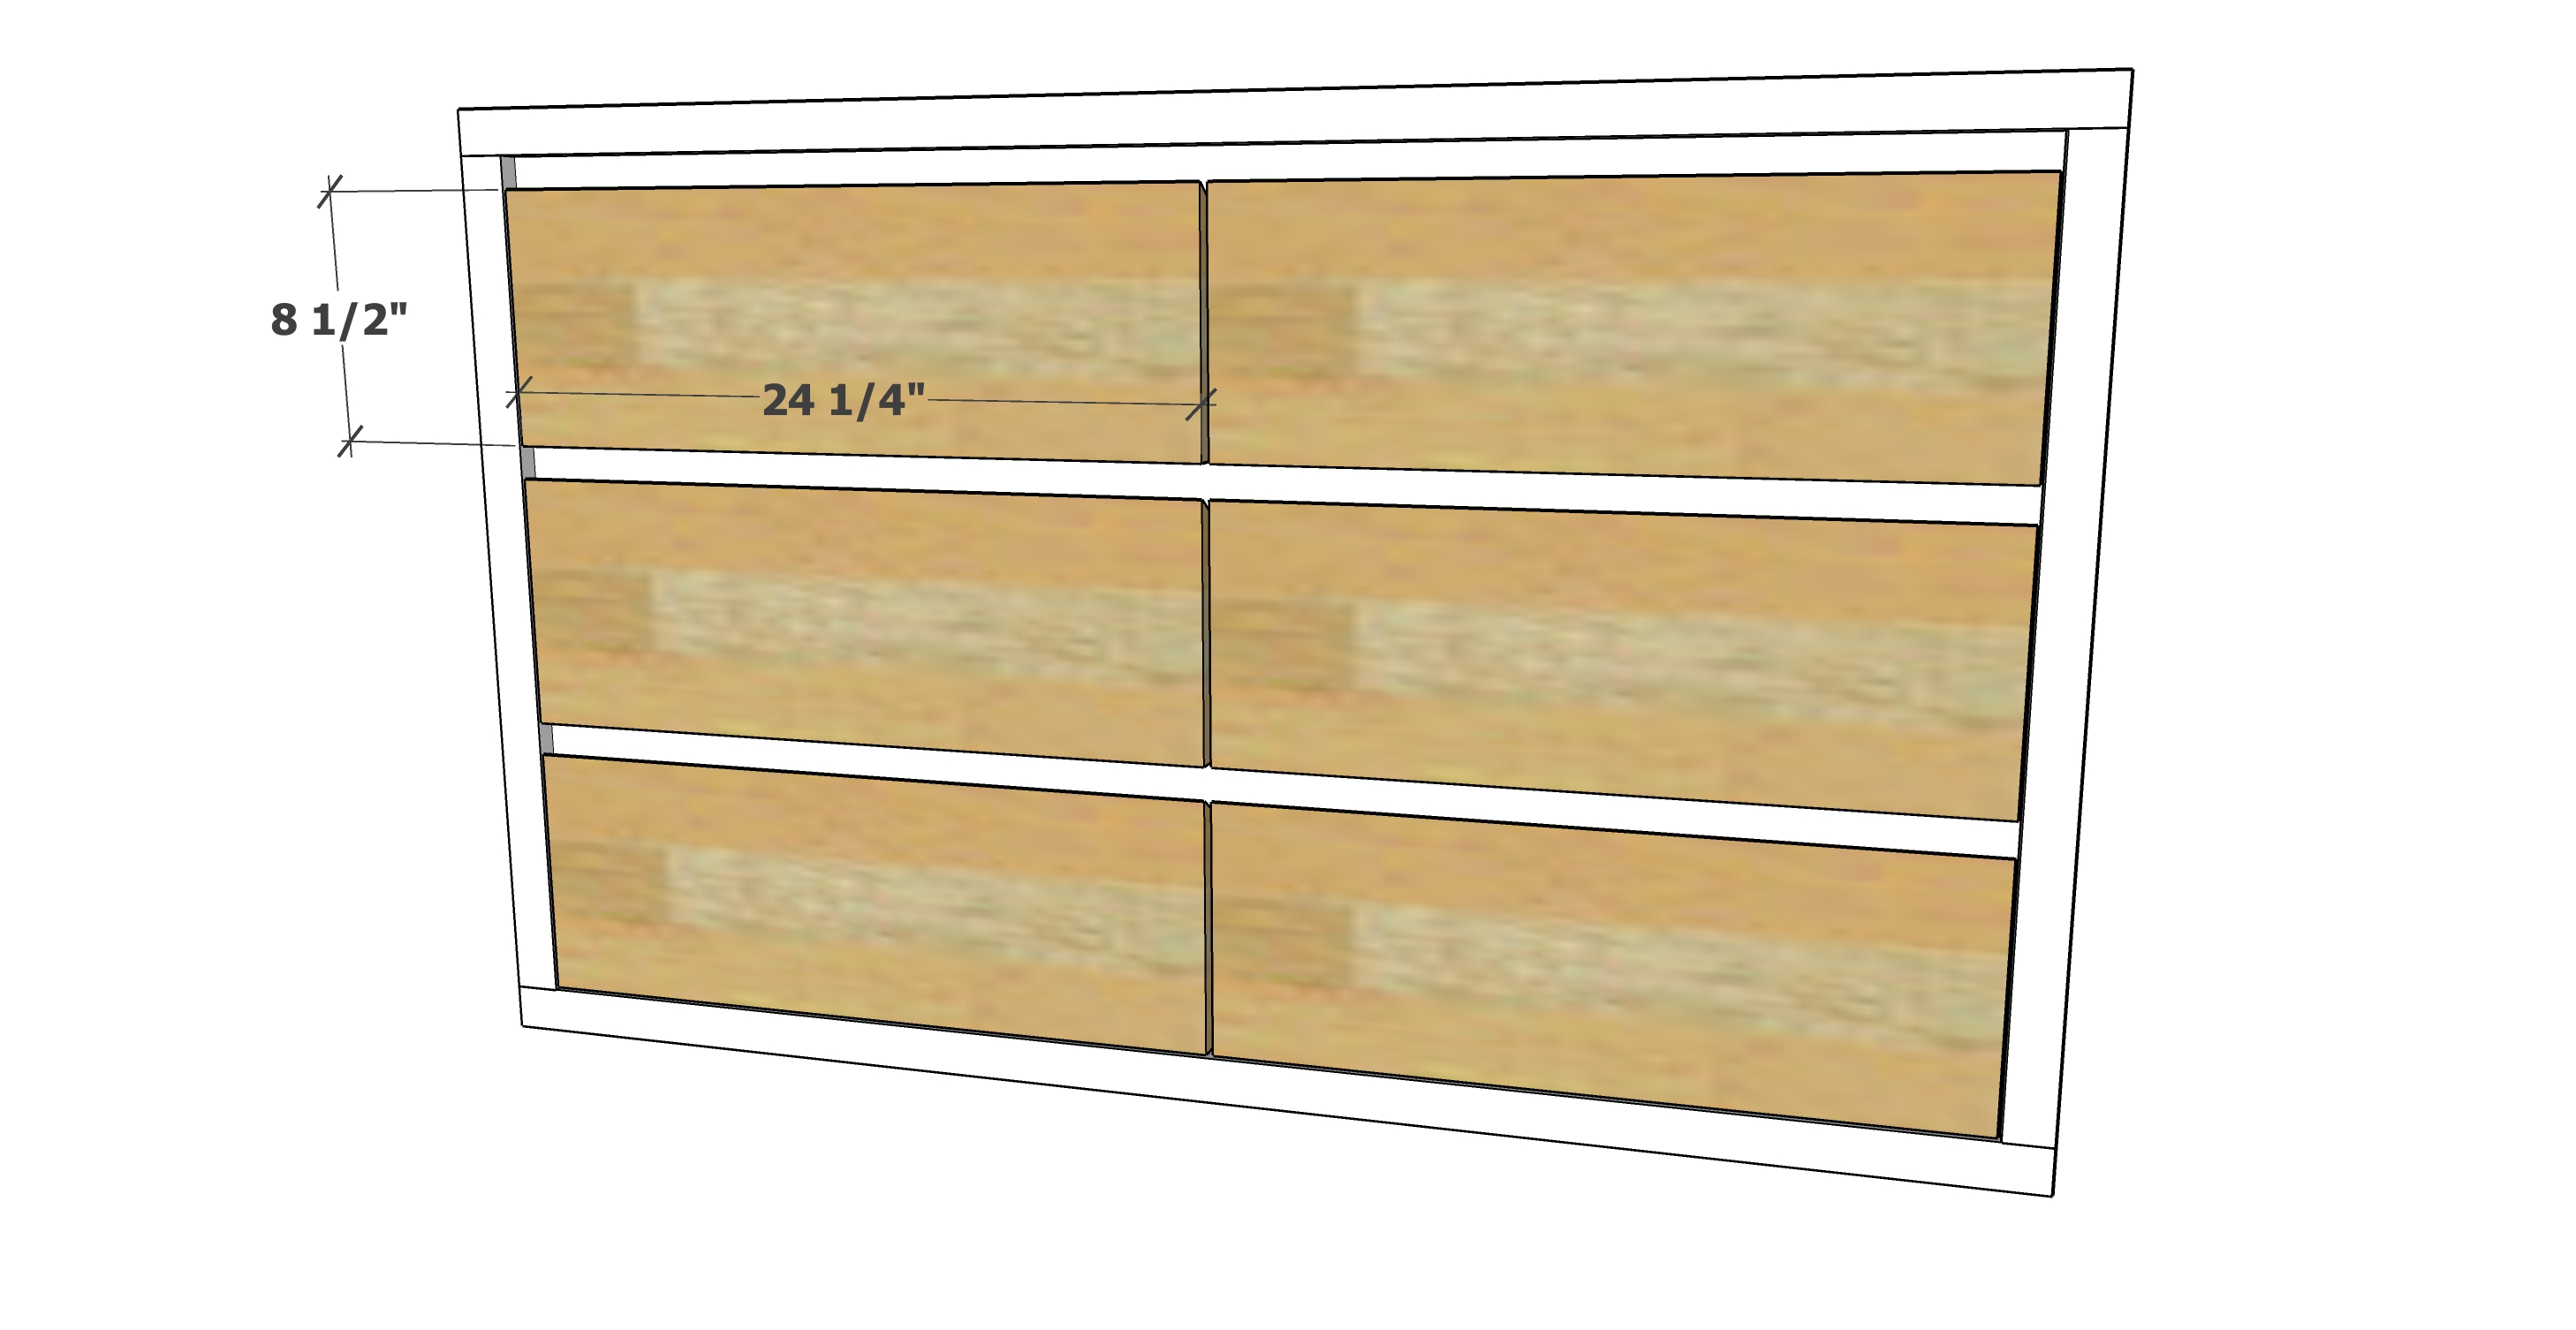
Drawer Faces
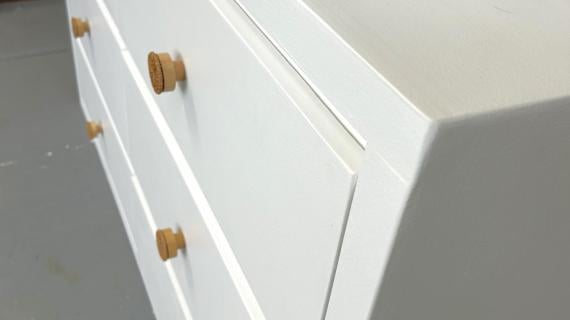
Rip the 1x10s down to 8-1/2" overall width, with the top edge at a 45 degree bevel.
Measure the openings and allow for about 1/8" in between the drawer faces. Cut the drawer faces.
Install the bottom two drawer faces with 1-1/4" brad nails from the front. Secure from the back with 1-1/4" screws (I used pocket hole screws).
The easiest way to add the upper drawer faces is to rip a piece of wood to 1-1/8" width and use it as a spacer in between.
Attach remaining drawer faces.
Then I sanded with 120 grit sandpaper in the direction of the wood grain. I actually just used a sanding block and sanded by hand.
Remove all sanding residue by vacuuming and then wiping with a damp, lint free cloth.
The whitewash is super important for a dimensional, high end look - and it's easy to do. Mix white paint with water, about 50/50. Wear gloves and wipe on with a paper towel in the direction of the wood grain.
To further protect the project, you can apply a polyurethane over top.