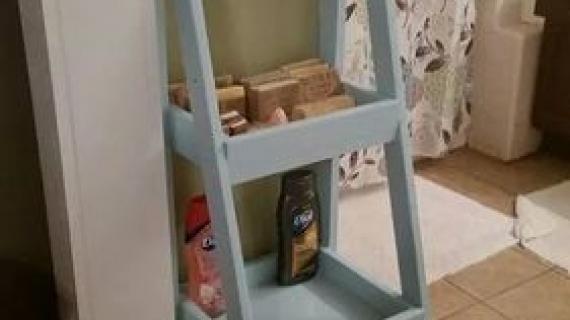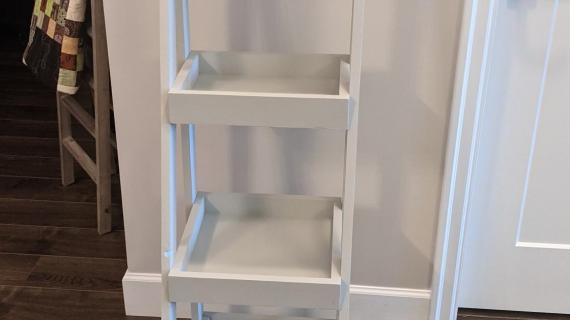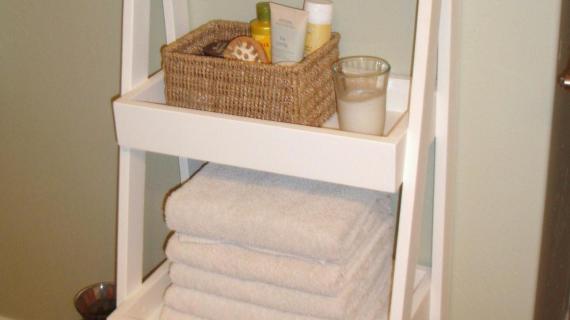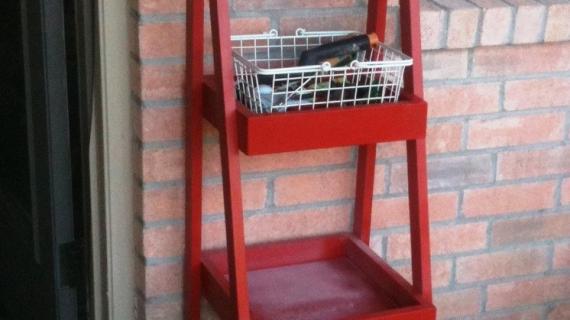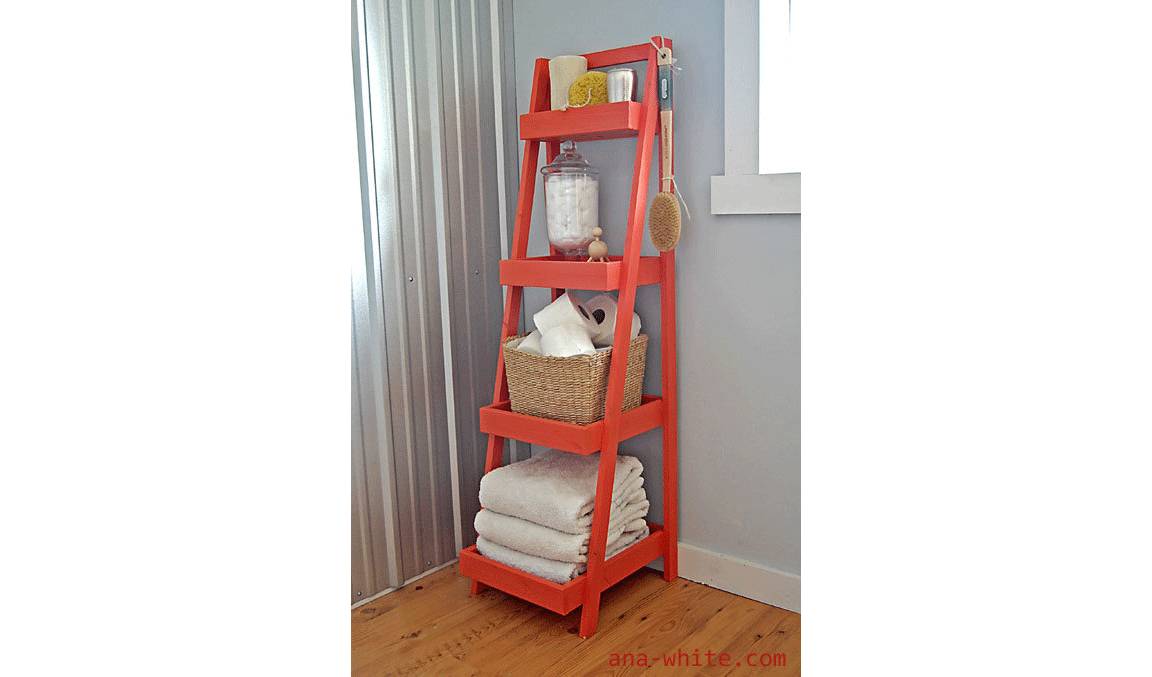


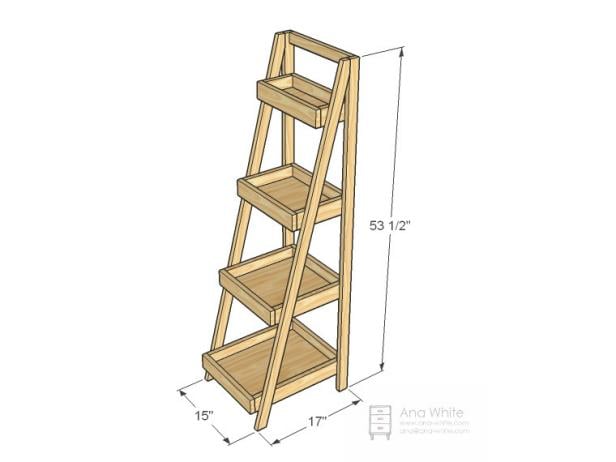
Free plans to build your own painter's ladder shelf. This is a great option for extra storage in bathrooms or tight spaces.
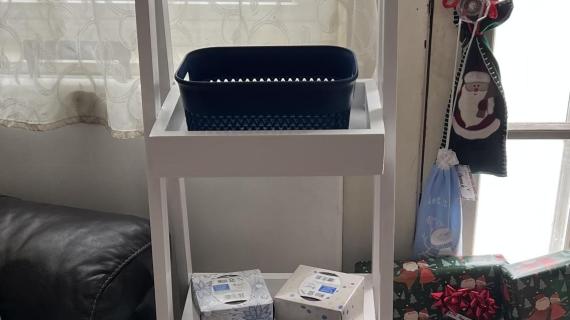
We love this little storage piece! You can build it out of all 1x pine boards, with 1x12s for the bottom, 1x3s for the trim, and 1x2s for the legs. It's also great in a kitchen for produce.

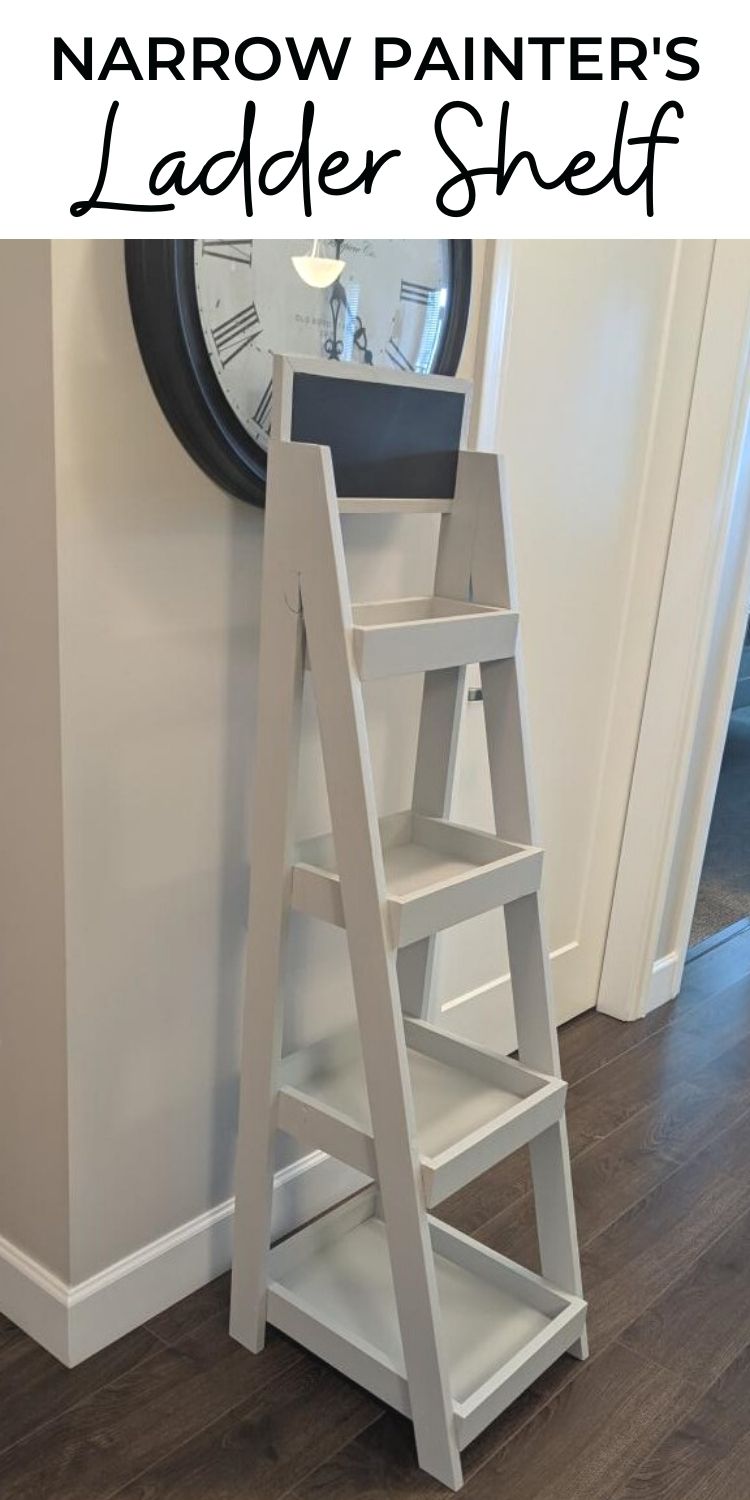
This modified version by Papa and Grammies Creations uses a 1x3 leg and features a chalkboard on top - perfect for using in a market!
Pin for Later!
Preparation
- 4’ - 1x12 pine board
- 6' - 1x2 pine board
- 8' - 1x4 pine boards (2)
- 2 -1/2" wood screws, self tapping star bit trim screws (24) or 2" brad nails
- 1-1/4" brad nails
- wood glue
Ladder Frame
- 2 - 1x2 boards cut @ 55-3/8" long (front legs, ends cut at 15 degrees off square)
- 2 - 1x2 boards cut @ 53-1/2" long (back legs)
- 8 - 1x3 boards cut @ ~12-3/4" long - measure and cut to fit (fronts and backs of shelves)
- 1 - 1x2 board cut @ ~12-3/4"" long (top trim) - cut same length as the 8 1x3 boards
Shelves
- 1 - 1x12 @ 4 3/4" (top shelf bottom)
- 2 - 1x3 boards cut @ 4 3/4" long (top shelf side trim)
- 1 - 1x12 @ 8 1/2" (second shelf bottom)
- 2 - 1x3 boards cut @ 8 1/2" long (second shelf trim)
- 1 - 1x12 cut @ 12 1/4" (third shelf bottom)
- 2 - 1x3 boards cut @12 1/4" long (third shelf trim)
- 1 - 1x12 cut @ 16" (bottom shelf bottom)
- 2 - 1x3 boards cut @ 16" long (bottom shelf trim)


This plan has been adjusted to use 1x12 pine boards for the shelf bottoms. 1x12s are 11-1/4" wide (not a full 12"), so the 12" widths have been replaced by 11-1/4" and the 13-1/2" cuts have been replaced by 12-3/4" cuts. This has not been updated in the diagrams, but the cut list is updated.
Instructions
Step 1
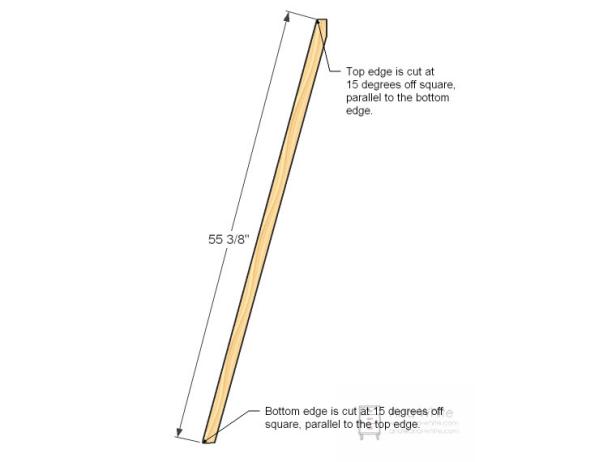
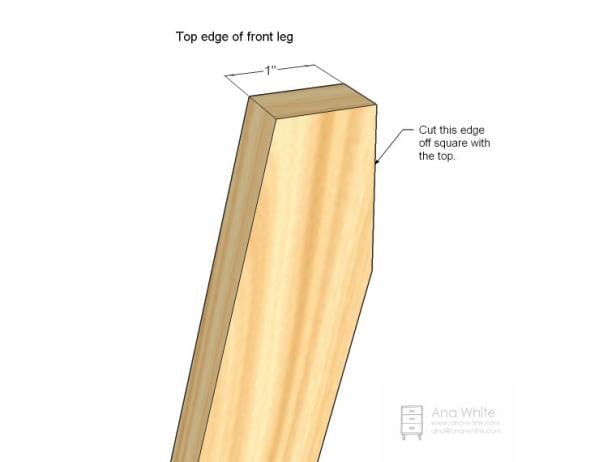
Cut the legs according to the cut list. For the front legs, you will also need to square up the top, back corners with a circular saw as shown in this diagram.
Step 2
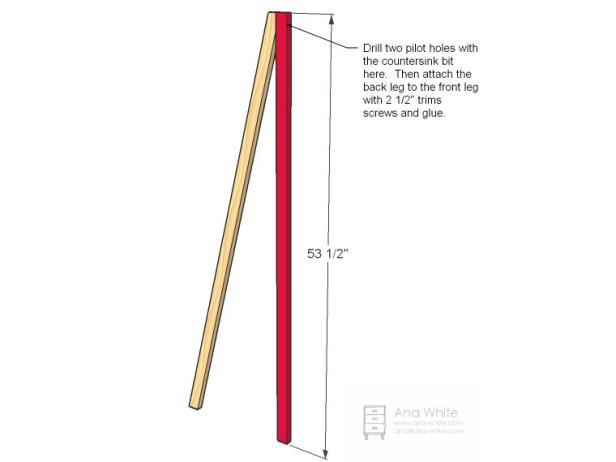
Attach the front and back legs together. Note that this is not a structural joint - a couple 2" nails or screws from the back will be fine (with glue). You can also do pocket holes, but the problem is the pocket holes will be exposed.
TIP: To make it easier to install the shelves in later steps, you can mark out the shelf locations on both legs (as shown in step 5) on the inside of the back legs, then use a square or straight edge to mark the front angled legs.
Step 3
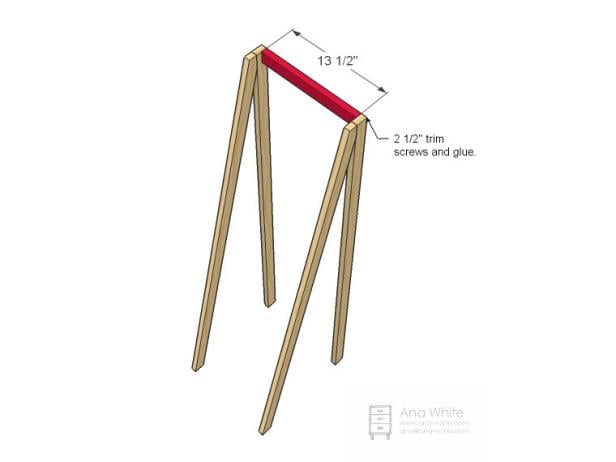
Attach the two legs together at the back. You can use the 1-1/4" brad nails and glue, or use pocket holes from the back side.
Step 4
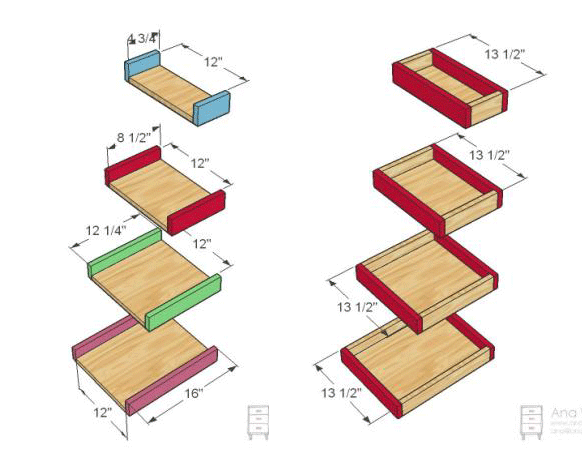
Trim the shelves with 1x3s by first attaching the side trim with 1-1/4" brad nails and glue. Then measure and cut the front/back trim (should be about 12-3/4") and attach to the front and back of all the shelves. Make sure you attach the 1x3s together at the corners.
Step 5
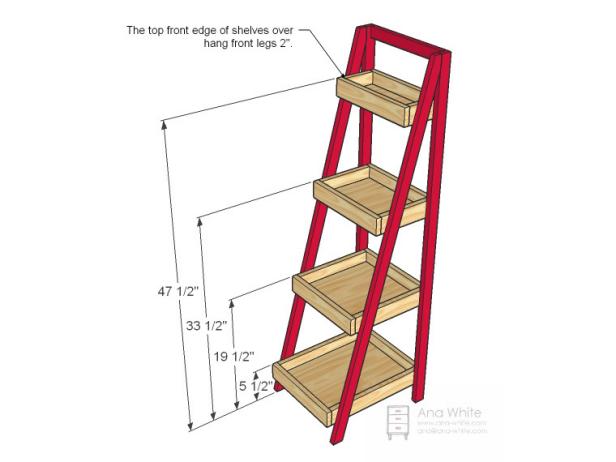
Attach the shelves to the sides with glue and 1-1/4" brad nails. You can attach from outside if this is easier.