
Difficulty
Beginner Projects
| 
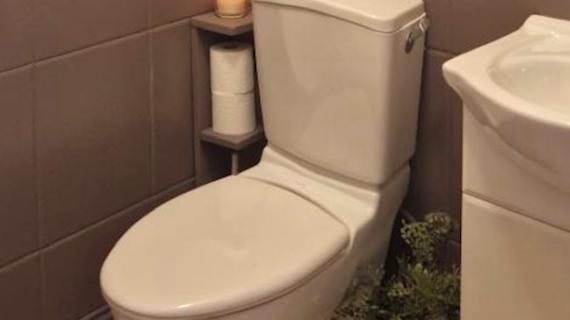
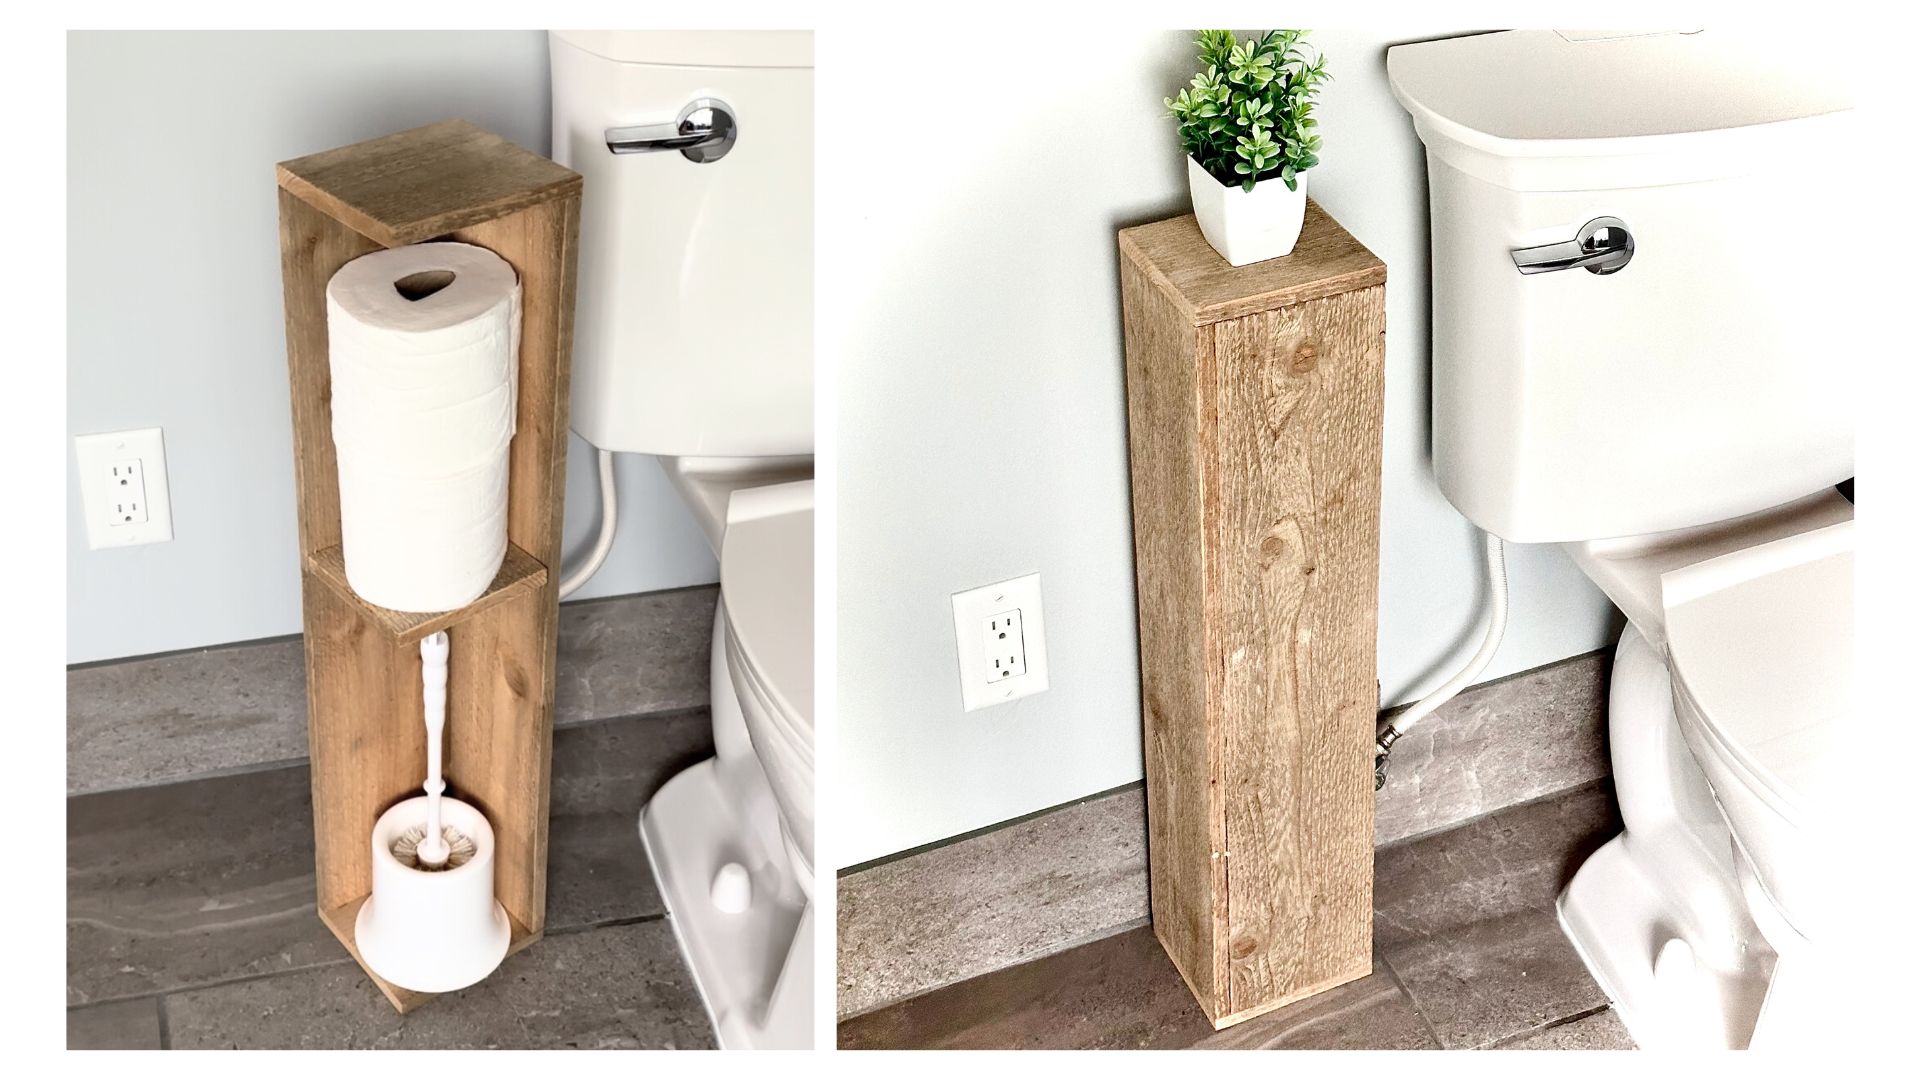
This narrow shelf hides and organizes your toilet brush and extra toilet paper, all behind a beautiful wood texture.
Using just one fence picket, you can build this beautiful bathroom organizer, to elevate your style and create extra storage. You'll love how simple this one is to build, and what a difference it makes!
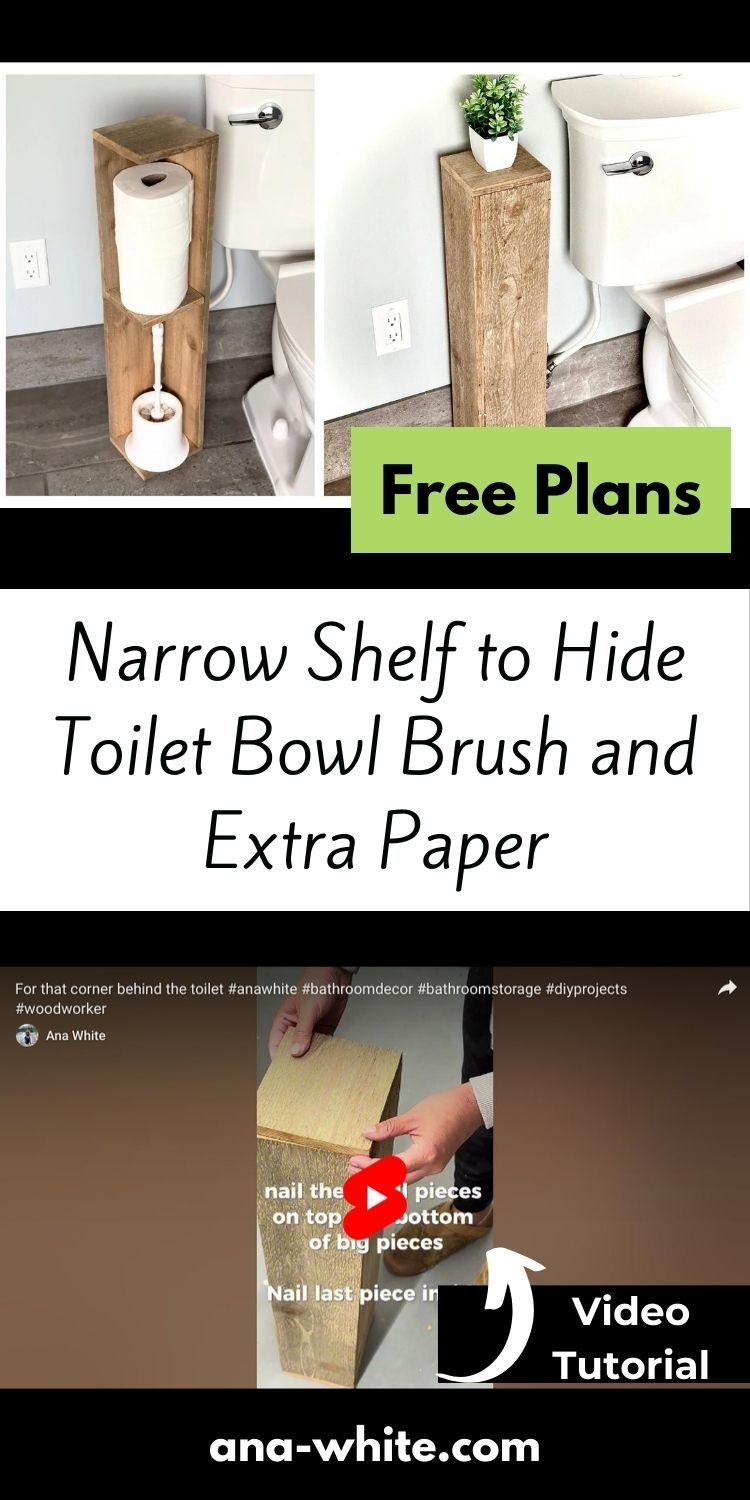
Free step by step plans with video tutorial from Ana-White.com
Pin For Later!
Dimensions
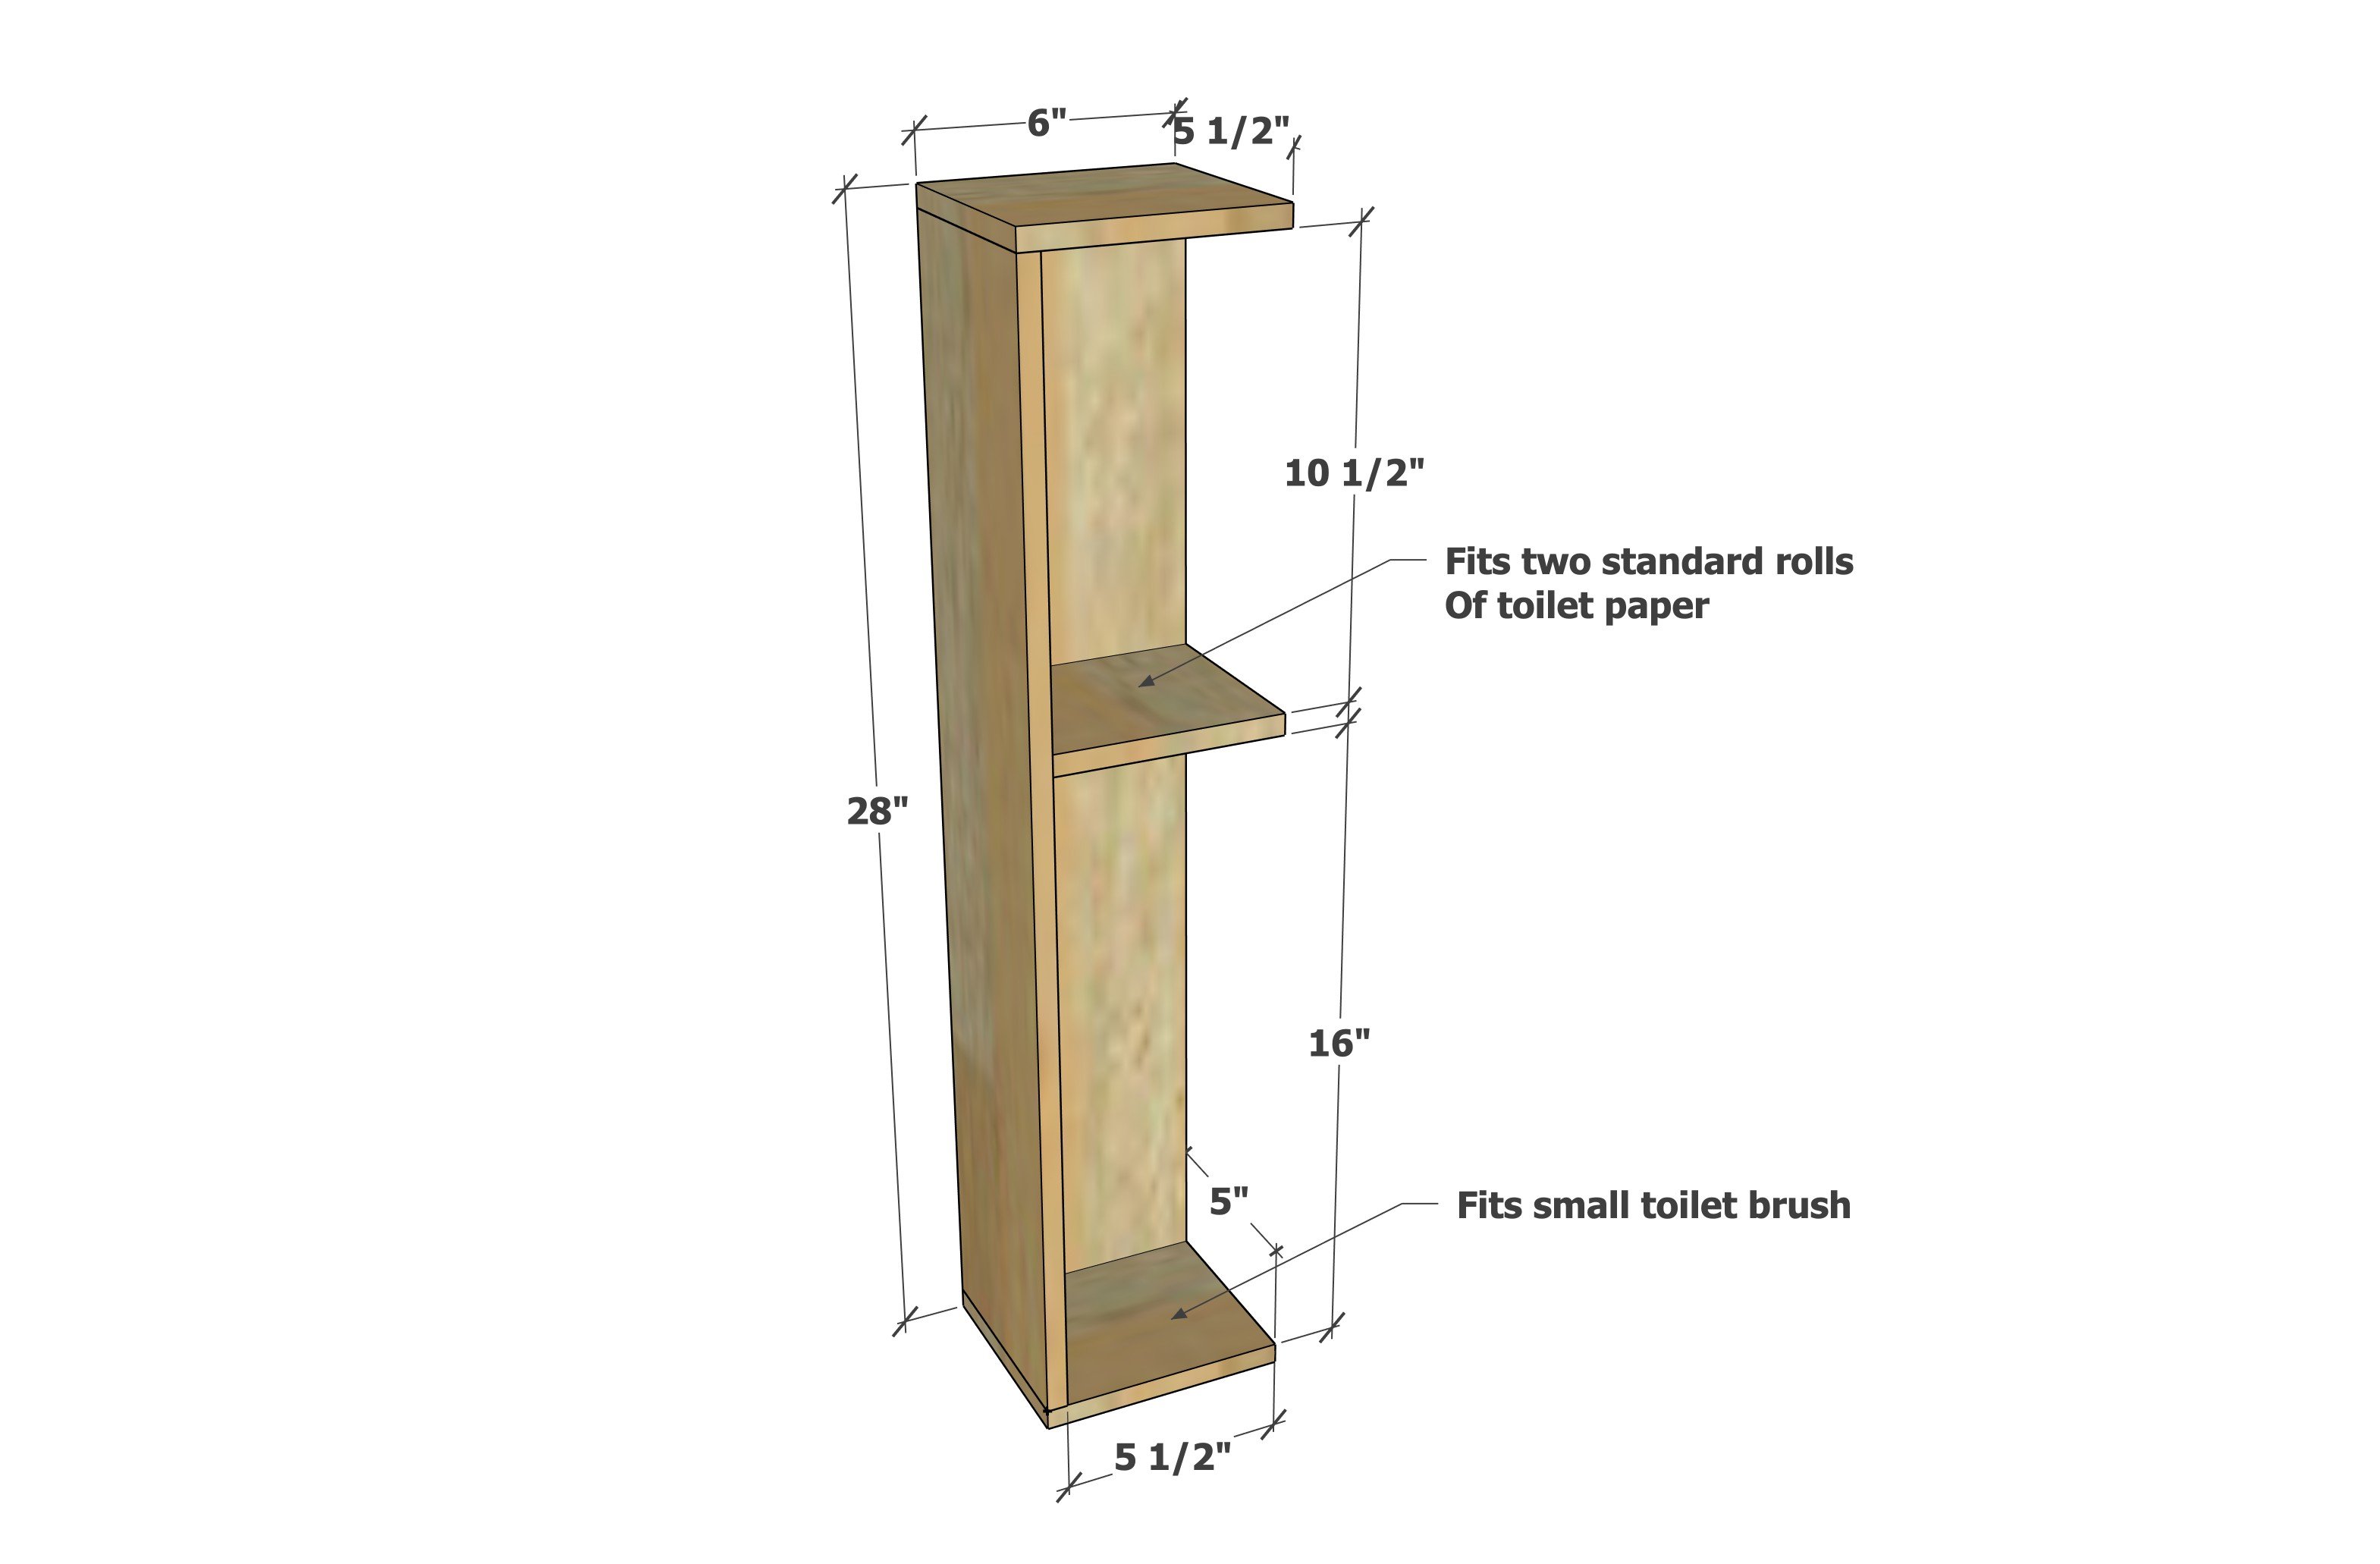
28" tall, about 5-1/2" x 6" - fits small bowl brush and two standard rolls of toilet paper
Preparation
Shopping List
- 1 - 5-1/2" wide cedar fence picket, NOT dogeared
- 1-1/4" brad nails
- wood glue
- wood filler
- coarse sandpaper
- paint or stain as desired
- foam brush applicator (for paint or stain)
- 4 stick on rubber pads for bottom to elevate off bathroom floor
Cut List
- 2 - 5-1/2" wide cedar fence pickets @ 27" long
- 2 - 5-1/2" wide cedar fence pickets @ 6" long
- 1 - 5-1/2" wide cedar fence picket @ about 4-7/8" - measure and cut to fit
Tools


Instructions
Step 1
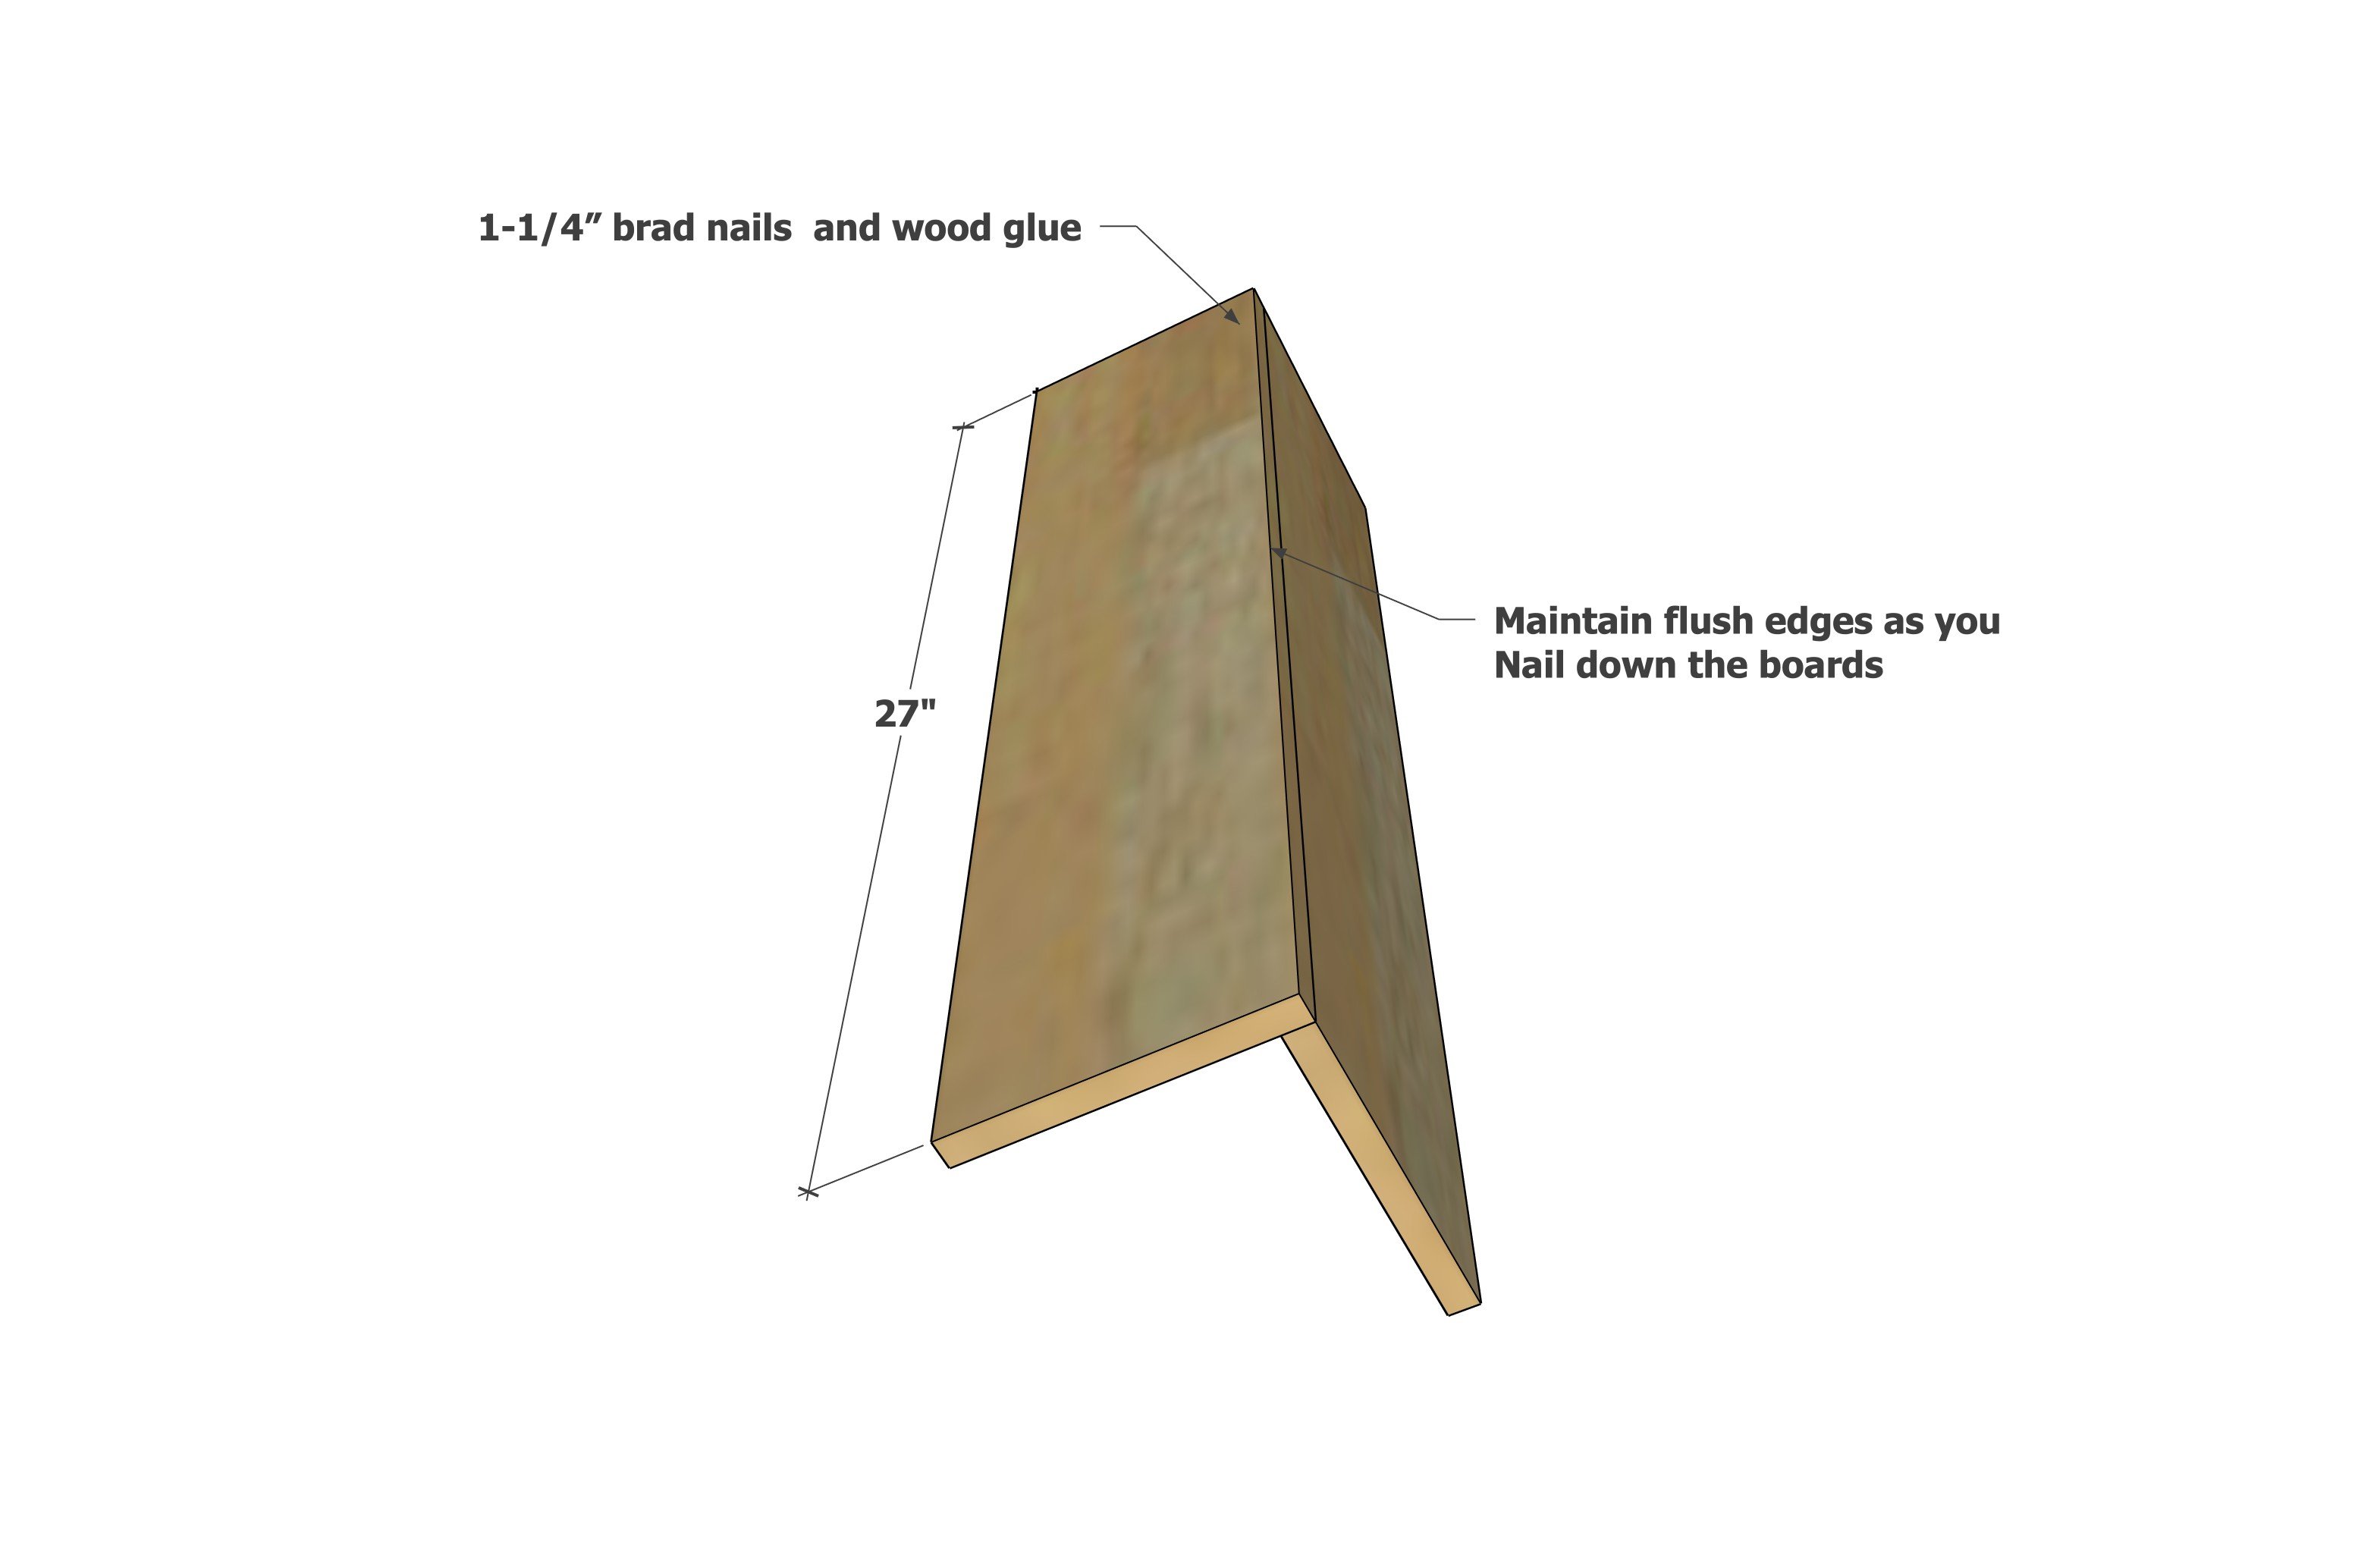
Nail the two long pieces together with 1-1/4" brad nails and wood glue. Keep the outside edge flush as you nail.
Step 2
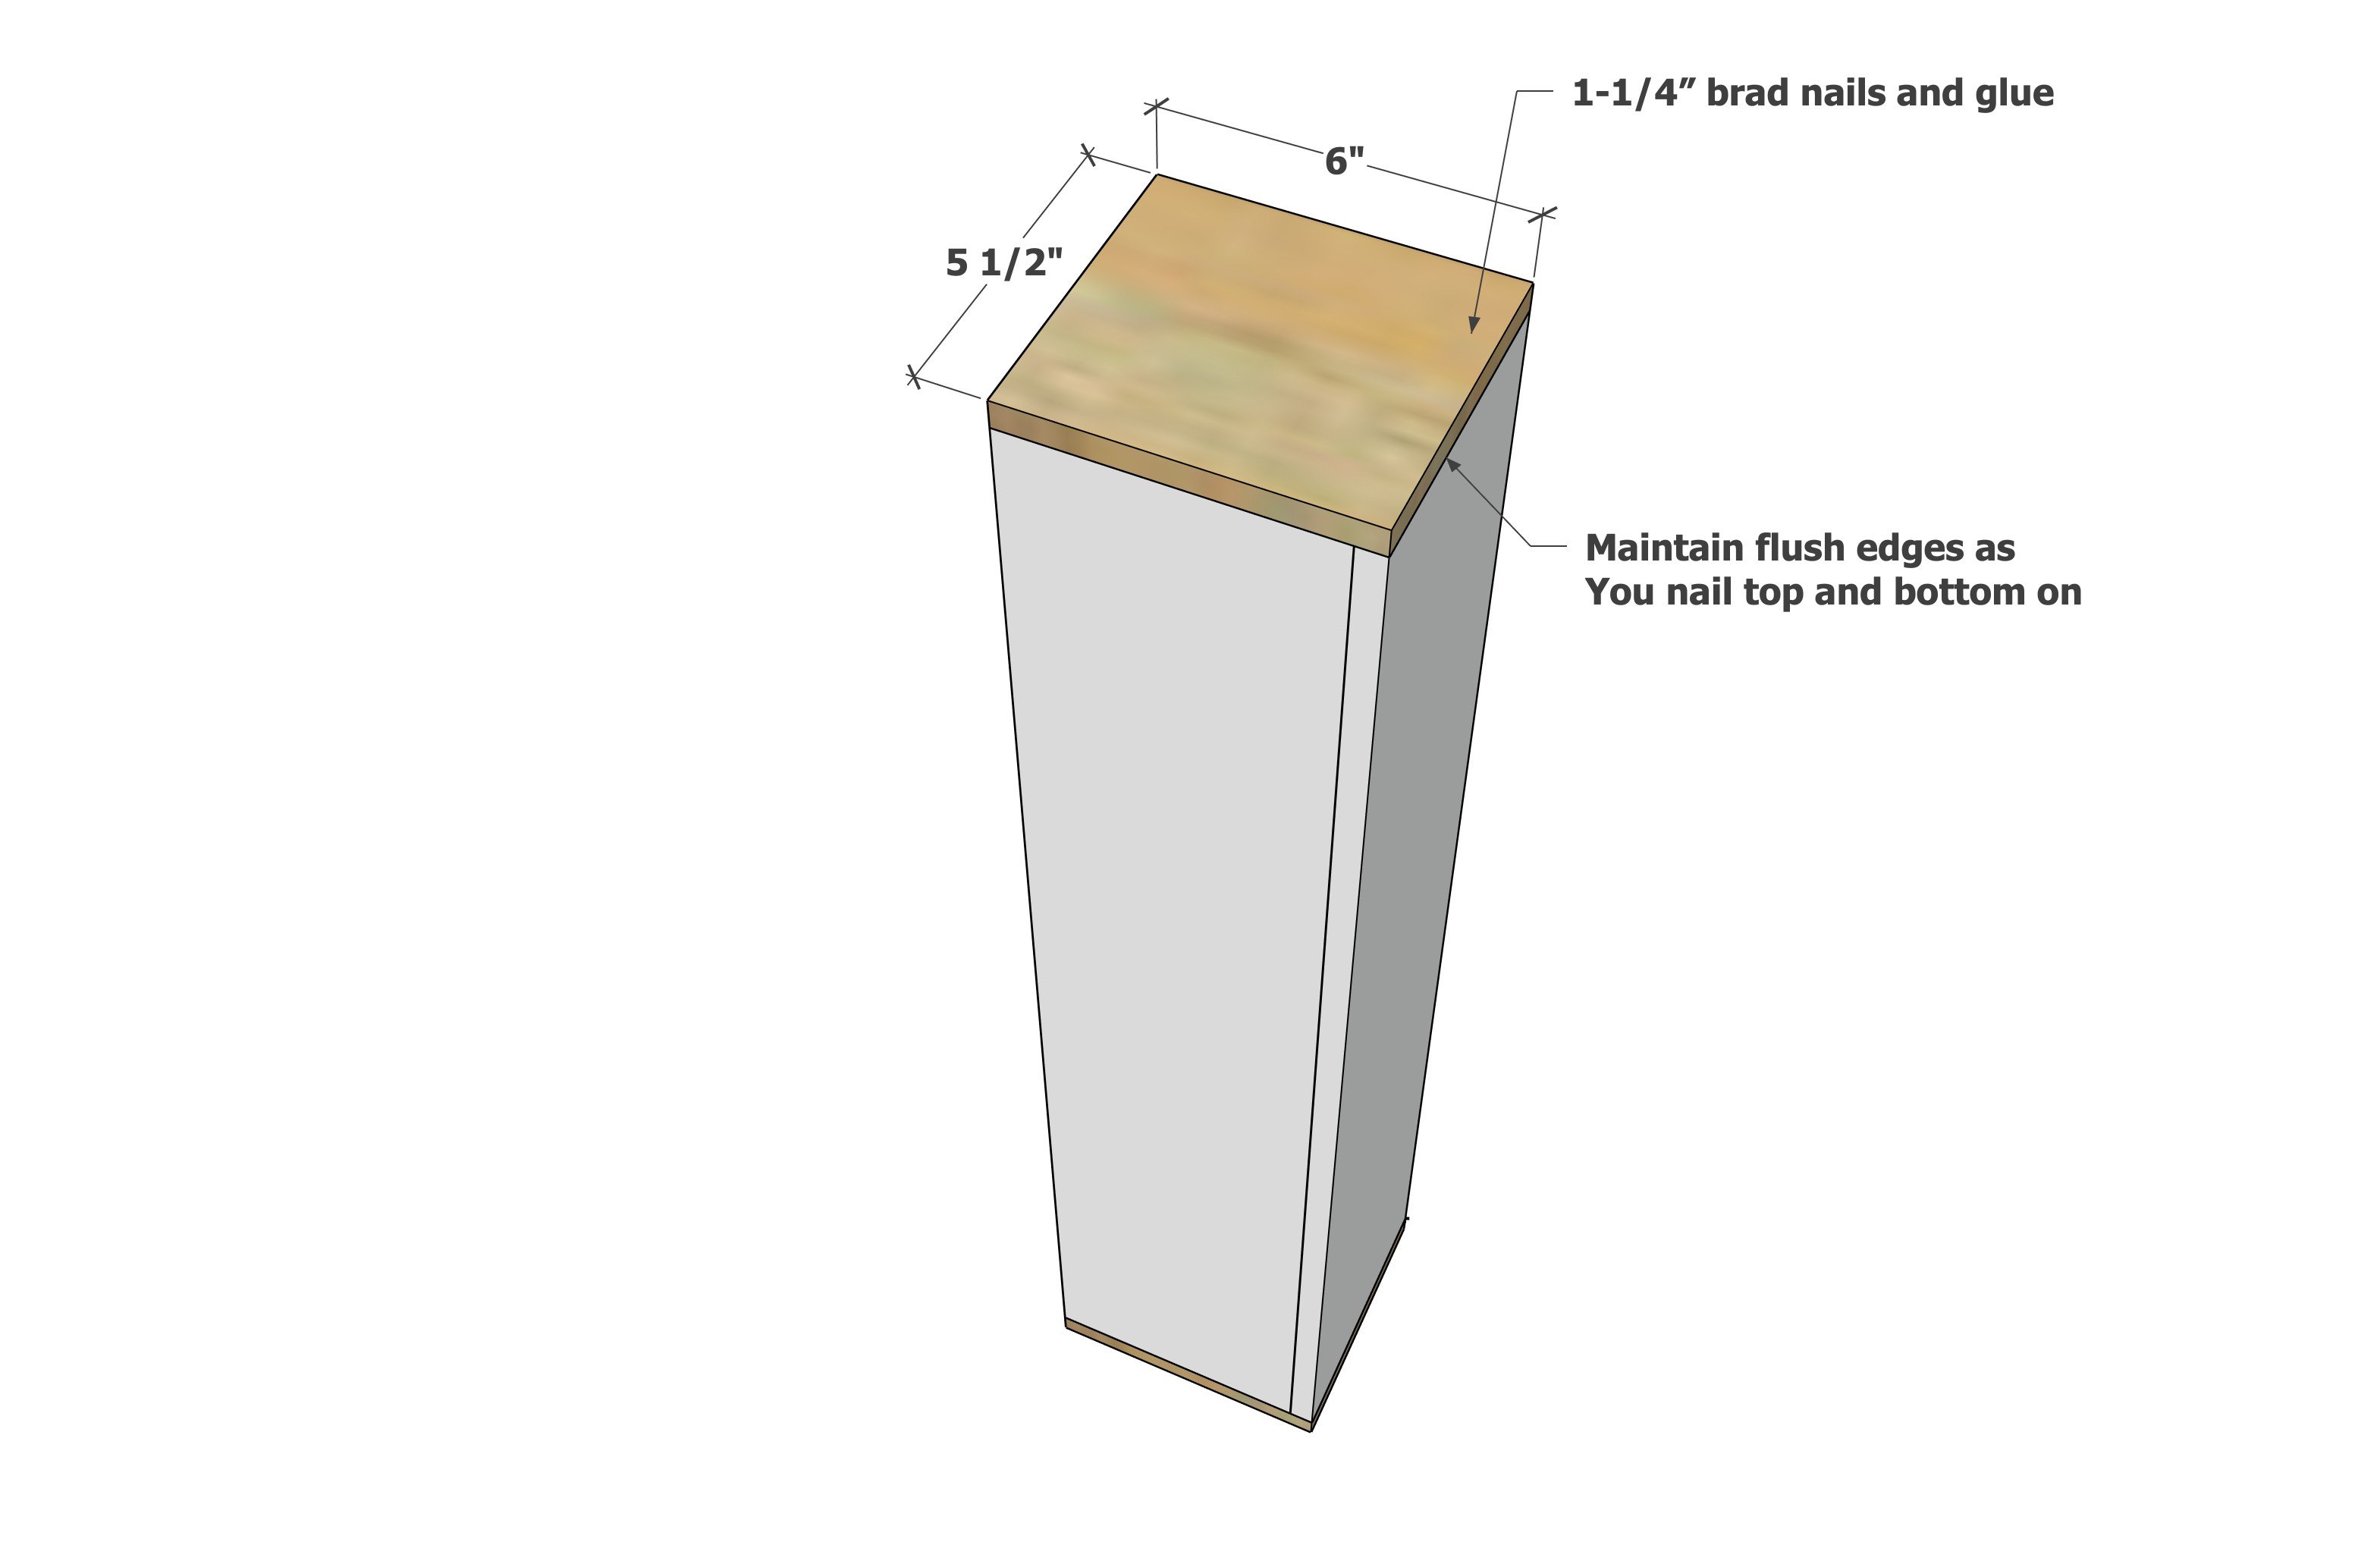
Nail the top and bottom on with 1-1/4" brad nails and glue.
Step 3
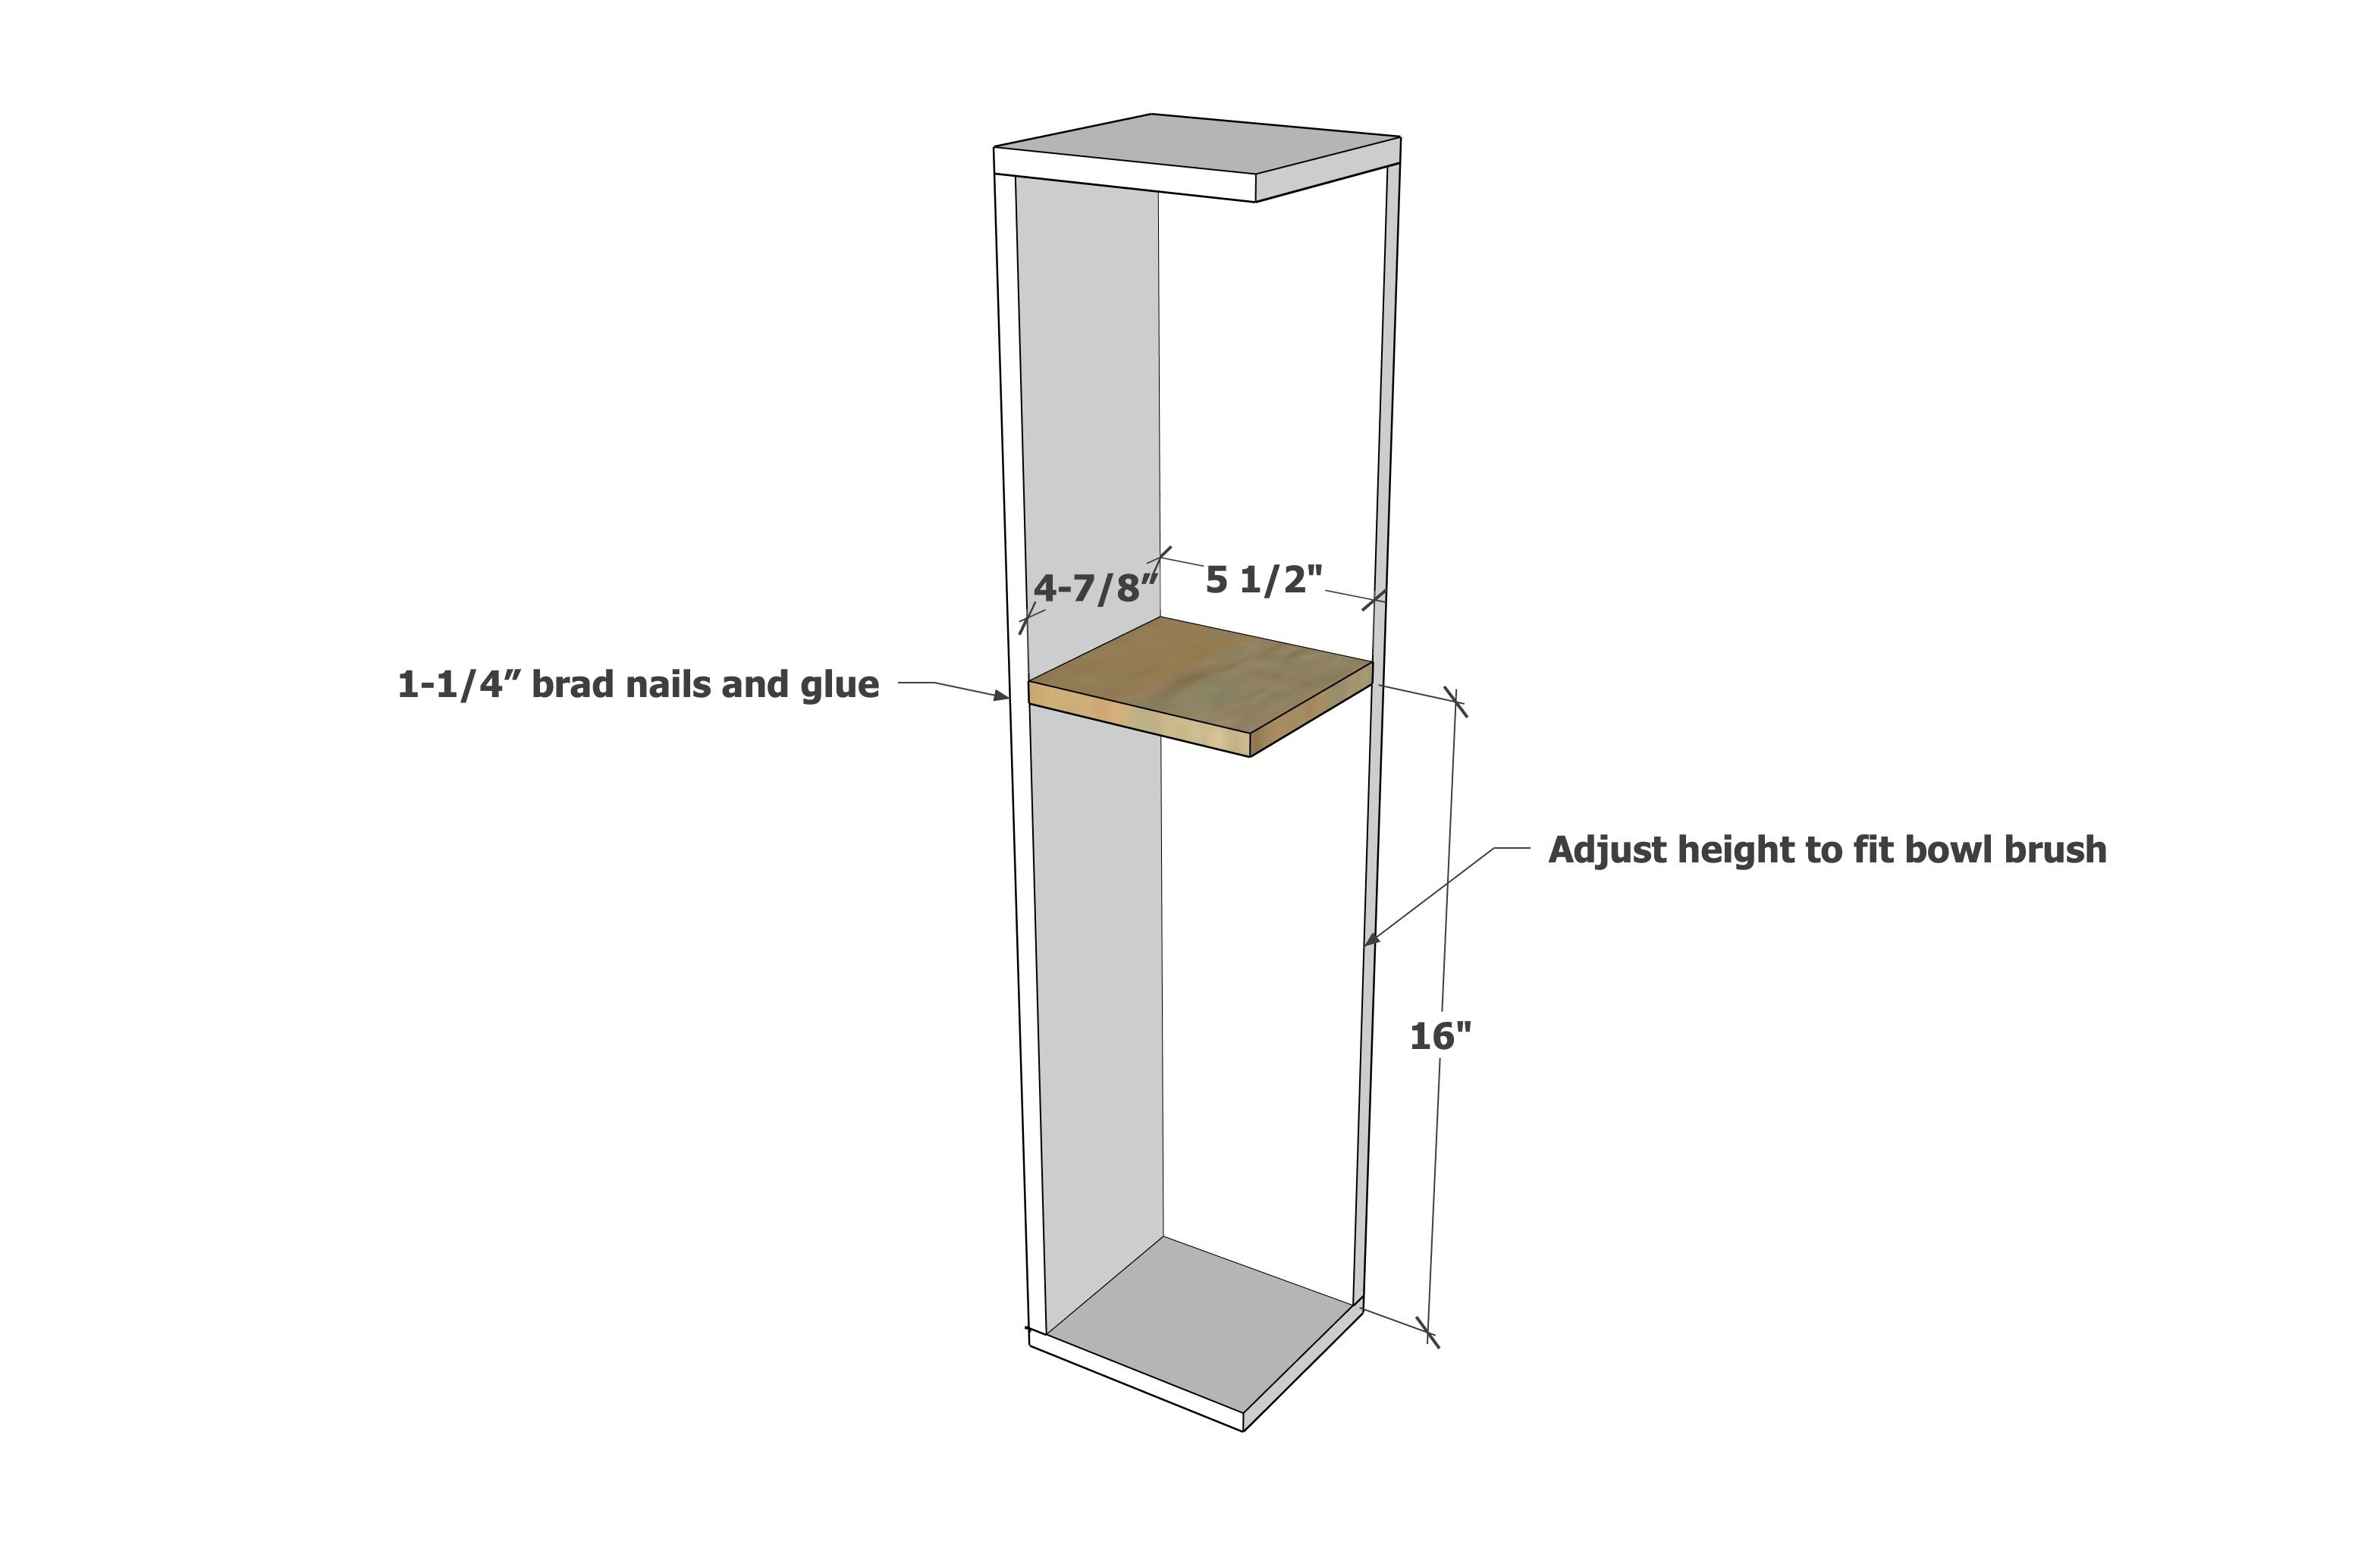
Measure, cut and mark the location of the inner shelf.
Nail and glue on.
Finishing Instructions
Preparation Instructions
Fill nail holes with wood filler and let dry.
Sand entire project with coarse sandpaper.
Vacuum sanding residue off.
Wipe off with a damp cloth.
Sand entire project with coarse sandpaper.
Vacuum sanding residue off.
Wipe off with a damp cloth.
Finish Used
Apply a stain or paint in the direction of the wood grain using a foam brush applicator.
Apply top coat as needed to protect interior of project.
Add stick on rubber feet to bottom to keep project stable and elevated off bathroom floor.
Apply top coat as needed to protect interior of project.
Add stick on rubber feet to bottom to keep project stable and elevated off bathroom floor.
Project Type
Room