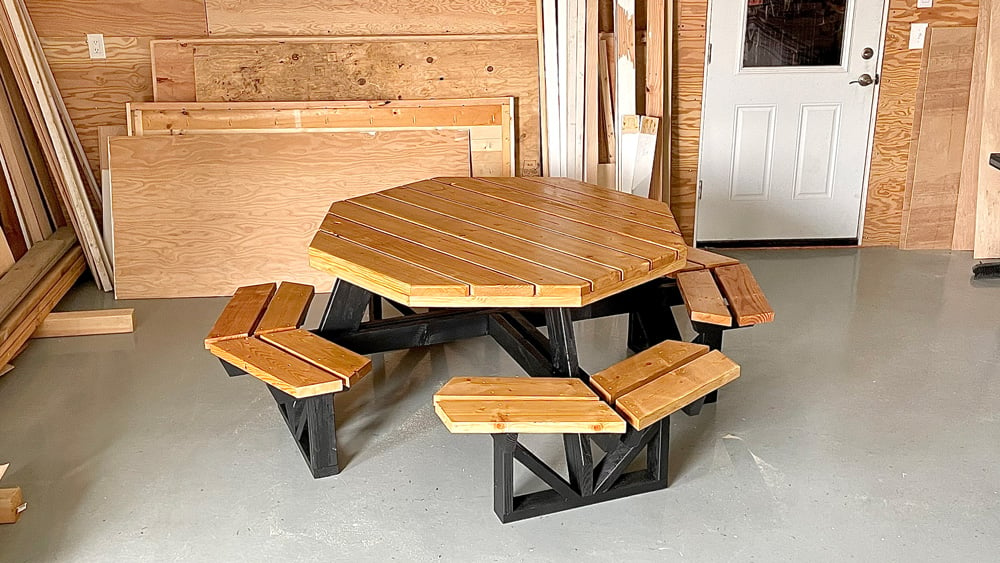


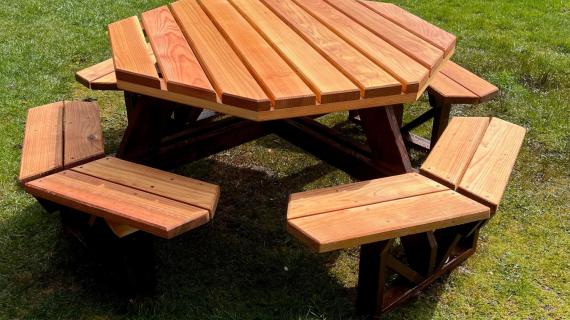
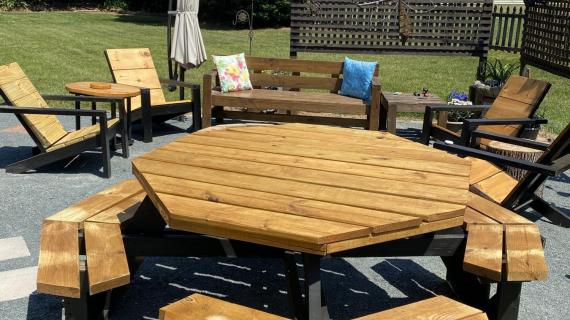
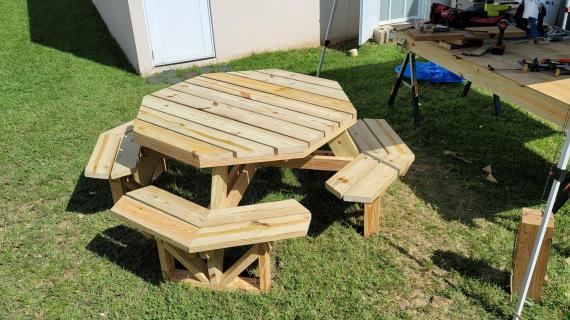
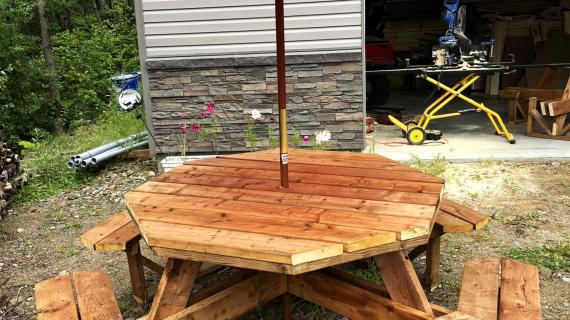
We love this picnic table because it's easy to step in and sit down! Round tables are more cozy for conversations and family style meals. This is a free, step by step plan, including a video tutorial, that has been tested, so you can build your own octagon picnic table.
Pin for Later!
Preparation
- 11 - 2x6 @ 8 feet long
- 11 - 2x4 @ 8 feet long
- 1 - 2x4 @ 8 feet long in TREATED wood for ground contact (use for the base of the table legs)
- 32 - 2-½ long exterior Pocket Hole Screws
- 200 - 2-½” to 2-¾” long exterior self tapping wood construction screws
- TOOLS: Miter Saw, Drill, Circular Saw, Kreg Jig (recommended), Level working surface at least 48”x48”, tape measure, speed square, power hand sand
- 4 - 2x6 @ 31-1/8” long, BOTH ends cut at 30 degrees off square, ends ARE PARALLEL, long point to short point measurement - LEGS
- 4 - 2x4 @ 31-½” long, BOTH ends cut at 45 degrees, ends are NOT PARALLEL, long point to long point measurement - INNER TABLETOP SUPPORTS
- 2 - 2x4 @ 85-¼” - BOTH ends cut at 22-½ degrees off square, ends NOT PARALLEL, long point to long point measurement - LONG SEAT SUPPORTS
- 4 - 2x4 @ 40-⅜” - ONE end cut at 22-½ degrees off square, longest point measurement - SHORT SEAT SUPPORTS
- 4 - 2x4 @ 24” - LEG FOOT - Recommend treated wood
- 8 - 2x4 @ 15” - SEAT LEGS
- 8 - 2x4 @ 13-¾” - Both ends cut at 45 degrees, ends NOT PARALLEL, long point to long point measurement - SEAT CROSS BRACING
- 8 - 2x6 @ 22-3/4” - BOTH ends cut at 22-½ degrees off square, ends NOT PARALLEL, long point to long point measurement - INNER SEAT BOARD
- 8 - 2x6 @ 23” - BOTH ends cut at 22-½ degrees off square, ends ARE PARALLEL, long point to short point measurement - OUTER SEAT BOARD
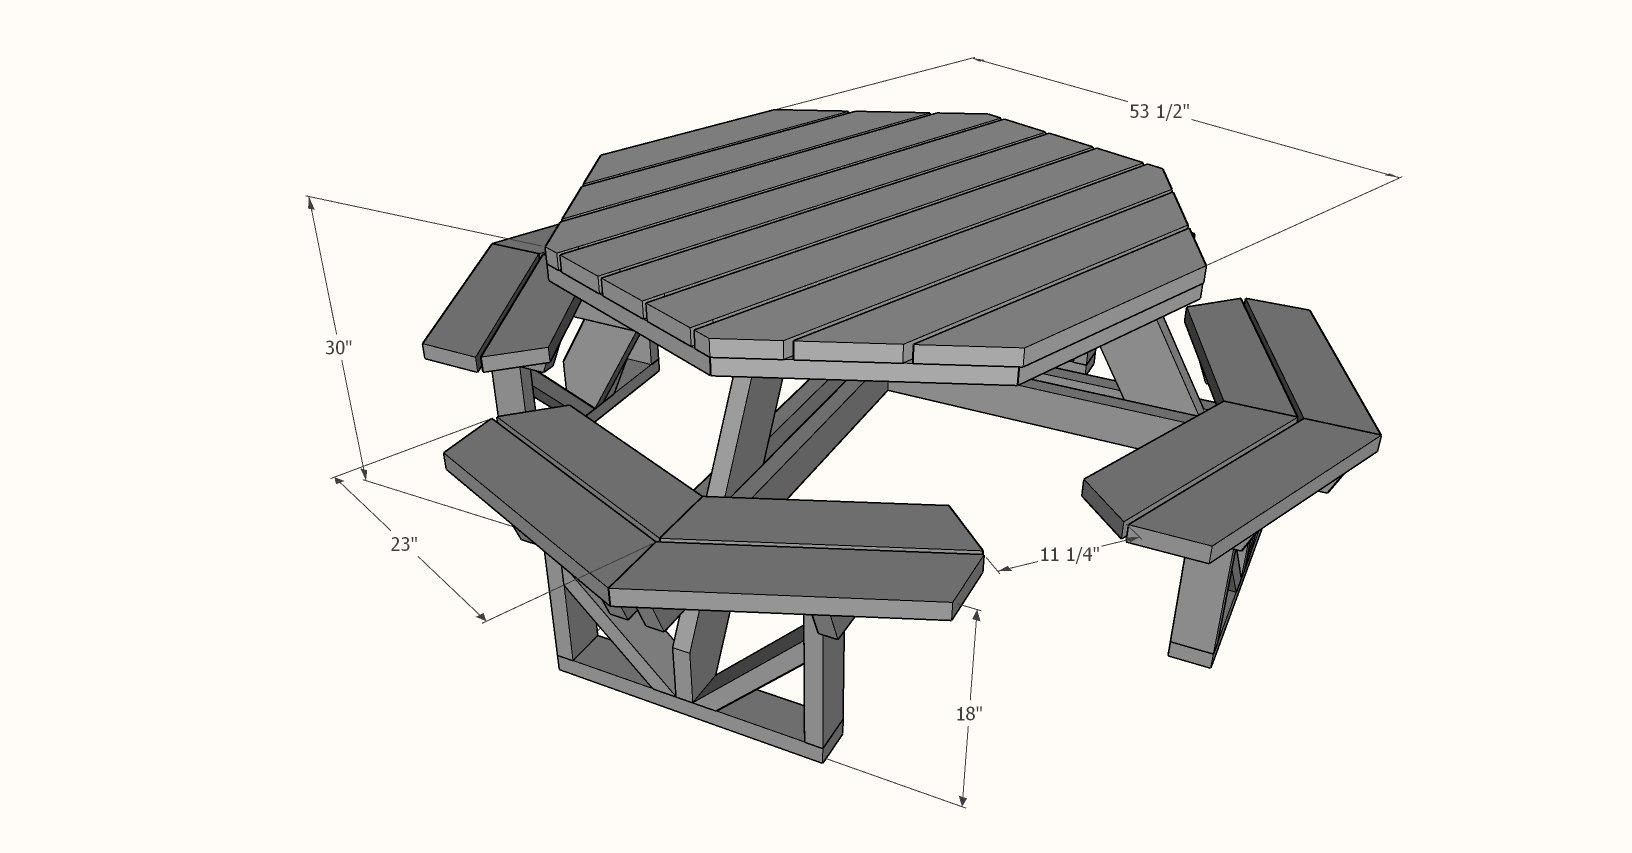
- 8 - 2x4 @ 11-¼” - BOTH ends cut at 22-½ degrees off square, ends NOT PARALLEL, long point to long point measurement - SHORT SEAT SUPPORT
- 8 - 2x4 @ 22” - BOTH ends cut at 22-½ degrees off square, ends NOT PARALLEL, long point to long point measurement - TABLETOP OUTER APRON
- 5 - 2x6 @ 53-1/4” - TABLETOP MIDDLE BOARDS
- 2 - 2x6 @ 44-5/8” - Both ends cut at 45 degrees, ends NOT PARALLEL, long point to long point measurement - TABLETOP SECOND TO END
- 2 - 2x6 @ 32-5/8” - Both ends cut at 45 degrees, ends NOT PARALLEL, long point to long point measurement - TABLETOP ENDS


Instructions
Step 1
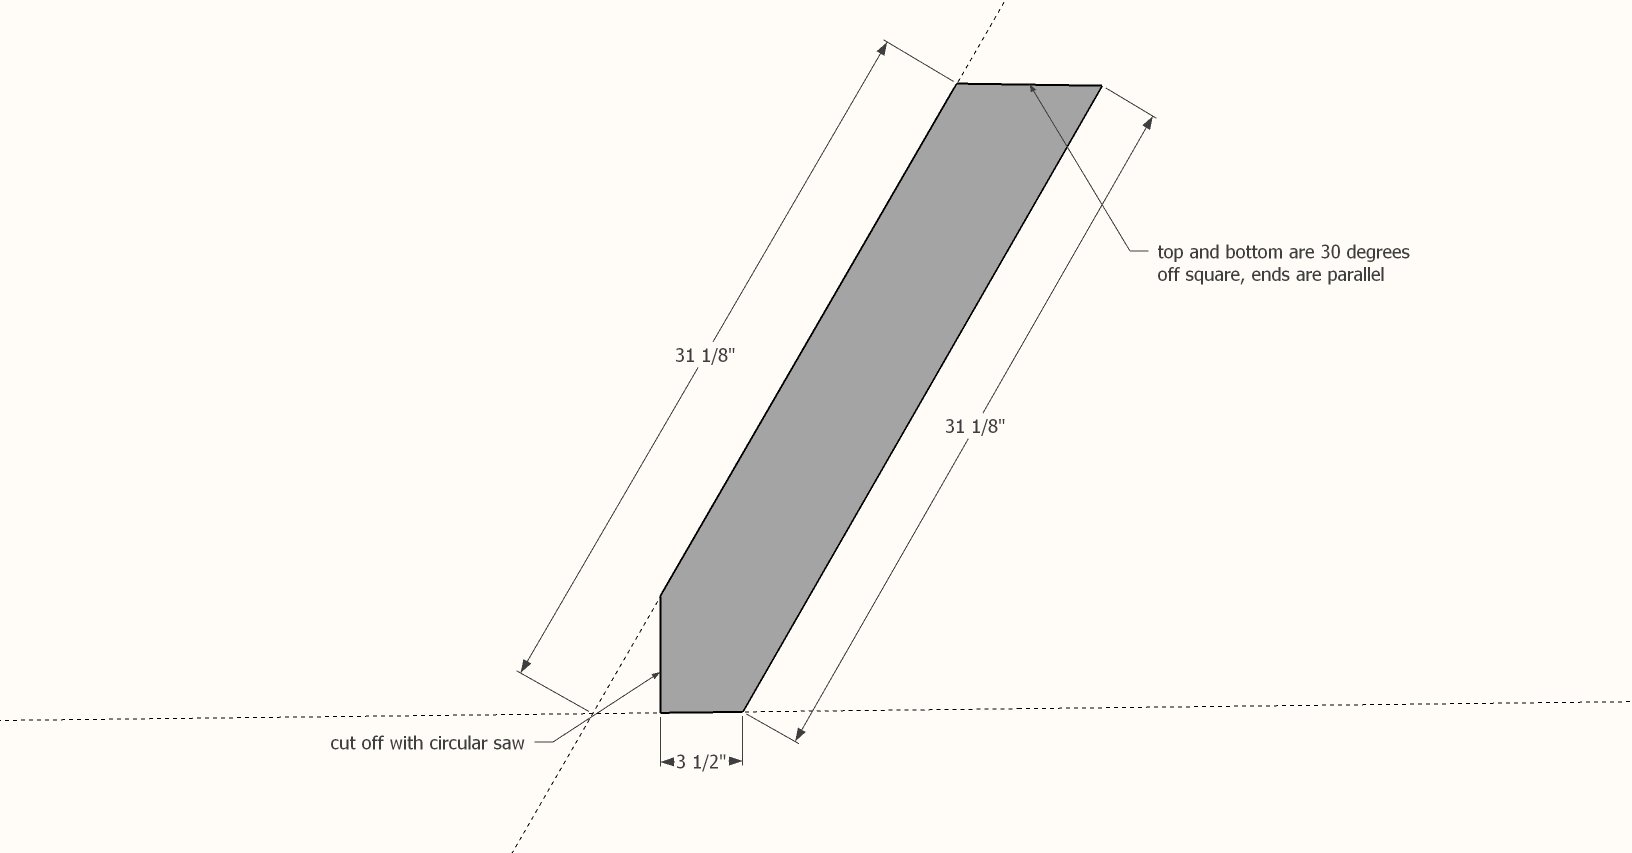
Use a speed square to mark the bottom of the four legs at a 90 degree angle, so that 3-1/2" is left at the bottom, as shown in the diagram. Use a circular saw to cut off the back.
Step 2
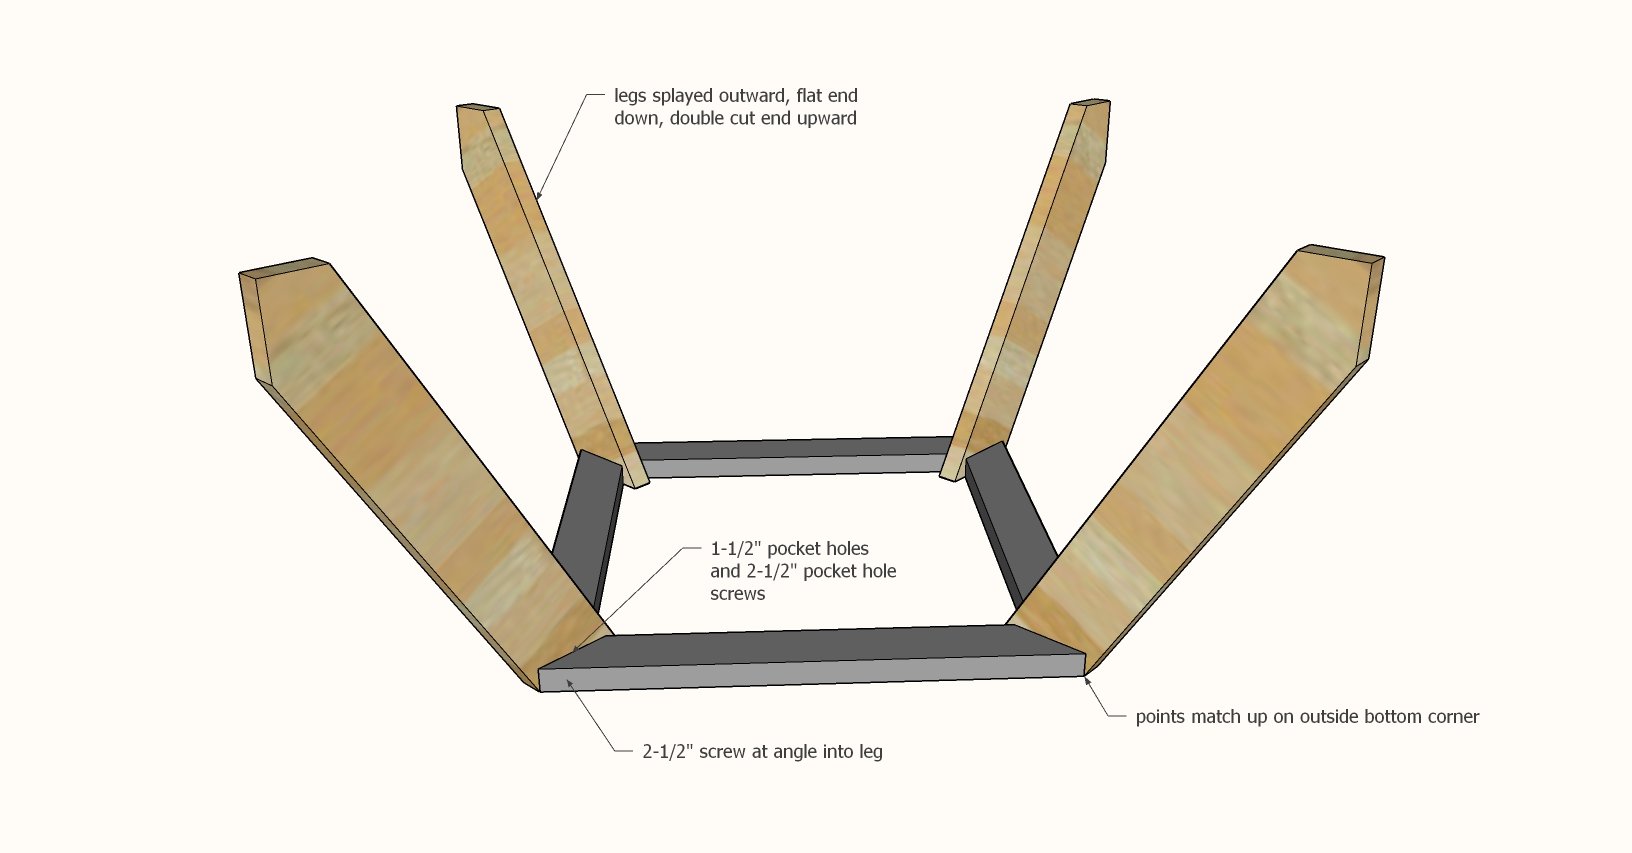
Find a level surface to work on.
Drill two pocket holes (1-1/2" material setting) on each of the inner apron boards.
Attach to the legs, so the legs are splayed outward, and the outer top edge (face down on the tabletop) is flush, using the 2-1/2" pocket hole screws.
This step is much easier with a second person helping support the legs.
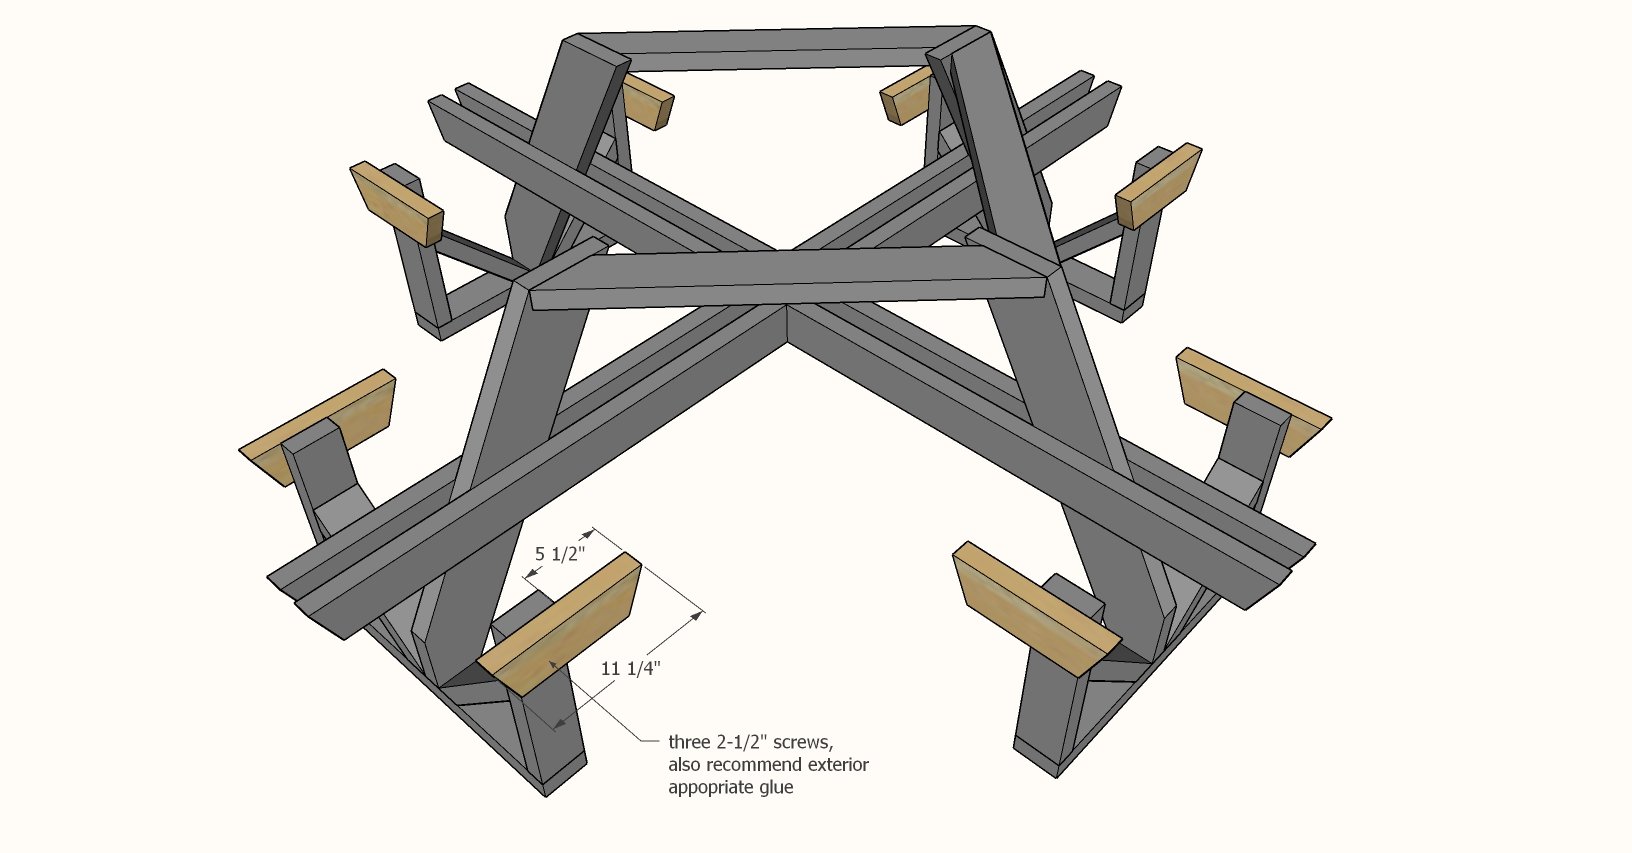
Step 3
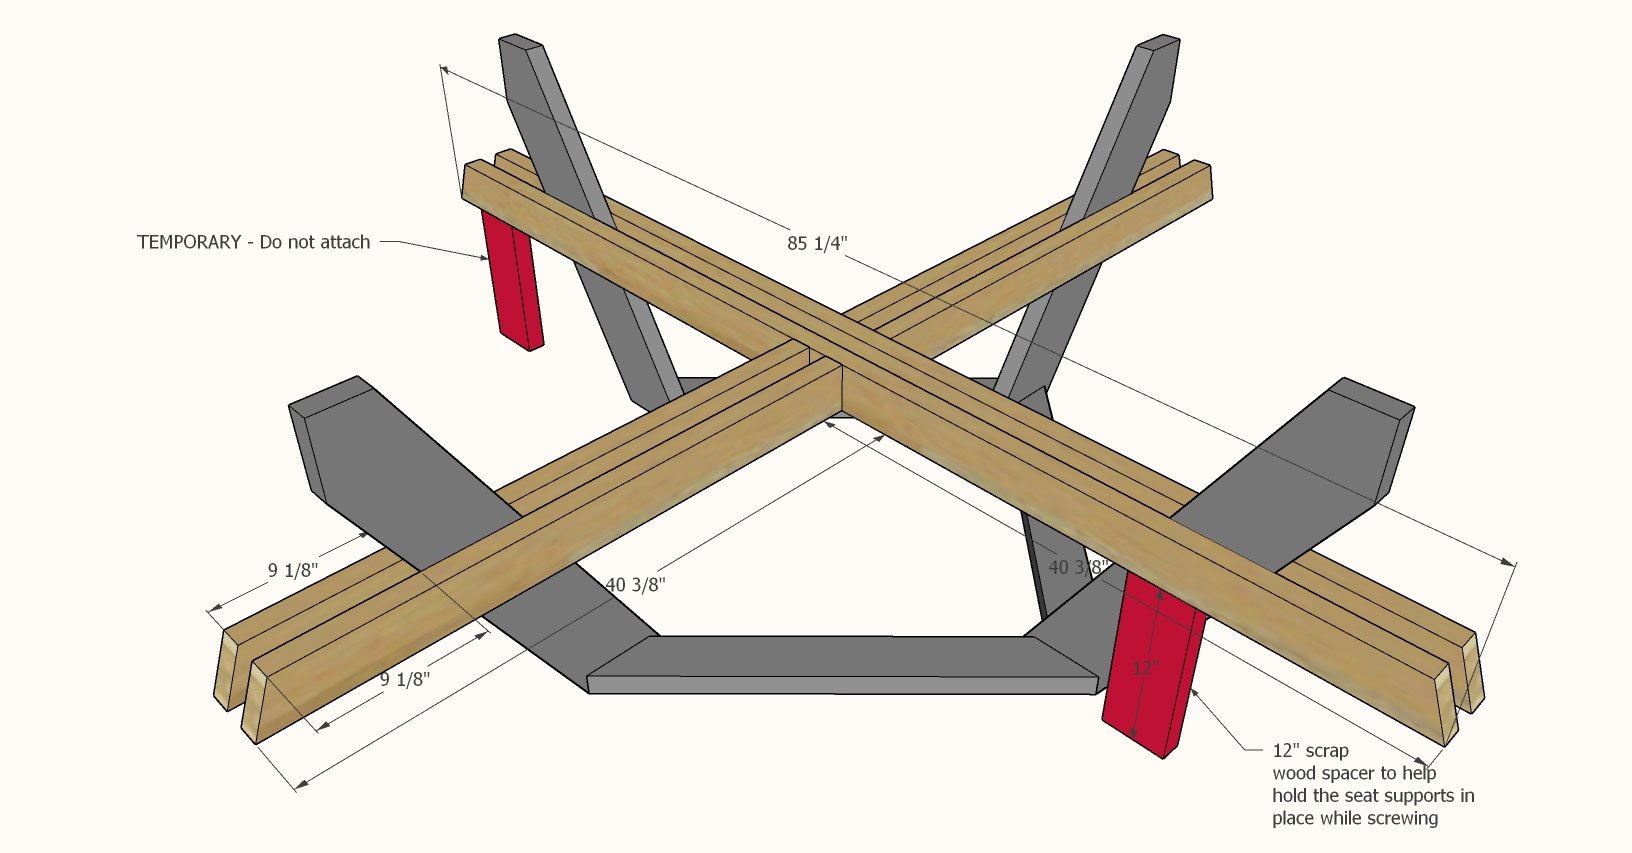
Please watch the video first on this step to demonstrate how we attach these pieces easily and accurately.
From scrap wood, cut two blocks, 12" long, to help hold up the seat support frame while you attach.
Attach one of the longer seat frame boards first, with even overhangs on the ends (past the legs).
Then attach the two half supports.
Build the second half of the seat frame using the first half as a pattern (just set the boards on top and screw together). Then flip into position, support with the temporary blocks, and attach.
Step 4
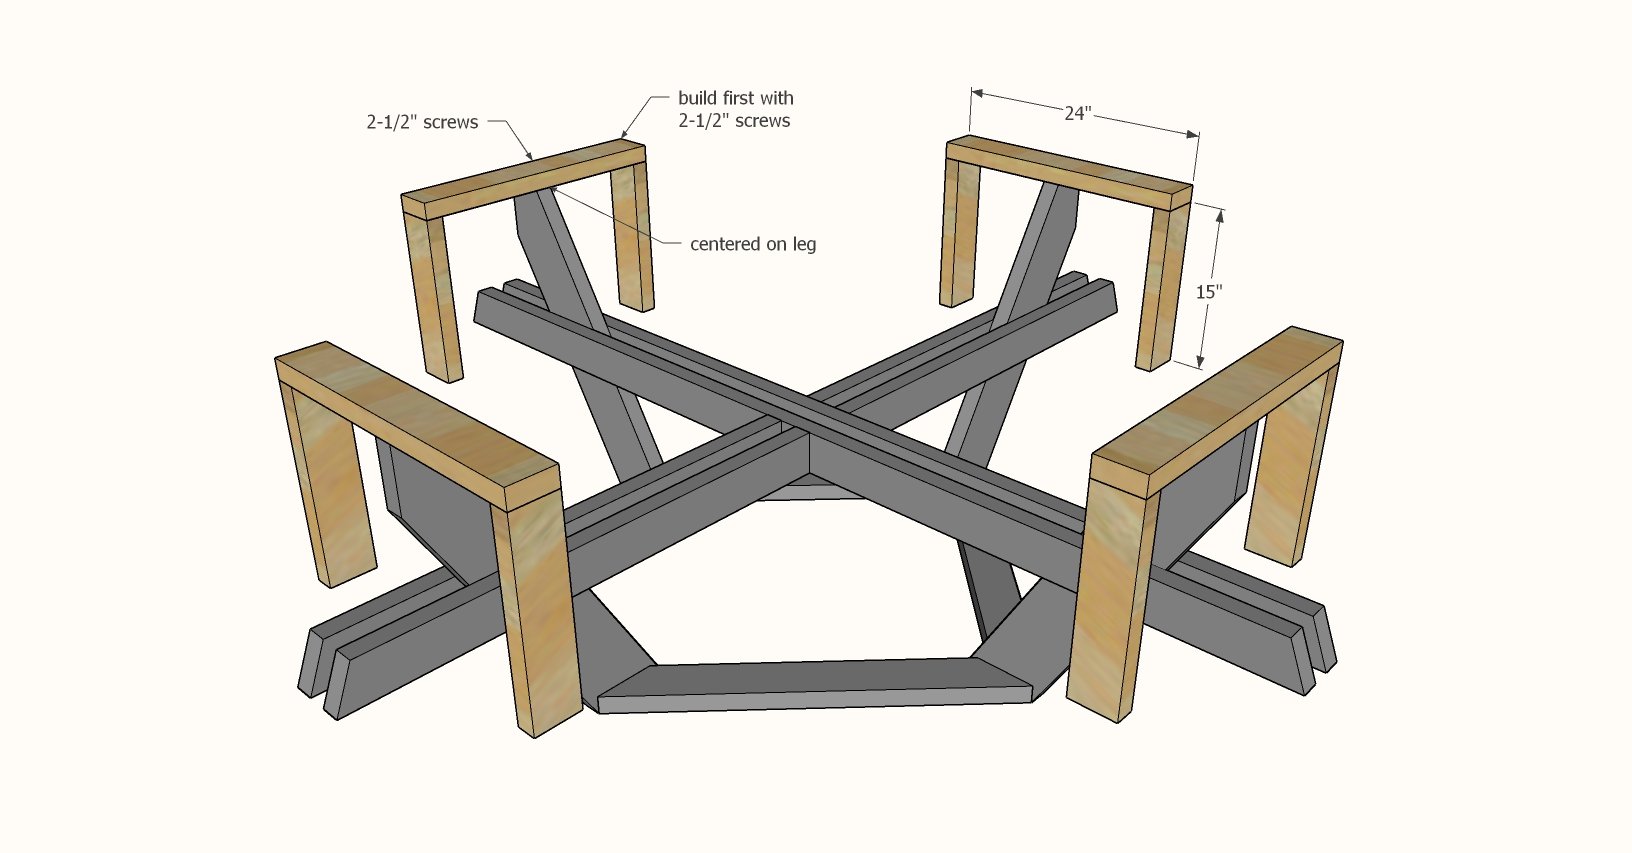
Build four bench frames on a flat surface with the screws.
Attach centered on the base of the legs with screws.
Step 5
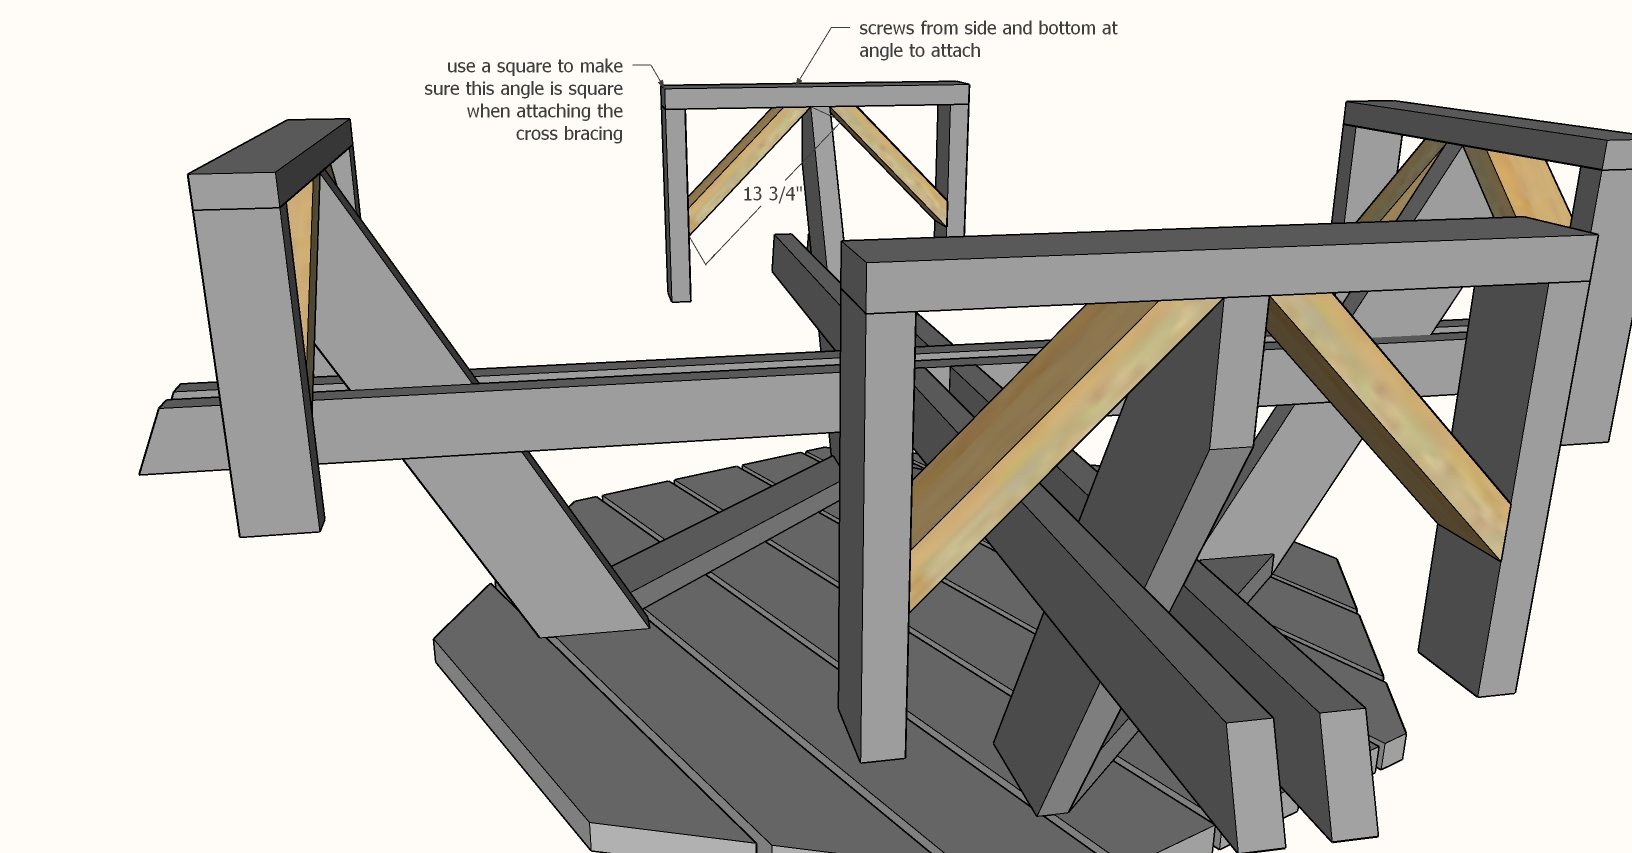
Attach cross supports inside the bench frames.
Step 6
Flip the picnic table over on to a flat level surface. Attach the small seat supports as shown with glue and screws to the eight smaller bench legs.
Step 7
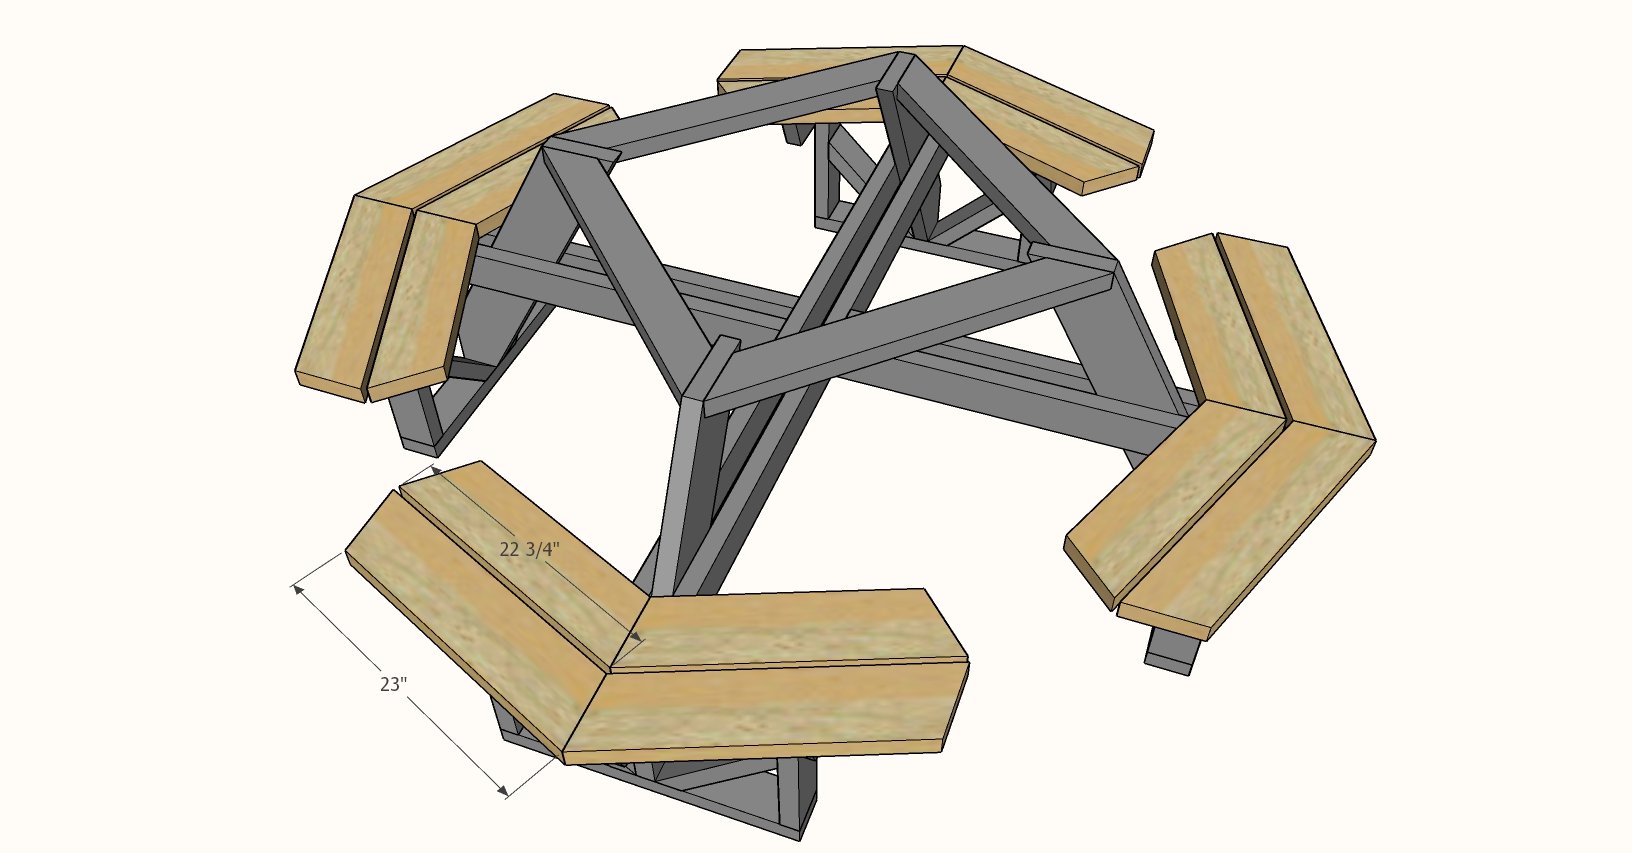
Position the seat boards on the frames and screws down.
Step 8
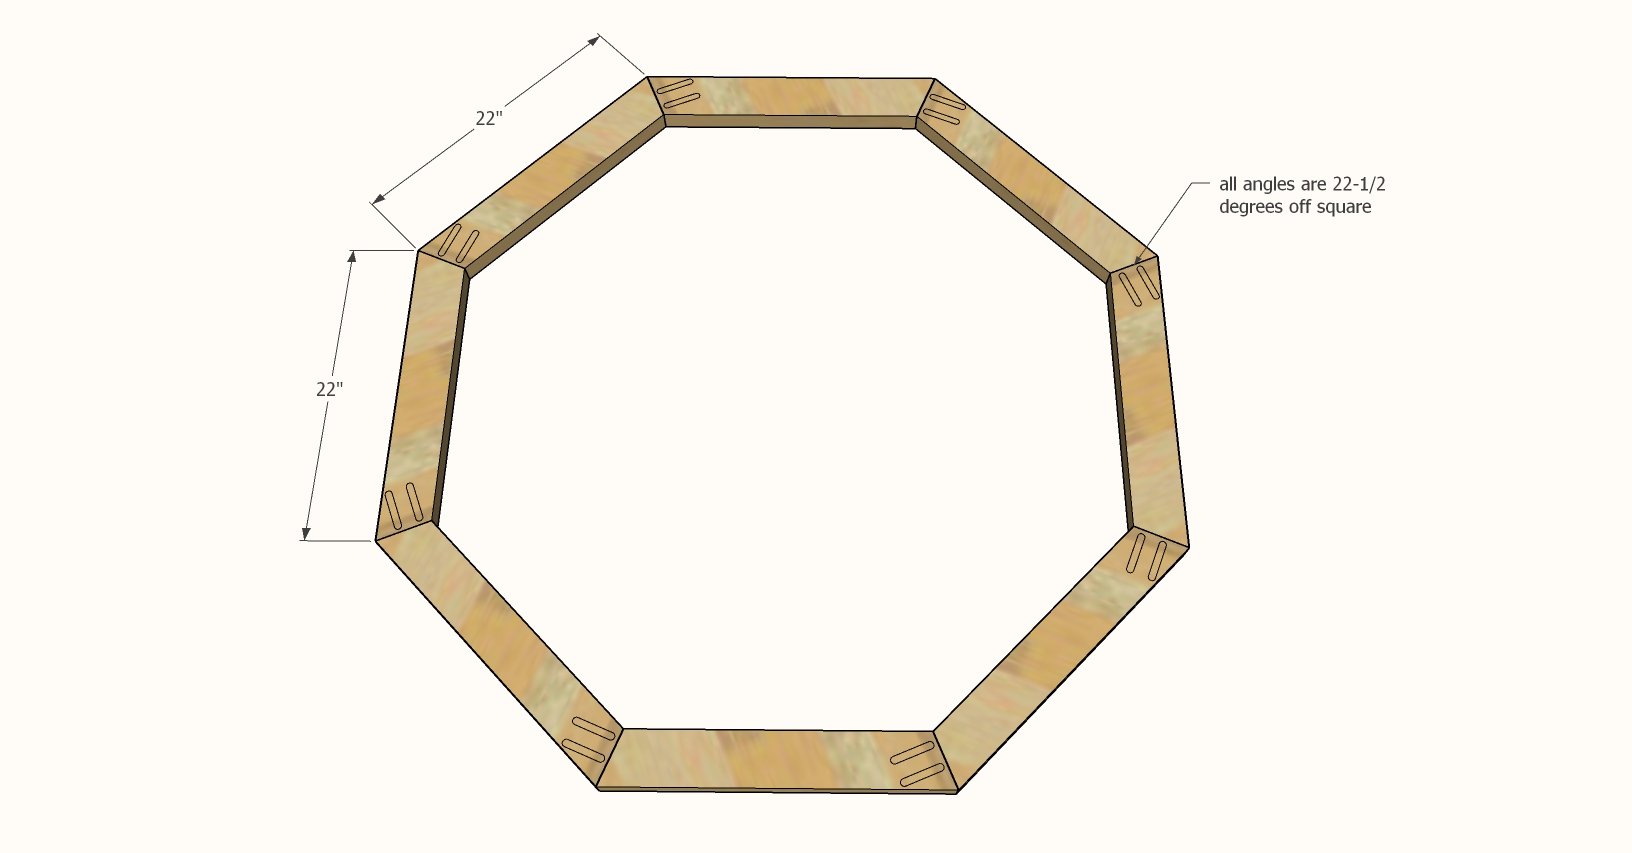
Build the inner tabletop frame first using pocket holes.
Step 9

Position the tabletop boards on top of the frame. Screw from underneath to attach.
Then cut off any excess with a circular saw from underneath.
Step 10
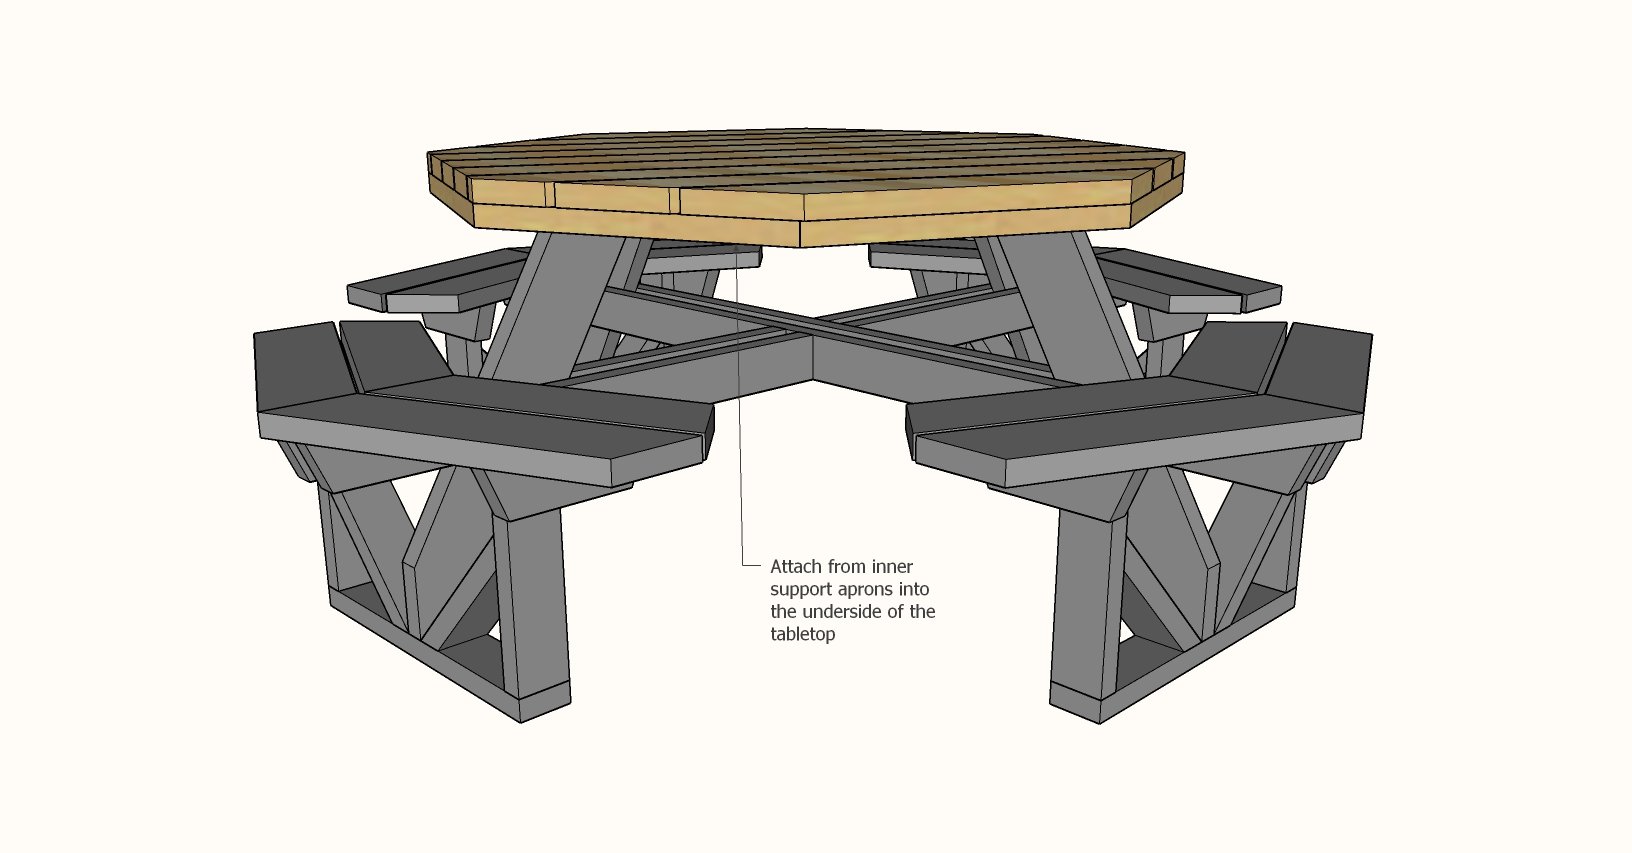
Attach the finished tabletop to the base with screws from underneath.


Comments
newelljohnson714
Wed, 05/12/2021 - 18:40
Octagon table
I made this over the weekend and was really impressed with the plan. I did notice that the cut list says 4 inner and outer seat supports but actually its 8 of each.
Tolko Vaira
Sat, 05/15/2021 - 02:14
Hi Anna
I LOVE that Anna. You are the best !
Jacksonsix
Mon, 09/27/2021 - 10:15
Octogon table cut list
The first item on the cut list says 31-1/8 ", but is it supposed to be longer than that to start with to accomadate the protuding angle at the bottom ?