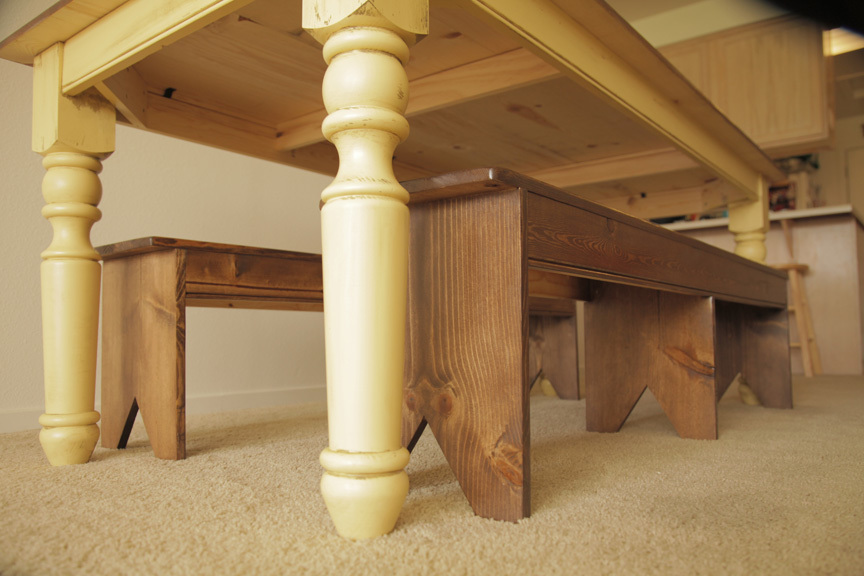
How to build primitive style benches! Free easy plans from Ana-White.com
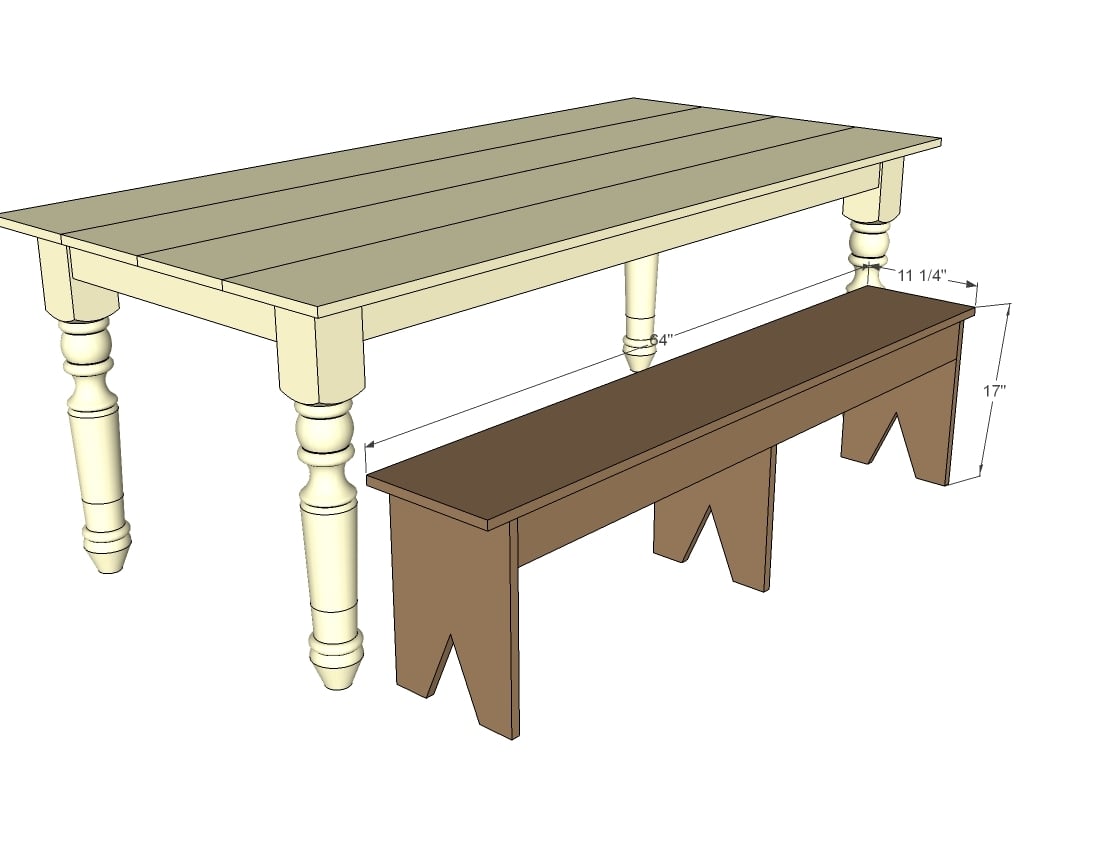
Preparation
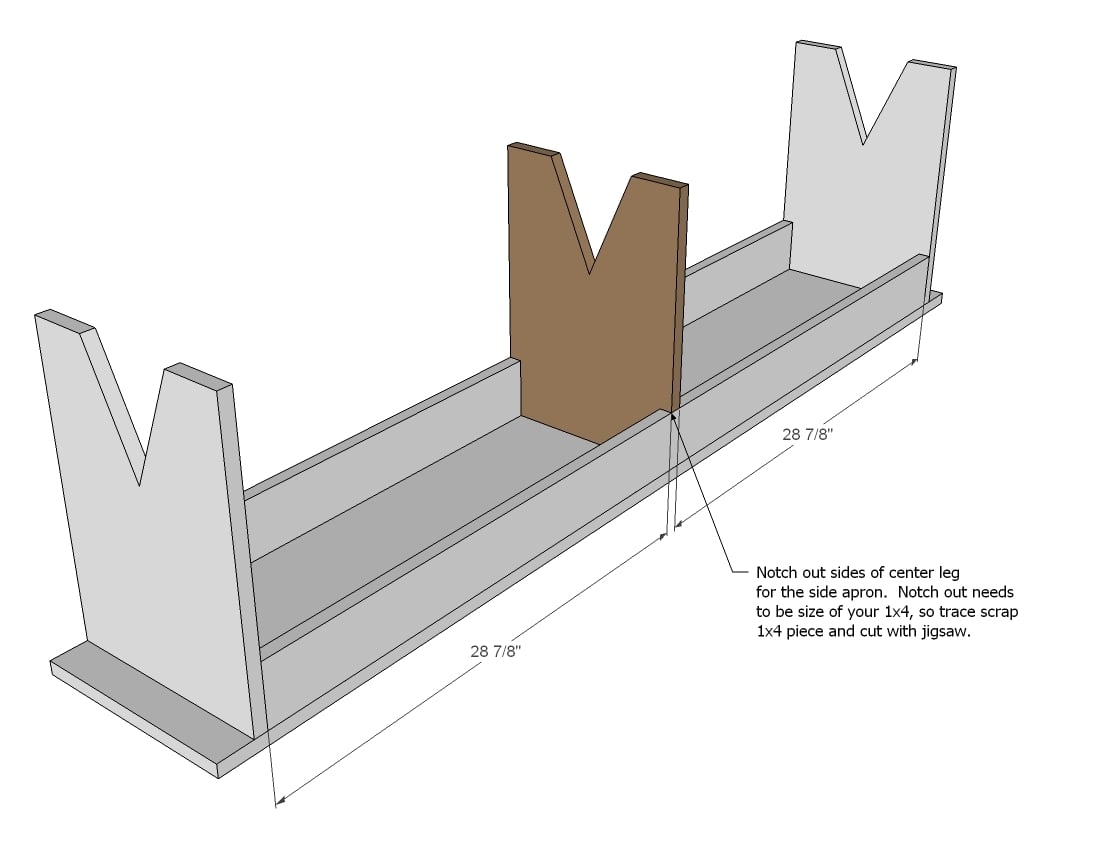
1 - 10' 1x12 board
1 - 10' 1x4 board
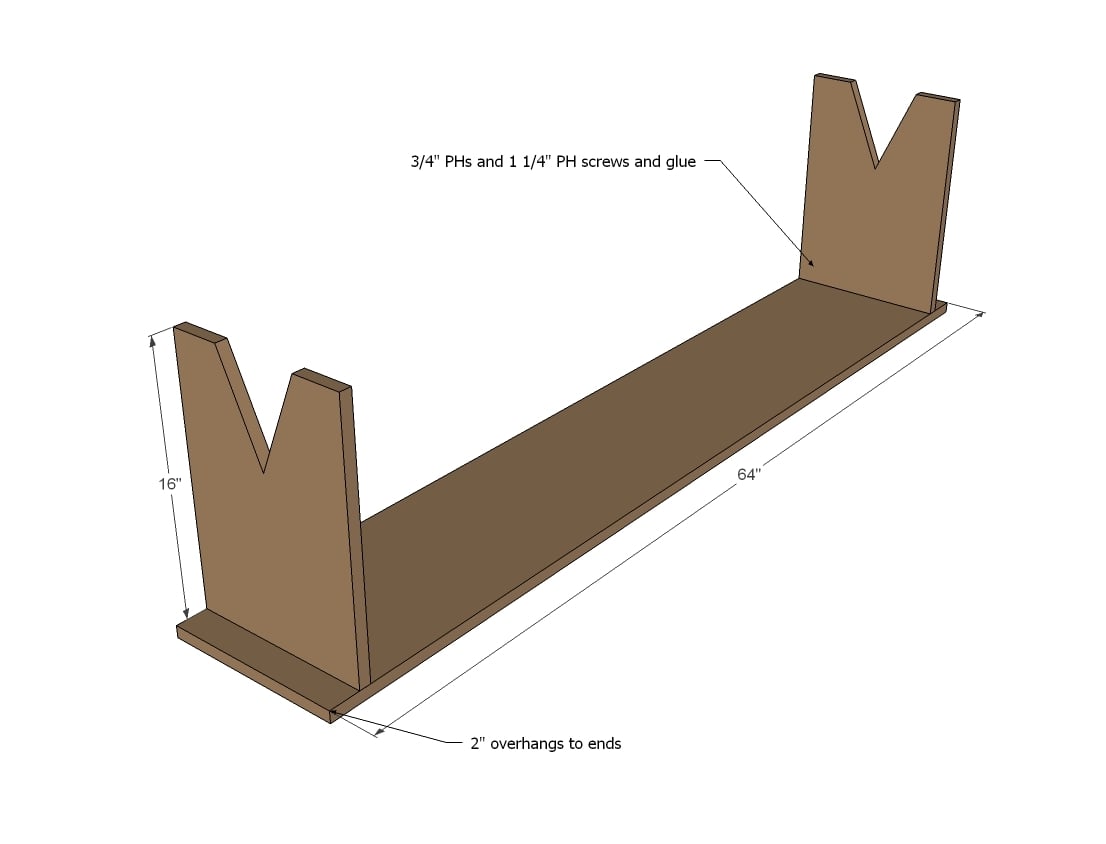
1- 1x12 @ 64"
3 - 1x12 @ 16"
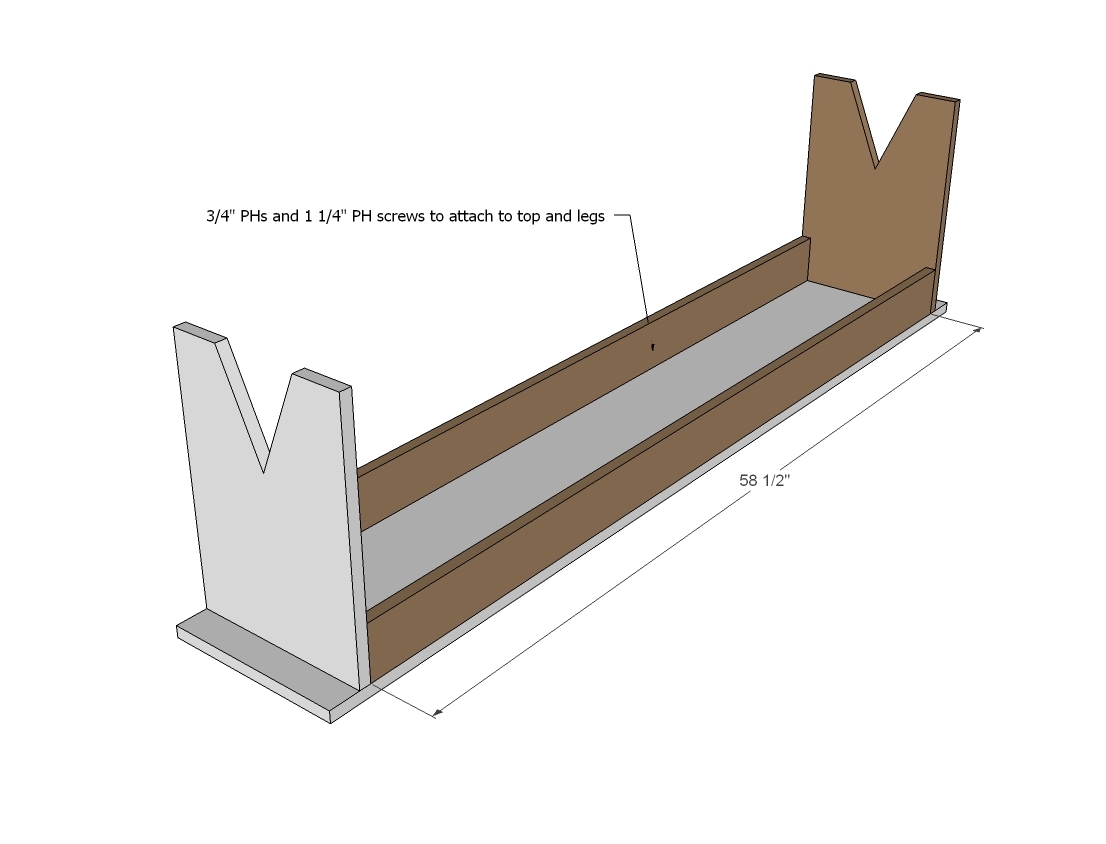
2 - 1x4 @ 58 1/2"
Please read through the entire plan and all comments before beginning this project. It is also advisable to review the Getting Started Section. Take all necessary precautions to build safely and smartly. Work on a clean level surface, free of imperfections or debris. Always use straight boards. Check for square after each step. Always predrill holes before attaching with screws. Use glue with finish nails for a stronger hold. Wipe excess glue off bare wood for stained projects, as dried glue will not take stain. Be safe, have fun, and ask for help if you need it. Good luck!
Instructions
Step 1
It is always recommended to apply a test coat on a hidden area or scrap piece to ensure color evenness and adhesion. Use primer or wood conditioner as needed.


Comments
YankeeBelle
Fri, 05/25/2012 - 18:57
The video is wonderful!
I truly appreciate the time that you and your readers take to help others with these projects. Videos bring the work to life and demystify the whole thing. Thank you Patrick for filming....the table and benches are absolutely gorgeous! Thank you Ana for creating such a wonderful community of passionate people who share their talents with others!
Cindy from Indiana (not verified)
Sat, 05/26/2012 - 08:15
Great video! Great project!
I love the video and I love how the project turned out! Awesome job! I particularly love how the members here work together. So awesome!
Jopor (not verified)
Tue, 05/29/2012 - 05:55
Router Table
The router table is from ShopNotes Magazine.
Patrick Hosey (not verified)
Sat, 06/09/2012 - 14:54
is it?
I'll have to check that out...
woodrow
Fri, 06/29/2012 - 08:23
Primitive Benches
Great Video and wonderful talent. You did a superb job.
Sammy (not verified)
Tue, 09/25/2012 - 20:38
13 foot Table
hi my name is sammy i was wondering how to make a 13 foot table sturdy because the table that i made is not sturdy enough and it wobbles
Tsu Dho Nimh
Wed, 09/26/2012 - 04:40
Stable 13-foot table?
Sammy - A 13-foot table needs very careful planning. Just the size alone makes it prone to wobbling.
How did you build the table? How many legs, and how are they attached?
If the corner joints are not blocked (have a diagonal brace), they will wobble. Start by adding corner braces - you can get them in any woodworking shop, or on amazon, or some hardware stores. Use the "surface-mounted" ones because the can be added after the table is built.
http://woodworking.rockler.com/ppc/corner%20braces
Ziggy Diaz (not verified)
Mon, 10/29/2012 - 07:02
Patrick's Primitive Bench
Ana,
Small observation, I have made similar benches in the past, in fact our newlywed dinning set was a table and a pair of benches that I hand made for me and my wife, so I am very familiar with them, anyway, the small change I would make is to add a hole with a hole saw to the vertex on the legs, as not doing so would result in the leg developing a crack that can damage the leg on the bench, this also helps you cut the leg with a circular saw and not have to worry about being perfect where the slanted cuts meet, plus it looks better.
Just my 2 cents,
Ziggy in Texas.