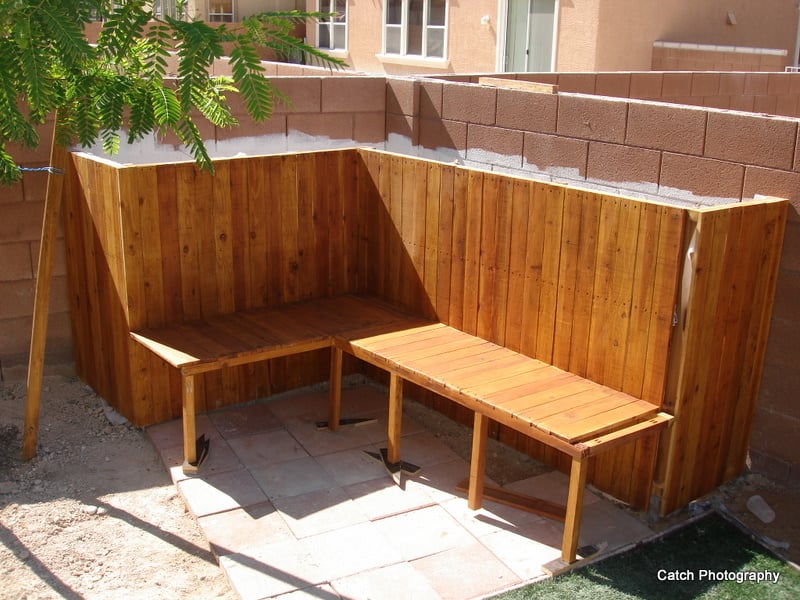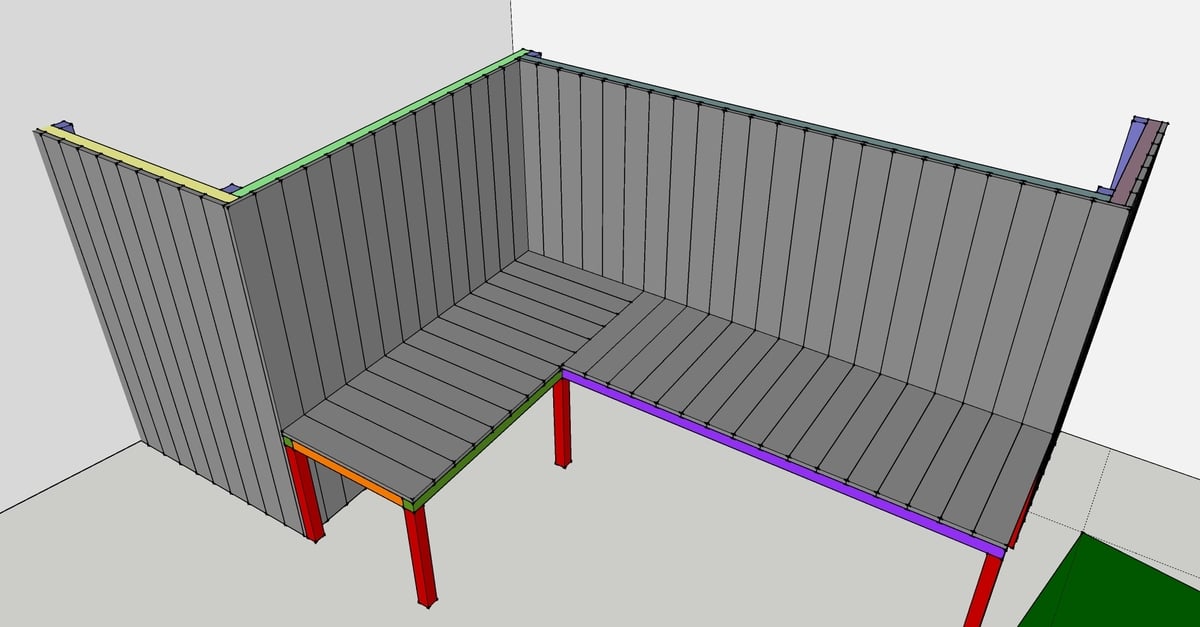
This was the PINING project for me since I bought my house last year. Living in starter home development America, we have to utilize every space available if you want to actually USE your backyard. I also love trying my hand at gardening, which lets face it, needs space. I always new I wanted raised planters and planned to do them bench height. But then got to eying all the amazing outdoor selections on Ana's site and new I wanted to build my own furniture. I wanted the sectional, but that would take out SO much room in my little backyard that I need for play space. I LOVE the idea of outdoor spaces. So I came up with this design. I had a good natural space in this corner of the yard that would be good for seating. So I raised up my planter idea to a low wall and added bench seating off the front and voila. I never thought I would be able to afford it. I toyed around with lots of options, some running upwards of $800 just for lumber. Then I saw Ana build her planters out of fence posts. GENIUS. I love cheaper wood options. So I used 3.5 inch dog eared Redwood posts and the total of everything including LOTS of screws and treatment for both my new "wood wall" and the cinderblock wall behind was around $310.00 I used special screws to anchor into the cinderblock wall, and then added tie wire to the wooden wall itself to keep the space even with all the pressure dirt will put on this when filled. I used a belt sander to make fairly quick of evening out the immense roughness of the fence post. I then used several coats of a weatherproofing finish to hopefully keep it nice for a while I put as intermediate project not because it was particularly hard to build but because it took A LOT of planning time and various stages that should be followed for an easier process. EX: I was anxious to get the wall part up and did not do the treatment to the wall first. That meant that I then had to climb in between the two walls (24 inch space) on a 106 degree day (let me tell you that now I know why most plants die when planted next to cinderblock walls. I have never sweat so much in my life!!!!) and reach over and climb under wires within the wall space to paint the sealant on the wall. IN HIND SITE: I build my support posts with 2x2 because they were also a lot cheaper, but I might spring for the actual sturdy 2x4. Not totally done yet, as you can see the pavers underneath need some work, but I can't wait to try this out and get it filled to plant this fall.
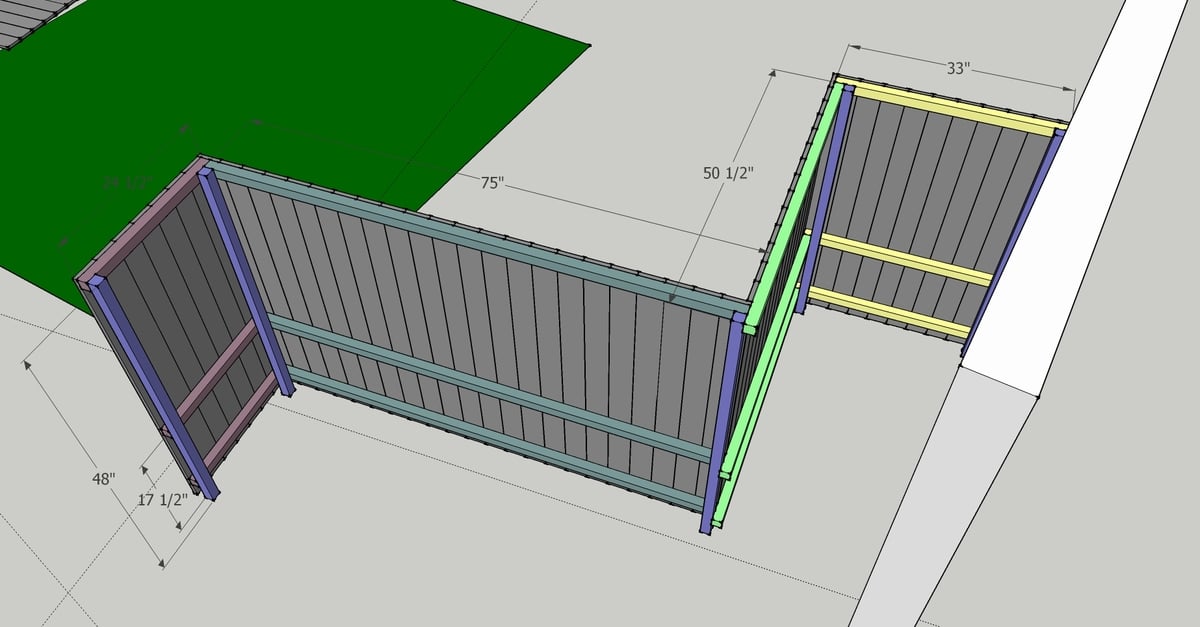
These are just my measurements and they were specific to the needs of my yard. My corner angle was NOT 90 degrees, and this is NOT a standard size. I will probably have to make cushions for this if I want it too look super tailored.
Preparation
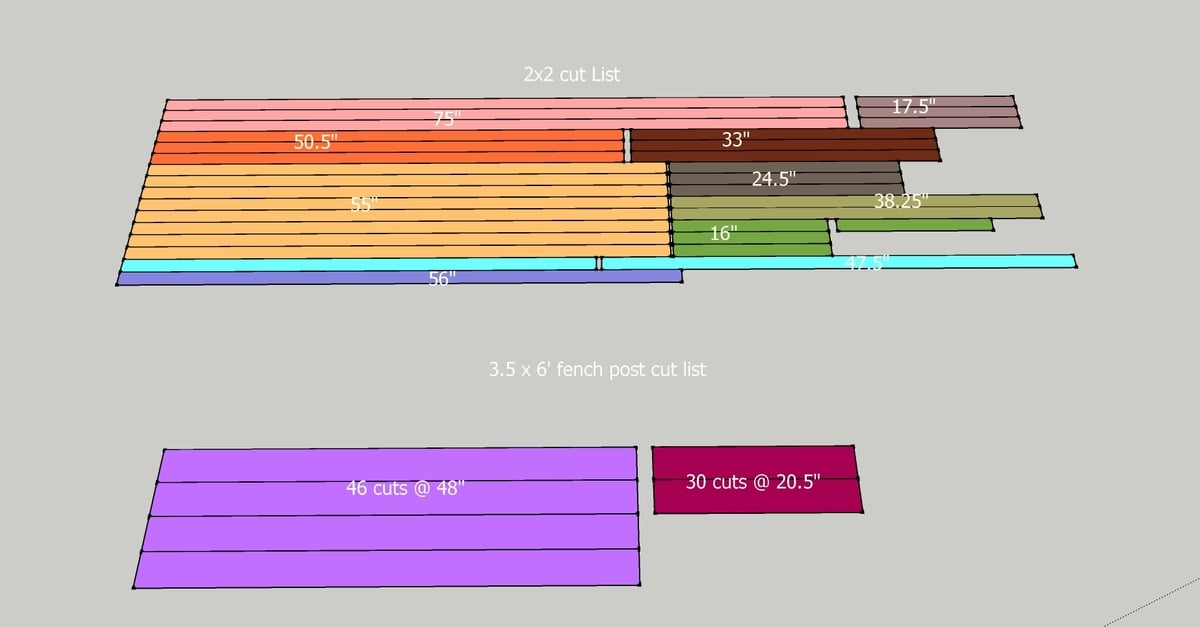
16 2x2 @8ft 46 3.5 @6ft fence post deck screws or outdoor screws outdoor sealant or deck stain
For 2x2 Planter parts 3 @ 75" 3 @ 50.5" 3 @ 33" 3 @ 24.5" 8 @ 55" 2x2 Bench pieces 1 @ 76.5" 1 @ 56" 2 @ 47.5" 2 @ 17" 4 @ 16" 3.5" x 6' Fence post 46 @ 48" 30 @ 20.5"
Please read through the entire plan and all comments before beginning this project. It is also advisable to review the Getting Started Section. Take all necessary precautions to build safely and smartly. Work on a clean level surface, free of imperfections or debris. Always use straight boards. Check for square after each step. Always predrill holes before attaching with screws. Use glue with finish nails for a stronger hold. Wipe excess glue off bare wood for stained projects, as dried glue will not take stain. Be safe, have fun, and ask for help if you need it. Good luck!
Instructions
Step 1
Step 2
It is always recommended to apply a test coat on a hidden area or scrap piece to ensure color evenness and adhesion. Use primer or wood conditioner as needed.


Comments
mamma_joy
Sun, 08/07/2011 - 21:17
I remember when you first
I remember when you first posted this idea so I'm glad to see it to this stage! It looks great but I bet it would be more sturdy with 2x4's--maybe just put next to the 2x2's instead of replacing. Cushions would be perfect!