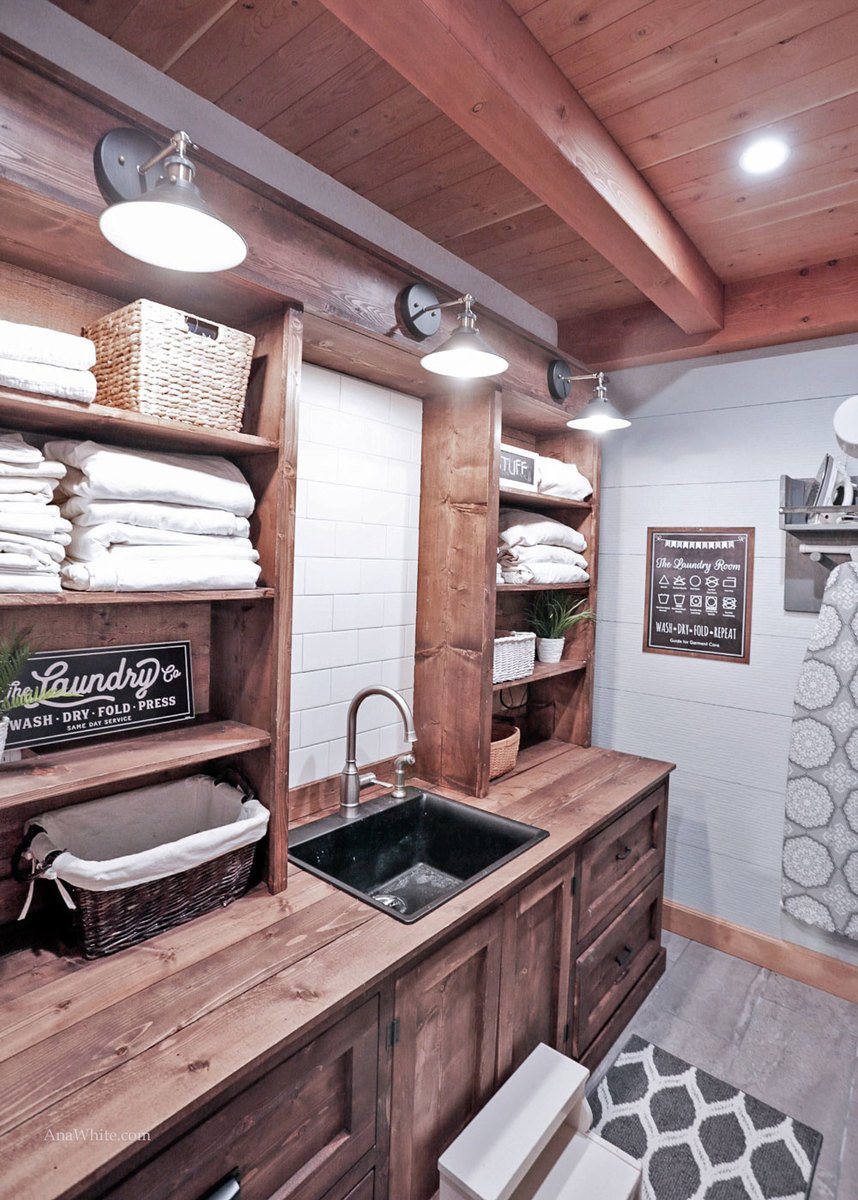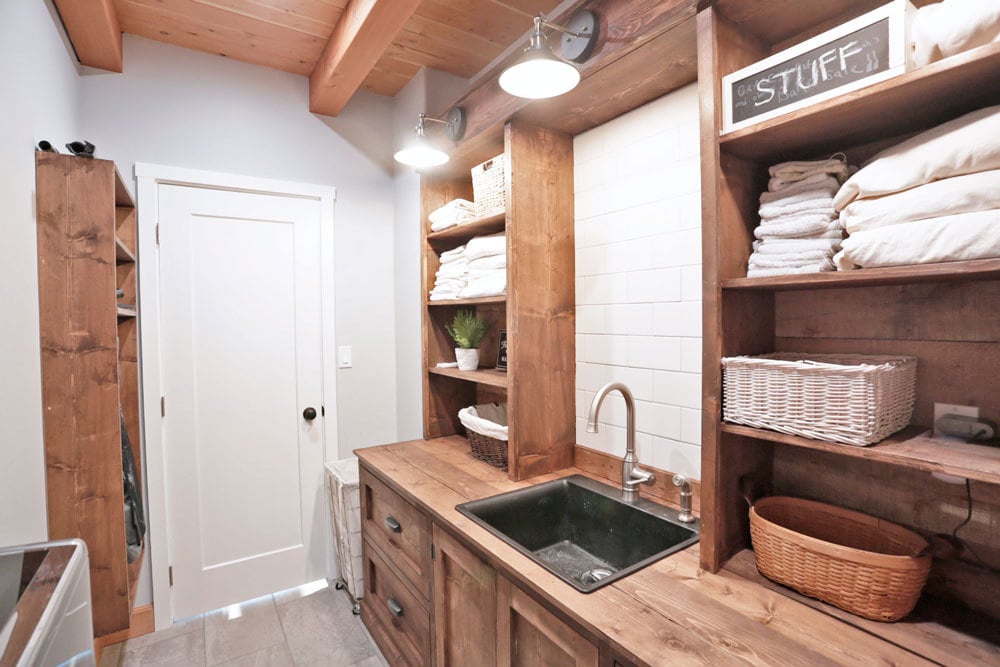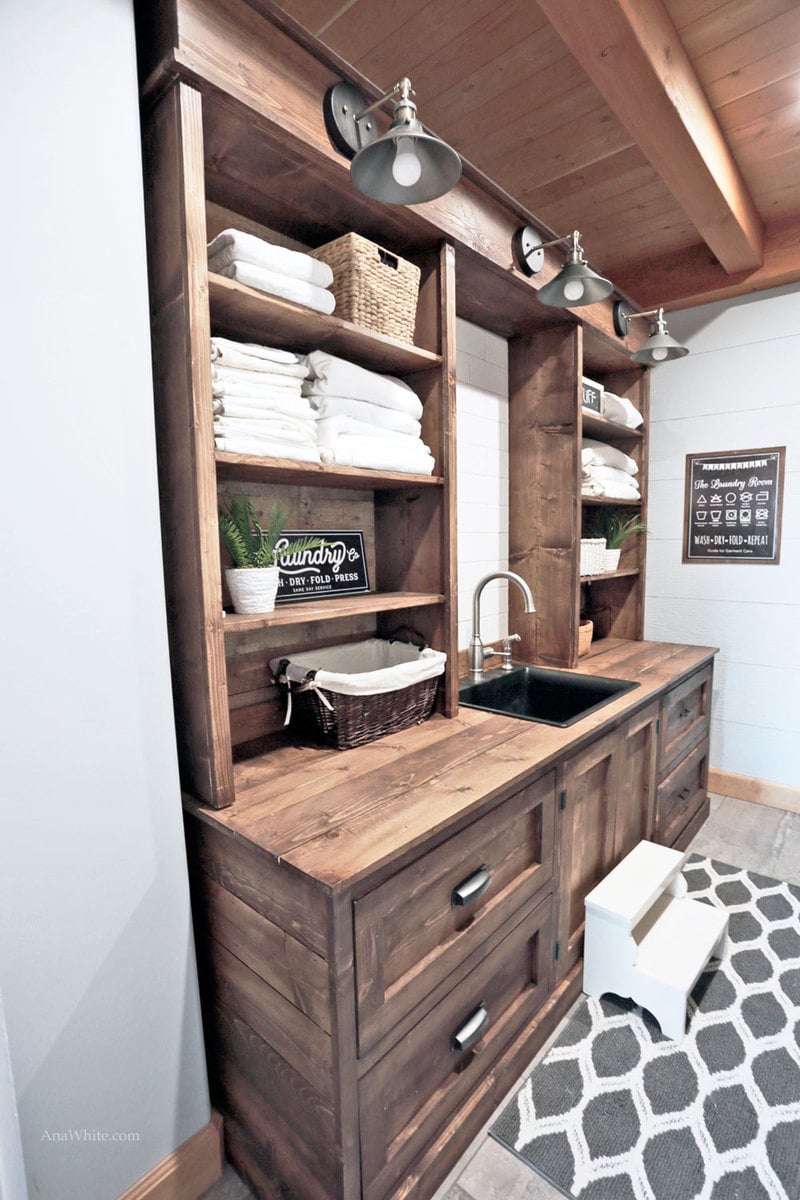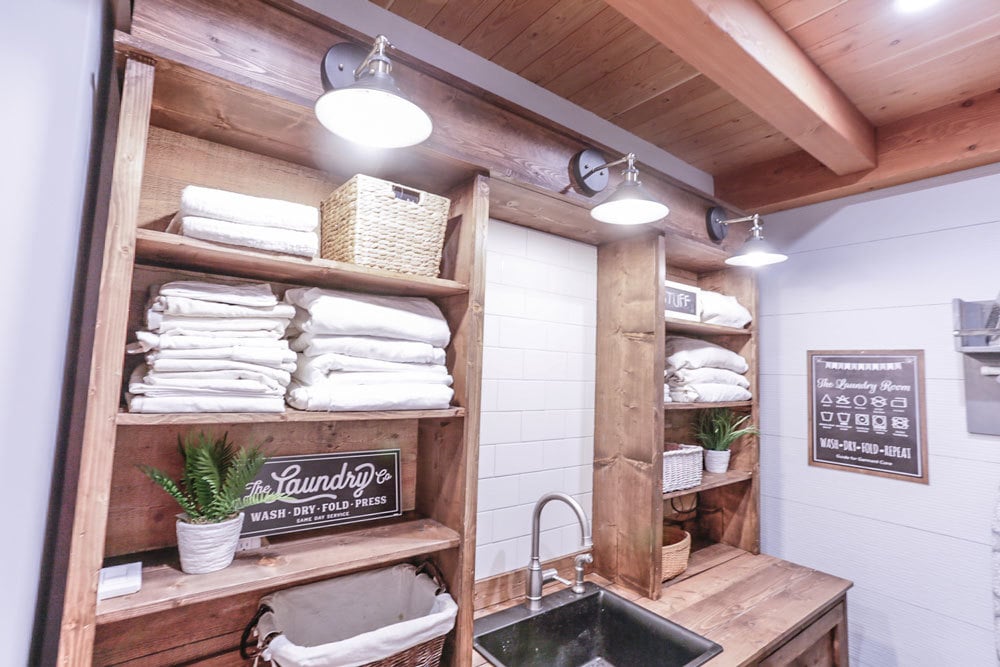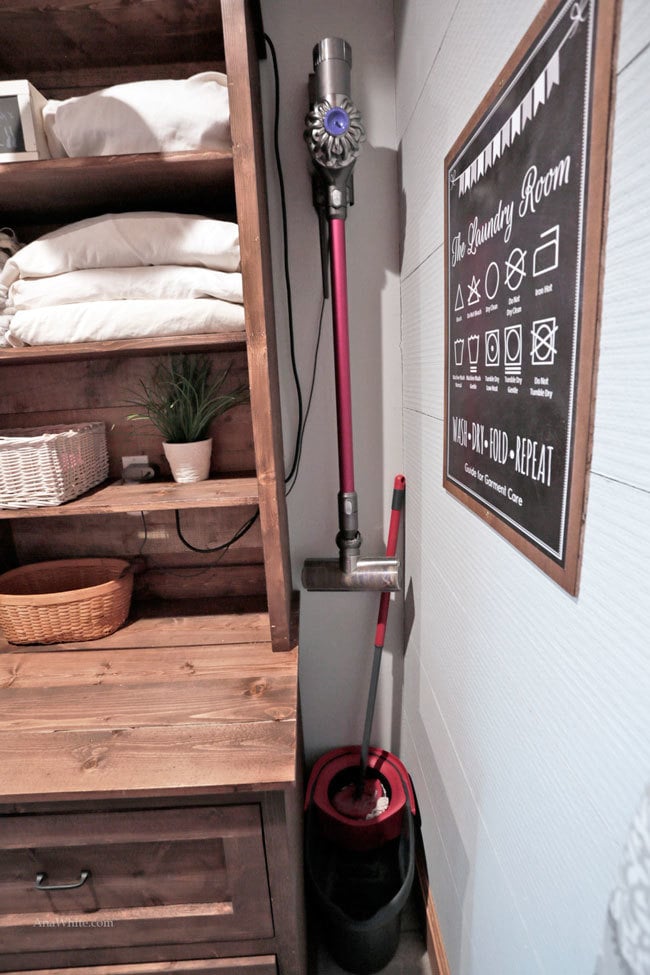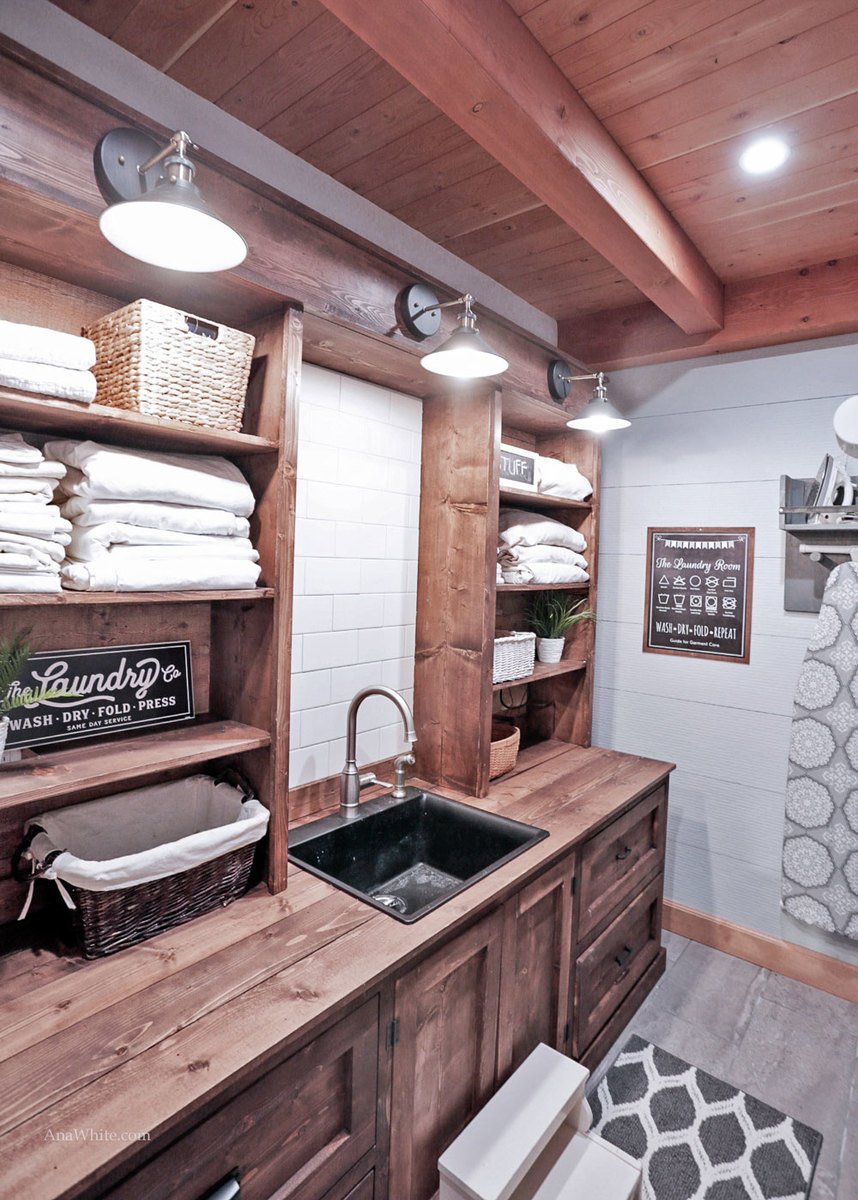
DIY custom laundry room cabinet with sink and hutch, farmhouse style. Free plans by ANA-WHITE.com
Preparation
1 - sheet 3/4" plywood ripped into strips 8 feet long x 23-3/4" wide
5 - 1x4 @ 8 feet long
1 - 1x8 @ 8 feet long
8 - 1x2 @ 8 feet long
4 - 1x3 @ 8 feet long
4 - 1x10 @ 8 feet long (cut the longer drawer pieces first)
5 - 1x6 @ 8 feet long (top planking)
2 sheets 1/4" plywood for back of hutch and drawer bottoms and door backs
2 - 1x12 @ 10 feet long (hutch sides/dividers)
3 - 1x12 @ 8 feet long (hutch shelves)
4 - 22" drawer slides
2 sets of hinges
2 magnetic clasps
4 pulls and 2 knobs
CARCASS
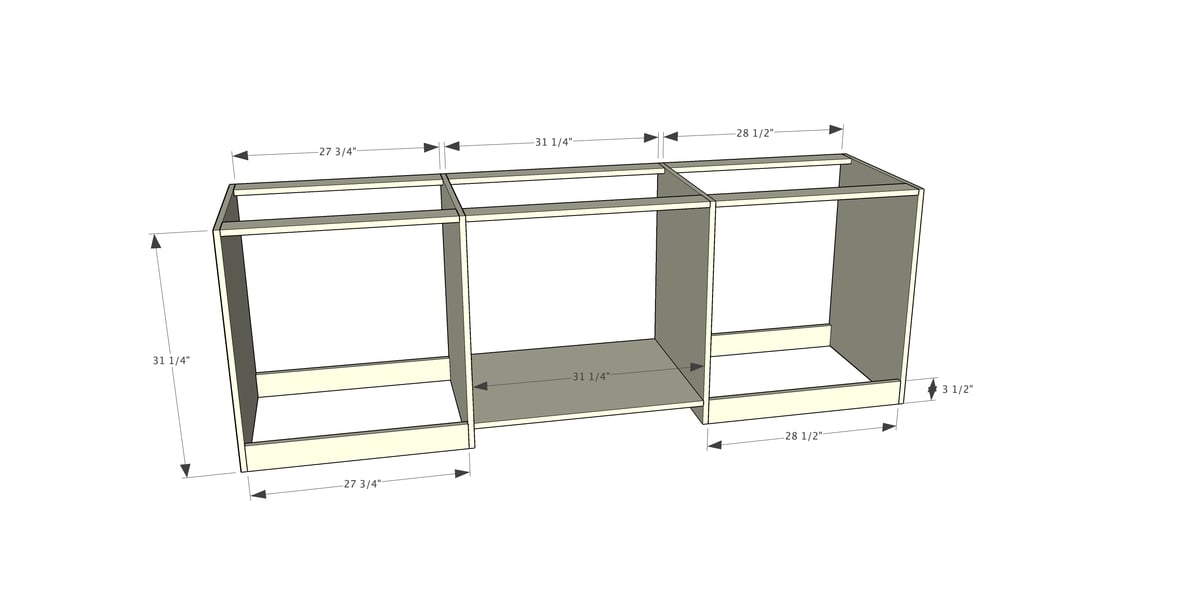
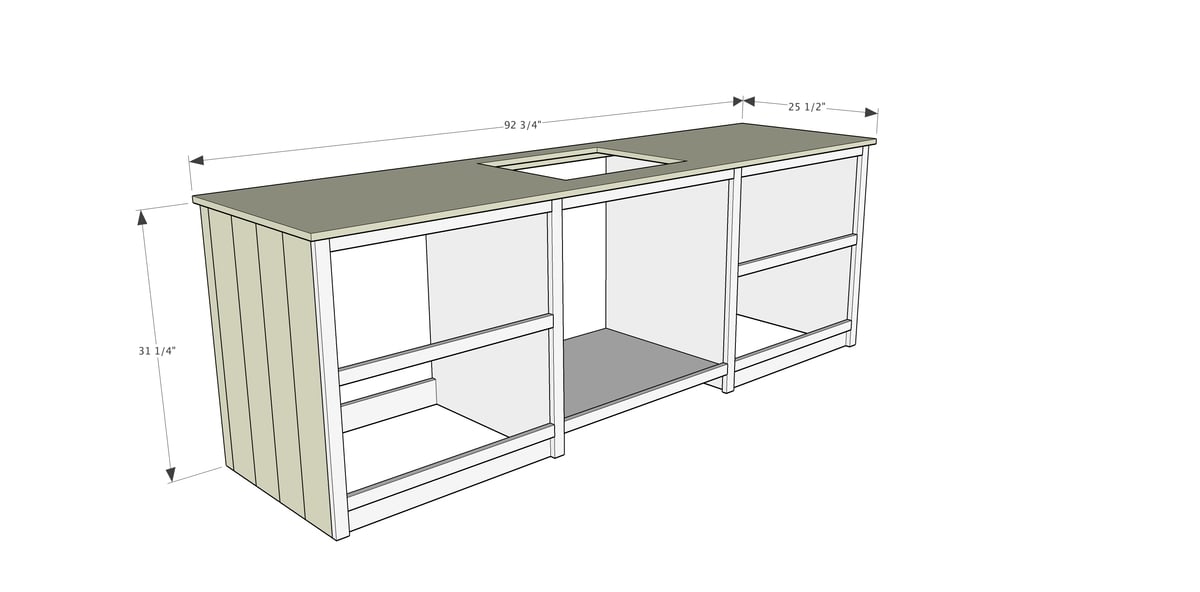
- 6 - 3/4" plywood @ 23-3/4" x 31-1/4" - Sides, dividers, middle area shelf/bottom
- 8 - 1x4 @ 28-1/2" - Drawer area top/bottom supports (NOTE: On drawings shows left side cuts at 27-3/4" - do this only on sides that you want to cover with planked wood.
- 2 - 1x4 @ 31-1/4" - Sink area top supports
CABINET FACE FRAME
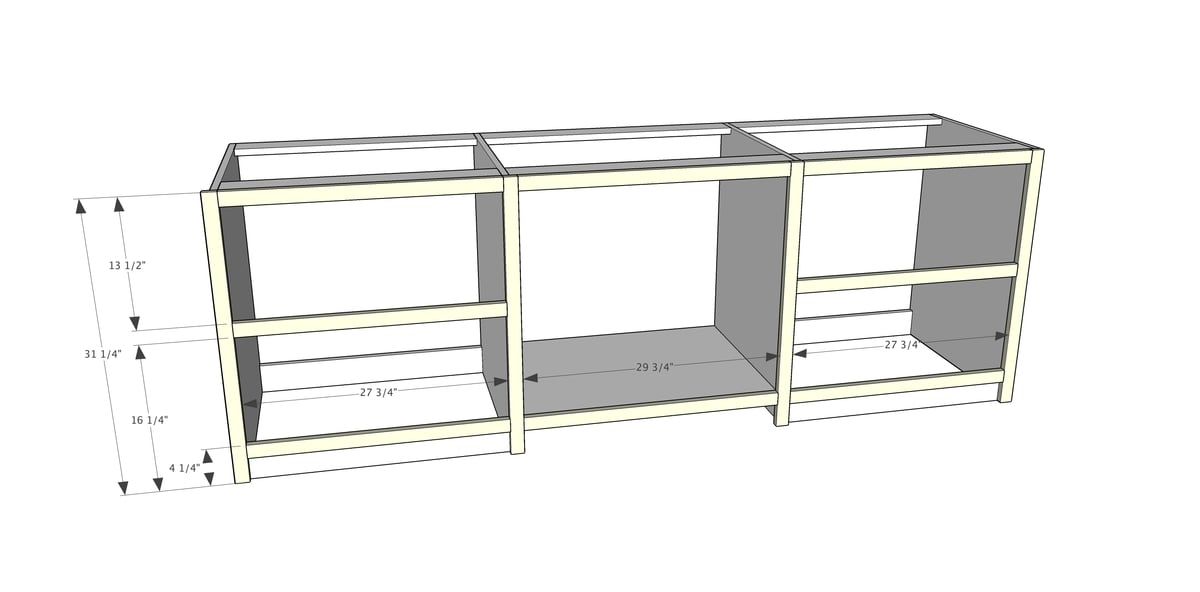
- 4 - 1x2 @ 31-1/4" - Stiles
- 6 - 1x2 @ 27-3/4" - Rails on Drawer Area
- 2 - 1x2 @ 29-3/4" - Rails on Sink Area
TOP - We used 1x6s planked together to create the top, 3/4" over hang on front and sides
OPTIONAL SIDE PLANKS - We held the left side of carcass in 3/4" and added planking as this side was very exposed in our laundry room. We used 1x6s to plank.
FOOTER
Footer should be cut to fit, using 1x4s. Cut sides first, then measure and cut front
DOORS and DRAWERS
- Build drawers to fit openings with 1x10s
- Drawer sides are length of drawer slides (8 - 1x10 @ 22" for 22" drawer slides recommended)
- Drawer fronts/backs are 2-1/2" less than opening width (8 - 1x10 @ approx 25-1/4"). Place pocket holes on front on inside to avoid showing on front of drawer.
Drawer Face Frames (should be built 1/4" less width and height wise than opening)
- 8 - 1x3 @ 11-3/4"
- 8 - 1x3 @ 22-1/2"
Door Face Frames (should be built 1/4" less width and height wise than opening)
- 4 - 1x3 @ 9-5/8"
- 4 - 1x3 @ 5-1/4"
- 1/4" plywood cut 1" larger than opening and stapled to back
HUTCH CARCASS
- 4 - 1x12 @ 60"
- 8 - 1x12 @ 29-1/4"
- 1 - 1x12 @ 29-3/4"
- 2 - 1x4 @ 29-1/4"
HUTCH TRIM
- 4 - 1x2 @ 51-1/4"
- 2 - 1x2 @ 92-3/4"
- 2 - 1x1 @ 11-1/4" - we ripped 1x scraps down to 3/4" x 3/4"
- 1 - 1x8 @ 91-1/4"
Instructions
Step 1
Step 2
Assemble the two drawer area face frames with 3/4" pocket holes and 1-1/4" pocket hole screws. Then attach the two drawer area face frames together with the 1x2s @ 29-3/4" long. Apply glue to front edge of carcass and nail face frame on with 1-1/4" brad nails. All outside edges should be flush (unless you do the planking option).
Step 3
Step 4
You will need to fur out inside of drawer areas with 1x boards. I run these vertical, right inside the face frame, and toward the back (any 3/4" thick material will work). The inside of the drawer area should be flush on both sides.
Measure the opening width, and build drawers to fit out of 1x10s, remembering that drawer slides usually take up 1/2" clearance on both sides (but do double check with your drawer slide instructions).
For drawer fronts, do not place pocket holes on outside, as they may not be covered by drawer face frames.
Install drawers on drawer slides.
Build face frames out of 1x3 and attach to front of drawers, with 1/8" gap all the way around.
If this is confusing, please watch our video on this cabinet where these steps are shown.
Build doors for the sink area and install with hinges.
Step 6
Nail 1x2 trim to front edges of 1x12 uprights with glue. I used 1-1/4" nails.
Then build up header with 1x2s and 1x8s, nailing in place.
NOTE: I also added a piece at the top middle in the back for securing the top of the hutch to the wall. If your ceilings are lower, you may not be able to do this, so add to the inside of the top.


