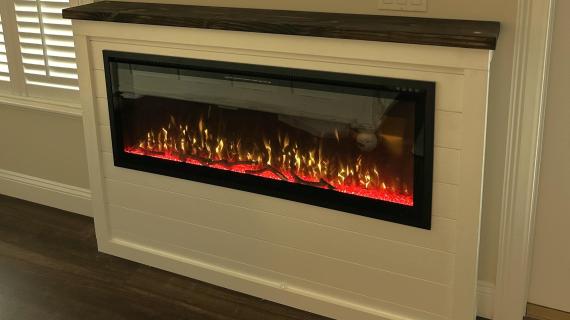


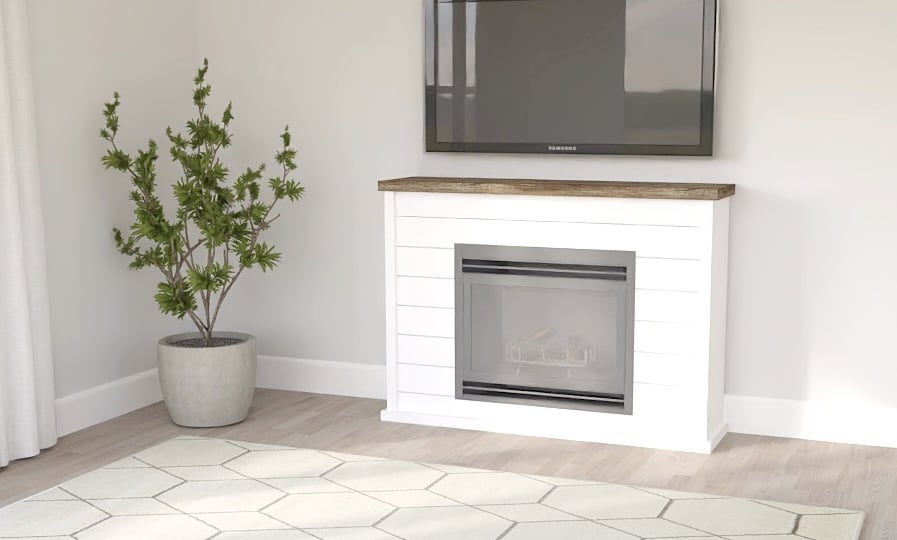
Free plans to build your own fireplace tv stand. This plan is easy to customize to fit just about any size insert.
With a front face of shiplap, this fireplace tv stand will give you the look of a shiplap fireplace bump out, with much less work and cost. Can be installed permanently or freestanding in a room.
This is a free project plan, with step by step diagrams, instructions, shopping list and cut list. This project plan is suitable for beginning to intermediate builders.
Why We Love this Shiplap Fireplace TV Stand
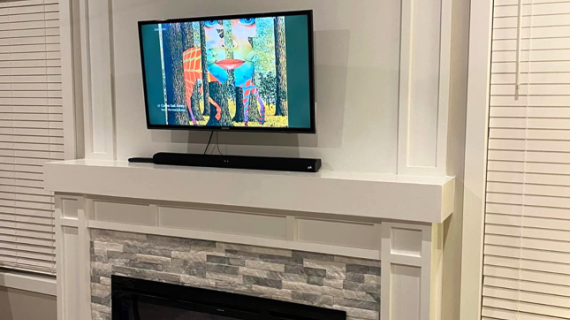
A couple years ago, I built a shiplap fireplace tv bump out for a boring room with flat ceilings. The project completely transformed the room and created a focal point. It was and still is one of my favorite projects of all time!
See plans for full fireplace tv wall here
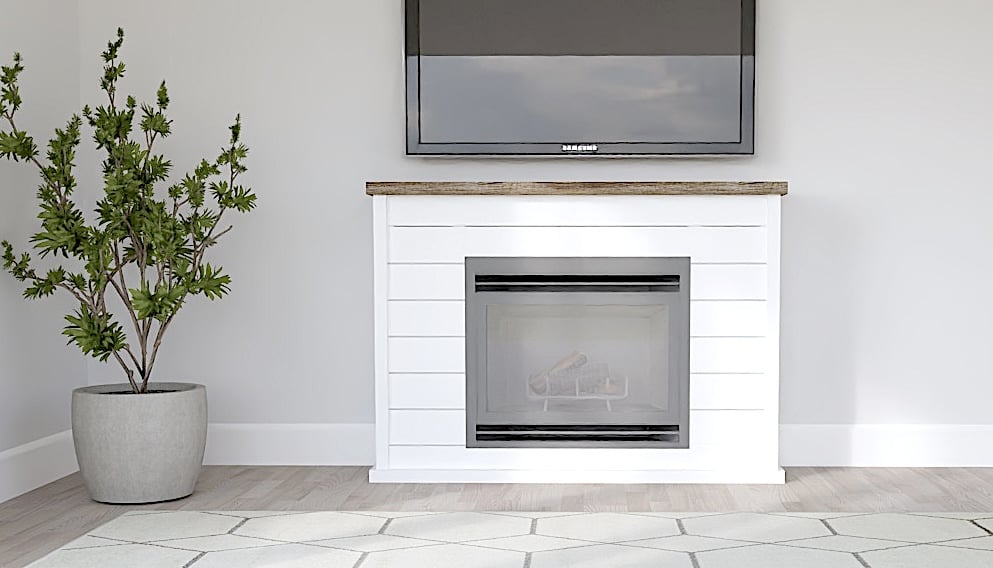
We've had quite a few requests for a version in a fireplace tv stand format, that could be built freestanding and moved into a room, that could be used unattached to the wall.
I'm sorry it took me this long to get plans, but am super happy with this half height fireplace tv stand and glad to be able to share the plans below with you for free.
Features of this Fireplace TV Stand Project Plan
Why do we love this project?
- Simple build, using common materials and minimal tools
- The face is shiplap, to add texture and interest to a room
- Freestanding, can be built independently and moved into a room
- Does not need to be attached to the wall
- Easy to modify to fit just about any fireplace insert
- Open back to plug cords in, hide tv wires and controllers
- No need for a tv hanging bracket, tv can be set on top
- Free step by step plans are easy to follow and designed for most people to tackle
Free Plans to Build Your Own Fireplace TV Stand
The free plans to build this fireplace tv stand follow, thank you for using our plans!
Pin For Later!
Preparation
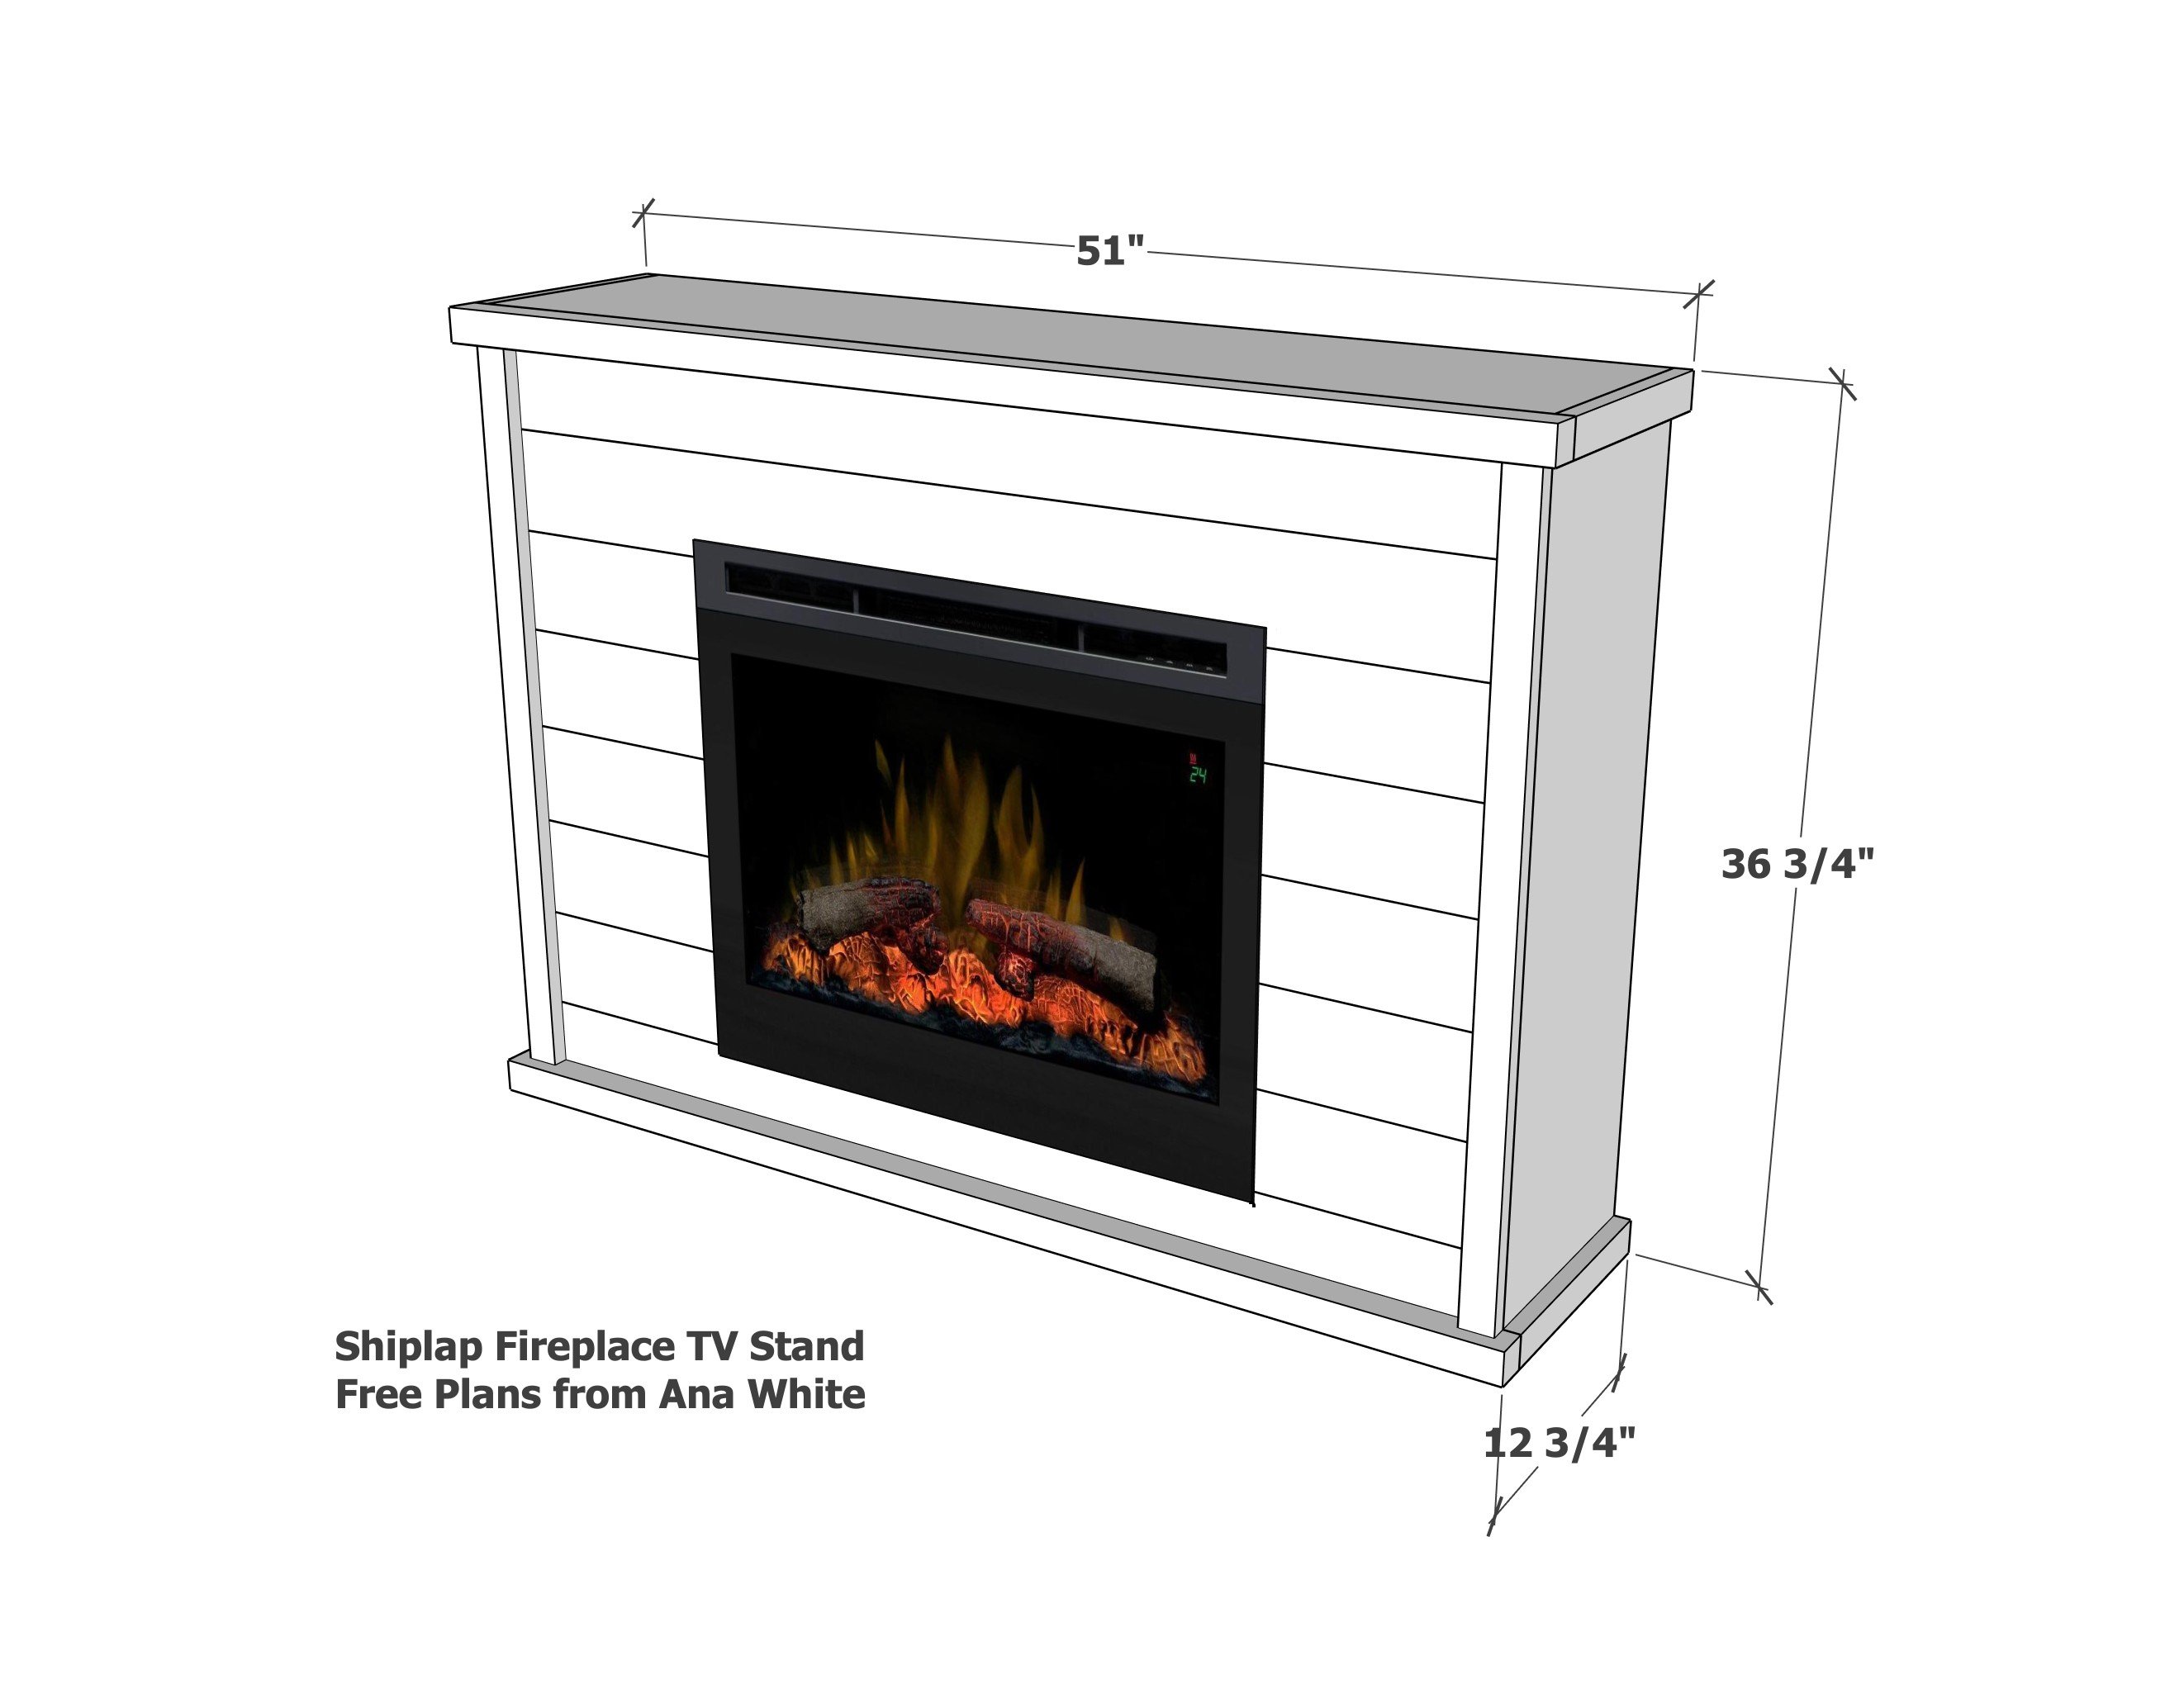
- Fireplace insert, this plan uses a 30" x 24" insert, but can be customized to fit 28-36" inserts with minimal changes, and for 40" or larger inserts, it is simple to adjust the plans, instructions detailed in the plans
- 4 - 2x4 @ 8 feet long
- 4 - 5-1/2" wide x 8 feet long shiplap pieces - this is approximate, depending on size of insert
- 1 - 1x12 @ 12" long
- 2 - 1x2 @ 8' long
- 2 - 2x2 @ 8' long
- Brad nails in 1-1/4" and 2" lengths
- 2-1/2" long self tapping star bit screws (about 30)
- wood glue
Boards are for common lumber, is using select pine, the shopping list can be reduced to reduce costs
Finger Joined 1x12 and MDF boards can be used for a more refined look.
- 4 - 2x4 @ 48" - framing, horizontal
- 4 - 2x4 @ 33" - framing, vertical
- Shiplap pieces cut to fit
- 2 - 1x12 @ 36" - sides
- 1 - 1x12 @ 49-1/2" - top
- 4 - 1x2 @ 11-1/4" - side trim
- 2 - 2x2 @ 51" - front trim
- 2 - 1x2 @ 33-3/4" - front trim


Instructions
Step 1
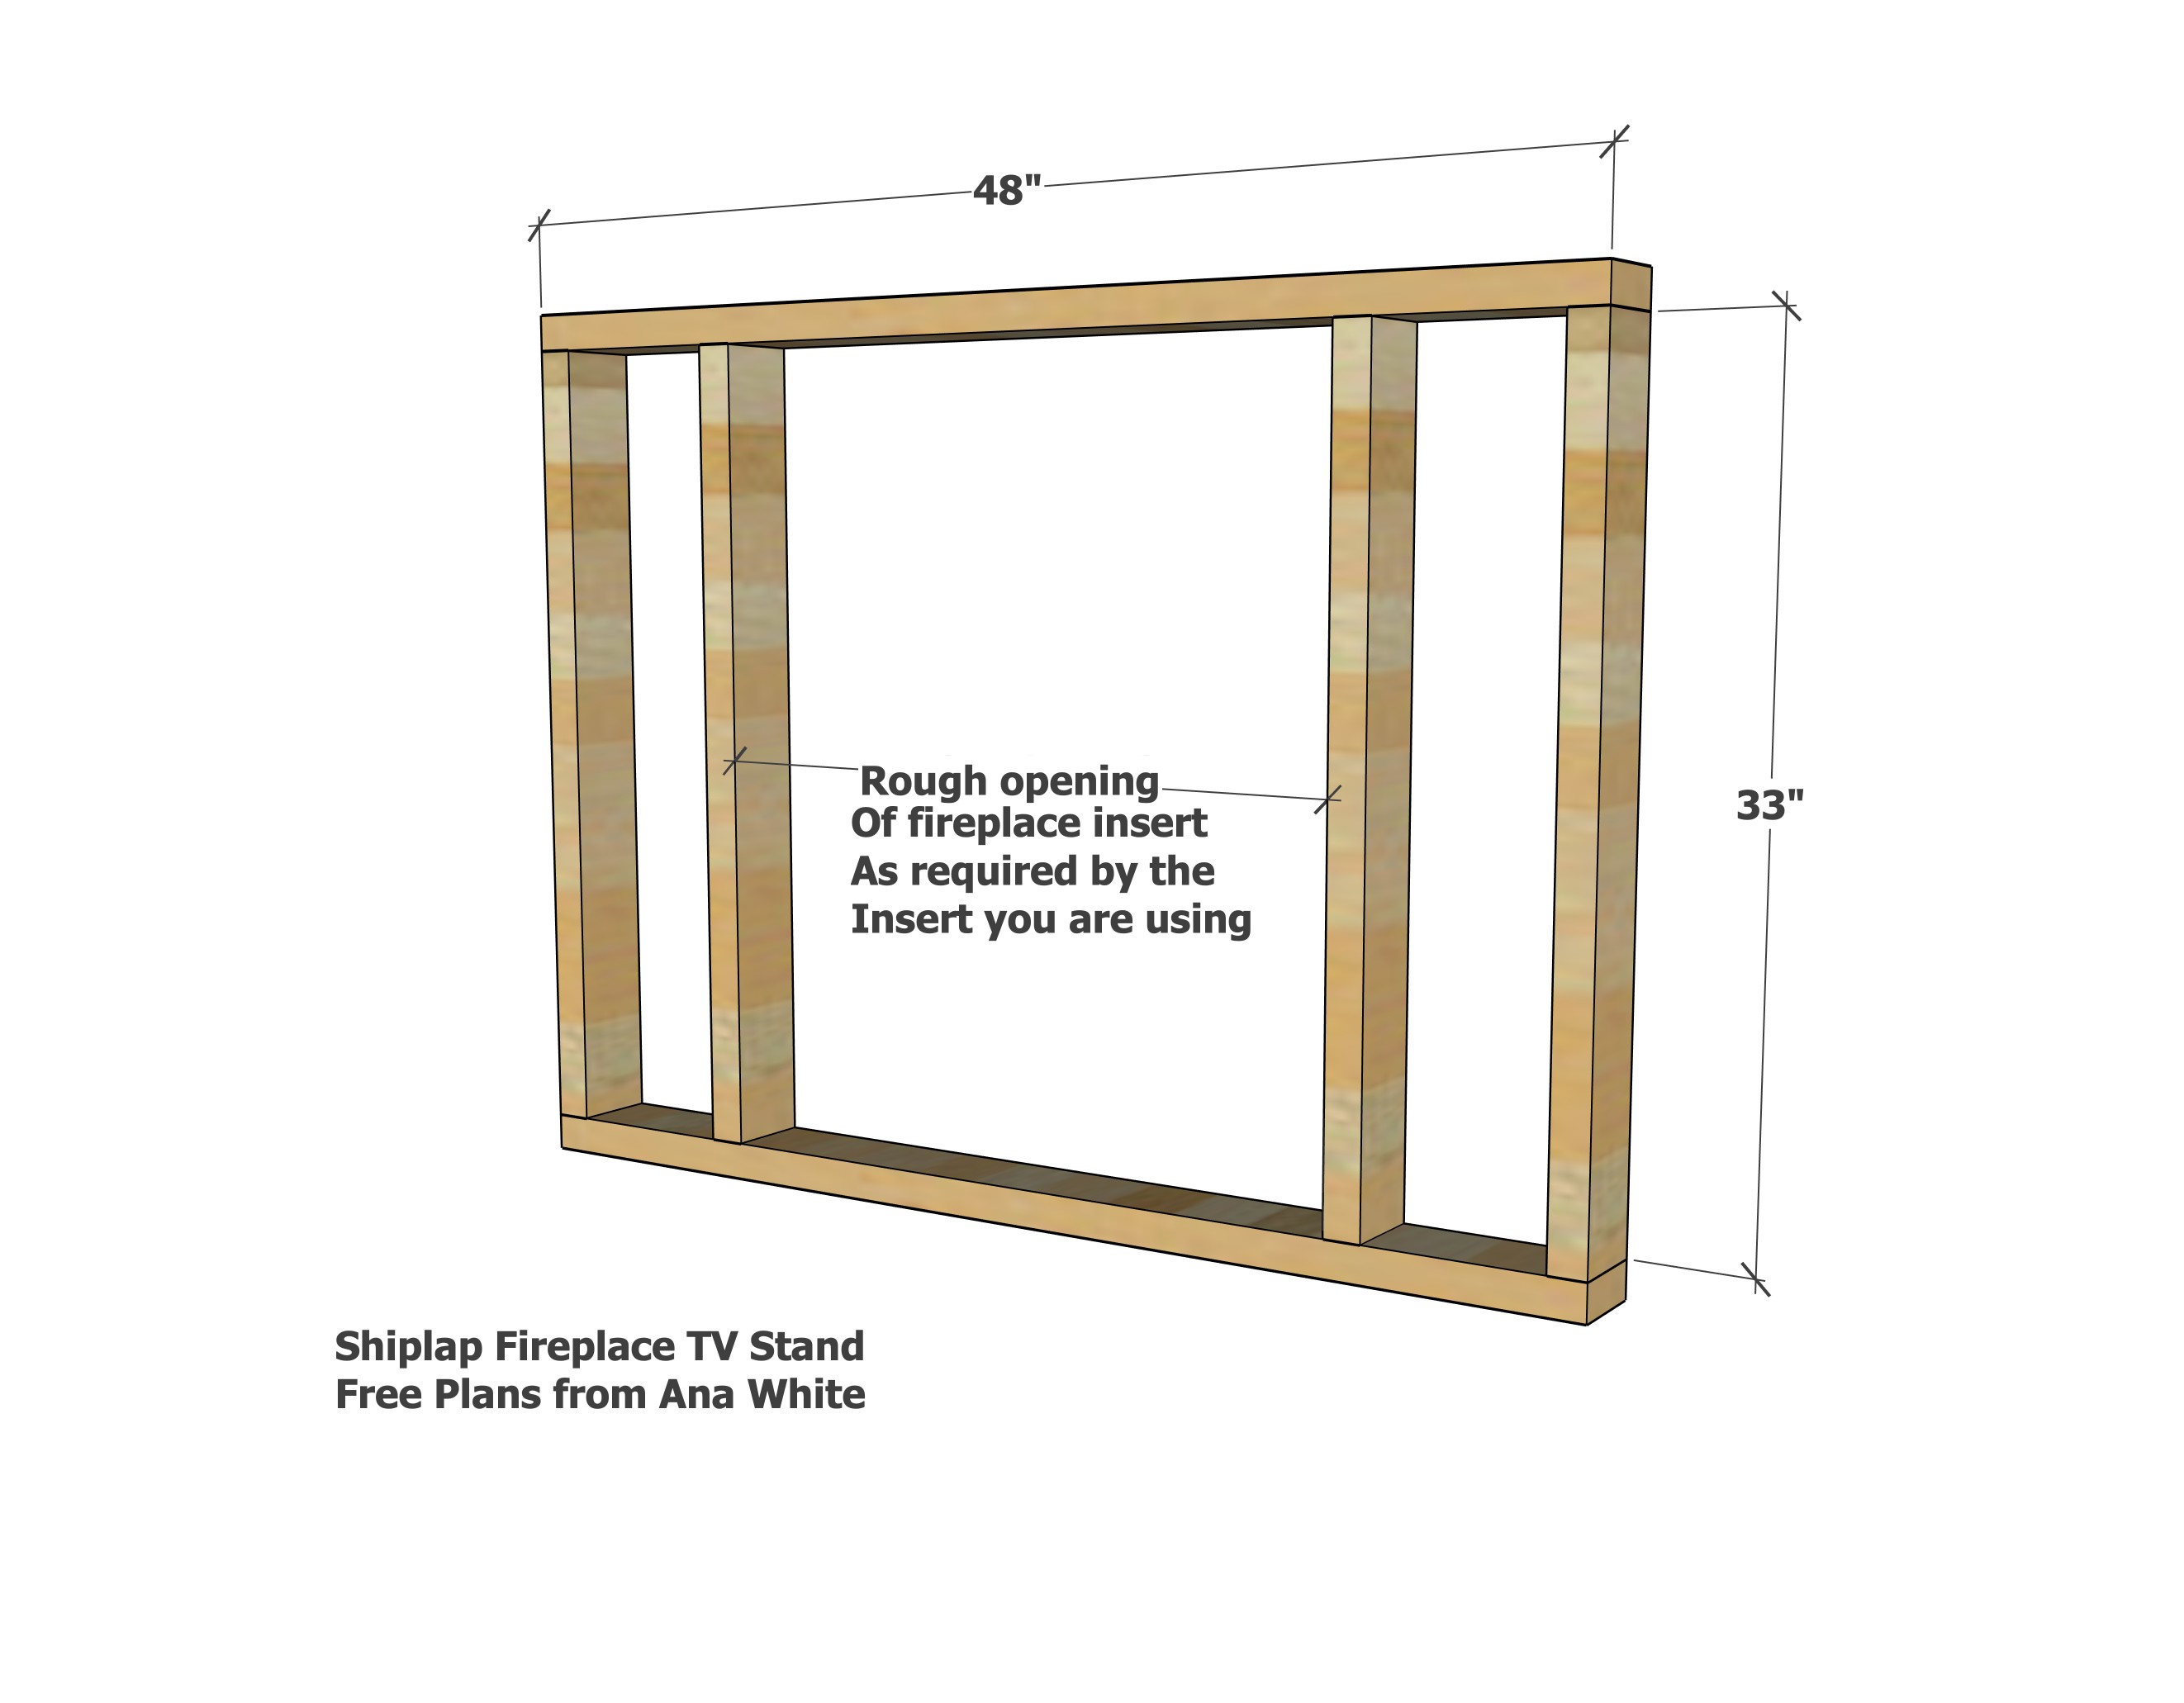
Start by cutting and building the front framing with 2x4s. Use the 2-1/2" screws to attach.
The inner 2x4 studs are spaced to match the rough opening requirements of your fireplace insert.
For a different sized fireplace tv stand, simply adjust the cut lengths of these 2x4s to fit your modification design.
Step 2
Carefully adjust the framing for square by taking opposite diagonal measurements and adjusting until the diagonals match.
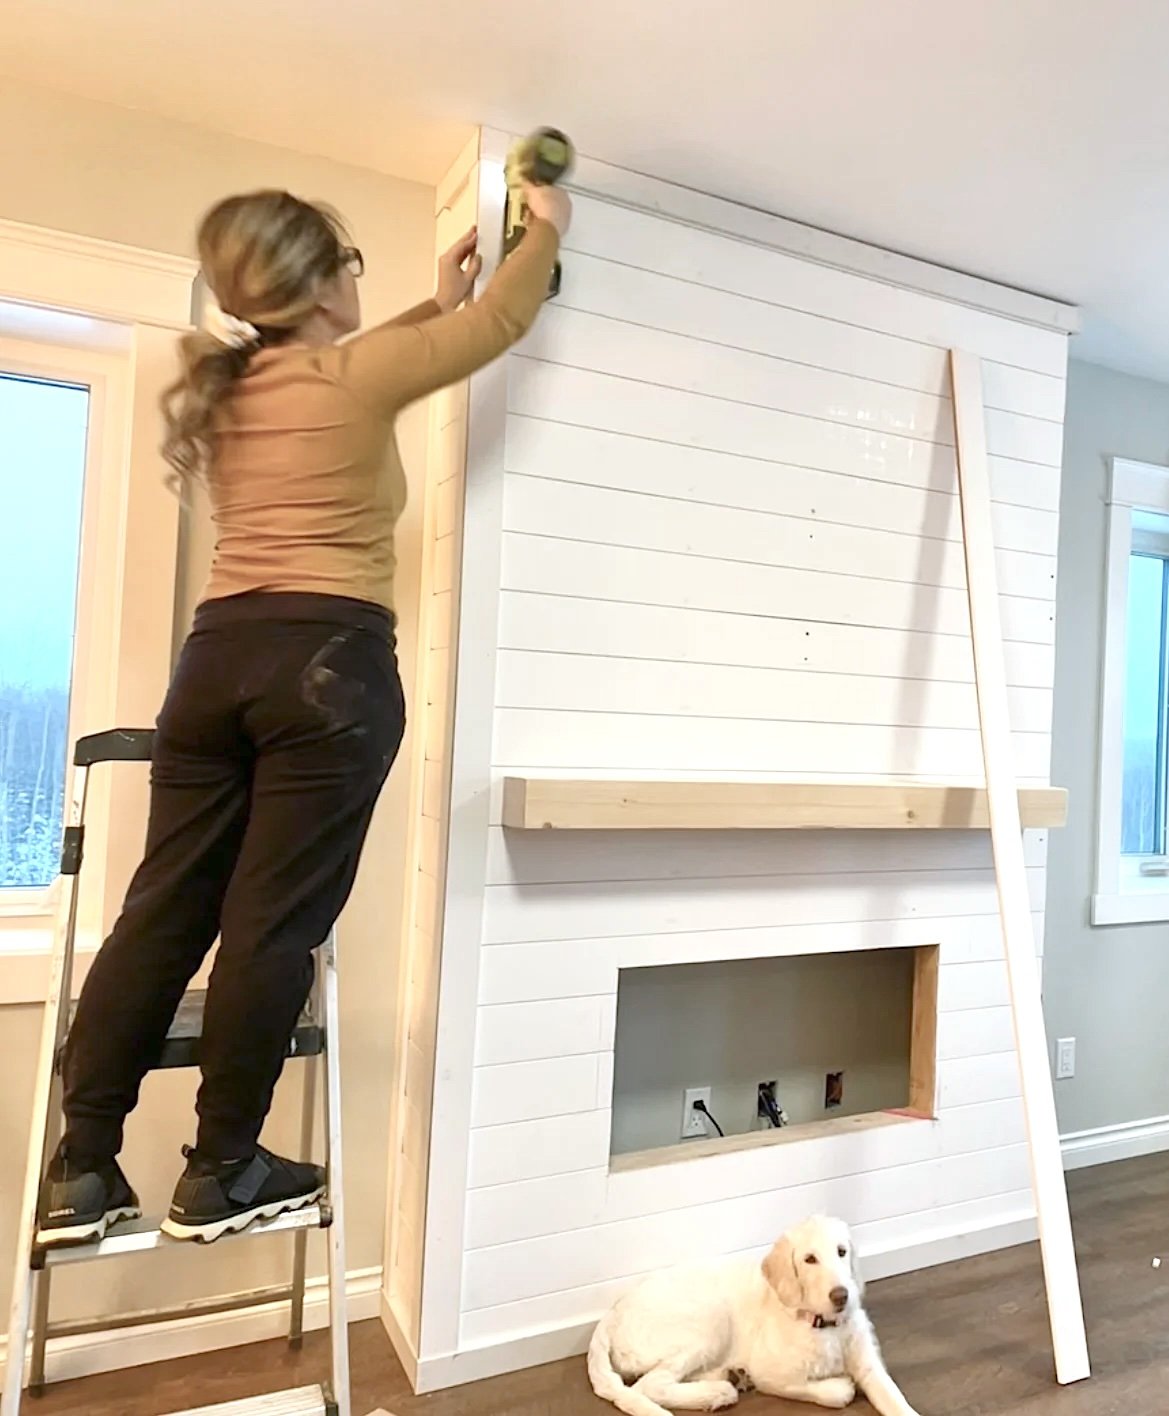
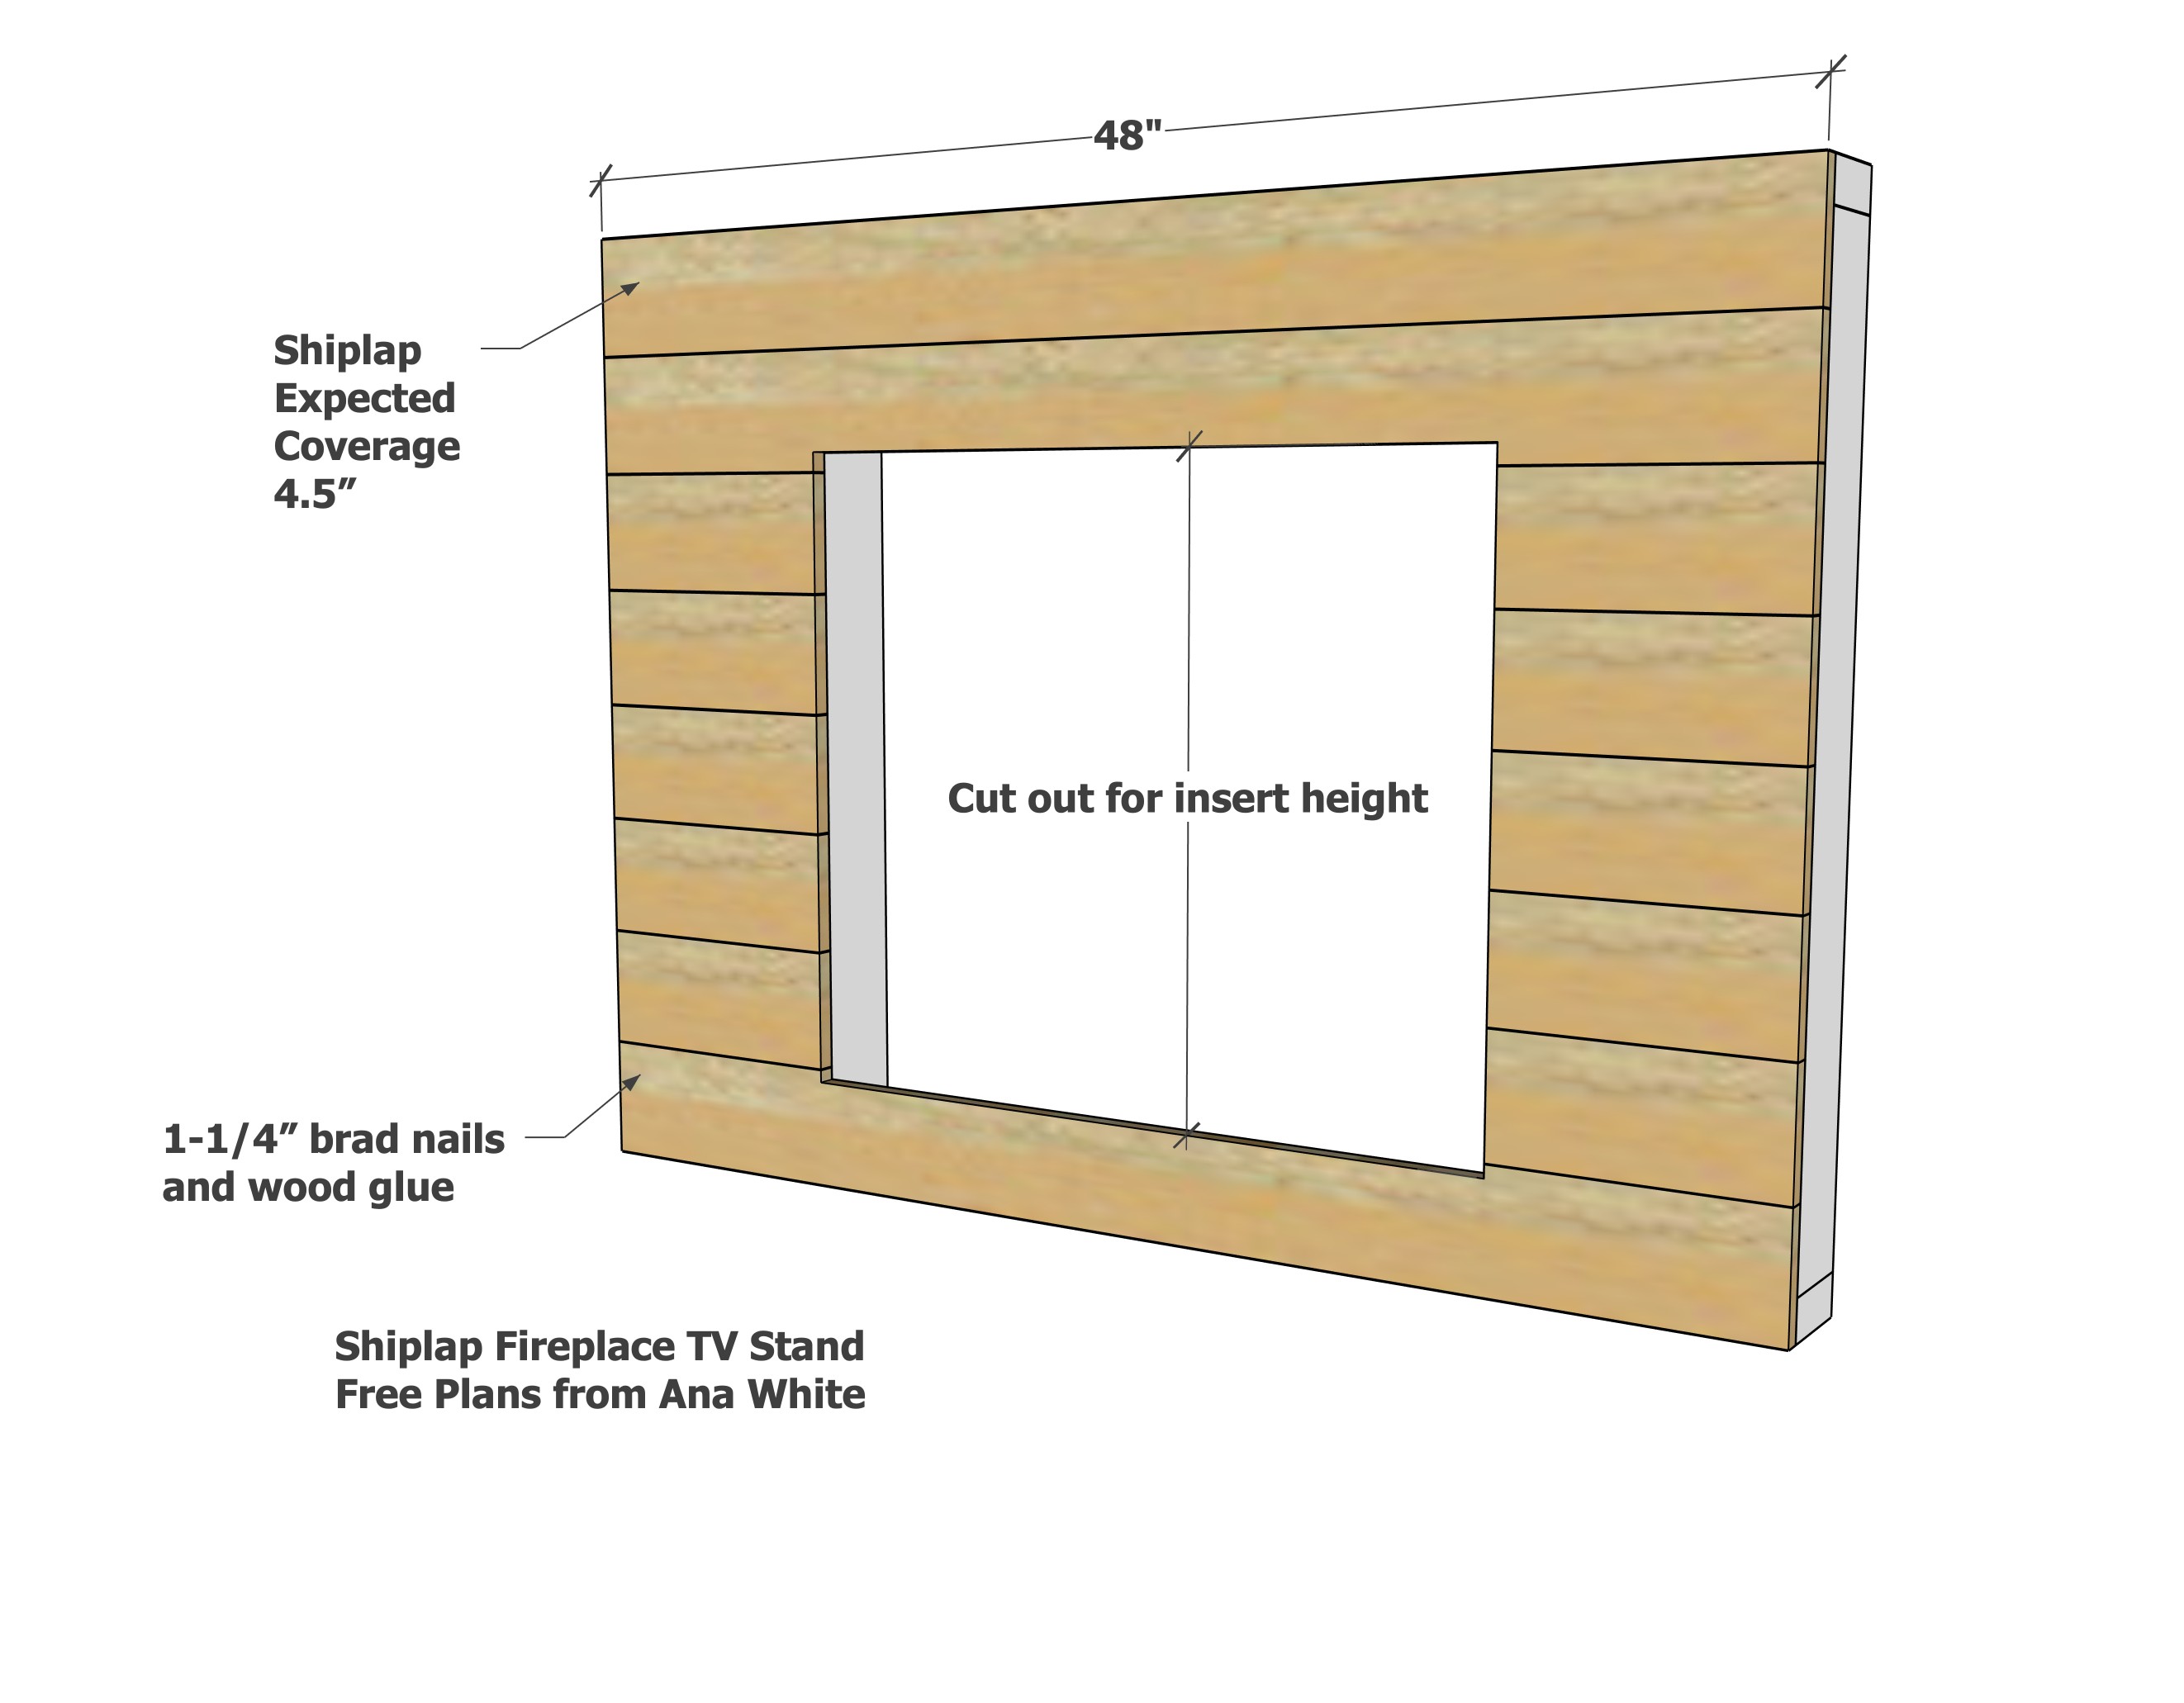
Cover the front with shiplap using glue and 1-1/4" brad nails.
Cut out the shiplap as required by your fireplace insert.
NOTE: Try to center the opening on the horizontal shiplap joints, so the insert looks balanced, as shown in the diagram.
Step 3
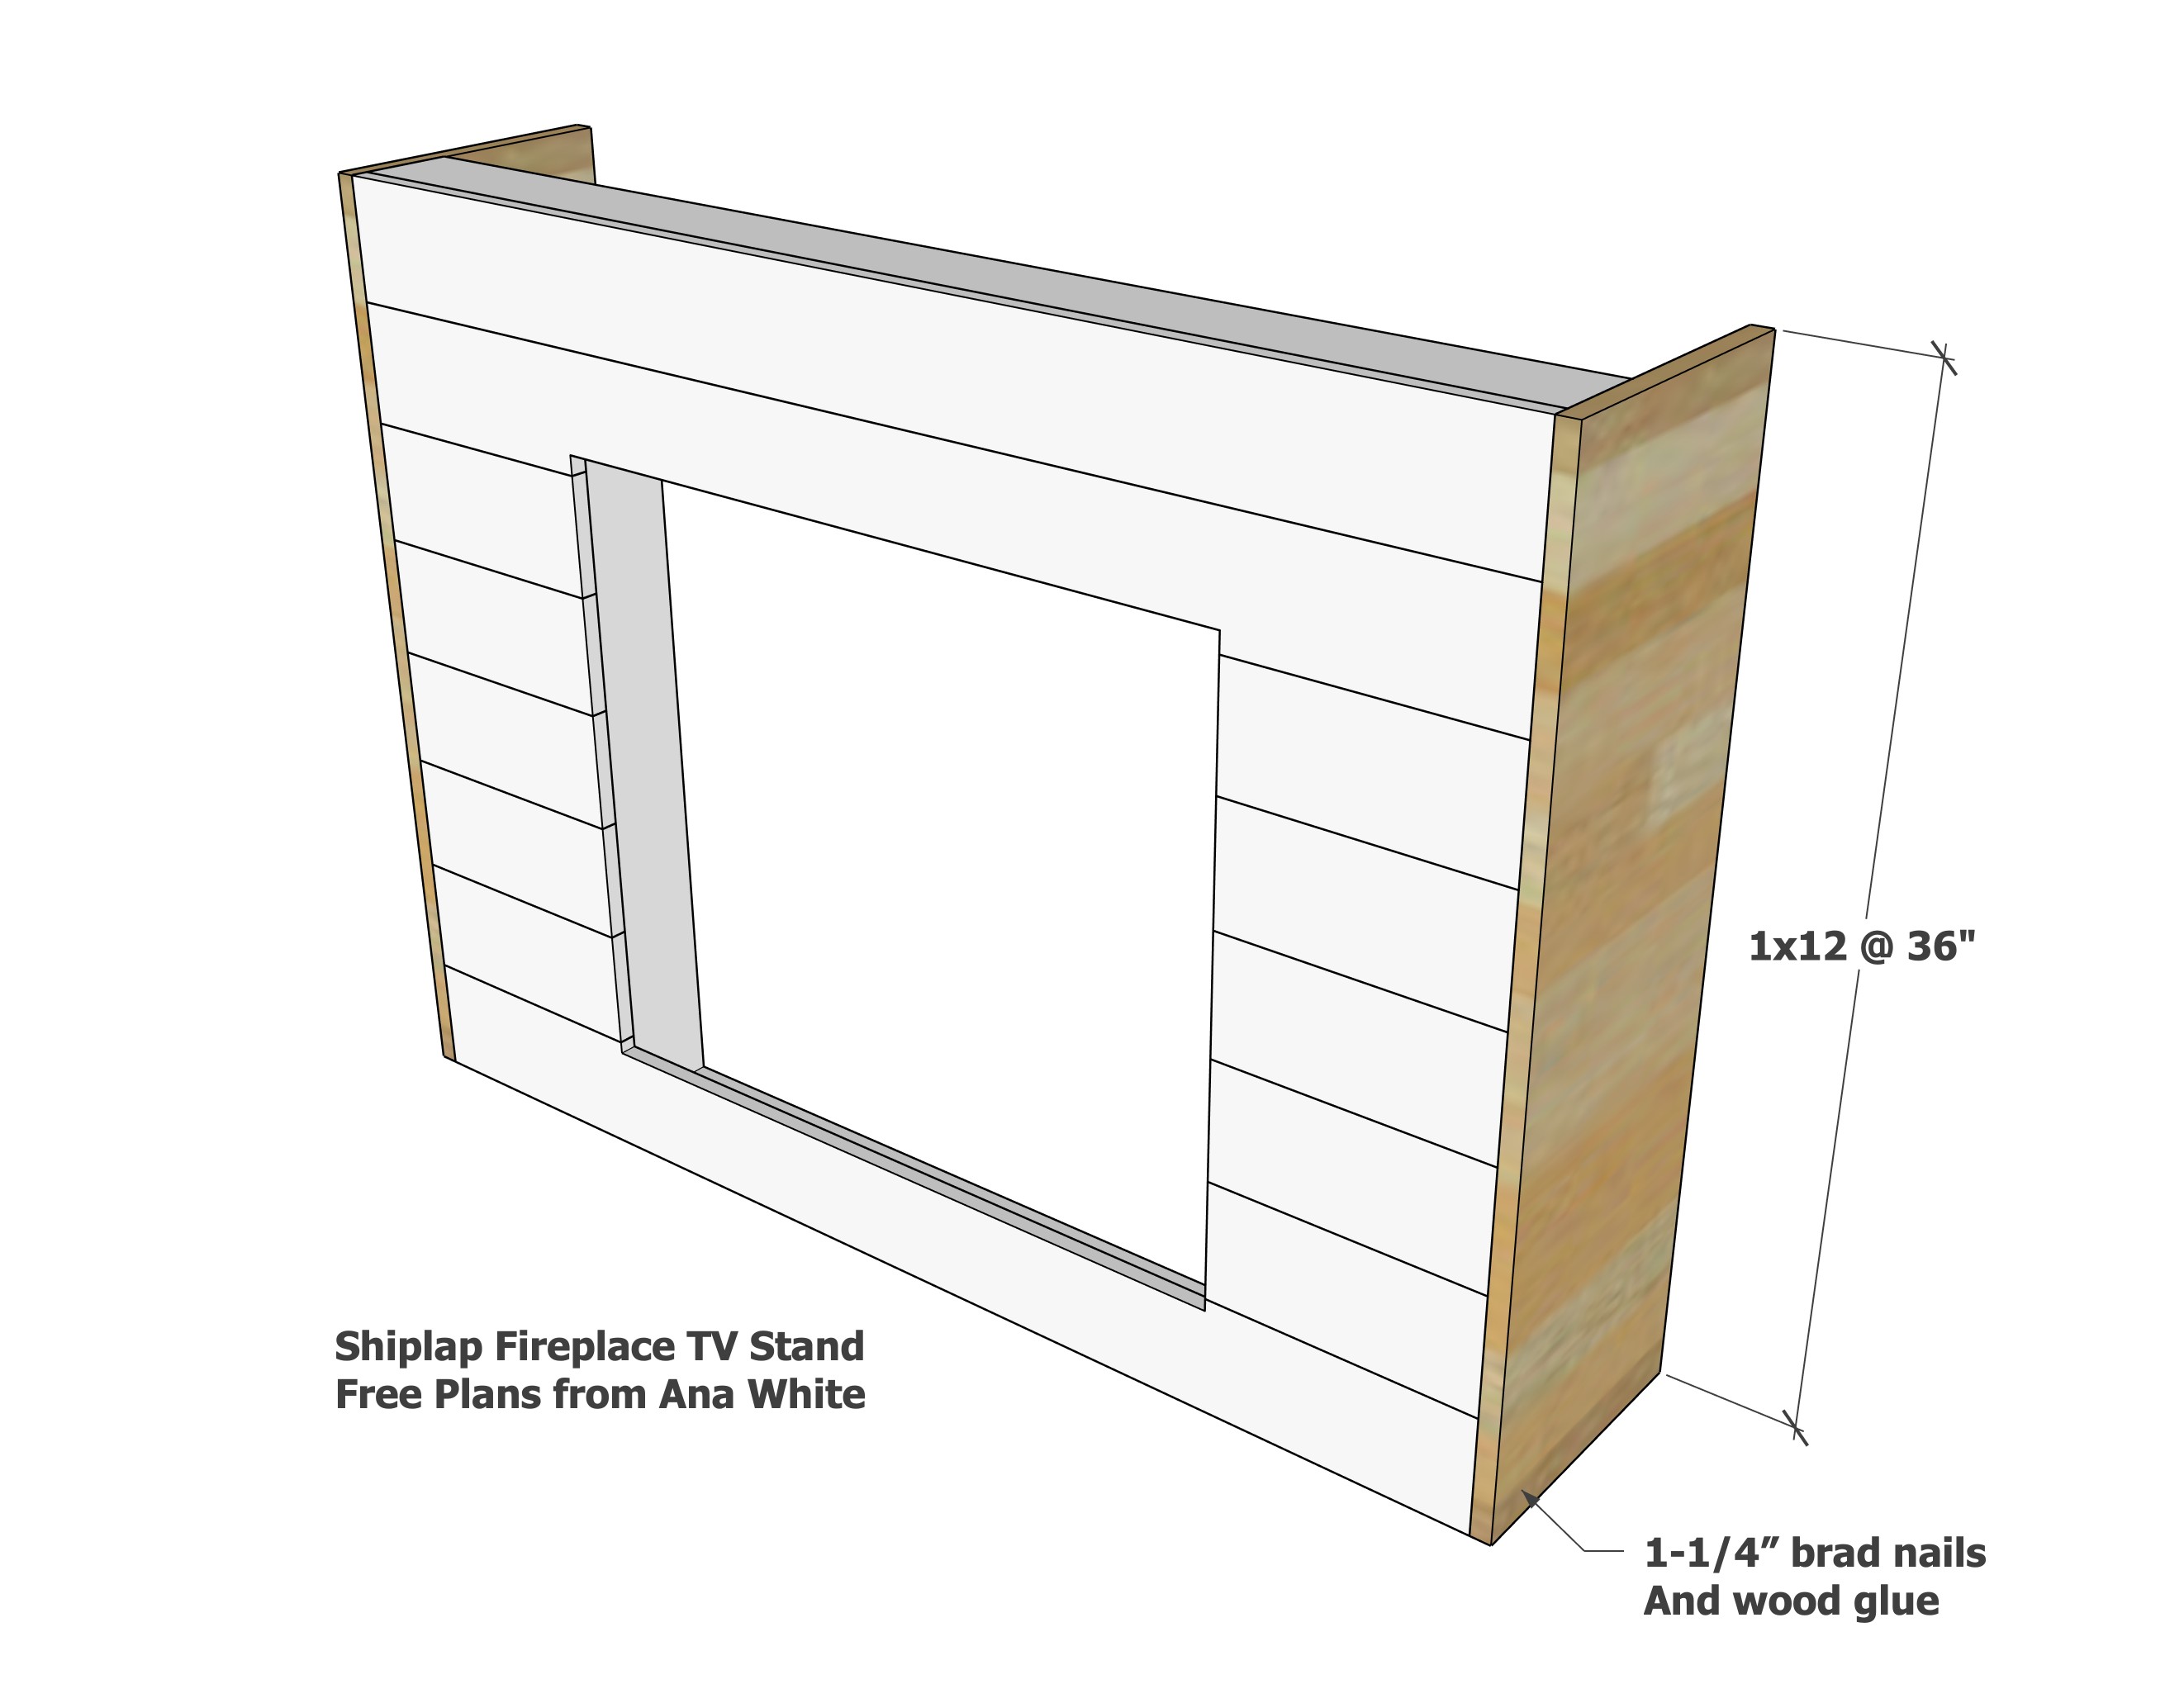
Attach to the sides the 1x12s with glue and 1-1/4" brad nails. If needed, add screws to further secure.
Step 4
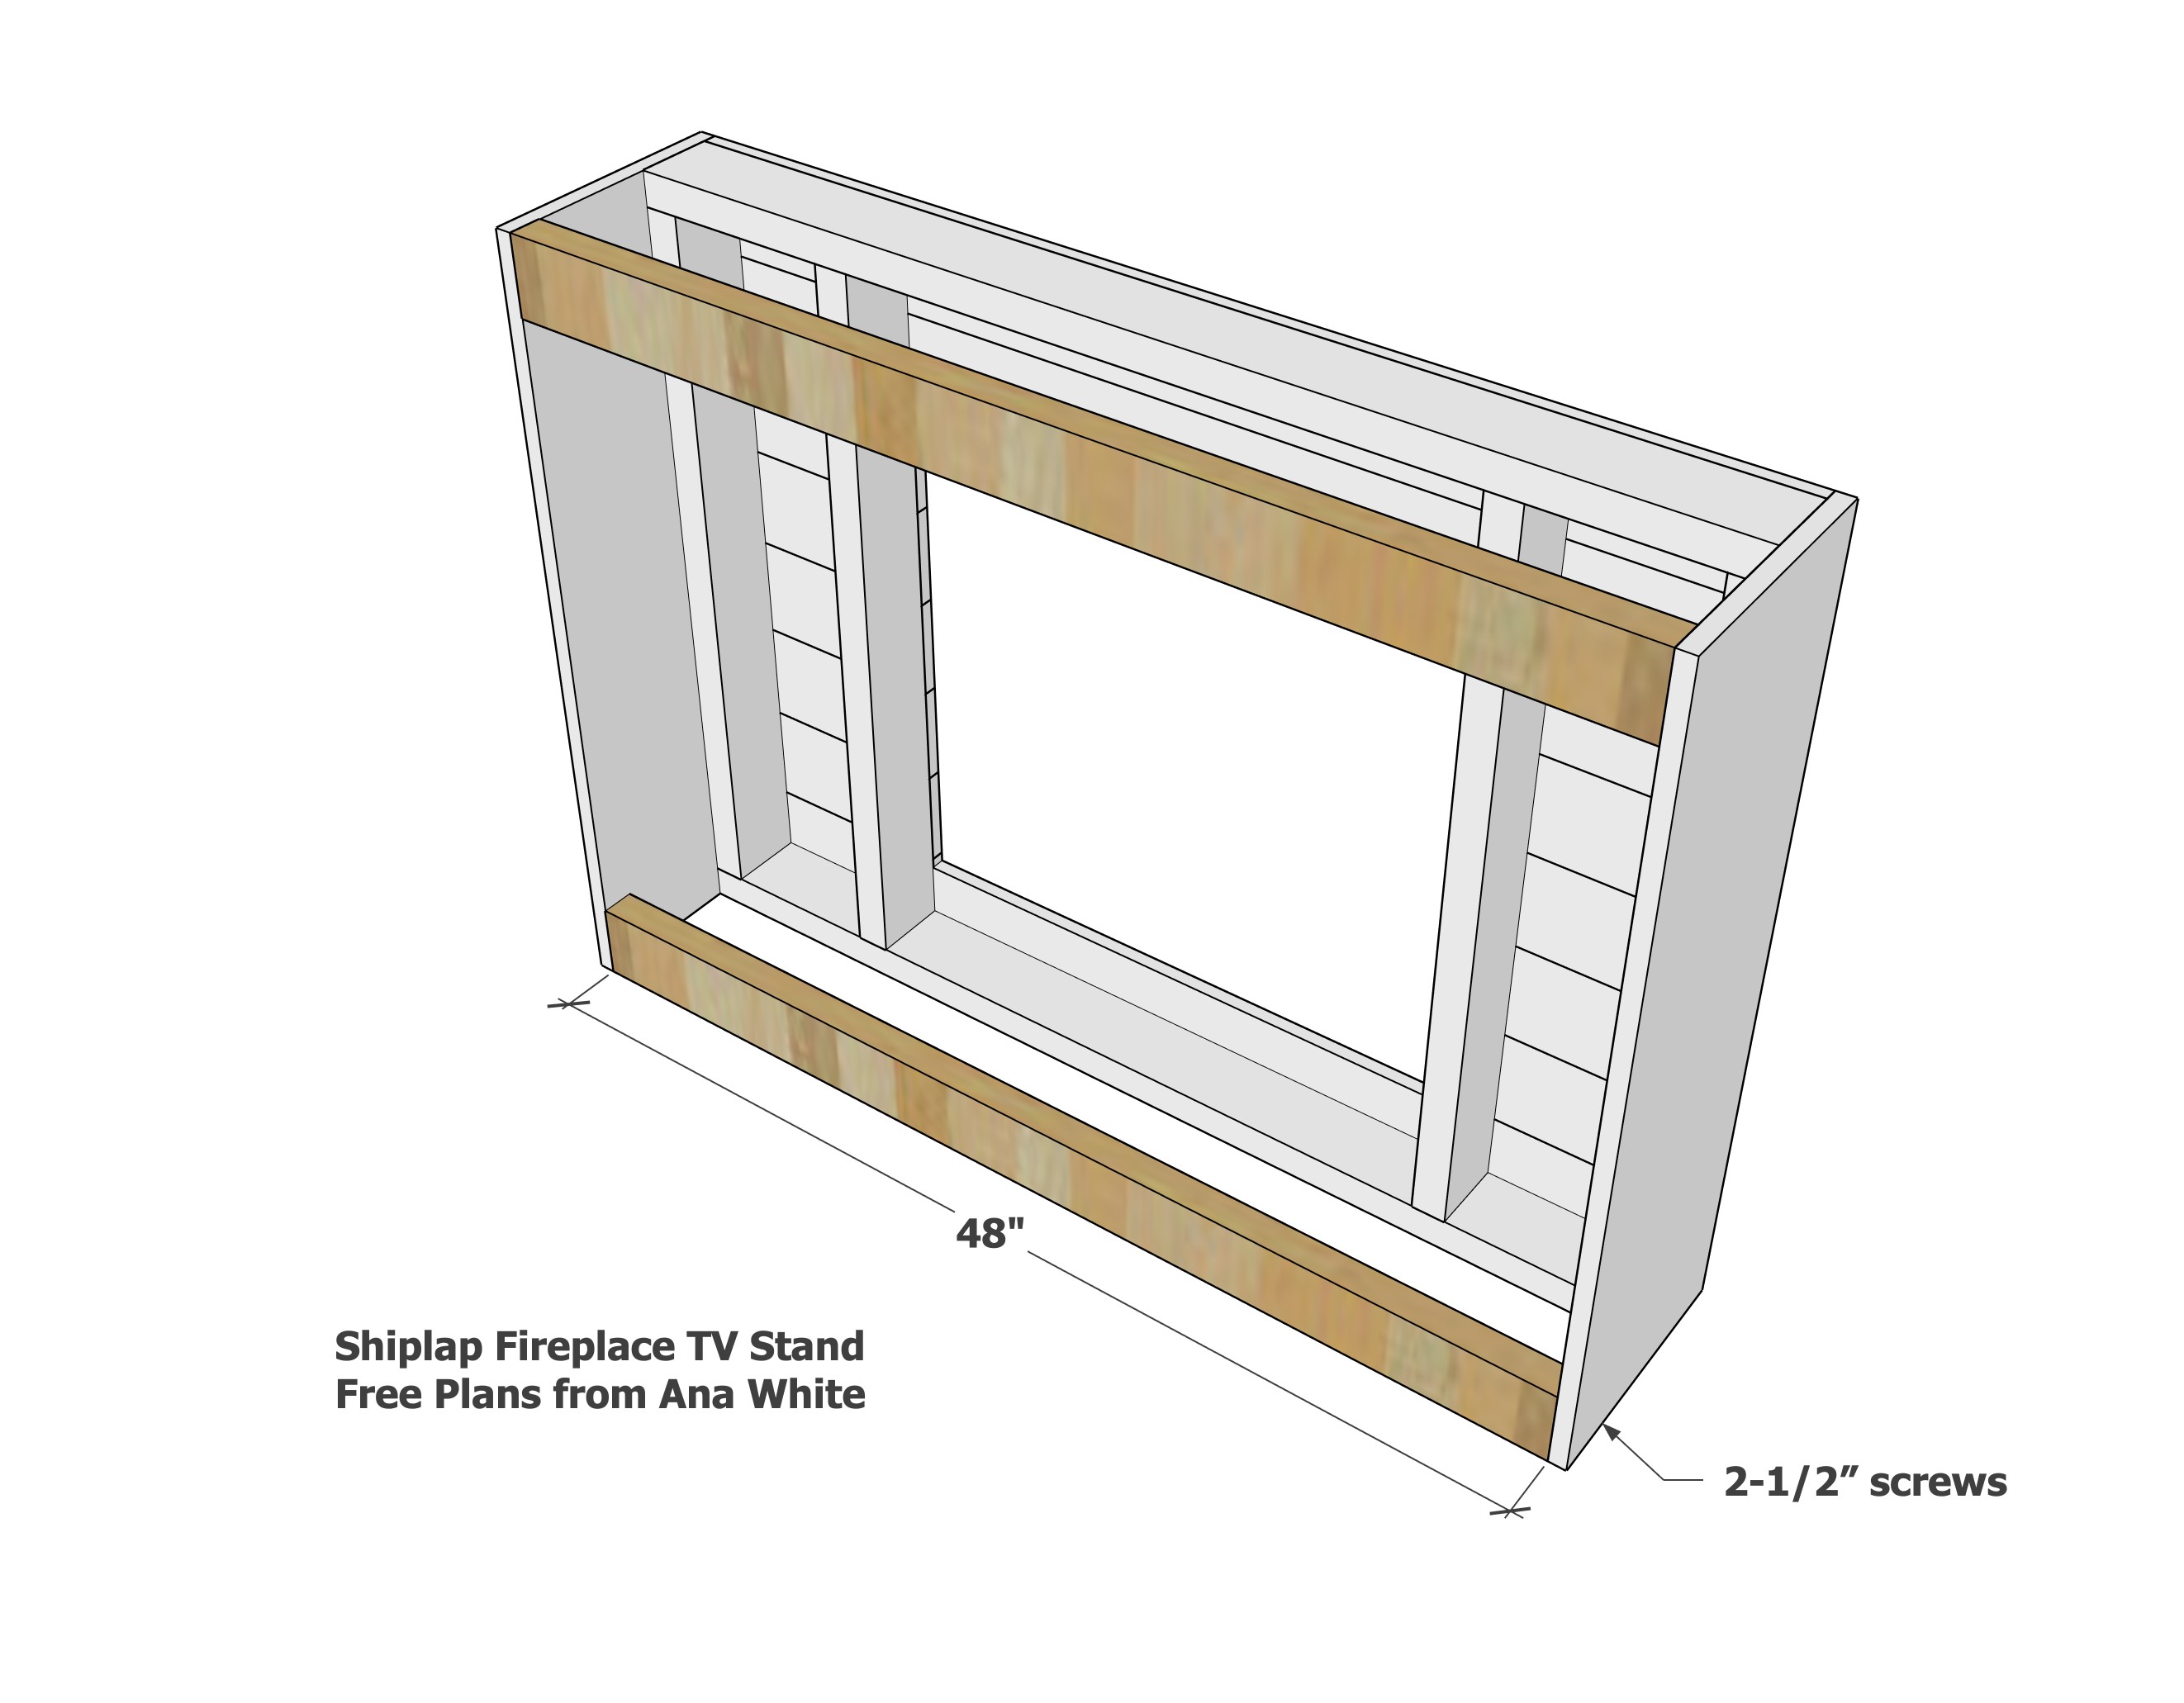
Add the 2x4 back framing as shown with screws.
You can use these 2x4 boards to attach the fireplace tv stand to the wall if a fixed install is the goal.
Step 5
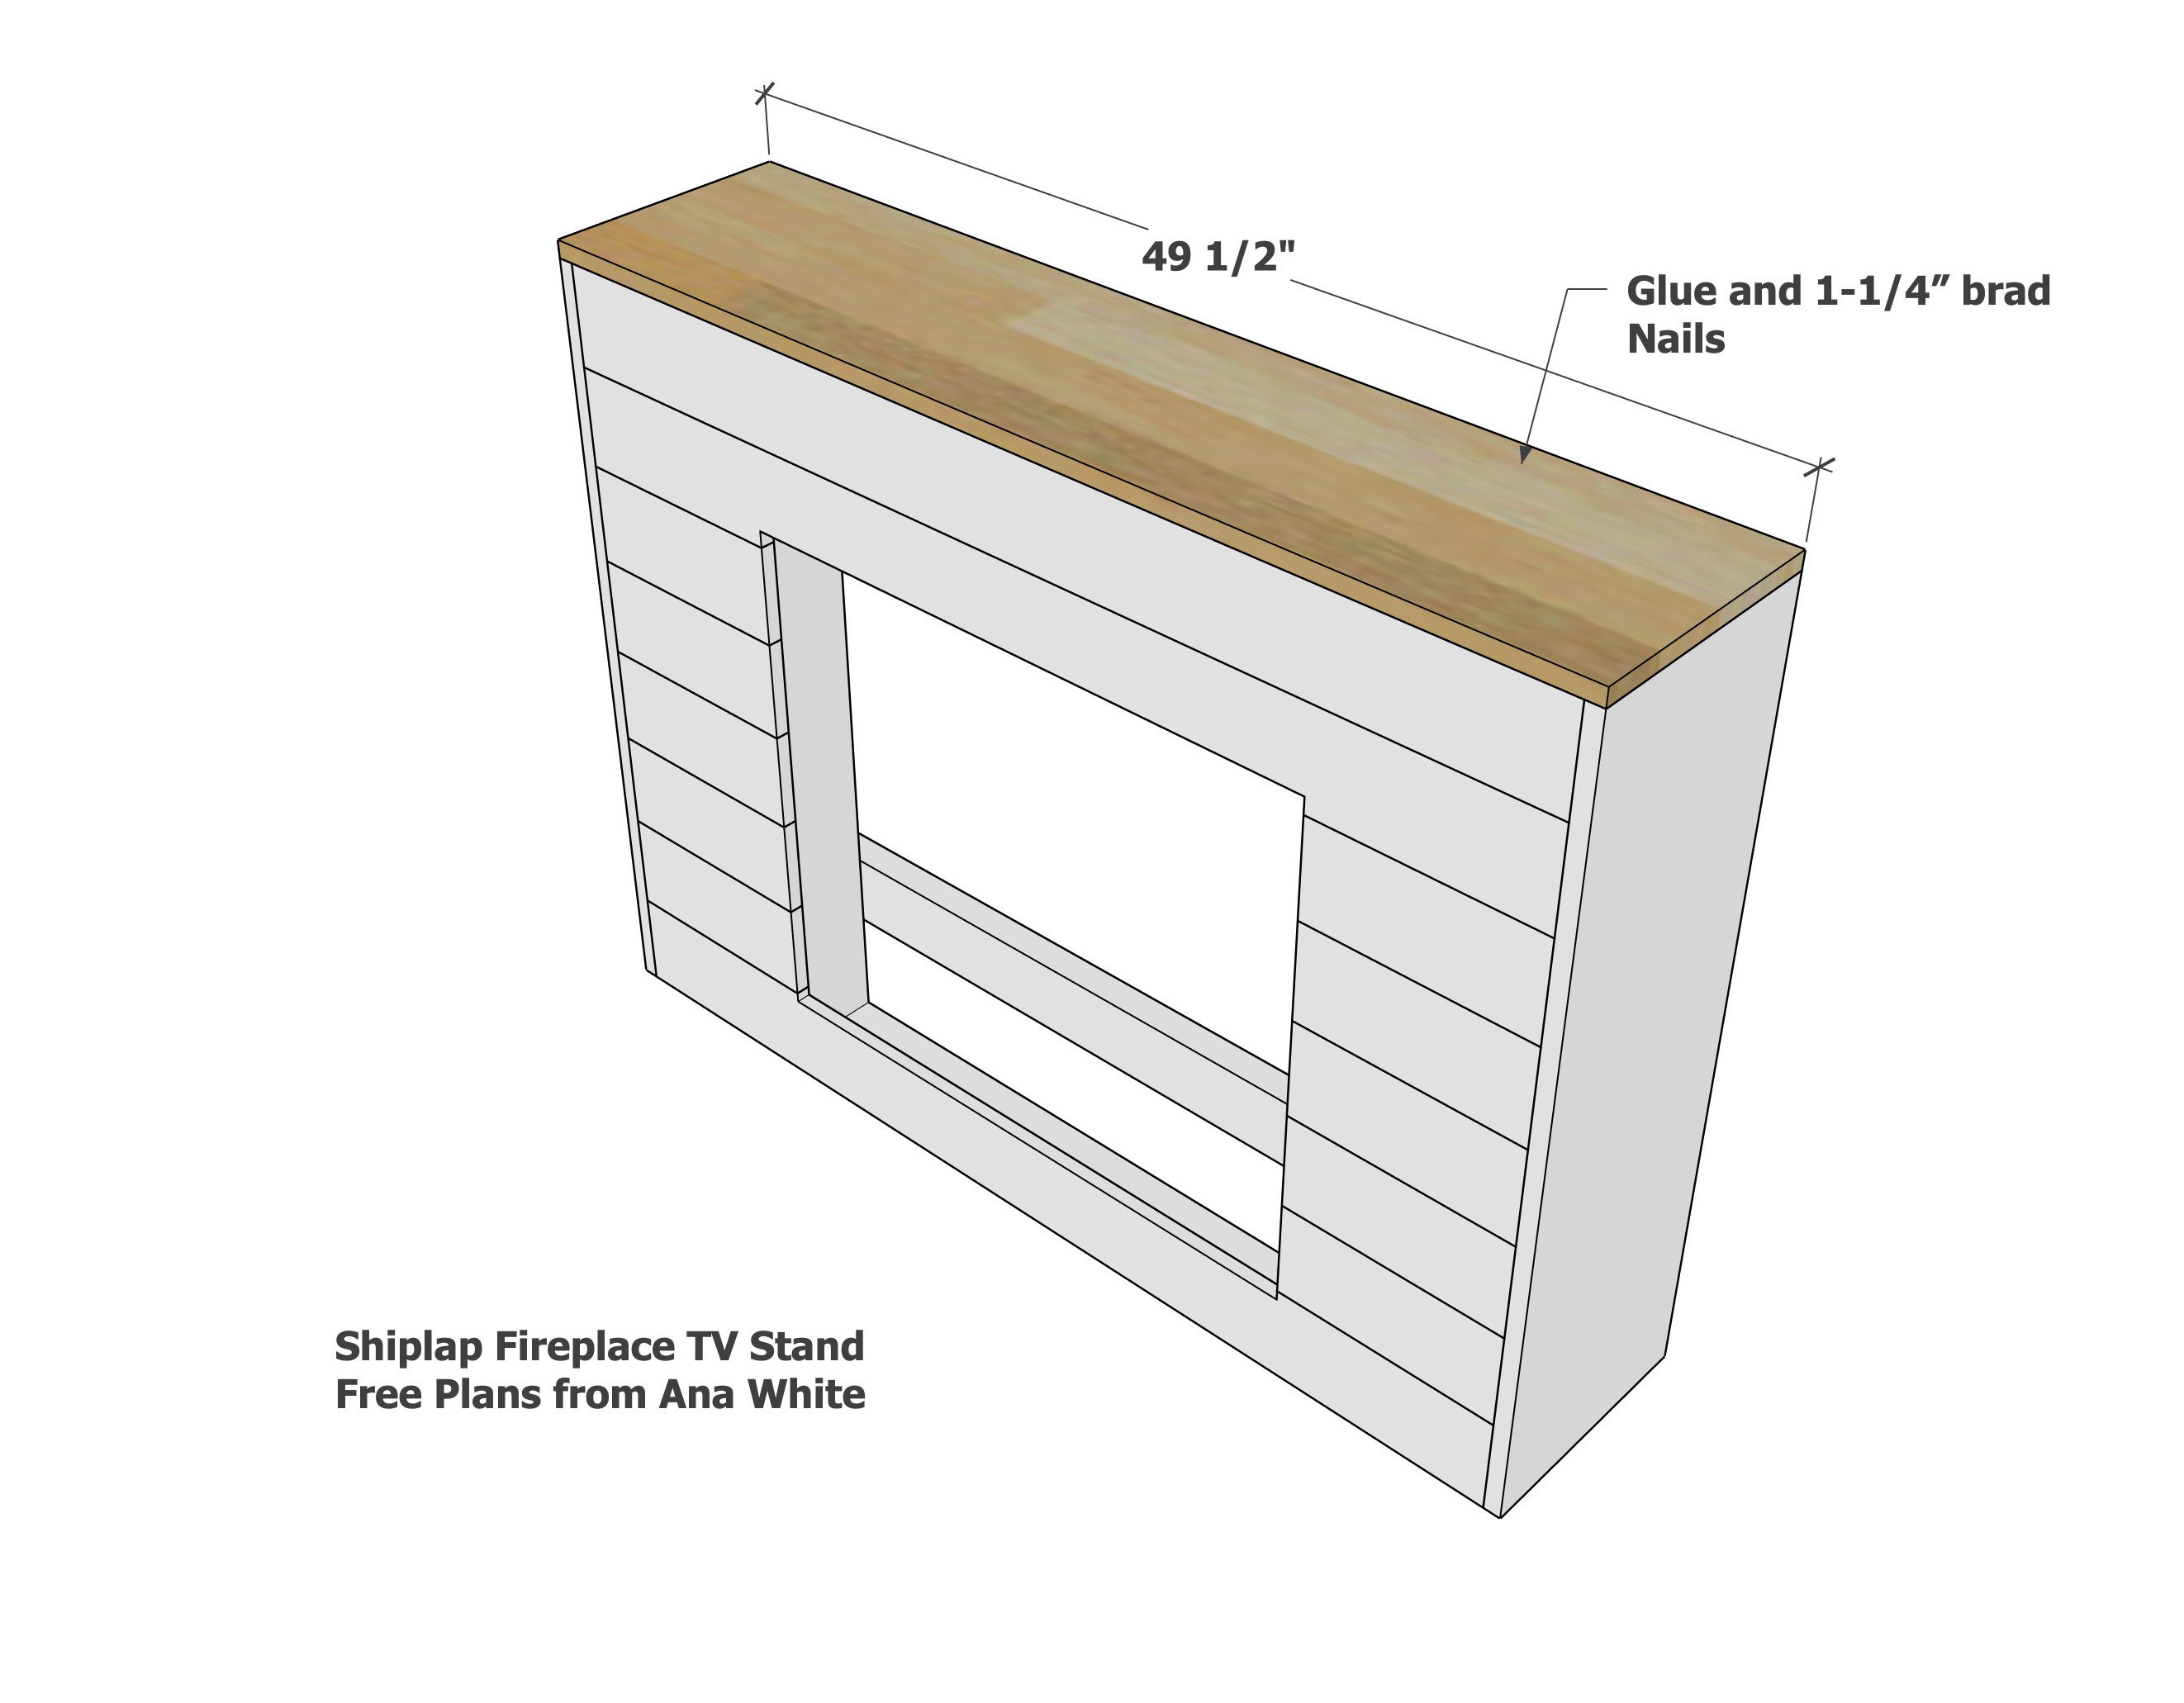
Measure and cut to fit the top 1x12. Use glue and 1-1/4" brad nails to attach. Further secure with a free screws if needed.
Step 6

Measure and cut the 1x2 side trim pieces and attach to the sides with glue and 1-1/4" brad nails.
Step 7

Measure and cut the 2x2s for the front.
Attach with 2" brad nails and screws if needed.
Step 8
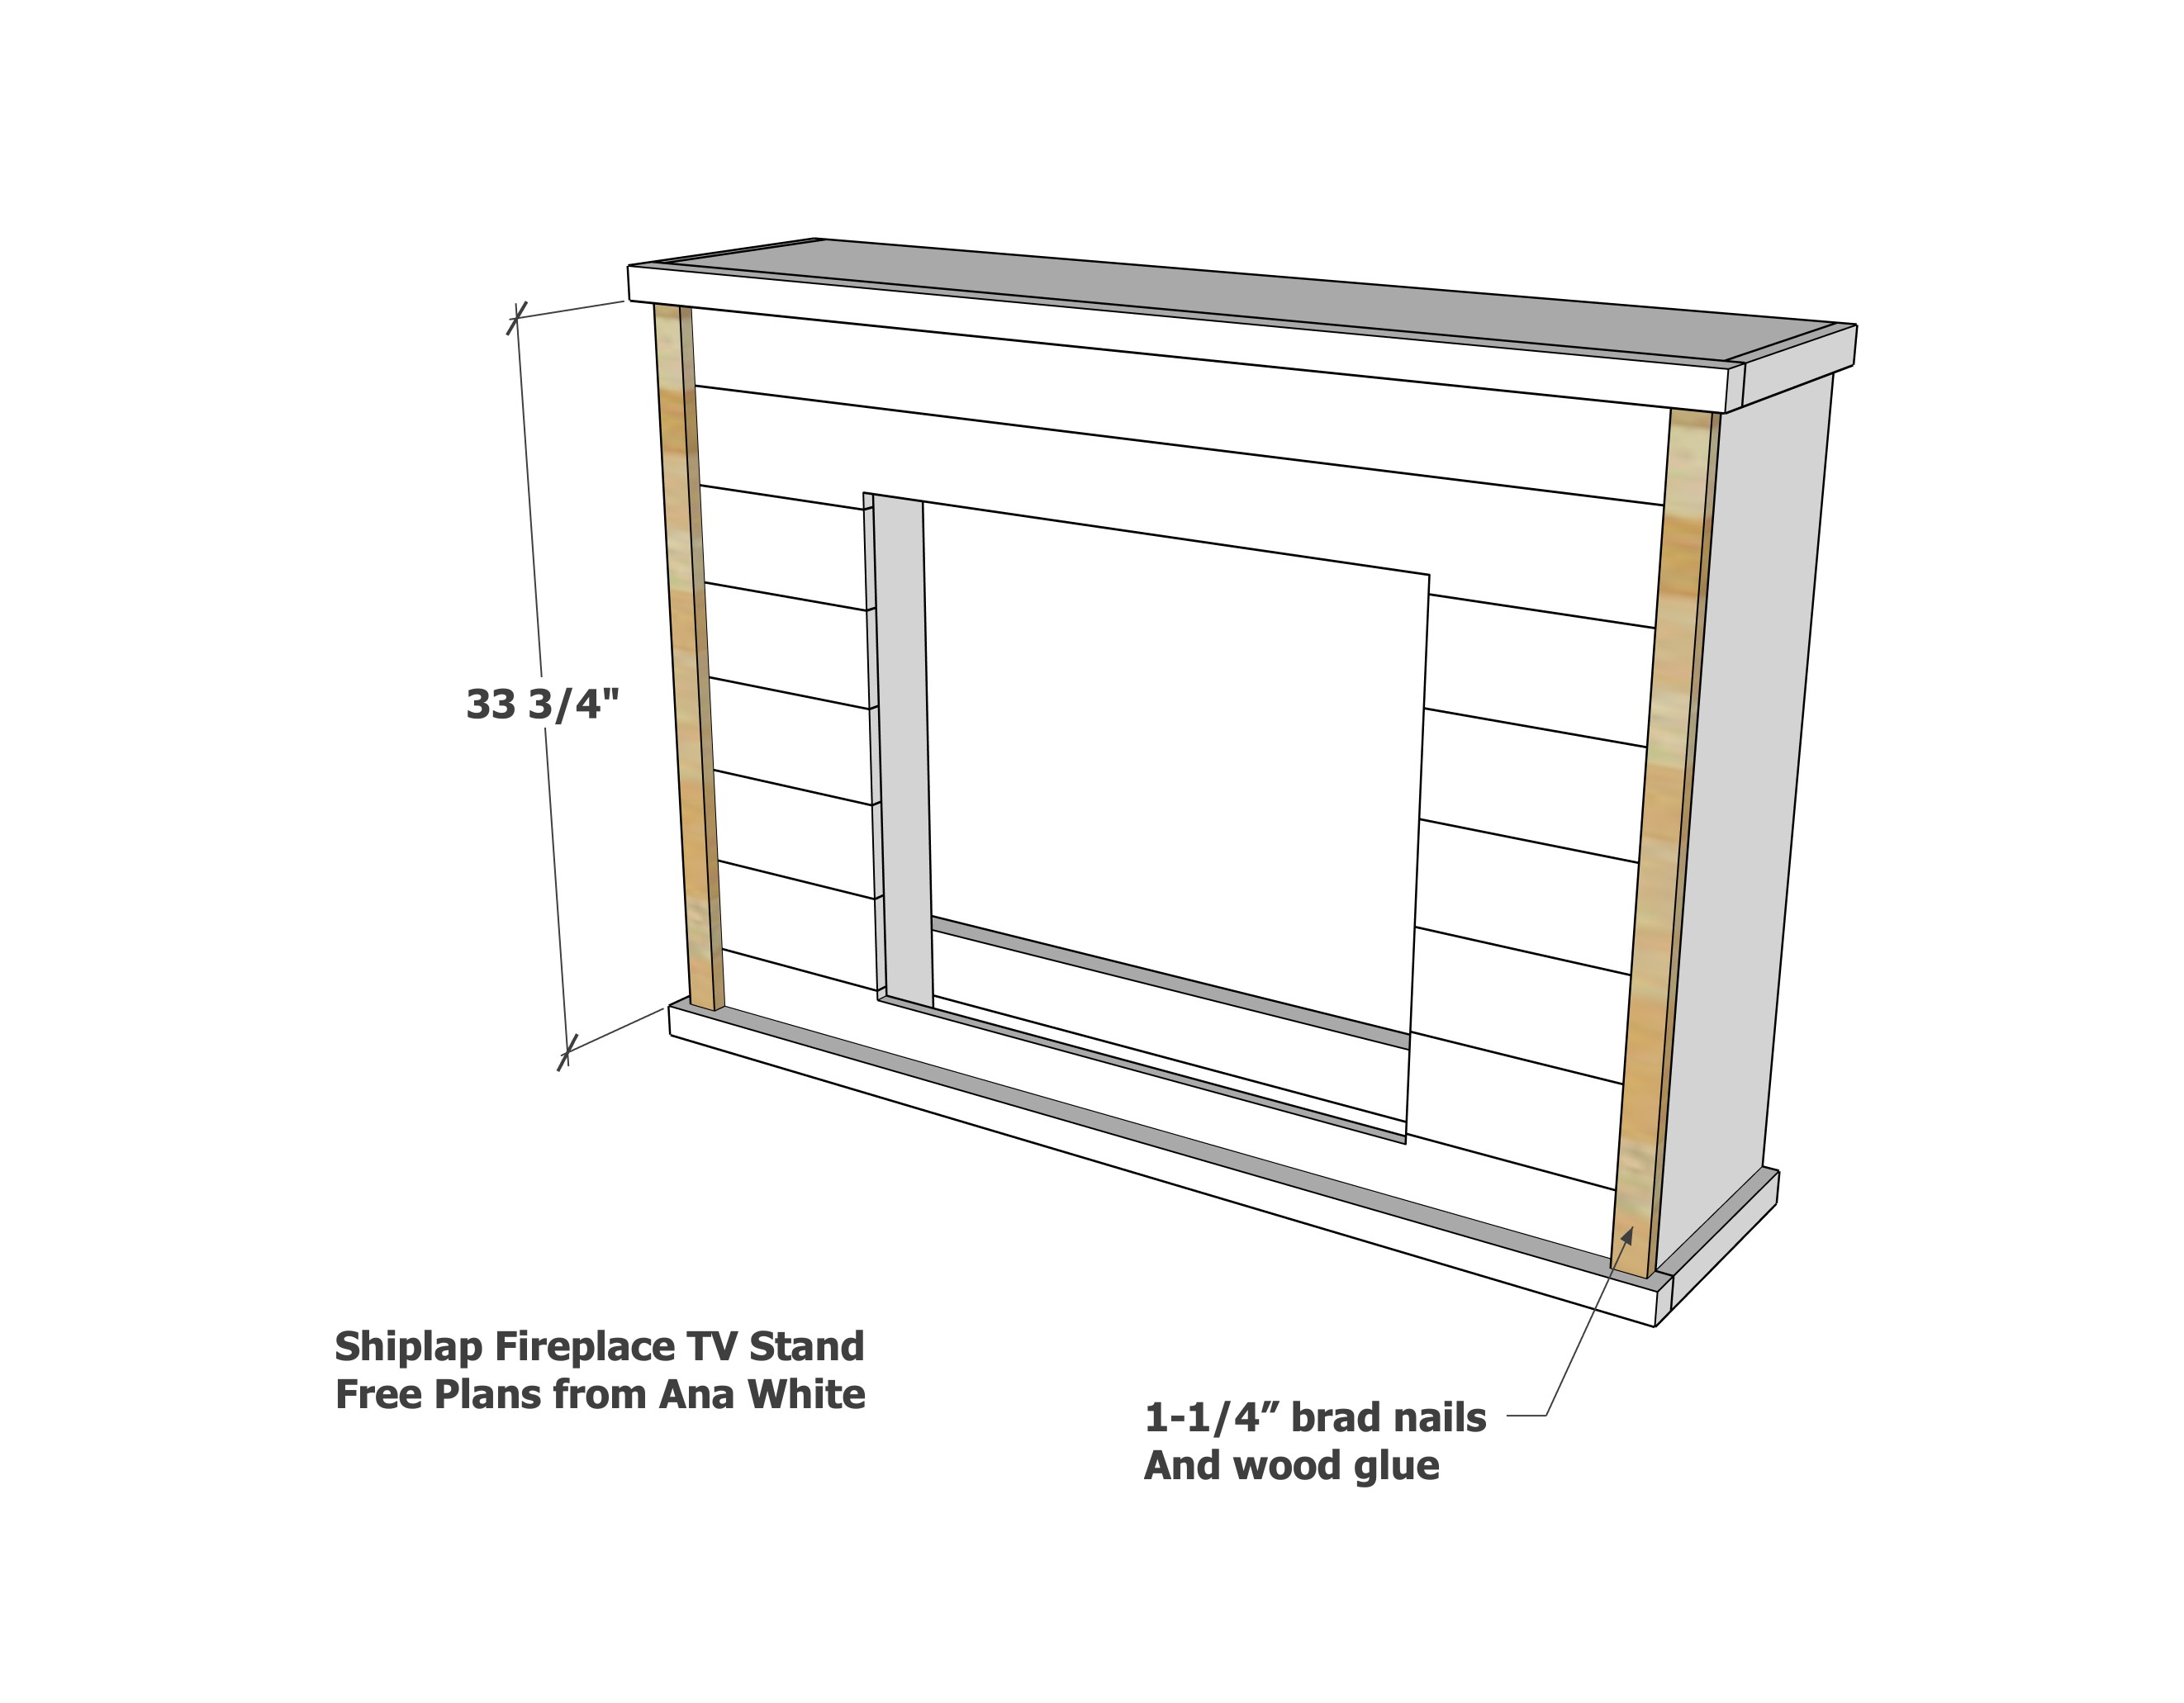
Measure and cut the 1x2 trim for the front corners. Attach with glue and 1-1/4" brad nails.
Step 9
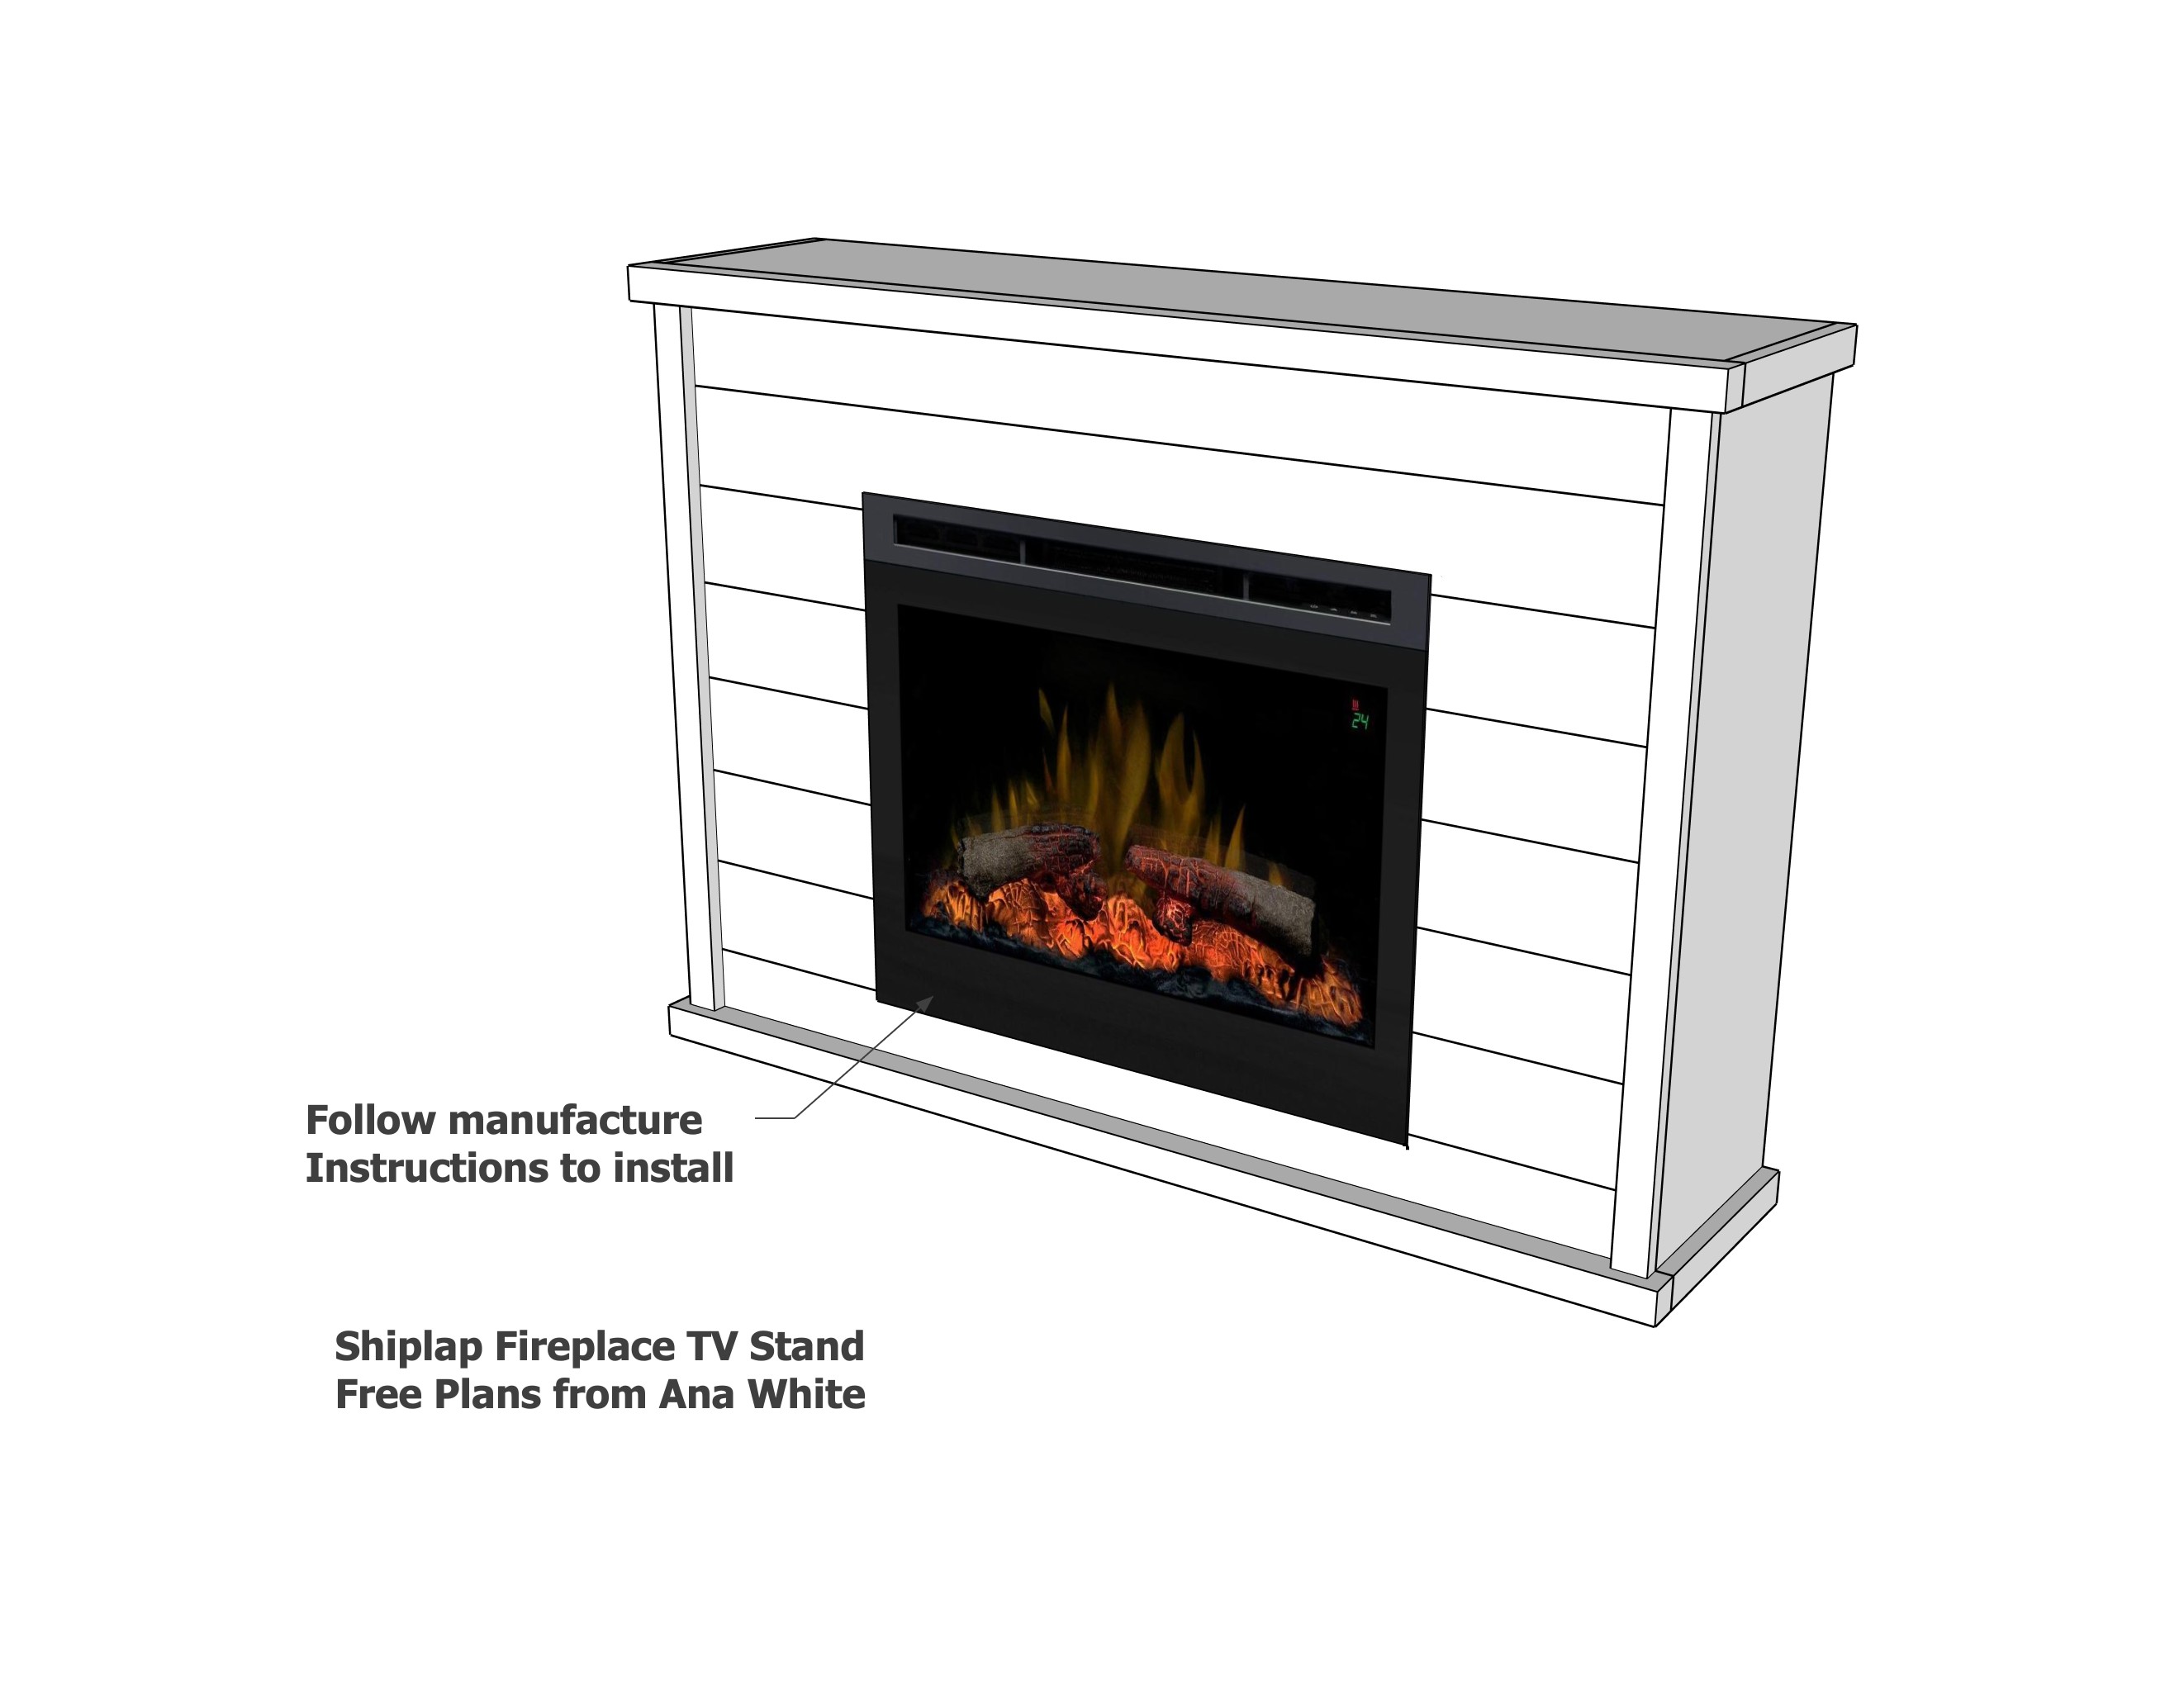
Follow the manufacturer's instructions to install the fireplace insert.
Sand off any excess wood filler.
Sand the entire project in the direction of the wood grain with 120 grit sandpaper.
Remove any sanding residue with a soft bristle brush on a vacuum.
Wipe clean with a damp, lint free cloth.