


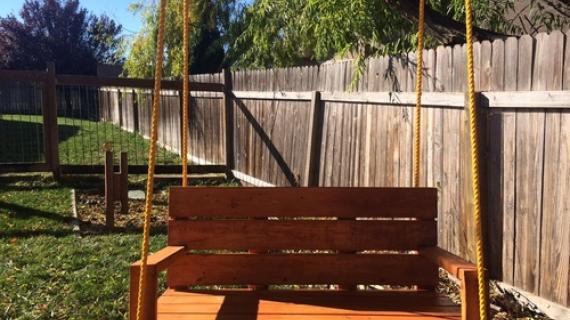
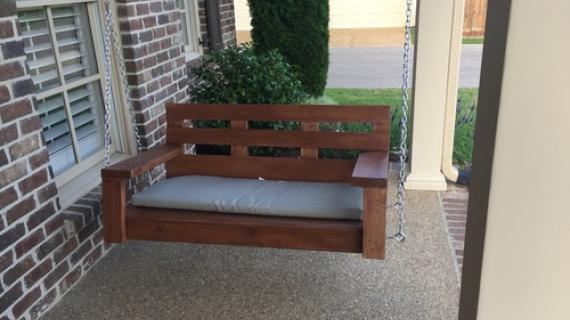
Free porch swing plans by ANA-WHITE.com
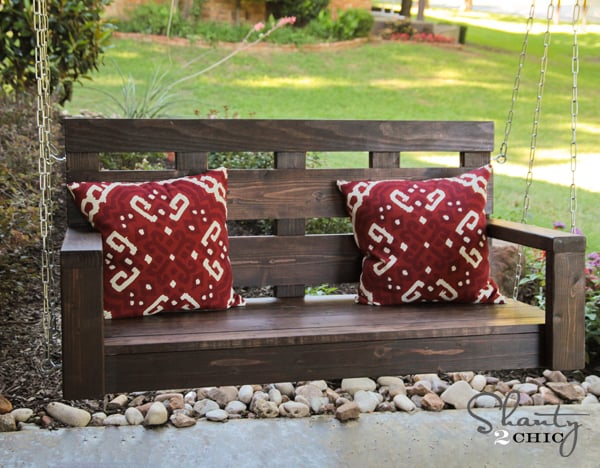
Are you enjoying your summer?
Would you enjoy your summer more if you could swing lazily in the afternoons on your very own porch swing?

Well, guess what??? We've got new plans for you to make your own porch swing!!!

You'll need to grab your drill and start building of course before you can grab your ice tea and favorite book and start swinging though!
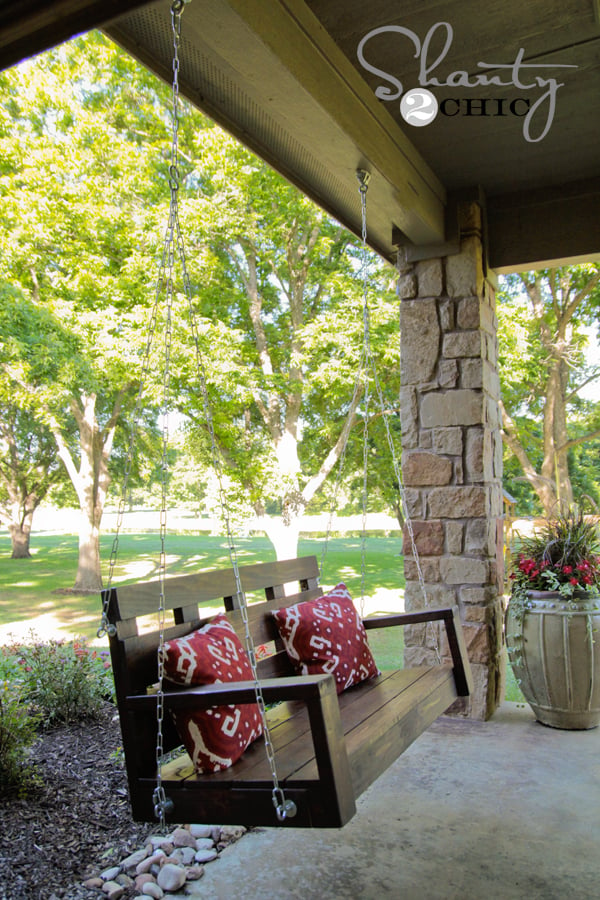
Before we get to the plans, please take a second to go visit Shanty2Chic to get step by step construction details, finishing materials, and how much they spent on this porch swing!
Enjoy the plans ... and hopefully the swing too!
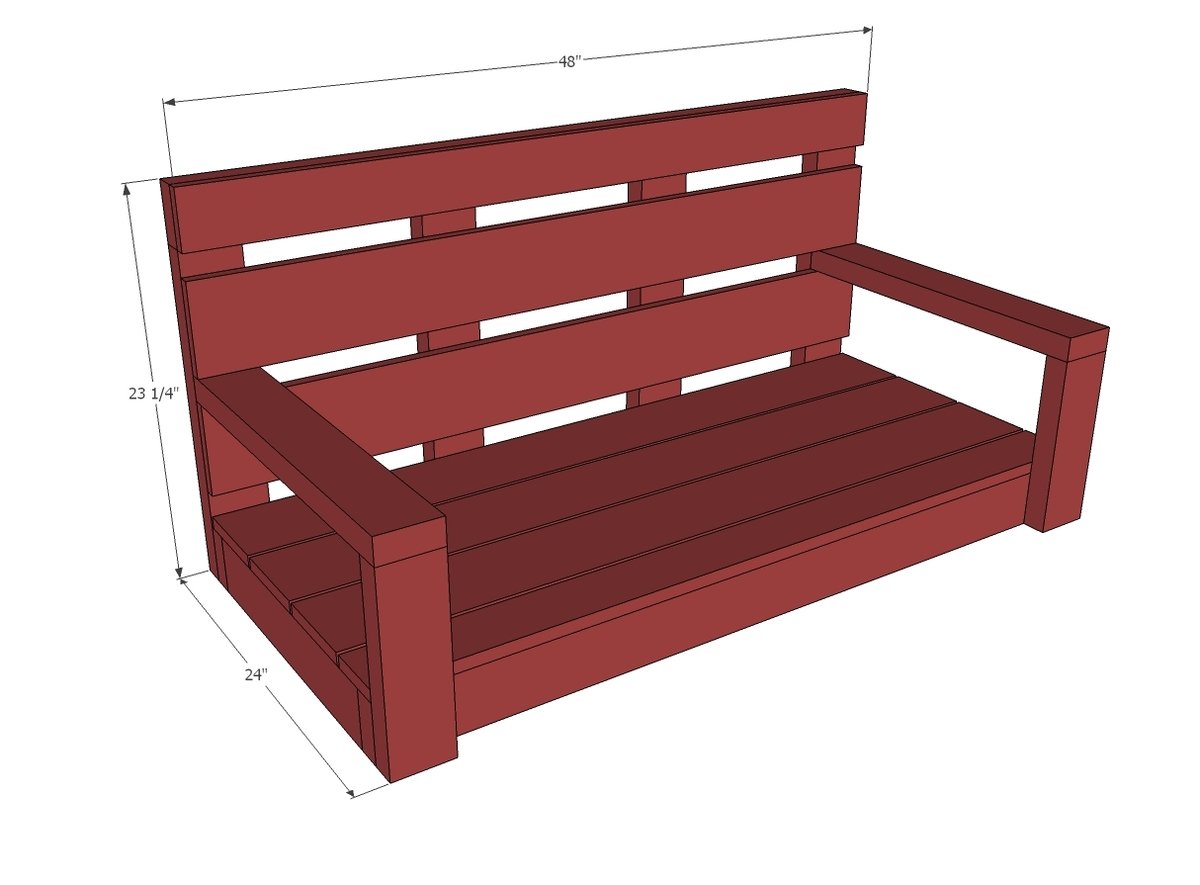
Preparation
5 - 2x4 @ 8 feet long
2 - 1x6 @ 8 feet long
1 - 1x6 @ 4 feet long
1 - 1x4 @ 8 feet long
Pocket holes are not necessary for this plan, but if you do have a Kreg Jig, you'll want to use the 2 1/2" exterior pocket hole screws. 2 1/2" exterior self-tapping screws for building the frame (unless you assemble with pocket holes) 1 1/2" exterior self tapping screws for attaching seat and back slats Hardware for hanging
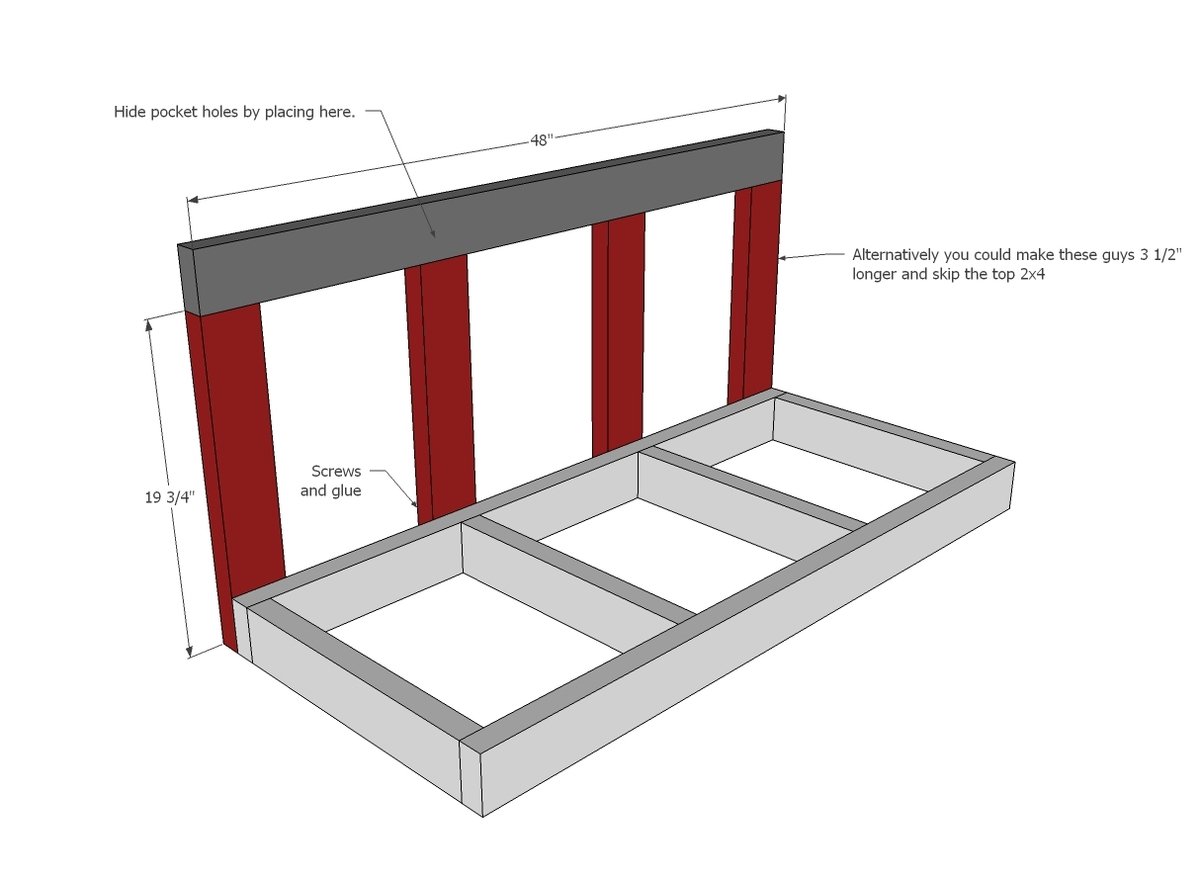
2 - 2x4 @ 48"
4 - 2x4 @ 18"
4 - 2x4 @ 19 3/4"
1 - 2x4 @ 48"
2 - 2x4 @ 11 1/4"
2 - 2x4 @ 22 1/2"
5 - 1x6 @ 48"
2 - 1x4 @ 48"


Please read through the entire plan and all comments before beginning this project. It is also advisable to review the Getting Started Section. Take all necessary precautions to build safely and smartly. Work on a clean level surface, free of imperfections or debris. Always use straight boards. Check for square after each step. Always predrill holes before attaching with screws. Use glue with finish nails for a stronger hold. Wipe excess glue off bare wood for stained projects, as dried glue will not take stain. Be safe, have fun, and ask for help if you need it. Good luck!
Instructions
Step 1
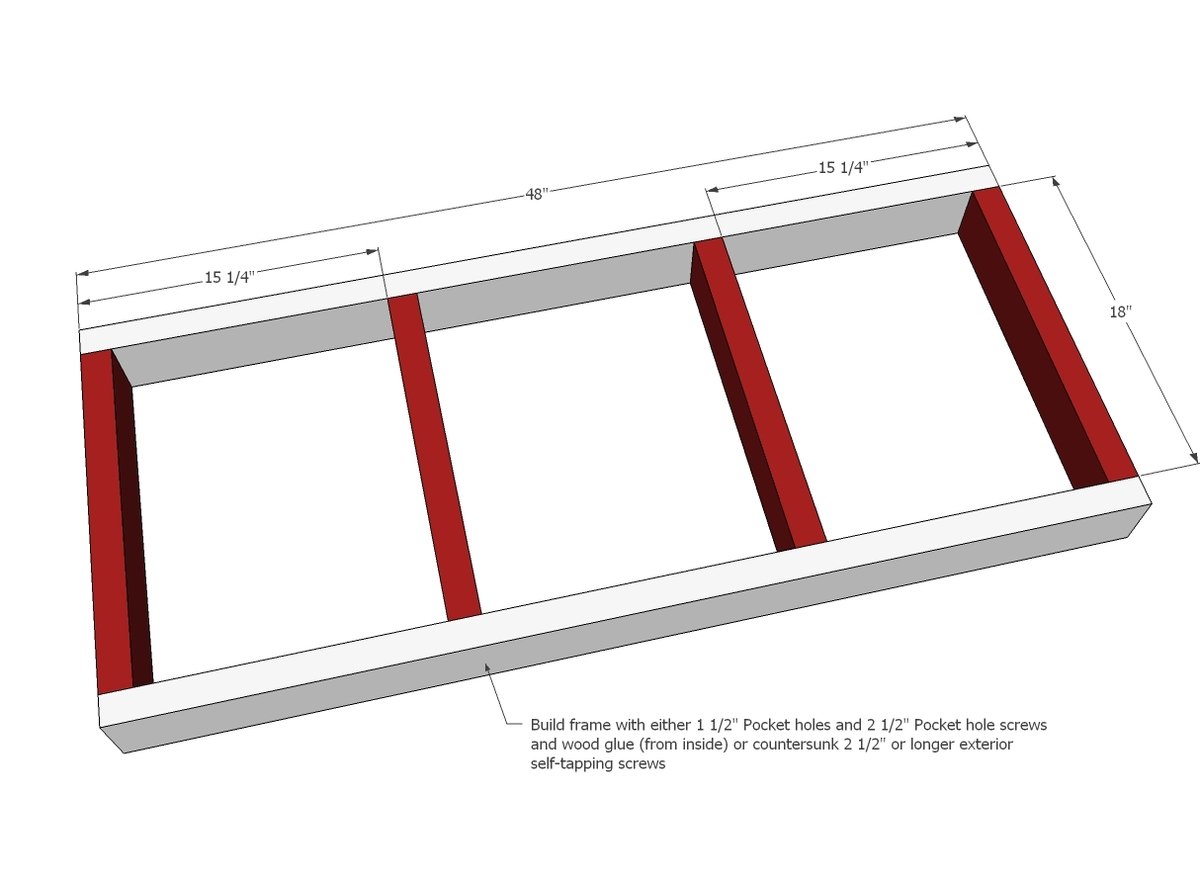
First, build a basic 2x4 frame.
Step 2
And then attach back supports and top 2x4.
NOTE: If you don't have a pocket hole jig, an alternative is to cut your back boards 3 1/2" longer and omit the top back board.
Step 3
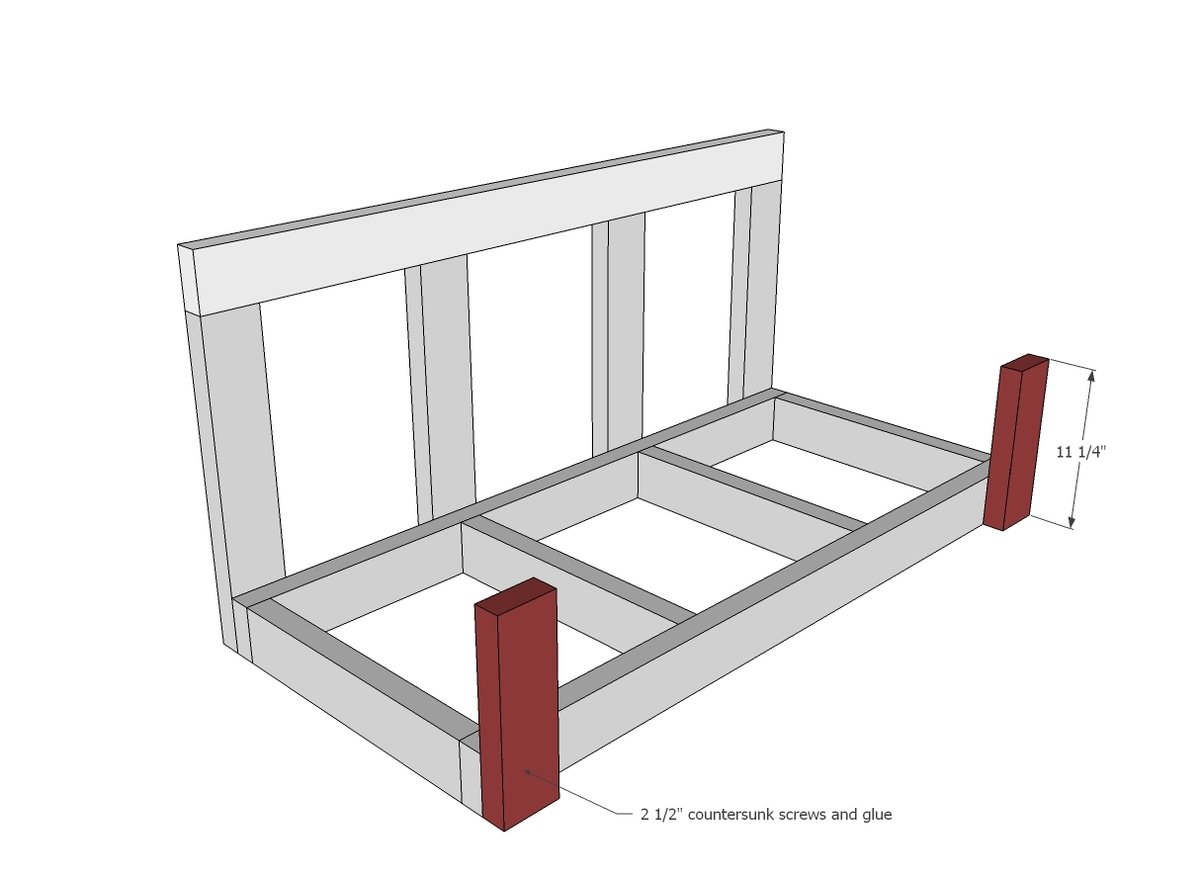
Then attach the front arm supports.
Step 4
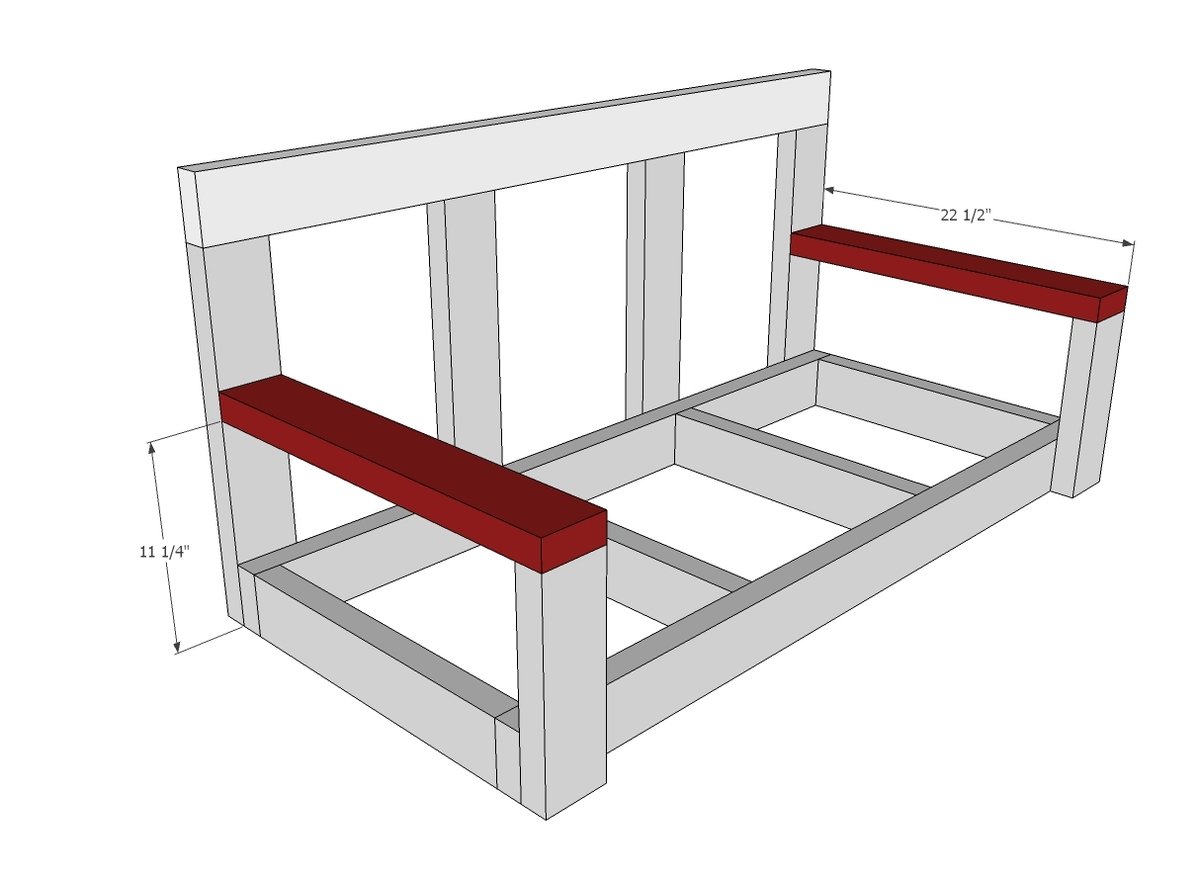
And then the arm supports on top.
Step 5

Step 6
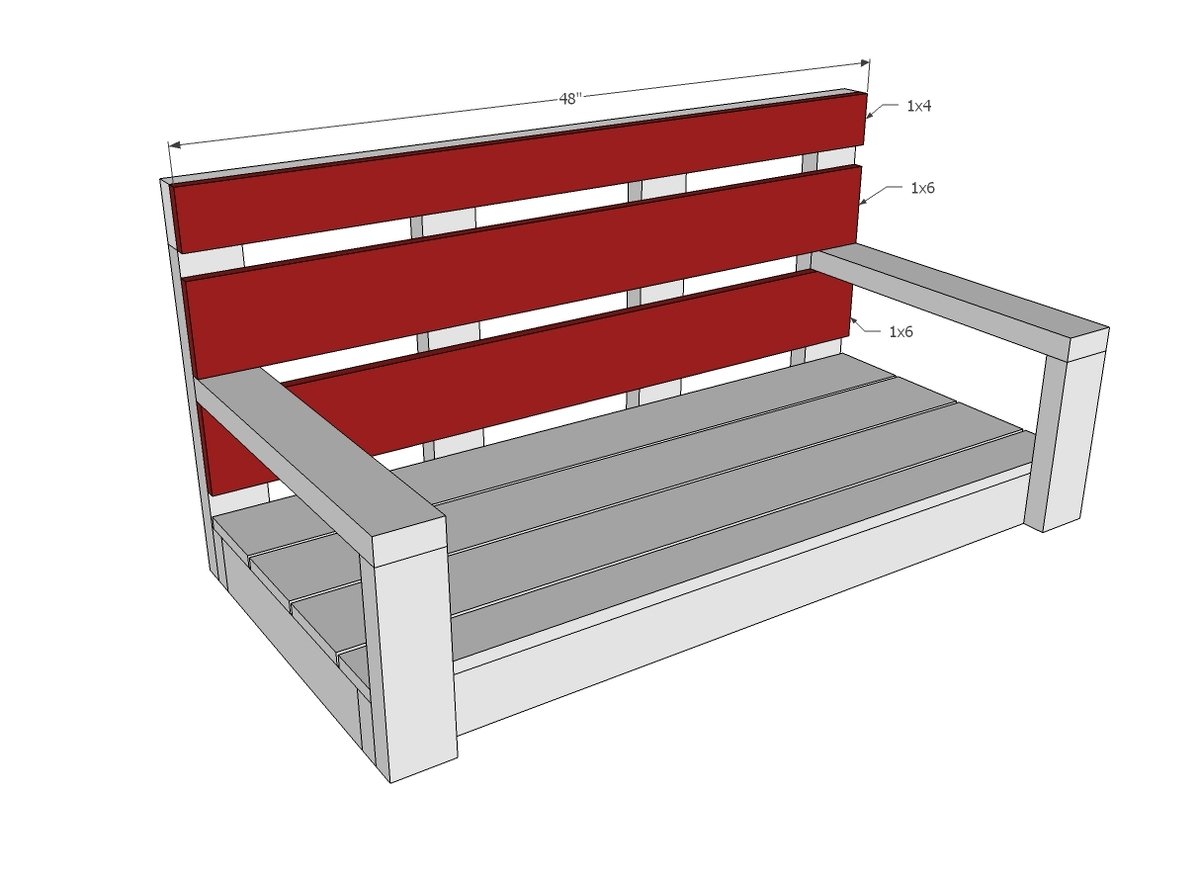
And then attach the back seat boards to the back supports.
Step 7

For more details on hanging the swing - please visit Shanty2Chic here.
It is always recommended to apply a test coat on a hidden area or scrap piece to ensure color evenness and adhesion. Use primer or wood conditioner as needed.


Comments
debinmi
Thu, 06/13/2013 - 06:30
SHANTY2CHIC PORCH SWING
This is wonderful! Any possibility of modifying the plan to make it into a glider for those of us without a porch to hang it from? I would love that!
Daisies and Crazies
Tue, 06/18/2013 - 11:12
Shanty's Porch Swing
Love it! Adding to To-Do List for someday... :)
thewoodbuilder
Fri, 07/12/2013 - 09:06
Love the swing
love it want to build it. lol Can you give me some more detail on the hardware for hanging it?
sylvialh
Mon, 09/24/2018 - 04:27
hanging hardware
Whiney didn't provide any info on the actual swinging hanger used, but having googled around it appears to be a heavy duty swing hanger, available at home depot or amazon, but they are pricey ($60 CAD each!). Having looked at the other options, and having already built the swing I will probably bite the bullet and get them. Good on you for planning ahead! I did find them on a swing hardware site for 15$ US but the shipping was prohibitive to Canada. If you are in the states you might be in luck tho! Just google Swing Hanger and lots of options should come up
kyser7389
Mon, 02/08/2016 - 11:56
Beautiful Swing
Quick question: what type of wood would you recommend to use for this?
sylvialh
Mon, 09/24/2018 - 04:24
Wood for use
I used cedar where it wasn't cost prohibitive (I used fence slats for the 1x's) and I used SPF for the frame. It will be on a covered porch and I will finish it so I chose untreated over pressure treated because we will be sitting right on it.
sylvialh
Mon, 09/24/2018 - 04:21
plan your hardware
Great plans, super easy to build, and can get away without the kreg if you don't have one. (But - if you don't have one get one because they are amazing!!!).
That being said, the hanging hardware isn't really mentioned very clearly in either Ana's post or Shanty2Chic - so plan out what you are going to use because the commercial swing hangers are around 50$ each for heavy duty ones (which is the style Shanty2Chic uses in her post if you zoom into the photo) - that will add $100 to you project, so plan ahead!
packjh
Tue, 06/25/2019 - 12:33
Modification
I plan on building this porch swing, however i believe that if you run the chains through the arms like most porch swings, it will eliminate tipping. This will also eliminate the need for a third chain in the back. I will update after build to present my findings.
christ87
Wed, 07/03/2019 - 02:44
Hello!! regards!! …
Hello!! regards!! Congratulations for your great work, I have a question and what is the distance of the screws that hold the chain? Thanks!!
travisstumbaugh
Tue, 05/19/2020 - 12:56
The wife loves it!
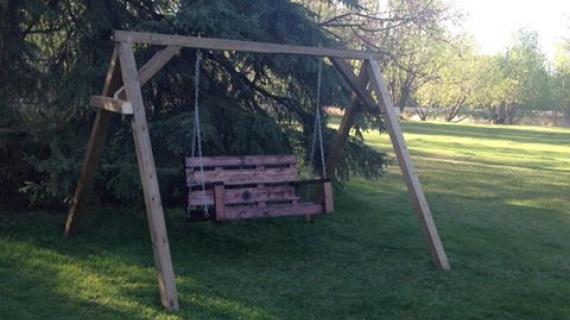
I made this one with some of my own modifications, the biggest being I made two separate single swings instead of one bigger swing. I also stopped the back of the seat at two slats so it's lower profile. It worked out great and she loves it!
WickedWood
Sat, 06/20/2020 - 19:16
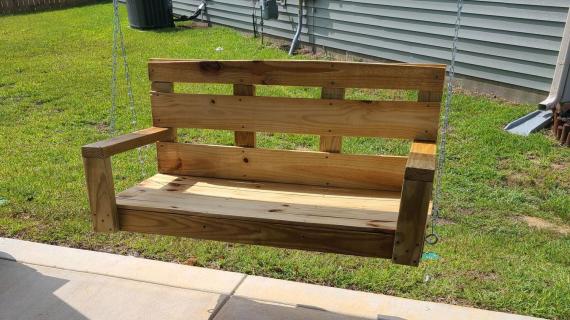
Plan and picture do not match :(
If you are planning on building this I would suggest going to Shanty 2 Chic and using the plans there. The plans here are not for the same swing, the picture shows 5 boards on the back, this one has 4. I did not notice that until I had already assembled everything. Learn from my mistake and save yourself some time.