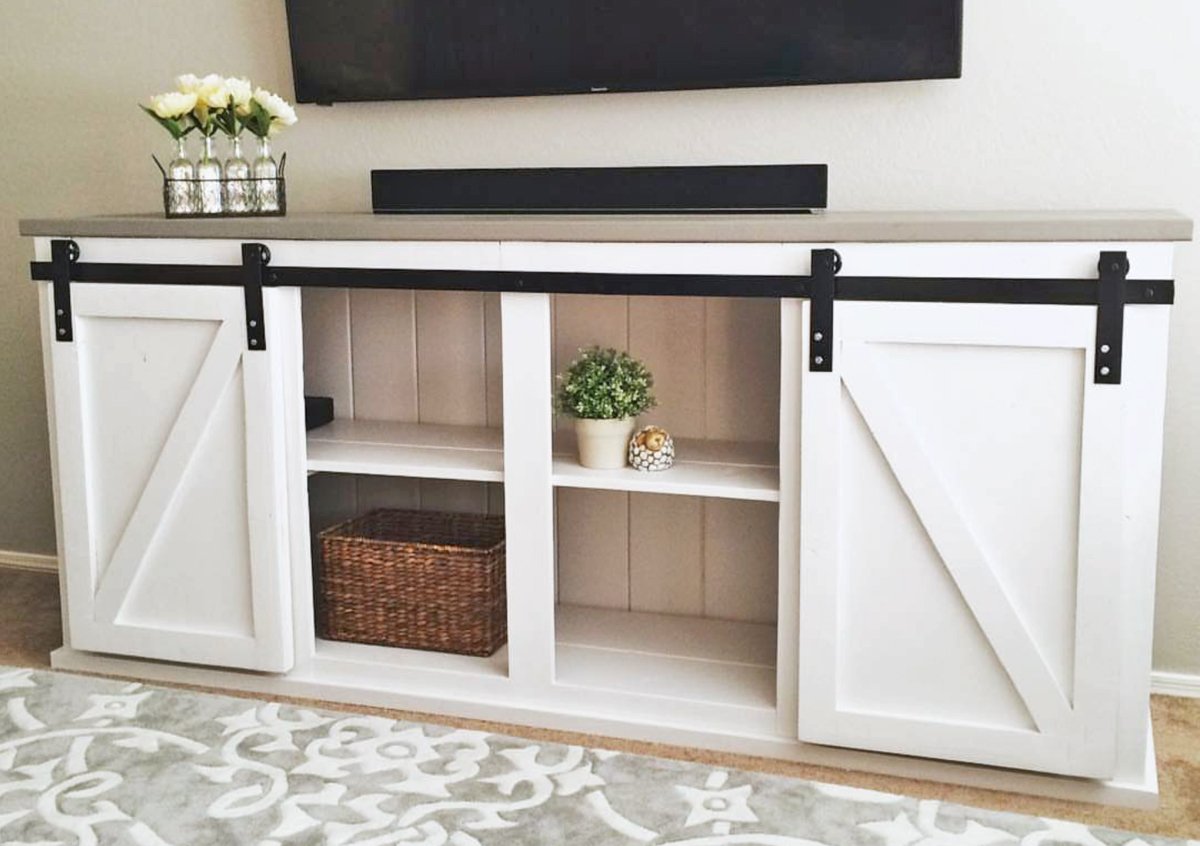


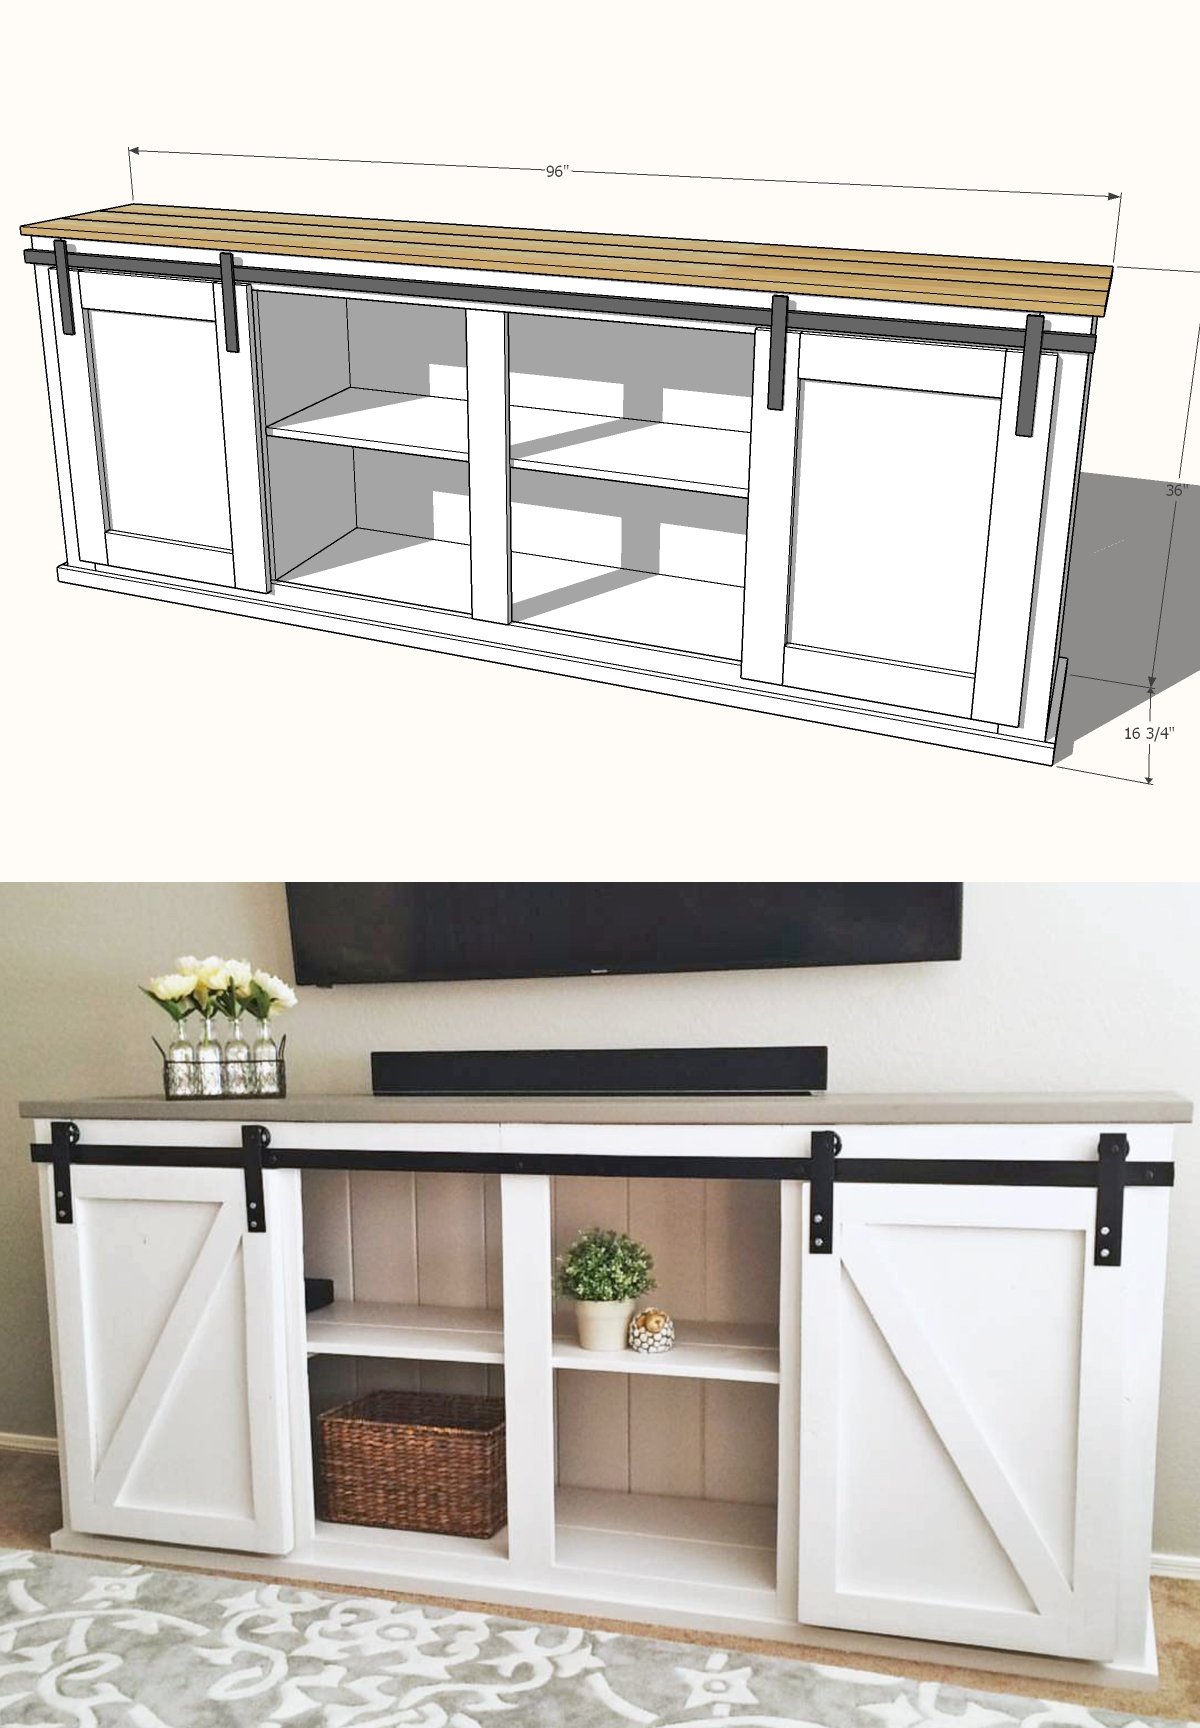
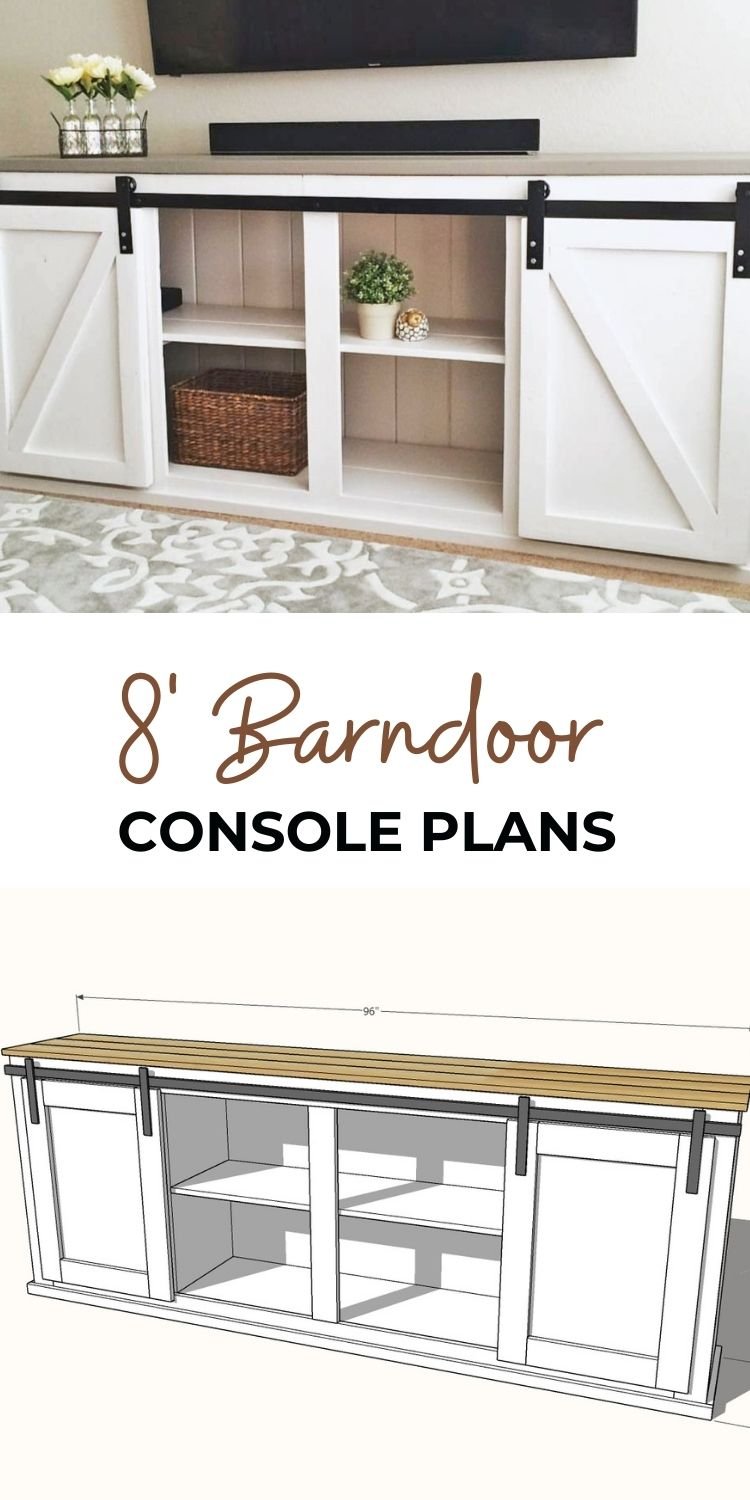
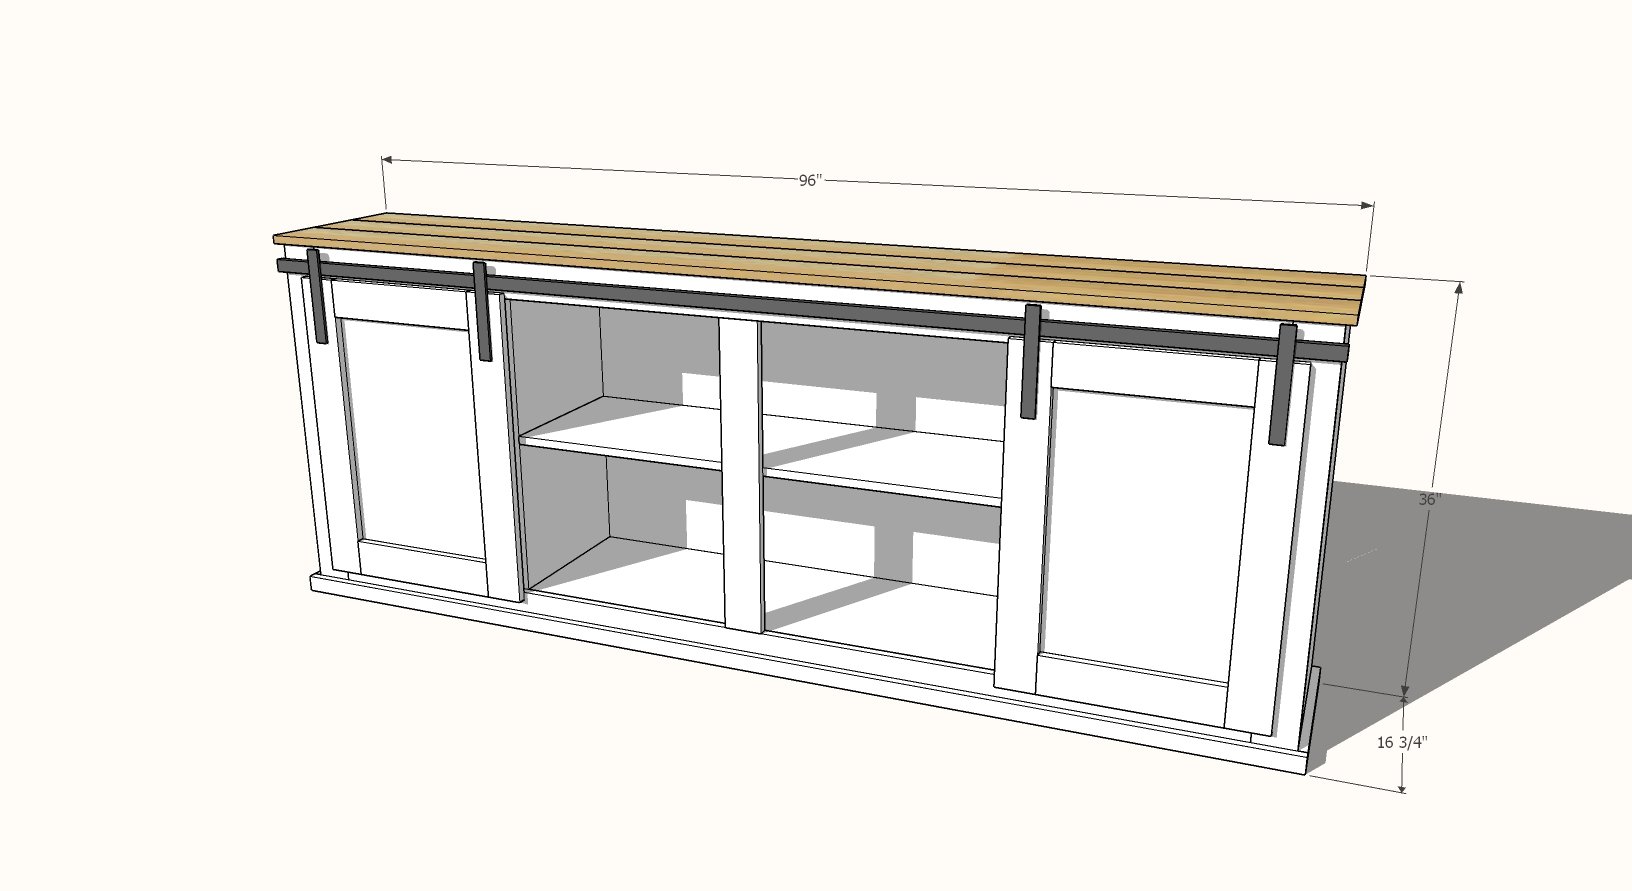
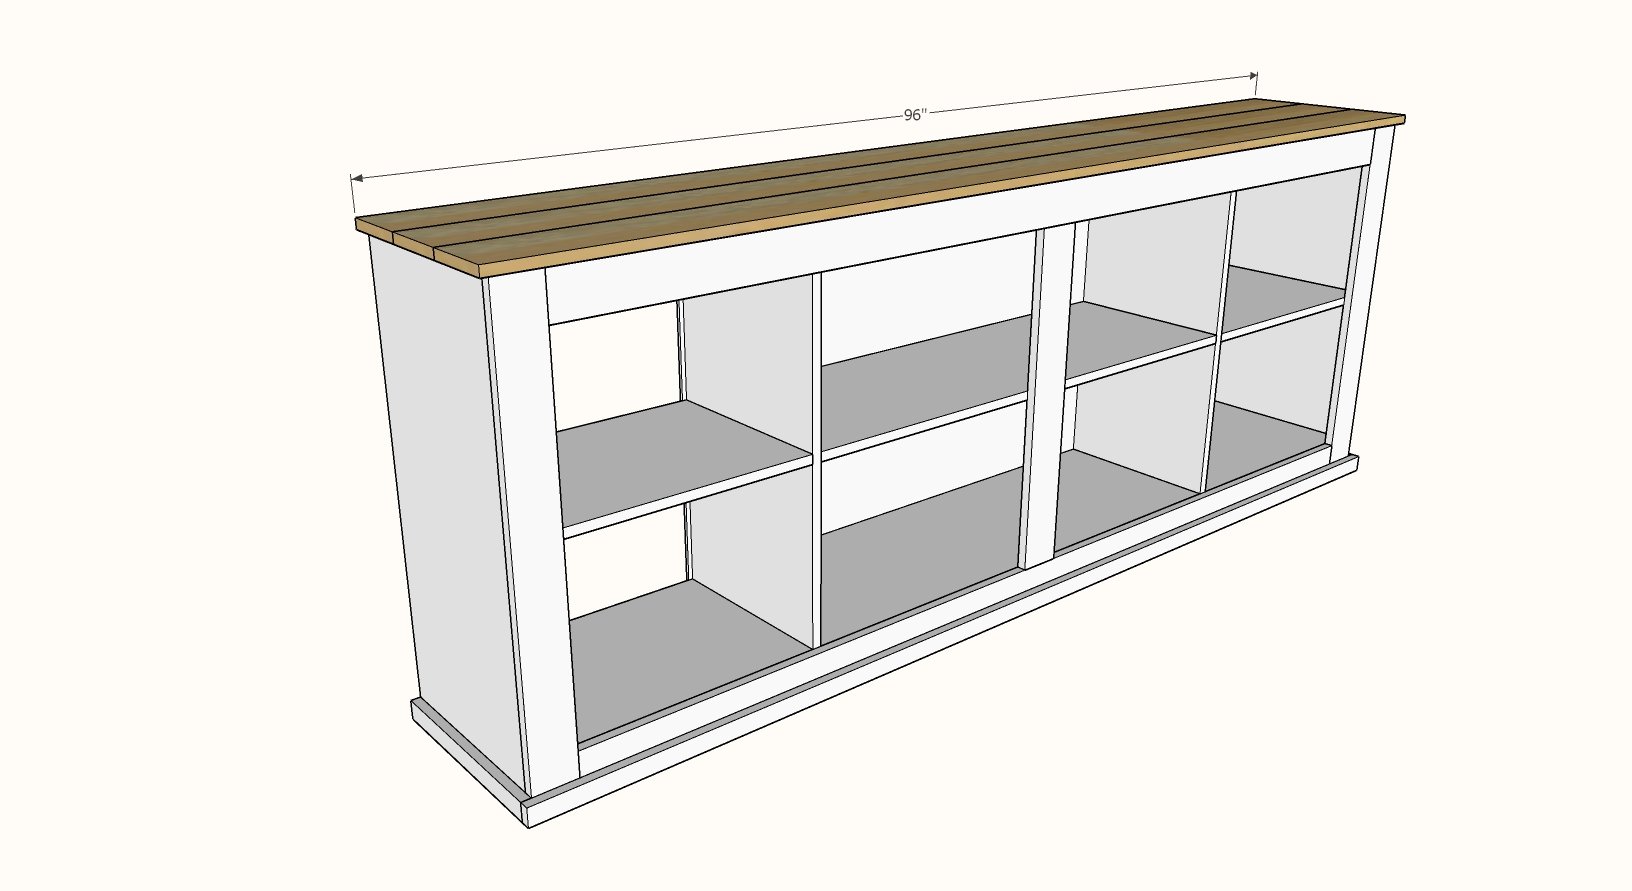
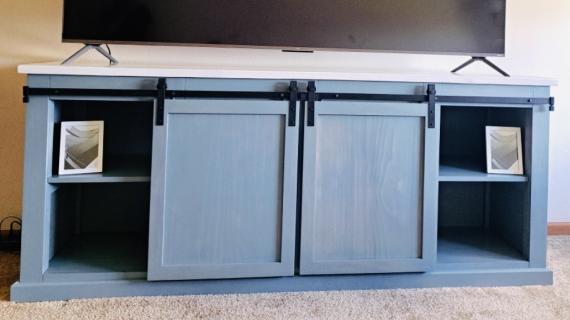
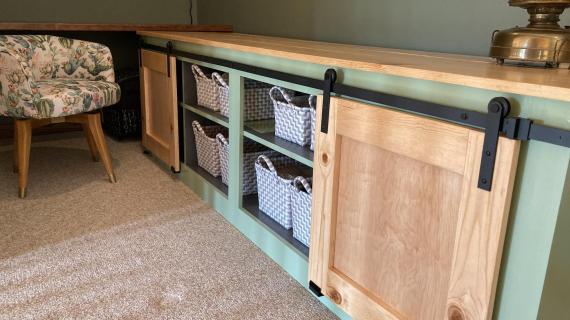
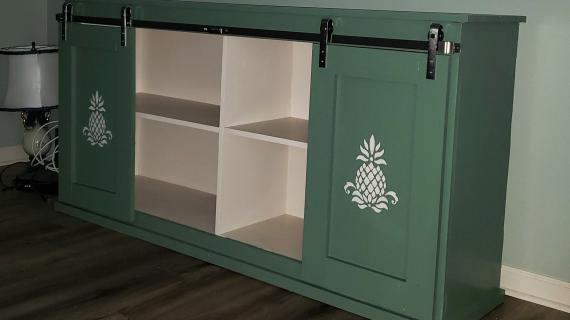
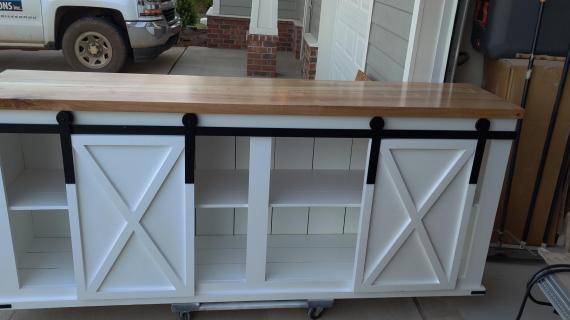
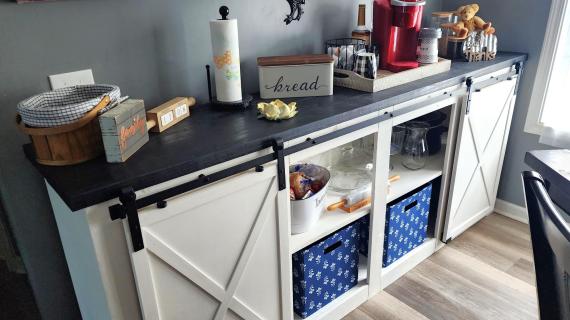
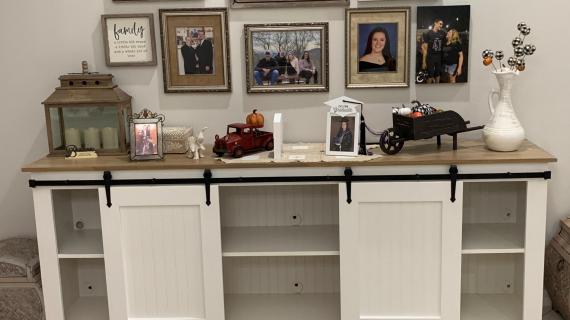
One of our most popular projects is this barn door console. But we wanted to make it even simpler and easier to build - and in a longer length! - so more people can have this amazing project in their home for about $350. The console in this plan is a whopping eight feet long, three feet tall and about 16" deep (it's BIG). Paint or stain any color. Free plans by Ana-White.com
Updated: 6' Version Now Available Here
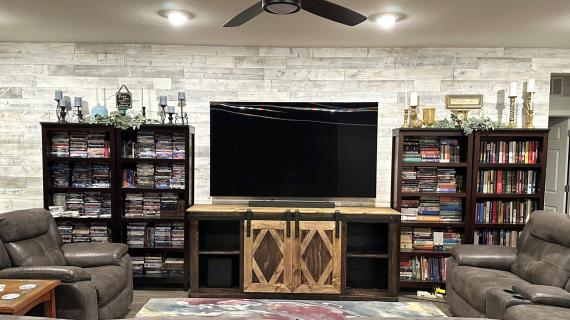
Want to make your living room instantly gorgeous (and tidier)?
A barn door door console can change everything!
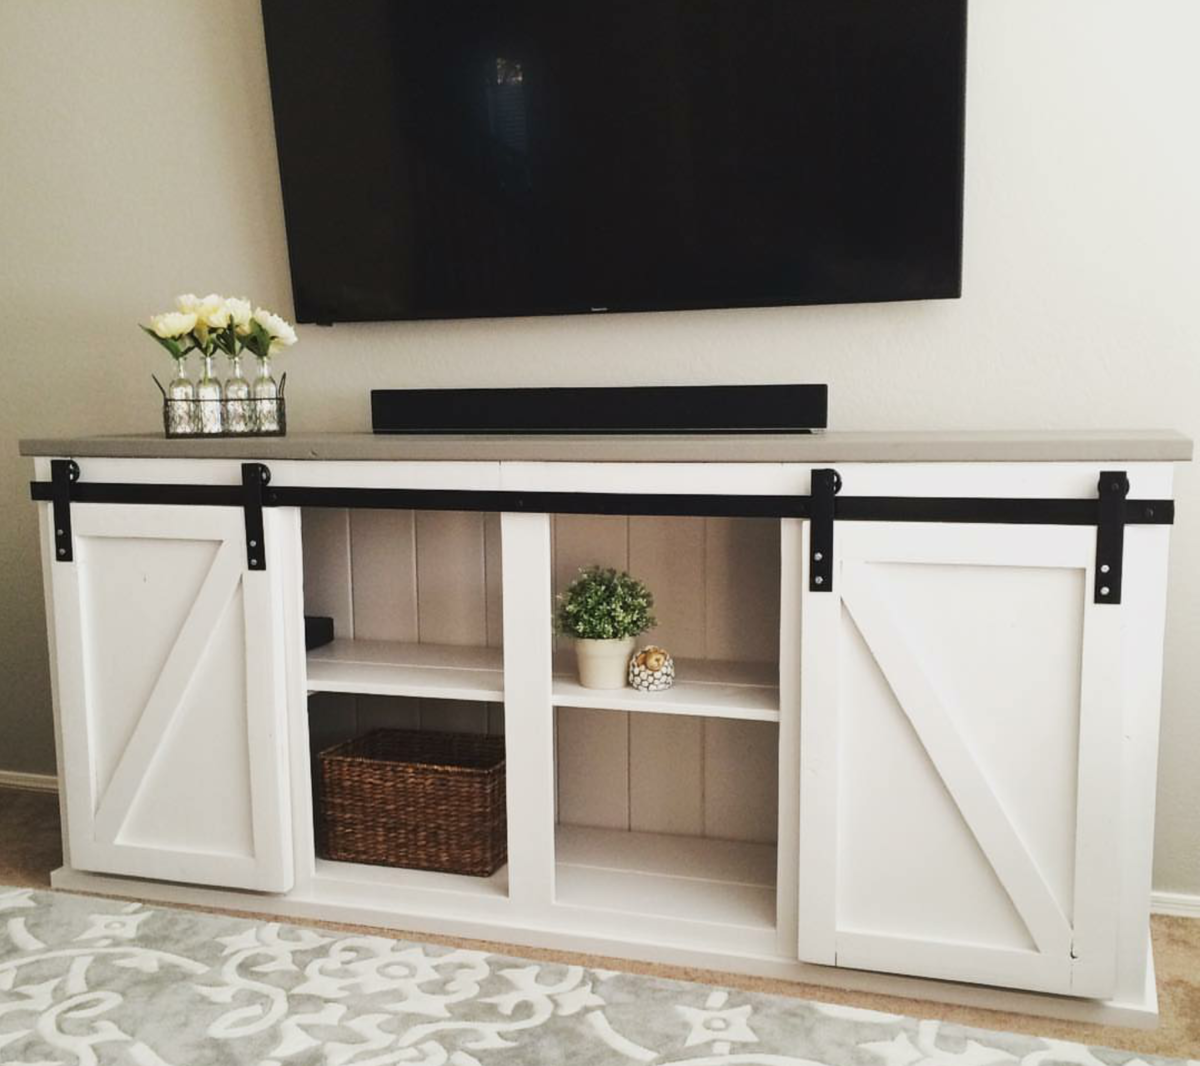
Instead of paying $1000+, have you thought about building it yourself?
- No particle board - this will last as long as you want it to
- Solid wood top
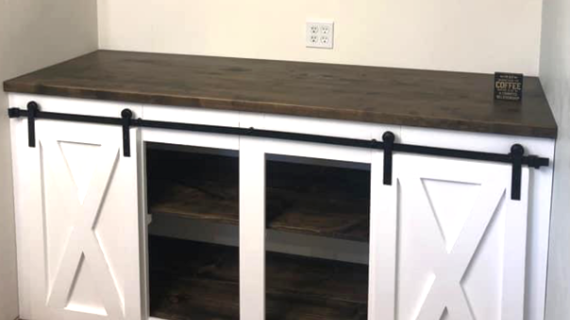
- You choose the finish
- Rustic look from using solid wood
- Save hundreds of dollars - we estimate building it yourself will cost about $350
- You only get to pick on piece in that spot - might as well make it the right piece!
Pin For Later!
Preparation
- 2 sheets of 3/4" thick Hardwood Plywood, ripped into strips 15-1/4" wide x 8 feet long
- 30 feet of edge banding in matching veneer to the hardwood plywood
- 2 - 1x3 furring strips, 8 feet long
- 5 - 1x4 pine boards, 8 feet long
- 1 - 1x2 pine board, 8 feet long
- 1 - 1x2 pine board, 4 feet long
- 3 - 1x6 pine boards, 8 feet long
- 1 - ¼” plywood half sheet (4’x 4’) for half back, or full sheet (8’x4’) for full back
- 100 pack of 1-¼” coarse Kreg Pocket Hole Screws
- 100 - 1-¼” brad nails
- 100 - ¾” brad nails
- 8’ barn door mini kit for cabinets like this one or DIY your own
- Circular Saw
- Drill
- Kreg Jig
- 18 Gauge Brad Nailer
- Palm Sander with 120 grit sandpaper
- Measuring Tape
- Safety Glasses
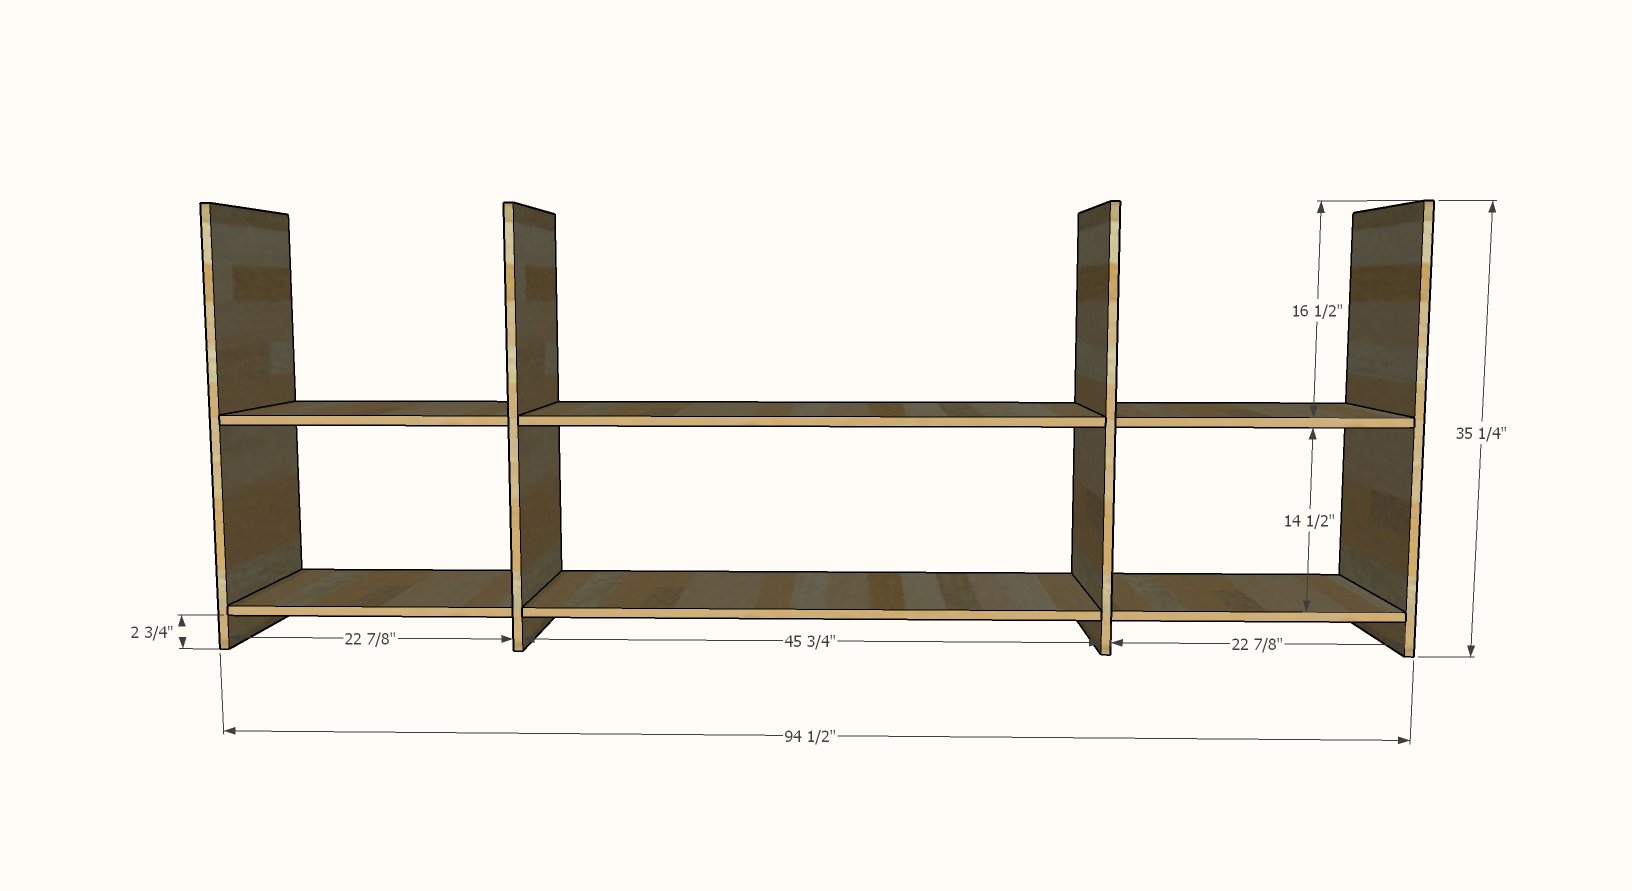
Carcass Pieces, cross cut from the 15-1/4" wide strips
- 2 - 3/4" plywood @ 15-1/4" x 45-3/4"
- 4 - 3/4" plywood @ 15-1/4" x 22-7/8"
- 4 - 3/4" plywood @ 15-1/4" x 35-1/4"
Trim, Top, Back and Door Pieces
- 4 - 1x3 @ 22-⅞” Bay Supports
- 2 - 1x3 @ 45-¾” Bay Supports
- 2 - 1x4 @ 35-¼” - Face Frame Stiles*
- 2 - 1x4 @ 87-½” - Face Frame Rails
- 1 - 1x4 @ 28-¼” - Face Frame Mid Stile
- 1 - ¼” plywood @ 48” x 32” - Back
- 2 - 1x2 @ 16” - Base Ends
- 3 - 1x6 @ 8 feet long
- 4 - 1x4 @ 29-½” - Door Stiles
- 4 - 1x4 @ 15” - Door Rails
- 2 - ¼” plywood @ 16” x 24” - Door backs
*Do not cut two 35-¼” pieces from the same 1x4 - instead cut | 35-¼” | 29-½” | 29-½” | so that all the cuts fit on your shopping list
The best way to rip the plywood down to the 15-1/4" width is using a table saw or a circular saw with a track or guide.
You can request your home improvement store make the cuts for you too, but it is very important to make sure the widths are all precisely 15-1/4"
Cross cutting the plywood pieces can be done on a miter saw by cutting as much as you can, then flipping and cutting the remainder, but this is hard to do accurately. A circular saw with a guide can be used for cross cutting.


Instructions
Step 1
Apply edge banding to all the plywood pieces, along the front edges. Trim excess edge banding and lightly sand the outside corners, so it is smooth.
On all shelf (horizontal) plywood pieces, drill three ¾” pocket holes on each end.
Attach to the side (vertical) plywood pieces with 1-¼” pocket hole screws, spacing as shown in the diagram.
Step 2

Drill two ¾” pocket holes on each end of the bay support pieces. Attach inside the bays with 1-¼” pocket hole screws as shown in the diagram.
Step 3

Drill two ¾” pocket holes on each end of the rails. Attach to the stiles with 1-¼’ pocket hole screws. Repeat for the mid stile, centering.
Step 4

You can do a full back or half back as shown.
Cut with a circular saw, elevating the plywood off the floor with scrap wood pieces. Make sure you adjust your circular saw so the blade is about ⅜” cutting depth.
Attach to back with ¾” brad nails and wood glue, to all shelves, sides, bay supports for maximum strength.
Step 5
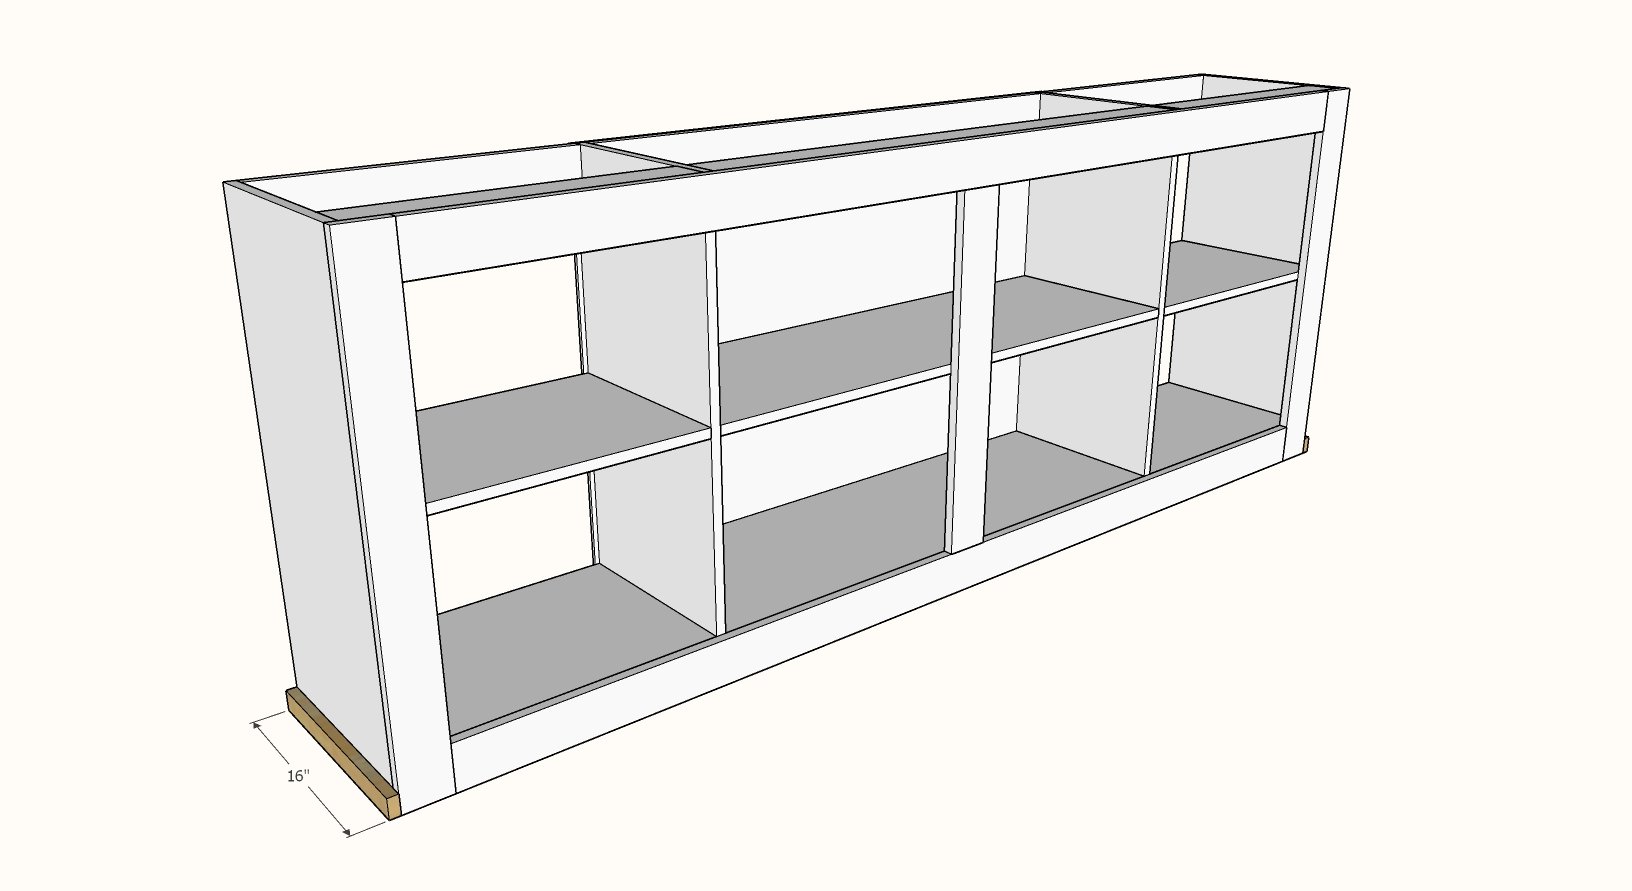
Measure and cut the base trim ends from the 1x2 @ 4 feet long.
Attach with glue and 1-¼” brad nails.
Step 6
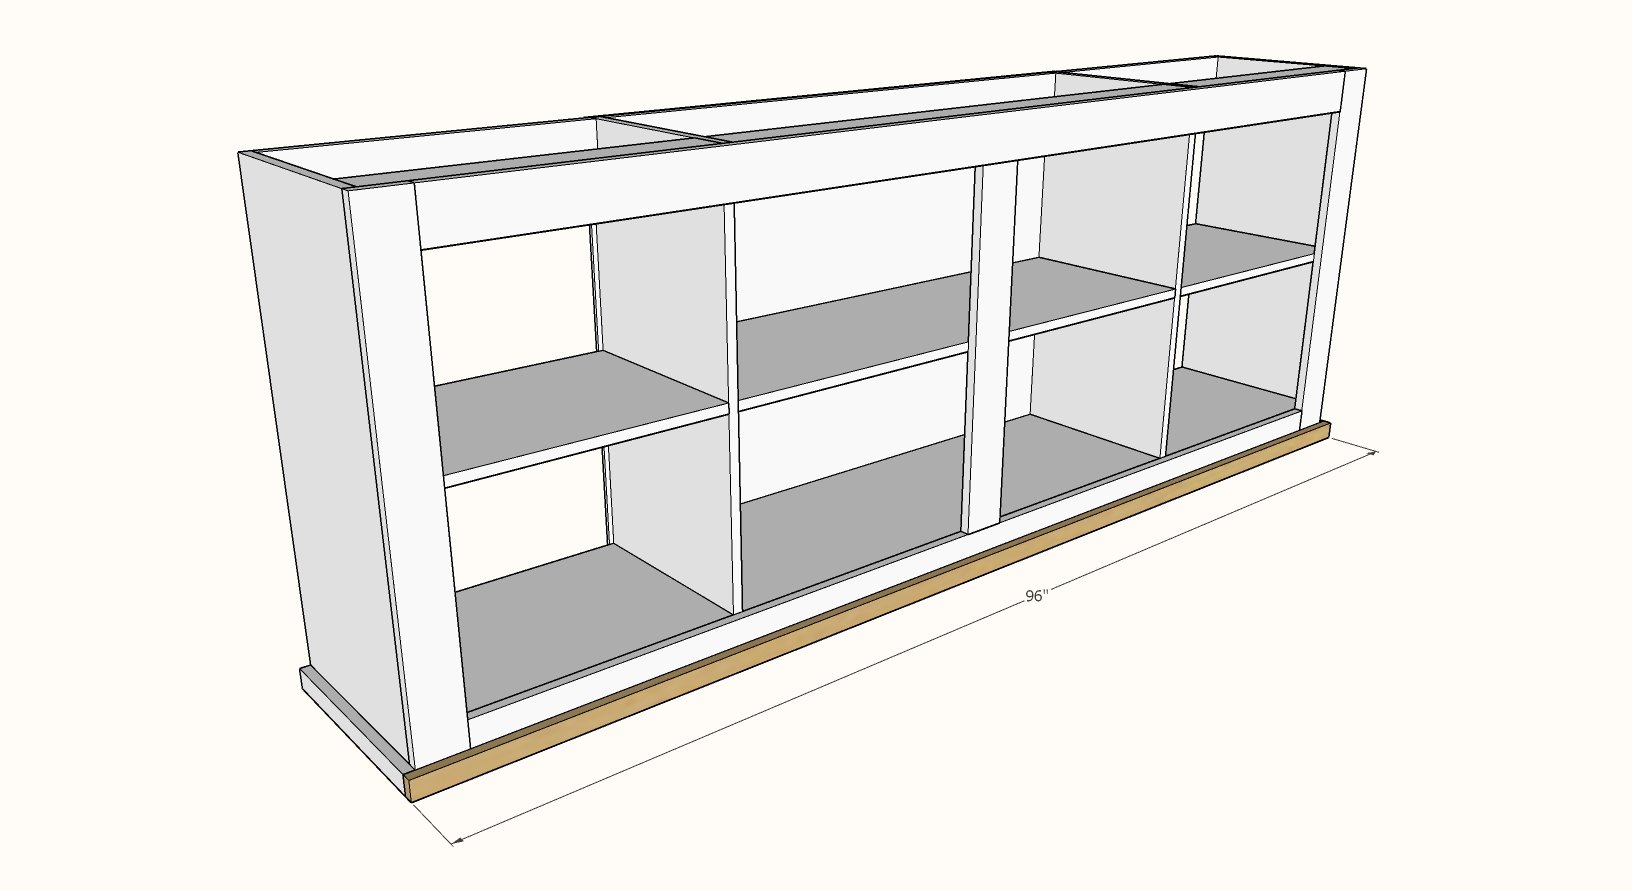
Measure and cut the front base trim.
Attach with 1-¼” brad nails and wood glue to the front.
Step 7
Attach the 1x6 boards together with ¾” pocket hole screws and wood glue.
Position on top with even overhangs on the ends, flush to the back, and attach with glue and 1-¼” brad nails.
Step 8

Depending on your hardware specs, you may wish to size and build your drawers after hardware installation.
Attach the door rails to the stiles with ¾” pocket holes and 1-¼” pocket hole screws. Then attach the back to the doors with ¾” brad nails and glue.
Step 9

Hang doors with 8’ barn door hardware kit.


Comments
Blndee217
Fri, 10/23/2020 - 09:24
6' Version of the Console
I wanted to view the plans for the 6' version as indicated in the post; however, when I click the link it gives a 404 error that the page isn't available. I realize to reduce the size, I should reduce the measurements, but I am new to woodworking and want to have plans. Can you point me in the direction of the 6' plans? Thank you!!
In reply to 6' Version of the Console by Blndee217
Ana White
Fri, 10/30/2020 - 12:26
We apologize for the trouble…
We apologize for the trouble, here is the 6' plans in PDF version with the configuration settings https://ana-white.com/sites/default/files/6%E2%80%99%20Barn%20Door%20Co…
cwatson
Sun, 10/25/2020 - 16:42
404 Error on 6' Plans
Hi Ana, just bought your book and I'm really excited to get started. Brand new to any type of woodworking. My wife and I just purchased our first house and we are so excited to fill it with your inspired designs. I was looking for the 6' version of this console and got the same 404 page not found error. Also, do you have any other books that I can check out and purchase? Thank you so much!
In reply to 404 Error on 6' Plans by cwatson
Ana White
Fri, 10/30/2020 - 12:25
Thank you so much for buying…
Thank you so much for buying the book!
I'm so sorry for the error with the 6' plan. We are having some backend website issues.
Here is the full 6' plans with the configuration - you can order the carcass through the configuration until we resolve the website issues? https://ana-white.com/sites/default/files/6%E2%80%99%20Barn%20Door%20Co…
jmartinezorlando73
Mon, 11/02/2020 - 09:19
Thank You, Thank You!!!
I just created this masterpiece and I cant thank you enough for the plans. I am VERY new to woodworking but your plans and site have made it easier for me to understand. I am waiting on my hardware, but I will brag about it this week when it comes in and I can install the doors. I did add 1/4 inch bead board on the entire back and gut out 2" holes with grommets to allow for wires to come through and plug stuff in.
In reply to Thank You, Thank You!!! by jmartinezorlando73
jmartinezorlando73
Mon, 11/09/2020 - 09:18
There is an upgrade that I…
There is an upgrade that I put into the plan. The mini cabinet hardware screws that came with the door hardware were very long and actually went through the facing. I actually put in a 1x2 on the inside edge of the facing across the top using glue and brads. This allowed for the screws to grab better and not have the screws go through the 1x4h
djtech2k2
Sat, 01/02/2021 - 13:33
Differences Between This and the Grandy
I have been looking for a project to expand storage and counter space for the kitchen. I have been looking at this project as well as the Grandy. Other than dimensions and the material, is there any major difference? For example, is one a lot more sturdy than the other? I have not built anything this large that will hold this much stuff with pocket holes so I have been back and forth. I do see that the hardware for the Grandy seems to be harder to get too.
Jami Reyes
Thu, 01/21/2021 - 07:17
Barn Door Kit
There isn’t a clickable link to the exact mini barn door kit used. Can you please provide that?
Jeff Richoux
Mon, 08/02/2021 - 10:29
Need some help
Ana, can you recommend a site where I can buy the 8' barn door hardware kit? My wife found a new project on your site for me to do and the hardware kit is what I can't find.