


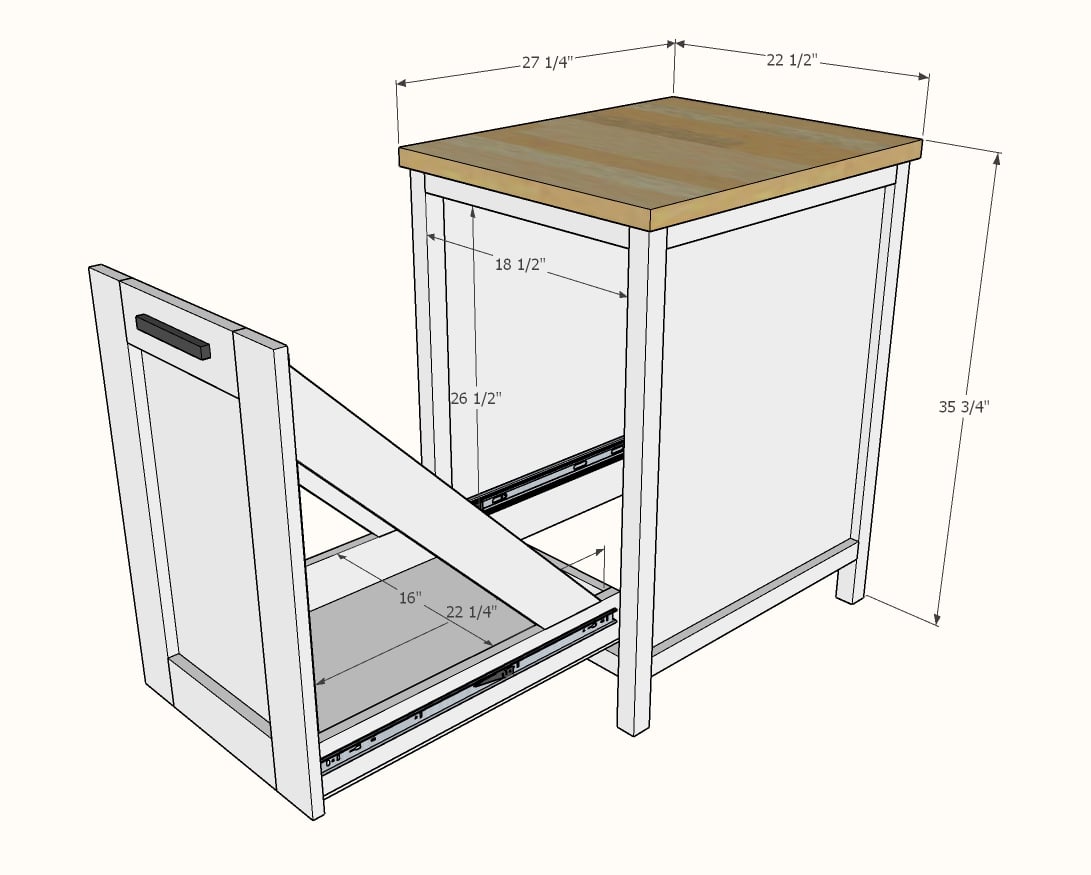
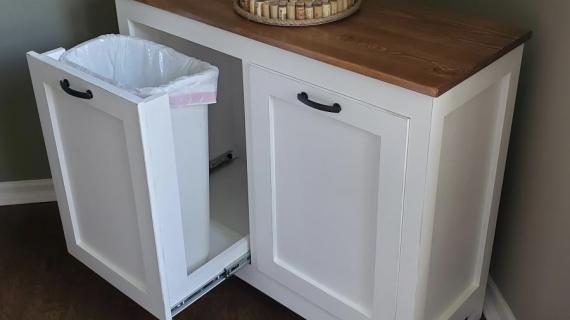
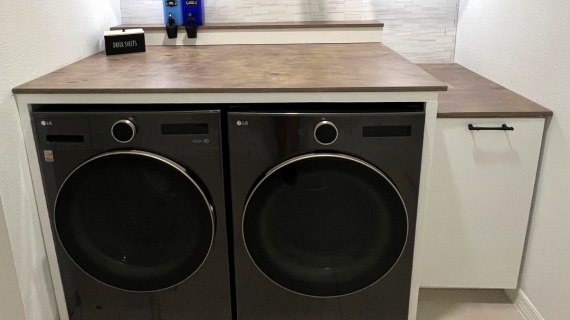
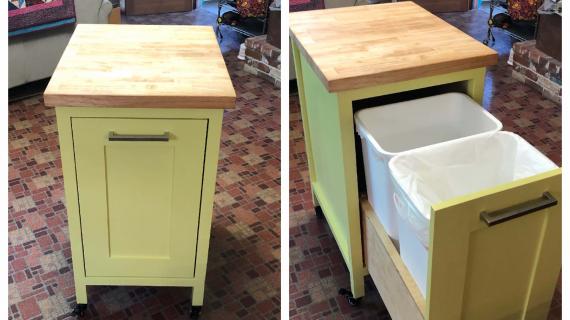
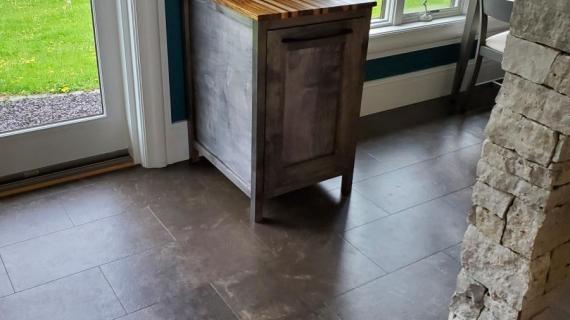
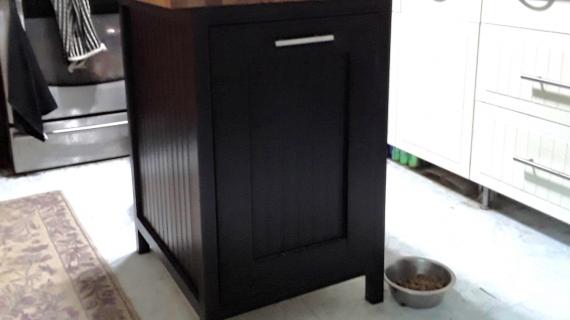
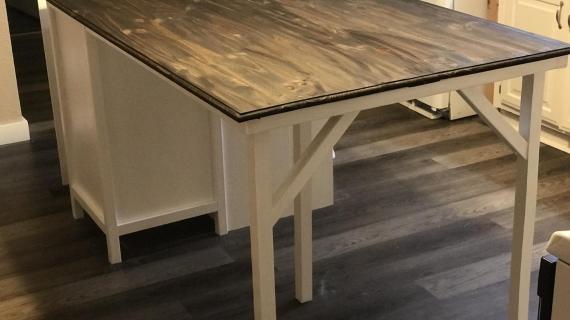
Build your own prep station with slide out double trash cans! Free step by step plans from Ana-White.com
Preparation
- 2 - 2x2 @ 8 feet long
- 1 - 1x2 @ 8' long
- 1 - 1x2 @ 4' long
- 2 - 1x4 @ 10 feet long (can also use 3 - 1x4 @ 8 feet long)
- 1 sheet of 3/4" cabinet grade plywood
- 1 set of 24" full extension drawer slides
- 2" cabinet screws (about 8 for attaching the countertop)
- Countertop or butcher block top 27-1/4" x 22-1/2"
- 1 pull or handle
- 2 standard 10 gallon plastic waste bins less than 16" wide x 24" tall x 11" deep
Carcass
- 4 - 2x2 @ 34-1/2" - legs
- 4 - 1x2 @ 23-1/4" - side trim
- 2 - 3/4" plywood @ 23-1/4" x 30-1/2" - side panels
- 2 - 2x2 @ 18-1/2" - front trim
- 2 - 1x2 @ 18-1/2" -back trim
- 1 - 3/4" plywood @ 18-1/2" x 30-1/2" - back panel
- 1 - butcher block top or similar @ 27-1/4" x 22-1/2"
Drawer
- 2 - 1x4 @ 23-3/4" - drawer sides
- 1 - 1x4 @ ~16" - drawer back - should be measured and cut to fit while building
- 1 - 3/4" plywood @ 25-1/2" x ~16" - should be measured and cut to fit while building
- 2 - 1x4 @ 31" - long point to long point measurement, both ends cut at 45 degrees, ends are NOT parallel
- 1 - 3/4" plywood @ ~16" x 22-1/4" - drawer bottom
- 2 - 1x4 @ 27-1/4" - drawer face stiles
- 2 - 1x4 @ 11-1/4" - drawer face rails


For long term durability and more professional results, I recommend using a pocket hole joinery system for wood joints. Here is a video with tips for using a pocket hole jig:
Instructions
Step 1
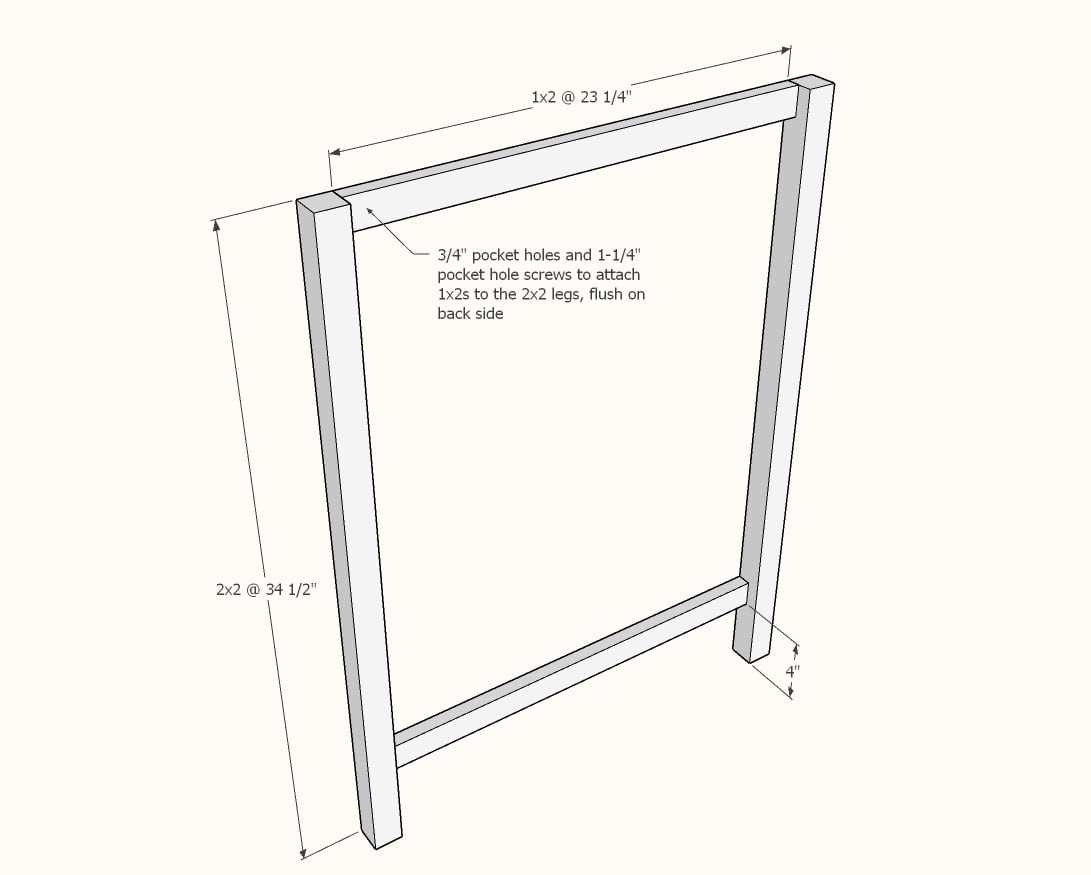
Drill two 3/4" pocket holes on each end of the 1x2 side trim pieces. Attach to the 2x2 legs, flush on back side, with 1-1/4" pocket hole screws.
Step 2
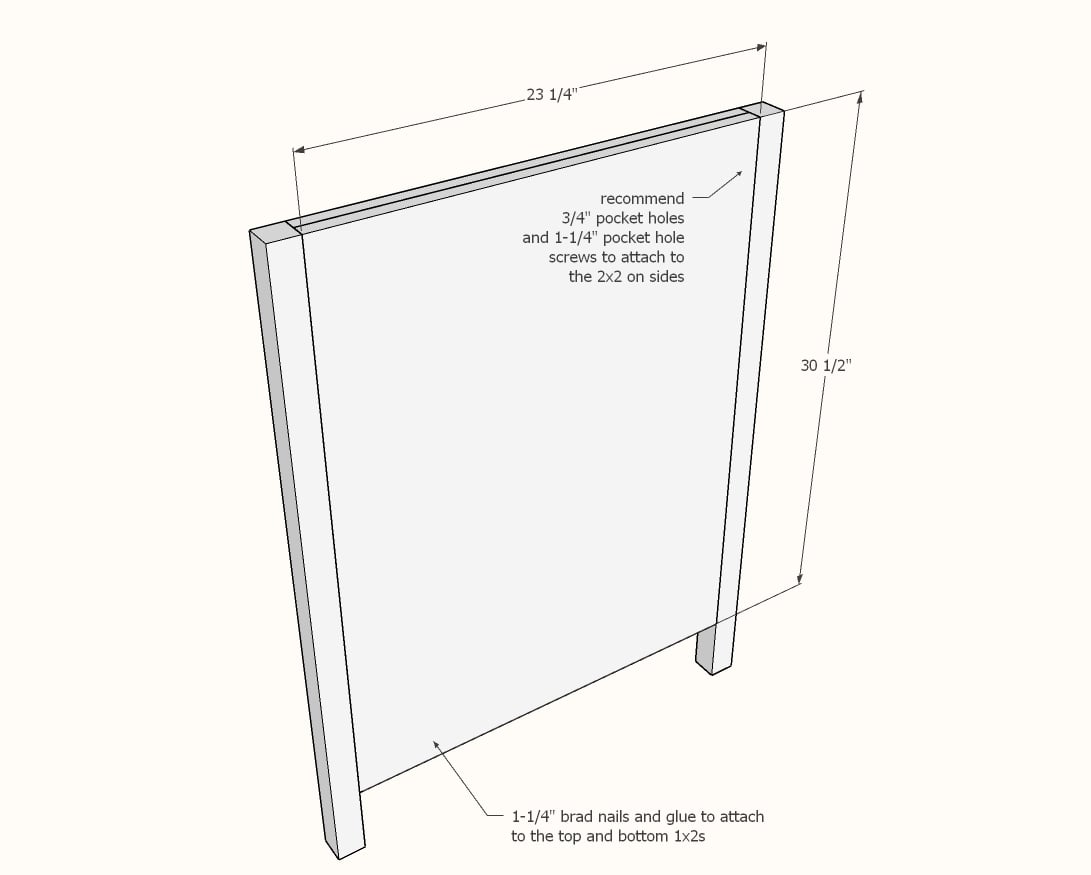
Make sure your plywood panel fits inside the 2x2s as shown.
Drill 3/4" pocket holes along long edges of side plywood panels, about every 8".
Apply glue to back side of 1x2s.
Place panel on top of 1x2s and nail down with 1-1/4" brad nails.
Then attach plywood panel to the legs with 1-1/4" pocket hole screws.
Repeat steps 1 and 2 to make a second side panel.
Step 3

Drill two 3/4" pocket holes on both ends of the remaining 1x2 trim pieces. Attach to back with 1-1/4" pocket hole screws.
Set pocket hole jig to 1-1/2" setting. Drill two pocket holes on each end of the 2x2s and attach to the legs at the front of the cabinet.
Step 4
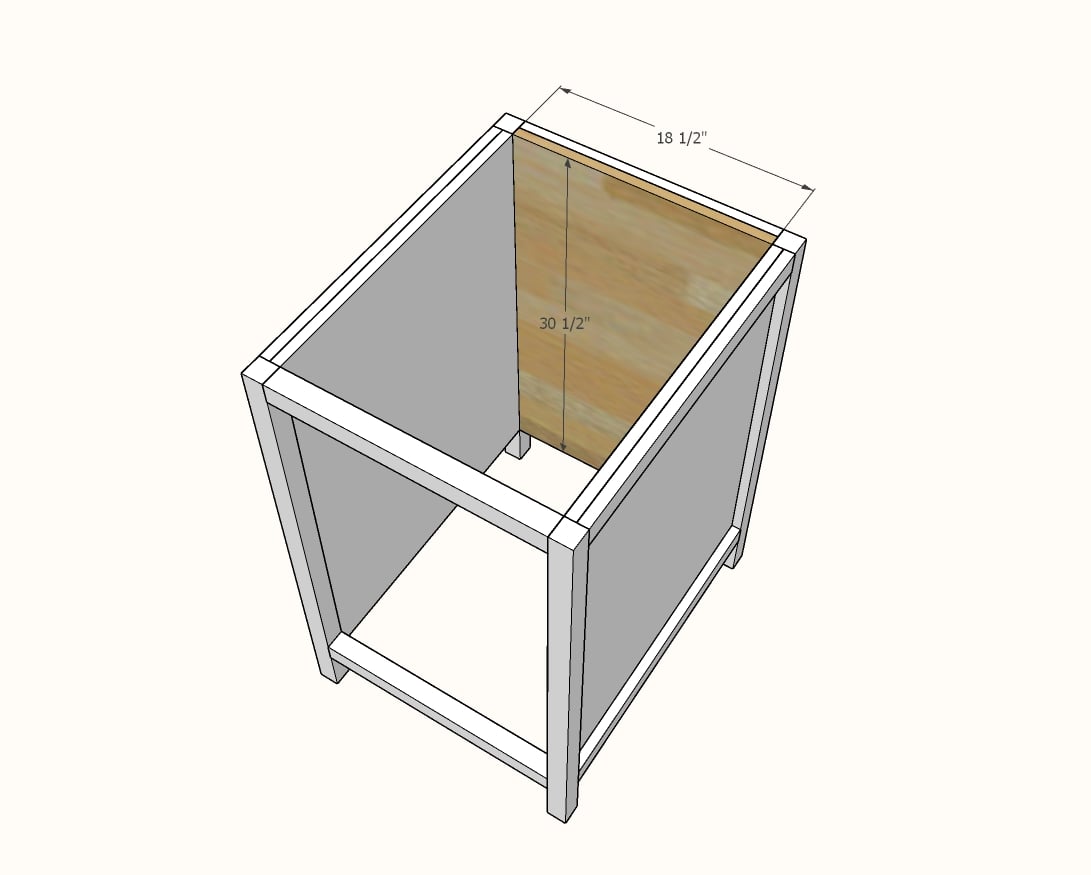
Fit back plywood panel inside the back.
Drill pocket holes along side edges and attach panel inside the back as you did the sides.
This completes the carcass build.
Step 5

Now it's time to work on the drawer.
Draw a level line, 8-1/2" up from the base.
Separate out the drawer slides cabinet member from the drawer member.
Position the cabinet member in the cabinet so the line is centered on the screw holes of the drawer slide, set in 3/4" from the front leg of the cabinet.
Attach the slide with screws into the line.
Repeat on the other side of the cabinet.
Step 6
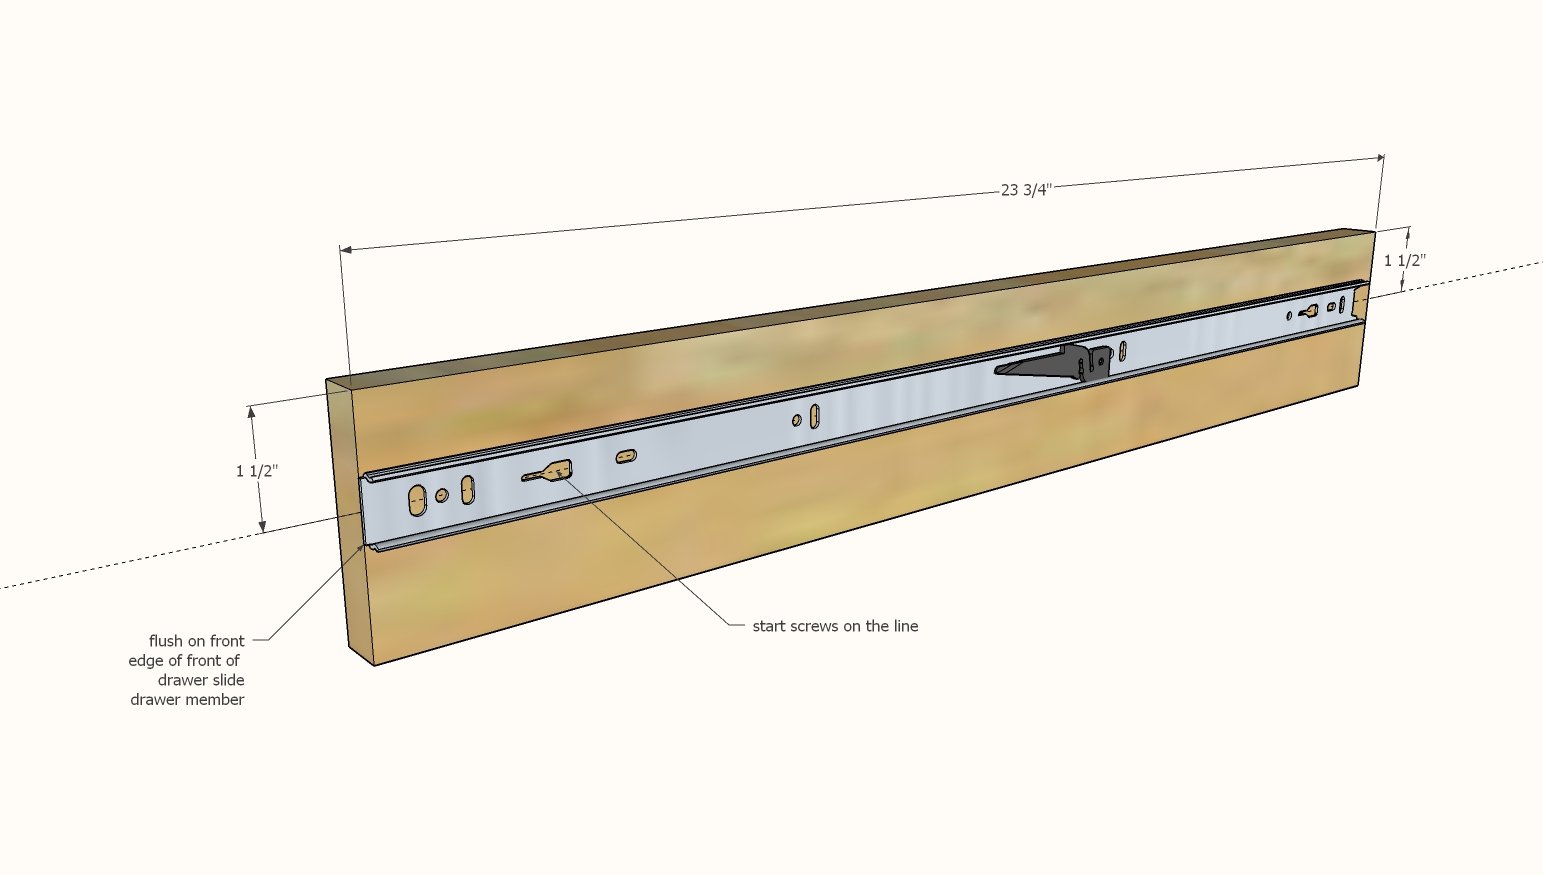
Draw a level line 1-1/2" down from the top edge of the 1x4 drawer sides.
Attach the drawer member to the 1x4, with the line centered in the screw holes of the drawer slide.
Repeat for opposite side, but remember to keep the other drawer slide in mirror as it will be installed on the opposite side of the drawer.
Step 7
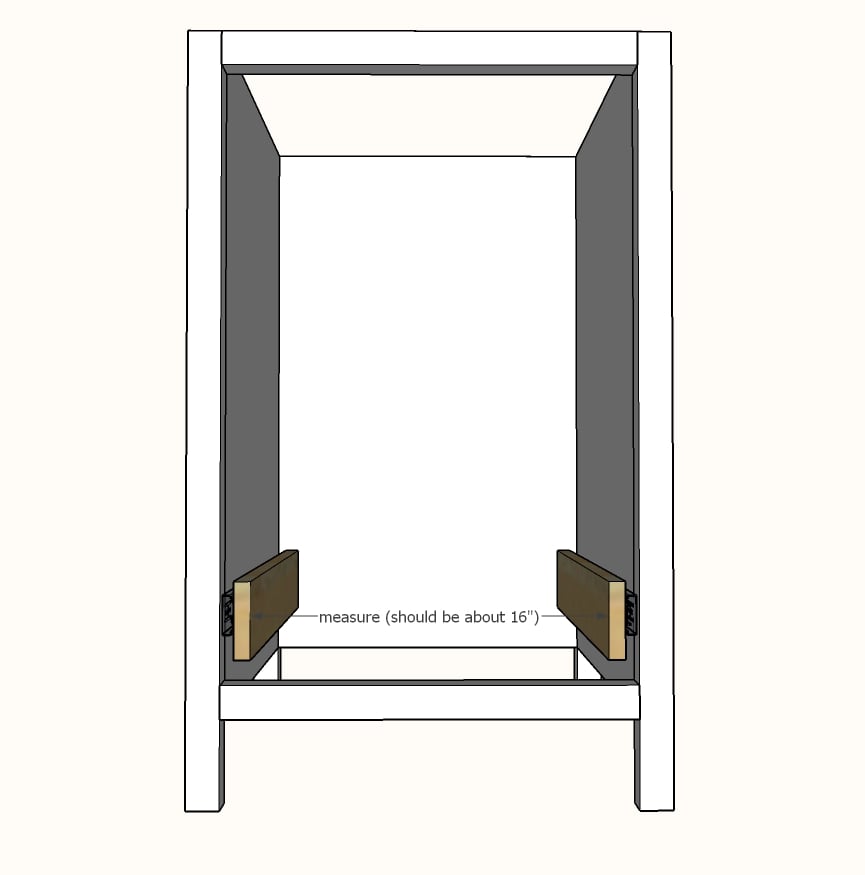
Slide the drawer sides into the cabinet members.
Measure in between the drawer sides - this should be about 16".
Step 8
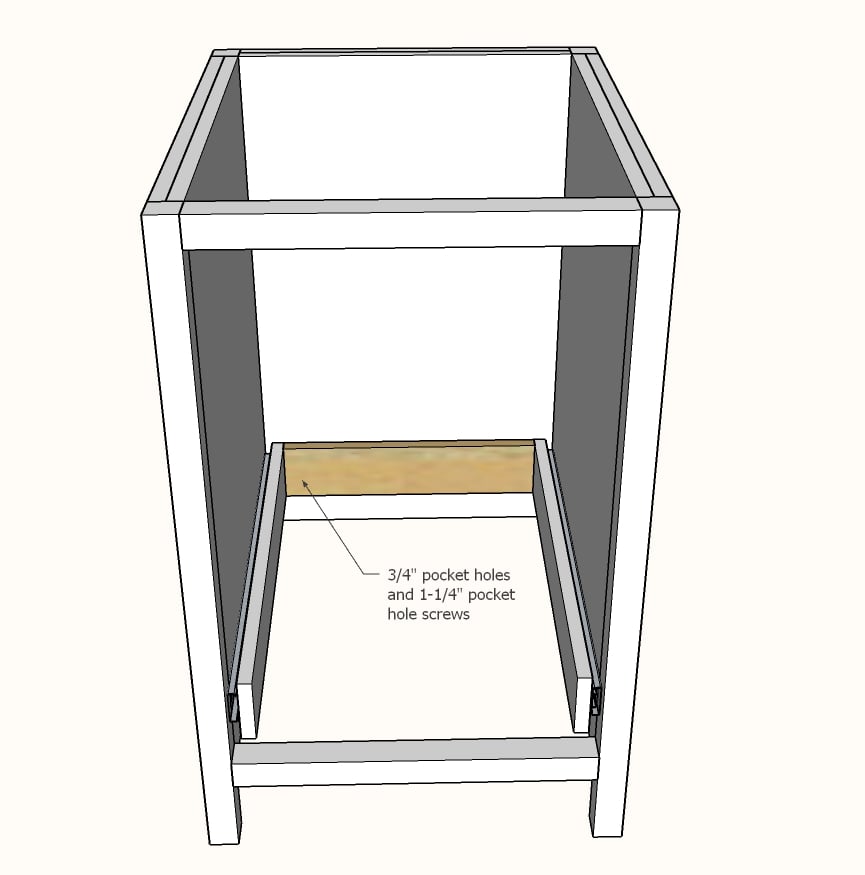
Cut the back of the drawer to your measurement and attach inside the drawer box with pocket hole screws.
Step 9
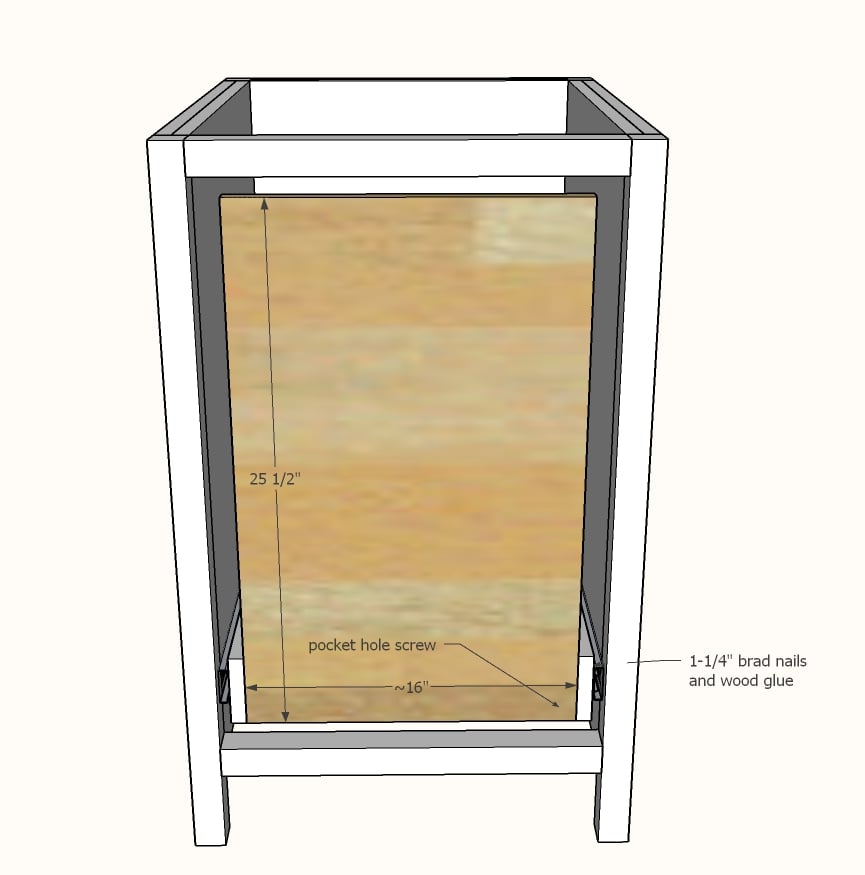
Repeat these steps for the front of the drawer.
Keep in mind that part of the plywood drawer front is exposed, so avoid pocket holes that may be visible after the drawer frame is installed.
Step 10
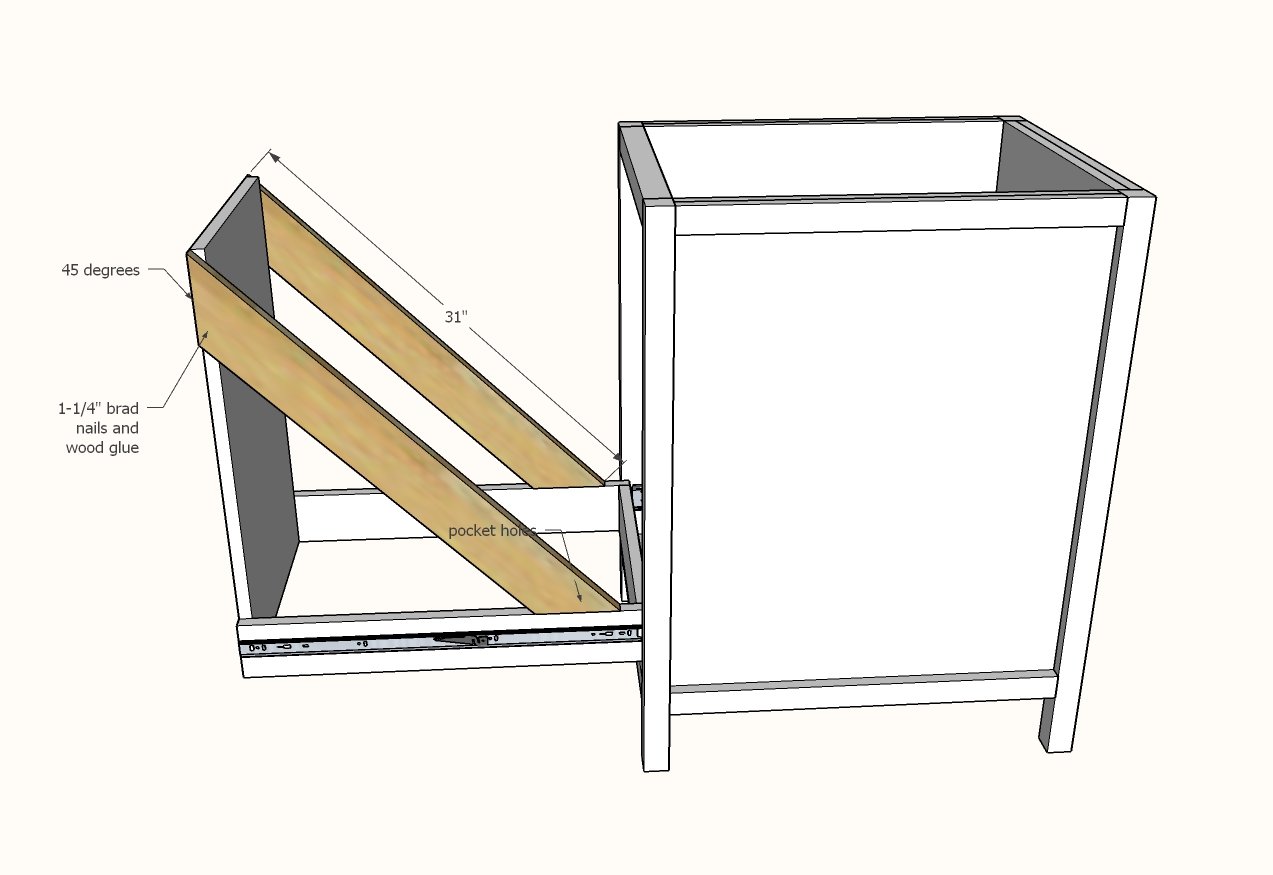
Attach drawer side supports with glue and pocket holes.
Step 11
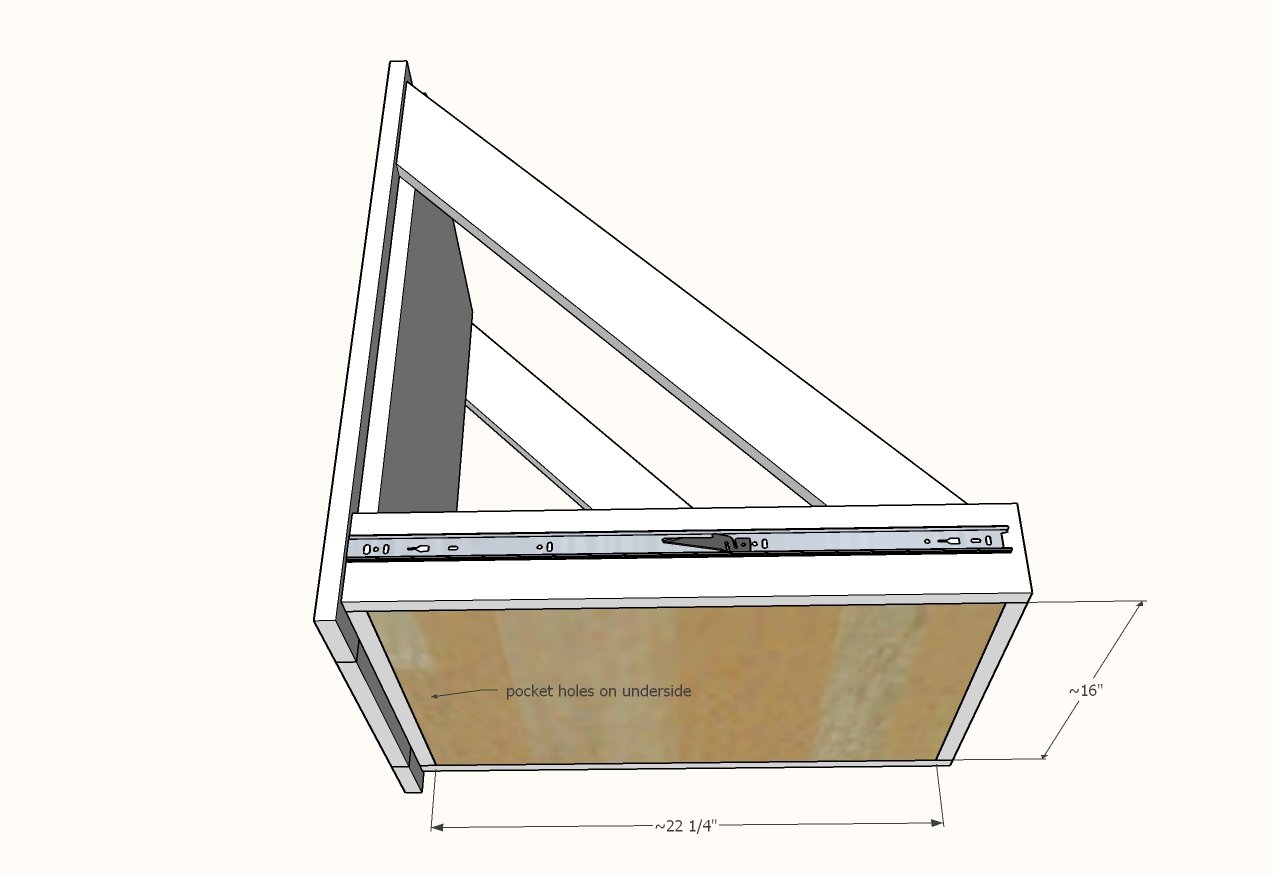
Measure the inside opening of the bottom of the trash drawer.
Cut 3/4" plywood to fit inside the opening.
Drill 3/4" pocket holes on all four edges.
Insert the panel inside the bottom of the drawer and attach with 1-1/4" pocket hole screws.
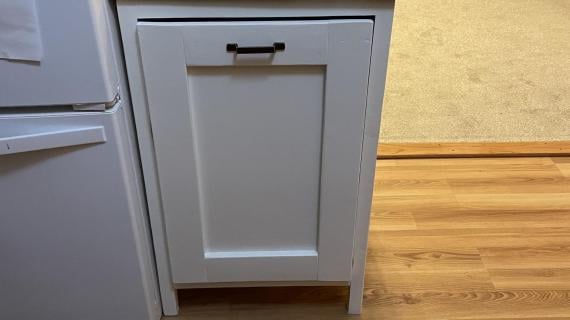
Step 12

Build the drawer face with 3/4" pocket holes and 1-1/4" pocket holes screws.
Set the drawer face on the drawer and center with an even gap around all four sides.
Attach with 1-1/4" brad nails and glue.
Pull the drawer out and further secure with 1-1/4" screws (yes, you can use pocket hole screws).
Step 13
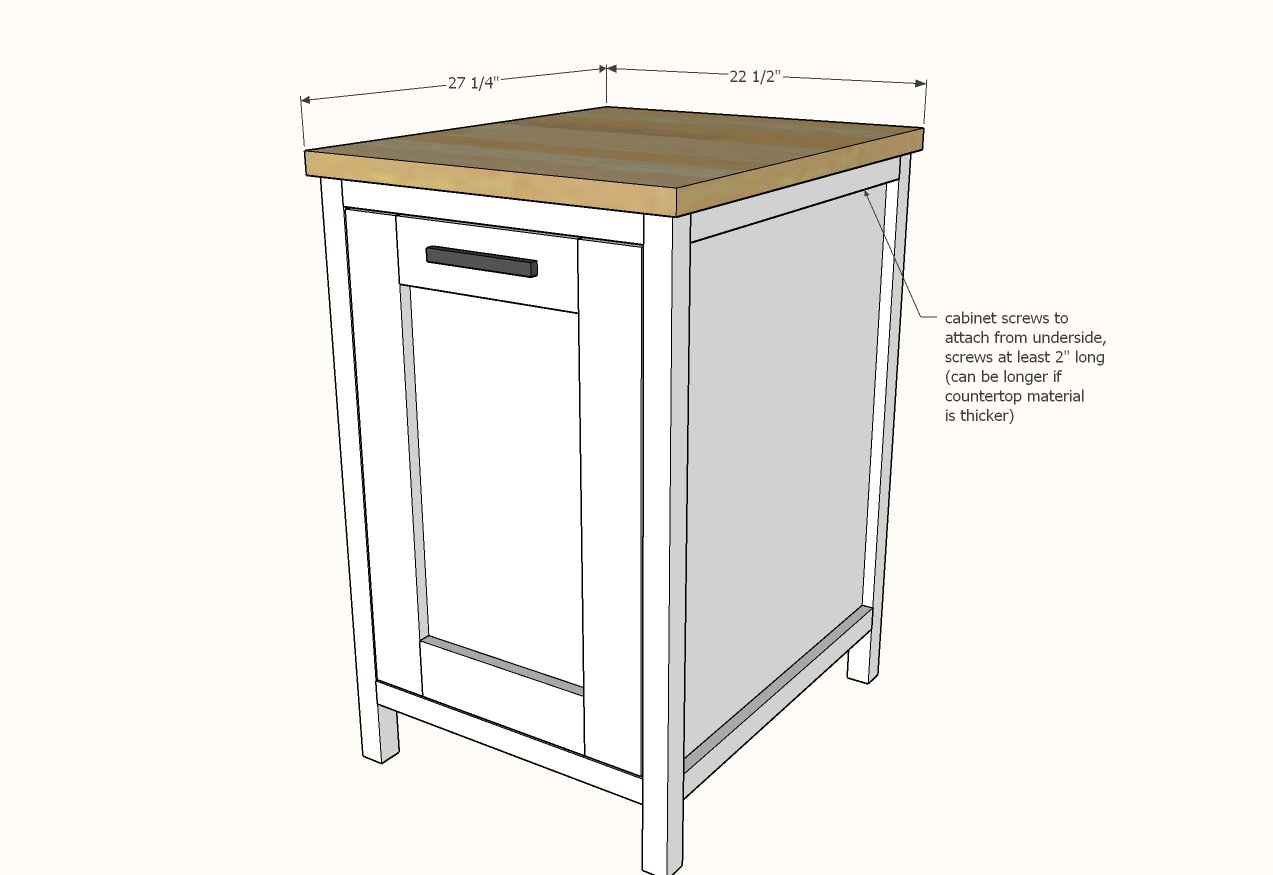
Attach the countertop to the top of the cart with cabinet screws through underside of side trim.

Comments
AmberG05
Sat, 01/25/2020 - 10:03
This is so neat! Ana, I’ve…
This is so neat!
Ana, I’ve also tried to find how you did the legs for the husky farmhouse table and can’t find it. I’m about to build one and would love to know how you did the look.
BigChinoDon
Wed, 02/05/2020 - 18:53
DImensional?
Does the "shopping list" reference dimensional lumber size? (is 2x2 actually 1.5x1.5?)
hollywood13
Wed, 06/24/2020 - 07:32
Measurements?
I was also wondering this??
In reply to Measurements? by hollywood13
Jenna_B
Tue, 07/21/2020 - 19:11
Yes, it is generally easier…
Yes, it is generally easier just to write the Nominal/Dimensional size rather than the actual size.
In reply to DImensional? by BigChinoDon
Jenna_B
Tue, 07/21/2020 - 19:11
Yes, it is generally easier…
Yes, it is generally easier just to write the Nominal/Dimensional size rather than the actual size.