Superhero Playhouse

The free plans on this website are made possible with advertising and affiliate links.  Thank you for helping us keep plans free.


superhero playhouse plans
Difficulty
Intermediate
| Print this plan

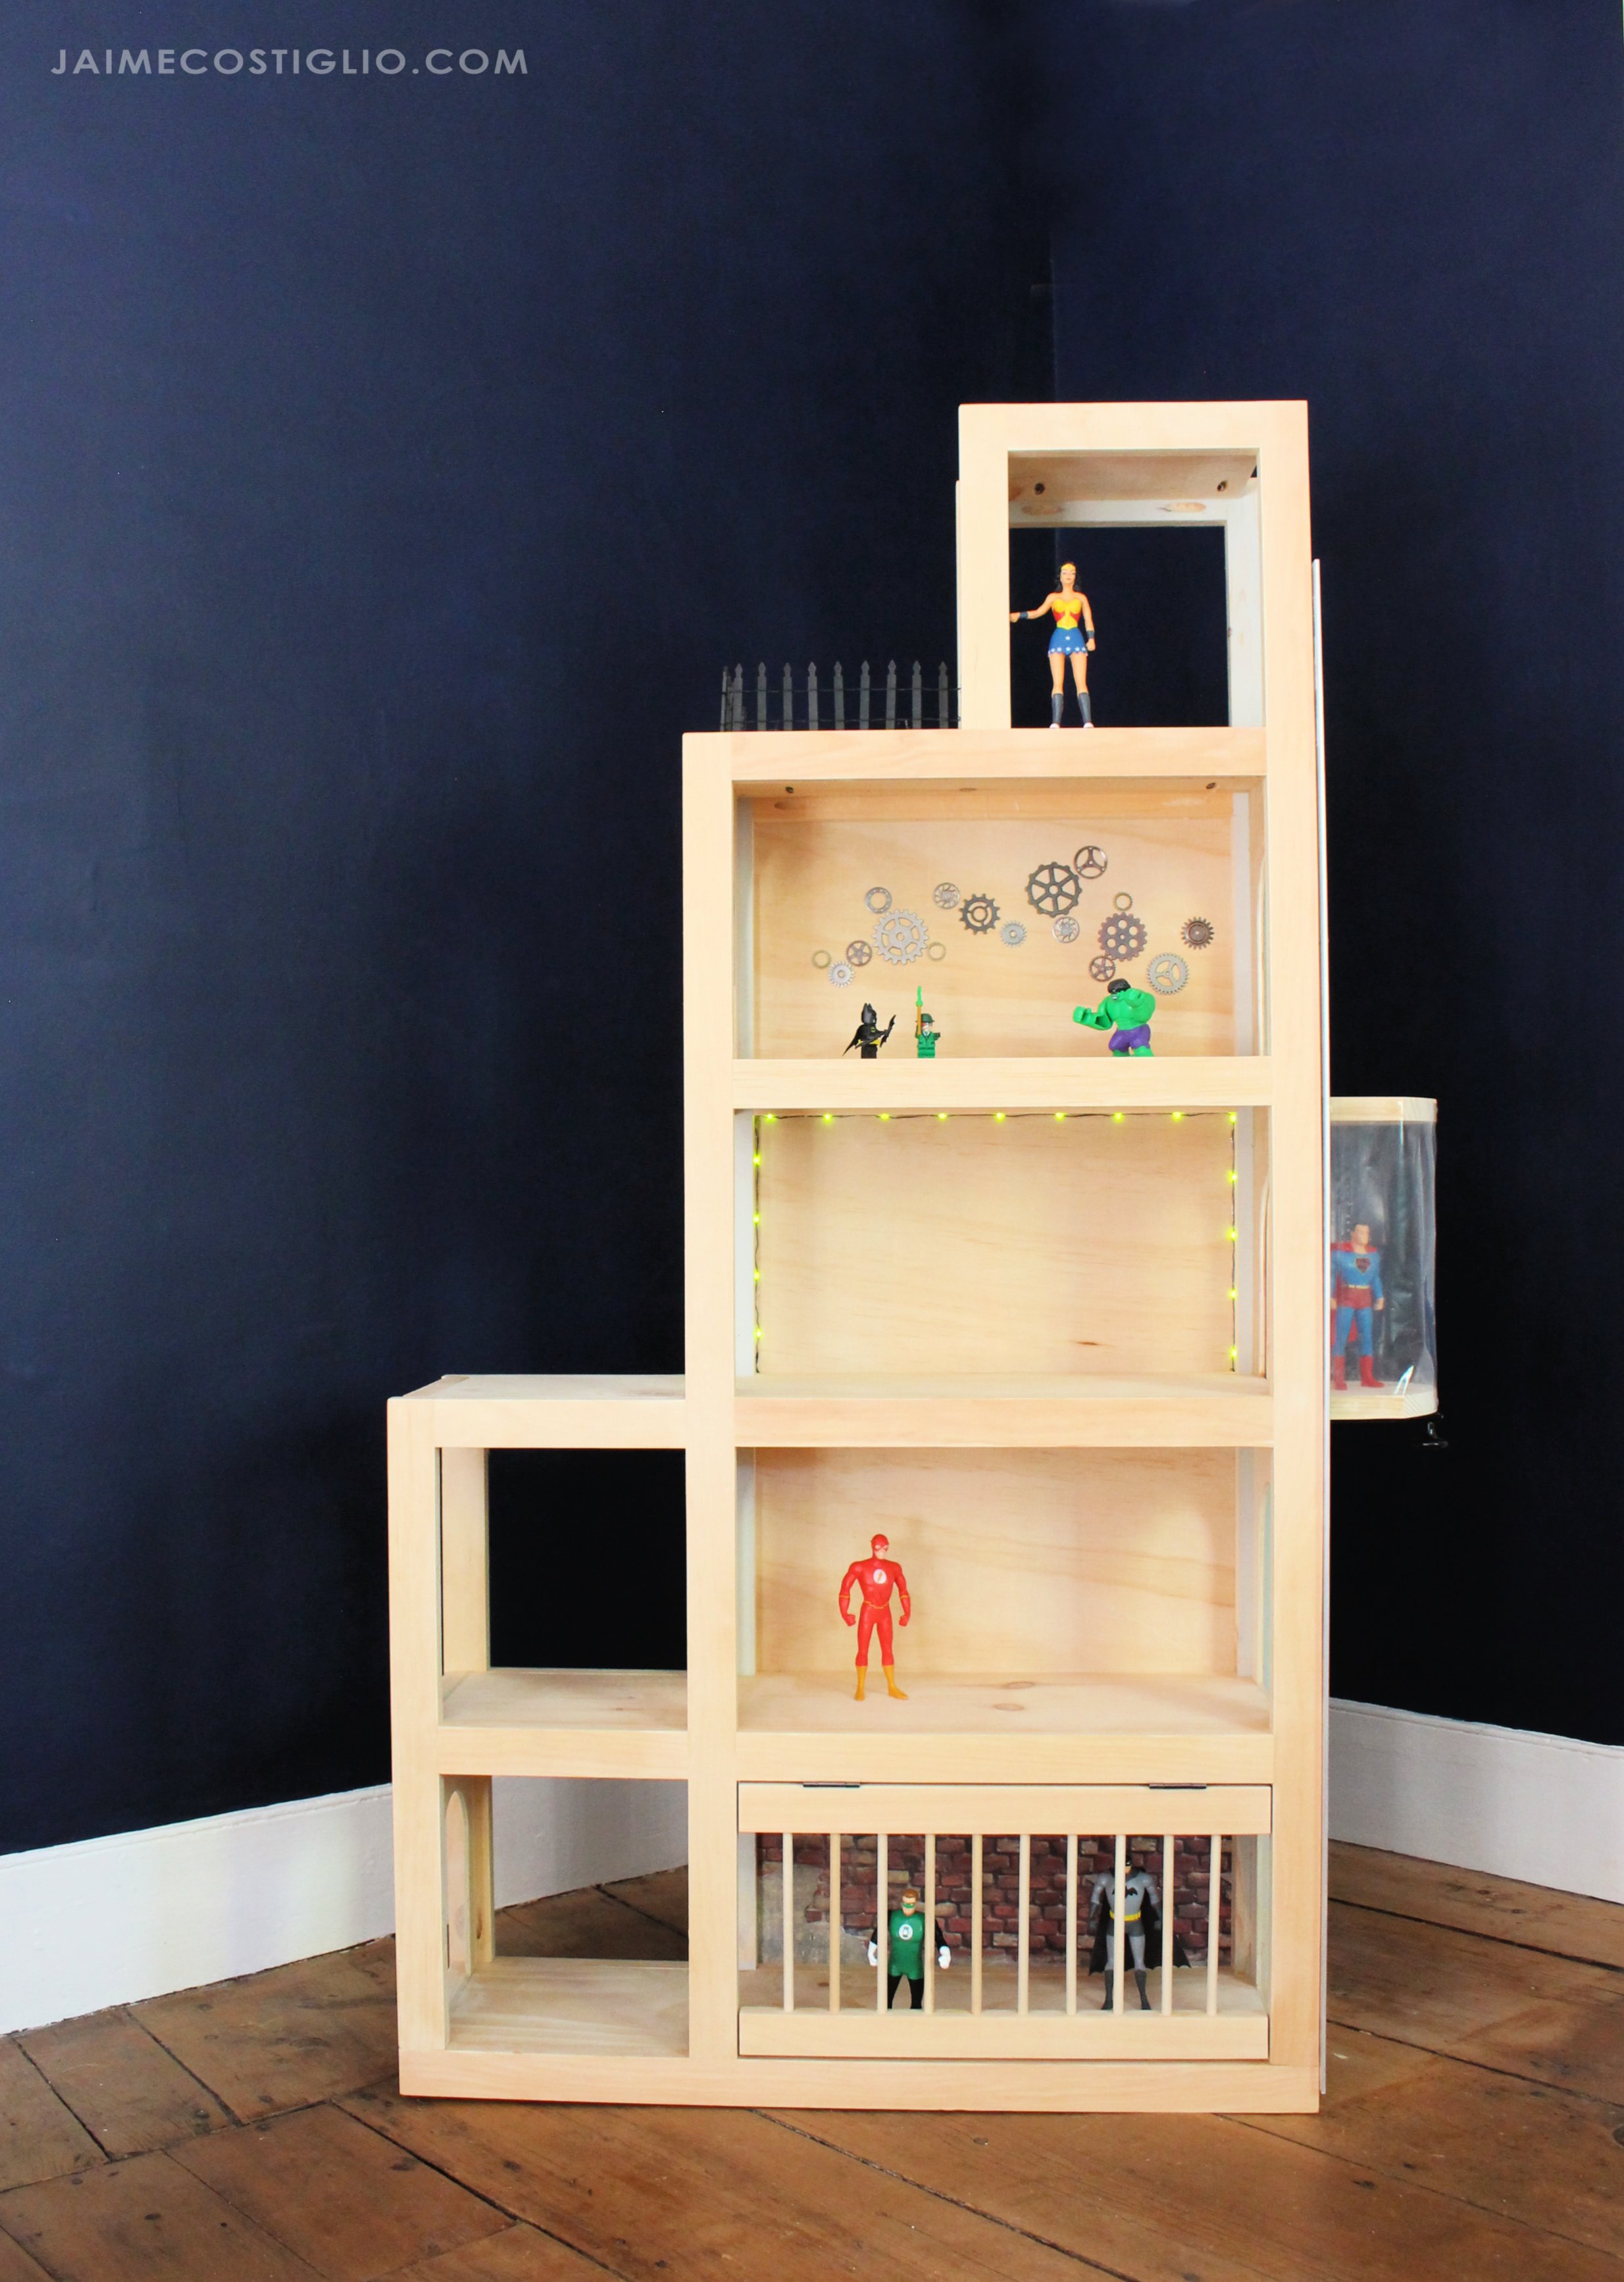
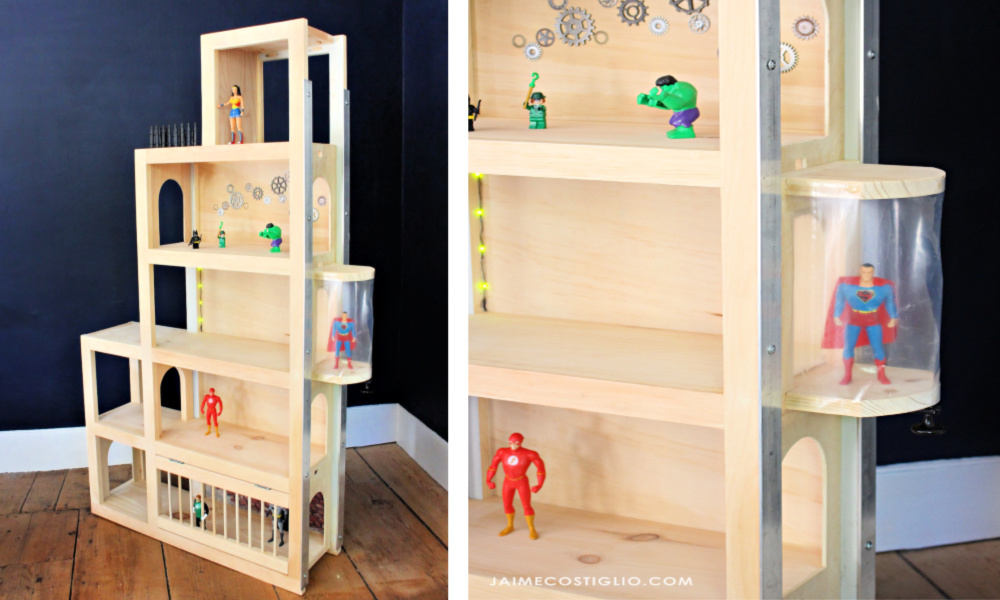
Superhero playhouse plans.  Build your own super hero city with working elevator and jail cell. Perfect for 8" action figures.  

Step by step plans include full diagrams, build photos and lots of details.
For the past seven years, Jaime Costiglio and I have teamed up to create the Handbuilt Holiday series in the 12 Fridays leading up to Christmas.  We add a brand new gift plan every Friday.  You can see all the plans in this series here.

handbuilt holiday

We are so excited about today's new plan!

superhero playhouse

It's an action-figurehouse for superheros!

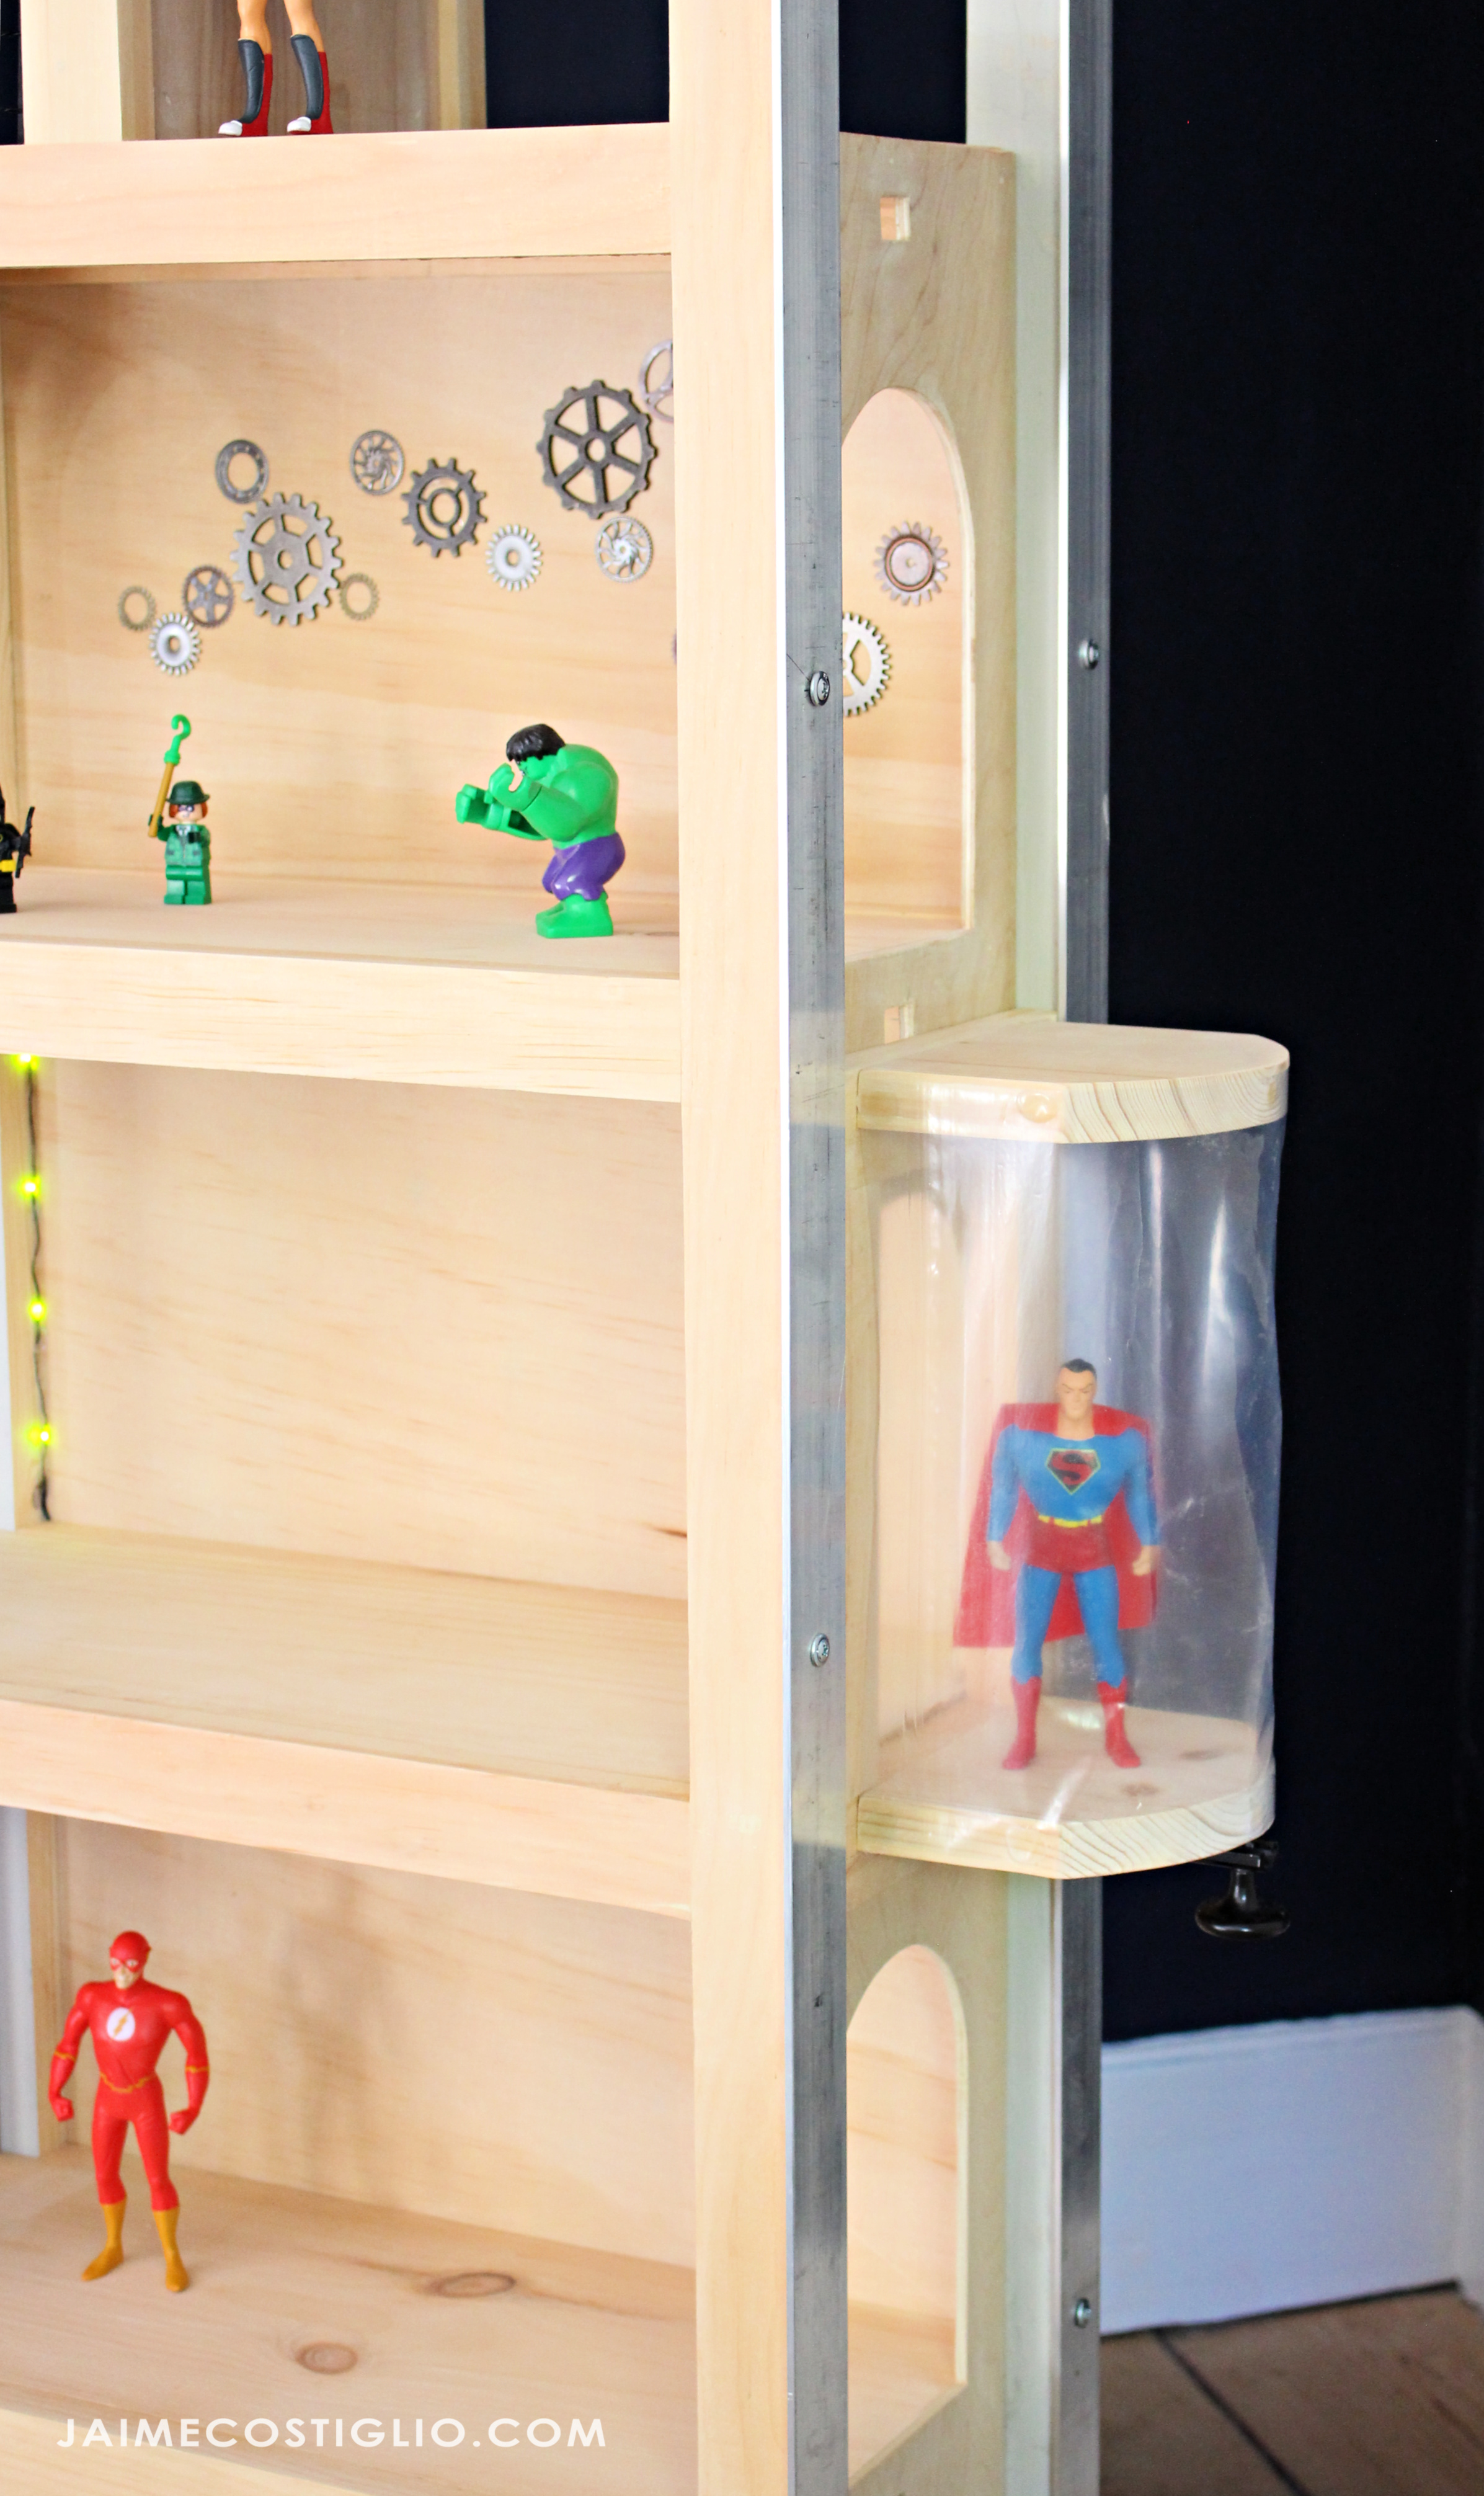
superhero city elevator

With a real working elevator made out of hardware store parts and scrap wood (see how Jaime built the elevator here)

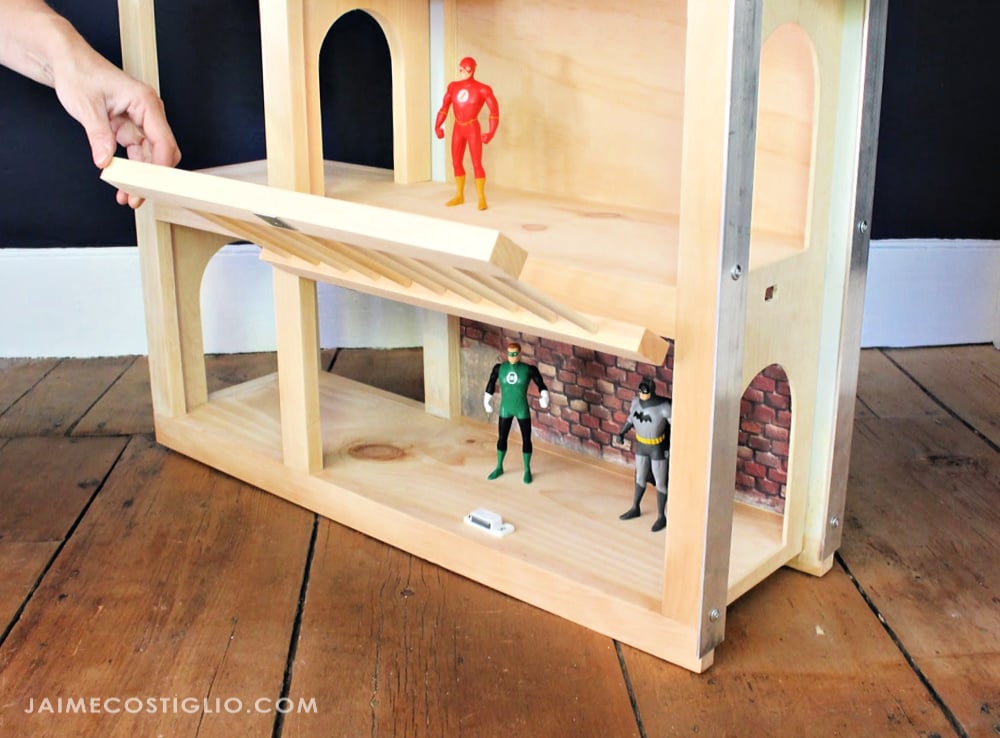
superhero city jailhouse

And a flip up jailhouse (See how Jaime built the jailhouse door here)

Lots more photos and essential building tips are available at JaimeCostiglio.com, please hop over now.

The free plans follow.

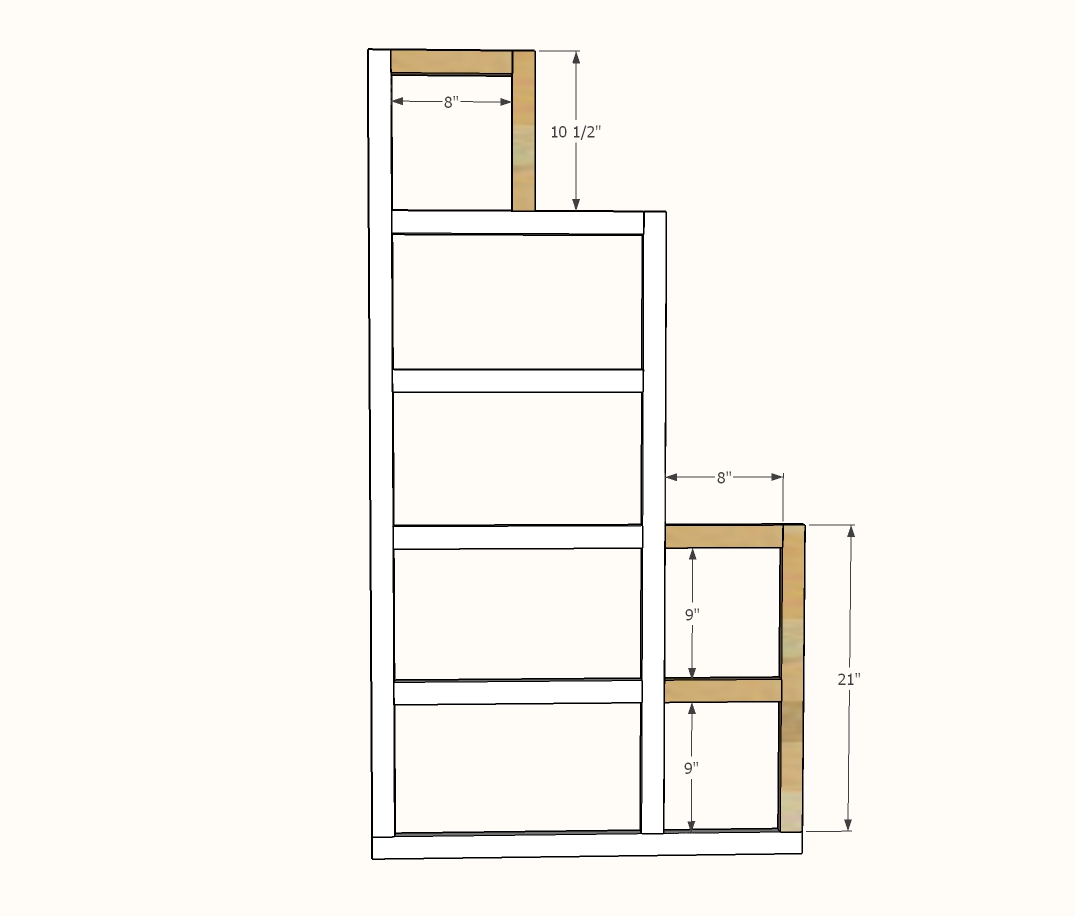
Dimensions
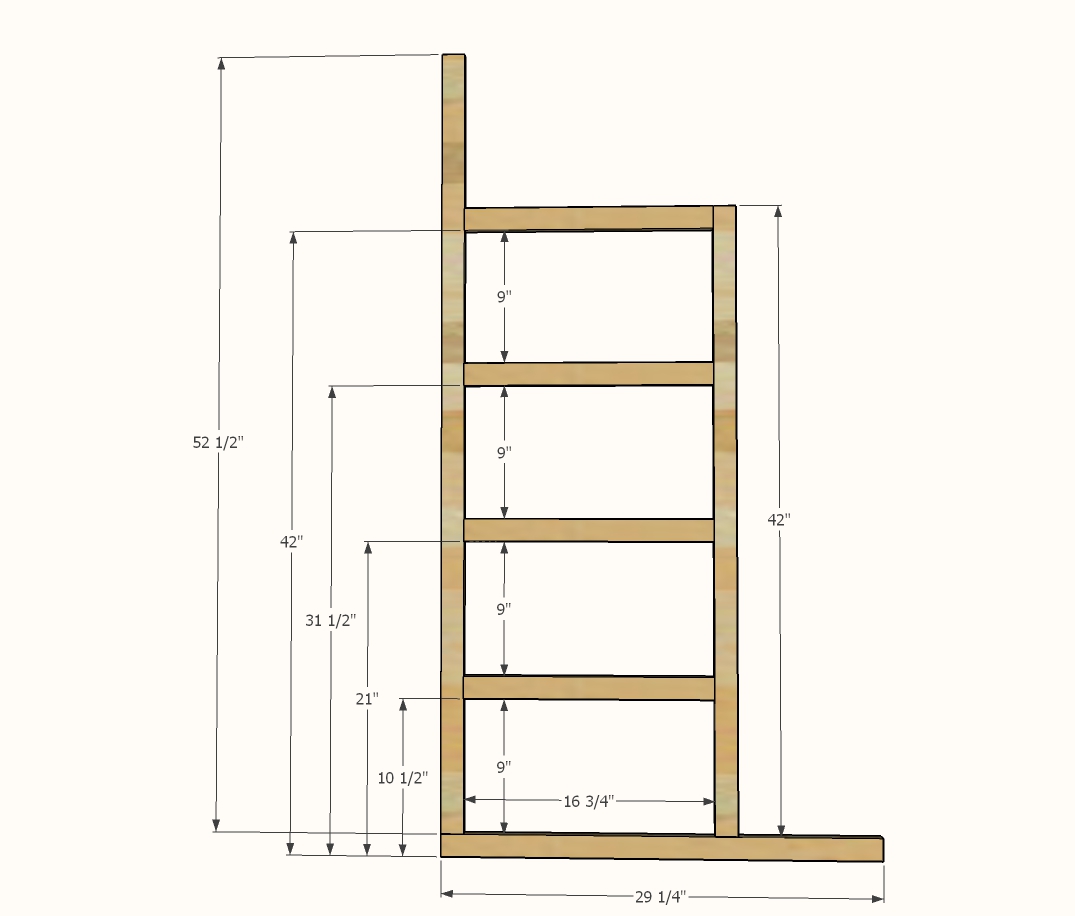
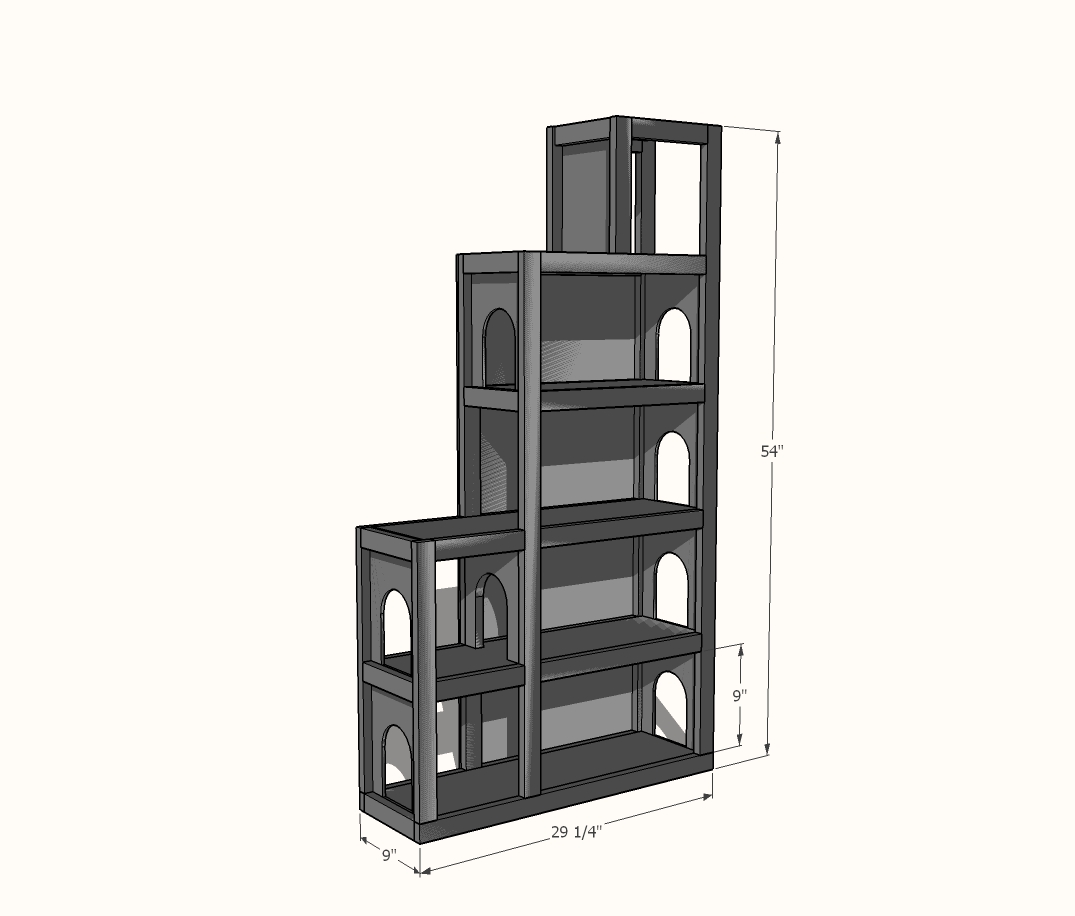
superhero playhouse dimensions
Dimensions for Superhero Playhouse shown in diagram

Preparation

Shopping List
  • 1 - 1 x 8 x 12 feet long (can substitute a 1x8x8' AND a 1x8x4')
  • 1 - 48" x 48" - 1/4" plywood panel 
  • 8 - 1 x 2 x 8'
Common Materials
3/4 inch finish nails
1 1/4 inch finish nails
Cut List

Face Frames

  • 2 - 1x2 @ 52-1/2"
  • 2 - 1x2 @ 29-1/4"
  • 2 - 1x2 @ 42"
  • 8 - 1x2 @ 16-3/4"
  • 6 - 1x2 @ 8"
  • 2 - 1x2 @ 10-1/2"
  • 2 - 1x2 @ 21"

Shelves

  • 3 - 1x8 @ 27-1/4" 
  • 2 - 1x8 @ 17-3/4"
  • 1 - 1x8 @ 8-3/4"
  • 1 - 1x8 @ 9-3/4"

Back and Side Panels

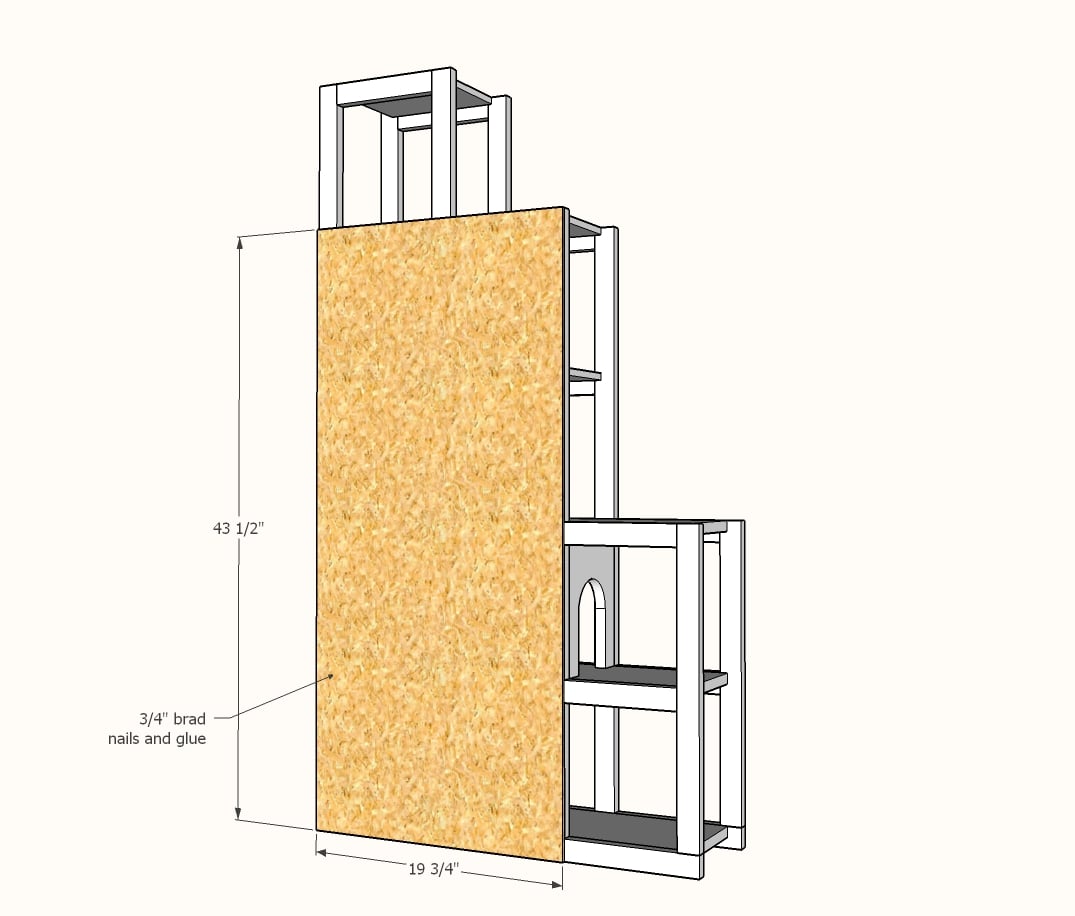
  • 1 - 1/4" plywood @ 43-1/2" x 19-3/4" - back
  • 1 - 1/4" plywood @ 7-1/4" (matches width of 1x8) x 43-1/2"
  • 1 - 1/4" plywood @ 7-1/4" (matches width of 1x8) x 22-1/2"
  • 1 - 1/4" plywood @ 7-1/4" (matches width of 1x8) x 12"
  • 1 - 1/4" plywood @ 7-1/4" (matches width of 1x8) x 10-1/2"

1x2 Trim

  • 6 - 1x2 @ 7-1/4" (matches width of 1x8)
Tools
Tape Measure
Speed Square
Pencil
Safety Glasses
Hearing Protection
Kreg Jig
Drill
Circular Saw
Jigsaw
Miter Saw
Brad Nailer
Power Sander

Instructions

Step 1

Cut pieces of face frames with miter saw.

Drill 3/4" pocket holes (two per joint) on ends of joining boards.

Clamp to a flat, level surface and attach joints with 1-1/4" pocket hole screws.

Step 2

Repeat for final face frame pieces.

Build two identical face frames.

Step 3

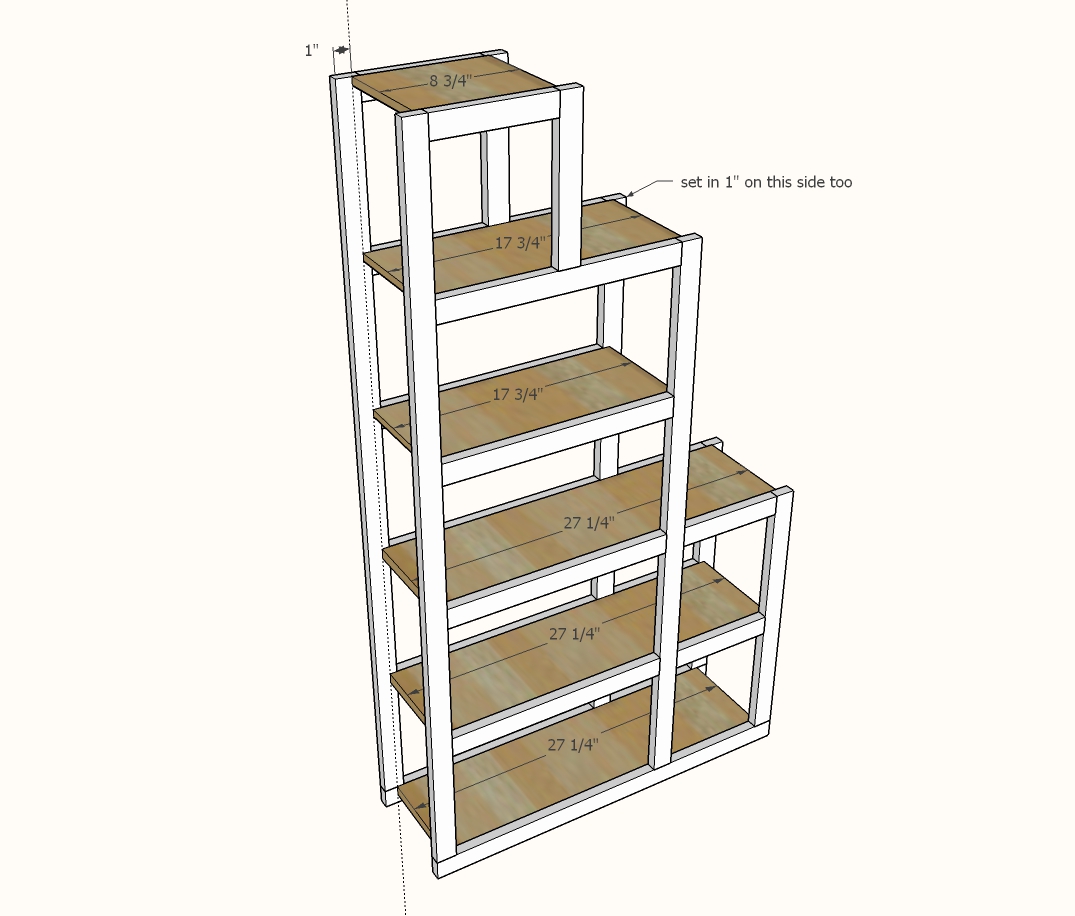
Cut shelf boards with a compound miter saw.

Drill 3/4" pocket holes along side edges (the longer edges) , one on each end and depending on the length of the shelf, more about every 8", avoiding directly behind 1x2 leg areas, so you can fit your drill inside the face frames when attaching the pocket hole screws.

Draw a line 1" in on the face frame, parallel to the vertical ends (dotted line shown in the diagram).

Attach shelves so ends meet the dotted lines, using 1-1/4" pocket hole screws.

Step 4

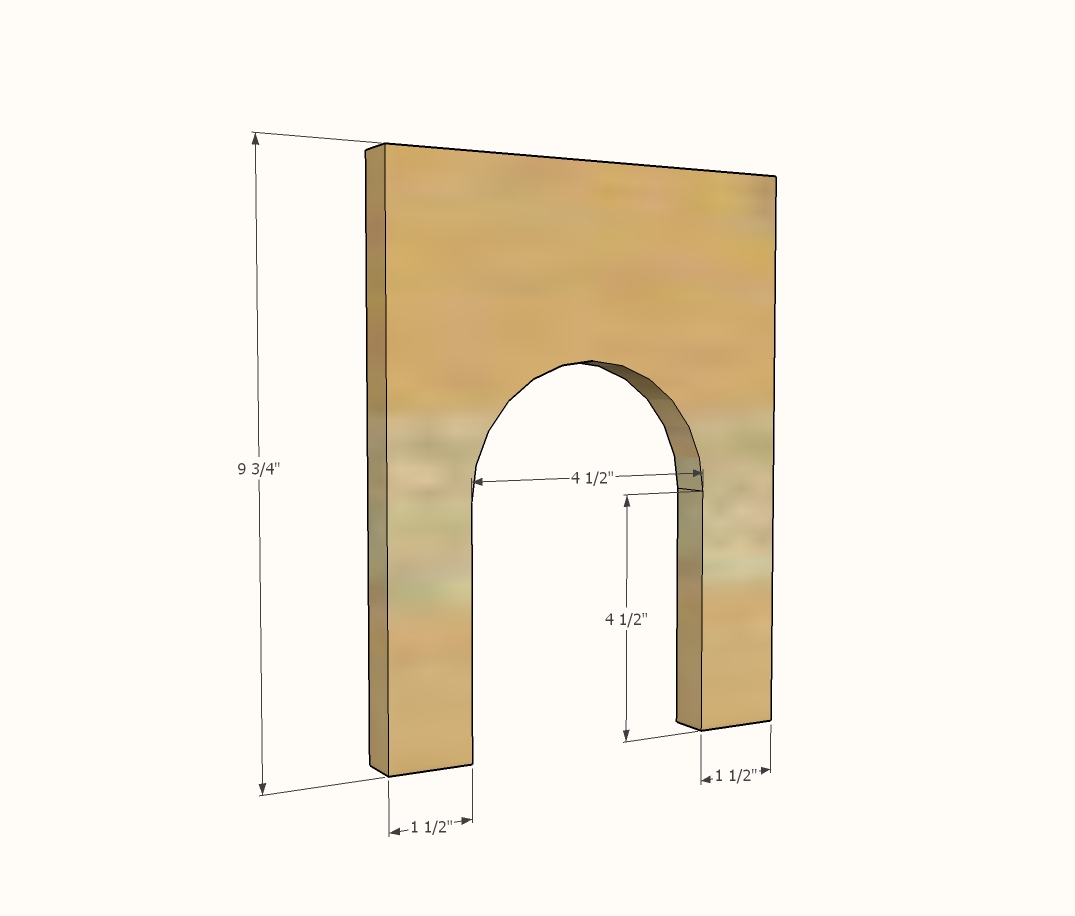
Cut out arches in the 1x8 room divider with a jigsaw.

You can also use a hole saw (4" size) to drill a 4" hole, and then finish the arch cut with a jigsaw.

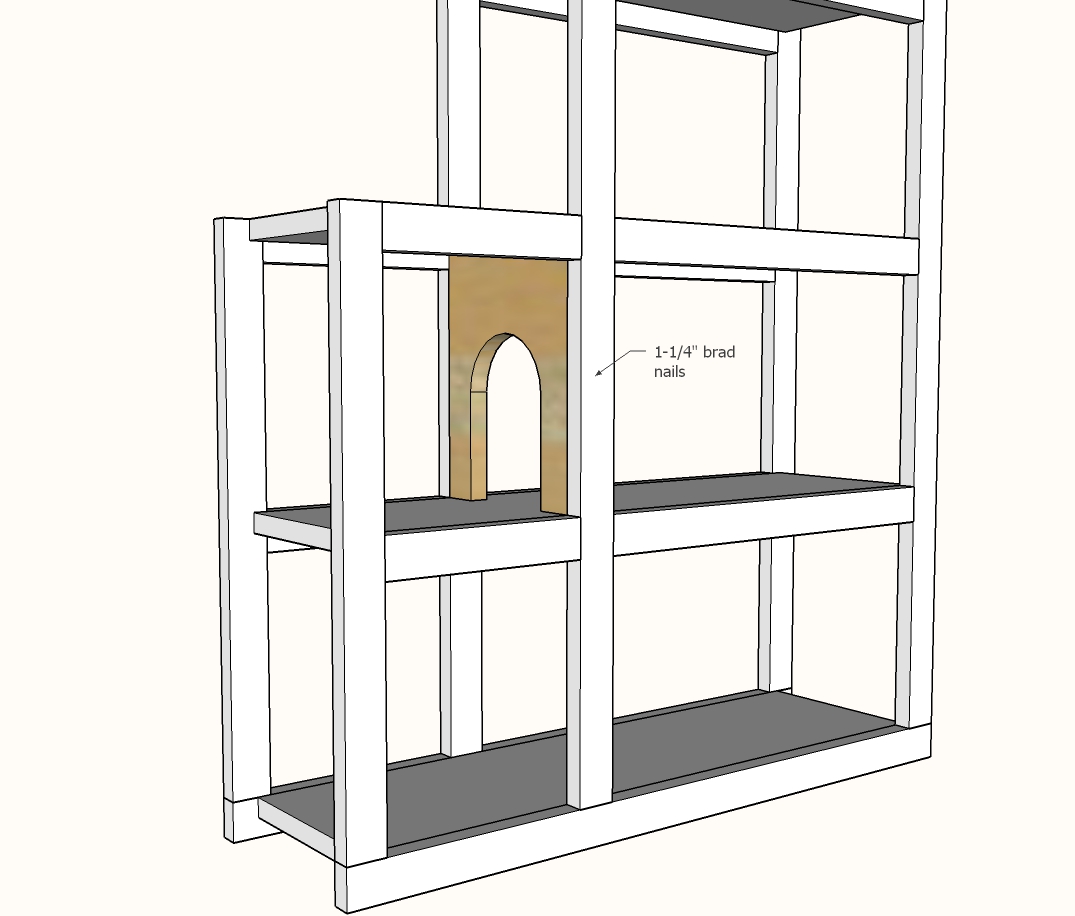
Step 5

Attach with 1-1/4" brad nails and glue inside the playhouse.

Step 6

Cut 1/4" pywood for the back with a circular saw.

Attach with 3/4" brad nails and glue.

Step 7

Cut the long side panel with circular saw, matching width to the width of the 1x8s.

Cut out the archways.

Attach to the ends with 3/4" brad nails and wood glue.

Step 8

Repeat steps for the remaining side panels.  Attach with 3/4" brad nails and wood glue.

Step 9

Add trim, attaching from face frames with 1-1/4" brad nails and wood glue.

Also nail to the shelf 1x8 ends with 1-1/4" brad nails and wood glue.

You can also add trim to the tall end, if you opt not to add the elevator.

Comments

adavalos19

Mon, 12/02/2019 - 13:53

Working on this now - pocket screws keep splitting the ends of the 1x2's when creating the face frame. Using (I think) the recommended screws you linked to (1 1/4" 7m pocket screws). Still splits after pilot holes drilled in through pocket holes. Maybe just a lower quality wood I'm using? Any tips?