Tabletop Lazy Susan - 21" Octagon

The free plans on this website are made possible with advertising and affiliate links.  Thank you for helping us keep plans free.


Tabletop lazy susan
Difficulty
Intermediate
| Print this plan

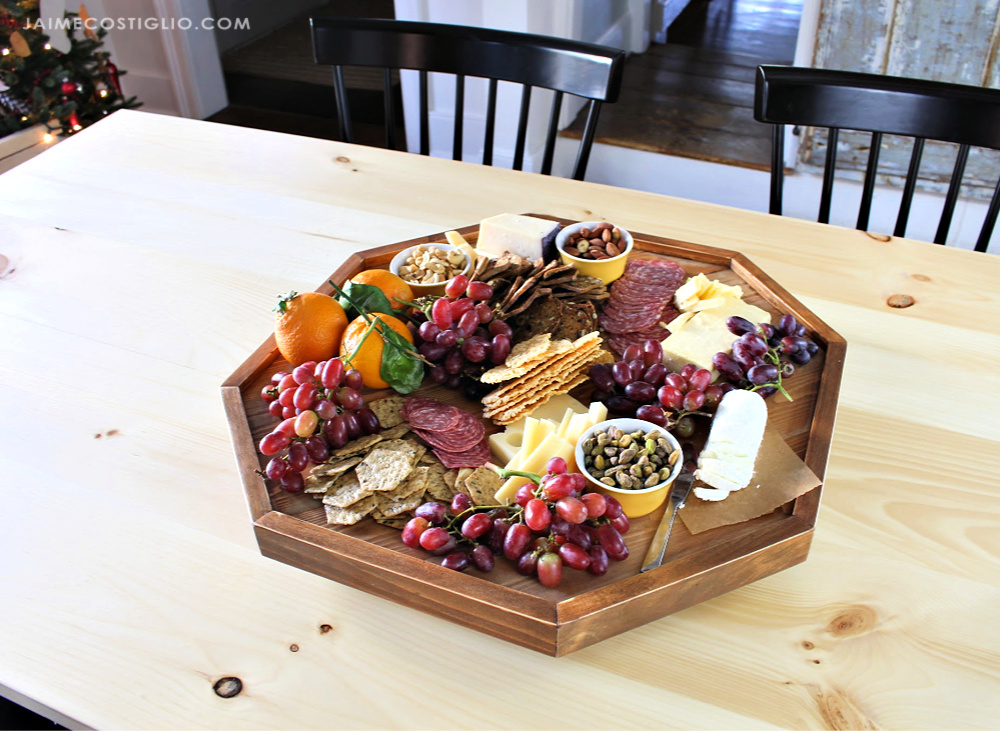
This gorgeous solid wood tabletop lazy susan in a modern octagon shape is perfect for serving.  This is a DIY project with full instructions and shopping and cut lists.

Built by Jaime Costiglio for Handbuilt Holiday

No one wants to be rude and reach across the table.  You can build your own tabletop lazy susan turntable with just a couple of boards in an hour!  Our free plans make it easy.

tabletop lazy susan turntable

We love the modern, octagon shape of this lazy susan turntable.  And it's less expensive to make than a circular turntable top.


More Photos and Build Post

This project plan was created in collaboration with Jaime Costiglio for Handbuilt Holiday - our Holiday series where we bring you a new, free gift plan in the 12 Fridays leading up to Christmas.

Please click here for more photos and build post at JaimeCostiglio.com

Dimensions
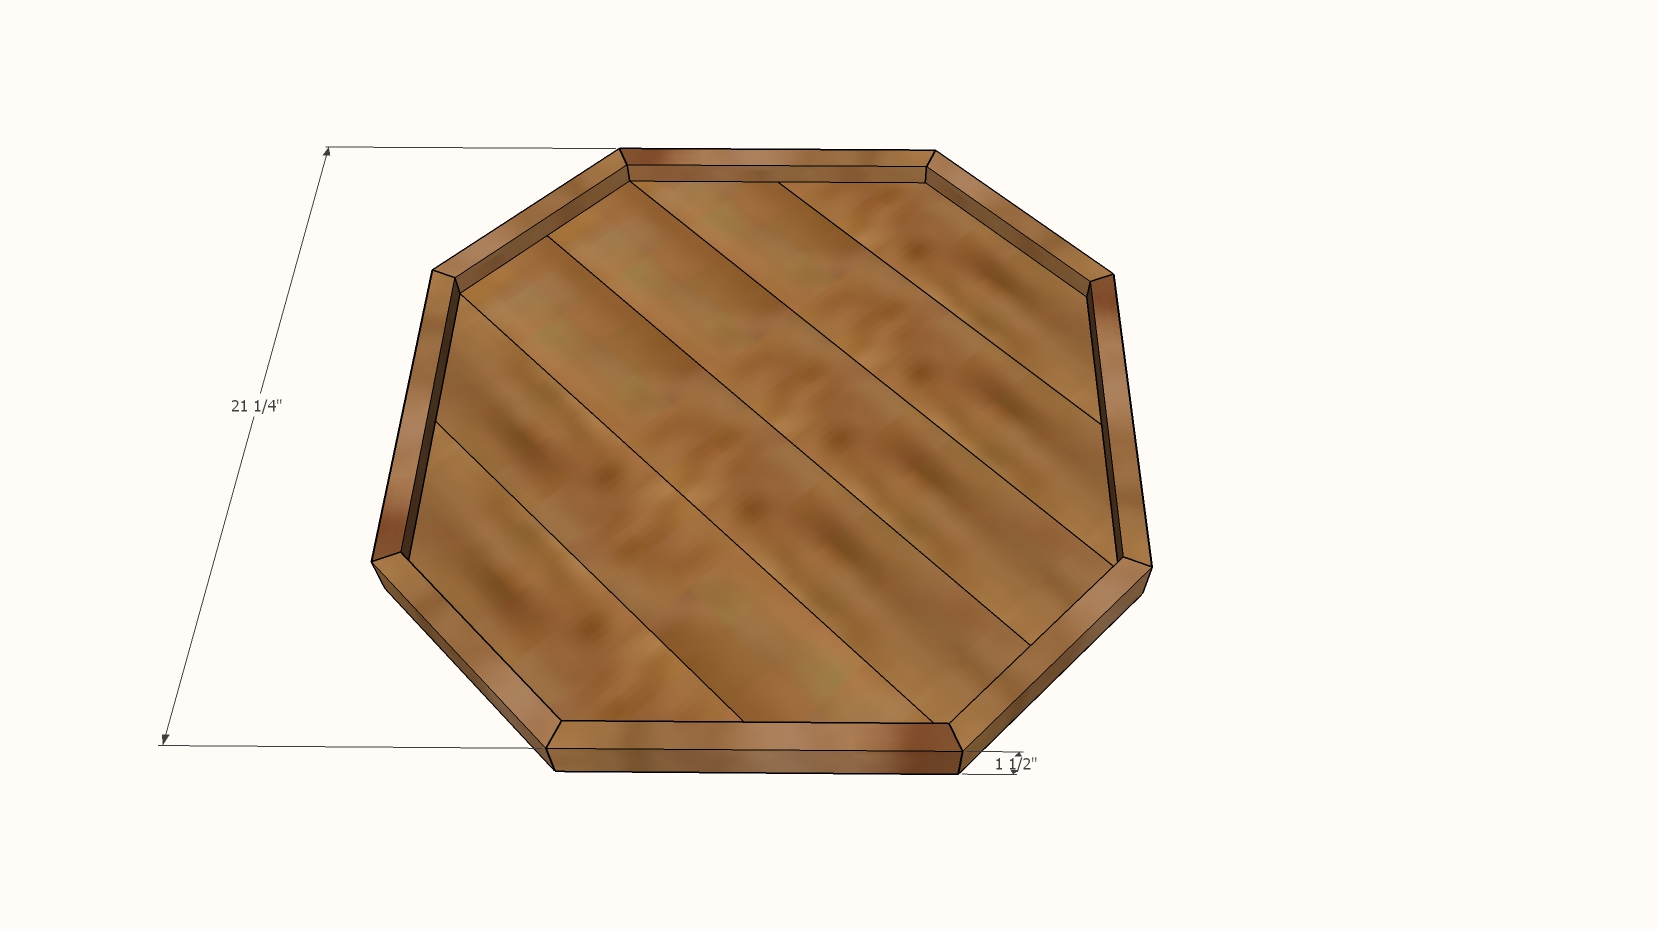
tabletop lazy susan dimesions
About 21" overall and 2" tall

Preparation

Shopping List
  • 1 - 1x4 @ 10 feet long (can use scraps in smaller sections)
  • 1 - 1x2 @ 8 feet long (can use scraps in smaller sections)
  • 12" lazy susan turntable hardware (see Jaime's post)
  • 1-1/4" brad nails
  • wood glue
Cut List
  • 2 - 1x4 @ 21"
  • 2 - 1x4 @ 21" - long point to long point measurement, both ends cut at 45 degree angle, ends NOT parallel
  • * 2 - 1x4 @ 14" -  long point to long point measurement, both ends cut at 45 degree angle, ends NOT parallel 
  • * 4 - 1x2 @ 7" - short point to short point measurement, both ends cut at 22-1/2 degree bevels, ends NOT parallel
  • * 4 - 1x2 @ 9-7/8" - short point to short point measurement, both ends cut at 22-1/2 degree bevels, ends NOT parallel  

* Should be measured and cut to fit

Tools
Tape Measure
Pencil
Safety Glasses
Hearing Protection
Drill
Miter Saw
Brad Nailer
Power Sander

Instructions

Step 1

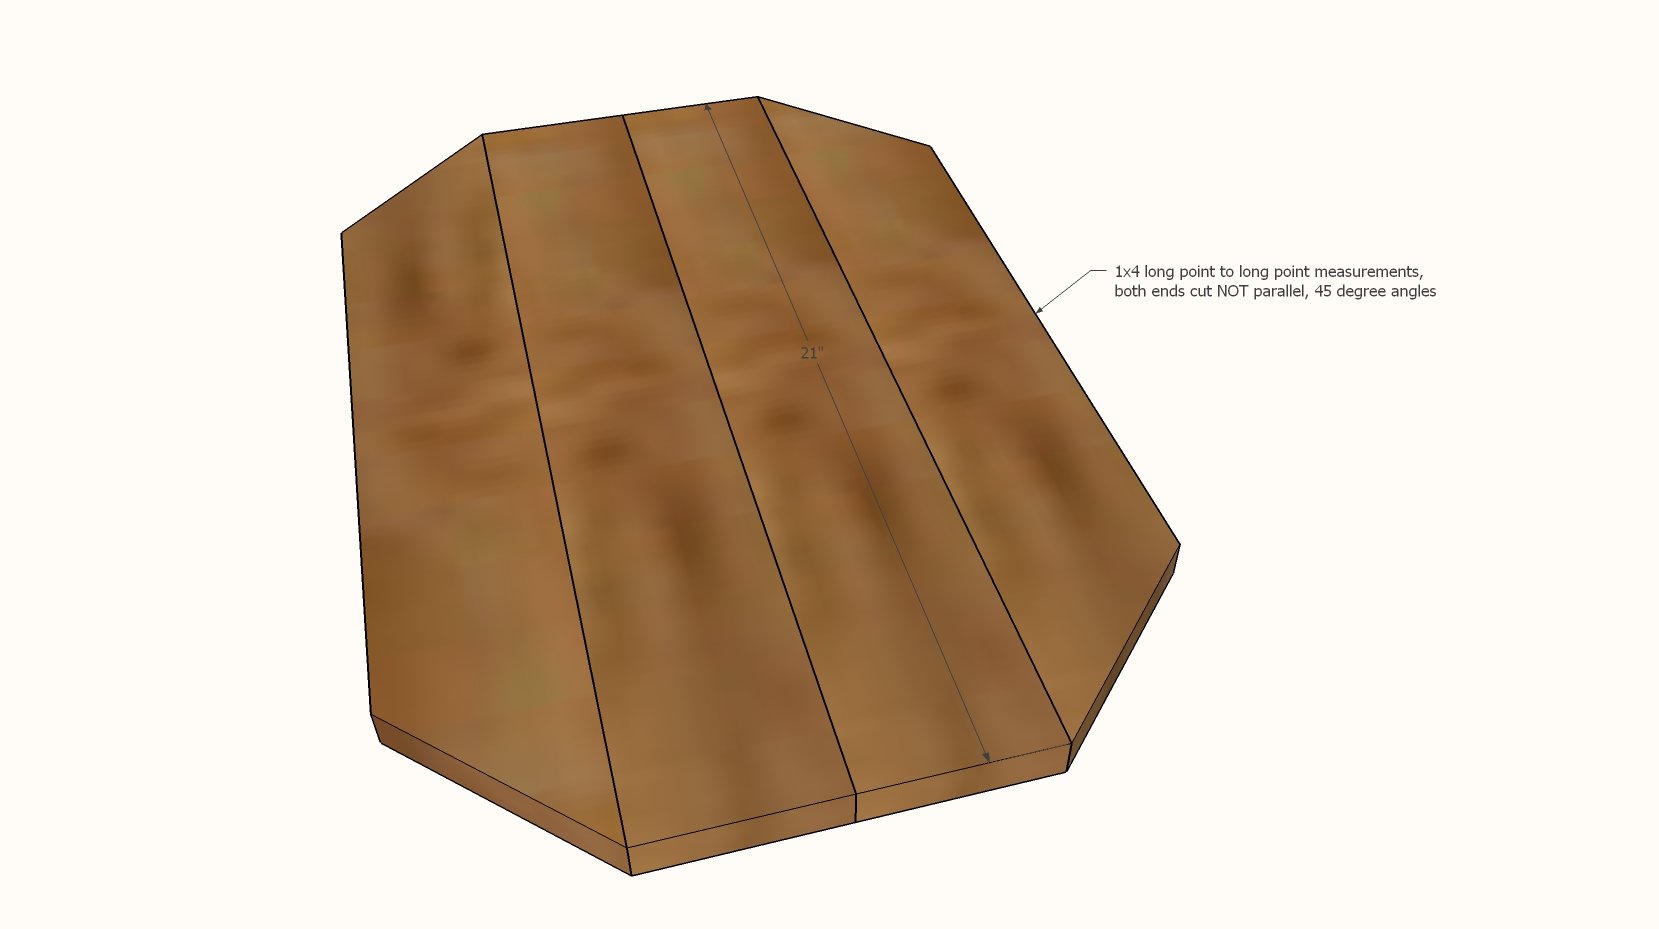
Cut two 1x4s with a miter saw to 21" length.

Set miter saw to a 45 degree angle.

Cut two 1x4s 21" long, both ends cut at 45 degrees, long point to long point measurement, ends NOT parallel.

Apply glue on edges to be joined.

Clamp pieces together and allow glue to dry.

Step 2

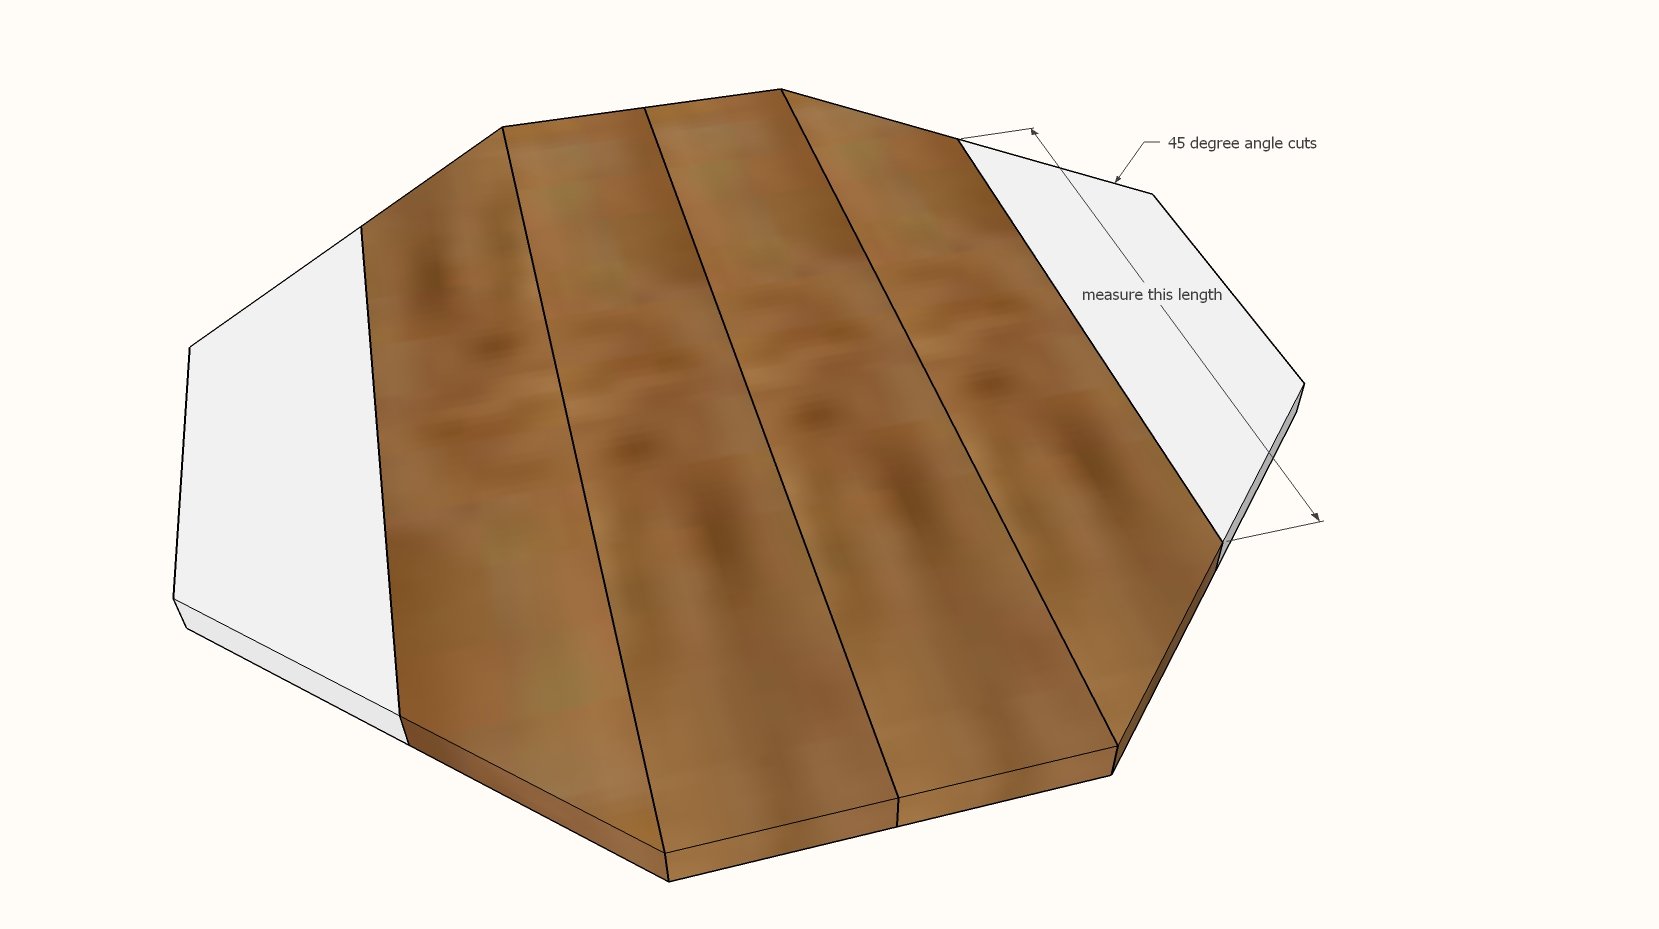
While glue is drying from step 1, measure the short point to short point of the outermost pieces on the project, as shown in diagram.

Use the miter saw to cut two 1x4s to this length, long point to long point measurement, both ends cut at 45 degrees, ends NOT parallel.

Apply glue and clamp to the project and let dry.

Step 3

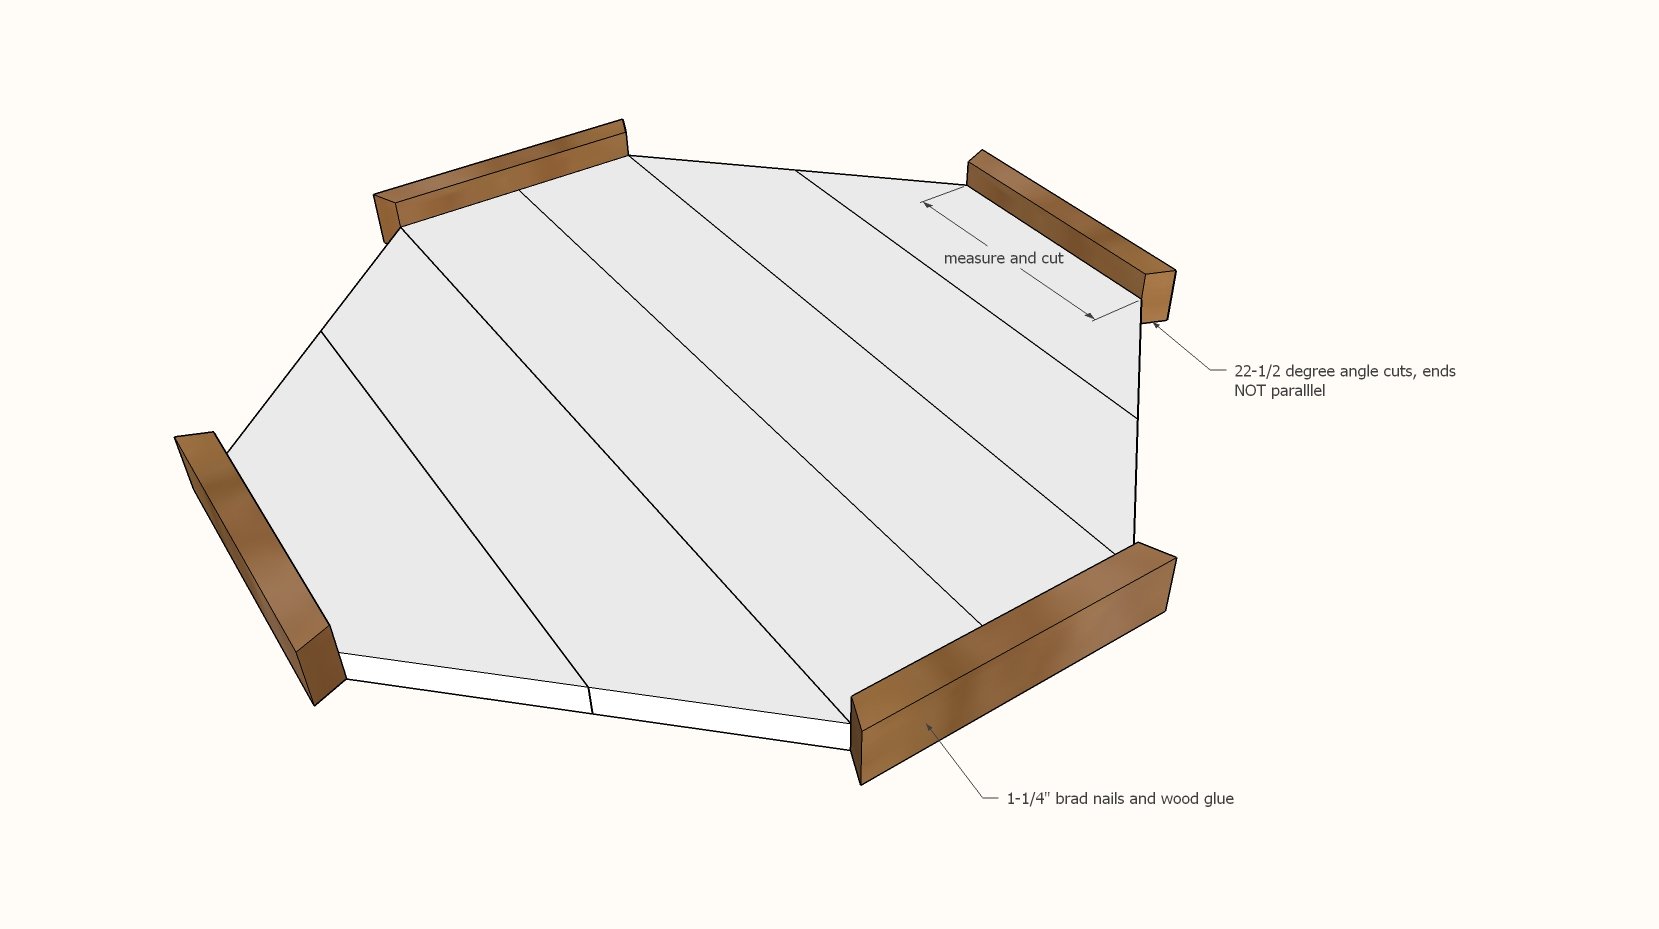
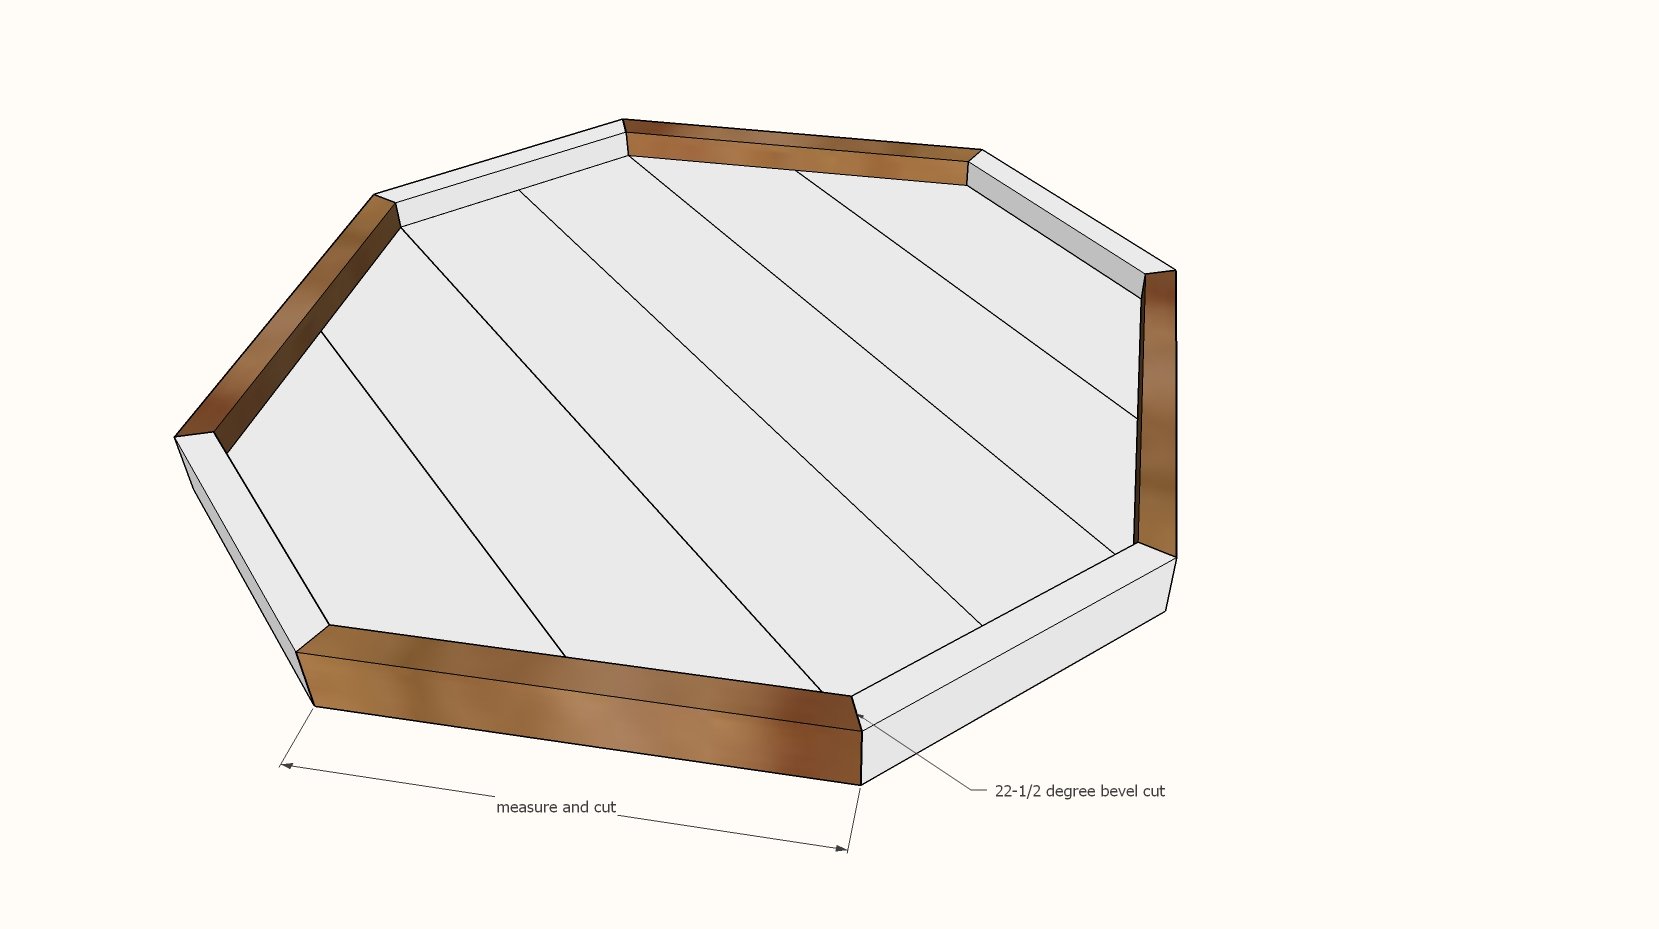
While glue is drying, cut out the 1x2 trim pieces.

Start by taking a measurement of the four shorter edges.  This will be your short point to short point measurement for the trim pieces.

Set the miter saw to a 22-1/2 degree bevel.

Cut the 1x2 pieces and and glue and use 1-1/4" brad nails to attach.

Step 4

Now measure the final pieces and cut to fit.  Note that each piece will most likely be slightly different from the others, so measure and fit each pieces.

Nail and glue to the project.

Step 5

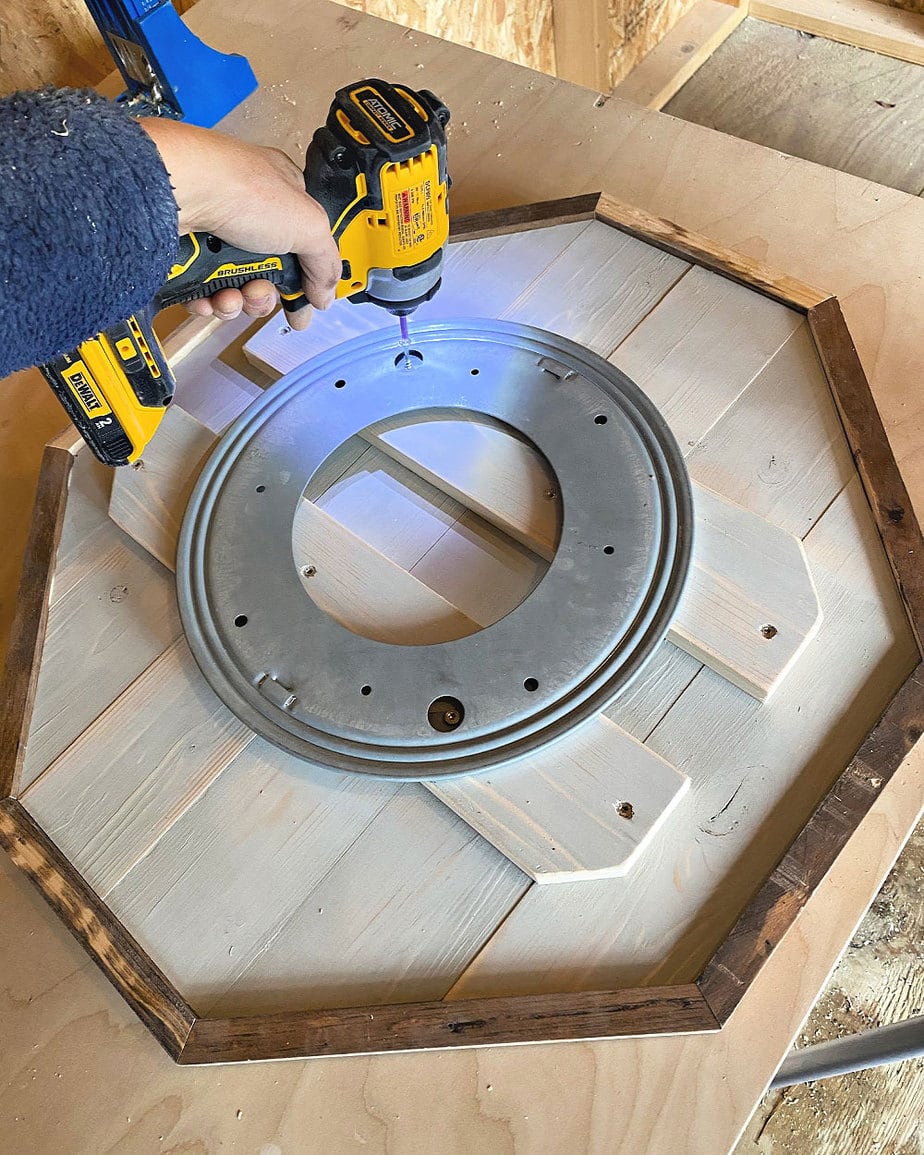
Jaime also added additional 1x4 supports underneath.

Then attached the lazy susan turntable to the bottom.

You can read more about how she did this here.