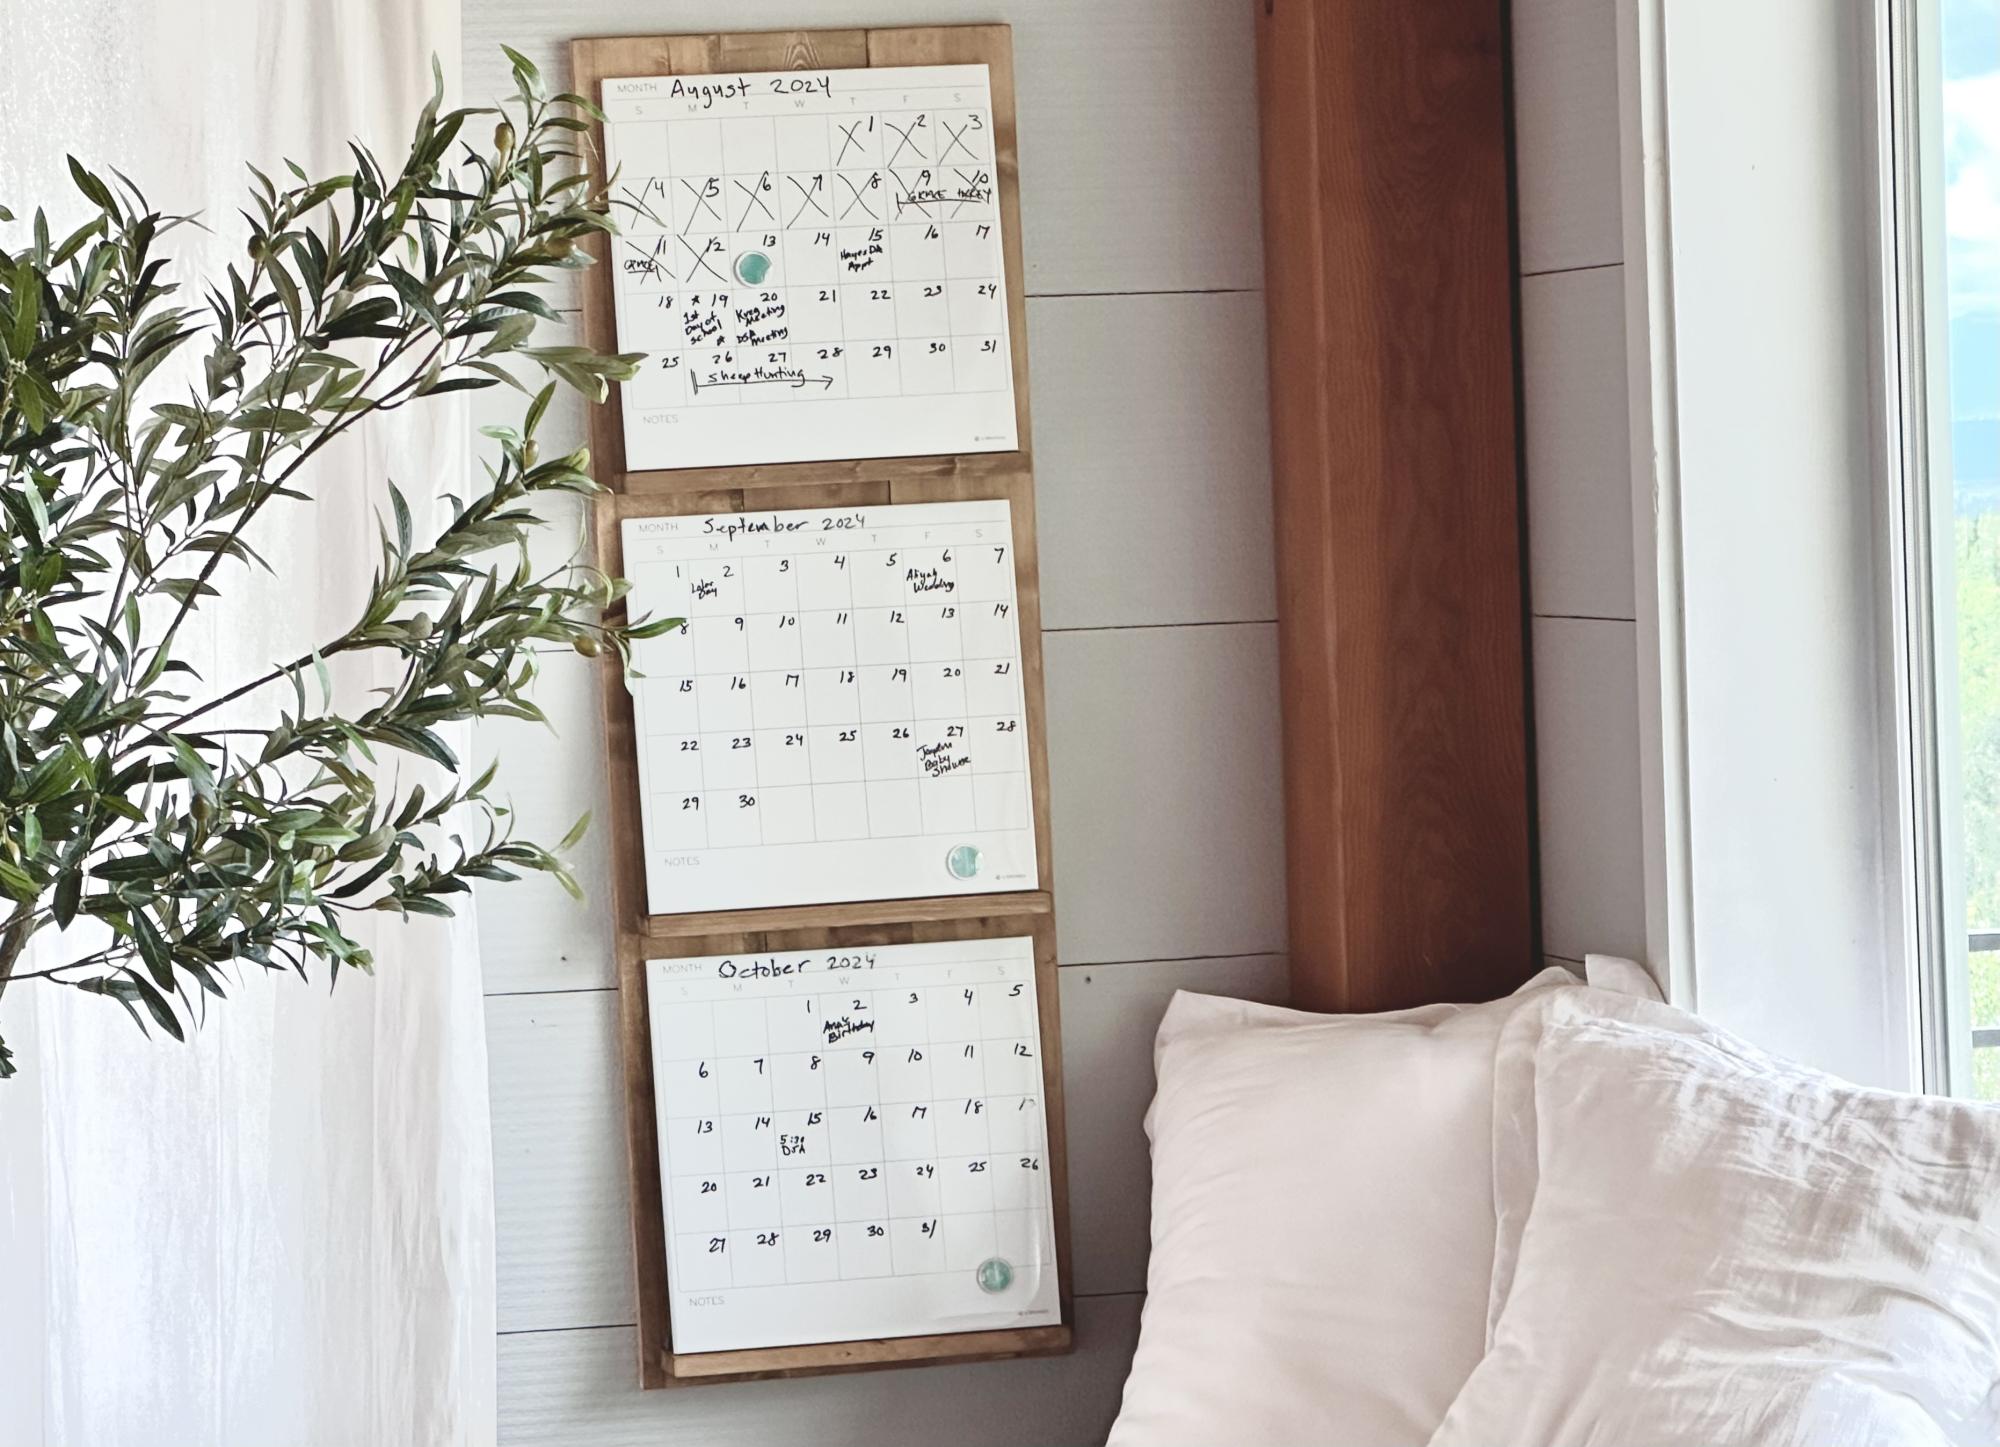


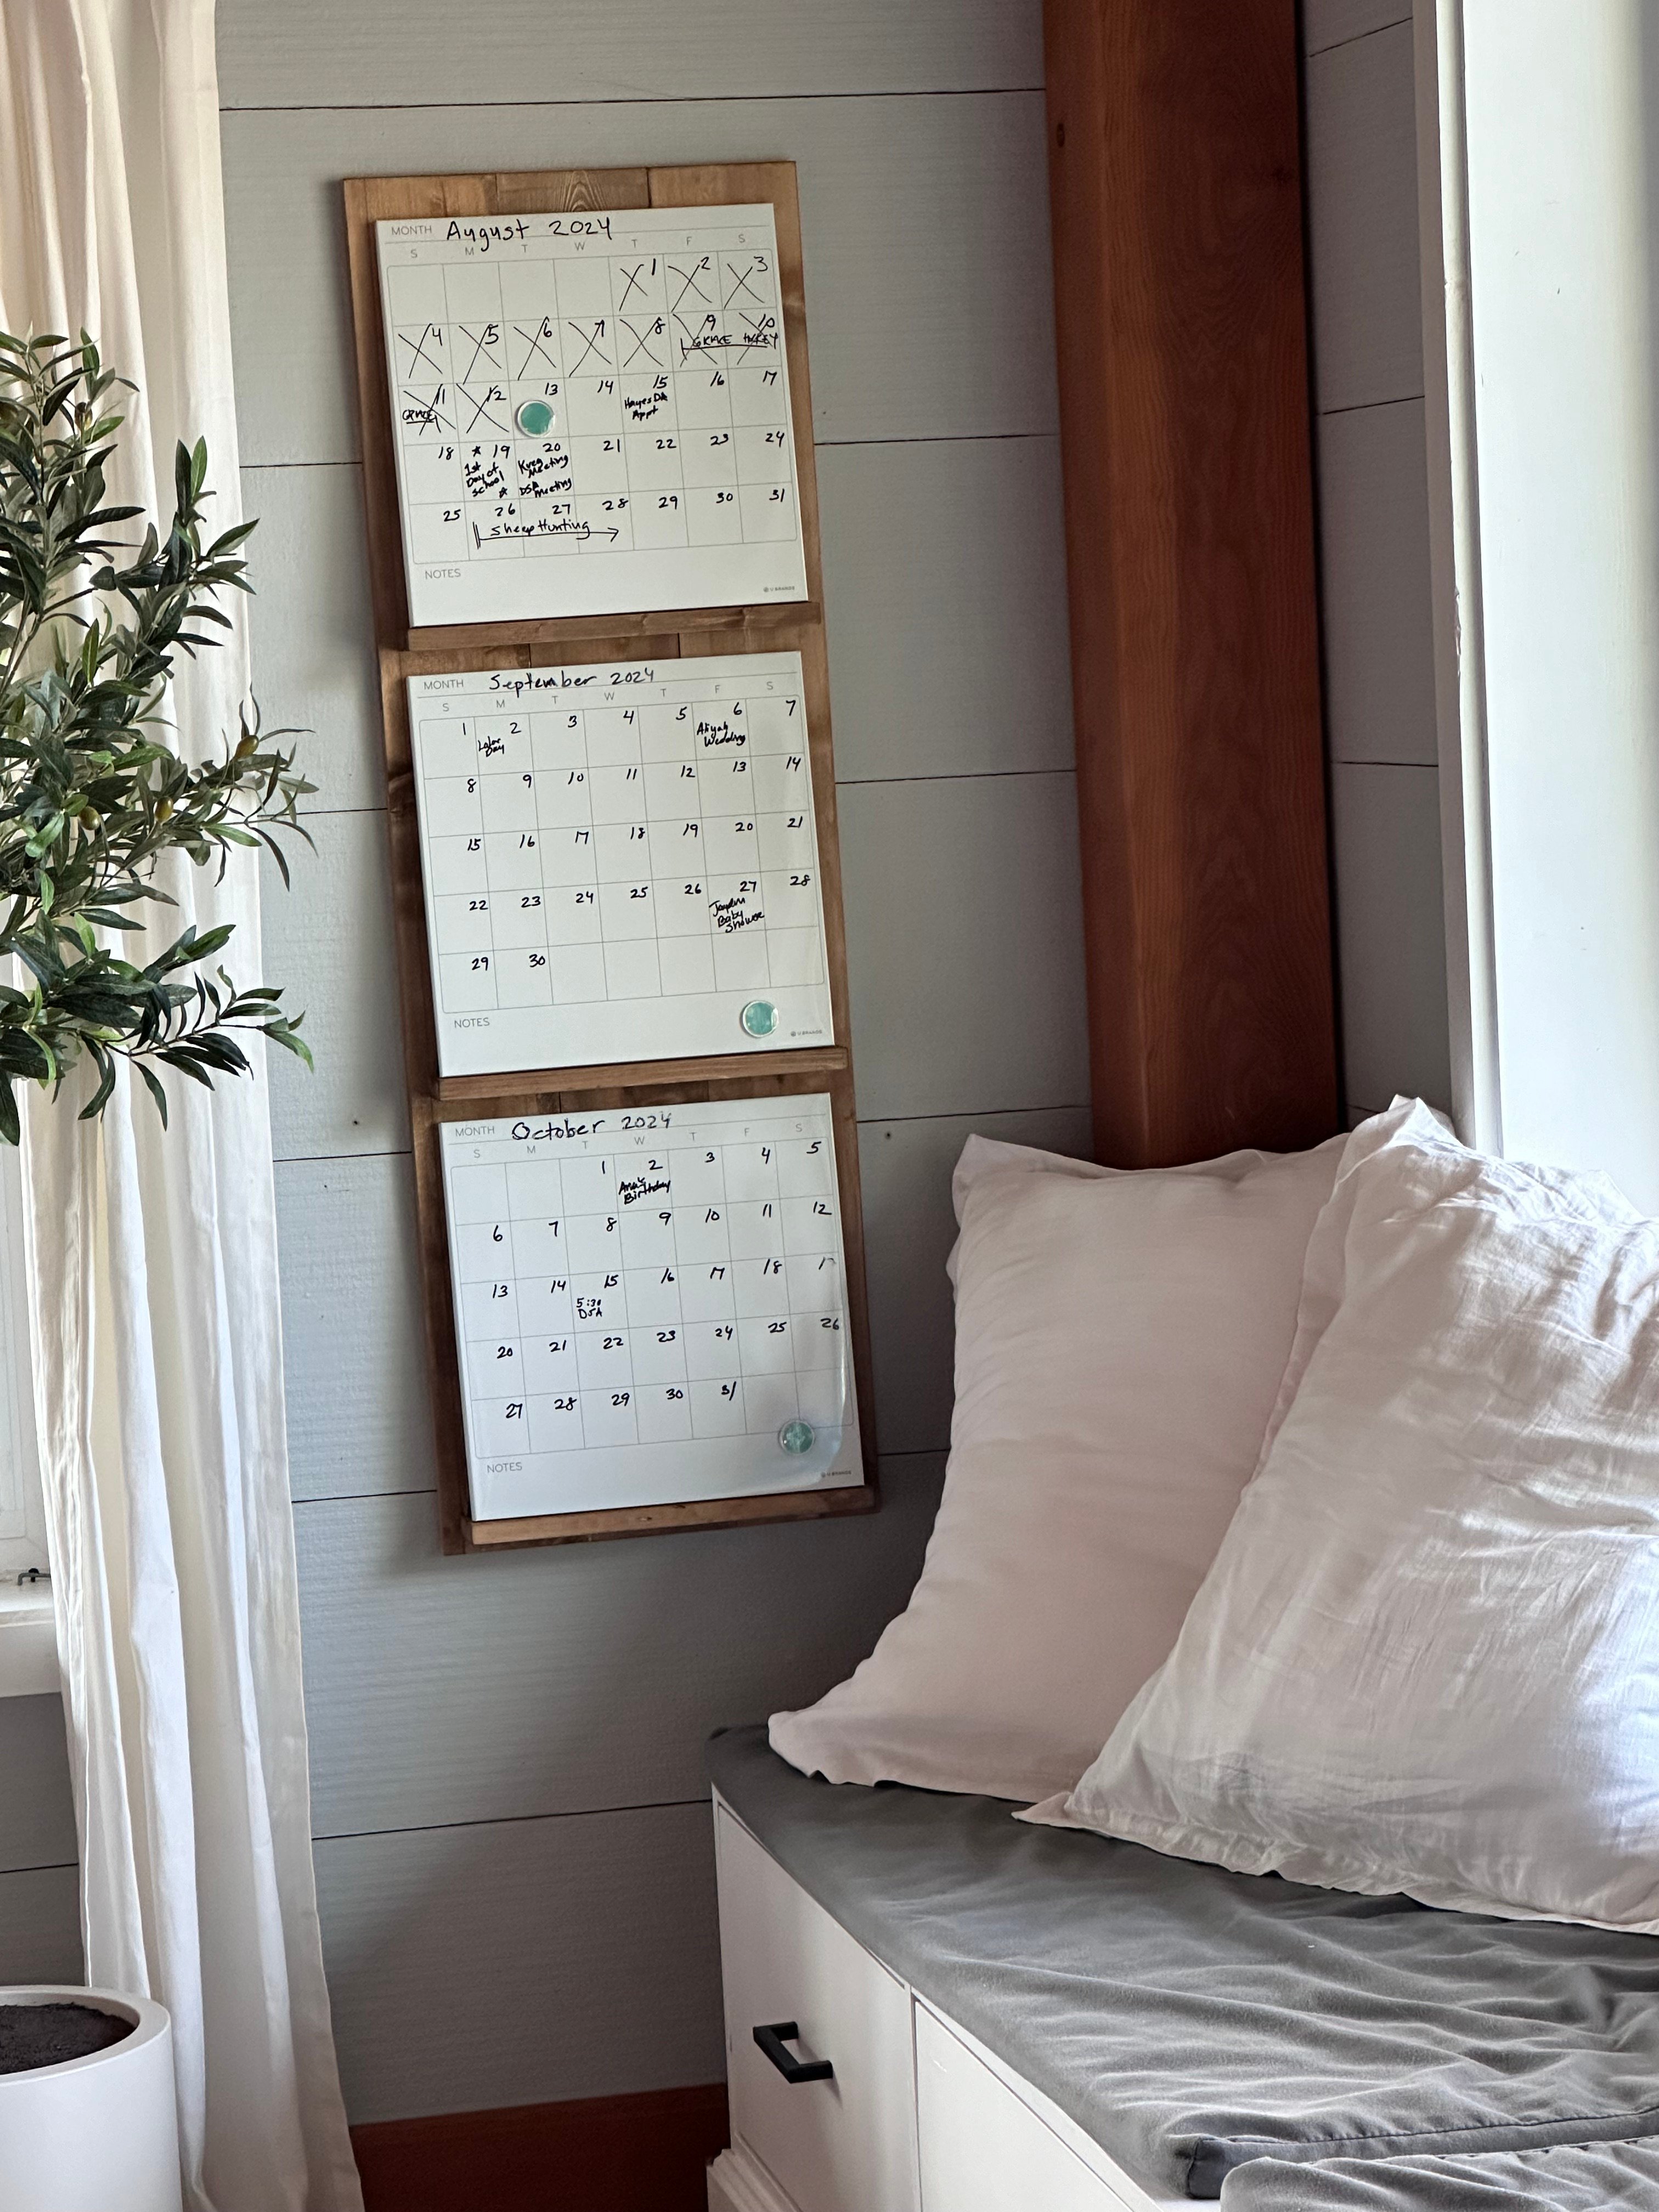
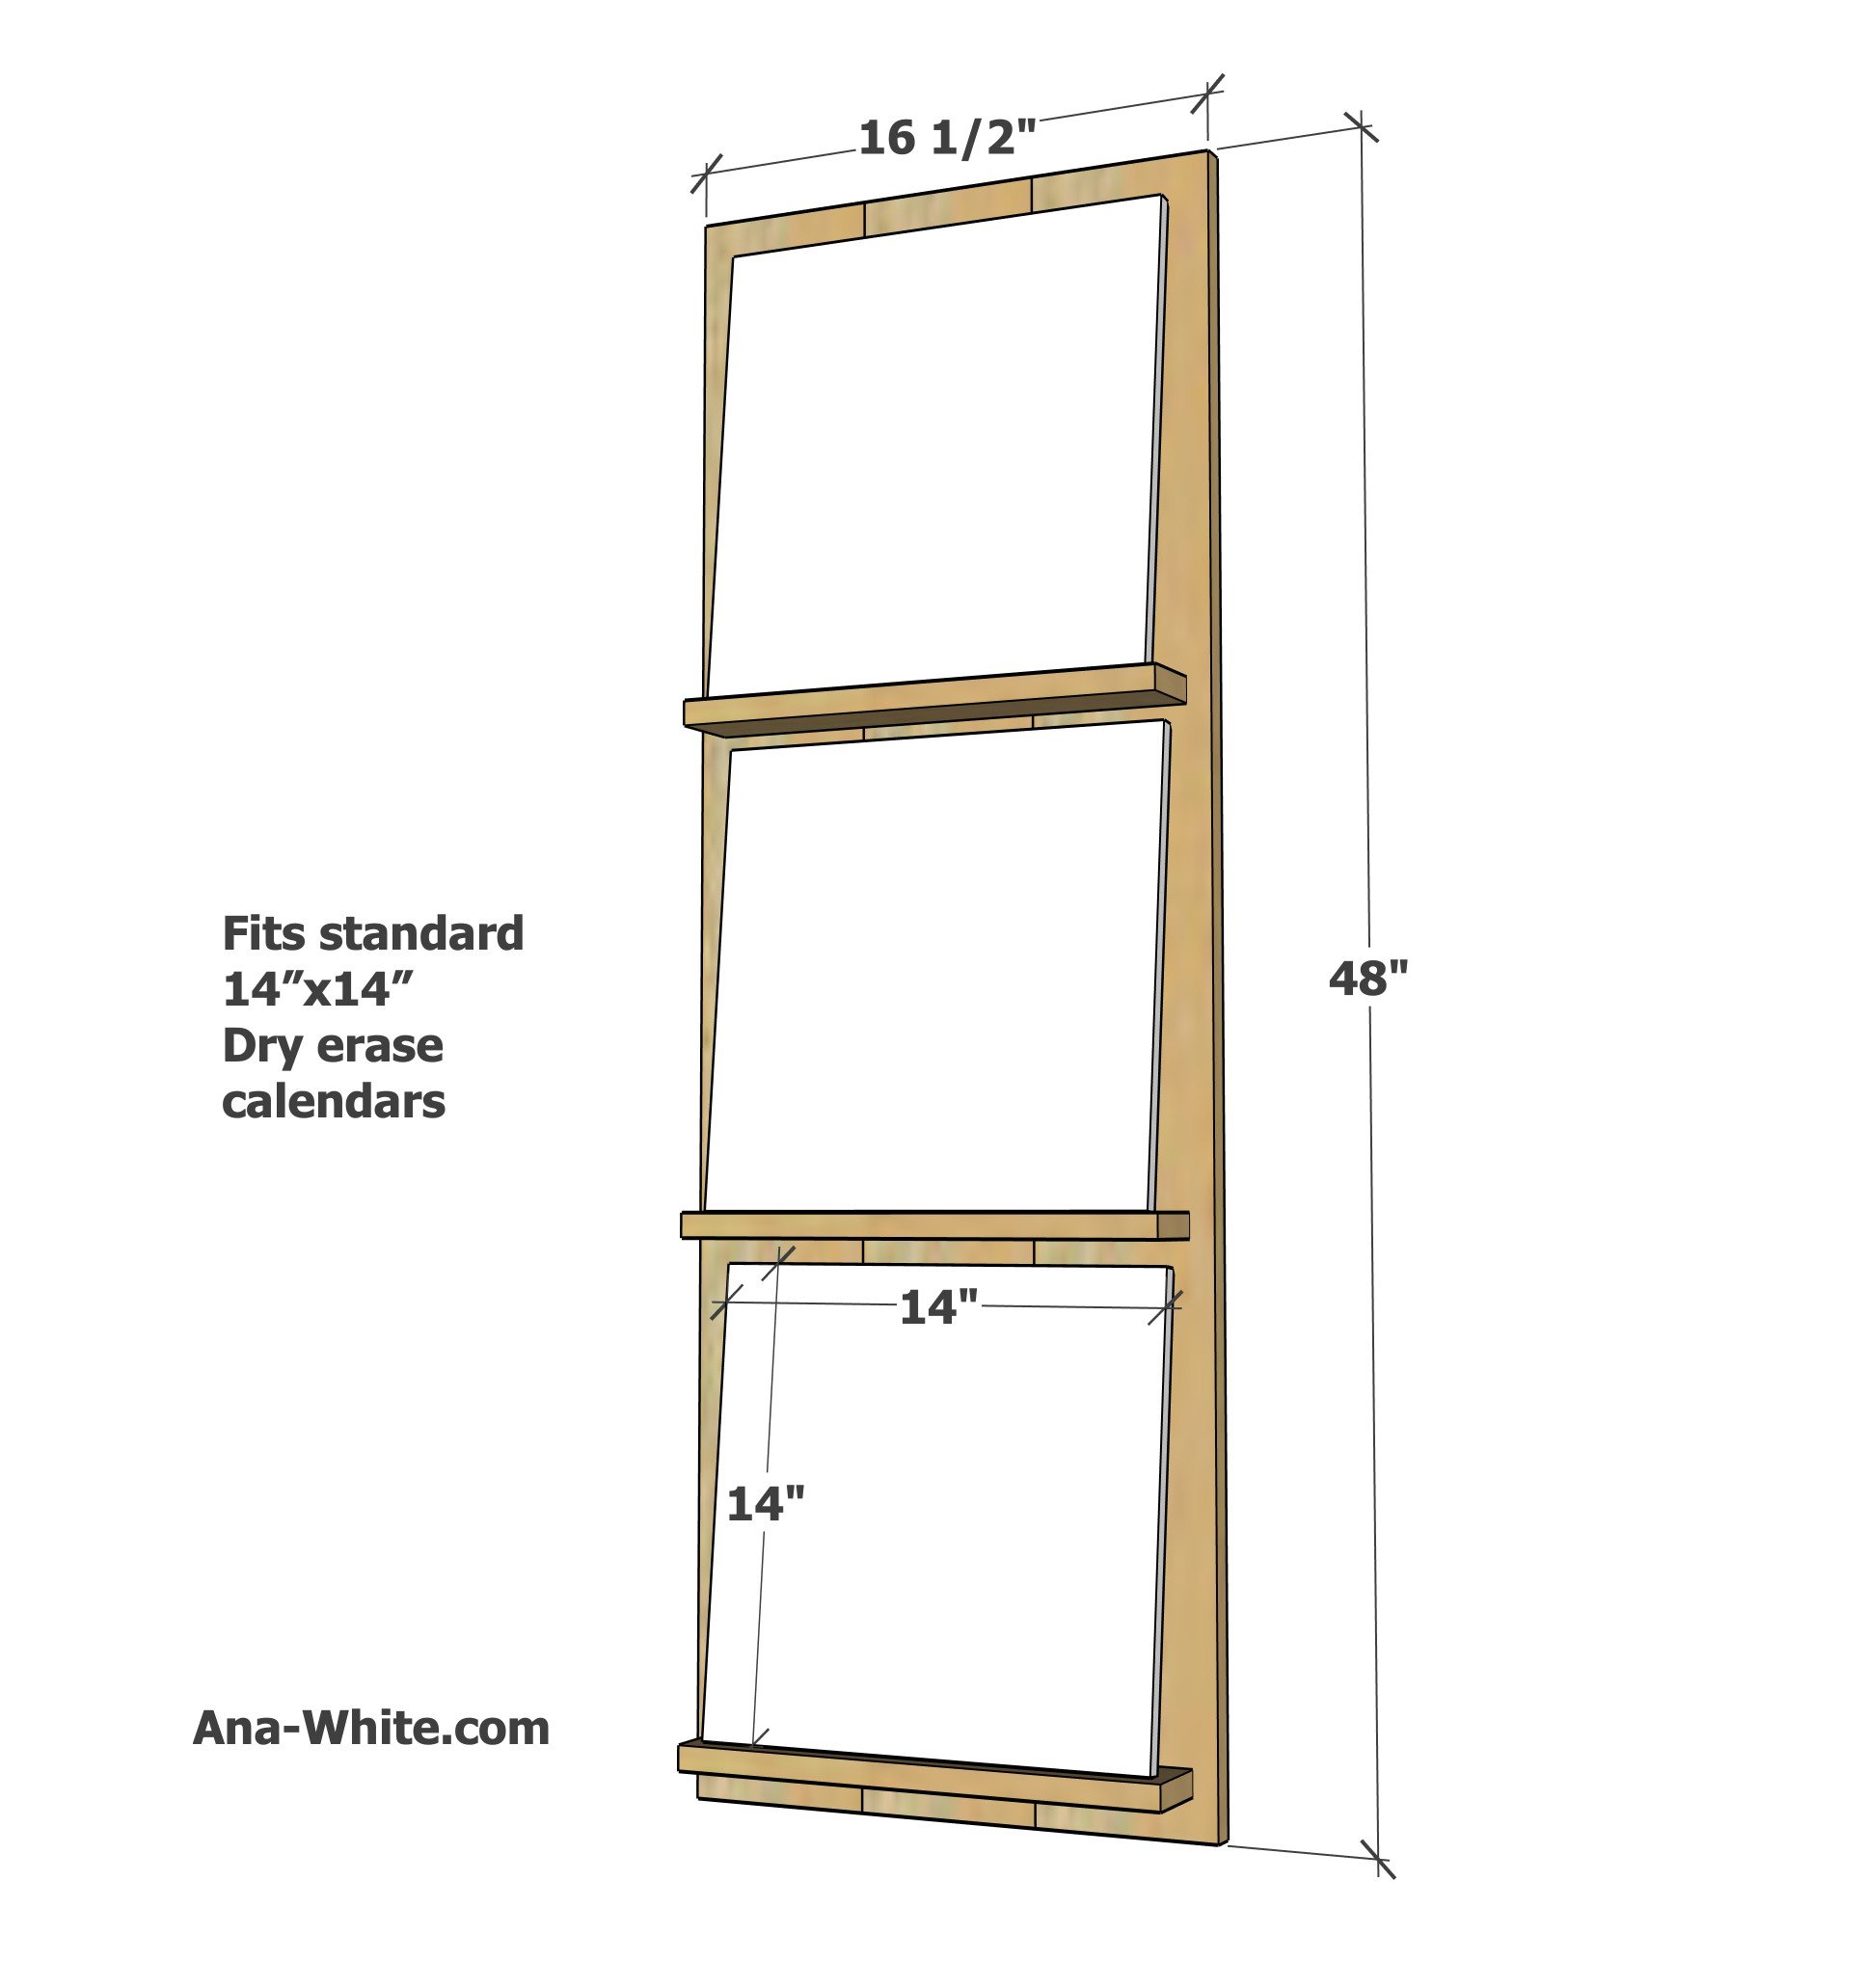
The must make calendar project for organized households, this shelf is designed to three fit standard 14" x 14" dry erase calendars, so you can stay organized three months out! Rotate calendars upward as months pass, for easy transitioning between months.
No more throw away calendars. Only one project to hang on the wall. Make and keep your plans up to three months out.
This amazing project is super easy to make with just a few boards and screws. Paint or stain any color.
Free step by step plans with video from Ana-White.com
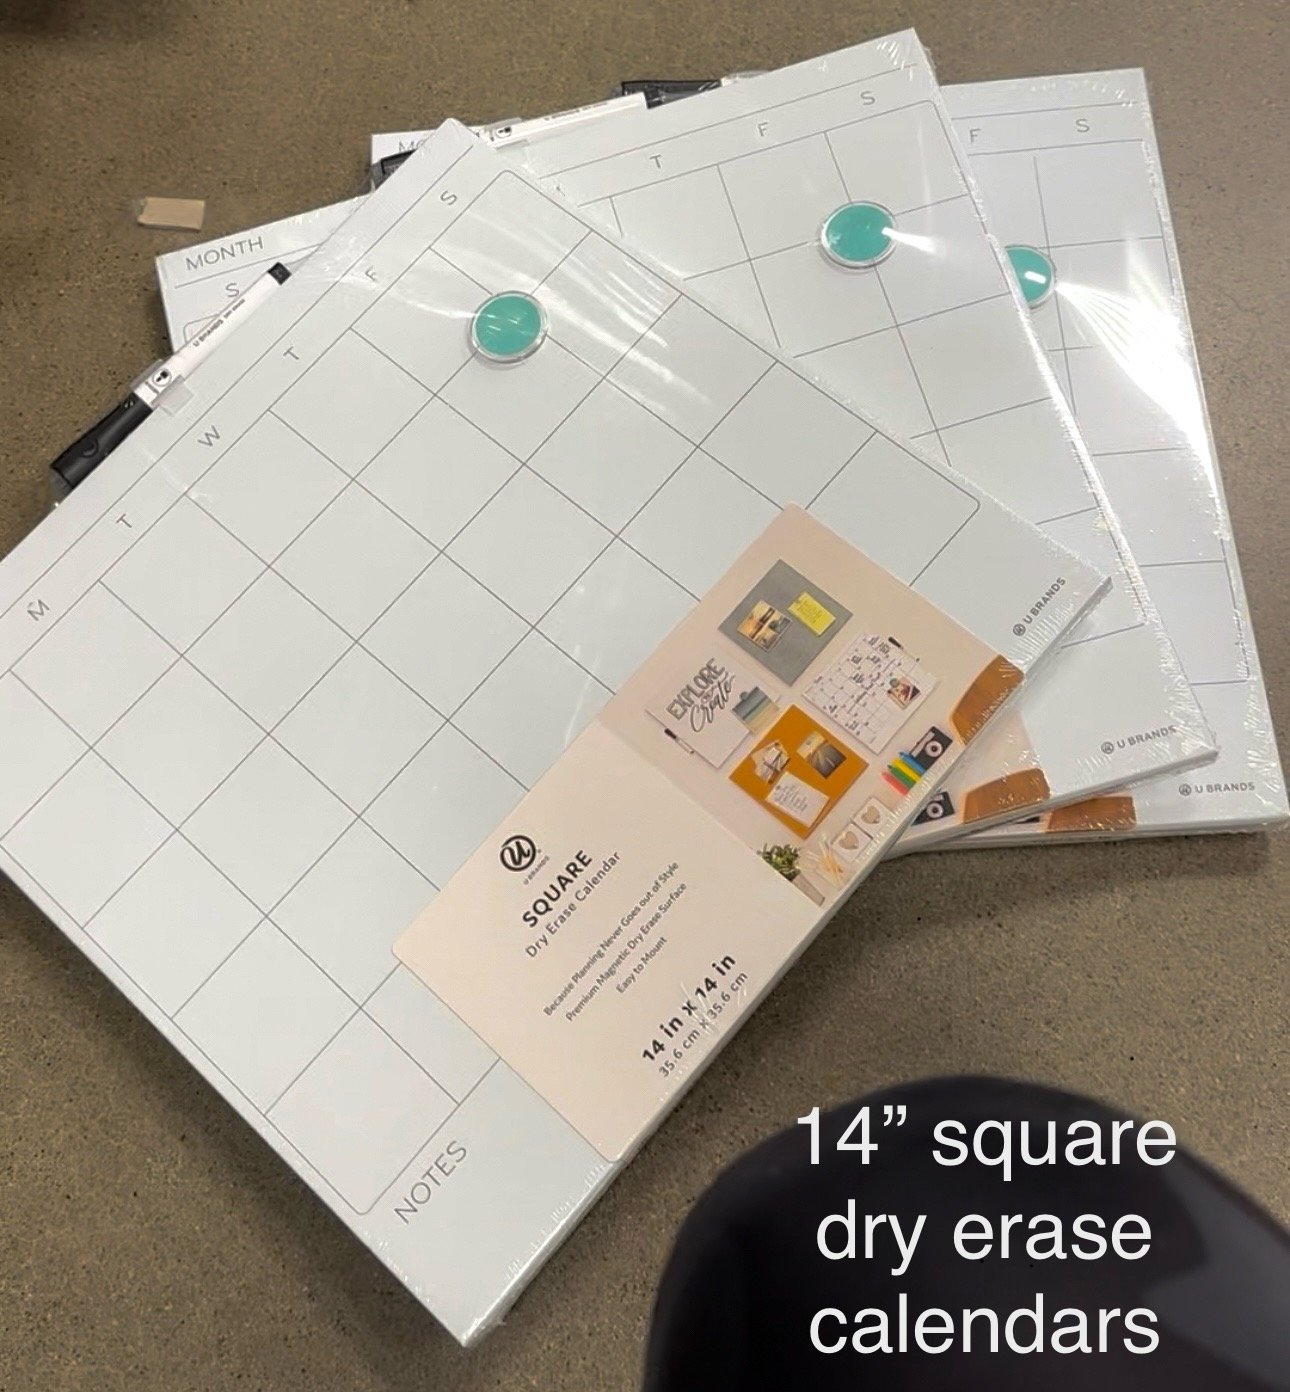
Start with 14” square dry erase calendars, about $7 each at most superstores or online.
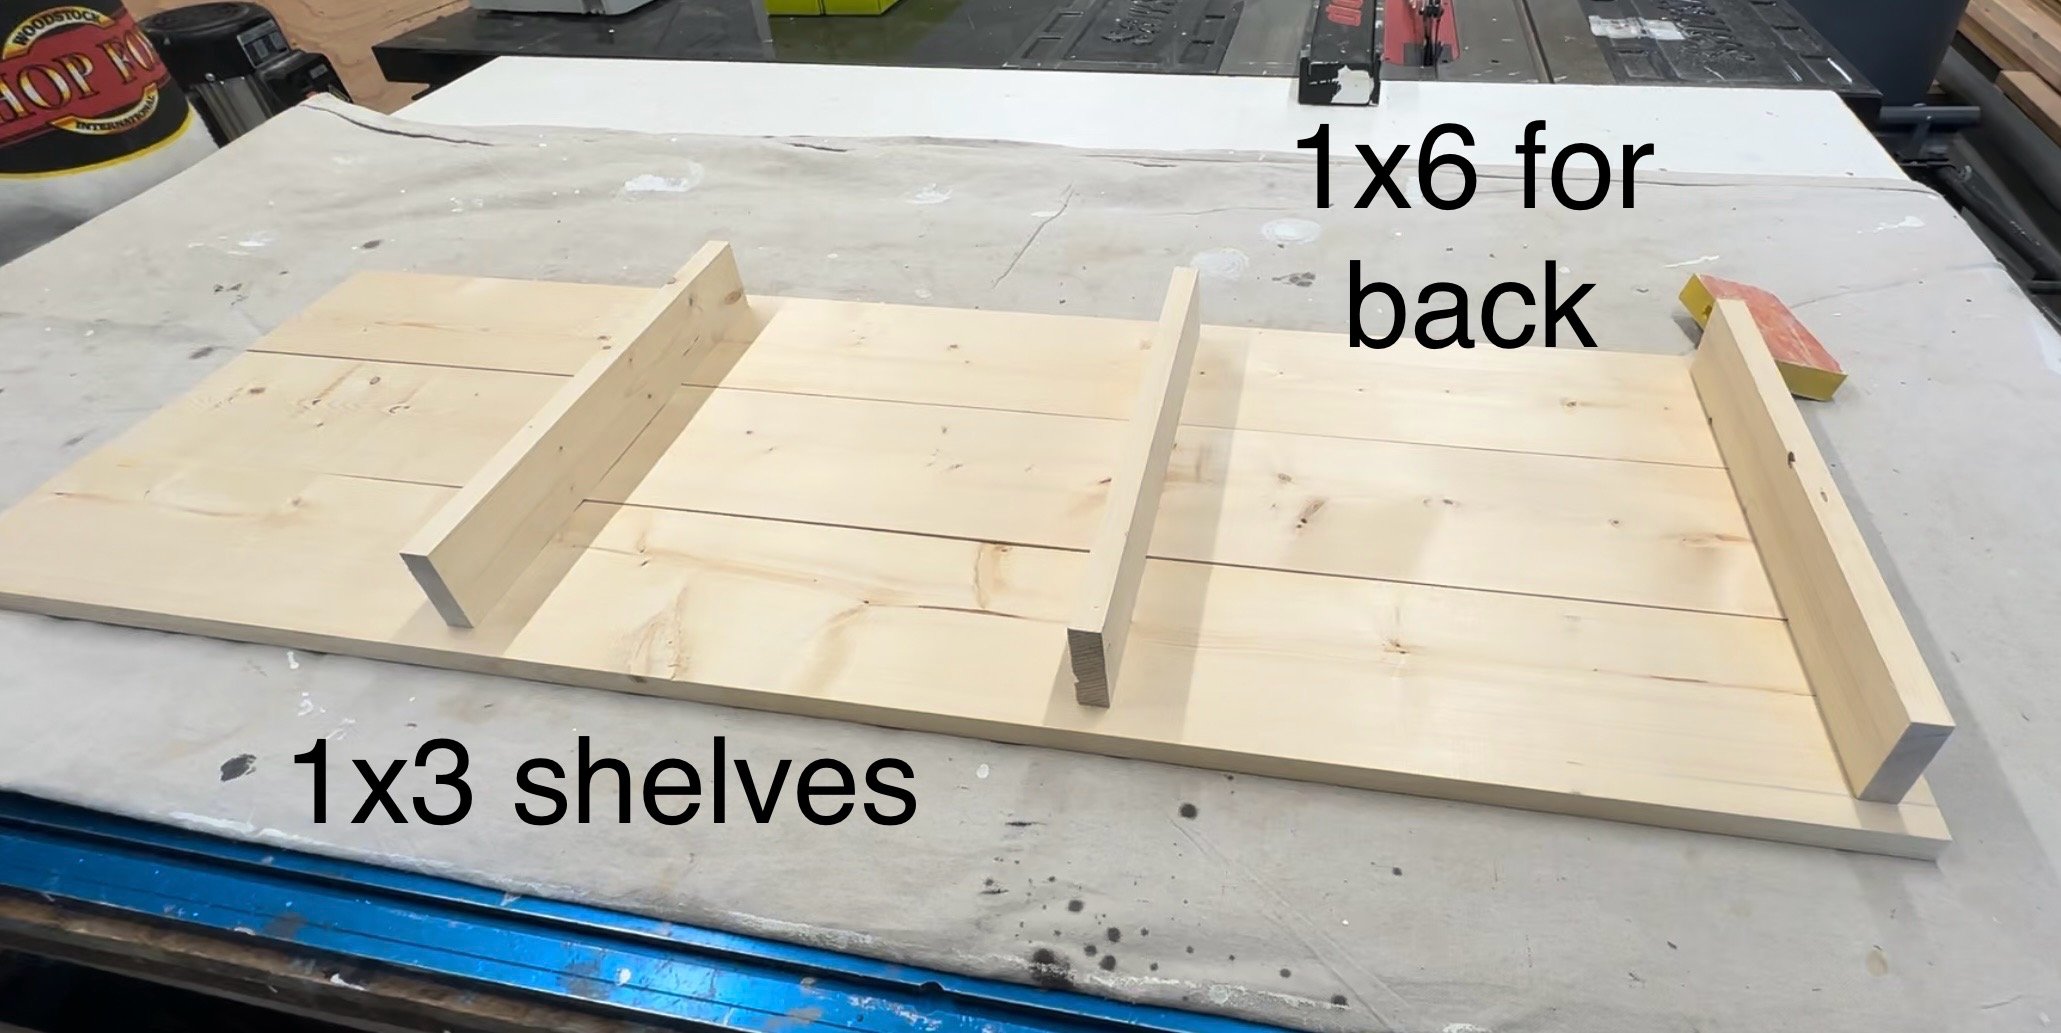
Build a shelf sized to fit the calendars using the plans below.
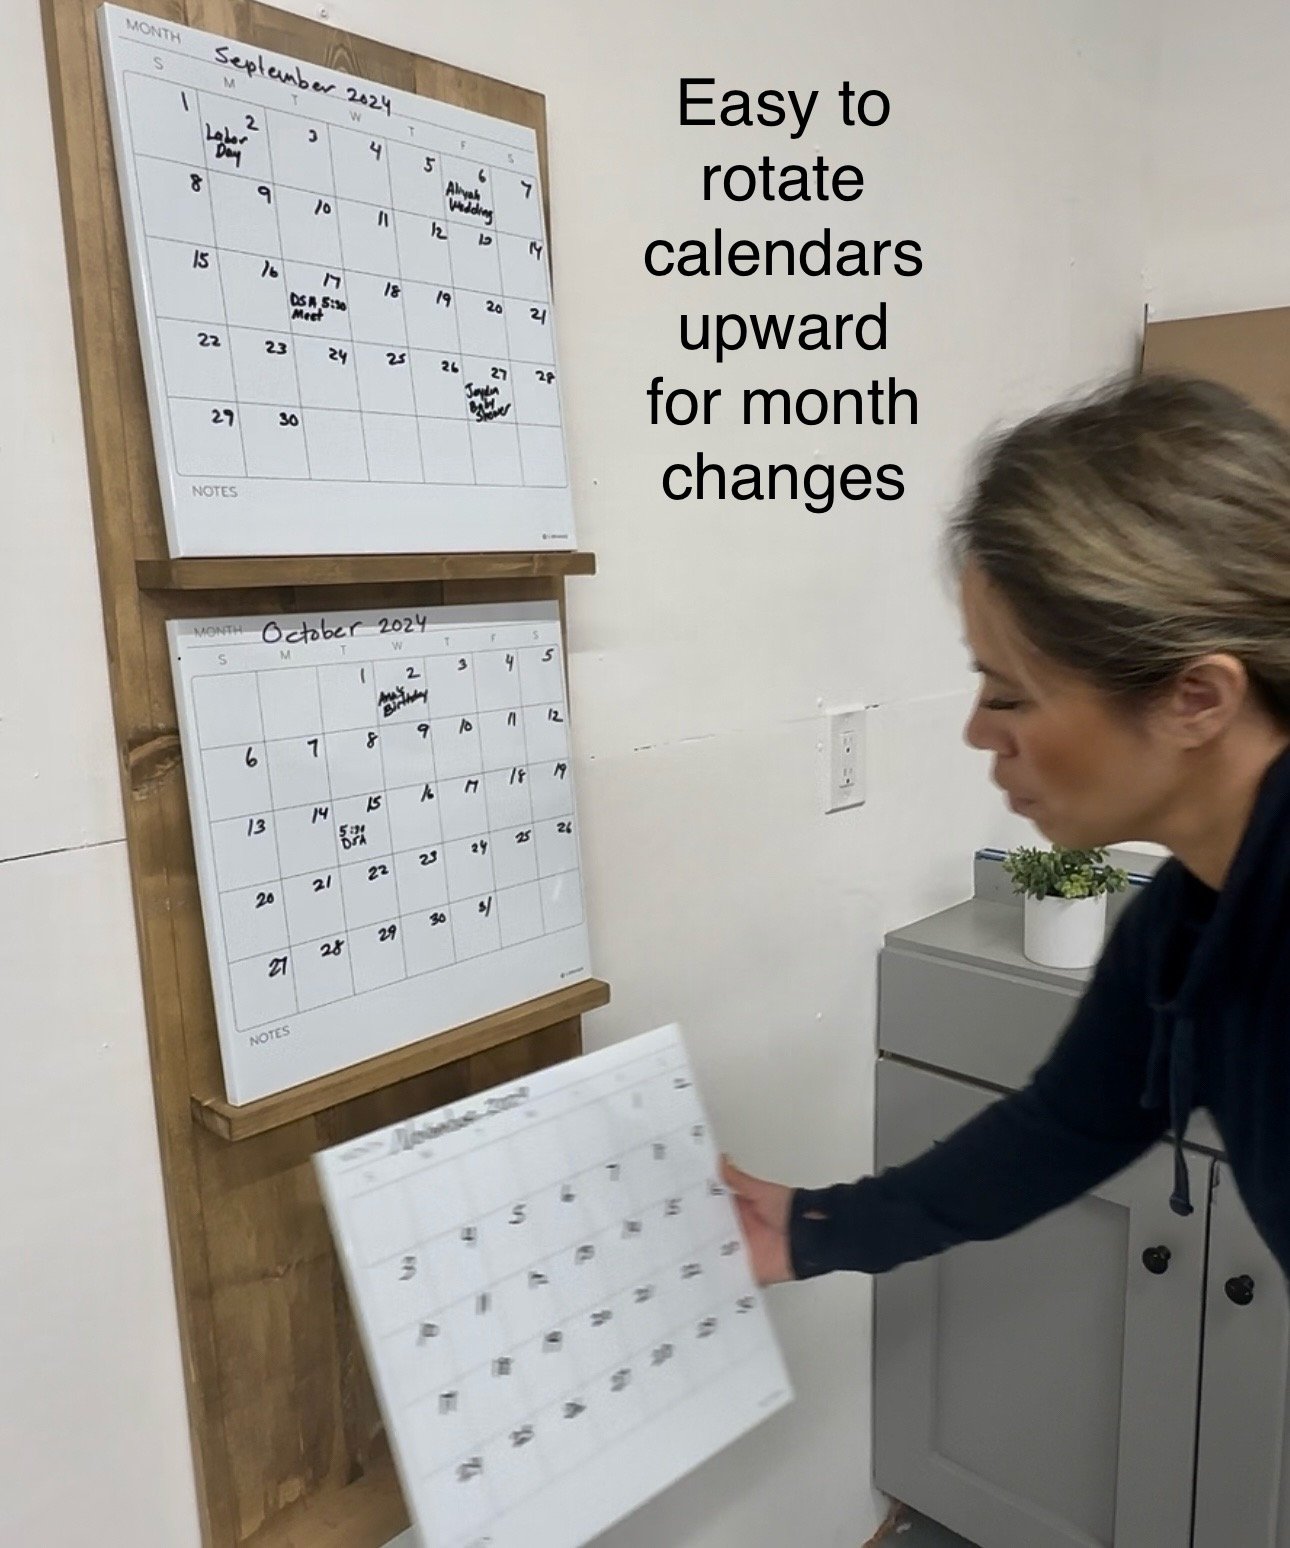
Easily change between months by rotating calendars upward.
Why I Designed This Project
We've tried so many different calendar ideas - from paper calendars, to giant desktop paper calendars - I tried syncing electronic calendars, and wall mounted dry erase. Nothing ever solved all the problems and was easy to use.
Yesterday, I was out shopping and saw 14" x 14" square dry erase calendars on the shelf.
And the project just came to me, right there in the store aisle. I could see it, see how it worked, I knew exactly to build.
Twelve board feet of 1x6 and four board feet of 1x3, and eighteen screw later, I built this!
Why this is the Best Wall Calendar System Ever
We've struggled for years with so many different calendar ideas and products. Here's why this calendar is the best system we've ever had:
- Calendars set on a shelf, so can be easily removed to edit and change
- 3 month calendar, so you are able to add events and plans to the next month, and the month after, without having to take notes, flip pages or other hassles
- Easily transition to the next month by simply removing the top calendar and erasing, then moving the two lower calendars up, and then adding the now blank calendar to the bottom, preserving all your plans and appointments
- Displayed clearly on the wall for all to see at all times
- Beautiful solid wood design adds a decor element to your space
- It's only one thing to hang - not multiple items to hang
- Narrow profile fits in narrow spaces, even the side of the fridge
- Shelf is big enough to hold the dry erase markers
- Eco-friendly - stop buying throw away calendars
- Long term solution - you can replace the square dry erase calendars easily if needed
This calendar system is going to help us keep our times organized and make plans well in advance.
How I Built this Calendar Shelf
While this is a quick and easy build, there is a technique to hide the screws on the back - do take a minute to watch my video tutorial:
Free Plans to Build Your Now 3 Month Calendar Wall Shelf
Are you ready to build it? Here's the free plans!
Pin For Later!

Preparation
- 3 - 14" x 14" dry erase calendars (these are the ones I used)
- 12 board feet of 1x6 (can be three 4' long boards, or an 8' and a 4')
- 4 board feet of 1x3 boards
- 18 - 1-1/2" self tapping star bit screws (spax or similar)
- heavy duty picture hanging bracket and wall anchor (or can screw directly to studs in the wall)
- Paint or stain as desired
- 120 grit sandpaper
- 3 - 1x6 @ 48"
- 2 - 1x3 @ 15-1/2"


Instructions
Step 1
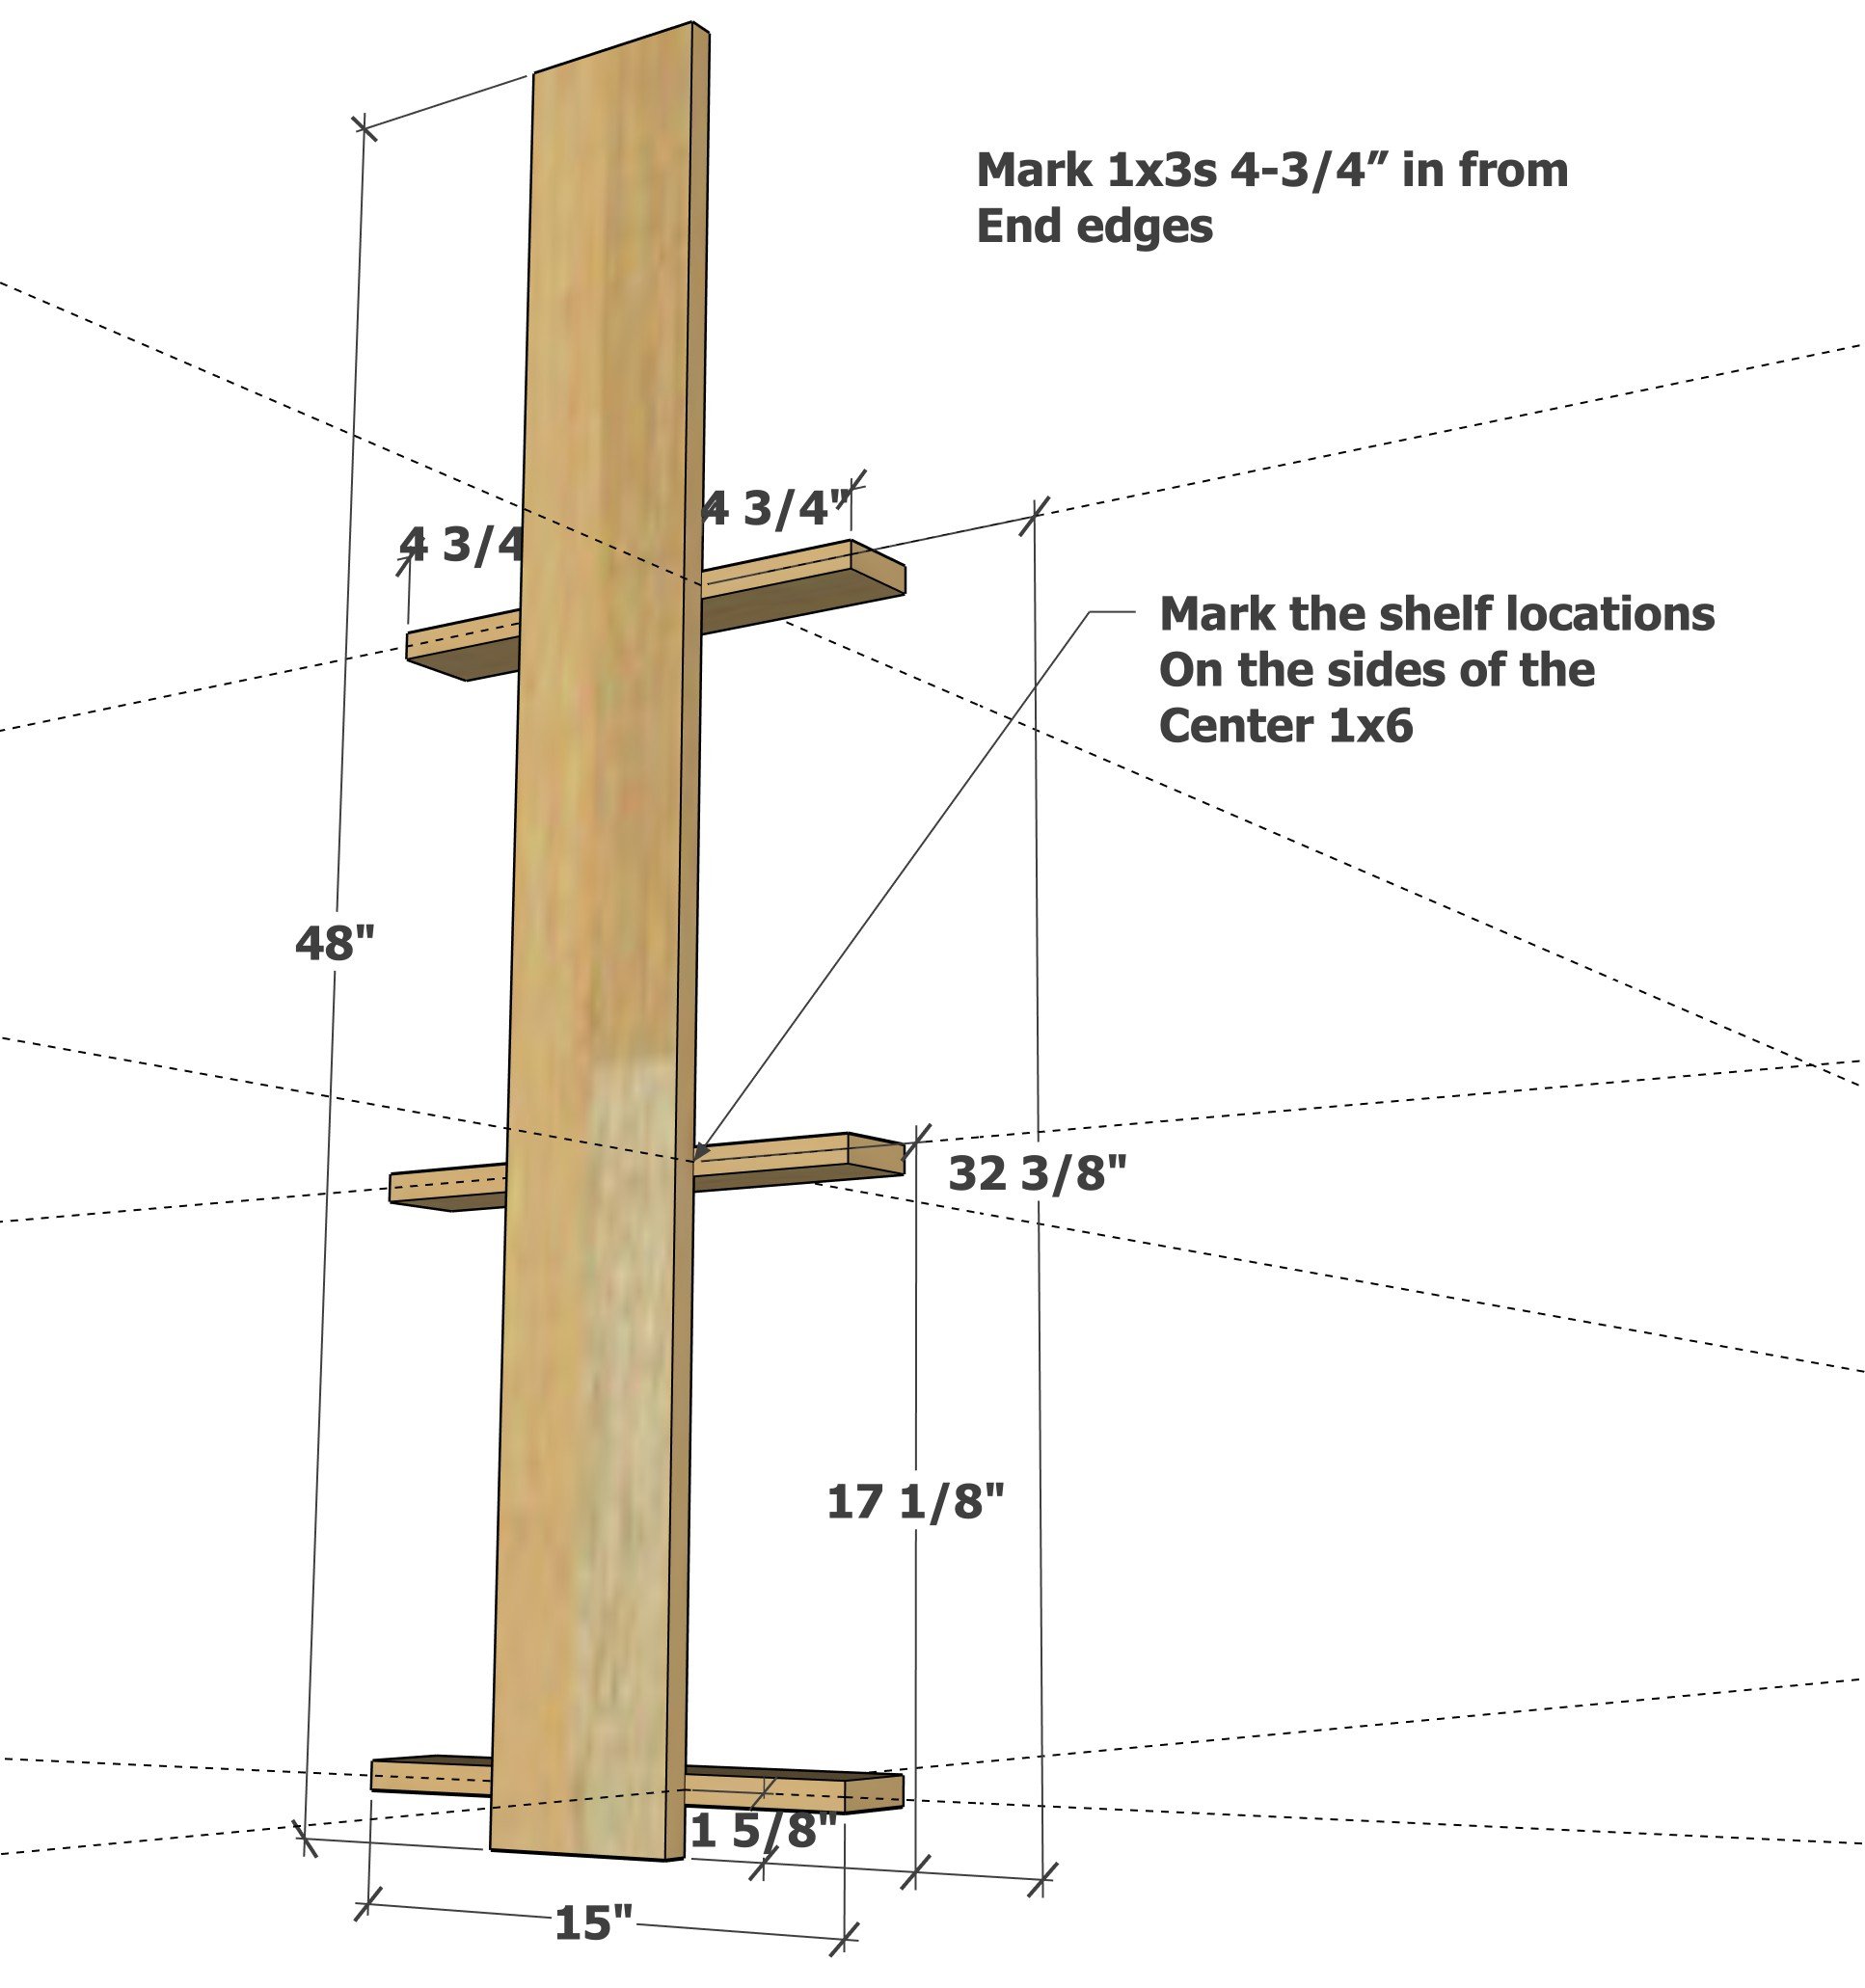
On one of the 1x6 boards, mark on the sides at 1-5/8", 17-1/8" and 32-3/8" as shown in the diagram.
On all three of the 1x3 boards, mark inward from both cut ends on the edge side, 4-3/4"
This is shown in the full YouTube tutorial video.
Place the three 1x3s on edge on a flat, level surface.
Line the 1x6 on top, and screw to the shelves.
Use a speed square to make sure the shelves are attached to the 1x6 perpendicular.
Two screws per shelf are required.
Step 2
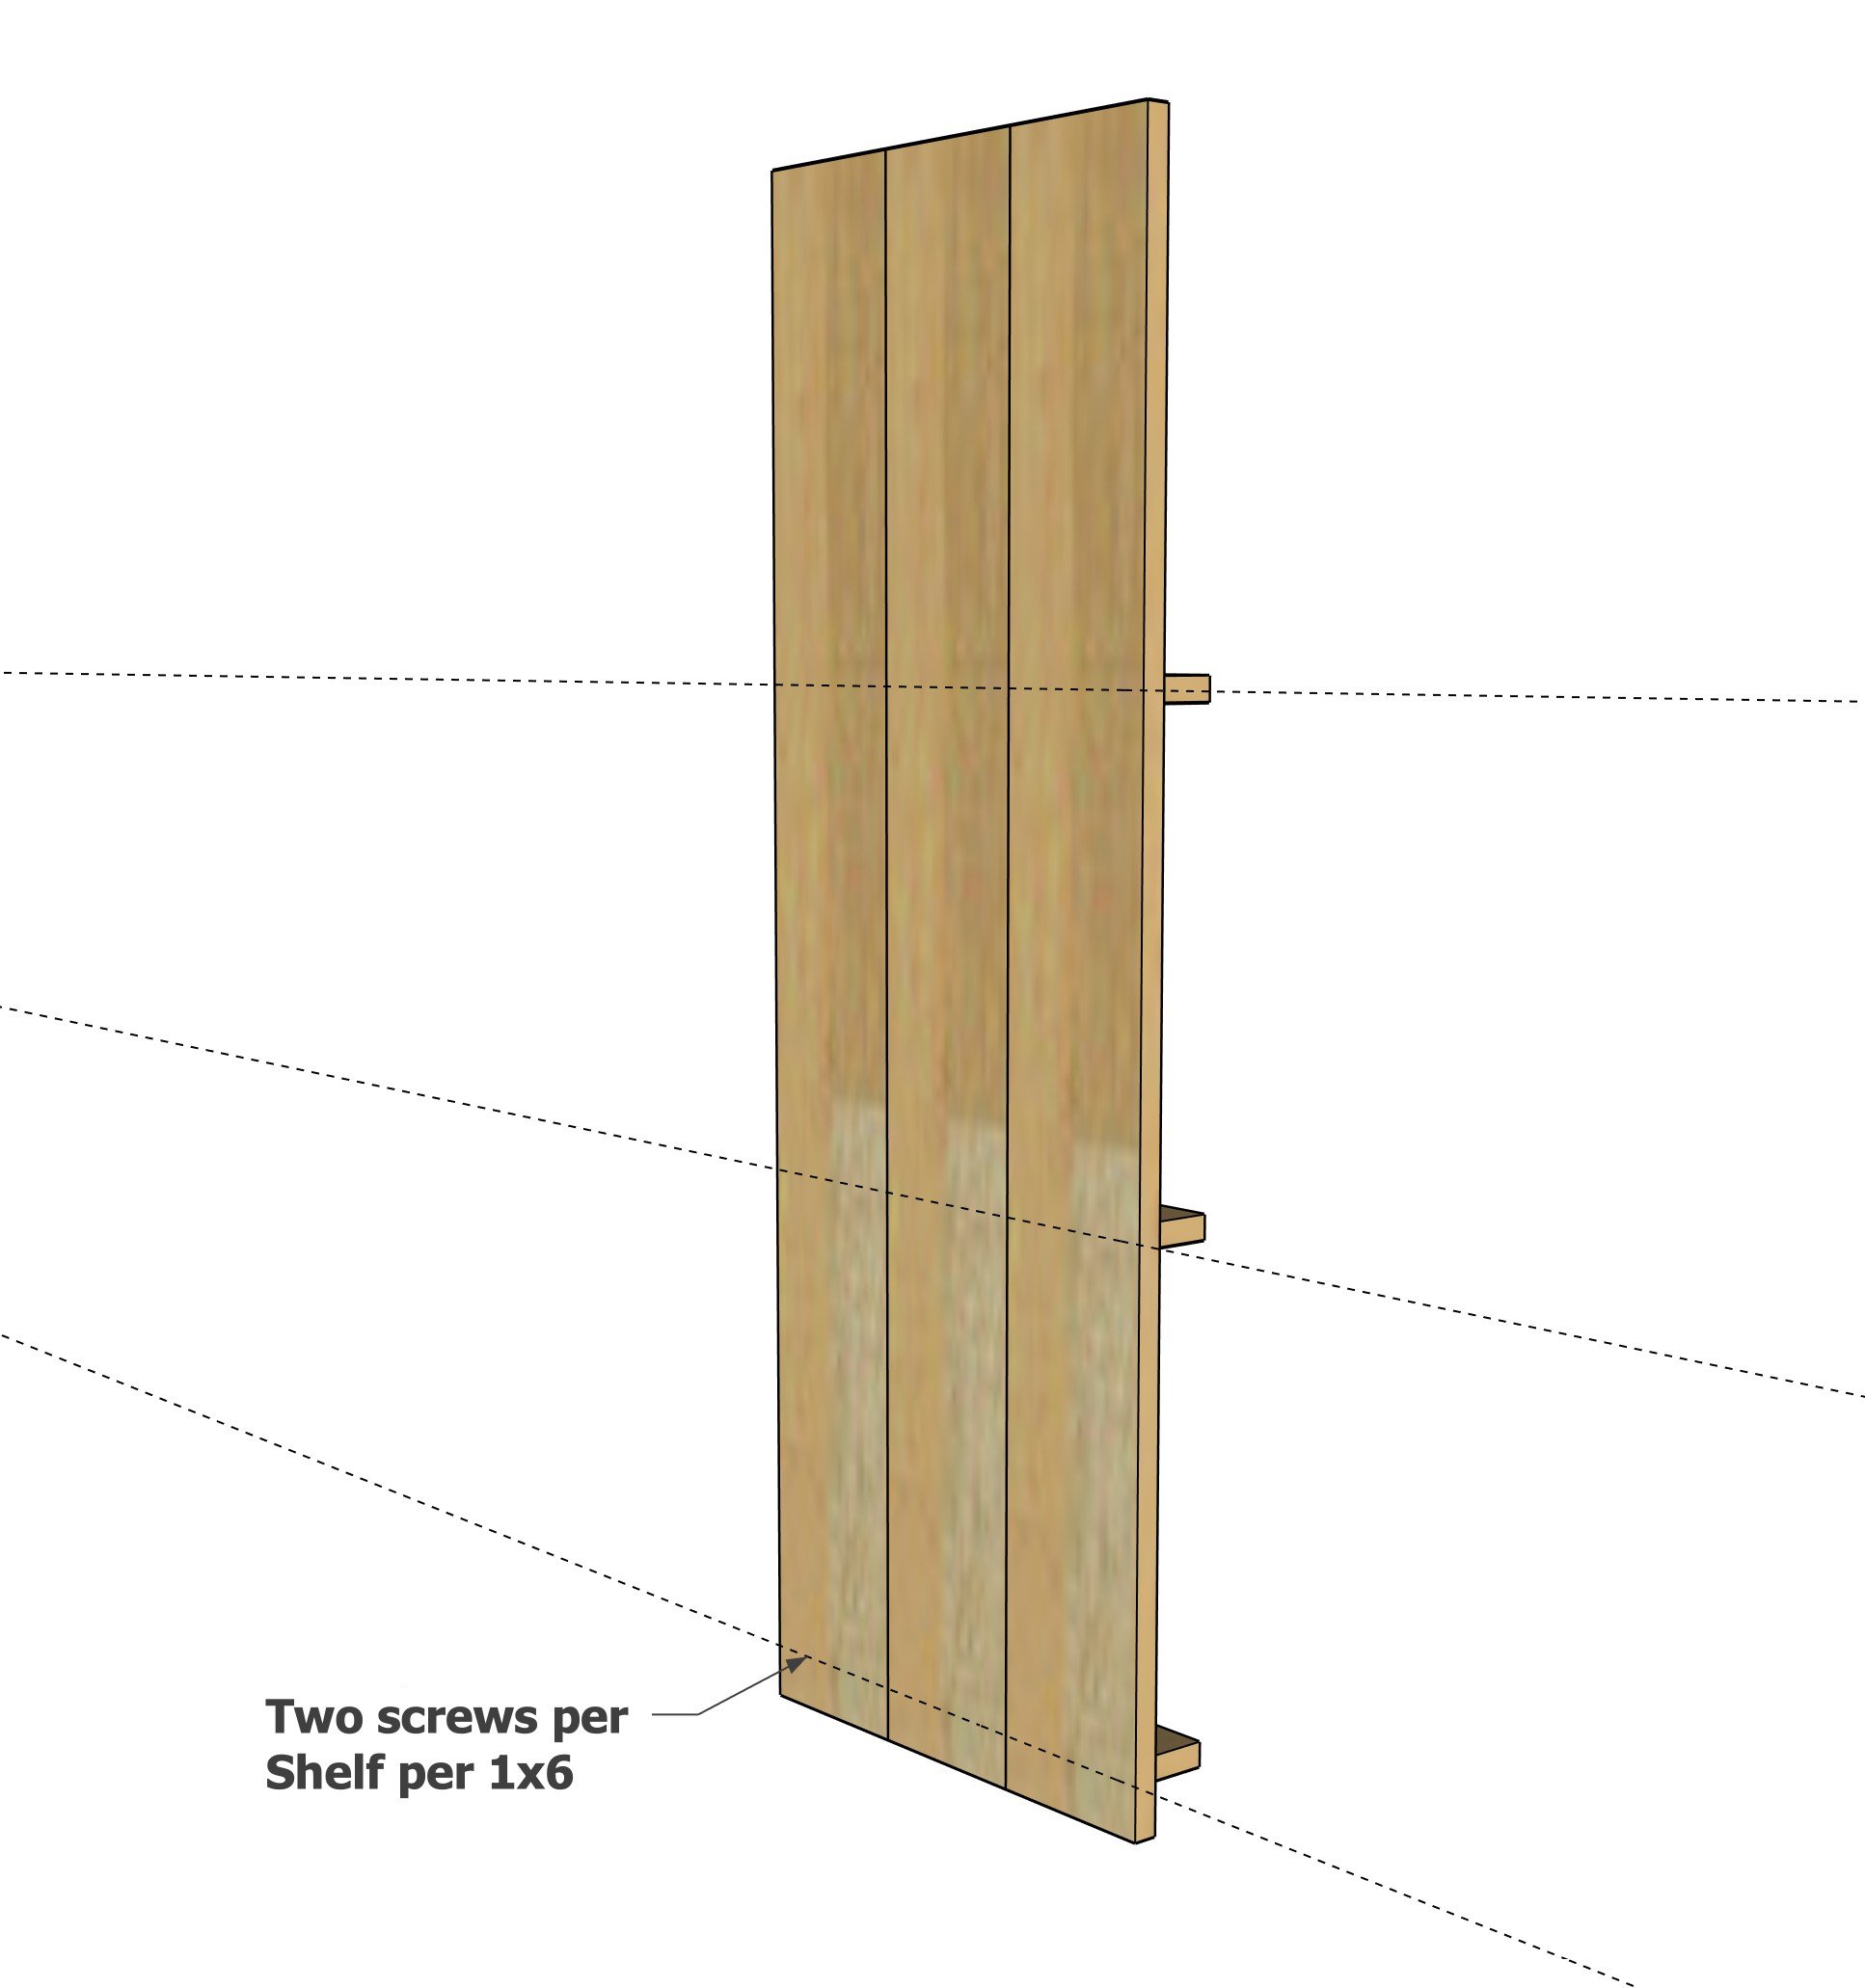
Place the remaining 1x6 boards on the back and mark the location of screws.
Then screw with two screws per joint the back to the back sides of the shelves.
Step 3
After sanding and finishing, hang the calendar shelf on the wall.

