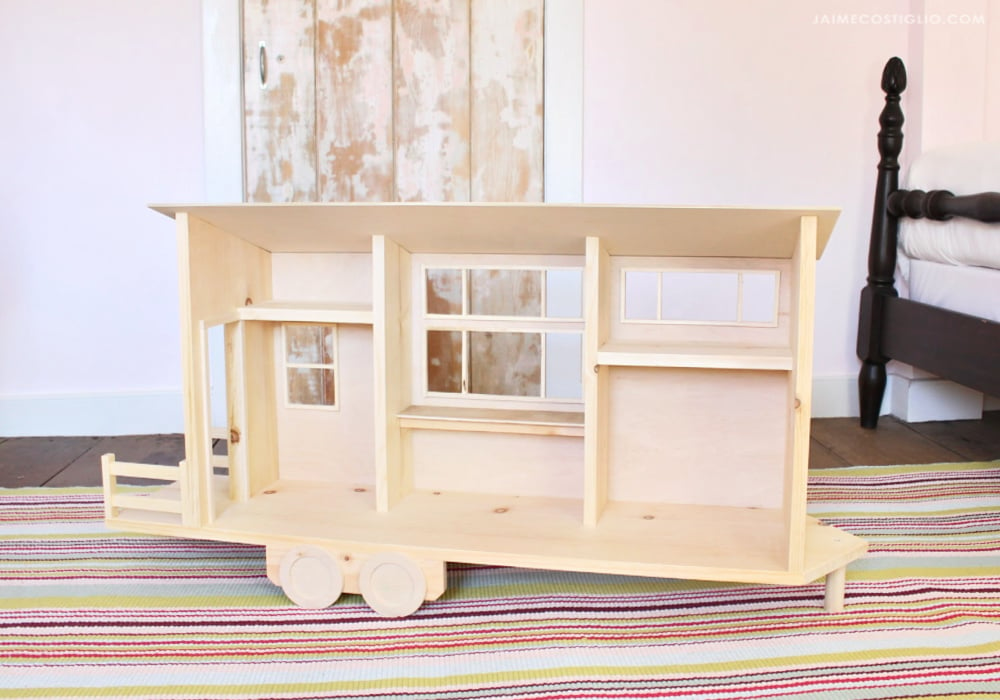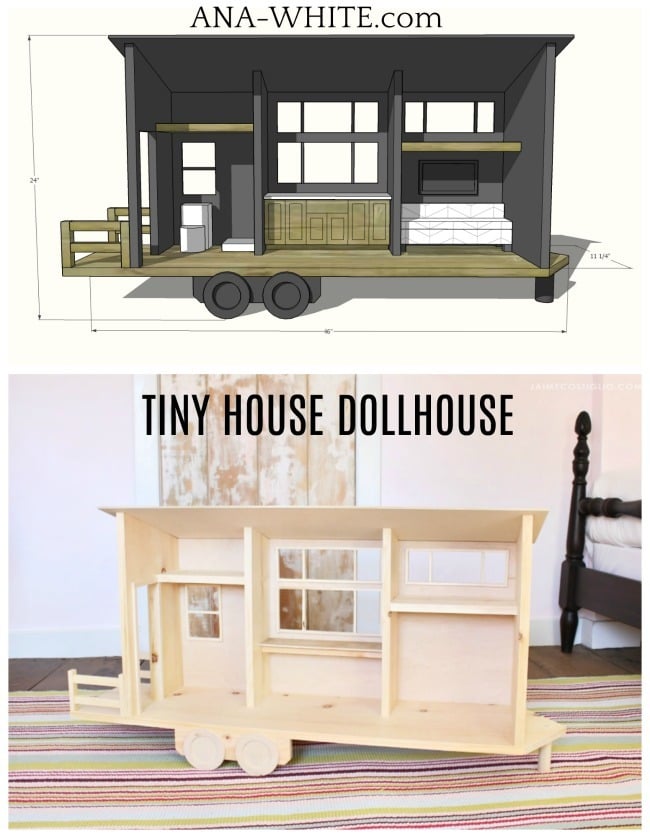
Tiny House Dollhouse for Barbies or 12" Dolls

The free plans on this website are made possible with advertising and affiliate links.  Thank you for helping us keep plans free.


Difficulty
Intermediate
| Print this plan

Free plans to build a Tiny House dollhouse for Barbies or 12" dolls by ANA-WHITE.com
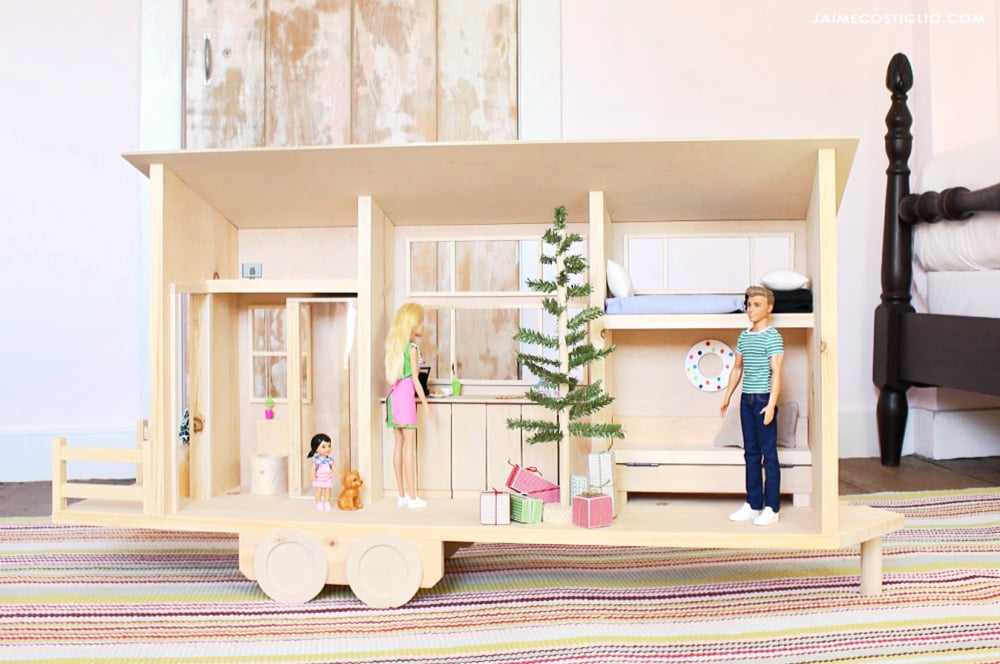
Are you looking for a new and fresh take on the dollhouse? 

How about a Tiny House Dollhouse?

It's Handbuilt Holiday season - The season of giving and building and giving all over again! 

It starts with Jaime Costiglio and I - we give you a new free plan every Friday in the weeks leading up to Christmas.  We hope you build and then give handbuilt gifts this season.

You can see all our Handbuilt Holiday gifts to you here.
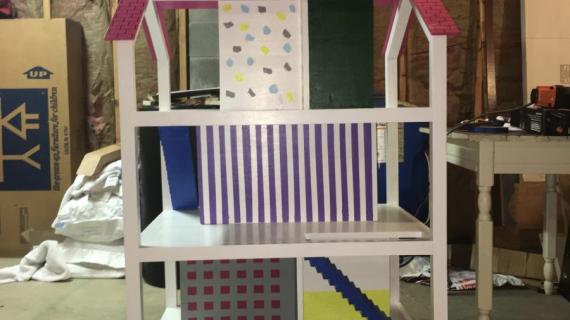
Today's plan is such an exciting one!  You know how much I love tiny houses.  We all love tiny houses.  So why not a tiny dollhouse?

This one is inspired by the Open Concept Rustic Modern Tiny House I did a few years back.  Complete with tons of convertible furniture!

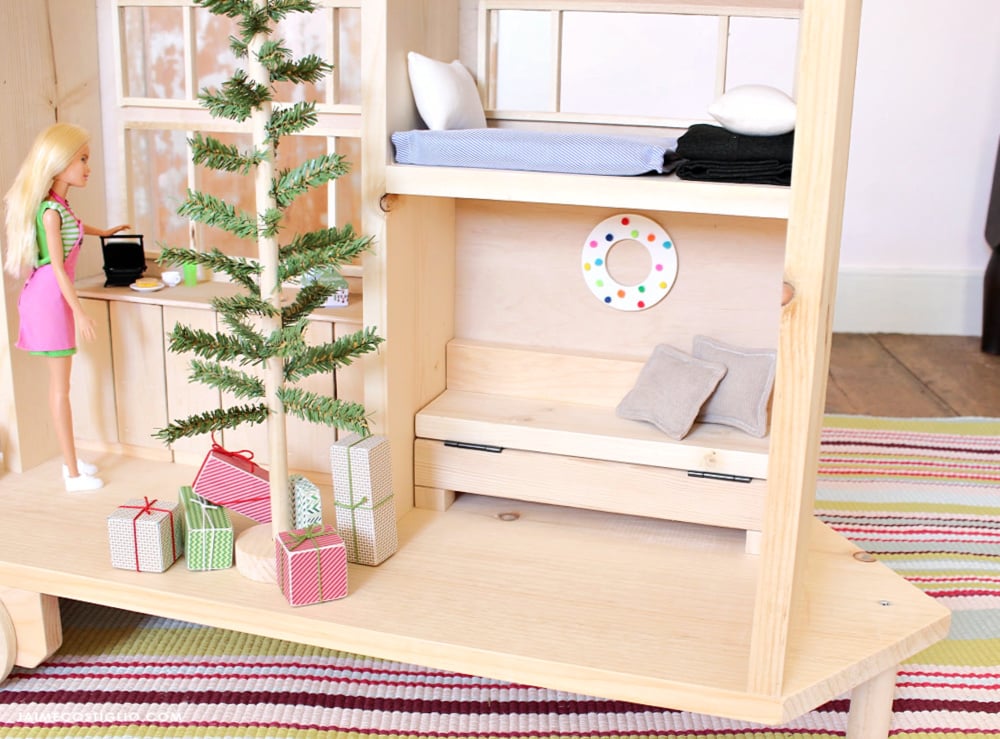
This couch is of course also a bed -

It's inspired by the flip chair -

Hinges really do make everything better.

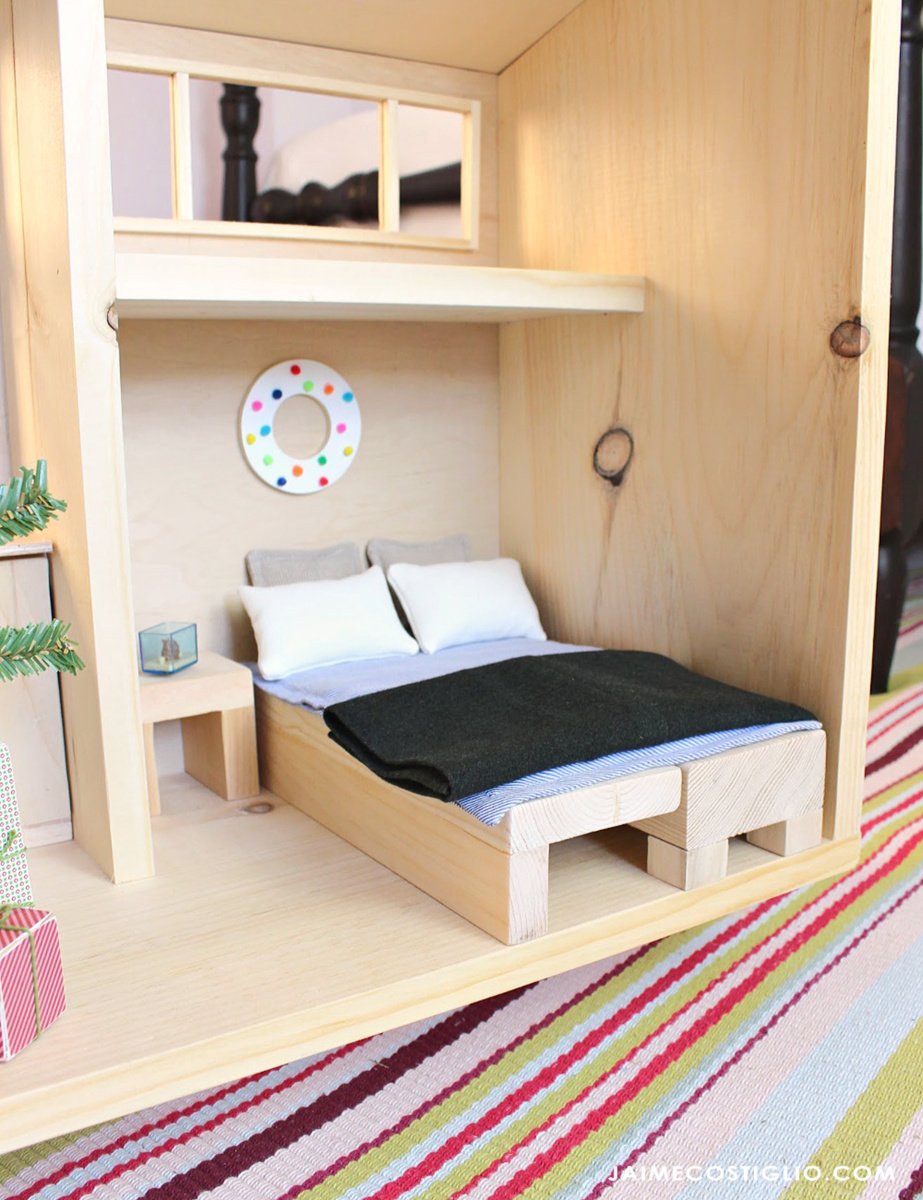
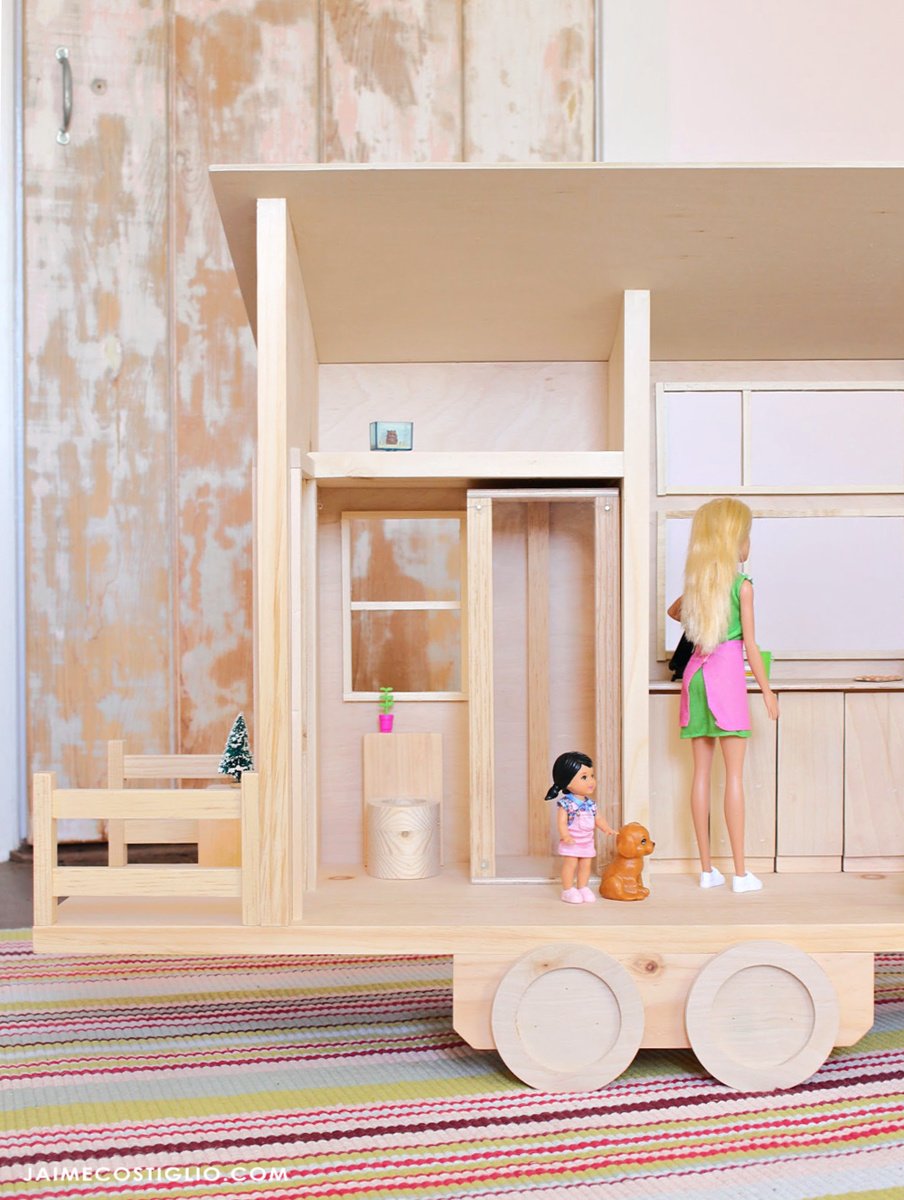
Jaime added alot more convertible furniture to the tiny house -

Like this shower.  Guess what it becomes???

Head on over the read Jaime's build post here to find out and see lots more photos.


Then get ready to build with the free plans below!

xo Ana


CLICK HERE FOR MORE PHOTOS AND CONVERTIBLE FURNITURE PLANS


Tiny House Dollhouse Plans

BUILD YOUR OWN TINY HOUSE DOLLHOUSE WITH FREE PLANS THAT ARE EASY TO FOLLOW.  CUSTOMIZE WITH LOTS OF CONVERTIBLE FURNITURE.


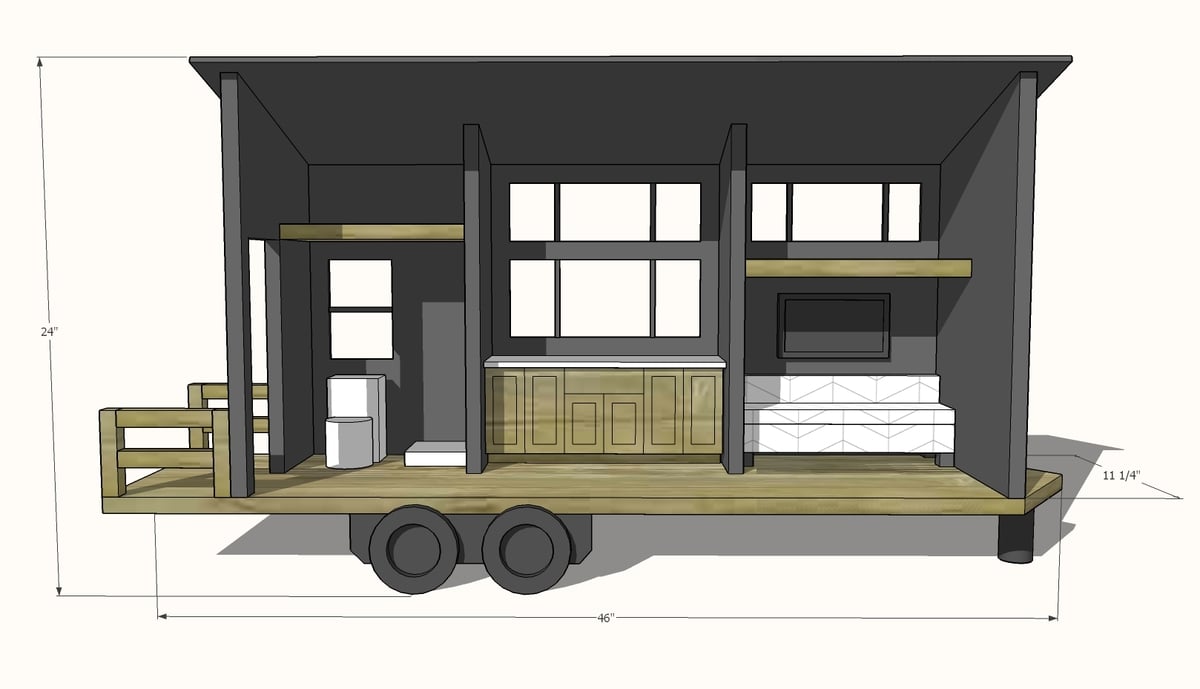
Dimensions
Dimensions shown above

Preparation

Shopping List

48” x 48” piece of ¼” thick plywood

3 feet of 1x1 material

1 - 1x12 @ 8 feet long

1 - 1x6 @ 6 feet long

1x2, 1x3, 1x4 and 2x4 scrap wood

Common Materials
2 inch screws
3/4 inch finish nails
1 1/4 inch finish nails
Cut List


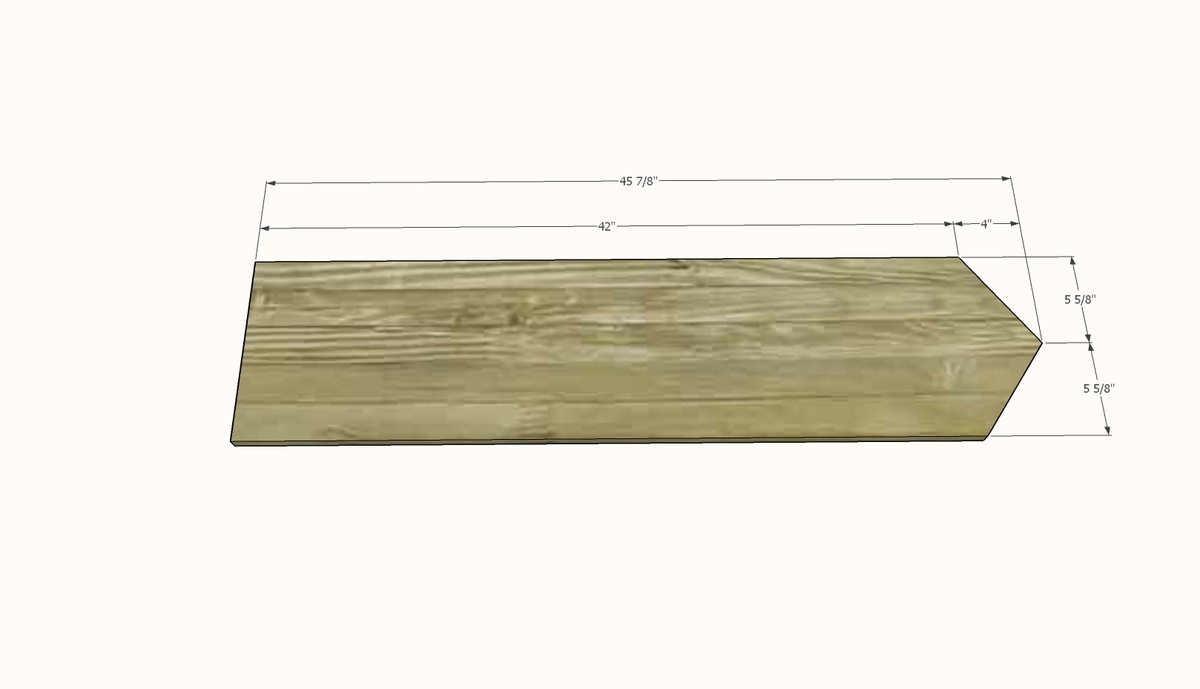
  • 1 - 1x12 @ 46” - bottom
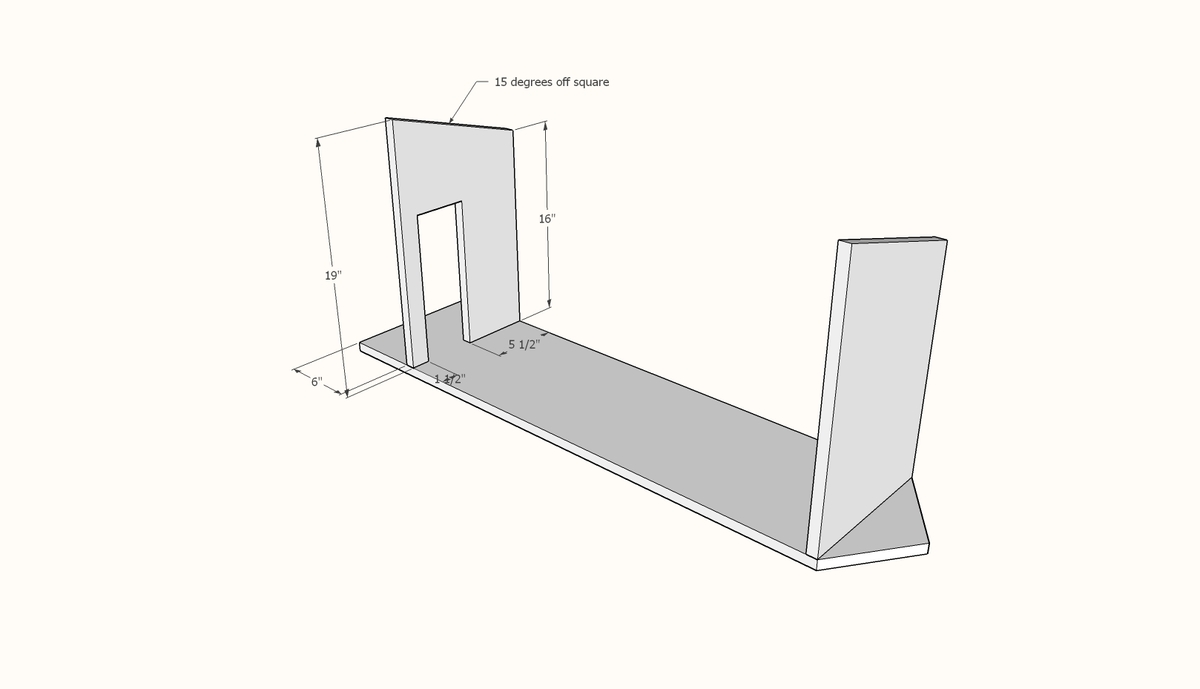
  • 2 - 1x12 @ 16” - short point measurement, one end cut at 15 degrees off square
  • 2 - 1x6 @ 16 - short point measurement, one end cut at 15 degrees off square
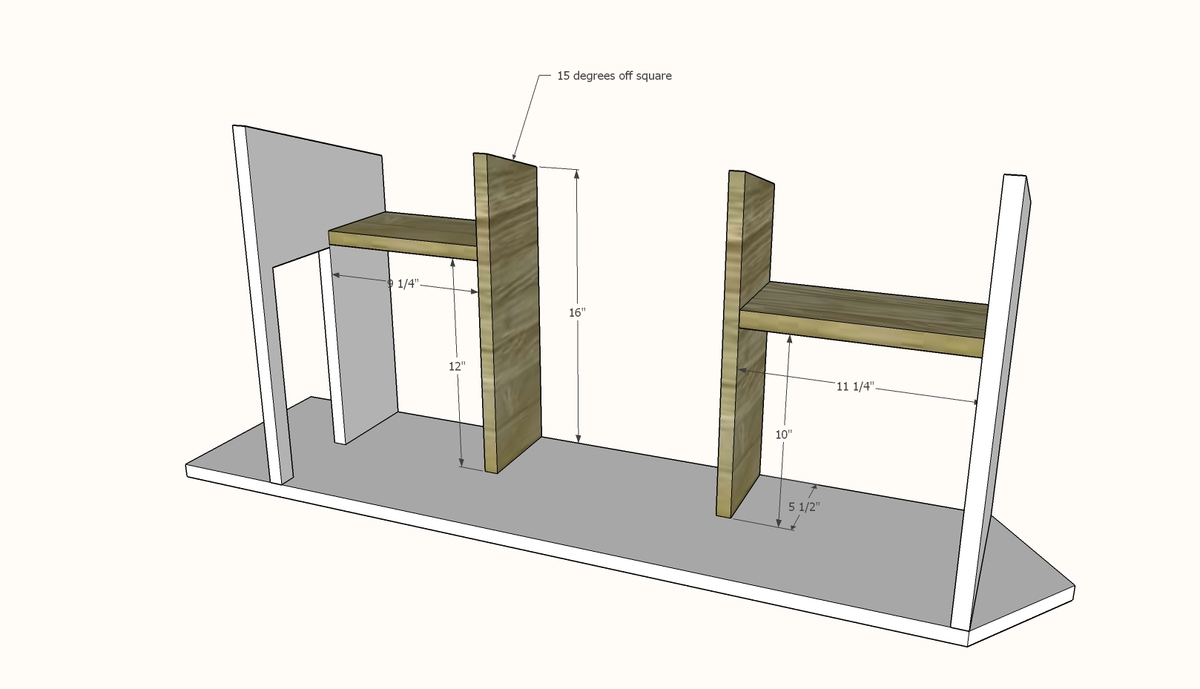
  • 1 - 1x6 @ 9-¼”
  • 1 - 1x6 @ 11-¼” - see step 9 before cutting
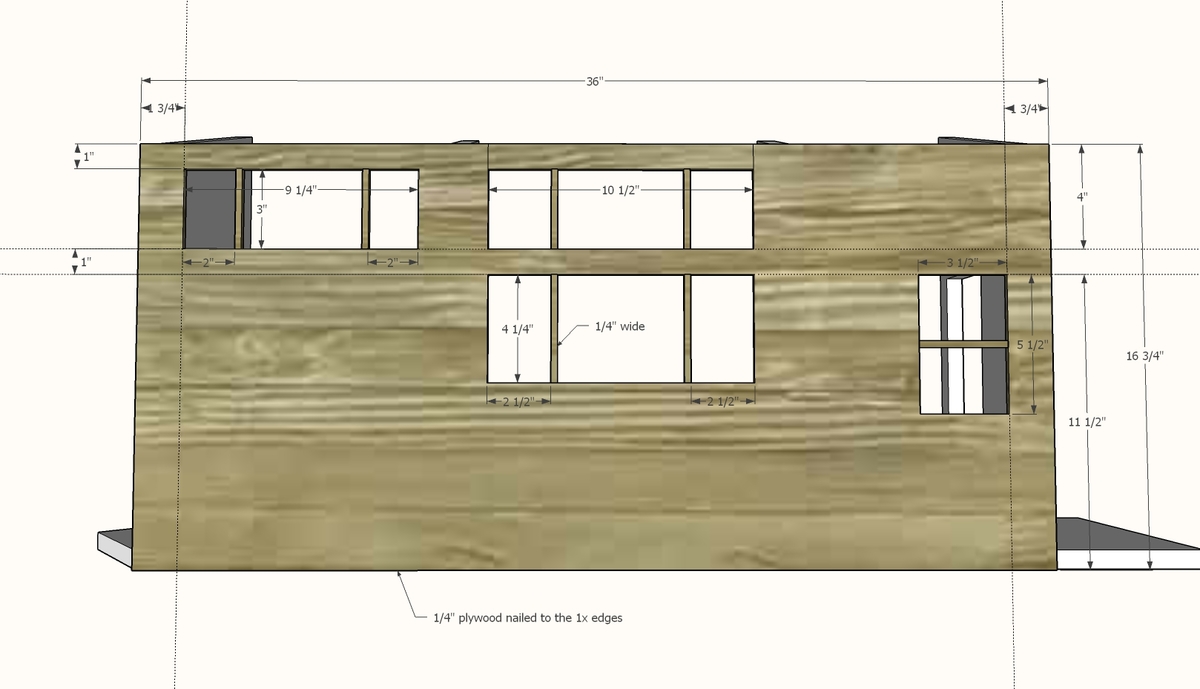
  • 1 - ¼” plywood @ 36” x 16-¾” - back
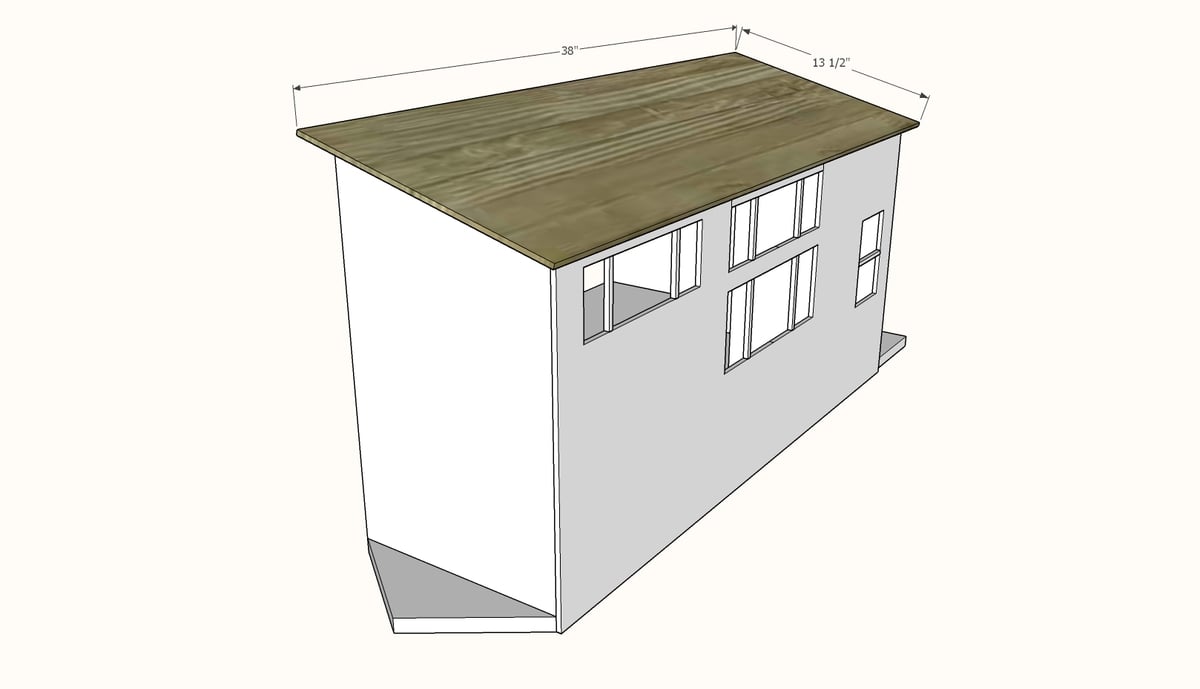
  • 1 - ¼” plywood @ 38” x 13-½”
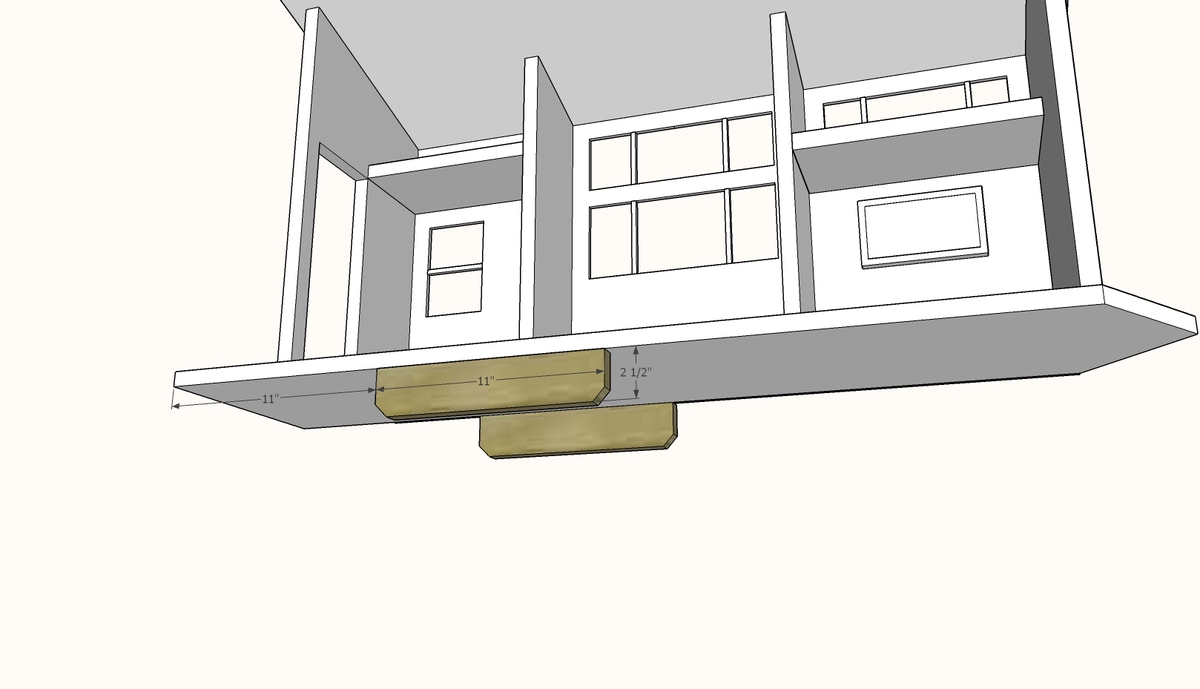
  • 2 - 1x3 @ 11” - can also cut 2 - 1x12 @ 2-½”
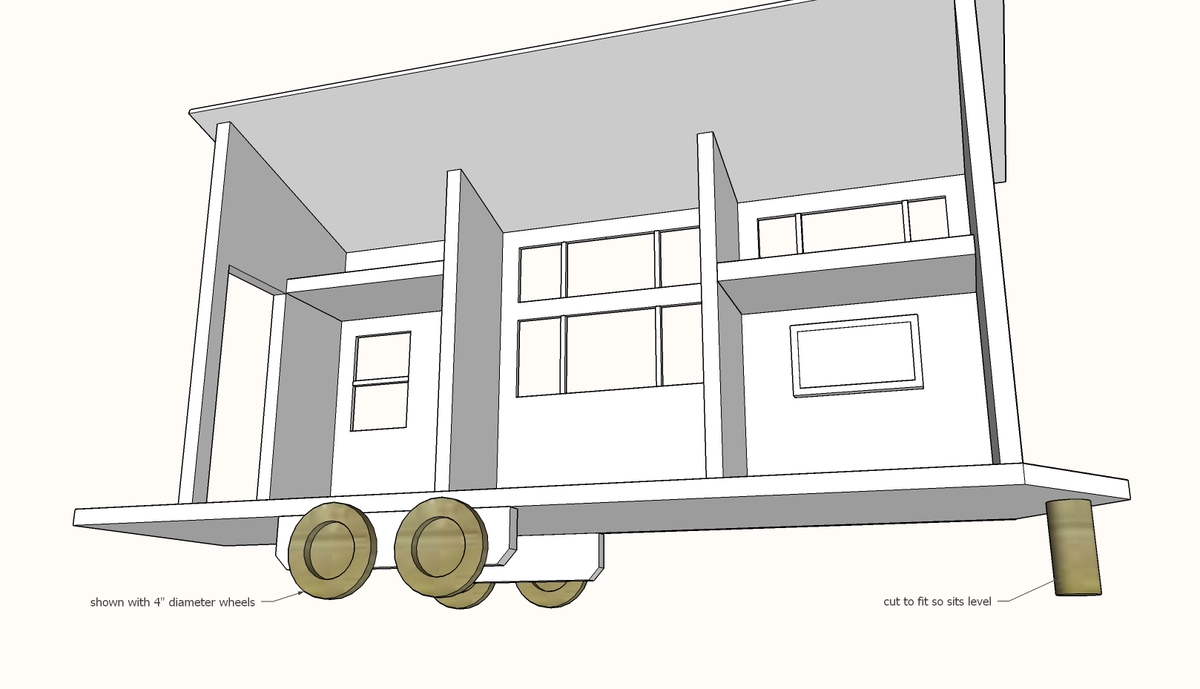
  • 4 - 4” diameter wheels - ½” plywood prefered can also use store bought wheels or wood rounds, size can be adjusted easily
Tools
Tape Measure
Speed Square
Pencil
Safety Glasses
Hearing Protection
Kreg Jig
Drill
Circular Saw
Jigsaw
Miter Saw
Brad Nailer
Power Sander
Drill Bit Set

Instructions

Step 1

Cut the bottom from a 1x12.  Use a circular saw or jigsaw to cut the front angled tongue.

Step 2

Cut the walls with a compound miter saw set to 15 degrees off square.  From one of the walls, cut out the doorway with a jigsaw.  Sand any rough edges.

Attach bottom 1x12 to the walls with 2" self tapping wood screws and glue.

Step 3

IMPORTANT: SEE NOTE ON COUCH STEP 9 ABOUT LIVING ROOM SIZING BEFORE PROCEEDING


Cut the inner walls on the miter saw at 15 degrees off square.

Cut the two loft areas on the compound miter saw, square cuts this time. 

Attach with 2" self tapping wood screws.

Step 4

Cut the back plywood with a circular saw or table saw.  Mark out windows and drill holes with a drill bit larger than jigsaw bit.  Then cut windows out.  NOTE: the windows don't need the vertical lines - it will be easier to cut without these lines.

Attach to back with 3/4" brad nails.

Step 5

Step 6

Attach wheels supports to the bottom with 3/4" pocket holes and 1-1/4" pocket hole screws.

Step 7

Cut the wheels from scrap wood material.  You can also use store bought wood rounds or wheels.  Drill holes and bolt to the wheel support.

Cut a 1x1 piece of wood or wood dowel to length after the wheels are installed so the tiny house sits level.  Screw to the tongue.

Step 8

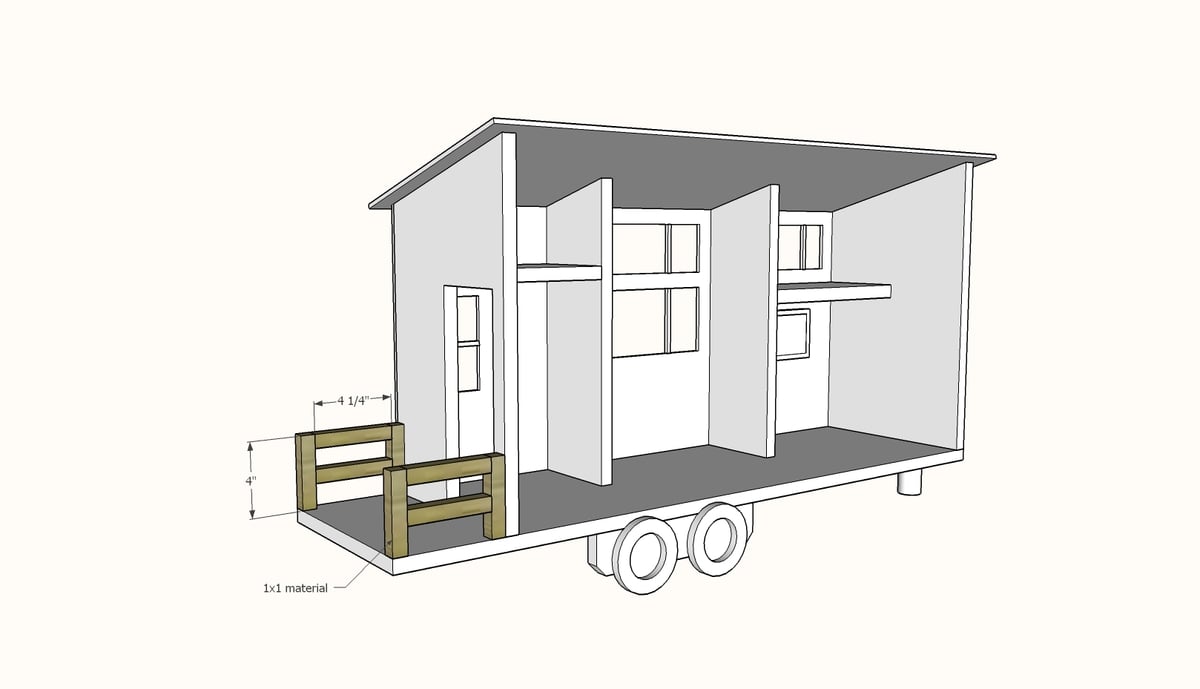
Back deck railing is made of 1x1 material.  It is very difficult to nail or screw but hot glue will work to attach together the small pieces.

Step 9

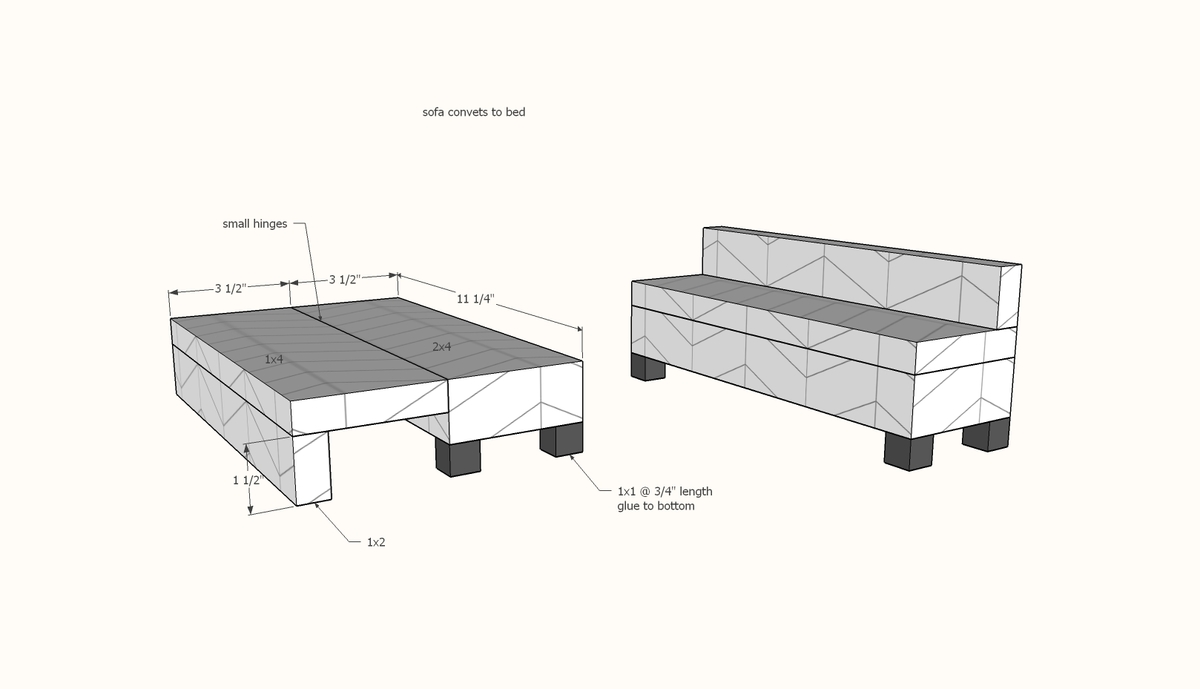
The couch is designed 11-1/4" wide to match the width of a 1x12 board - 11-1/4" wide - so that the couch/bed can be turned both ways in the living room.  However, Barbie is about 11-1/2" wide - you may wish to make the living room areas slightly larger (12") and the sofa/bed 12" but the compromise is the sofa/bed won't be able to be placed against the end wall.  

If you do make your sofa/bed 12" in length, make sure you also make the living room 12" wide in step 3.

To build glue and nail the legs on the 2x4 bottom.  Then glue and nail the 1x2 to the 1x4 top.  Attach the two pieces together with a small hinge.


Convertible couch/bed cut list

  • 1 - 1x2 @ 11-1/4" or 12"
  • 1 - 1x4 @ 11-1/4" or 12"
  • 1 - 2x4 @ 11-1/4" or 12"
  • 4 - 1x1 @ 3/4"

Step 10

Comments

Becky mai

Sun, 07/12/2020 - 07:29

Hi from London, UK! I would love to make this for my girls for Christmas! (Personally, I want the full size version but I'll have to settle on a Barbie version!) 2 questions! I cannot find 1x12 or 1/4 inch plywood here. Could I use 3/4 inch ply for the base instead of 1x12? For the plywood, we have 3mm or 5.5mm. Should I layer up 2 3mm boards and glue or use the 5.5? I'm worried it would mess up the measurements! Thanks! Looking forward to making this!!