Free plans to build a drawer insert for an armoire from Ana-White.com
Hey DIY Friends!
Remember last week when I teamed up with my friend Whitney from Shanty2Chic to create a new plan for you for this toy armoire?

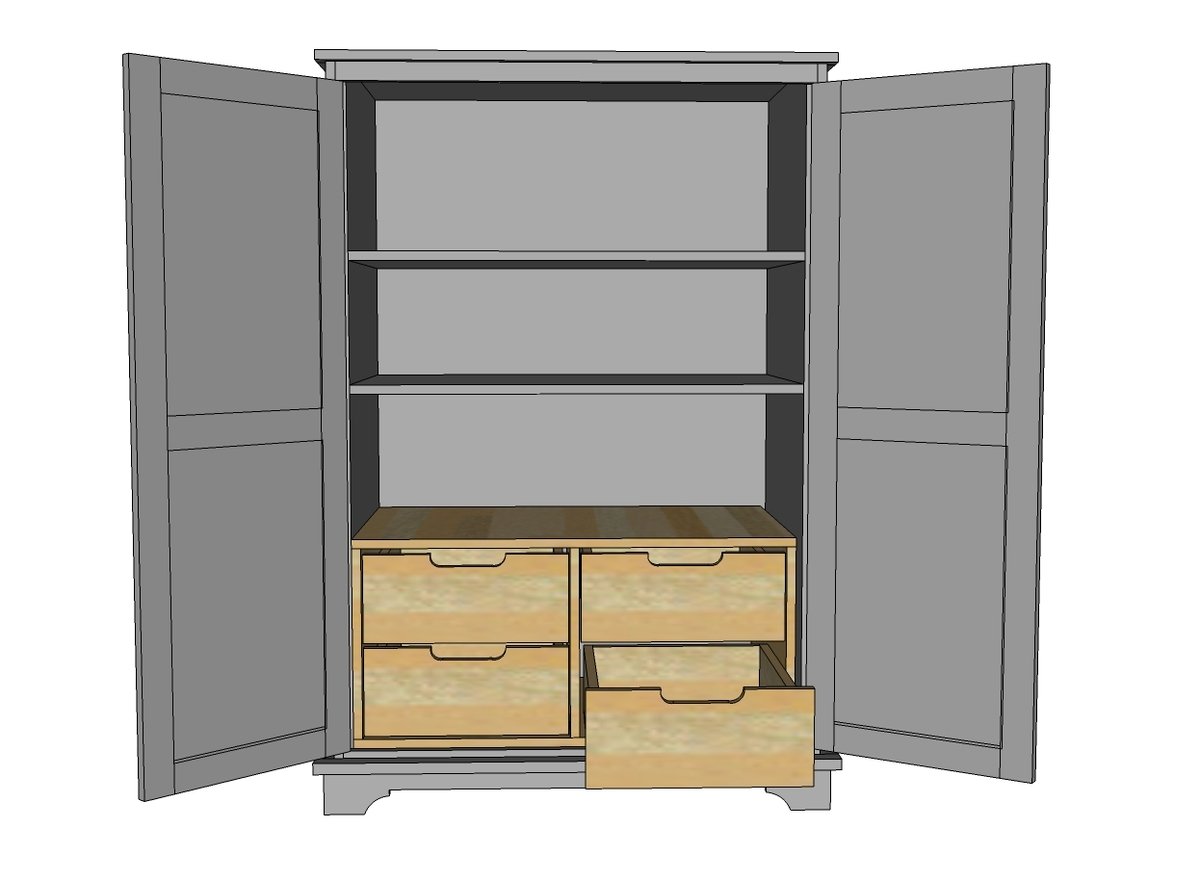
Well, guess what's inside?
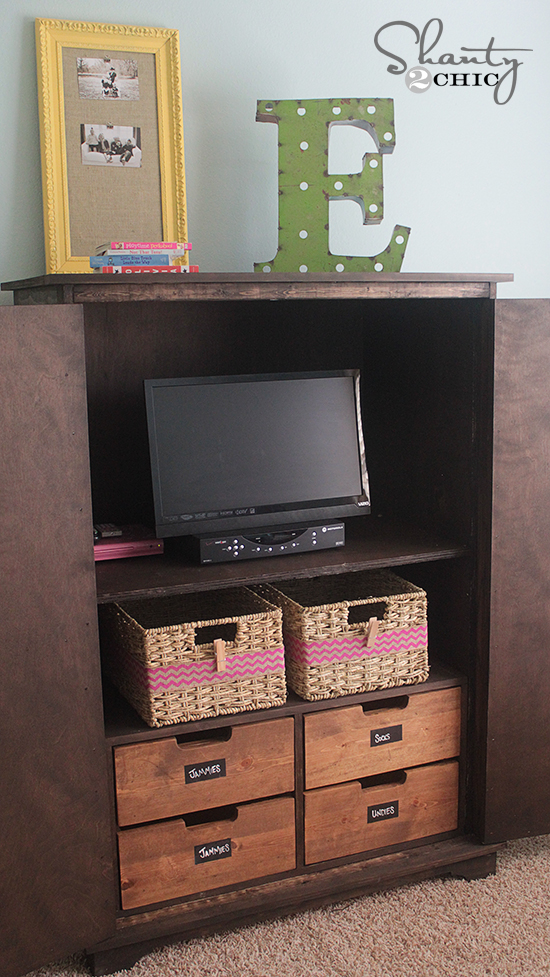
A drawer insert!

And of course we got you covered with the free plans right here!
But before we get to the plans, please take a second to go visit Whitney at Shanty2Chic for more details on how she built this drawer insert - aren't those little chalkboard labels cute?
Thanks Whitney!
Plans follow!
Preparation
Shopping List - you may have leftover from the toy armoire
Plywood ripped into 21 3/4" widths - about 10 feet (use same rip width as the armoire)
4 - 1x6 @ 8 feet long
1 - 1x8 @ 8 feet long
4 sets euro drawer slides, 21" length
Cut List
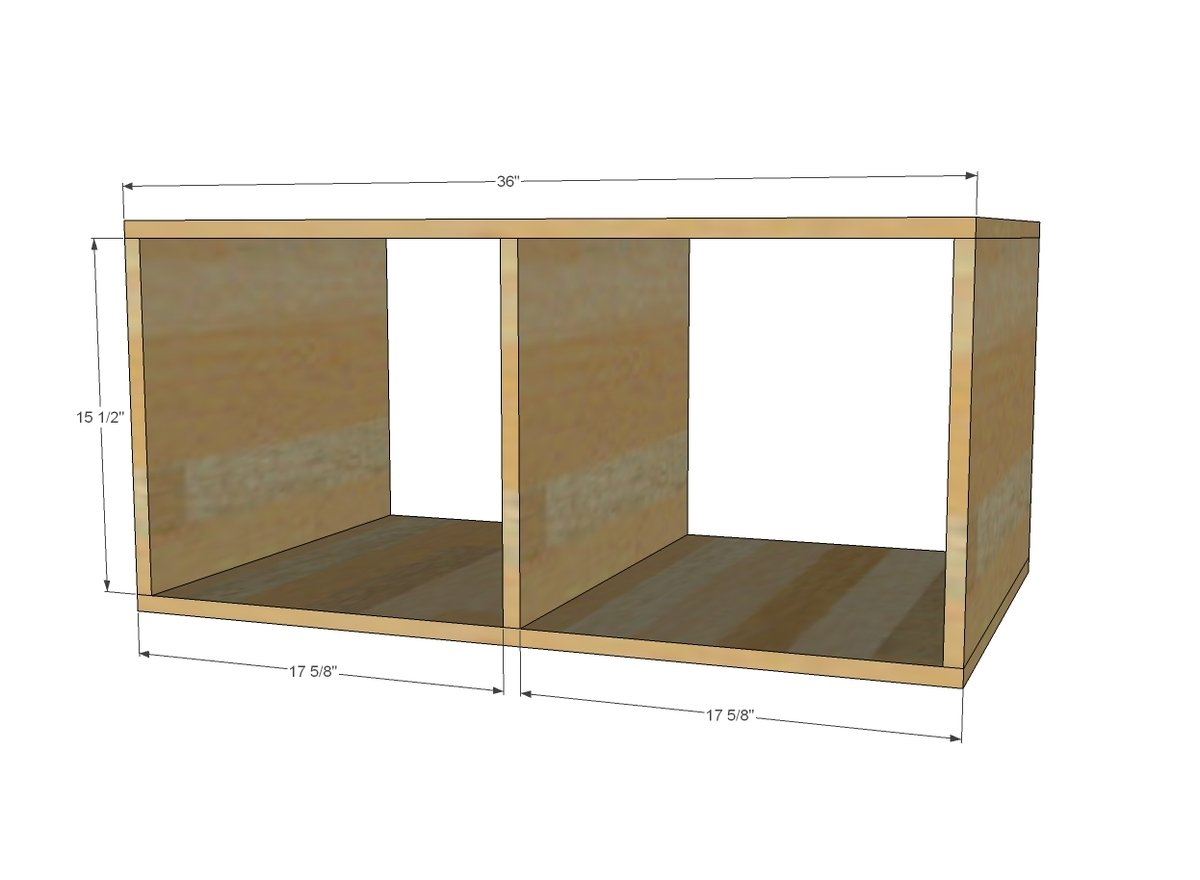
2 - 3/4" plywood 21 3/4" x 36" (top and bottoms)
3 - 3/4" plywood 21 3/4" x 15 1/2" (dividers and sides)
DRAWERS
8 - 1x6 @ 21" (sides)
8 - 1x6 @ 15 7/8" (front/backs)
4 - 1/4" plywood @ 21" x 15 7/8" (bottoms)
4 - 1x8 @ 16 5/8" (faces)


Please read through the entire plan and all comments before beginning this project. It is also advisable to review the Getting Started Section. Take all necessary precautions to build safely and smartly. Work on a clean level surface, free of imperfections or debris. Always use straight boards. Check for square after each step. Always predrill holes before attaching with screws. Use glue with finish nails for a stronger hold. Wipe excess glue off bare wood for stained projects, as dried glue will not take stain. Be safe, have fun, and ask for help if you need it. Good luck!
Instructions
Step 1
You'll definitely want to build yours to fit - so take a second to measure the inside of your toy armoire and check to see if it's about 1/2" larger than the insert. Adjust if necessary - you want this insert to be able to fit inside, but not so tight it's a battle to get it in.
Then build the basic box for the drawers. Because we will be adding drawers, you must be very very precise and make sure the box is square or your drawers will not slide right.
I highly recommend a pocket hole jig just to ensure that your joints are square. If you use countersunk screws, you may wish to add back plywood to keep the box square.
Step 2

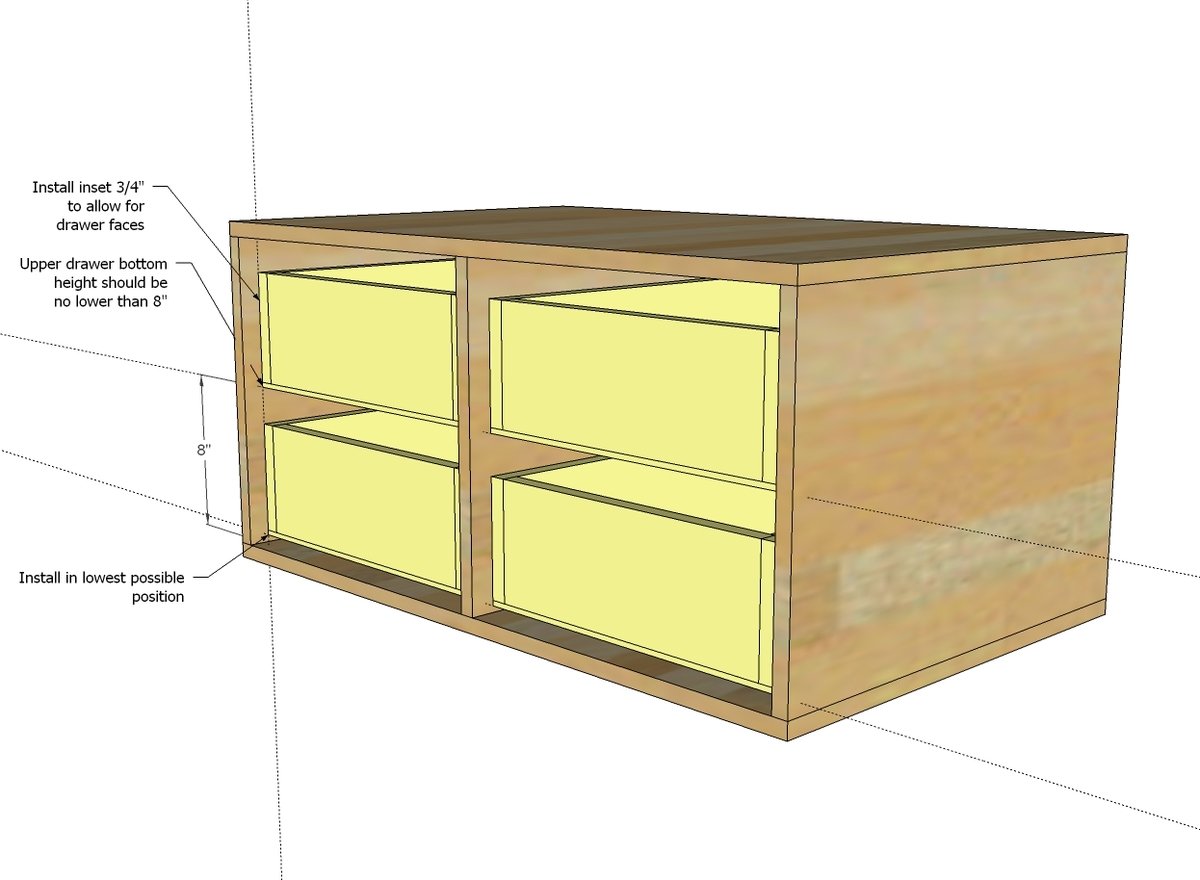
Next, build your four drawers as shown above.
Step 3
Insert drawers into box.
Step 4

Attach faces to front.
Finish and insert into the toy armoire!
It is always recommended to apply a test coat on a hidden area or scrap piece to ensure color evenness and adhesion. Use primer or wood conditioner as needed.