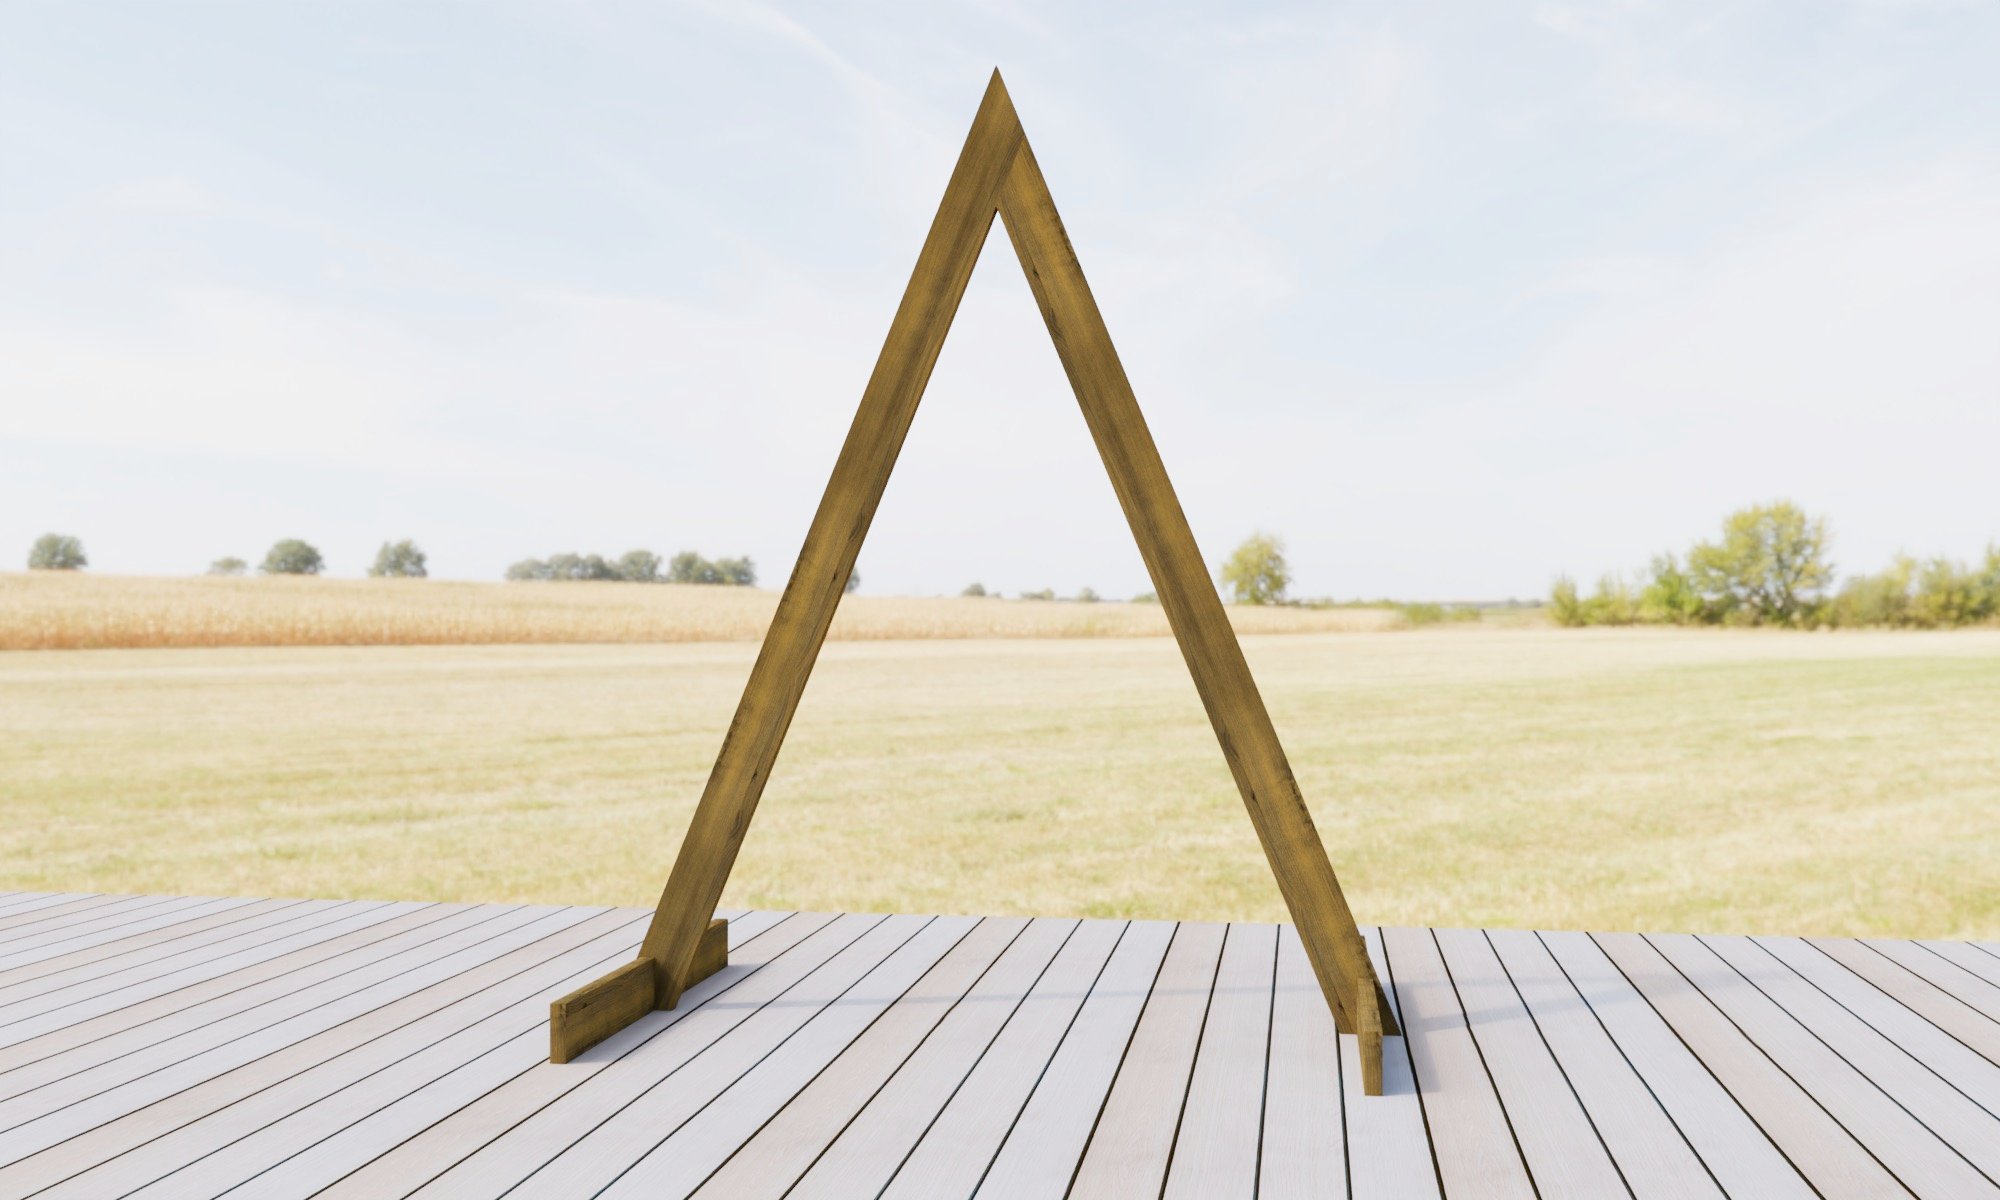


Free plans to build your own triangle wedding arch from Ana-White.com. This free plan includes shopping list, cut list, and detailed step by step diagrams, everything you need to build your own triangle wedding arch.
This project should cost about $50. The arch is reusable, or you can repurpose the wood into a bench or other project to keep in your home.
Pin For Later!

Preparation
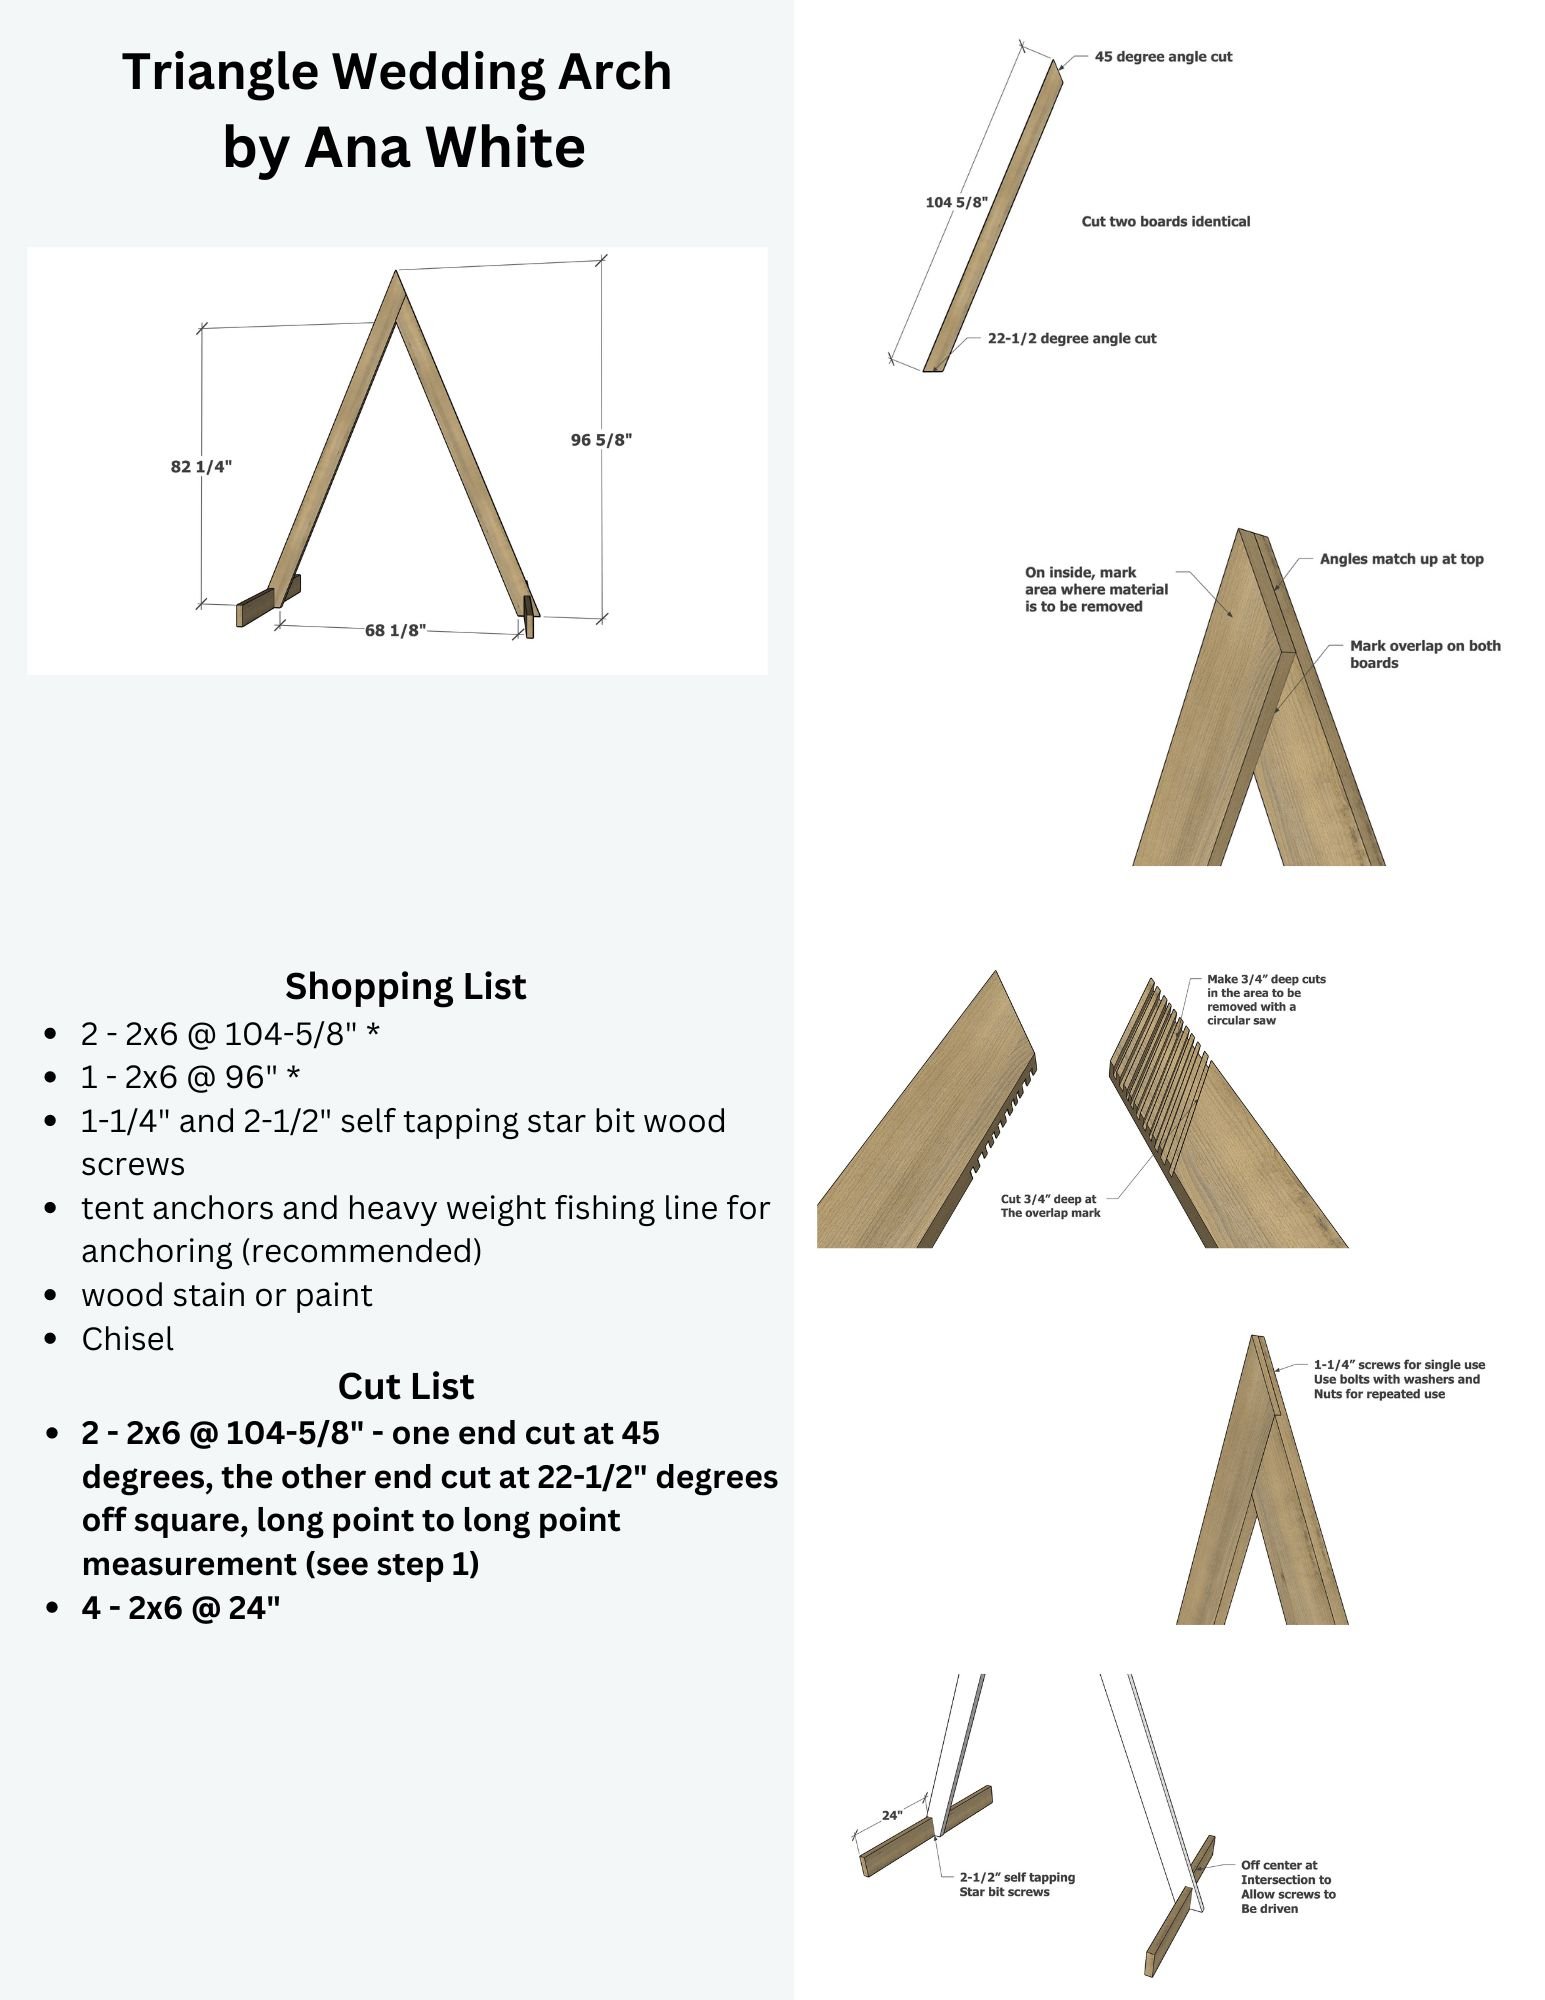
- 2 - 2x6 @ 104-5/8" *
- 1 - 2x6 @ 96" *
- 1-1/4" and 2-1/2" self tapping star bit wood screws
- tent anchors and heavy weight fishing line for anchoring (recommended)
- wood stain or paint
- Chisel
*You can substitute for 2x4s for a thinner look, this will also be less expensive and lighter weight. No changes need to be made to the cut list.
- 2 - 2x6 @ 104-5/8" - one end cut at 45 degrees, the other end cut at 22-1/2" degrees off square, long point to long point measurement (see step 1)
- 4 - 2x6 @ 24"
*If using 2x4s, no changes need to be made to the cut list


Instructions
Step 1
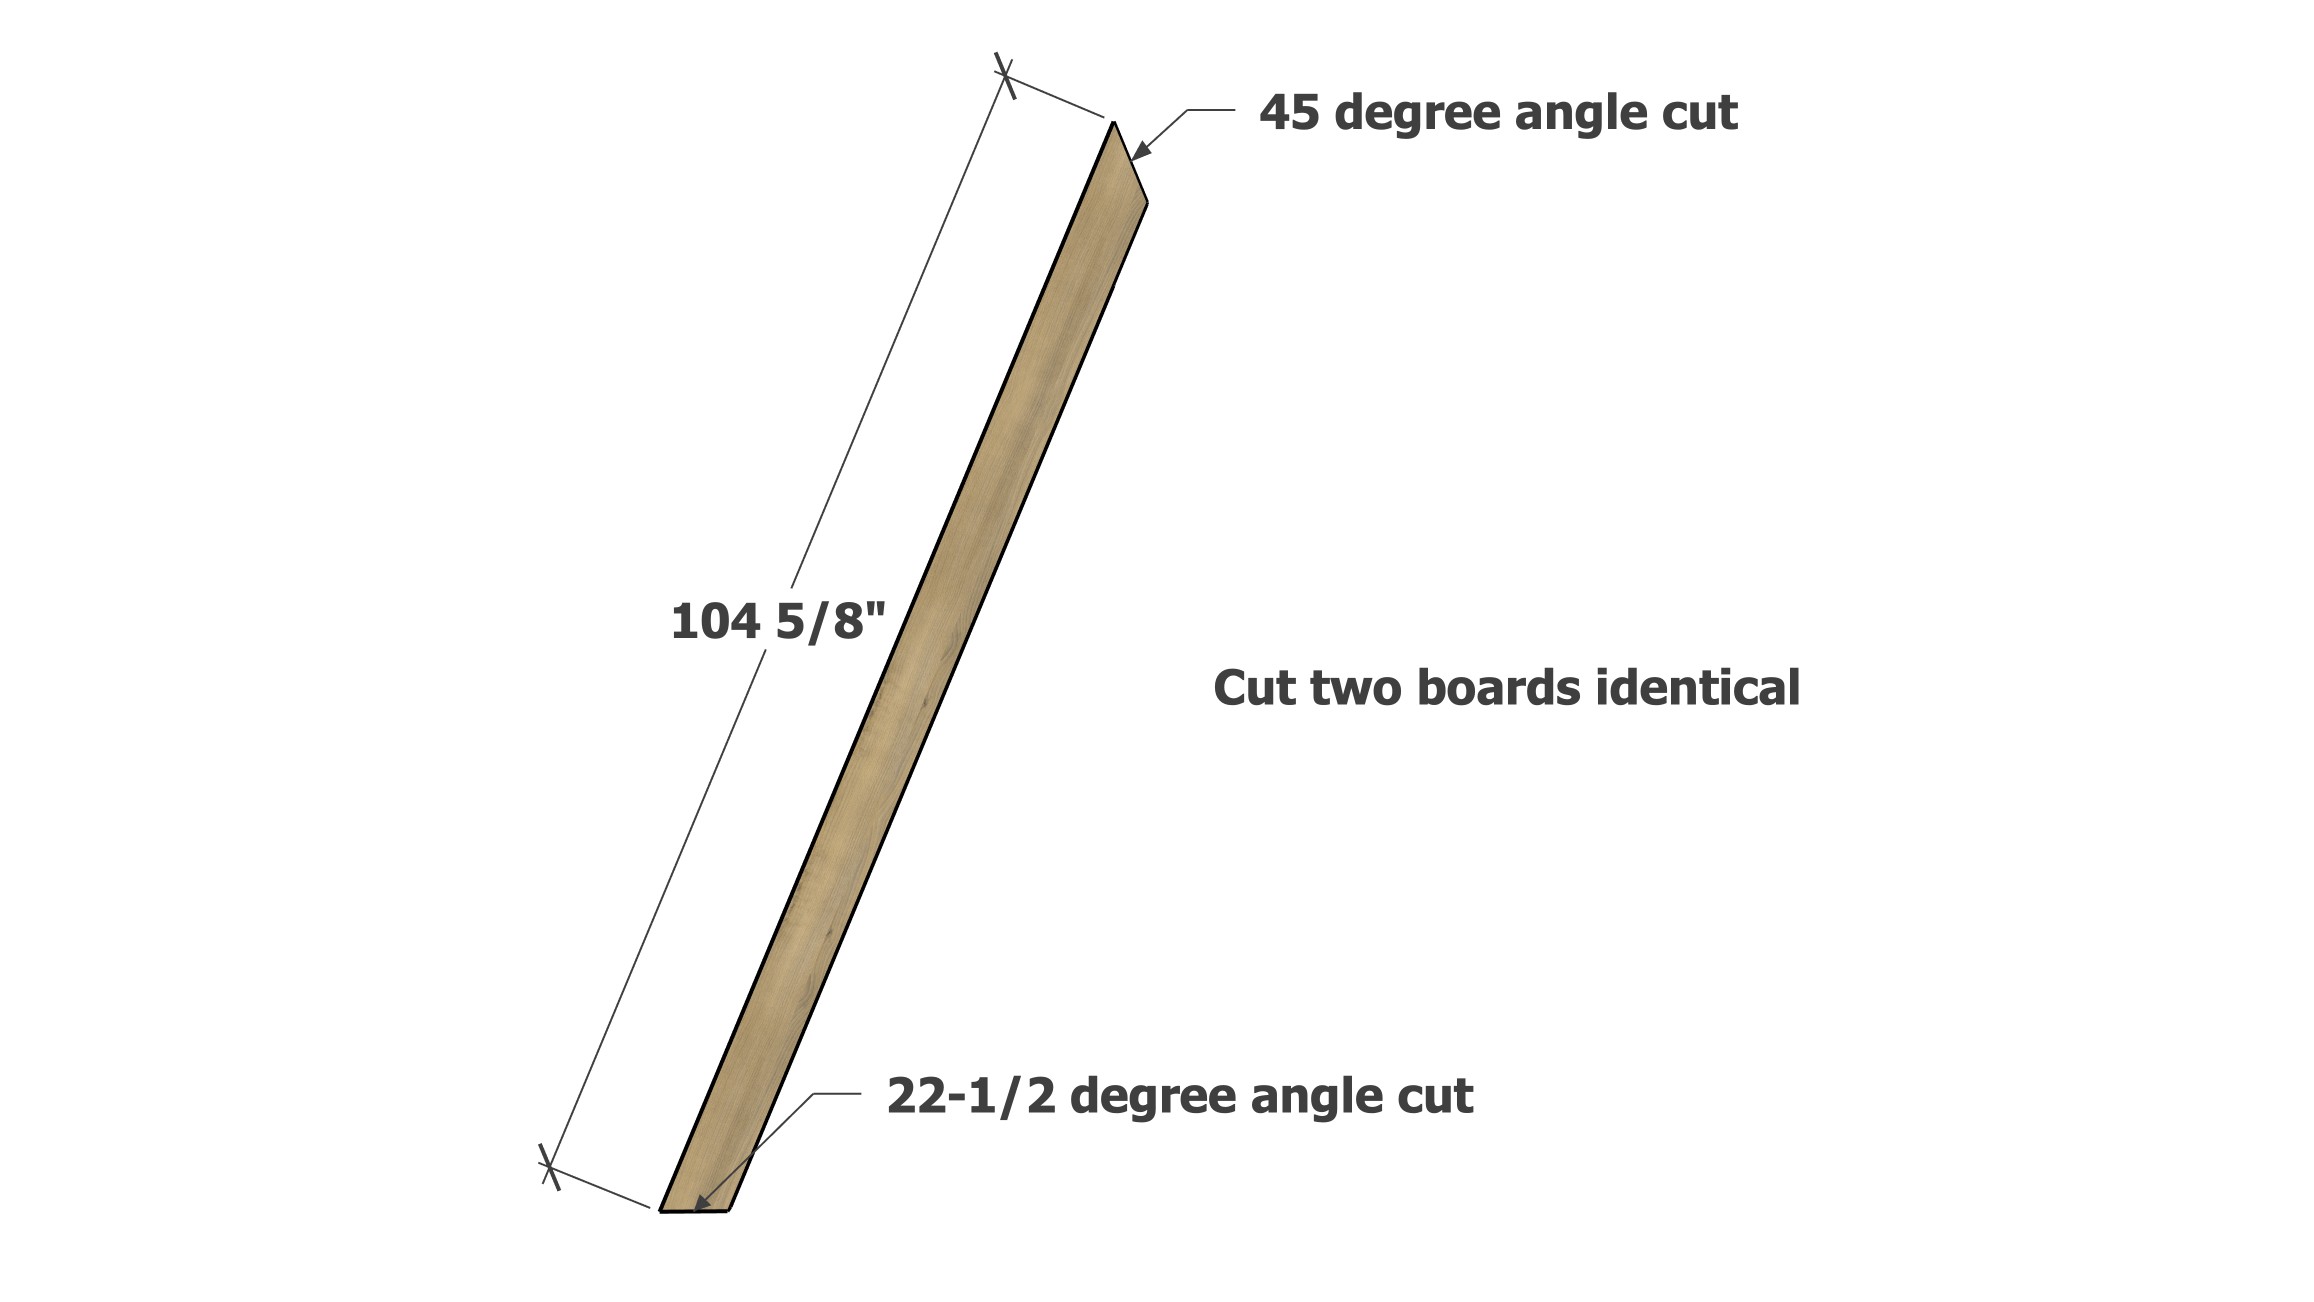
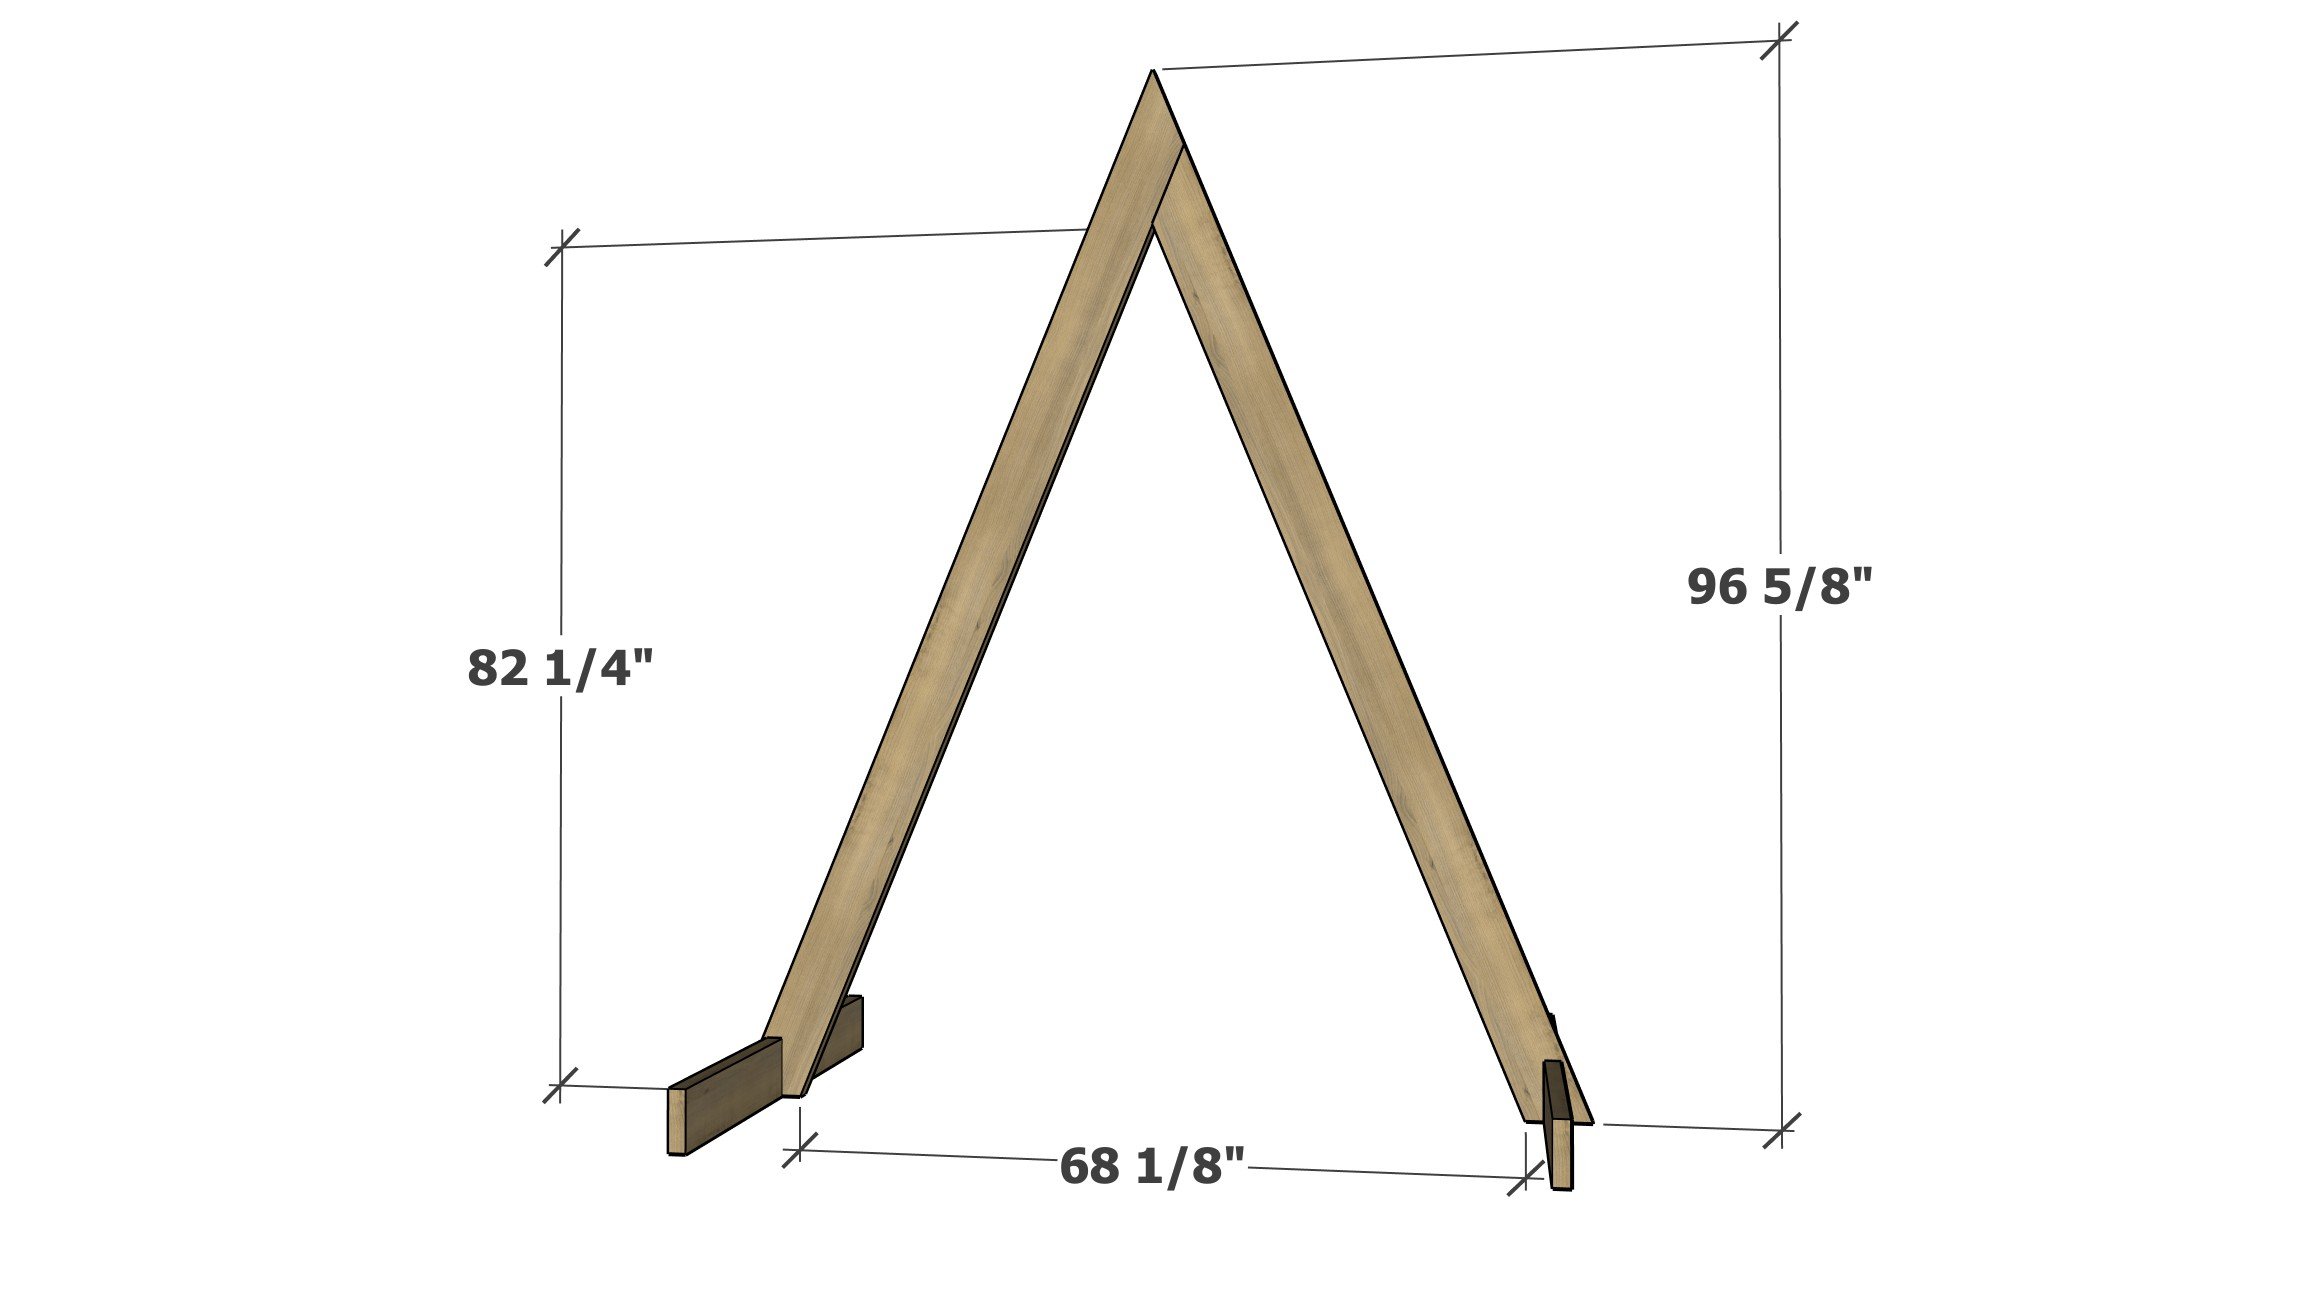
On the two 2x6 boards at 104-5/8", mark the angle cuts as shown and cut off with a miter saw or a circular saw.
NOTE: The 22-1/2 degree cut is measured as a angle off a square (90 degree) cut. If using a miter saw, simply set the angle cut to 22-1/2 degrees and cut.
Step 2
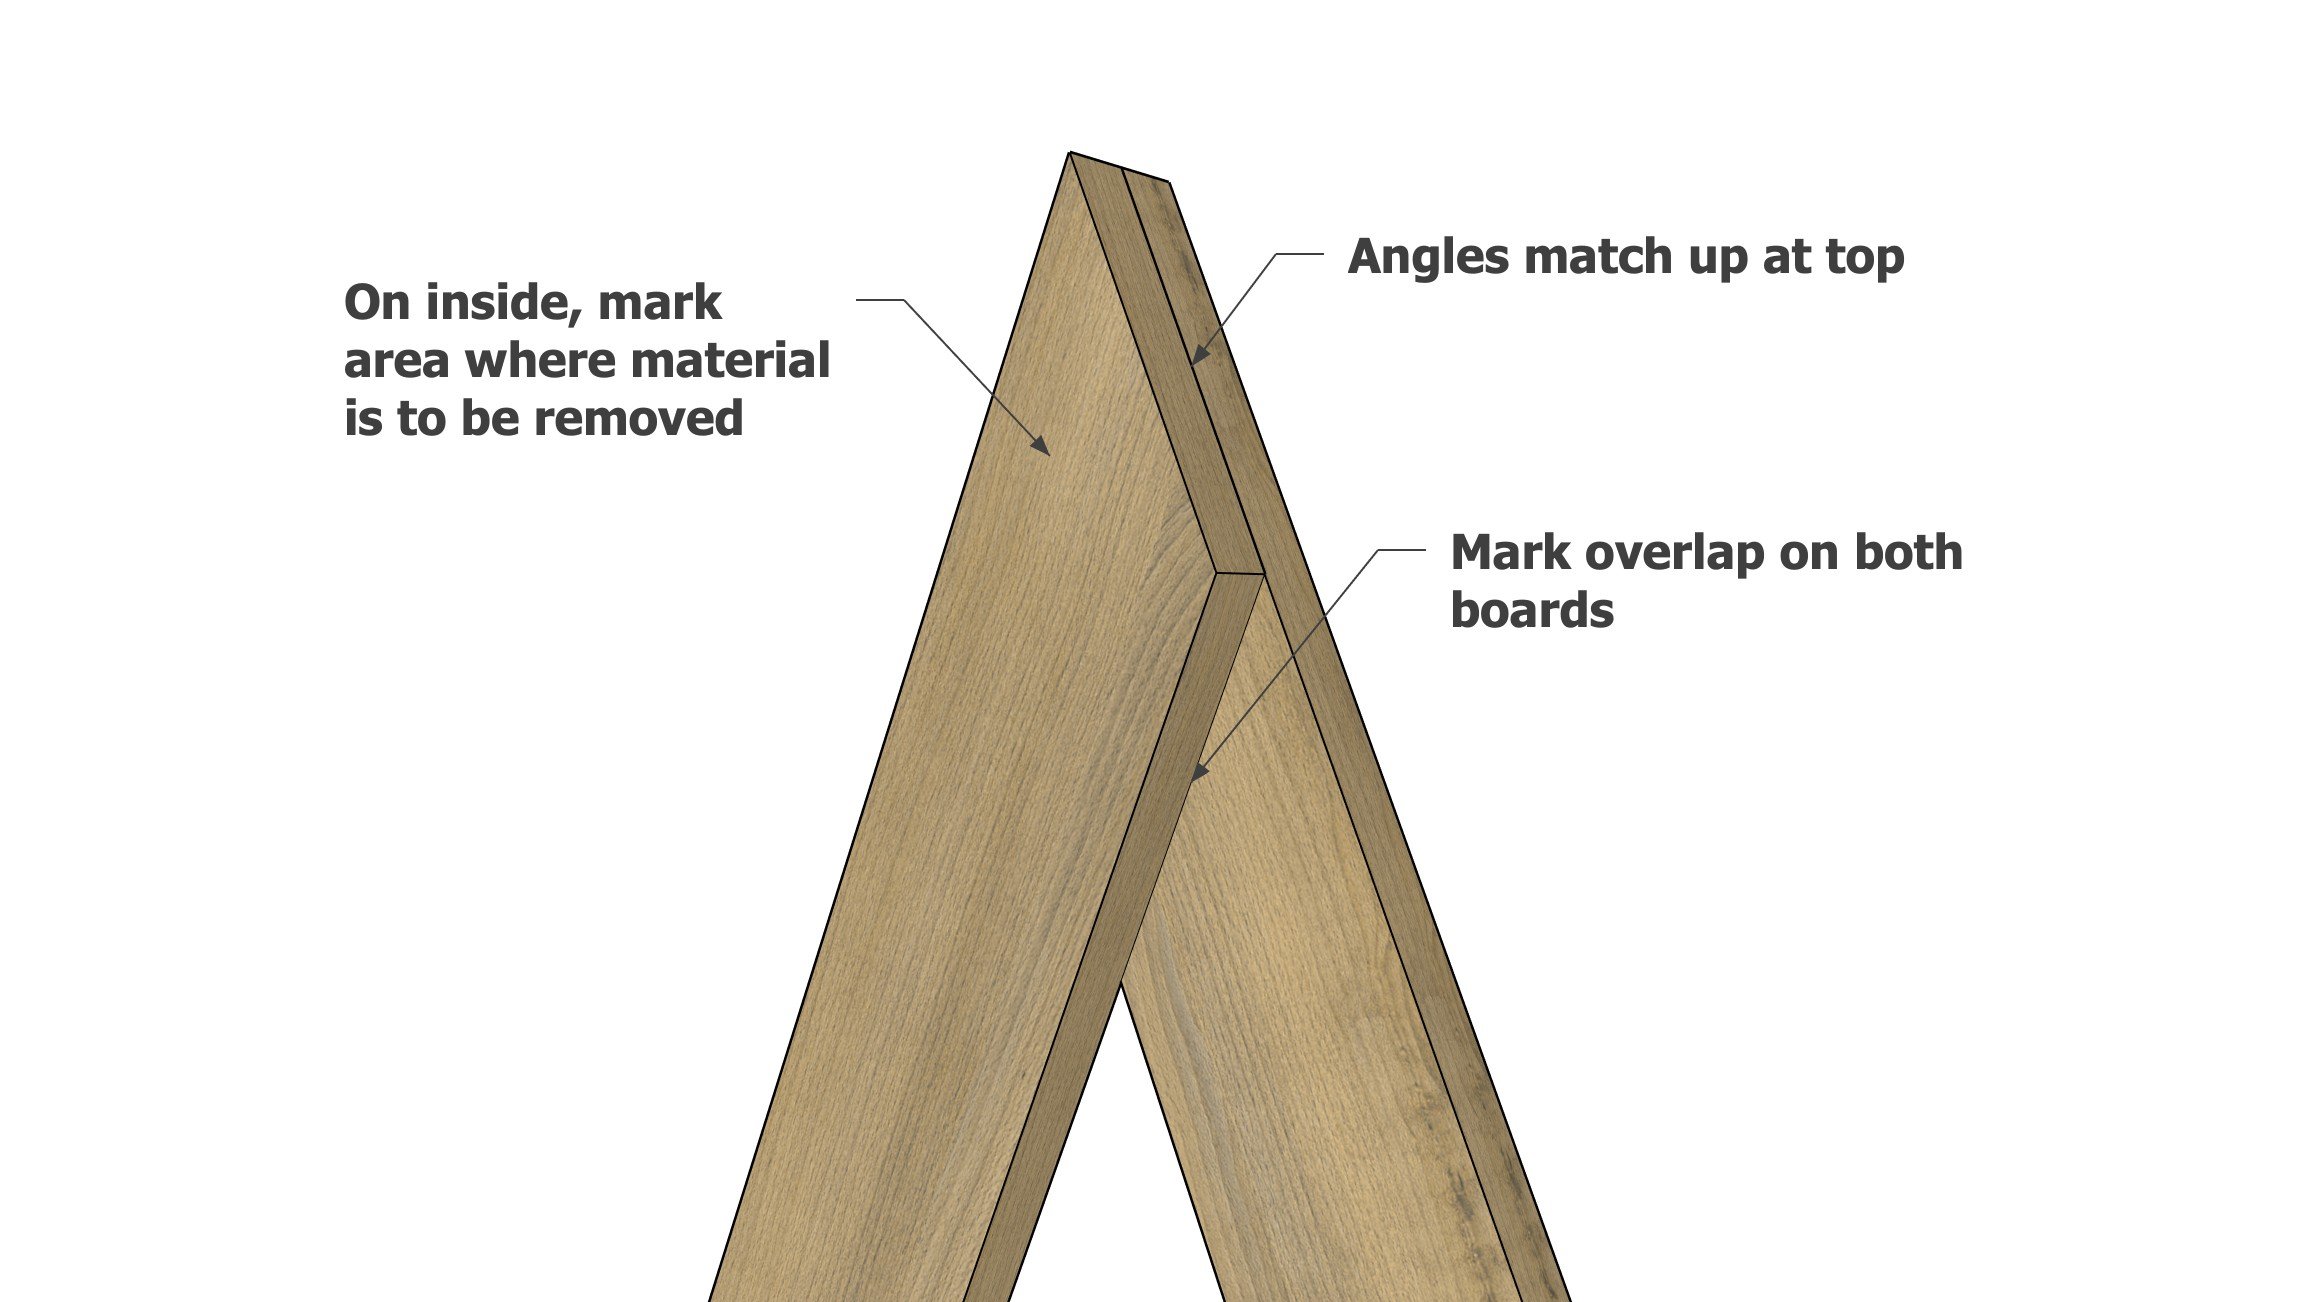
Layout the two cut boards, so the 45 degree cuts match each other at the top as shown.
Use a pencil to trace the overlaps.
Step 3
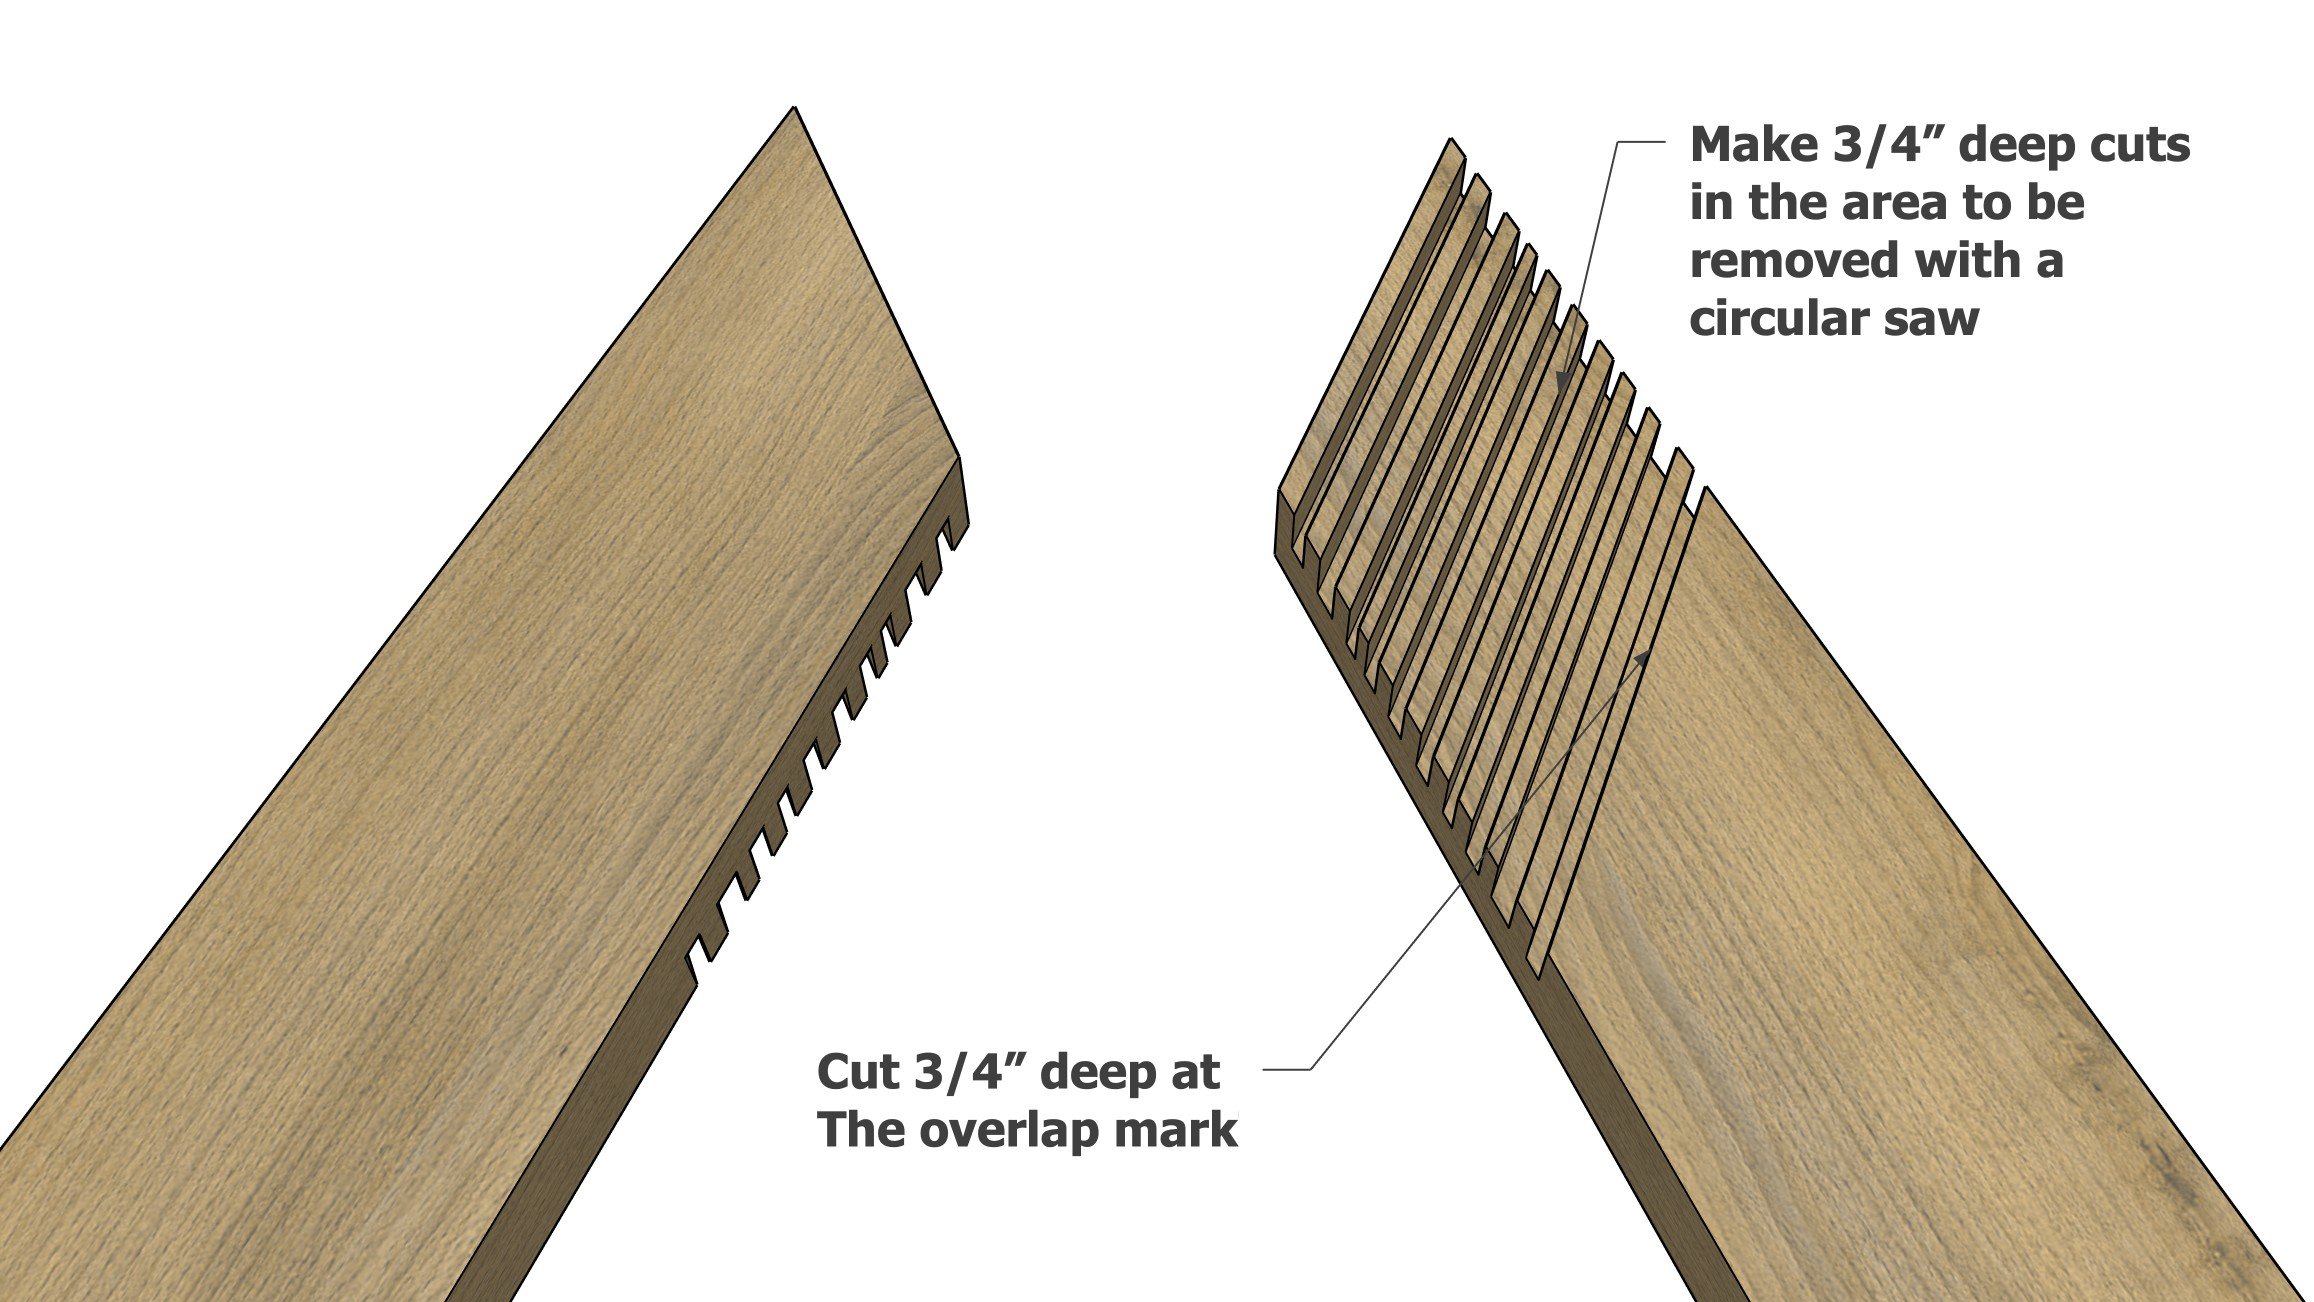
Set the circular saw cutting depth to 3/4".
Clamp the boards to a stable surface.
Make cuts about 1/4" apart on the overlapping areas with the circular saw.
Break the pieces out and then use a chisel to remove excess.
Step 4

Lap the two pieces and test the fit.
You can proceed to the next step and apply a finish before final assembly, or you can attach the two pieces together now with 1-1/4" screws.
If you are planning to use the arch repeatedly, use 1-1/2" bolts and washers and nuts for easy assembly/disassembly.
Step 5
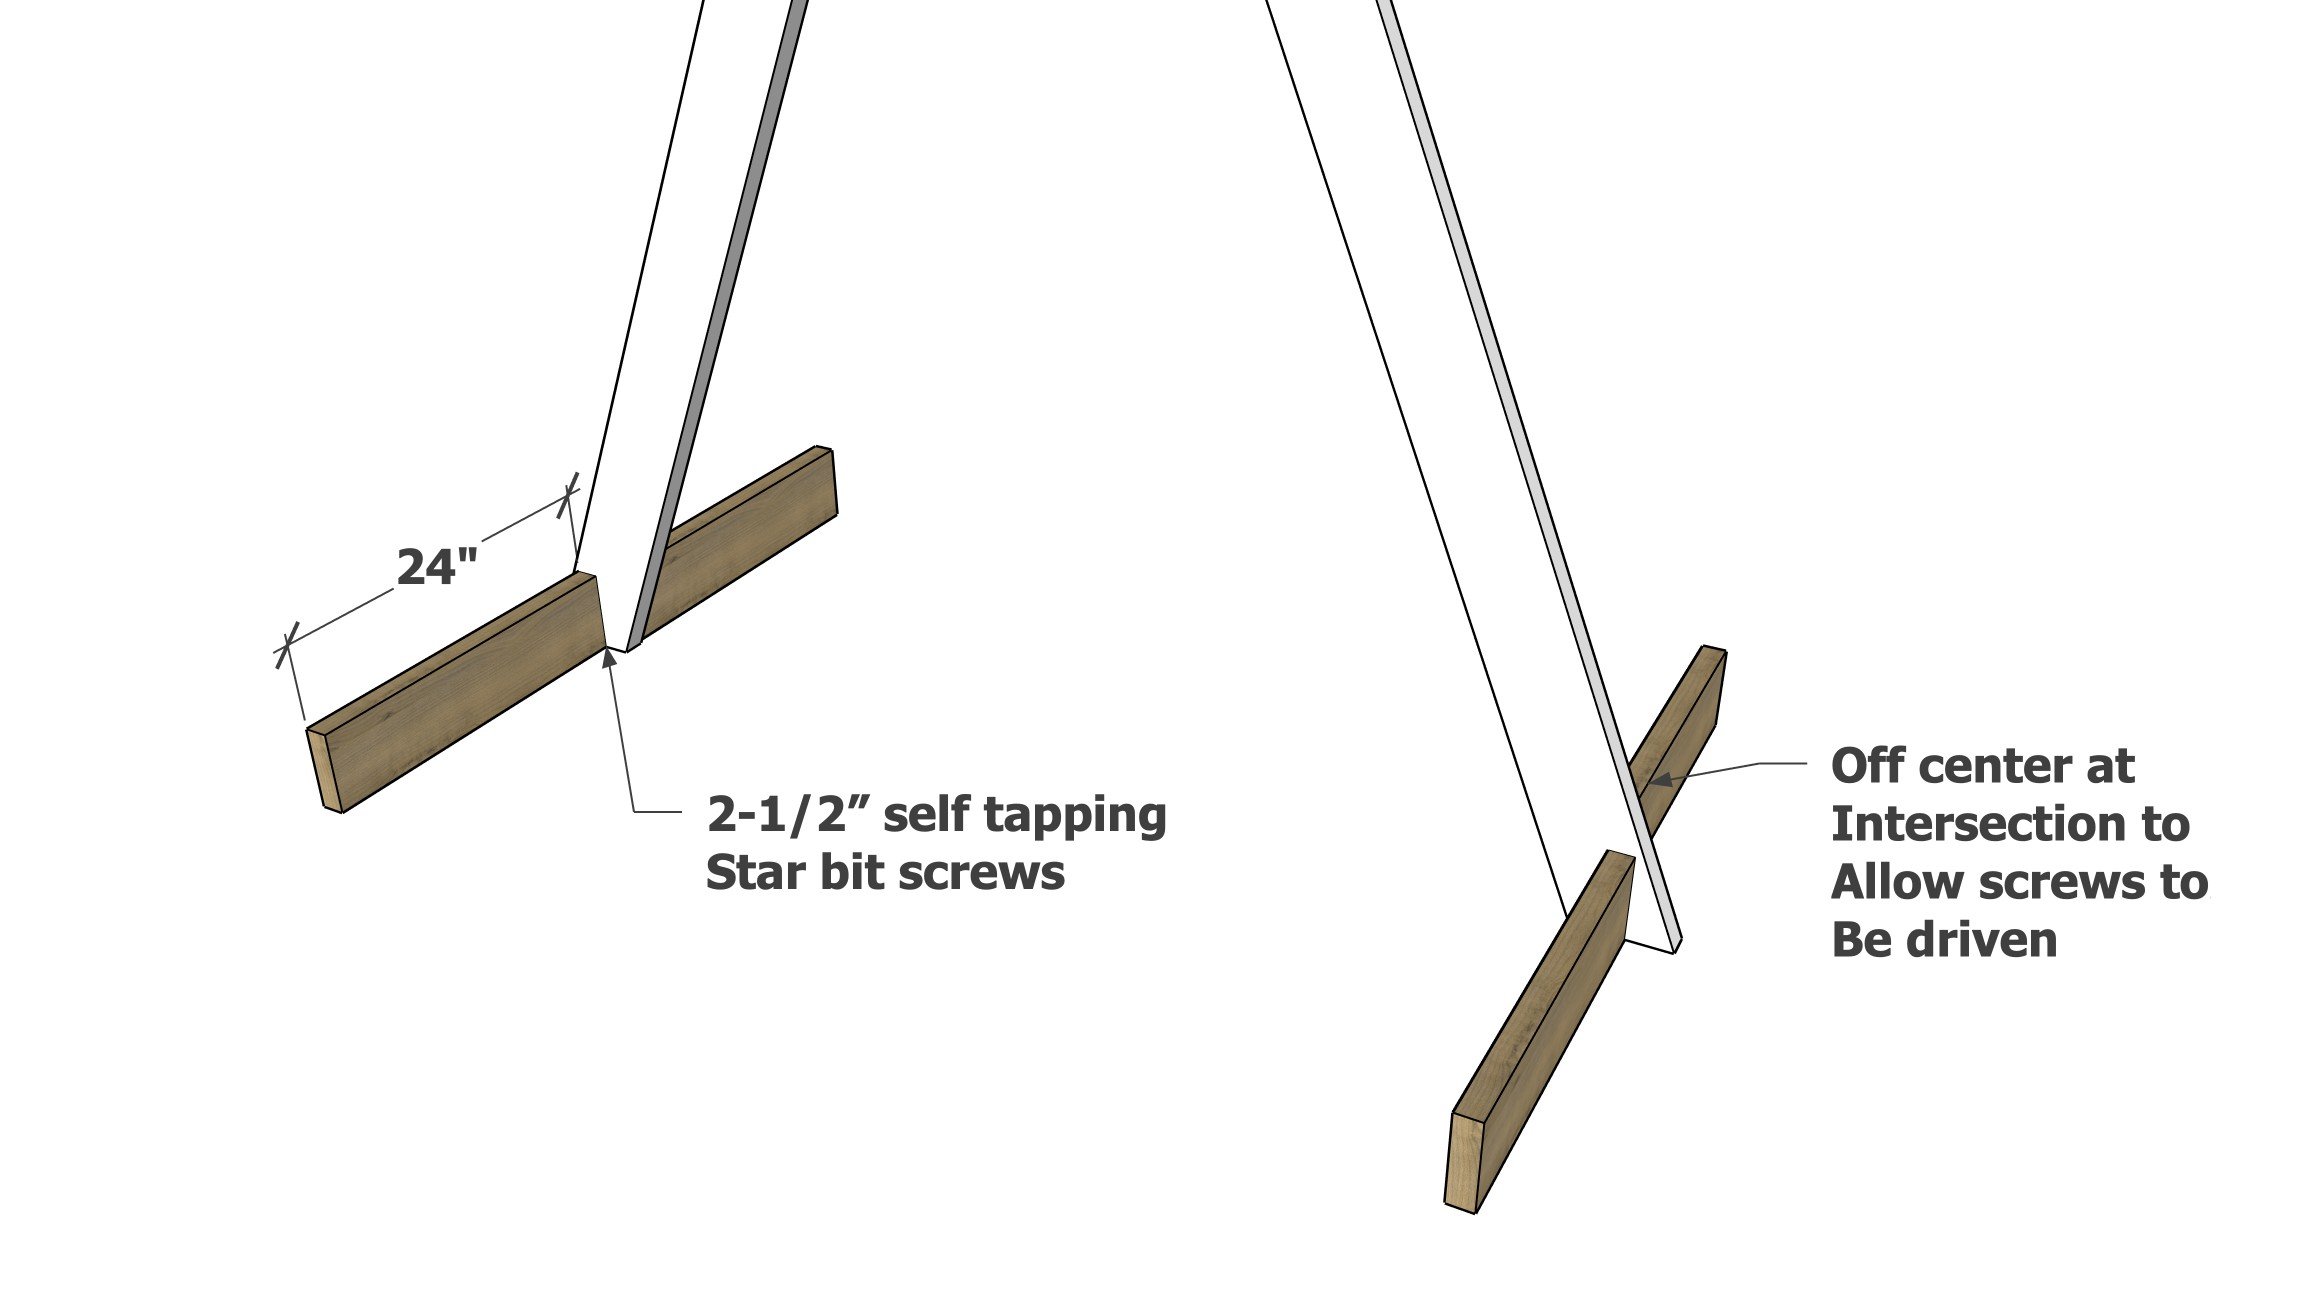
Screw the base pieces to the bottom of the arch with 2-1/2" screws.
Dispose of the rags and applicator brush as directed by the wood stain manufacturer, as the stain could be combustible.