


Free easy plans to build a truss coffee table out of 2x4s from Ana-White.com


Whoa!!!
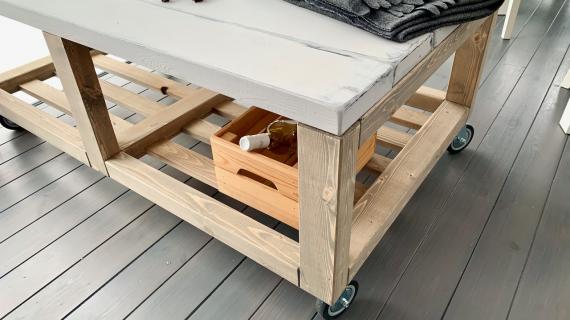
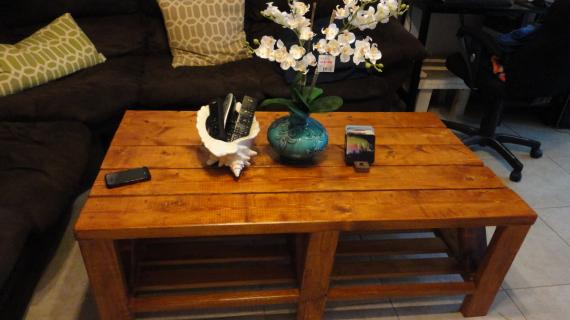
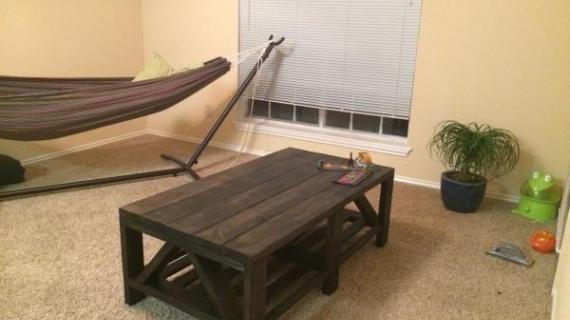
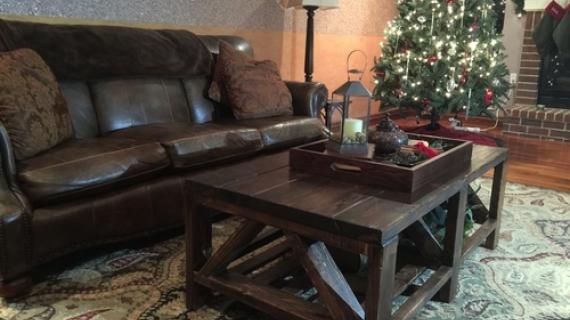
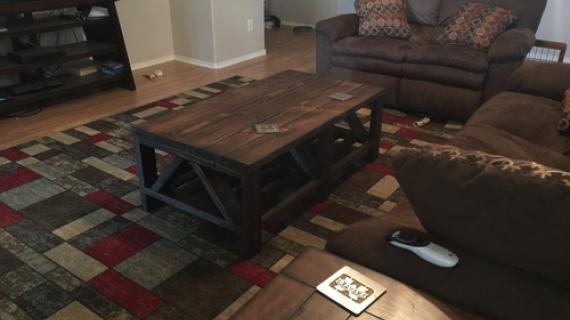
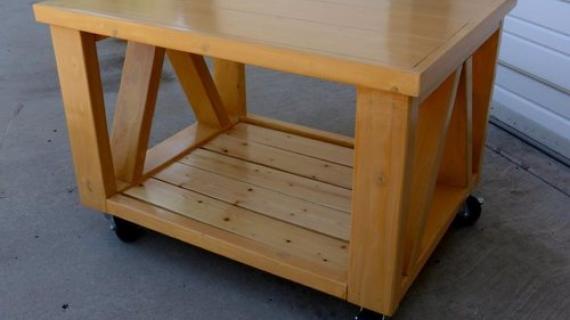
Yep, that's a 2x4 - and some 2x6s and 1x3 boards - and you can cut them up and screw them together to make this coffee table! All for less than $50!!!
My friend Whitney from Shanty2Chic wrote me about a coffee table plan idea and I thought you'd love it too! Whitney and Ashley, as you know, are up for Reynold's Real Moms Contest - if you love the Shanty girls as much as I do, and they've helped you or inspired you on a project - please take a second to click over and return the favor.
And here's from Whitney:
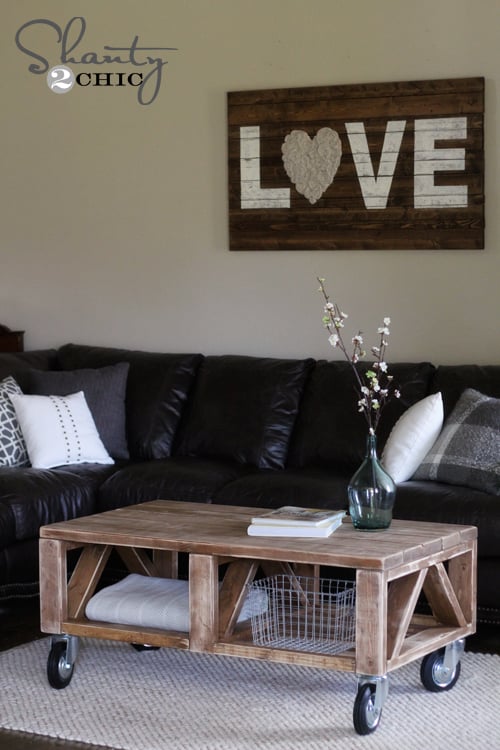
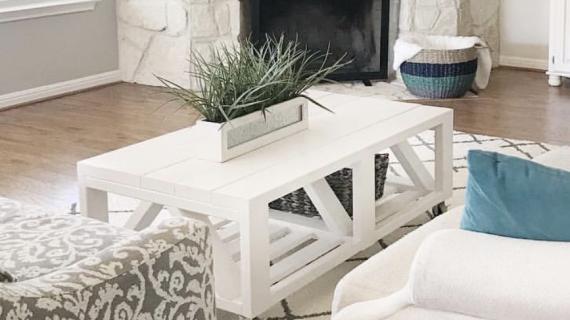
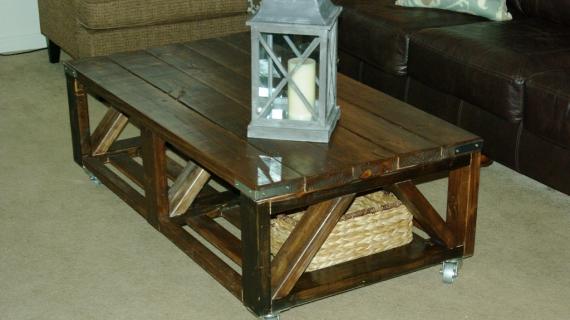
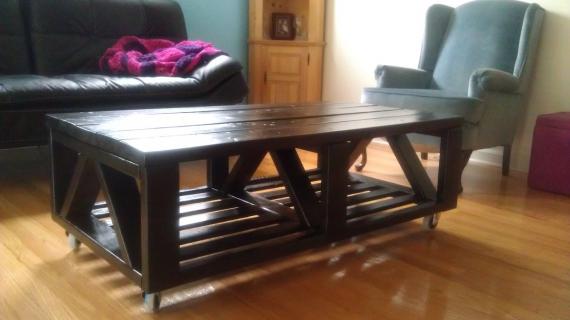
I am loving my new coffee table! I love that a pile of 2x4's can be turned into something beautiful. I spent under $50 on the wood and had it done in just a few hours. I tried a new, easy finish on it that I LOVE! It fits perfectly in my space and gives me a little storage room as well. Thanks so much for designing this with me Ana!
Thank you so much Whitney!
And of course the plans follow. For more photos and tips and tricks, please stop over and read Whitney's post as well.
Preparation
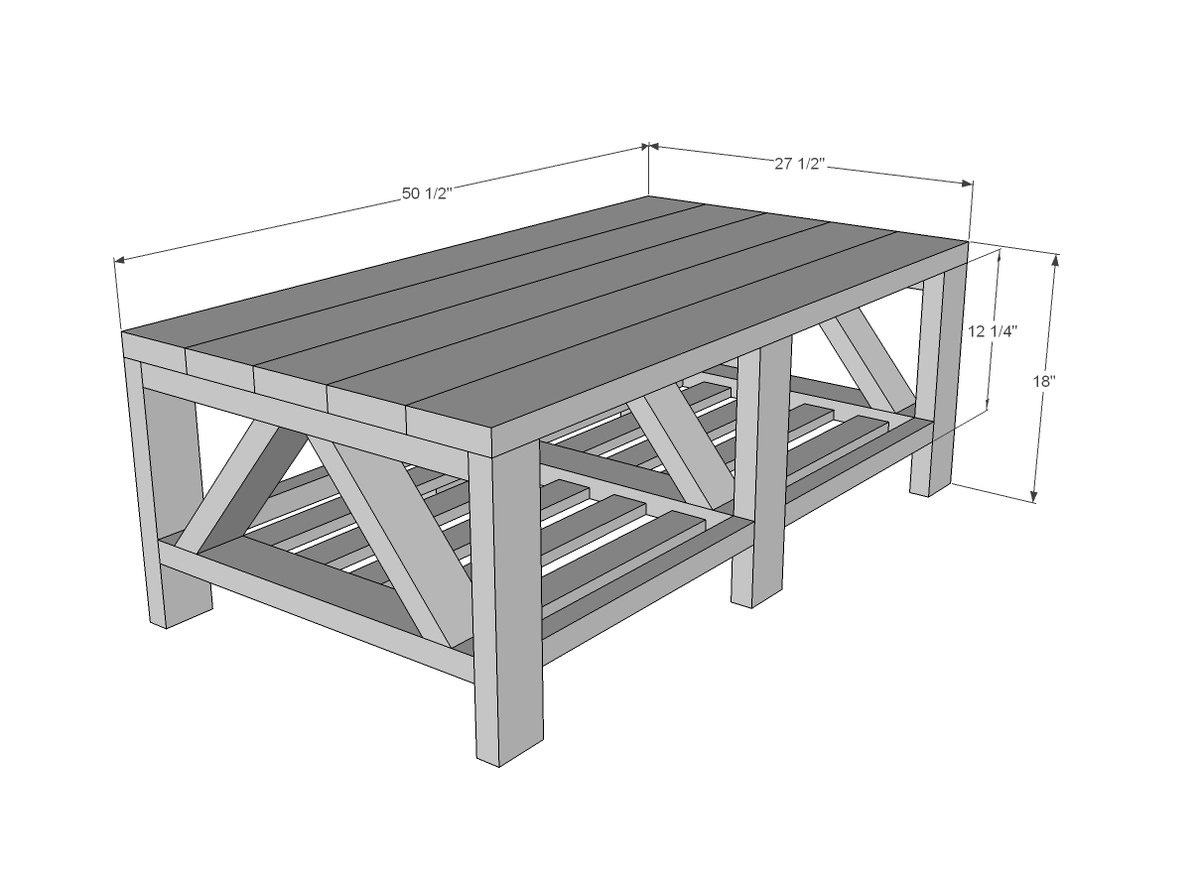
4 - 2x4 @ 8 feet long
1 - 2x2 @ 8 feet long
3- 1x3 @ 8 feet long
1 - 2x6 @ 8 feet long or stud length
2 - 2x6 @ 10 feet long
1 1/4" and 2 1/2" pocket hole screws
2 1/2" wood screws (decorative screws for attaching top to bases)
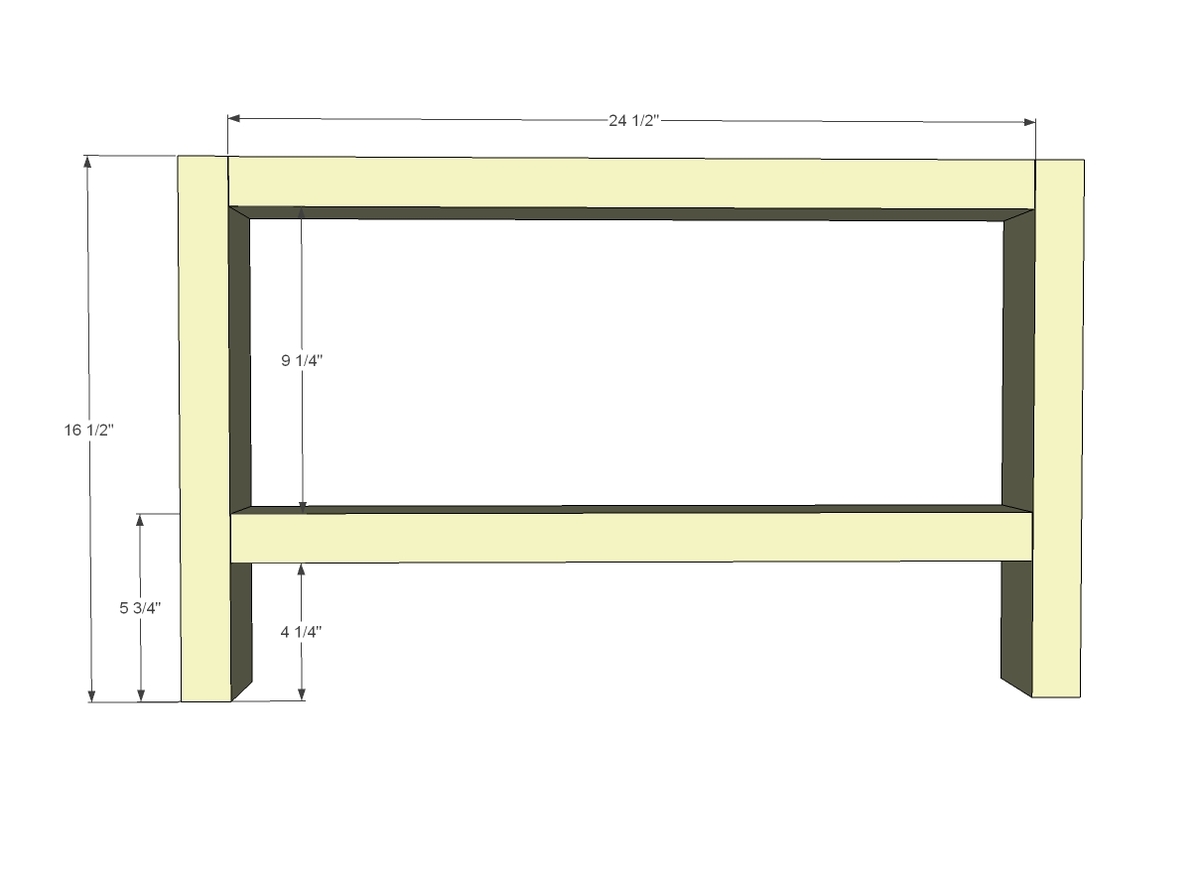
6 - 2x4 @ 24 1/2"
6 - 2x4 @ 16 1/2"
6 - 2x4 @ 12 1/8" (Both ends BEVELED at 40 degrees off square with ends parallel)
4 - 2x2 @ 20"
10 - 1x3 @ 20"
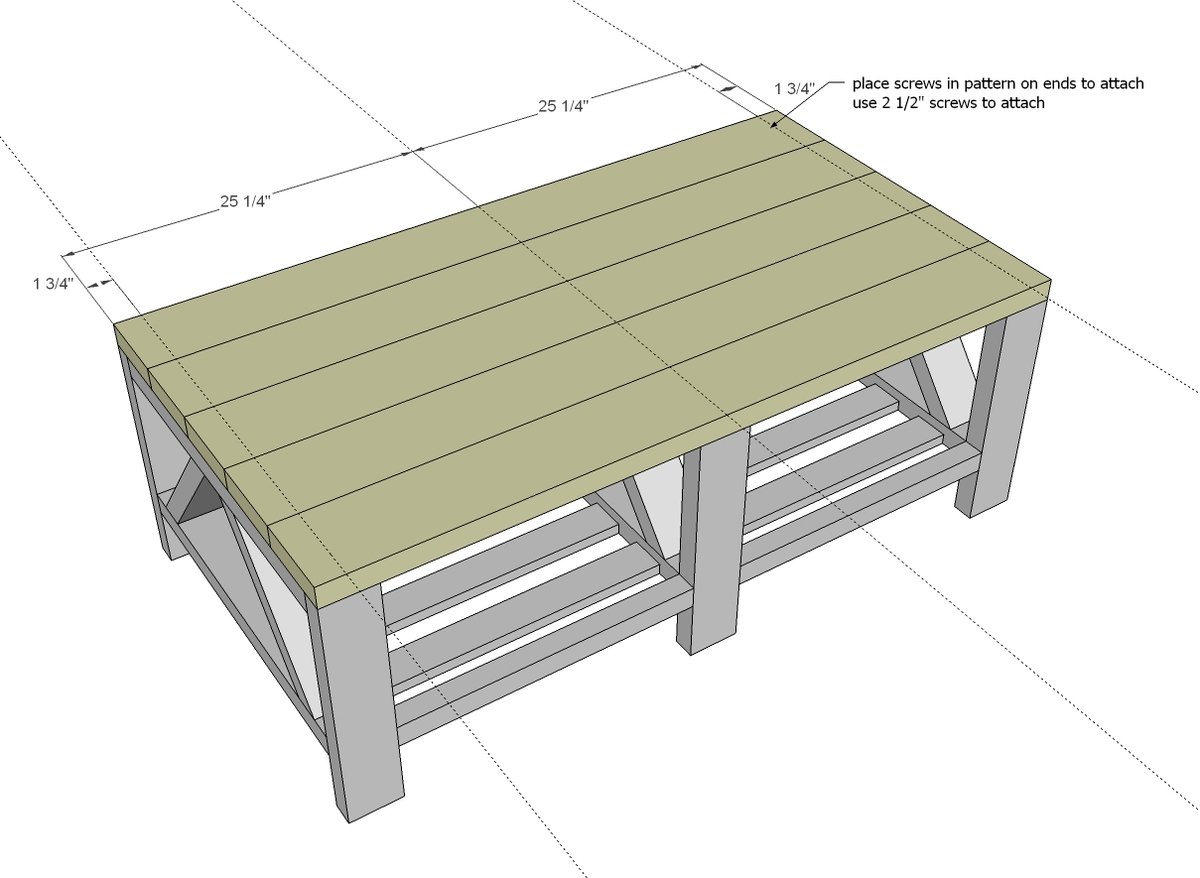
5 - 2x6 @ 50 1/2"


Please read through the entire plan and all comments before beginning this project. It is also advisable to review the Getting Started Section. Take all necessary precautions to build safely and smartly. Work on a clean level surface, free of imperfections or debris. Always use straight boards. Check for square after each step. Always predrill holes before attaching with screws. Use glue with finish nails for a stronger hold. Wipe excess glue off bare wood for stained projects, as dried glue will not take stain. Be safe, have fun, and ask for help if you need it. Good luck!
Instructions
Step 1
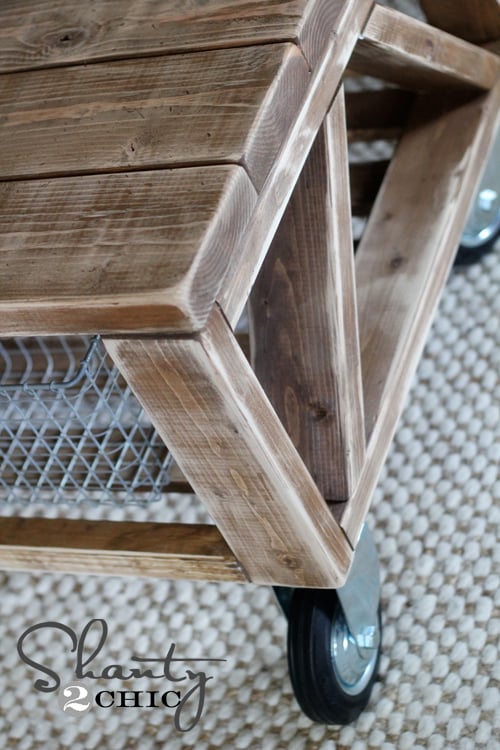
Start by making three of the truss frames. Whitney opted for wheels so you cut her legs shorter. If you opt for pocket holes, place on top of top board and bottom of bottom board - the top gets covered by the tabletop boards, and the bottom will be hidden underneath.
Step 2
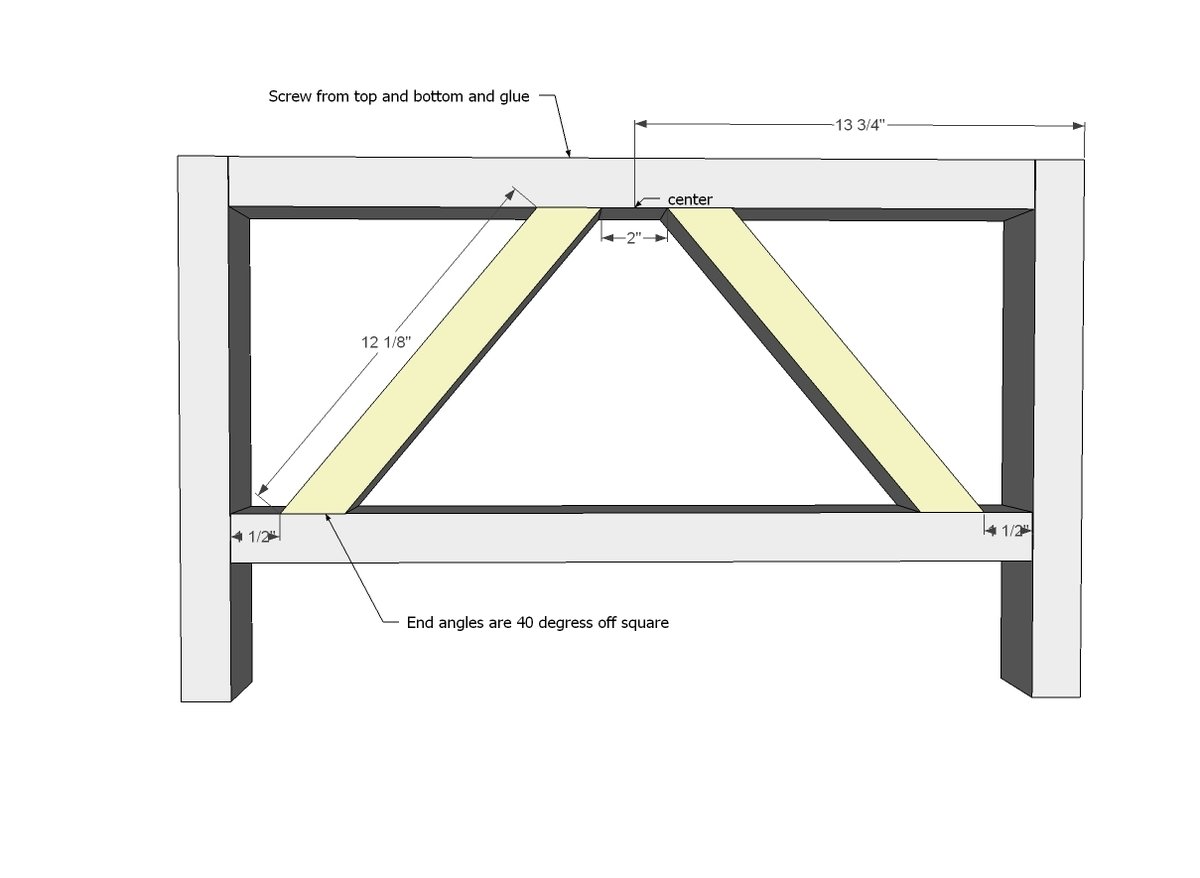
Add the truss detail in. The easiest and most hidden way to do this is to nail or screw from tops and bottoms with 2 1/2" screws or longer.
Step 3

Take the three trusses and joint together with side aprons. The best way is pocket holes on the insides.
Step 4
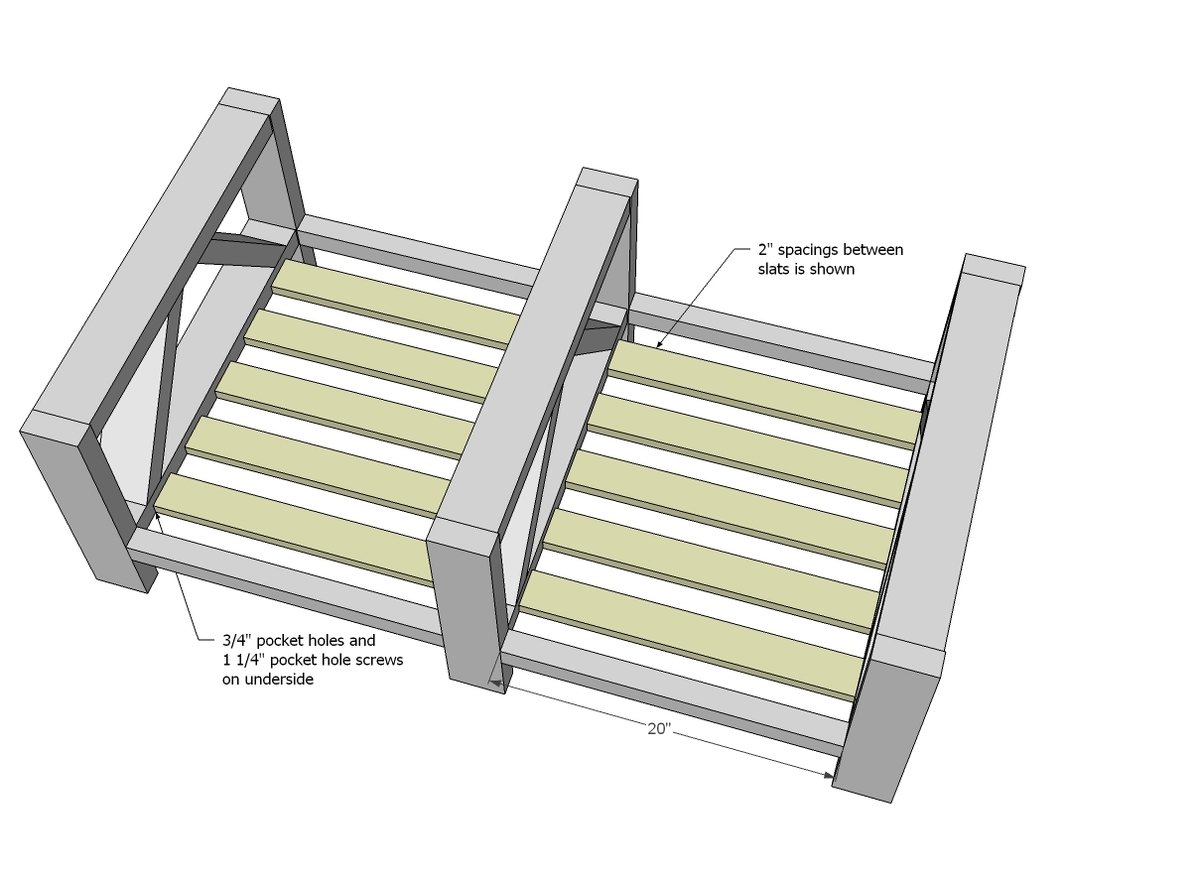
Next, add in the rungs. The best way is 3/4" pocket holes and 1 1/4" pocket hole screws on the underside.
Step 5
It is always recommended to apply a test coat on a hidden area or scrap piece to ensure color evenness and adhesion. Use primer or wood conditioner as needed.


Comments
aroundtowndecor
Mon, 03/04/2013 - 12:53
stain color
I love the color of the stain used on the table. Can you tell me what it is?
Thanks so much!
riss1819
Fri, 01/09/2015 - 07:15
I'm not quite finished but I
I'm not quite finished but I like it so far. It definitely costs more then $50 to make especially if using the casters as legs.
sleepiestlifter
Wed, 06/17/2015 - 13:59
Coffee table stain
I would also love to know the stain you used for this table! I am crazy about it an in the process of making it as we speak! :)
Love your site and appreciate the plans you provide to your readers!! :)