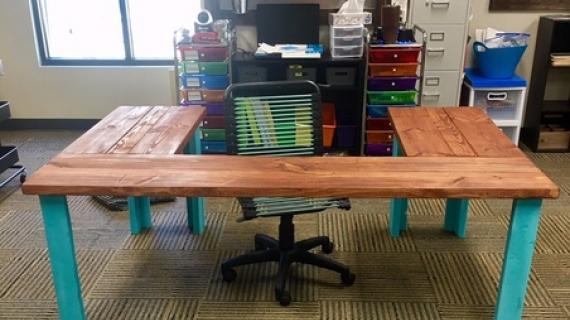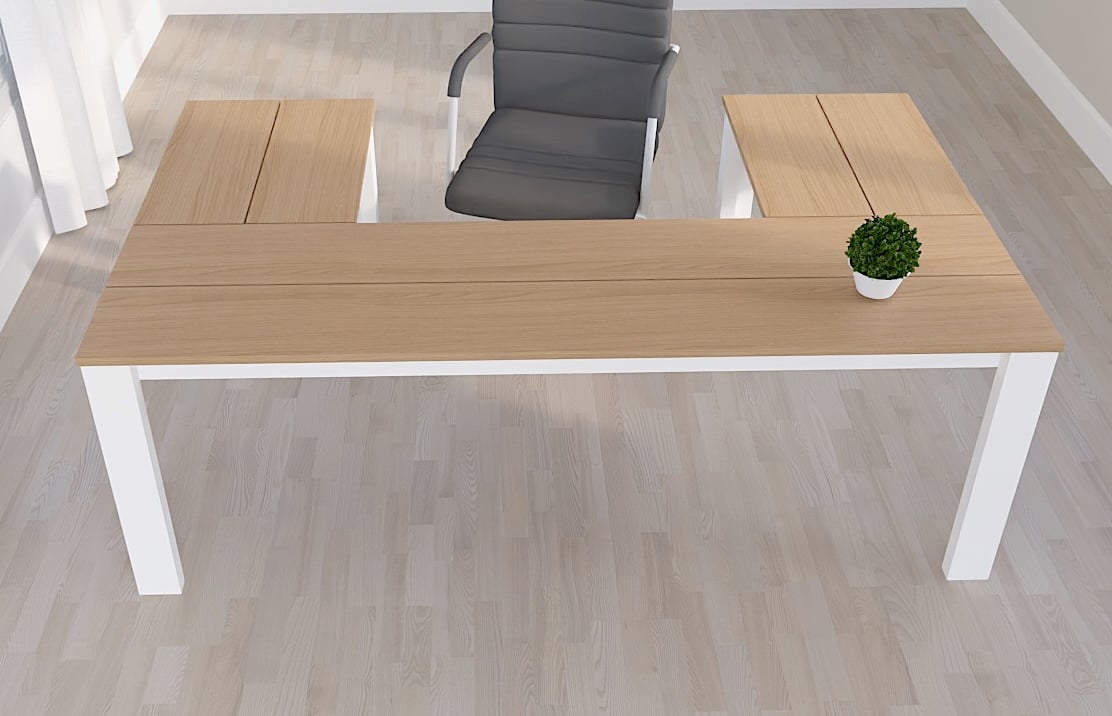


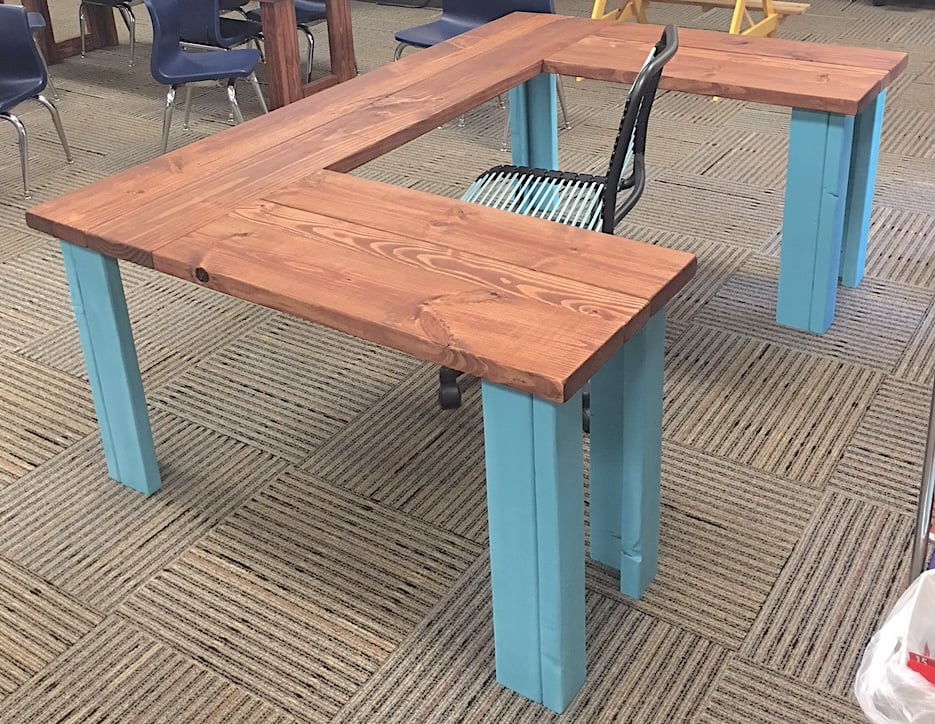
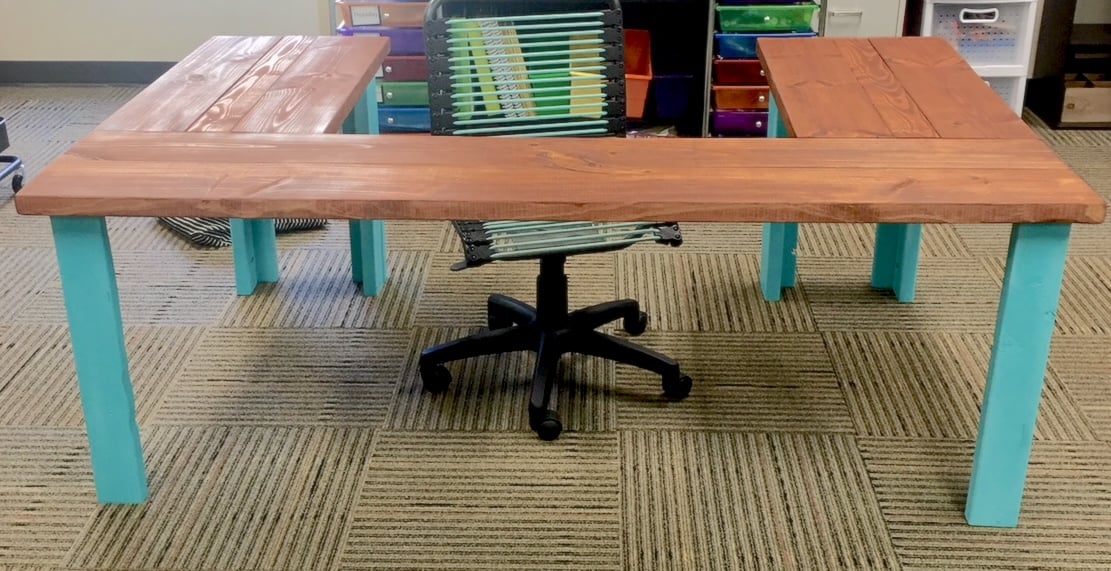
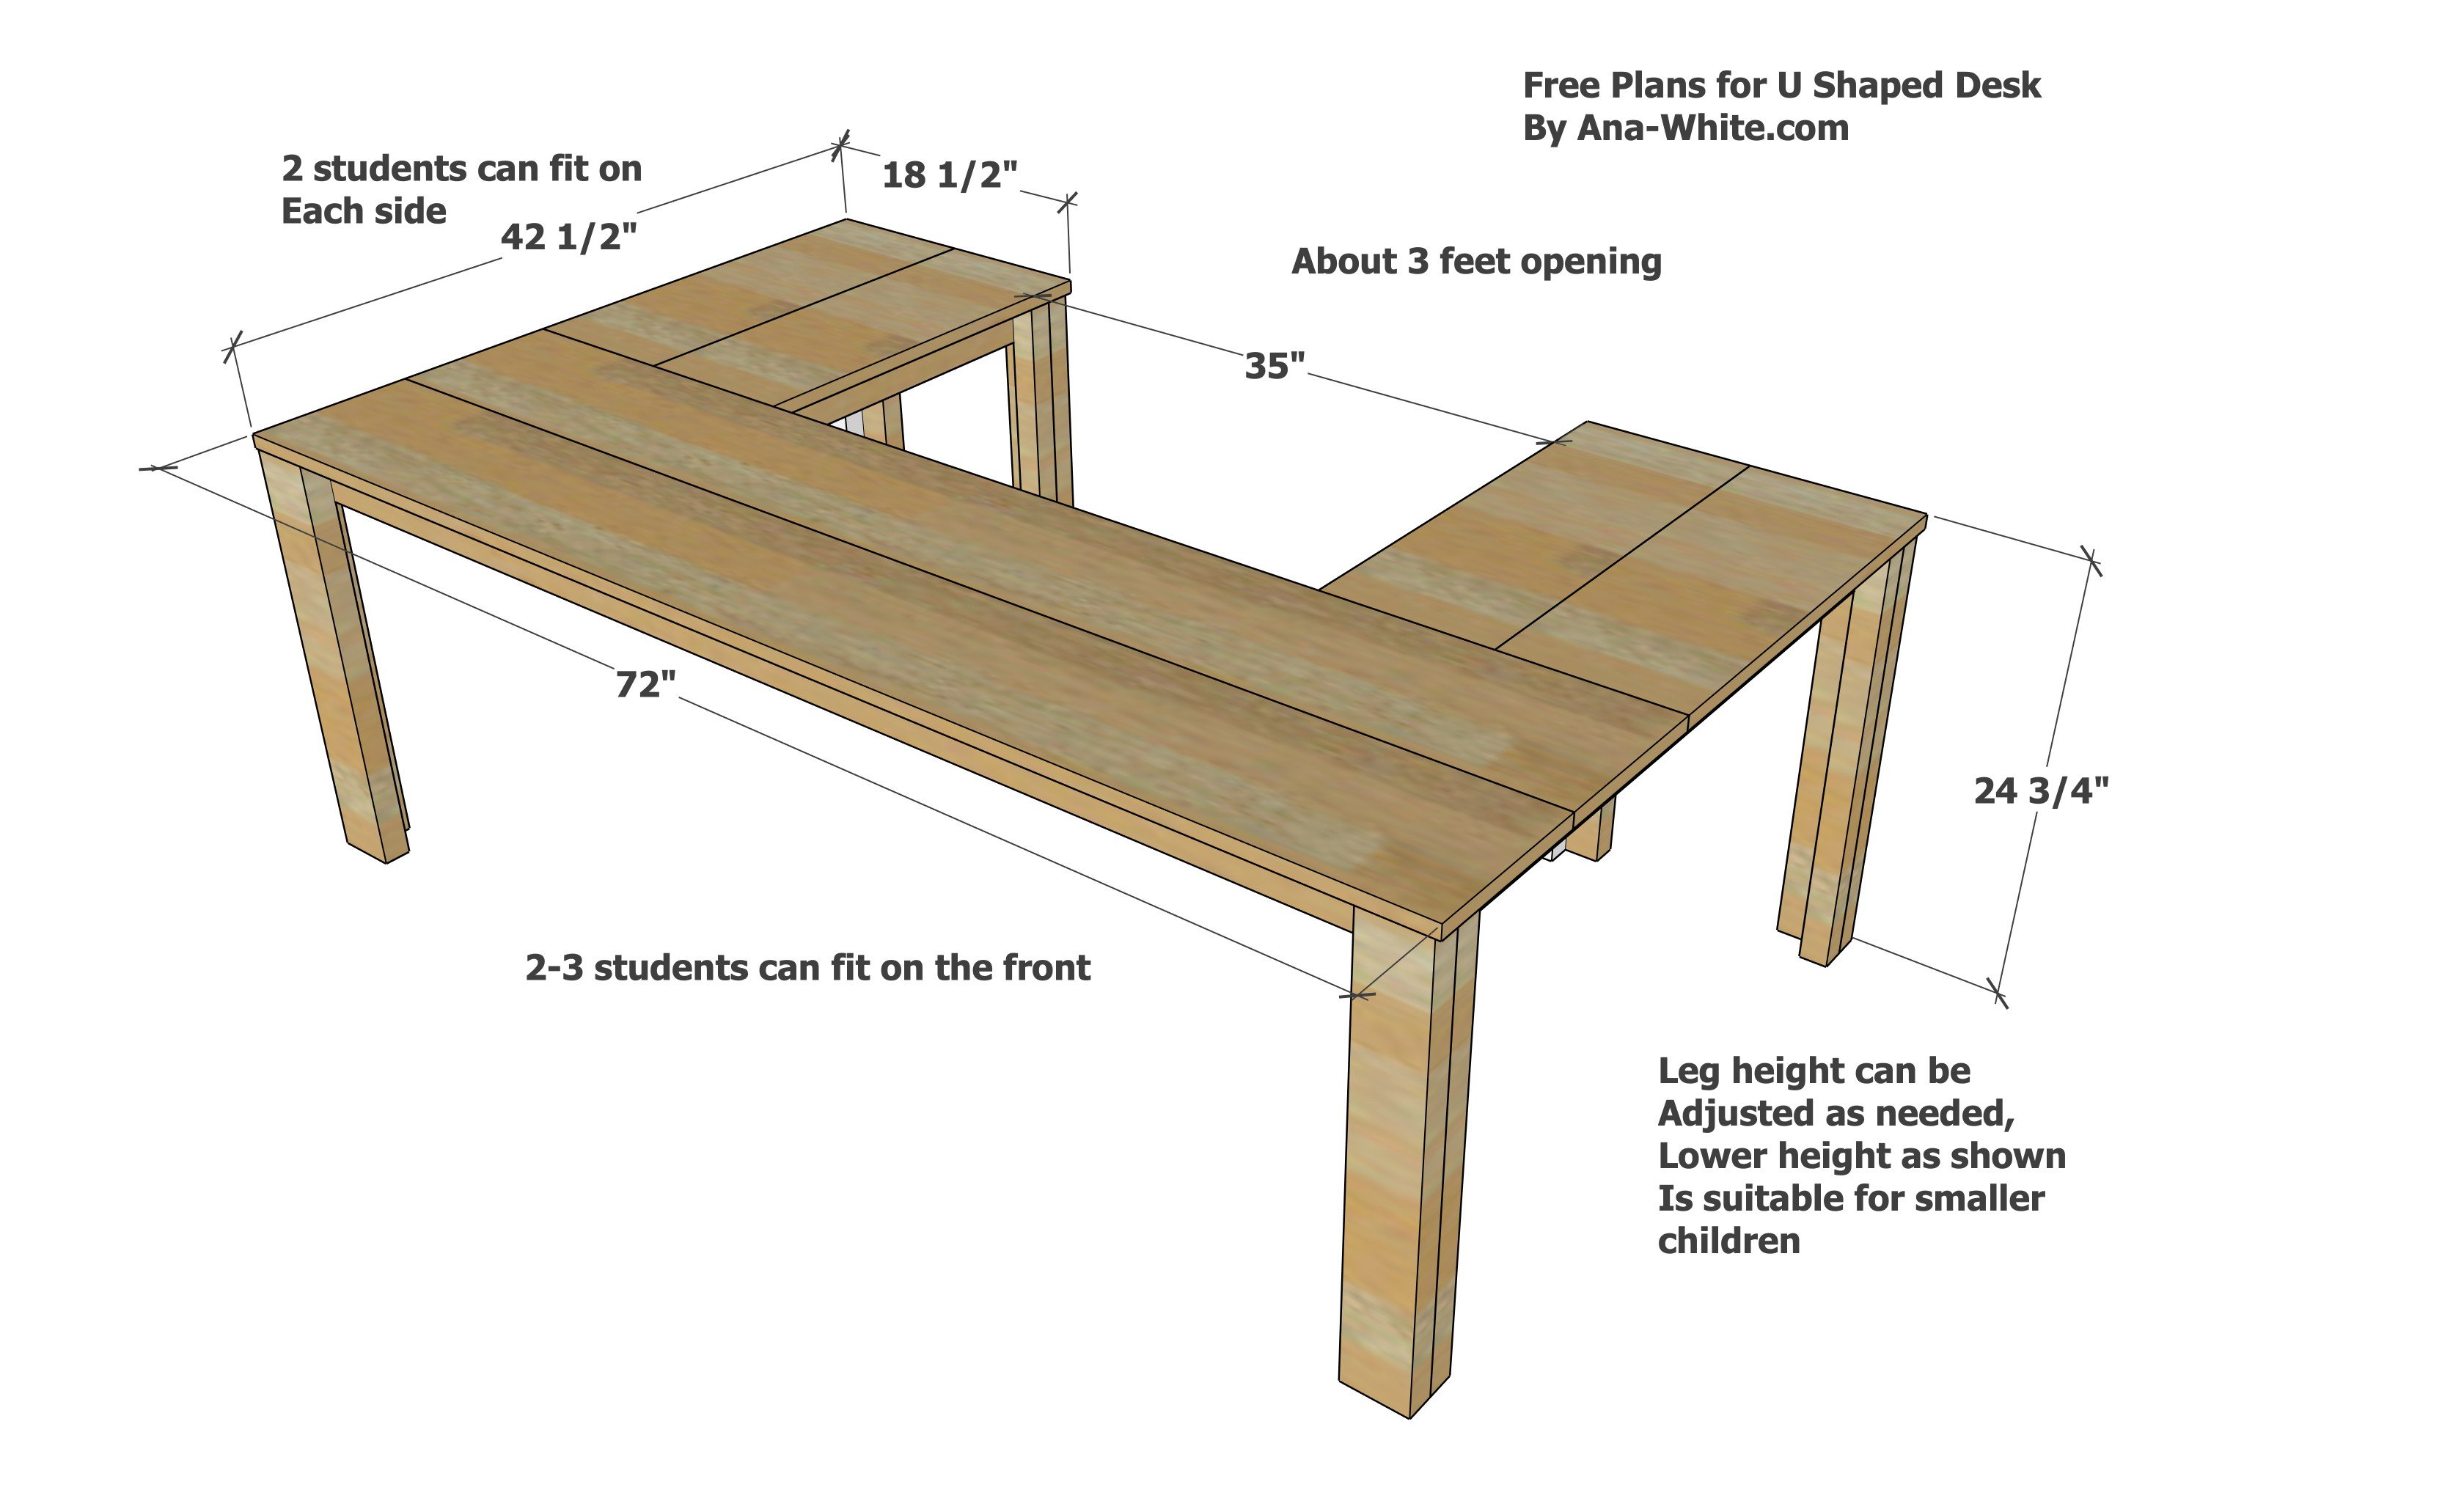
Free plans to build your own U Shaped Table or desk, sometimes called a horseshoe table, designed to work with up to four students at once. This desk is perfect for homeschool, work groups, kindergartens, preschools, or anywhere multiple students can work, with the teacher in the middle.
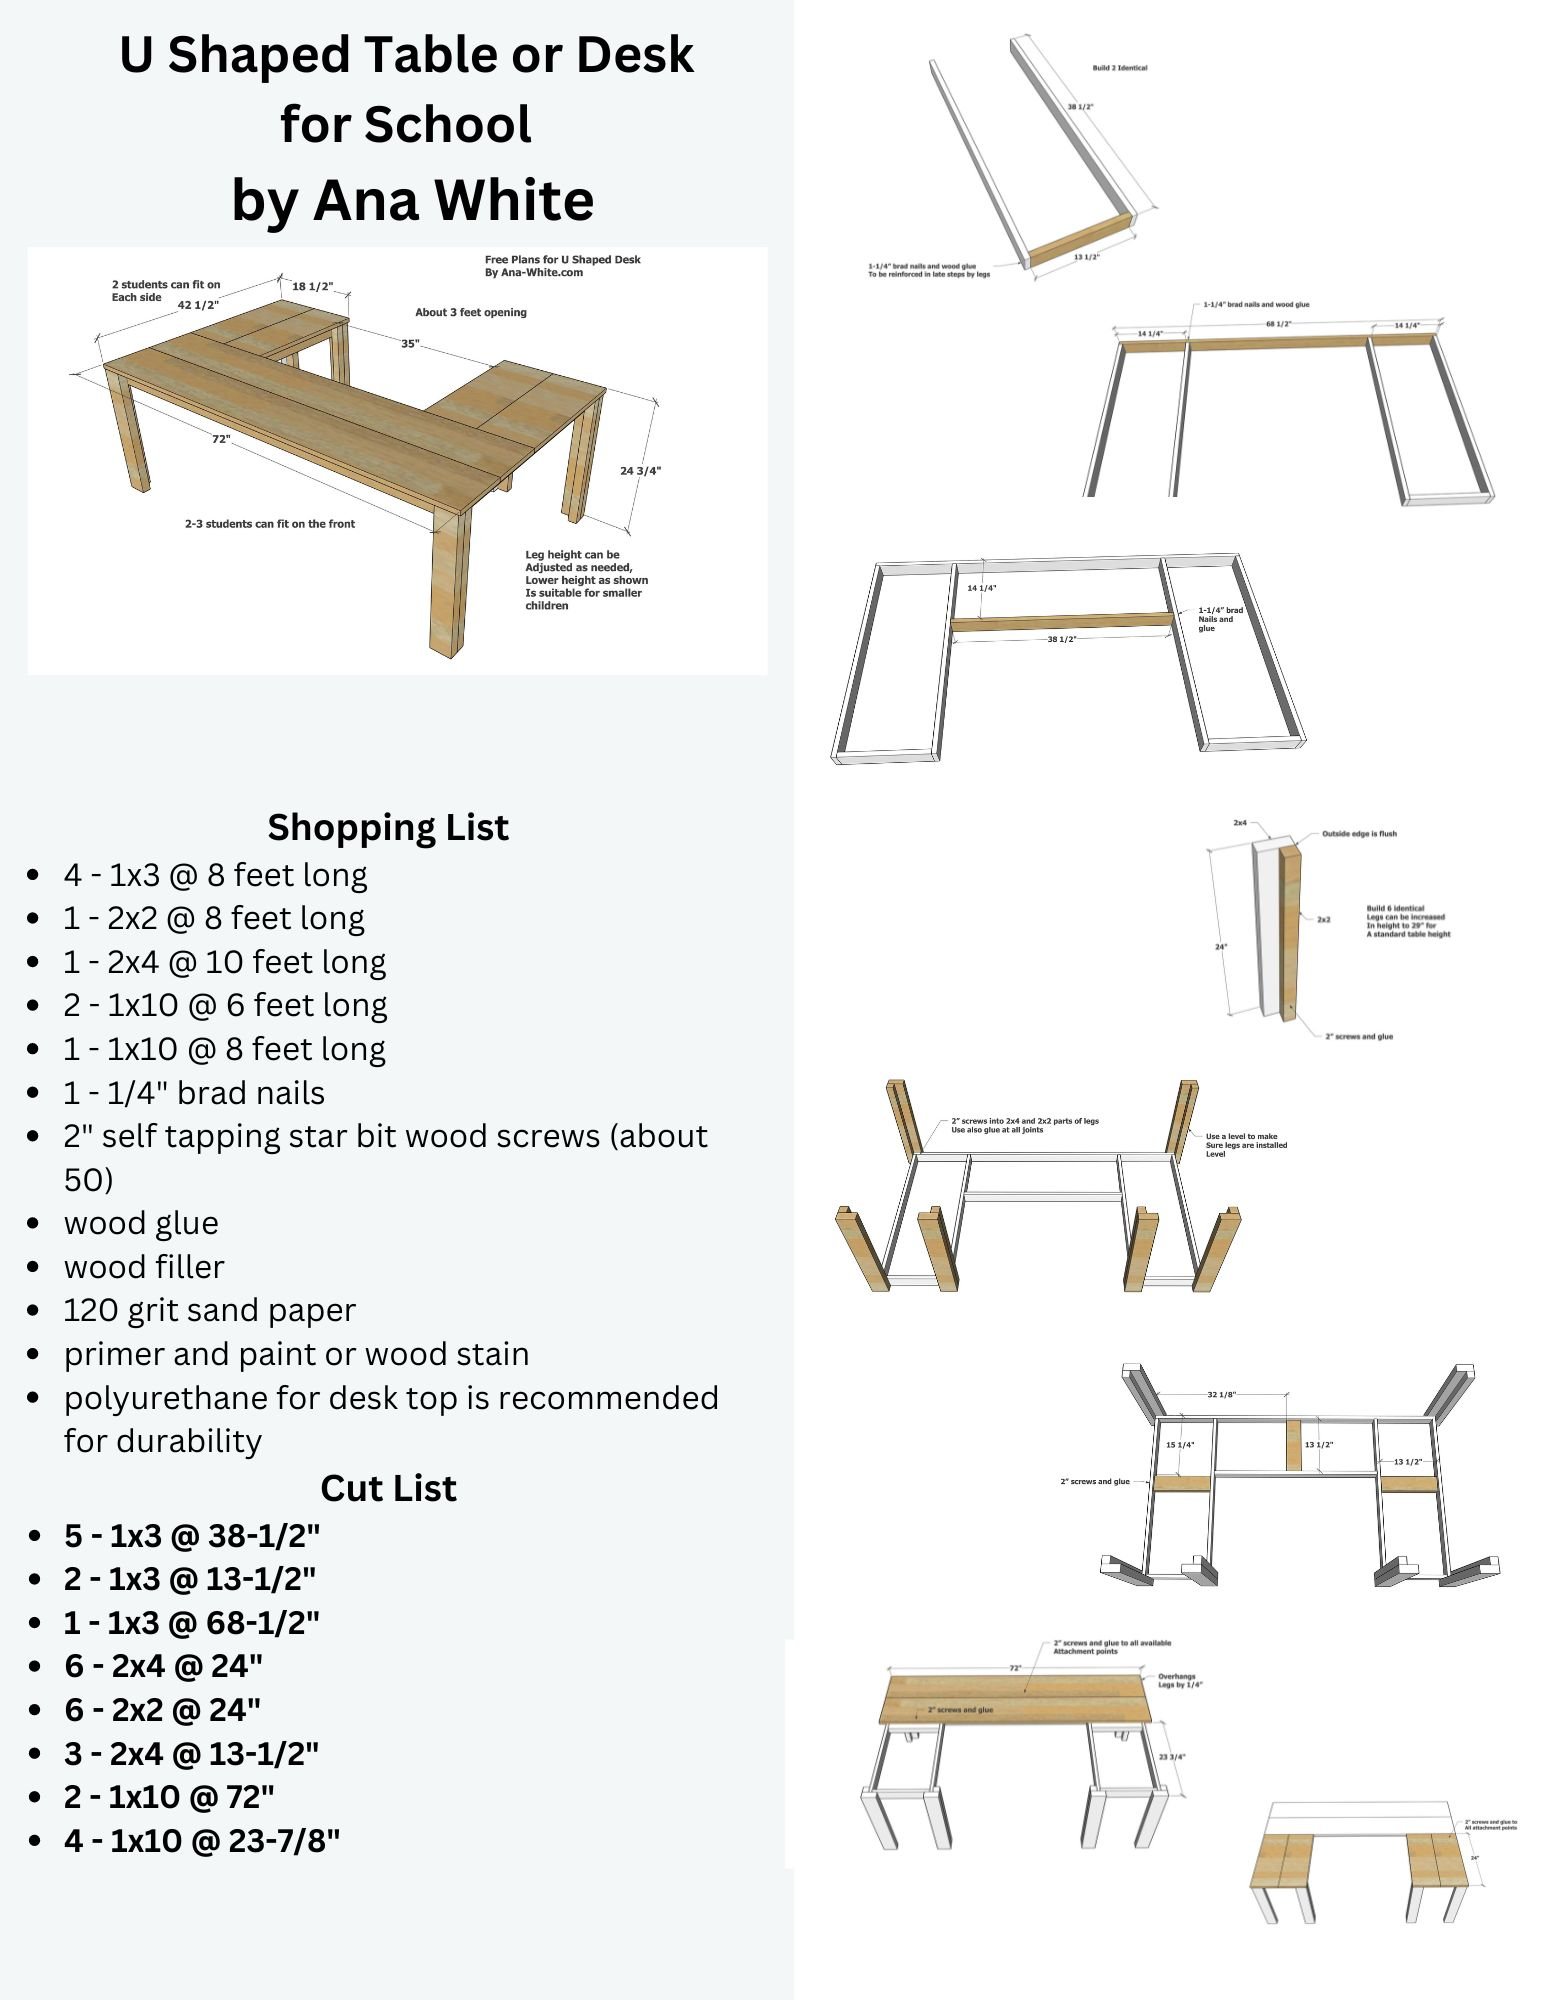
The free plans use a 2x4 base, with a 1x10 top. It is easy to build with basic lumber, you can upgrade the construction using pocket holes if you wish. Plans include user photos, step by step diagrams, detailed shopping list and a cut list - everything you need to build your own U shaped table or desk.
Why We Made this Plan
A favorite brag post on this blog has long been Jeff McClure's U shaped desk for his wife's kindergarten classroom.
From preschool teachers, to homeschooling parents, and even kindergarten teachers have asked for this plan.
We drew inspiration from Jeff's amazing design, but used 1x boards for the top as they tend to be smoother. We added a frame underneath to support the 1x boards.
Free Plans for U Shaped Desk
Thank you for using the plans, please send in photos when you build - we love seeing how your projects turn out!
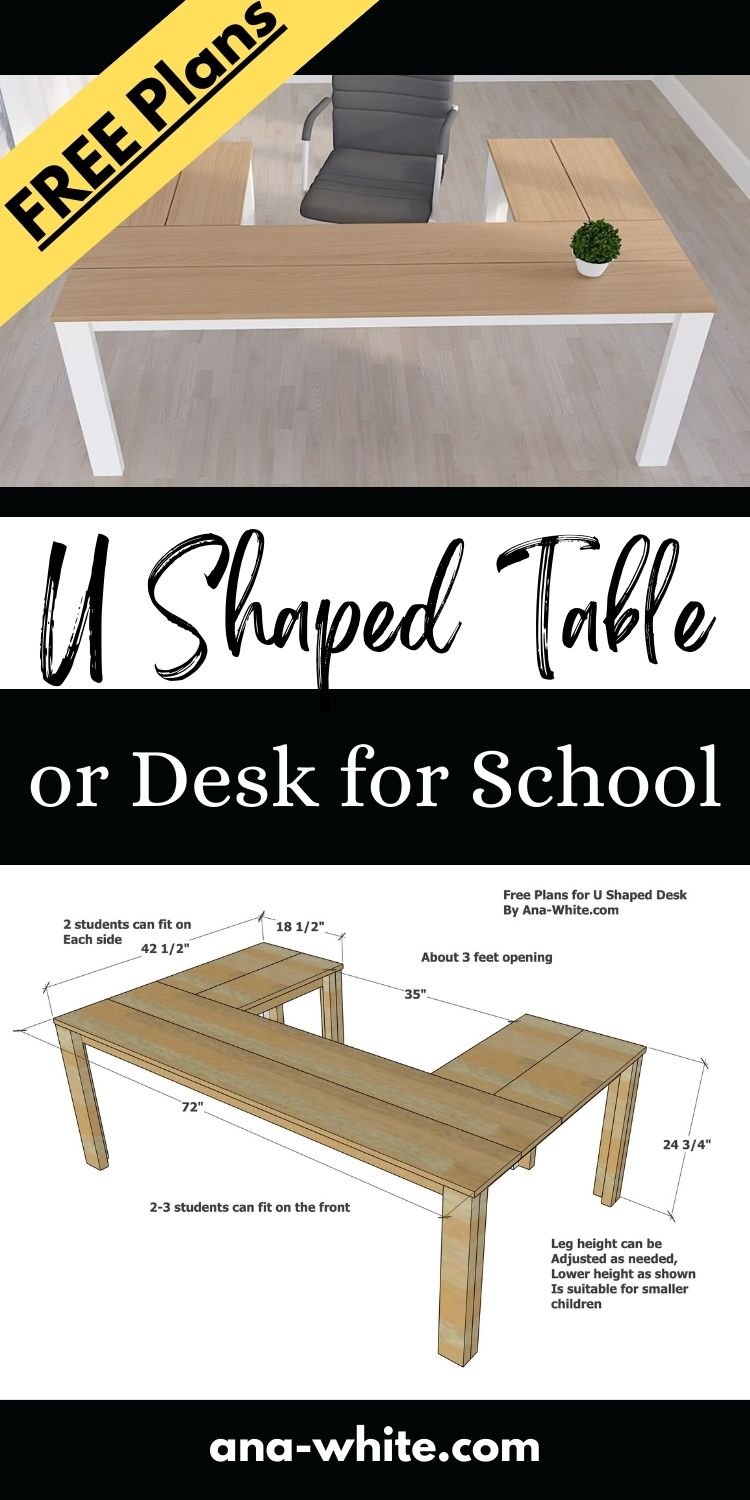
Pin For Later!
Preparation
- 4 - 1x3 @ 8 feet long
- 1 - 2x2 @ 8 feet long
- 1 - 2x4 @ 10 feet long
- 2 - 1x10 @ 6 feet long
- 1 - 1x10 @ 8 feet long
- 1 - 1/4" brad nails
- 2" self tapping star bit wood screws (about 50)
- wood glue
- wood filler
- 120 grit sand paper
- primer and paint or wood stain
- polyurethane for desk top is recommended for durability
- 5 - 1x3 @ 38-1/2"
- 2 - 1x3 @ 13-1/2"
- 1 - 1x3 @ 68-1/2"
- 6 - 2x4 @ 24"
- 6 - 2x2 @ 24"
- 3 - 2x4 @ 13-1/2"
- 2 - 1x10 @ 72"
- 4 - 1x10 @ 23-7/8"


The instructions given are for the simplest and most basic build method with the fewest toolset. Using pocket hole screws, or 2" screws to build the frame will increase strength and durability.
Instructions
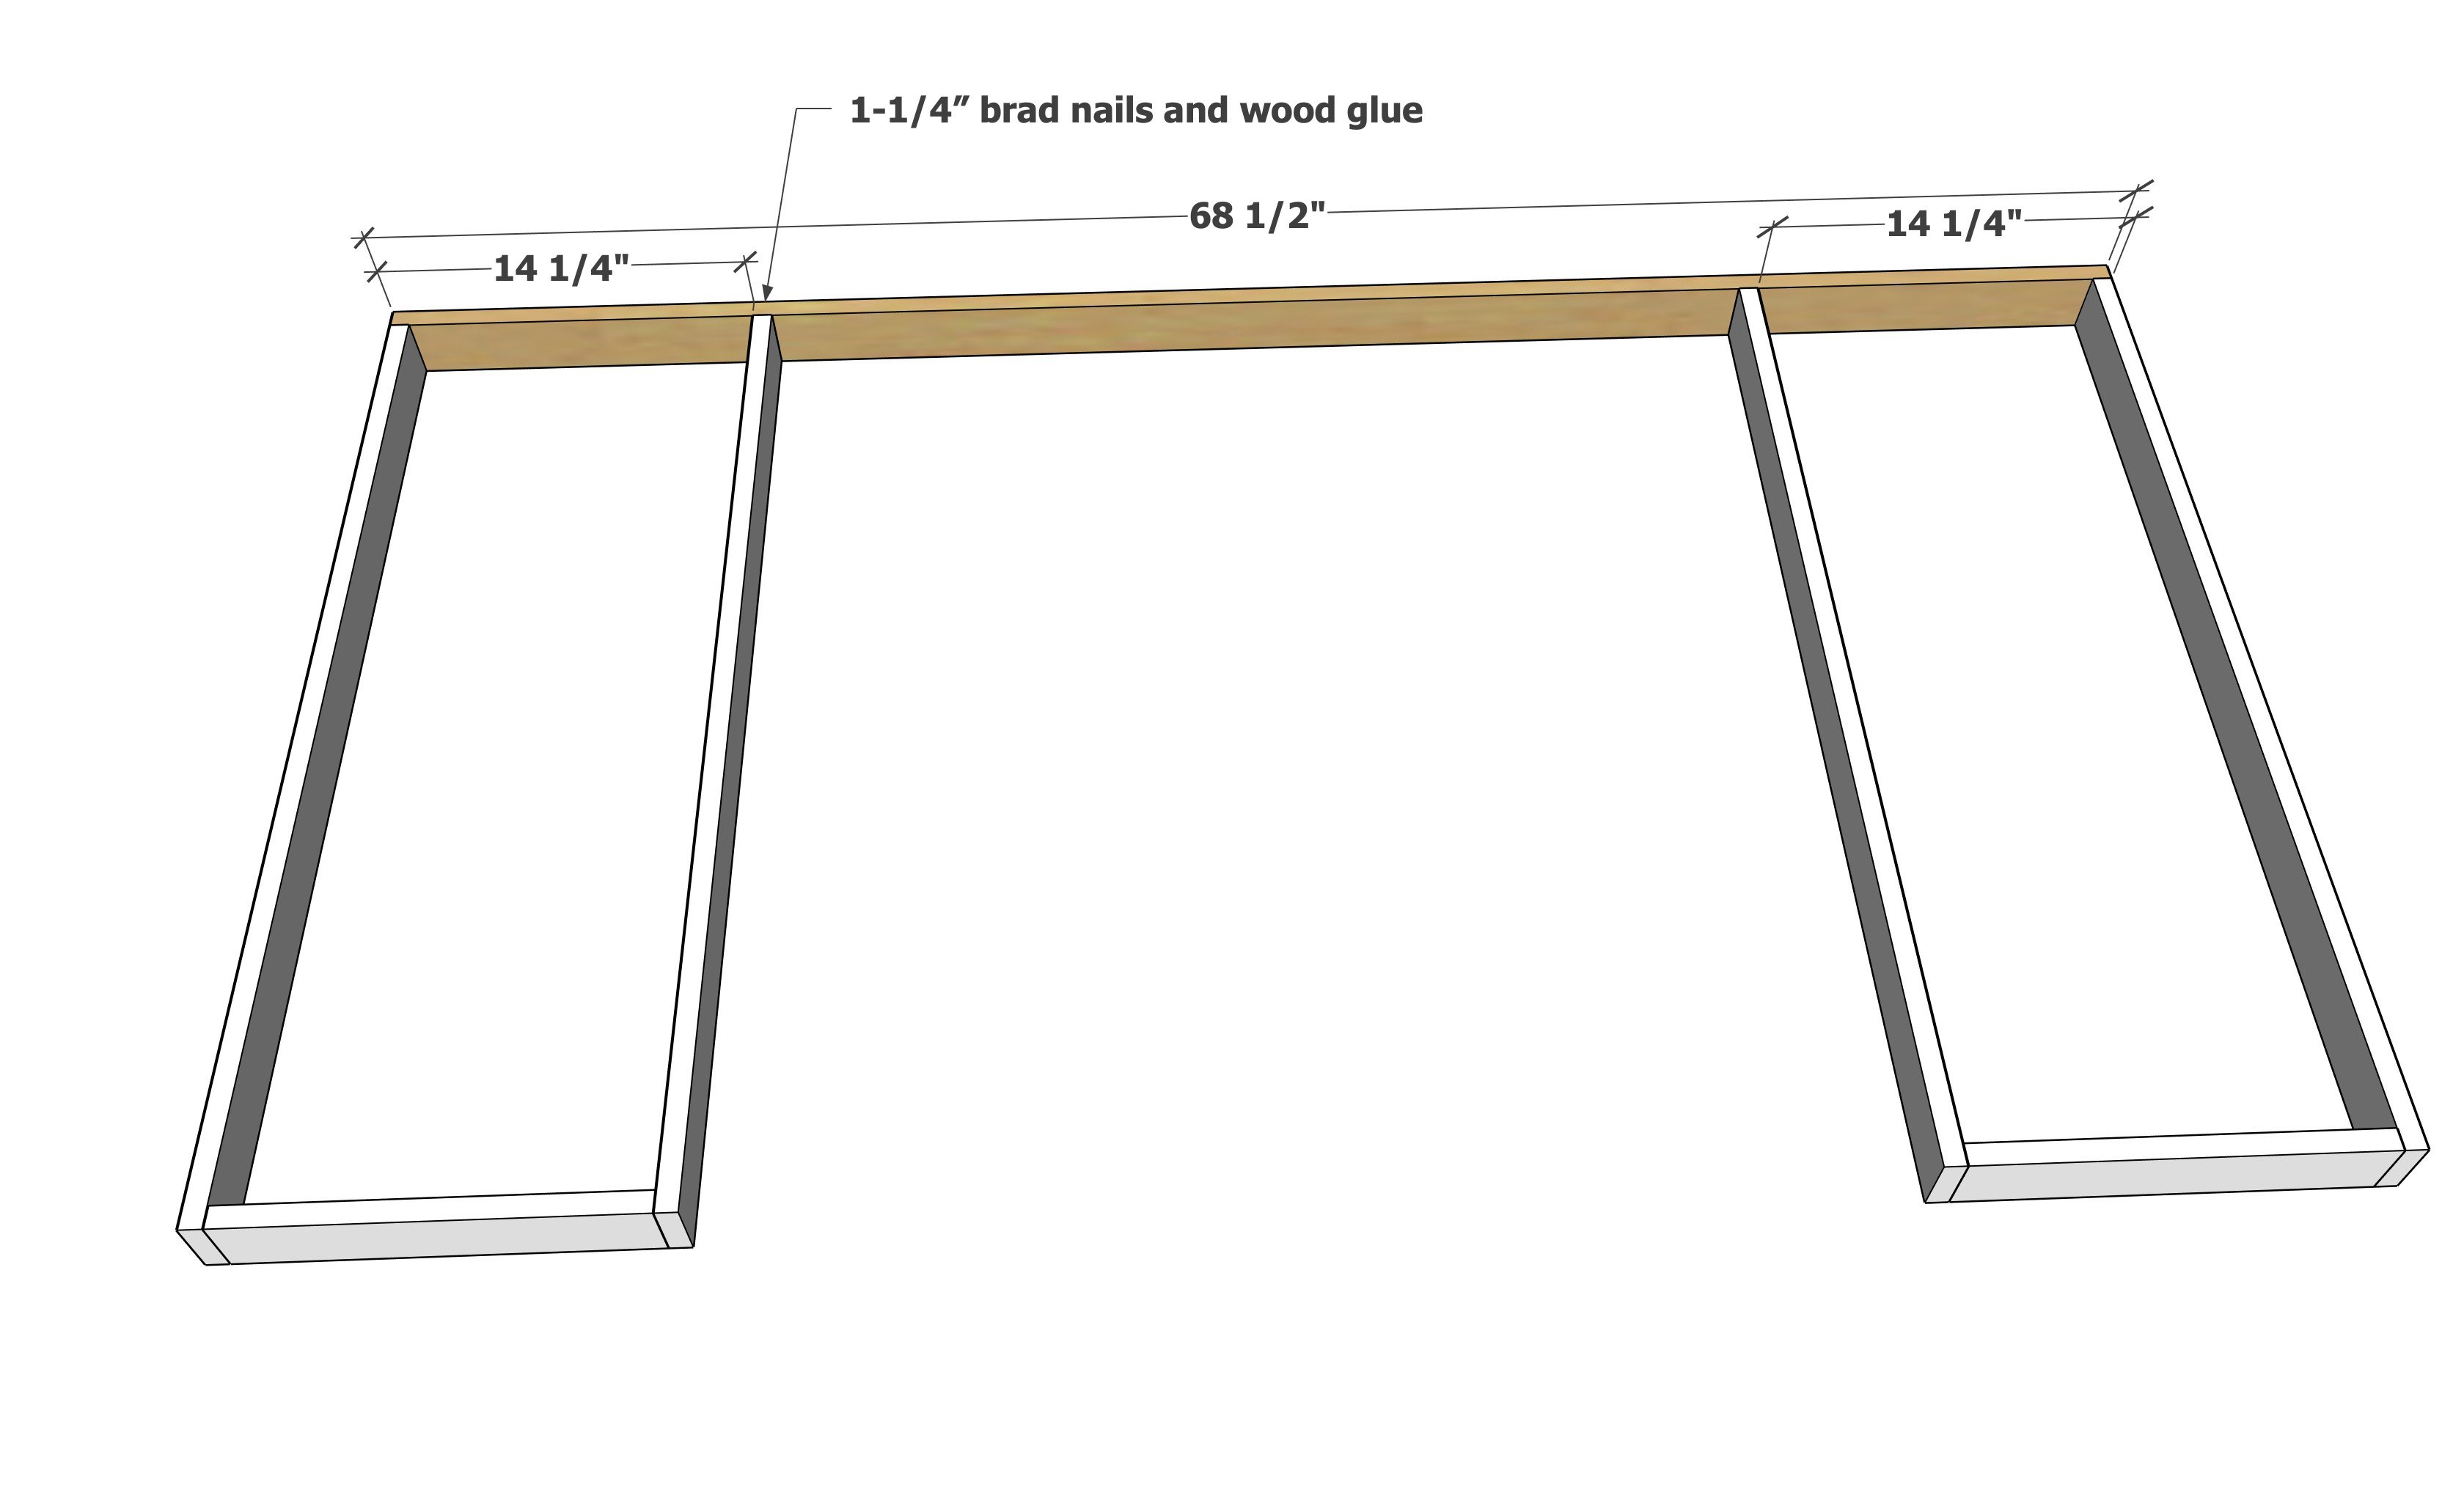
Step 1
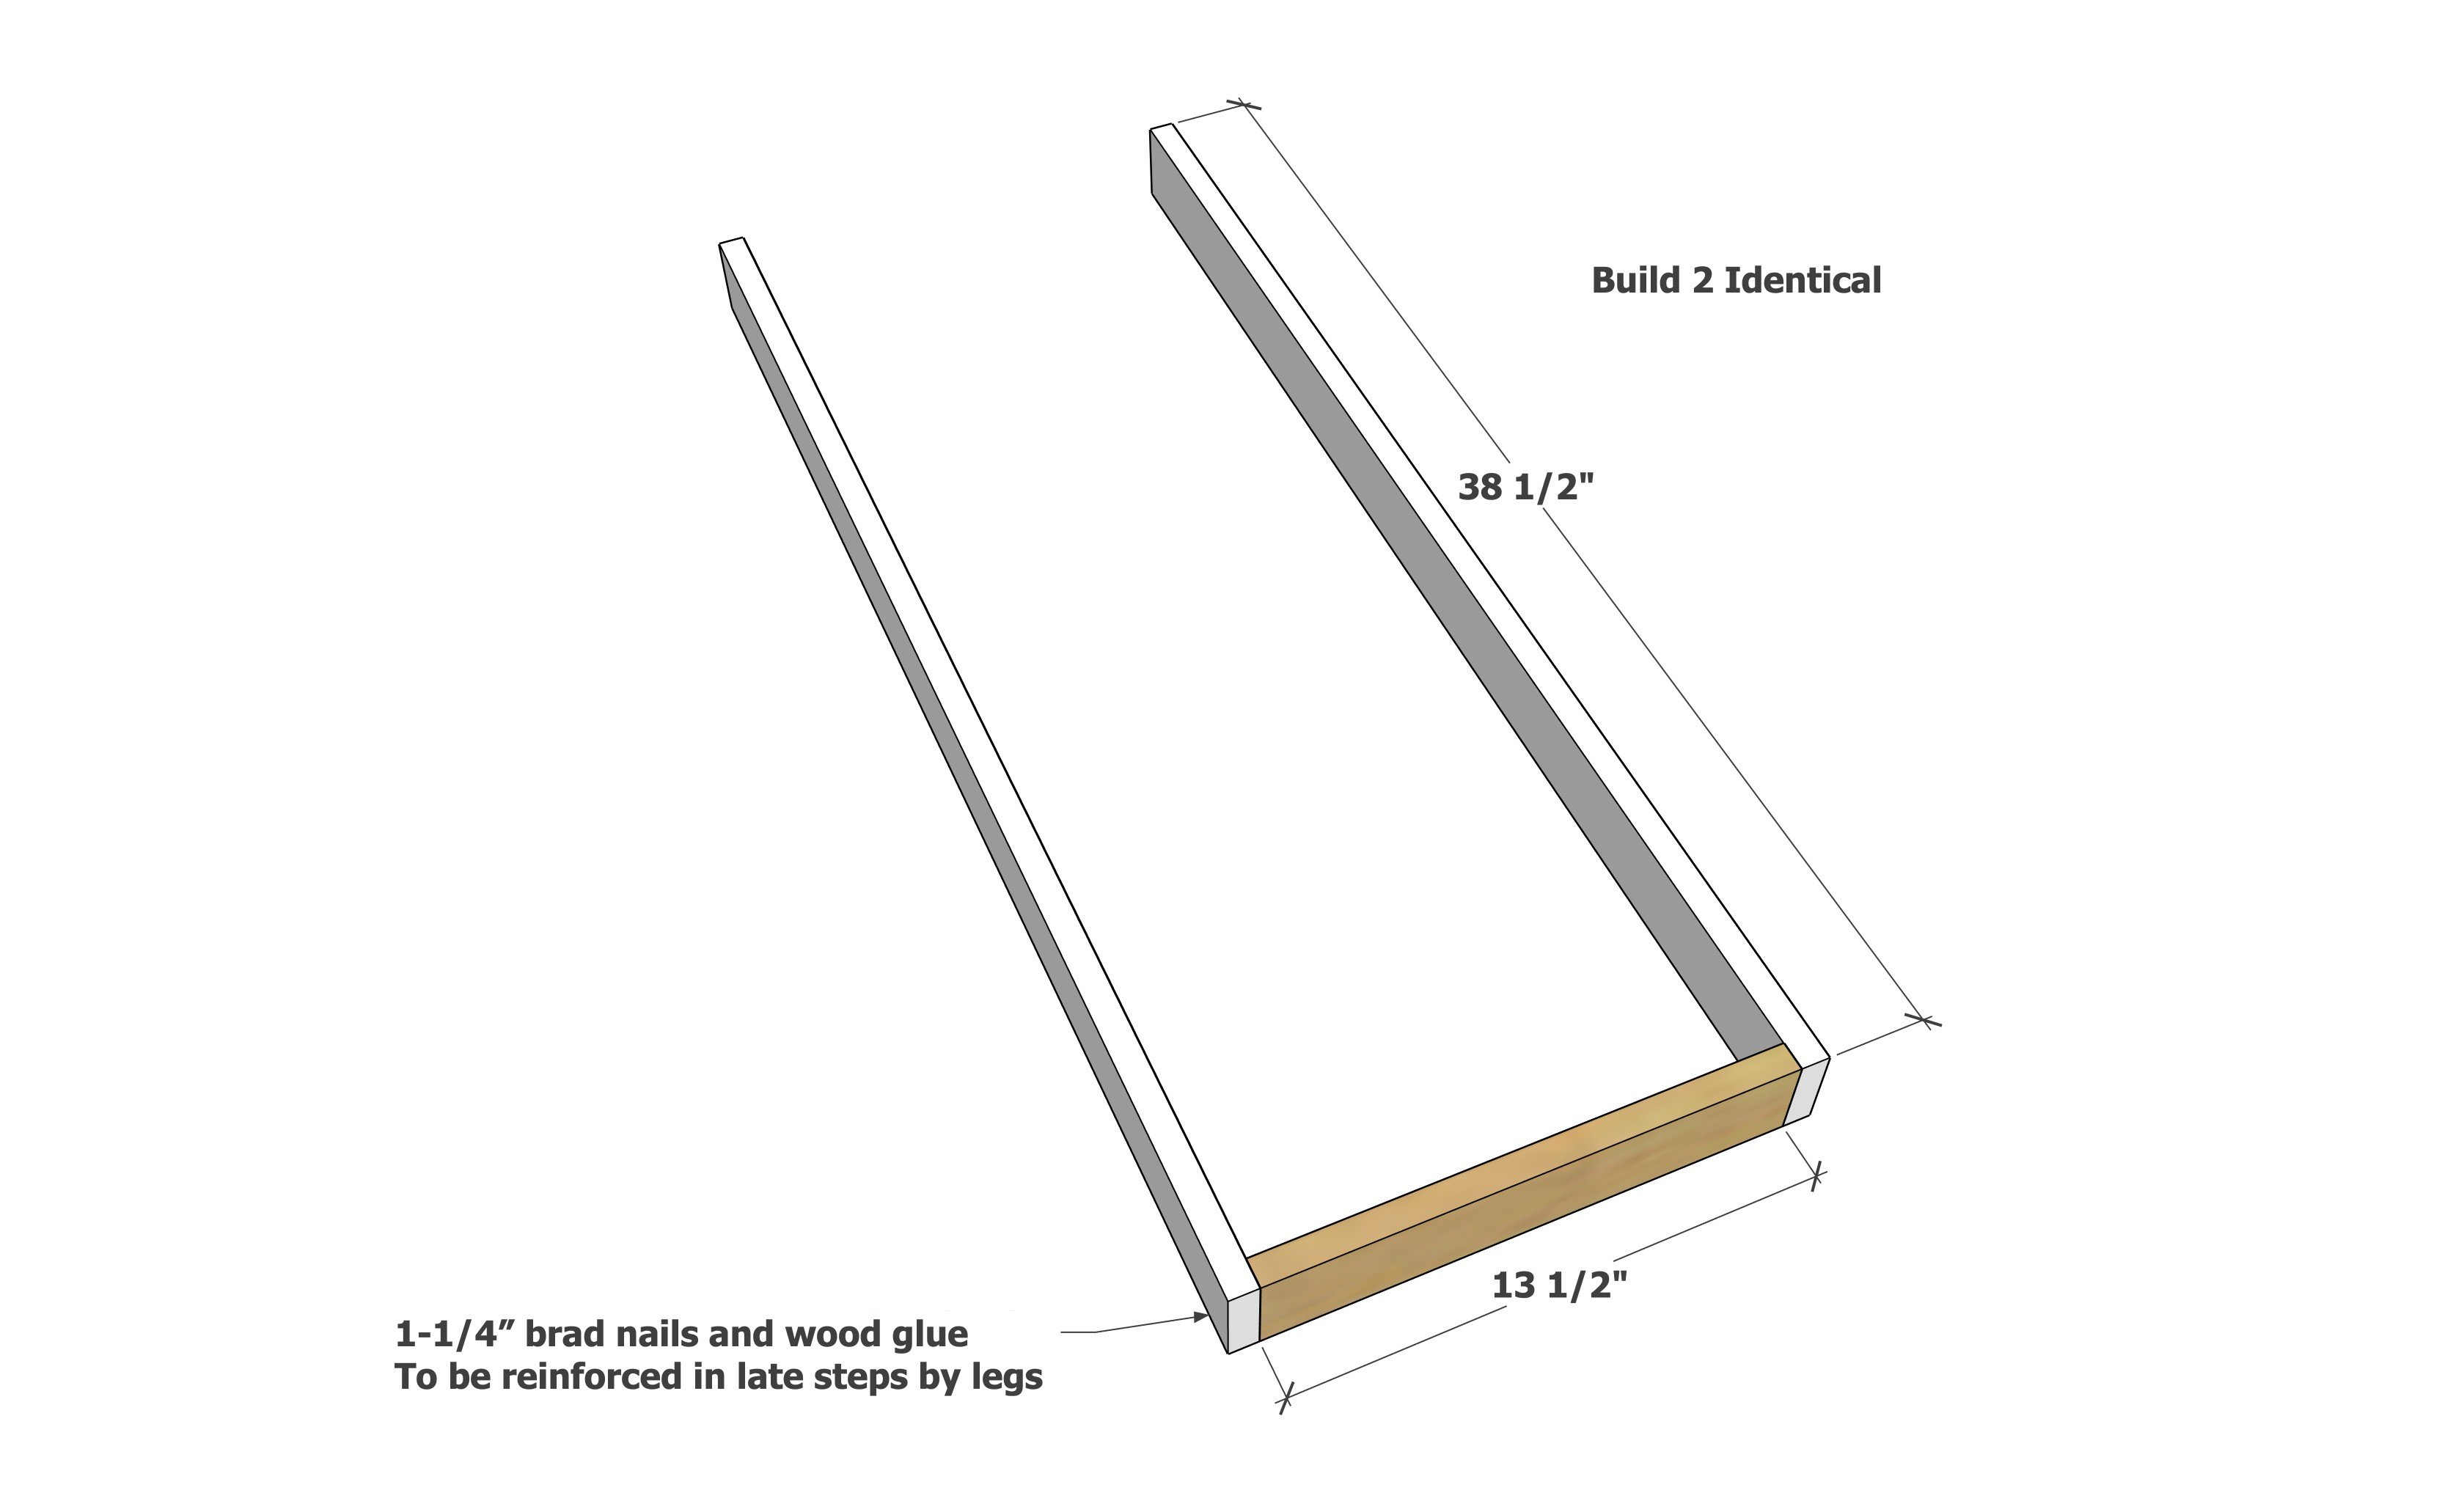
Build two frames as shown. For greater strength, predrill and use 2" screws.
Step 2
Attach the back apron board as shown to the two pieces built in step 1.
Step 3
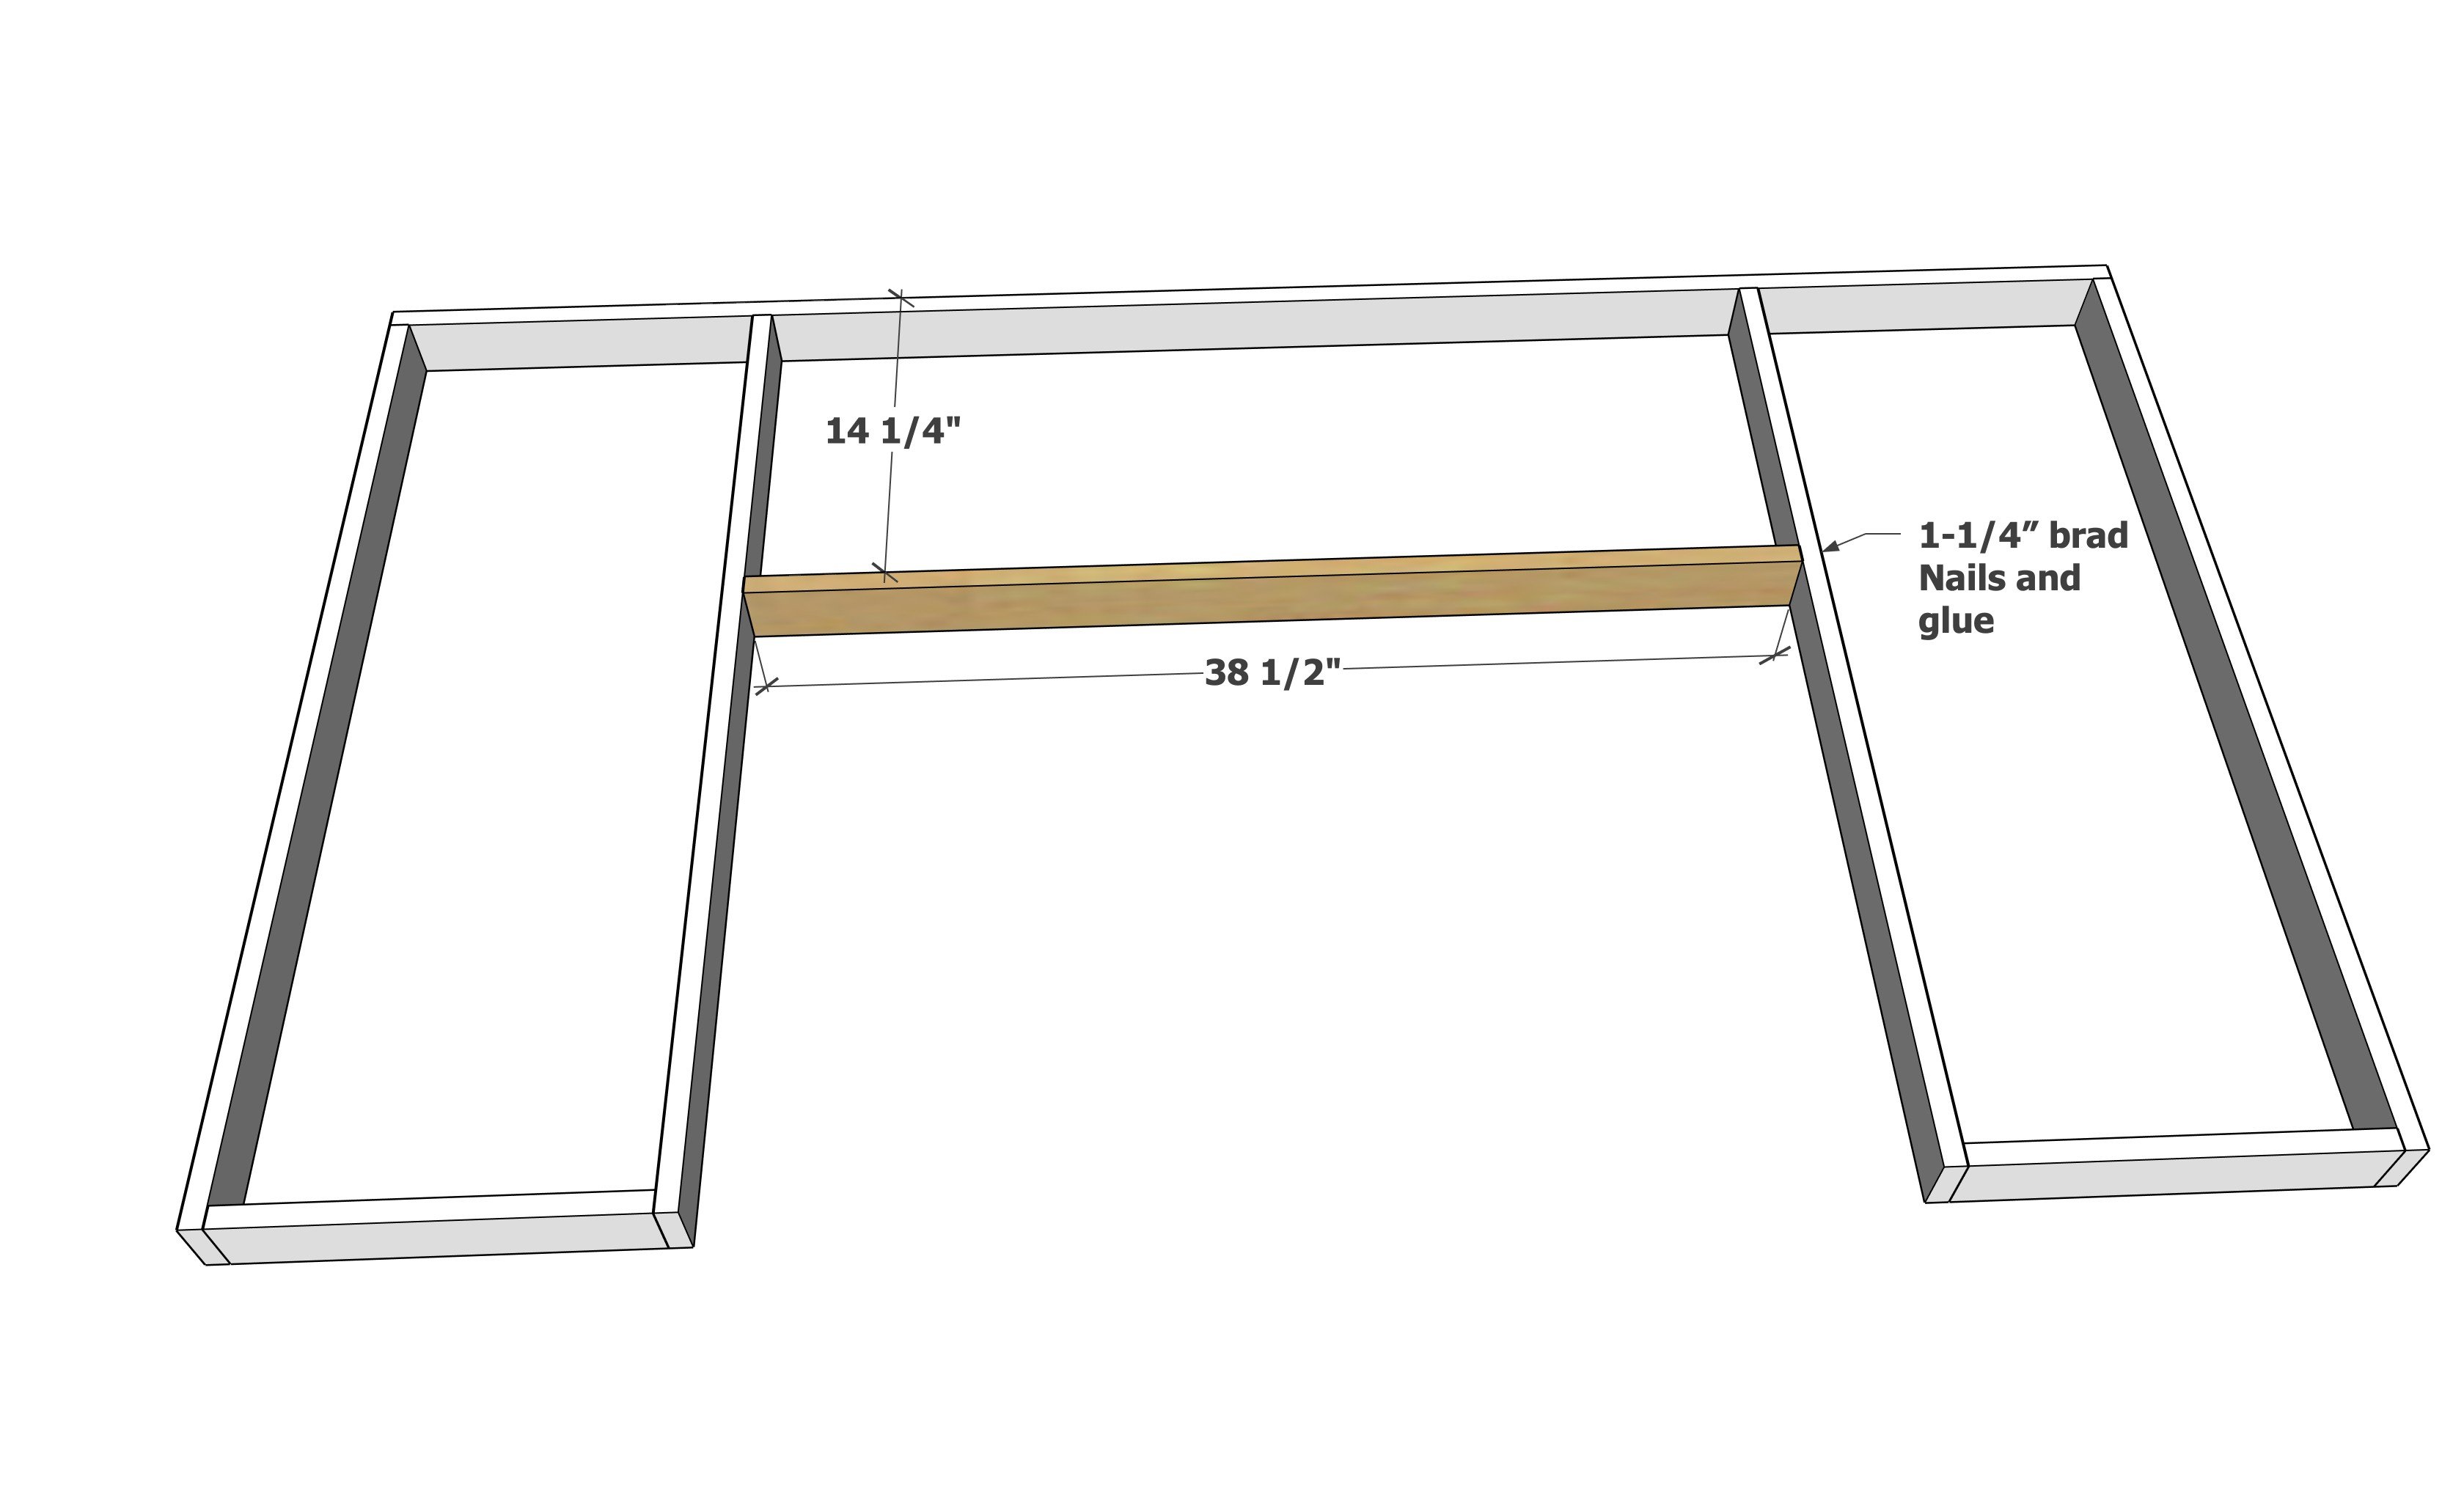
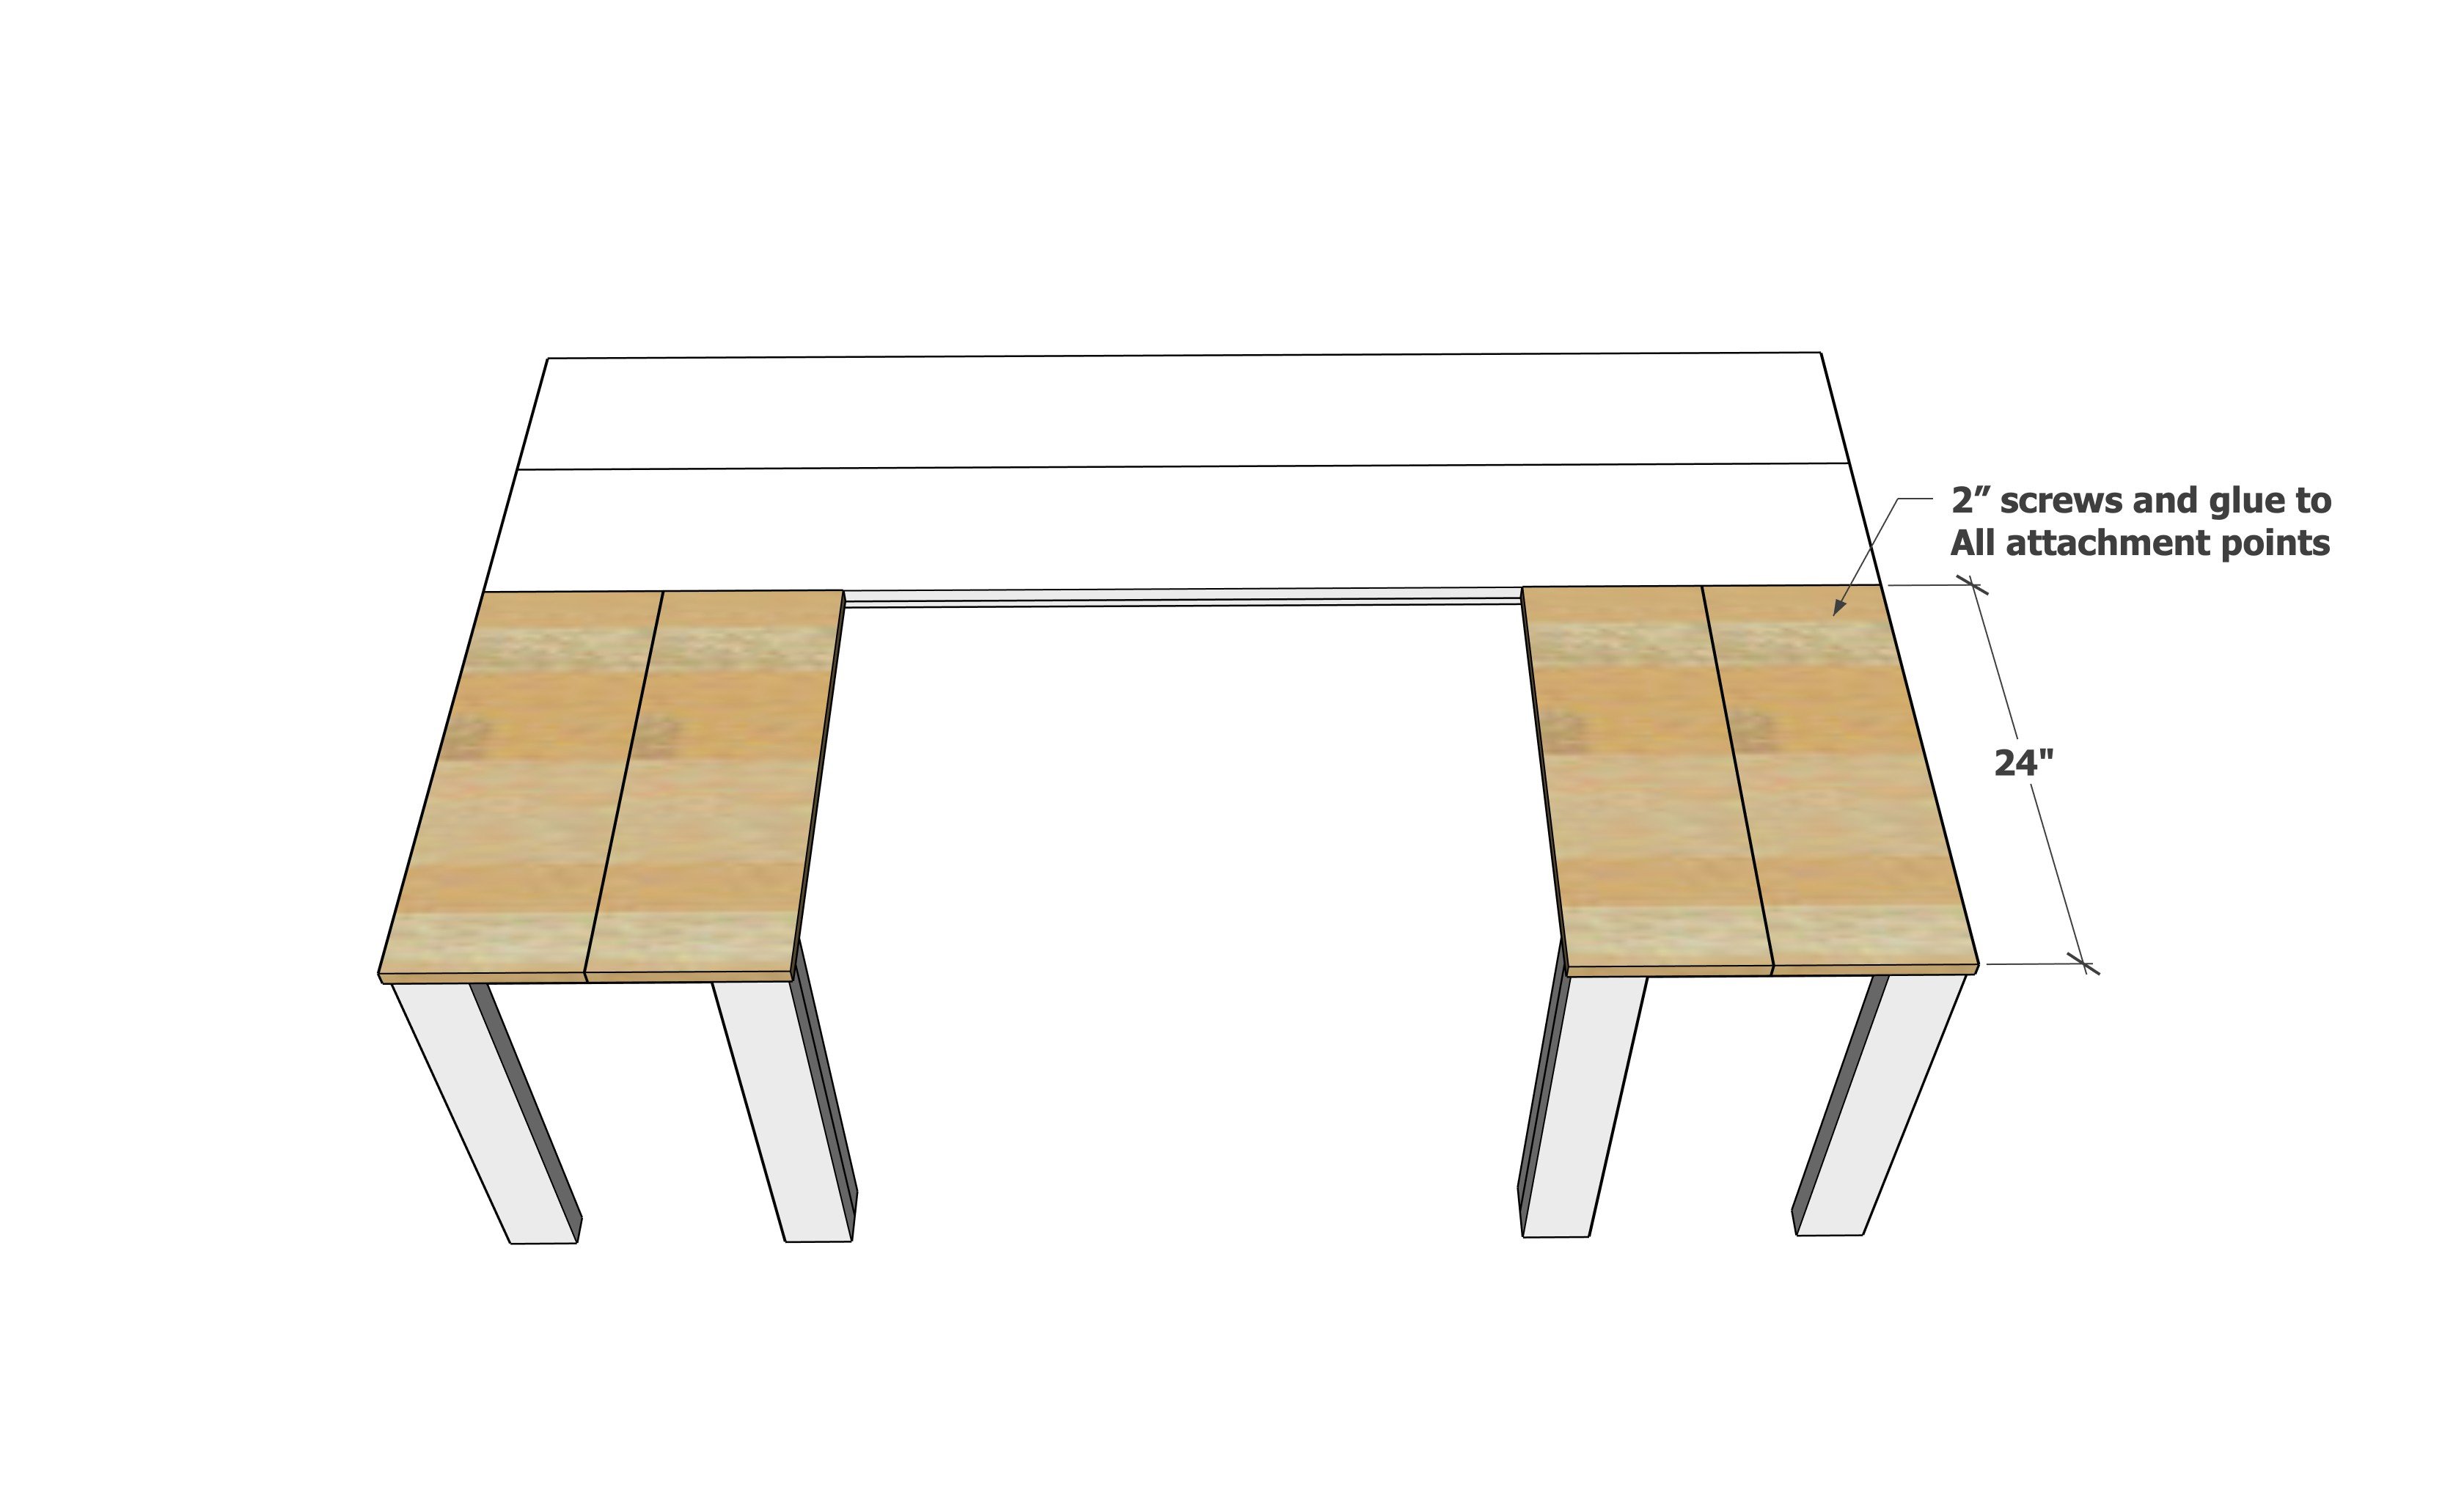
Attach the inner support frame piece as shown.
Step 4

Build six legs by attaching 2x2s to 2x4s.
Step 5
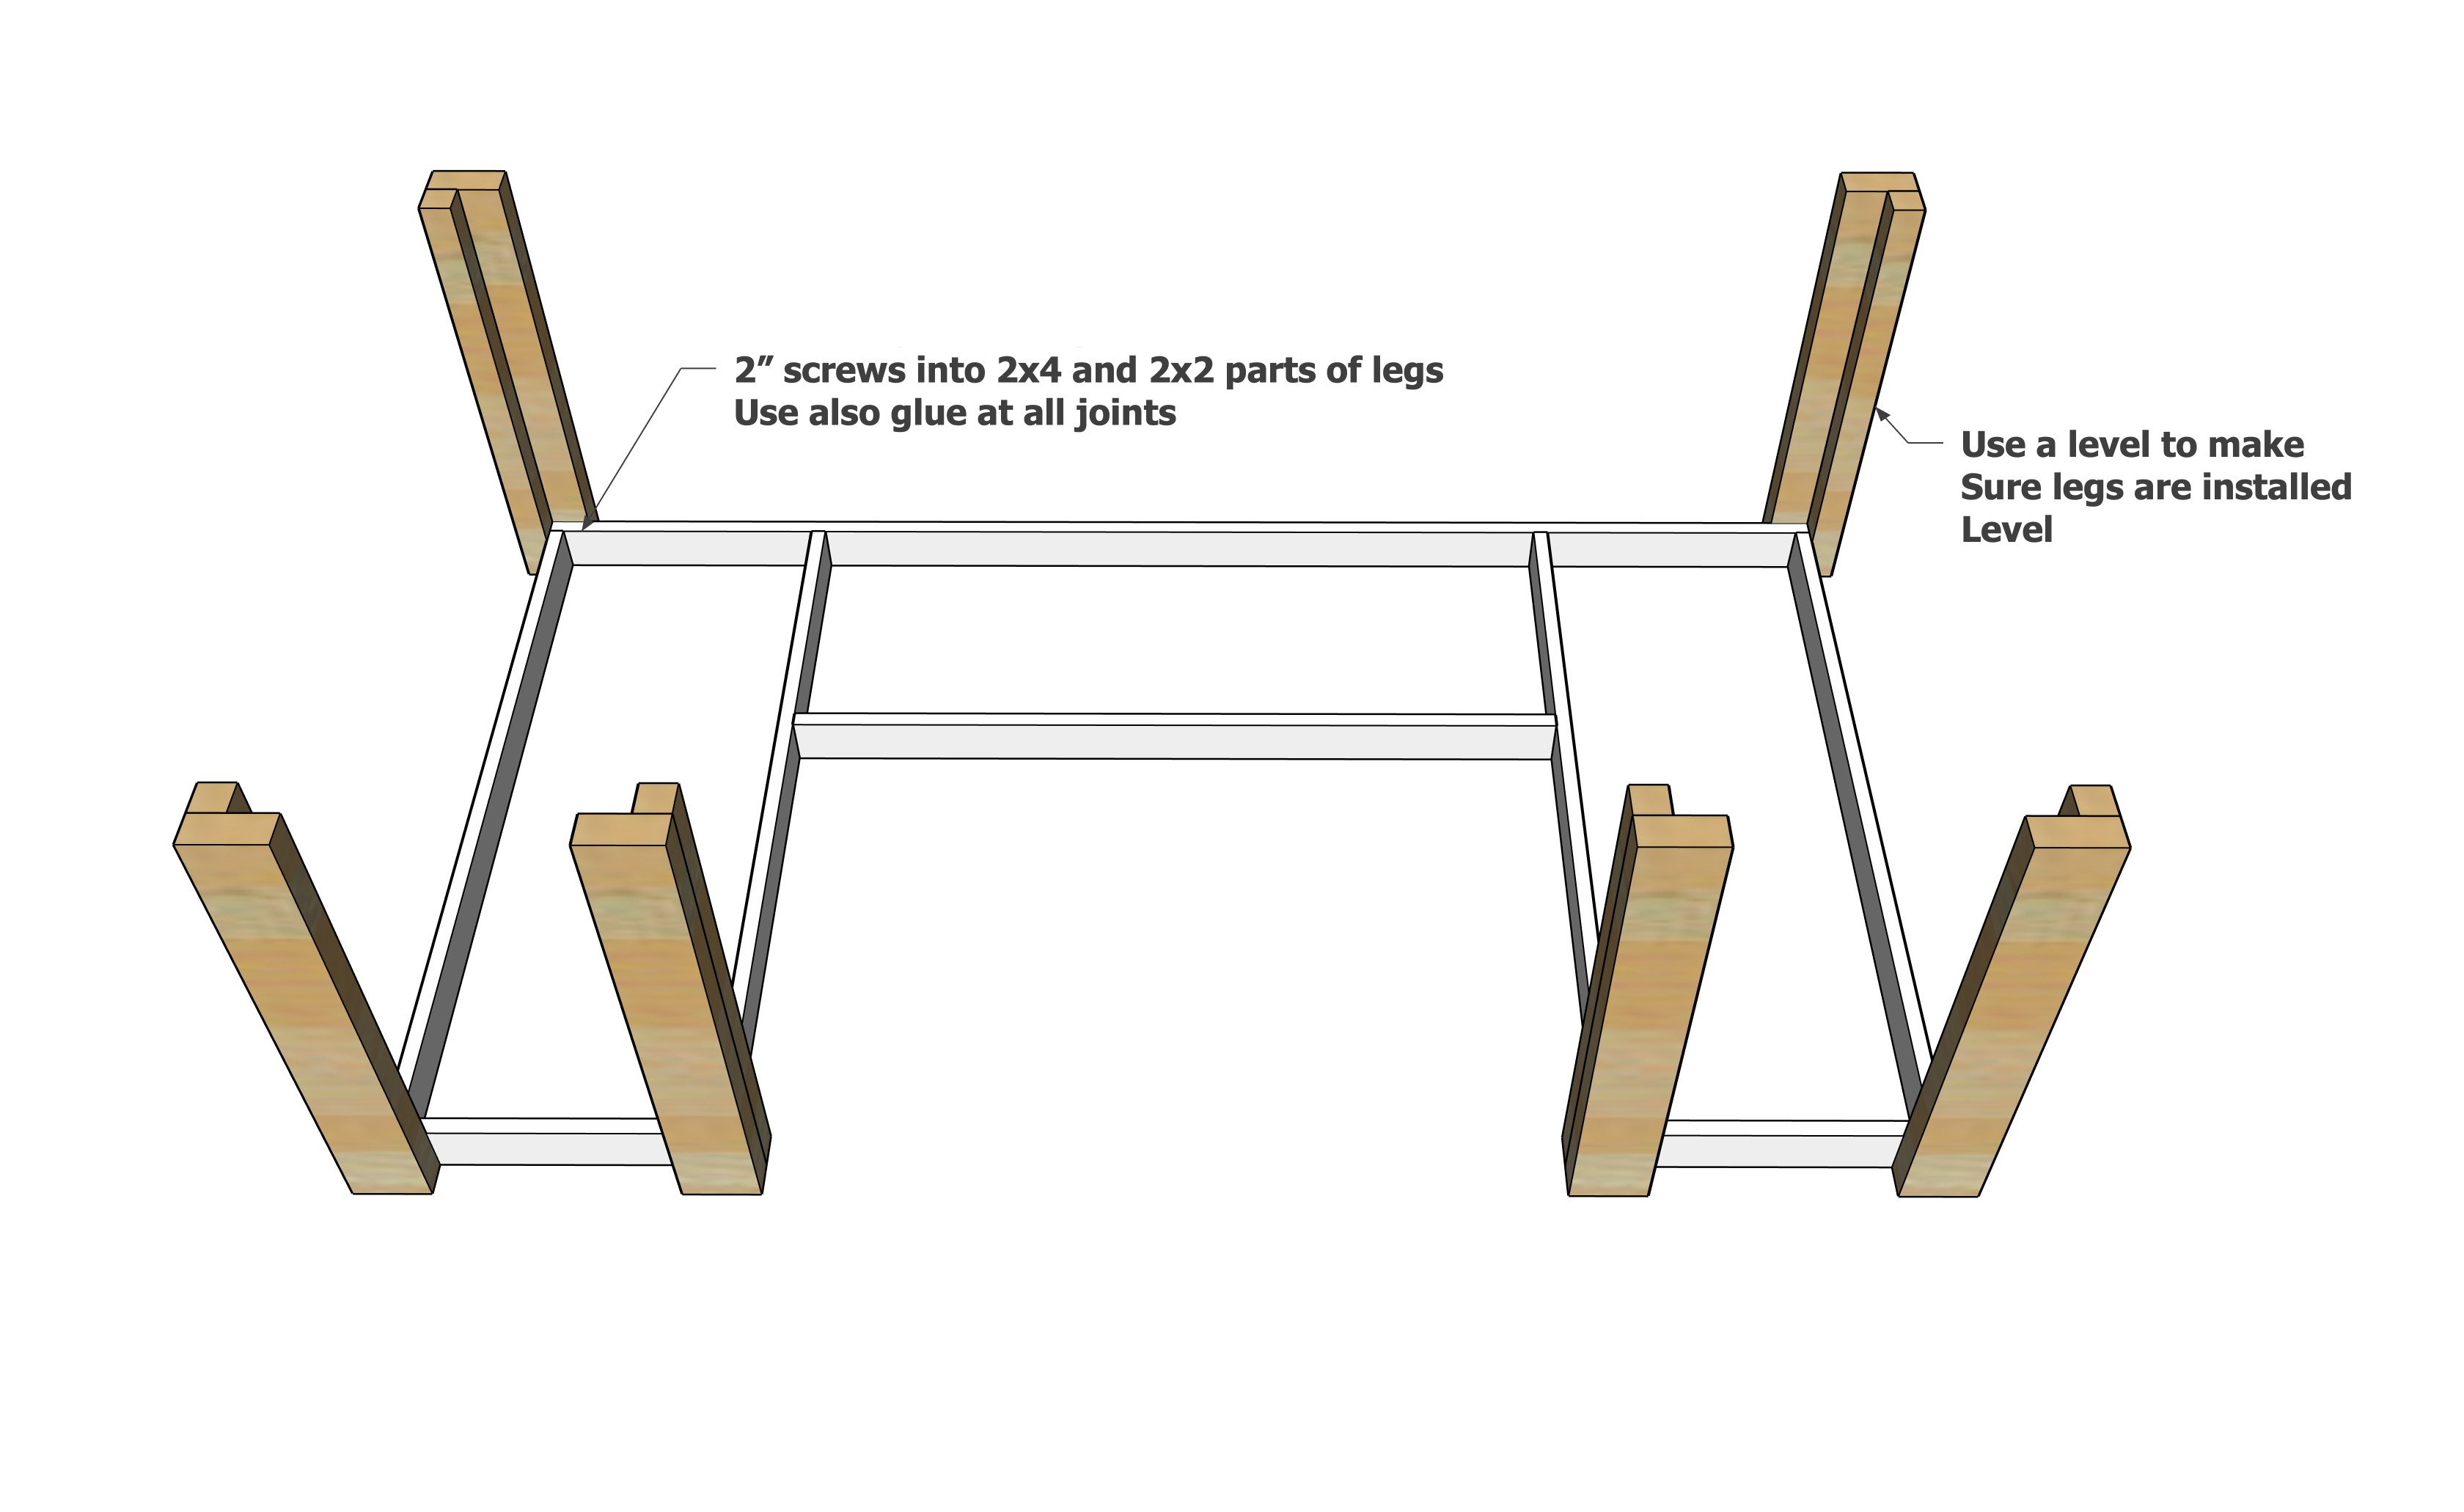
Attach legs to the corners of the desk frame with multiple 2" screws and glue, using a level to make sure the legs are attached level.
Step 6
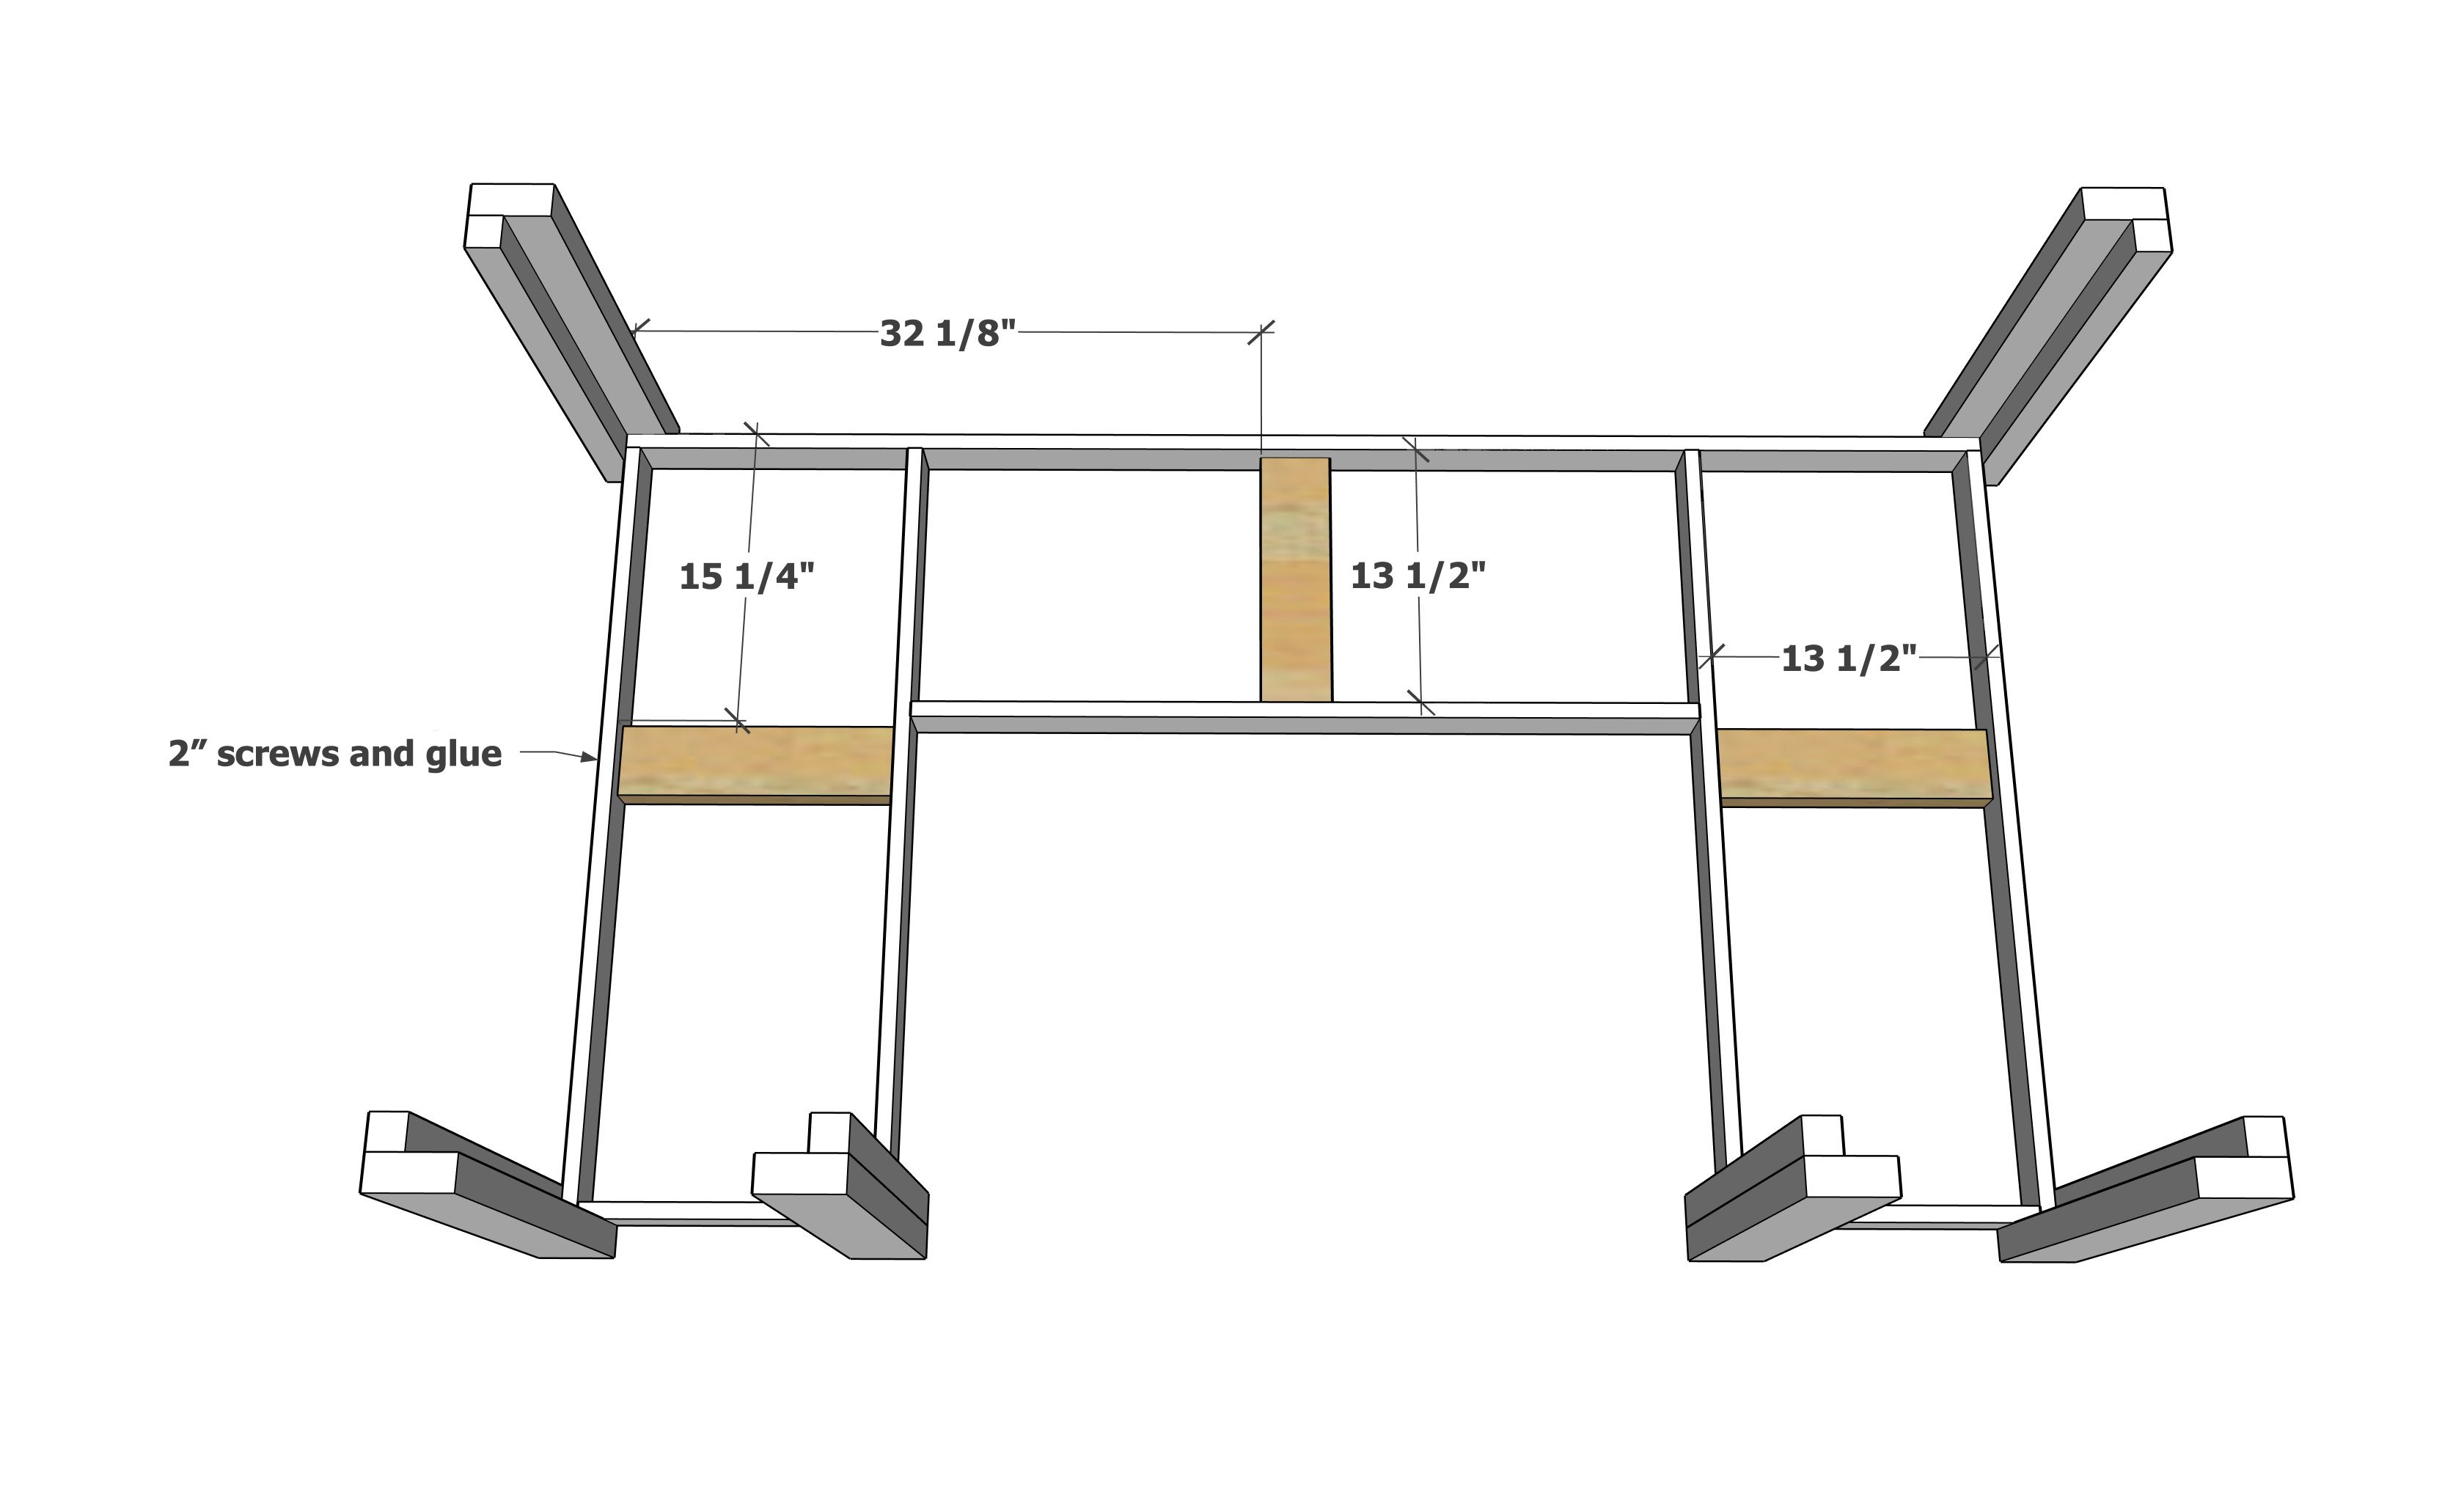
Add blocking as shown.
Step 7
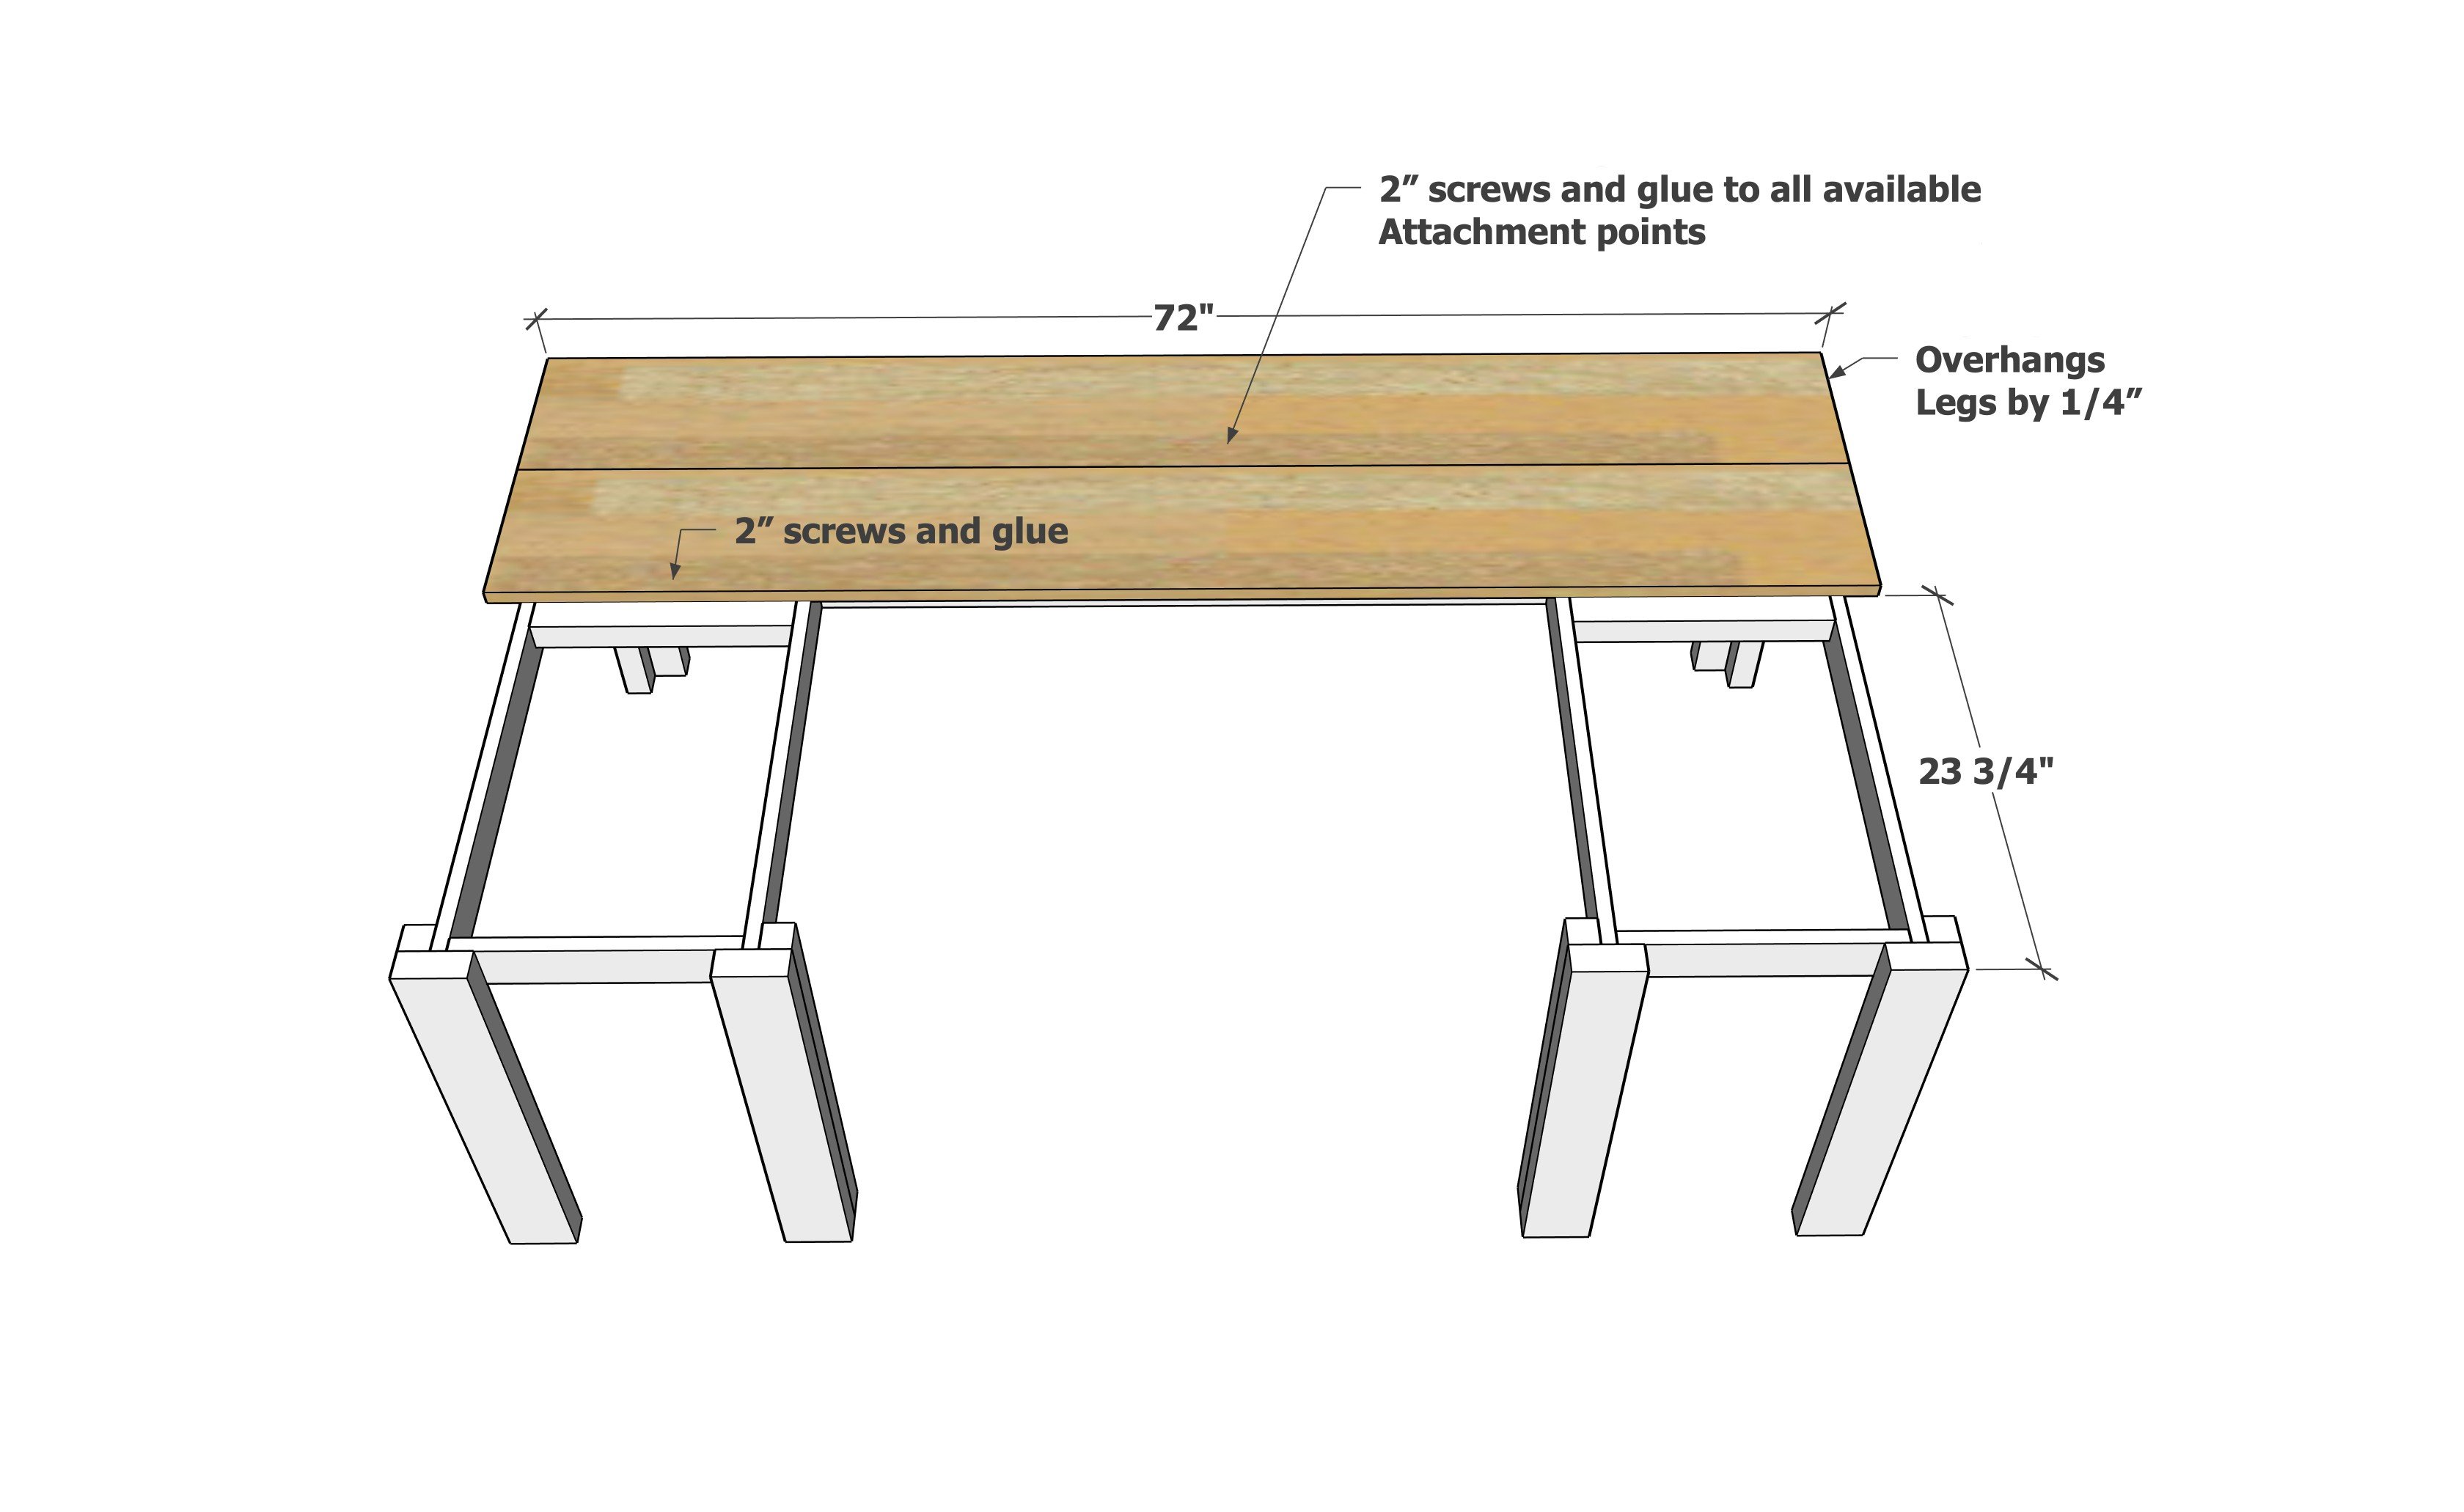
Position the 1x10 desktop pieces on top and screw down.
TIP: For a nicer top, build the entire top first with pocket holes, then attach the completed top to the frame.
Step 8
Add the remaining desktop pieces and screw down.
After the wood filler dries, sand off excess with 120 grit sandpaper, sanding in the direction of the wood grain.
Remove all sanding residue with a vacuum with soft bristled brush. Then wipe clean with a damp cloth.
For a stained finish, apply interior wood stain with a foam applicator, working in the direction of the wood grain. Wipe excess off with a paper towel. Dispose of the staining tools as recommended by the stain manufacturer.
For a stained finish, a top coat of polyurethane is recommended to increase durability and make surface easier to wipe clean.