

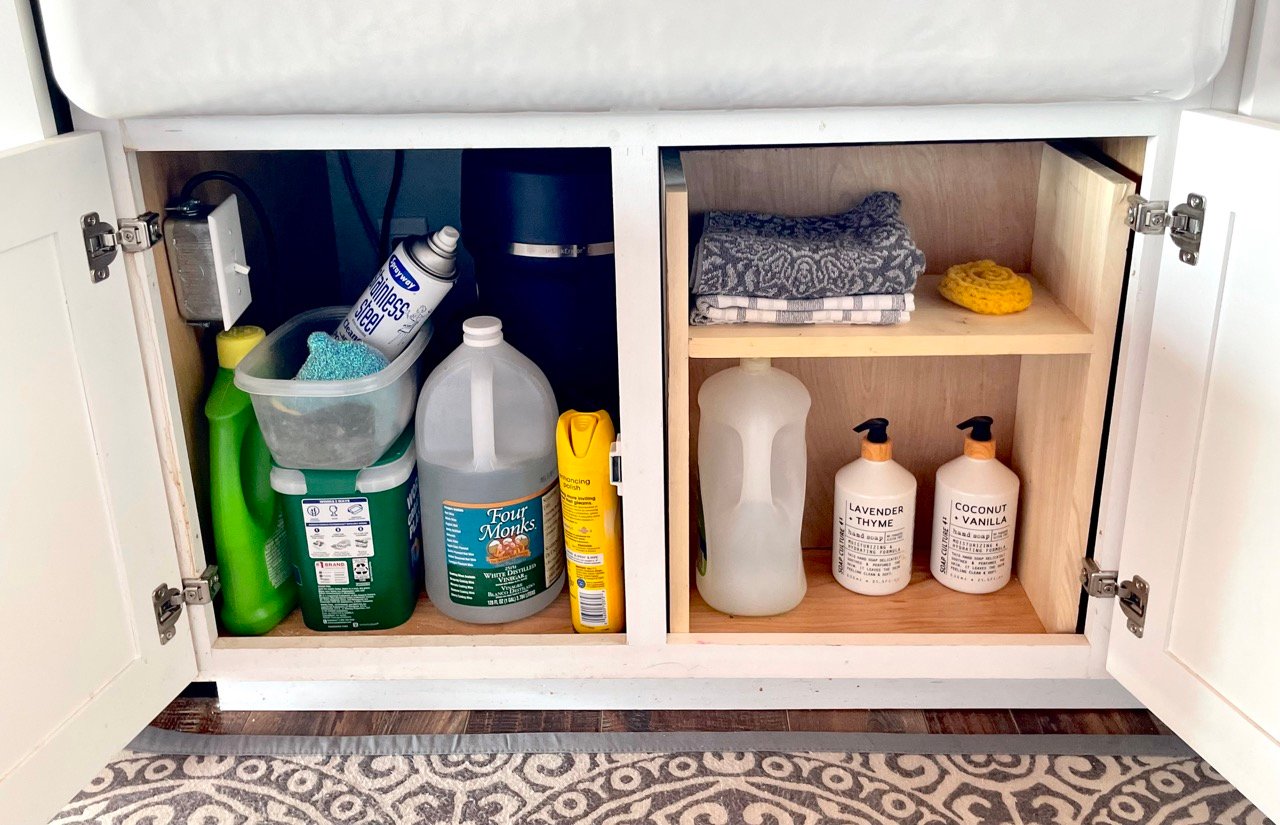
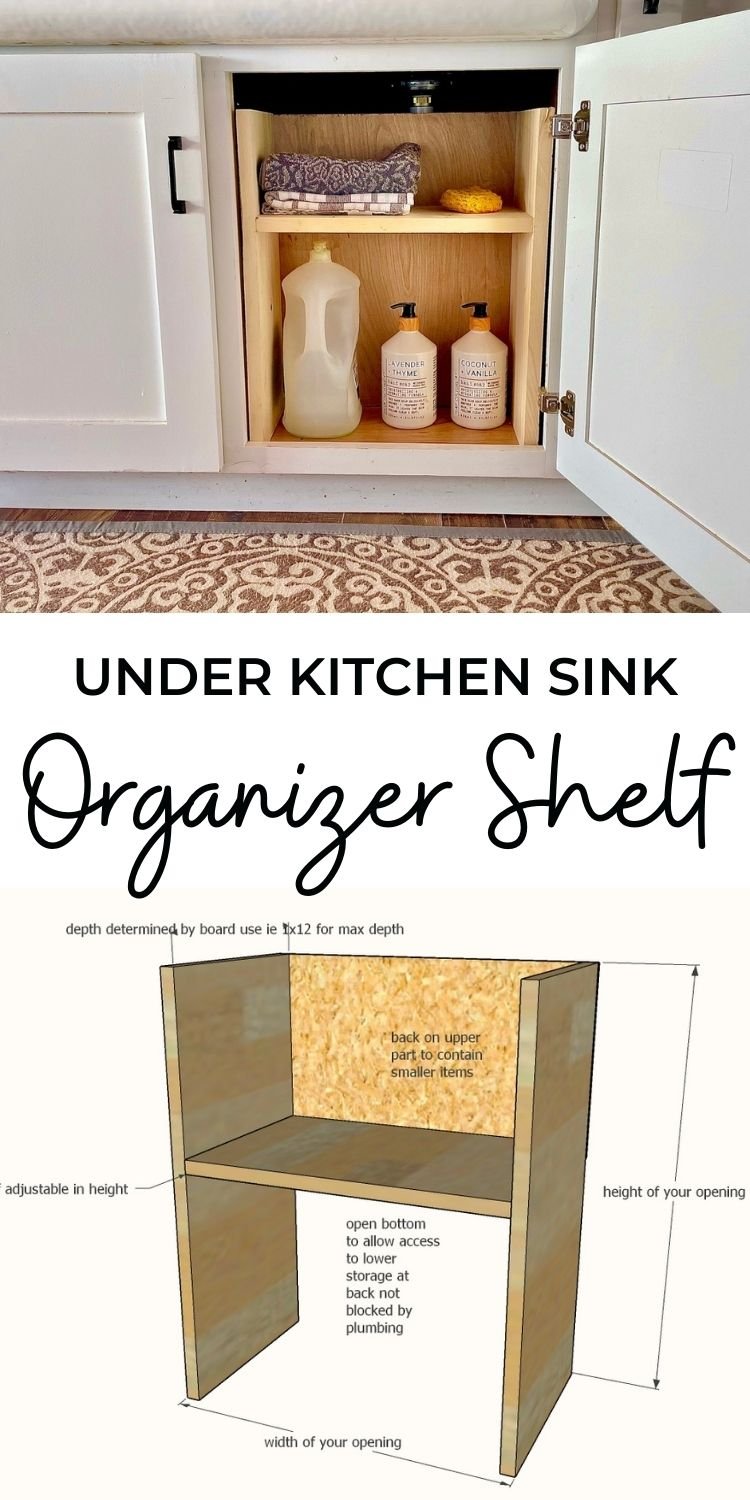
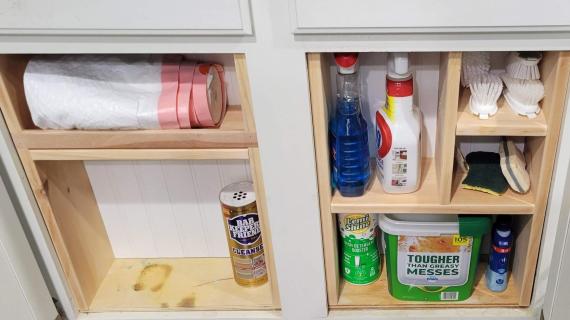
Organize under your sink with our DIY wood shelf. This is a super easy project that will transform under your sink and give you more storage options. The bottom can be left as a pass through if your sink plumbing allows too.
Free step by step plans with video from Ana-White.com
Why I Built This
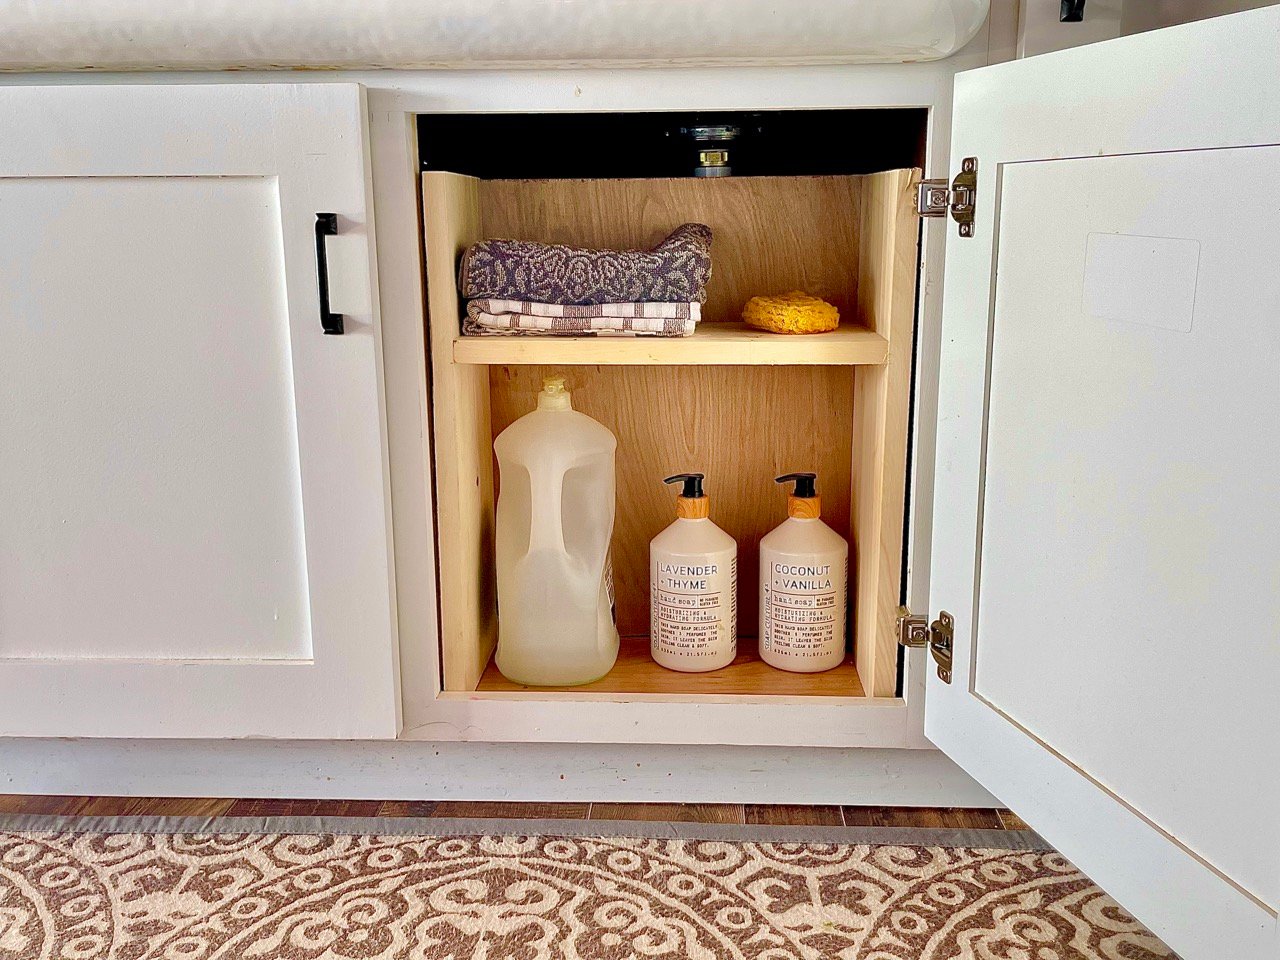
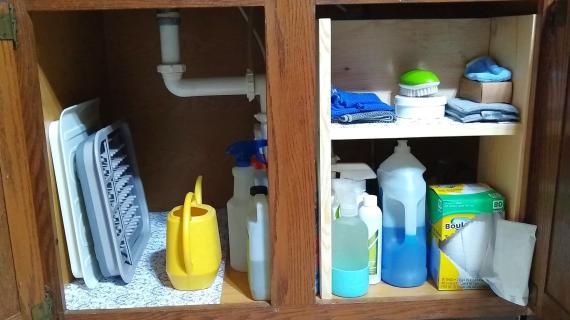
Under our kitchen sink was a serious mess. I couldn't find anything and the small stuff was taking up just as much space as the big stuff.
For about $10 I built this amazing, simple organizer that turned frustration into storage freedom!
The question is: Why wouldn't you build this?
Customize Easily For YOUR Under Sink Space
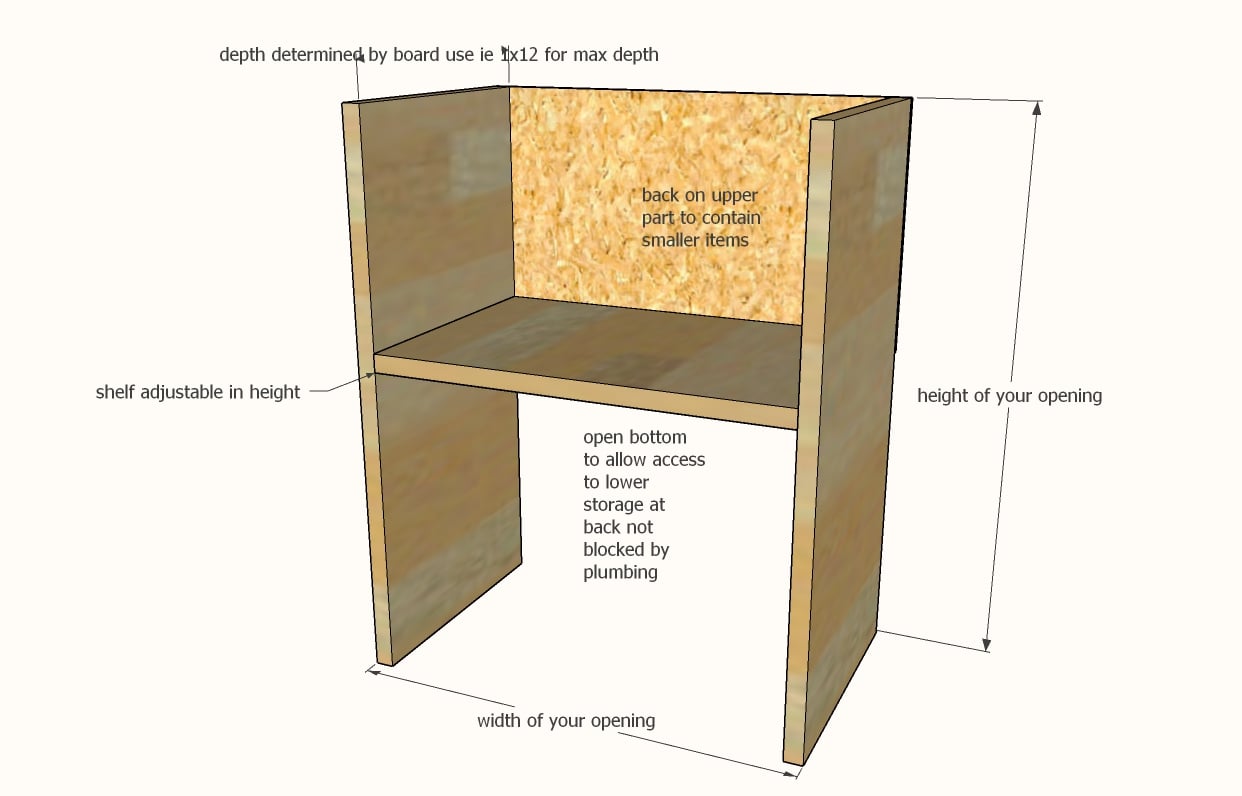
This project is designed for you to be able to customize for your sink space, and maximize the storage underneath your sink.
- If your space allows, the bottom should be left open to allow for pass through storage underneath.
- Measure your items that need storing and adjust the shelf height so you can fit your items on/under the shelf
- The shelf depth can be adjusted for a deeper shelf if your plumbing allows
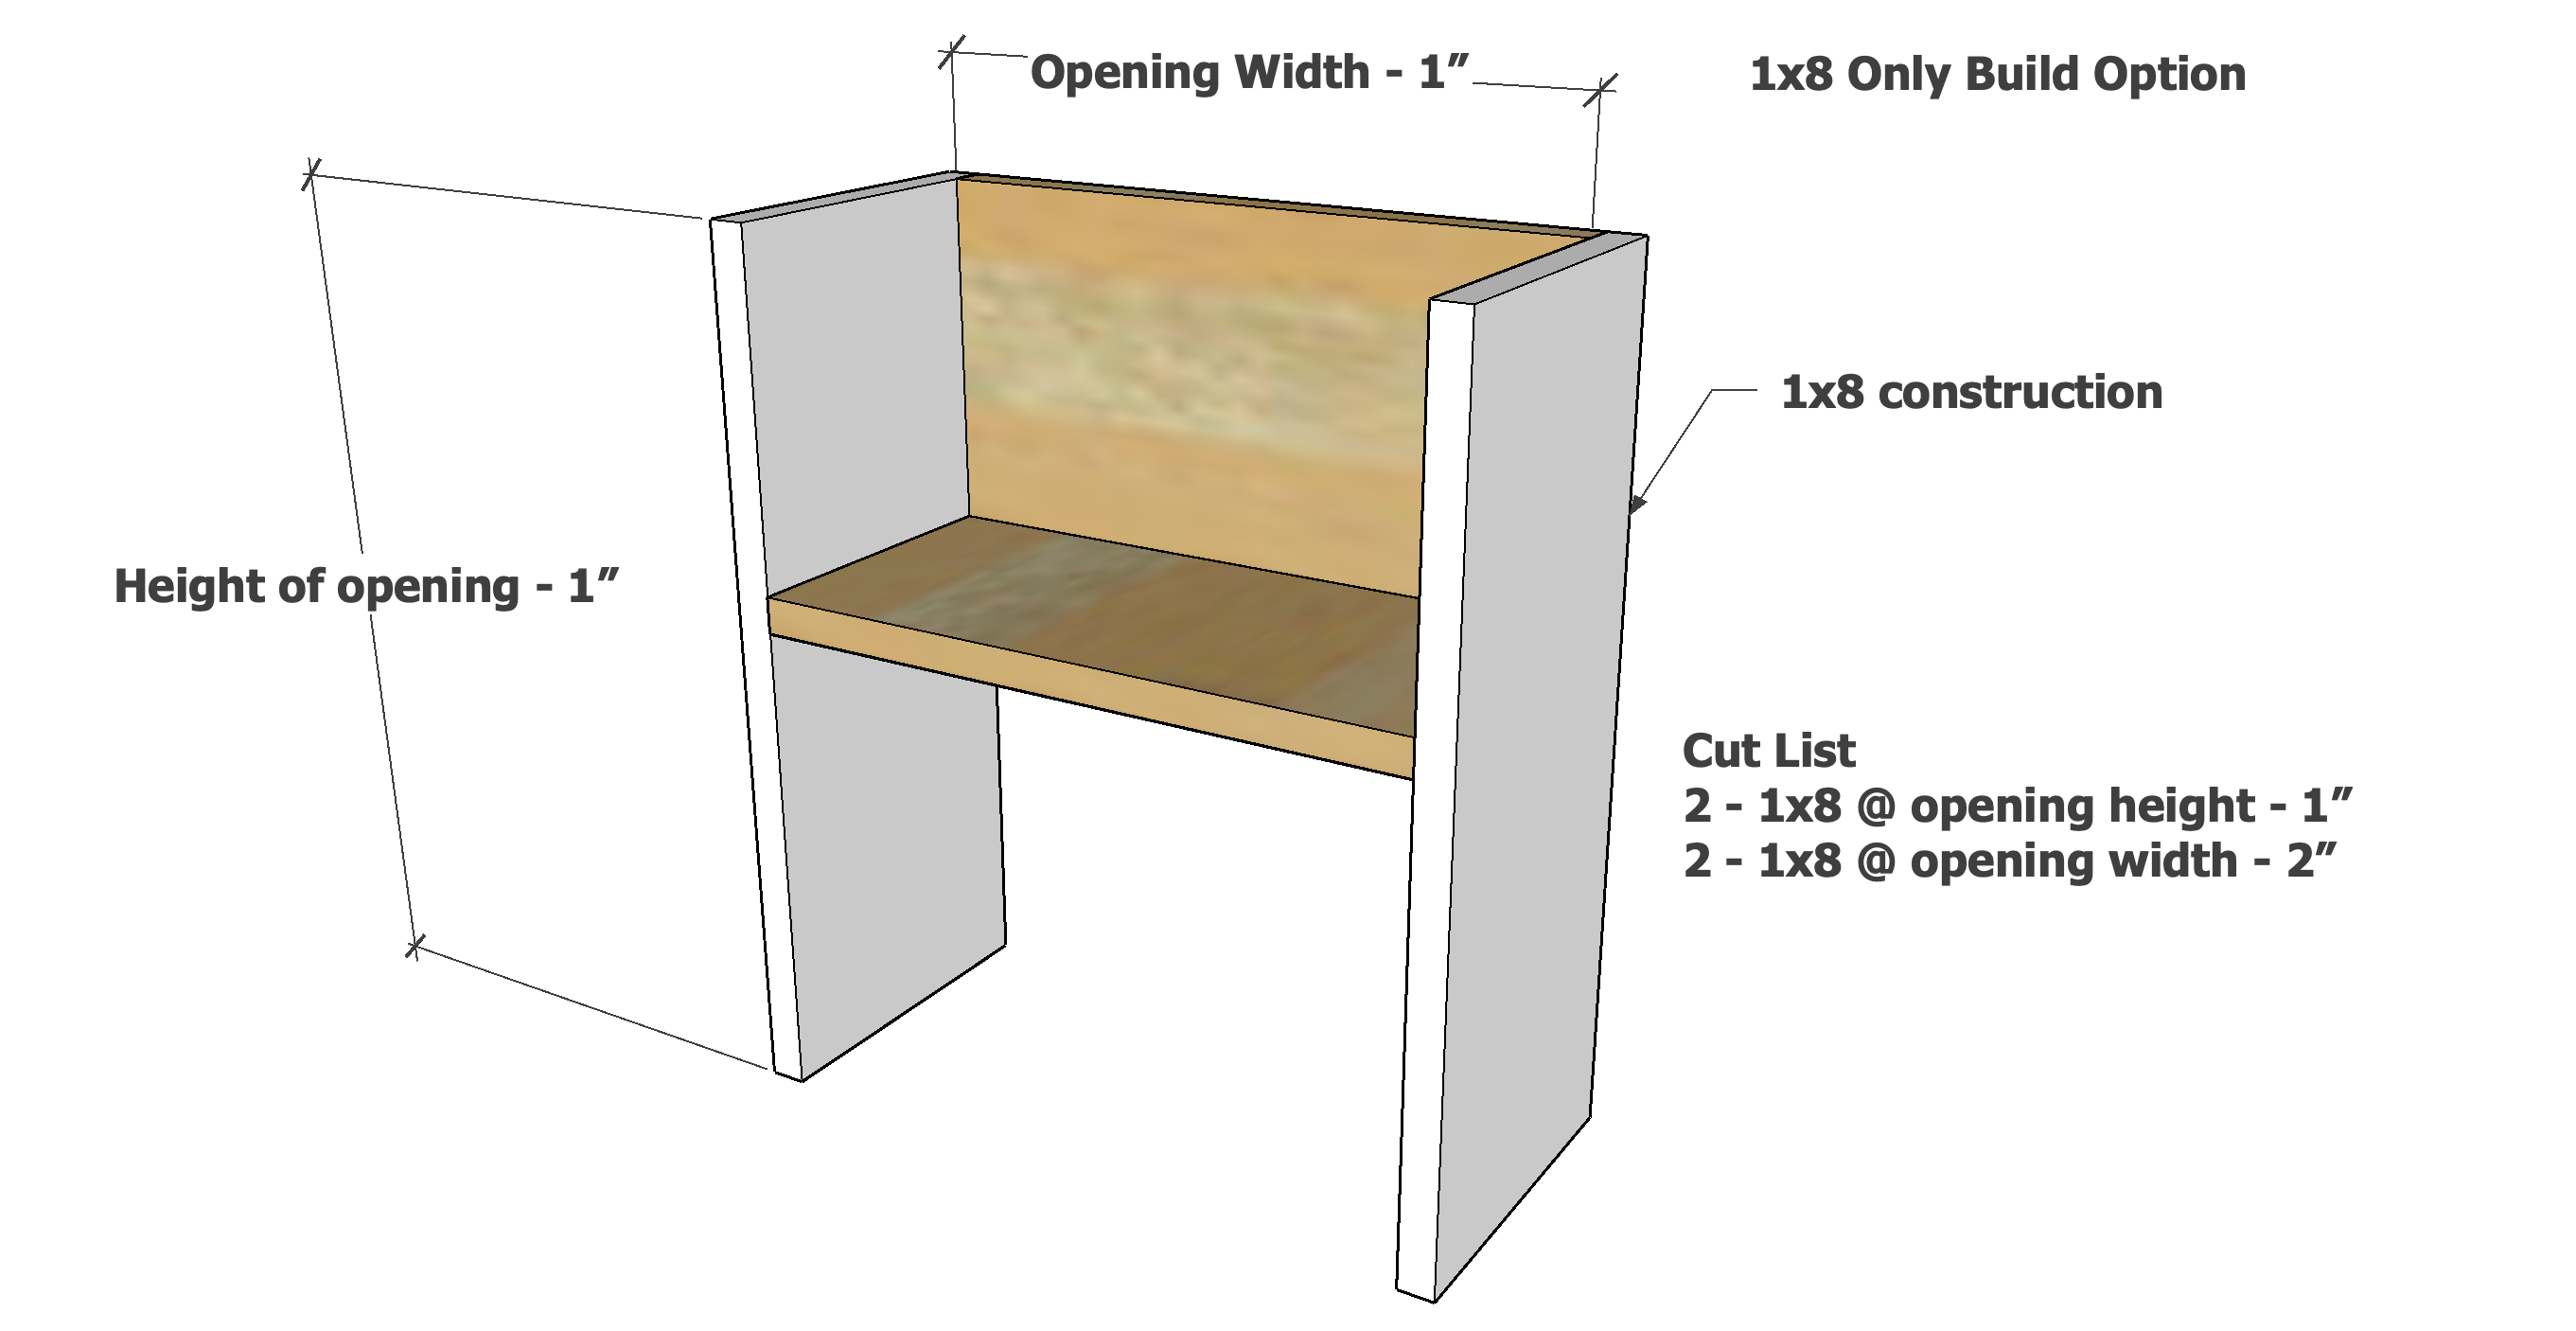
Build with 1 - 1x8 board, 6 feet long
This is a easy to customize project, but if you are looking for quick with minimal tools, here's the most basic version that you can build:
Video Showing How to Build this Under Sink Organizer
In this very quick build video, watch how I build this under sink organizer.
Pin For Later!
Preparation
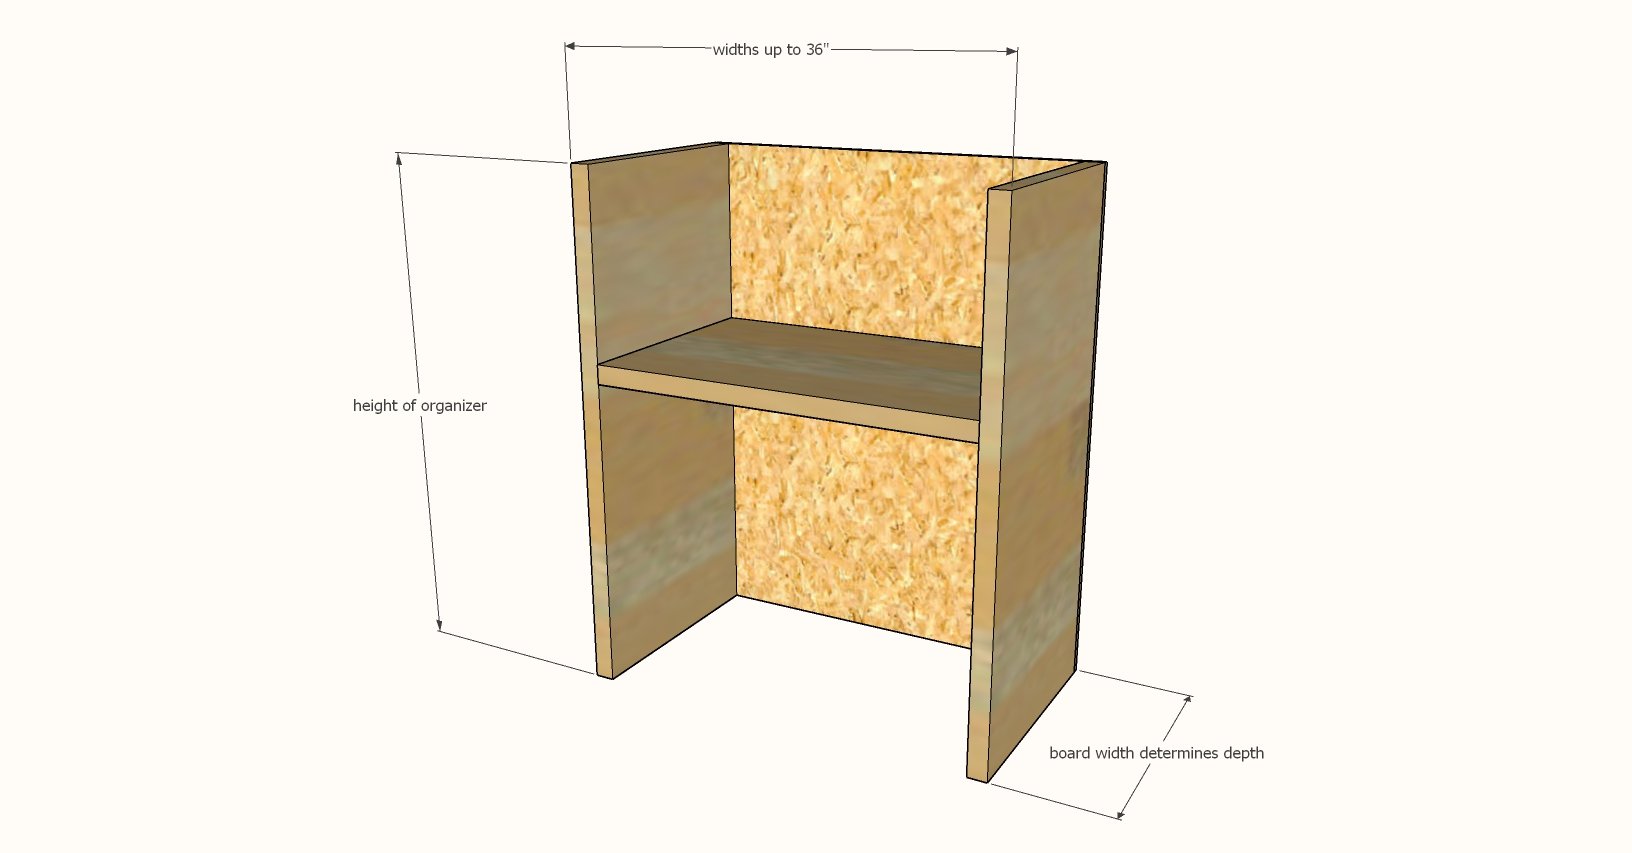
- 1x boards in desired depth (ie 1x12 for 12" or depth, 1x10 for 10" depth, 1x8 for 8" depth)
- 1x8 if using a pass through option on bottom, or 1/4" plywood if covering entire back (as shown in my photos)
- Brad nails in 1-1/4" length and 18 gauge brad nailer OR 1-1/2" long SPAX self tapping screws or similar (about 10 screws) if you don't have a brad nailer


Instructions
Step 1
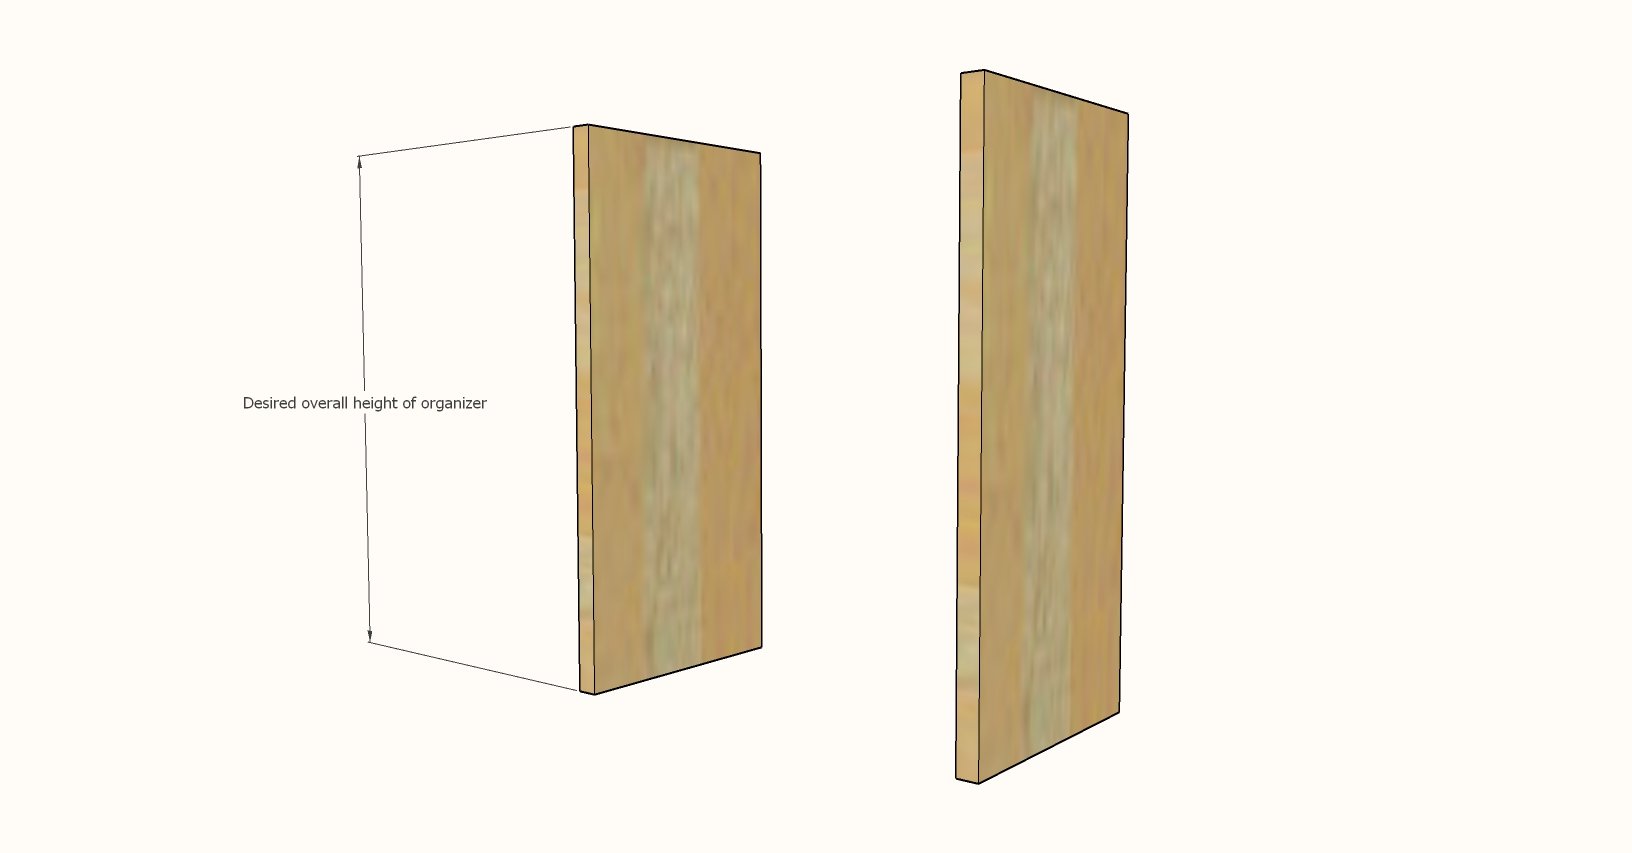
Cut two boards to match the desired height of your under sink storage organizer.
NOTE: The overall height should be about 1" less than opening to be able to easily place the organizer under your sink.
Step 2
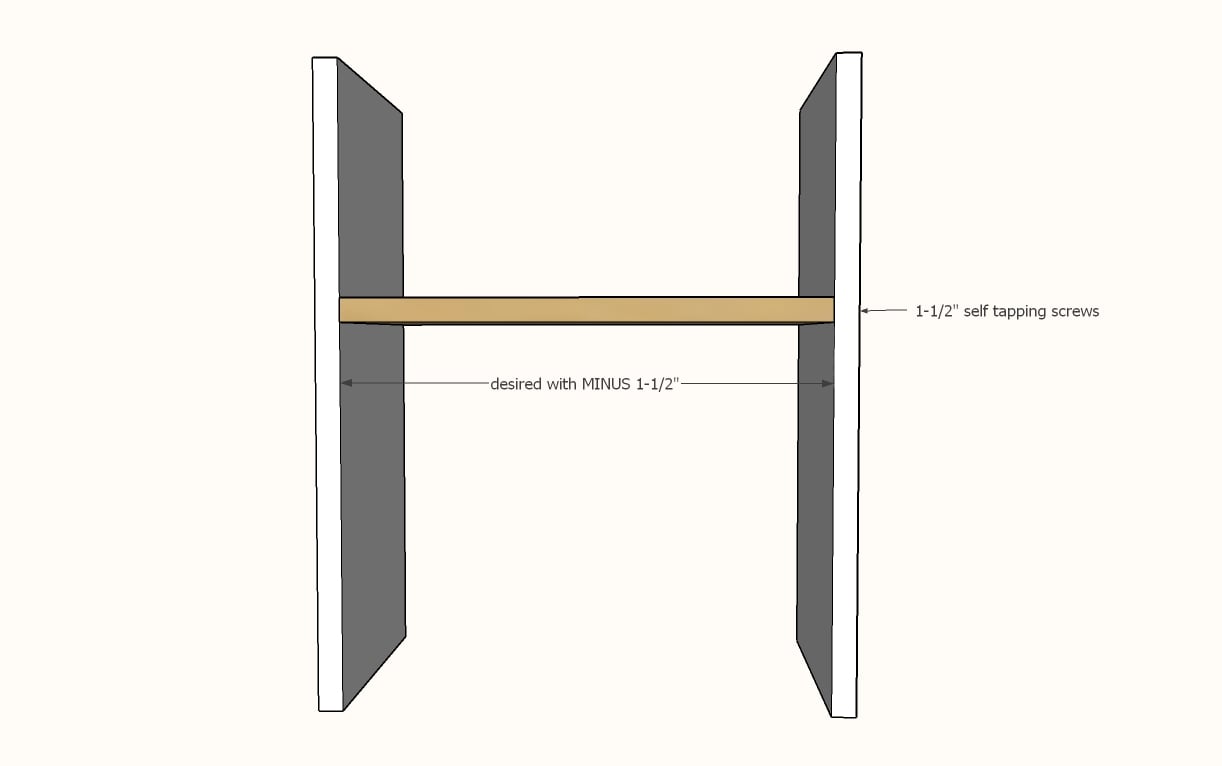
Cut a third board for the shelf, 2" less in width than your desired final width of the organizer. This will give you about 1/2" to fit your organizer under your sink
Attach with the screws or 1-1/4" brad nails and glue. If using a pass through design on the bottom, place the shelf so a 1x8 board can fit above it for the back.
Step 3
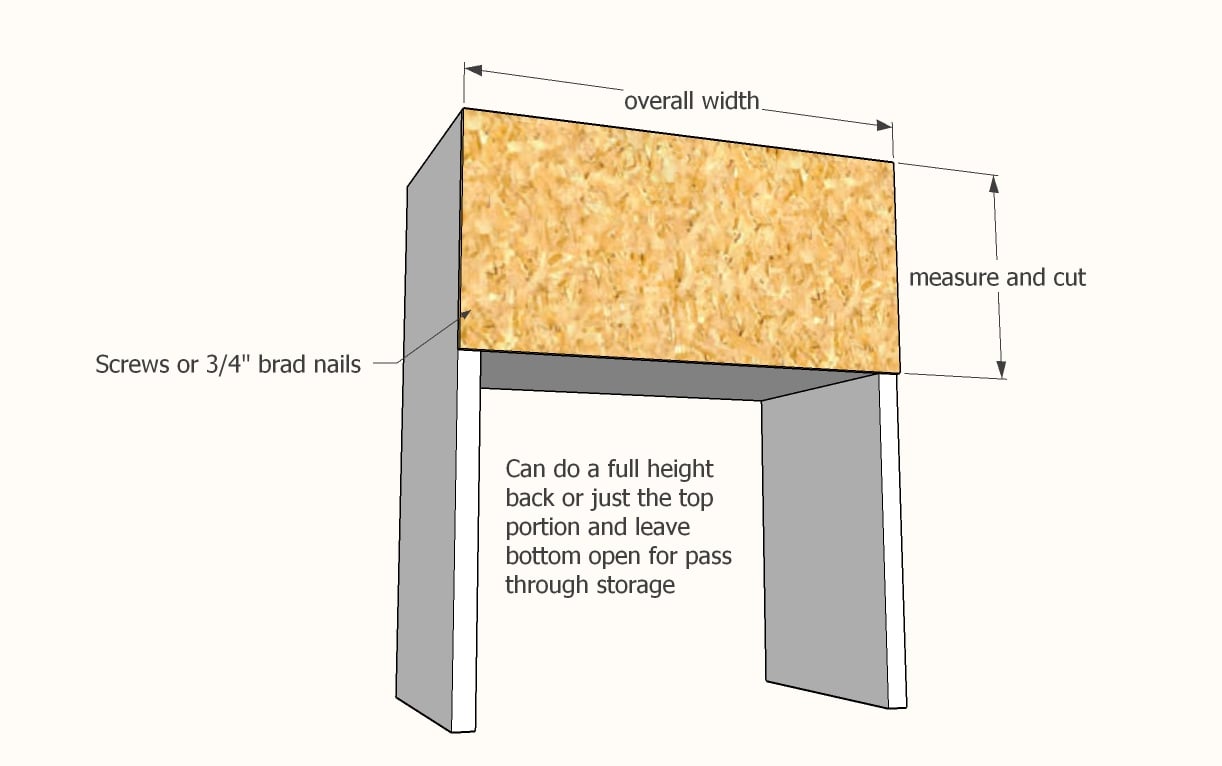
Alternatively, if using plywood, cut a piece of 1/4" plywood to fit the upper part of the back or the full back.
Attach with the brad nails or the screws and glue.
Comments
A-family
Mon, 11/16/2020 - 16:18
Great little plan, thank you…
Great little plan, thank you! Love your H2O clay! ;)